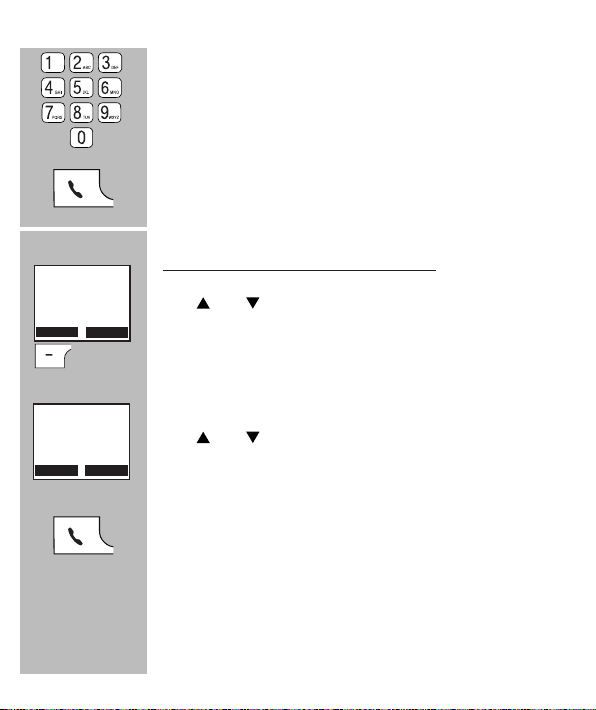
Fysic FX-9000 User manual

FX-9000
FX-9000 DUO
USER’S MANUAL

2
1 OVERVIEW
1.1 HANDSET:
Speaker
In standby mode, above
this the handset number
(1 - 5), the actual time
and the battery power are
shown
You may enable the
functions shown here by
pressing the soft buttons
underneath them
Soft button
Phone ‘on’ button, to call
somebody or to answer a
call
Direct memory buttons
‘asterisk’ button, function
button for e.g. telebanking
R button: function button
for certain teleservices
Microphone
Charging contacts, to recharge the handset’s
battery when the handset is placed into the
base or cradle/charger
Indicator; ashes when
you’re receiving a call
Flashes also to indicate
‘new call’ (this function may
be disabled)
++ button: to enable the
additional amplier during
a call
+and -buttons: to increase
or decrease the reception
volume during a call
and buttons, to scroll
through settings and mem-
ories
Phone ‘o’ button, to end a
telephone call
0-9 buttons: to dial phone
numbers and to enter mem-
ories
‘hash’ button, function but-
ton for e.G. Telebanking
Speaker button, press
during a call to enable the
hands-free function

3
1.2 BASE:
Pager button: to call all handsets
(handset search button)
Serves also as the registration button
for a new handset.
Charging contacts: the rechargeable
batteries of the handset are recharged
through these contacts

4
2 INSTALLATION
2.1 BASE:
Telephone input:
Insert the small plug of the phone cord cable into the connection
underneath the base (depress the plug until you hear a click).
Insert the phone plug into a telephone wall socket.
Power supply:
Connect the supplied power adaptor with the input at the rear of
the base and insert the adaptor into a 230V wall socket.
ONLY USE THE SUPPLIED ADAPTOR. CONNECTING A
DIFFERENT ADAPTOR WILL LEAD TO DANGEROUS SITUA-
TIONS OR CAUSE DAMAGE TO THE ELECTRONICS OF THE
TELEPHONE.
Power adaptor input
Phone cord input

5
2.2 HANDSET:
1. Open the battery compartment of the handset by sliding down and
removing the battery cover
2. Install the batteries into the battery compartment, paying attention to
the polarity (+ and -)
3. Slide the battery cover back onto the handset and place the handset
onto the base or cradle/charger
4. Properly charge the batteries by leaving the handset on the base/char-
ger for 15 hours without interruptions
ONLY INSERT REACHARGEABLE NiMH (NICKEL-METAL-HY-
DRIDE, 750mAh) BATTERIES. USING NON-REACHARGE-
ABLE BATTERIES LEADS TO DANGEROUS SITUATION OR CAUS-
ES A RISK OF EXPLOSION.
2.3 EXTRA HANDSET AND CHARGER: (FX-9000 DUO)
Each handset is supplied with 2 batteries and a charger with adaptor.
Insert the adaptor of each charger into a 230 Volt wall socket, install
the batteries in the handset(s) and place the handset(s) for 15 hours
onto the charger(s) to charge the batteries.

6
3 CALLS
3.1 RECEIVING CALLS:
Upon receiving a call the device starts ringing, the handset’s display lighting
switches on and the indicator on top of the handset starts ashing; when the
vibration function is enabled you’ll also feel the handset vibrating
Press the phone “on” button to answer the call
• Refer to paragraph 9.3, item [ Auto answering ] to answer the call by only picking up the
receiver from the base
3.2 PHONE CONVERSATIONS USING THE RECEIVER OR SPEAKER
FUNCTION:
You may have phone conversations holding the receiver against your ear or
by using the speaker function allowing family members to listen in or to have
your hands free to e.g. make notes.
During the call, press the speaker button to enable the
speaker function
Press the speaker button again to turn the speaker func-
tion back o
3.3 TO END A CALL:
Press the phone “o” button to disconnect a call
• You may also place the handset back onto the base or cradle/charger to disconnect a call

7
3.4 DIALLING NUMBERS:
Use the keypad to enter the phone number
• Press and hold the 0 button for at least a second to insert a dial-
ling pause (the display will show a -P-)
• Press the [ CLEAR ] soft button to delete an incorrect input
Press the phone “on” button to dial the number
Dialling from the phonebook memory:
Use and to scroll to [ Phone book ]
Press the OK soft button
Use and to search for the desired person
Press the phone “on” button to dial the number
• See paragraph 7.3 with regards to programming the phonebook
memories
Calls
Phone book
OK
Barber
Rob
Karel P

8
Redialling or dialling from the call list:
Use and to scroll to [ Calls ]
Press the OK soft button
Use and to scroll to [ Redial List ] and redial a num-
ber or to [ Call List ] to call a person back who has called
you before
Press the OK soft button
Use and to search for the desired number or call
Press the phone “on” button to dial the number
Direct memory dialling: (*)
Briey press one of the buttons I, II, III or IV to dial the
number
Speed dial memory dialling: (*)
Press and hold the concerned numeric button (2-0) to
dial its corresponding speed dial number
• See paragraph 7.4 or 9.2 item [ Speed Dial ] with regards to pro-
gramming the memories
Calls
Phone book
OK
Redial List
Call List
OK
0201234567
Gerard
GP

9
3.5 INQUIRY:
During a phone conversation you may disable the microphone allowing you
to consult with family members without the person on the line listening in.
During a phone conversation, press and hold the
button for 2 seconds to disable the microphone;
Press and hold the button again for 2 seconds to en-
able the microphone
3.6 RECEPTION VOLUME:
Normal amplication:
During a conversation, use the +and -buttons to adjust
the reception volume; for this you may also use the
and buttons in the middle of the handset
Boost amplication:
During a conversation, press the ++ button on the right
side of the handset to enable the extra boost amplica-
tion
The display will show [ Boost On ]
• Volume levels for calls via the handset and via the hands-free function may be set individ-
ually
• The selected setting will be saved in the memory
• After a phone conversation, the boost amplier is automatically disabled
• The boost amplication factor is +8dB
2 sec.
2 sec.
or
Boost On

10
3.7 CALL DURATION:
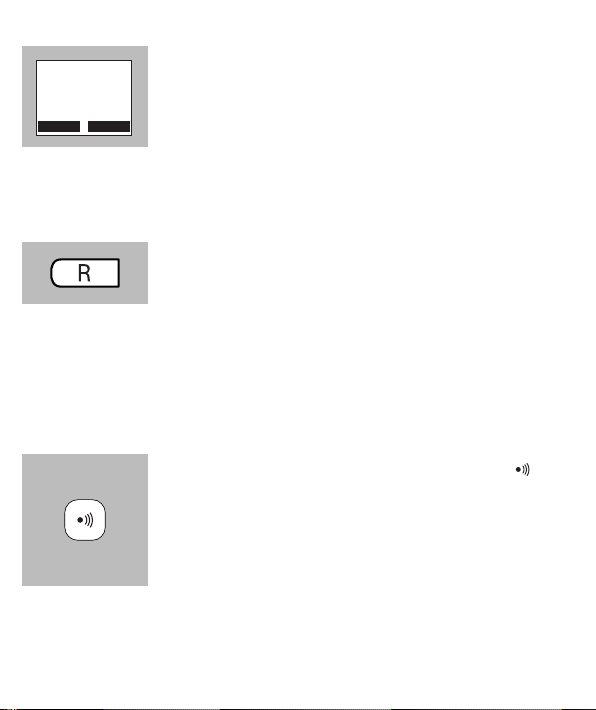
During a phone conversation, the display of the handset
will show the call duration; several seconds after discon-
necting the call, the call duration will disappear from the
display.
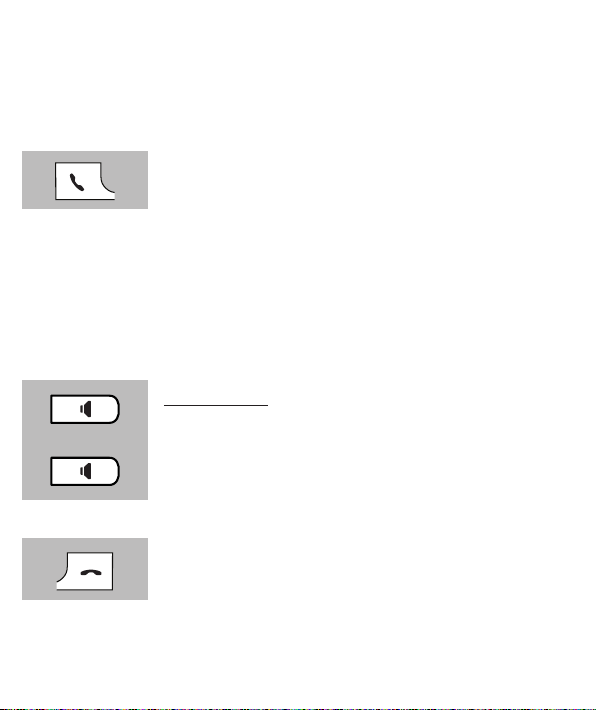
3.8 R/FLASH FUNCTION:
R/FLASH means that you very briey interrupt the phone connection. On
certain home or oce switchboards, this allows you to transfer calls or to
activate phone services such as ‘Call Waiting’.
During a conversation, press the Rbutton to activate a
FLASH pulse
• Certain telephone companies may require you to also press a numeric button after acti-
vating the FLASH pulse to use e.g. ‘Call Waiting’; ask your telephone company for more
details.
• You may adjust the interruption duration of the FLASH pulse; to do so, refer to paragraph
9.4, item [ Flash Time ].
3.9 HANDSET SEARCH FUNCTION:
In case you’ve lost the handset, briey press the but-
ton on the base.
For 60 seconds the handset will emit a signal while
[ PAGE BUTTON! ] ashes in the display. The signal
stops after 60 seconds or you may press any button the
end the signal beforehand.
00:01:25

11
3.10 TO SWITCH OFF THE HANDSET:
To save battery power or to remain undisturbed by any calls, you may fully
switch o the handset:
Press and hold the phone ‘o’ button for 5 seconds
Press the [ Yes ] soft button to conrm or press [ No ] to
keep the handset switched on
• Keep in mind that you cannot make or receive calls while the handset is switched o
• You may switch the handset back on by depressing the phone ‘o’ button for 5 seconds
or by placing the handset back onto the base or charger
5 sec.
Switch o
handset?
Yes No

12
4 REDIALLING
4.1 INTRODUCTION:
The handset memorises the 20 last dialled numbers. You may redial these
numbers, save them in the phonebook memory or delete them.
4.2 OPNIEUW KIEZEN:
Use and to scroll to [ Calls ]
Press the OK soft button
Use and to scroll to [ Redial List ]
Press the OK soft button
Use and to search for the desired number
Press the phone ‘on’ button to dial the number
Calls
Phone book
OK
Redial List
Call list
OK
0201234567
Dorette
Dentist

13
4.3 TO SAVE OR DELETE:
Find the number according to the instructions on the
previous page
Press the [ Option ] soft button
Use the and buttons to select one of the following
options:
Details: to check the number in case the display shows
the contact’s name
Delete Entry: to delete the selected call only
Delete All: to delete all calls from the redial memory
Call Number: to call this number again
Store Number: (this option appears only when the num-
ber is not yet saved in the phonebook)
To save the number in the phone book; you may then
also add a name and indicate to which group this con-
tact belongs with regards to the ring tone (for this, see
paragraph 7.4, item [ Edit Call Group ]).
Press the [ OK ] soft button to conrm your choice
0201234567
Wim
Neighbors left
Option
OK
Details
Store Number
Call Number
Delete All
Delete Entry

14
5 Caller-ID
5.1 INTRODUCTION:
If your subscription includes the Caller-ID service, the number of the caller
will appear in the display of your handset. If you’ve programmed this num-
ber, including a name, in the phonebook memory, this display will show both
the number and name, you may set a separate ringer in each memory. The
(each) handset provides a memory for 30 calls.
5.2 NEW CALL INDICATION:
A new call is indicated by the ashing indicator on the
upper part of the handset (see the end of the following
chapter for how to disable this function) while the display
of the handset shows a dot ( ) behind [ Calls ]
5.3 LIST CHECK, CALL BACK & STORE OR DELETE:
Use and to scroll to [ Calls ]
Press the OK soft button
Use and to scroll to [ Call List ]
Press the OK soft button
Calls
Calls
Phone book
OK
Redial list
Call List
OK

15
Use and to scroll the list with calls
= indicates a new call
= indicates an old call
Only after checking the details (see below), the
closed dot becomes an open dot
Press the [ Option ] soft button and use the and
buttons to choose from the following options:
Details: for the day and time of the call
Delete Entry: to only delete the selected call
Delete All: to delete all calls
Call Number: to call this number back
Store Number: (this option appears only when the num-
ber is not yet saved in the phonebook)
To save the number in the phone book; you may then
also add a name and indicate to which group this con-
tact belongs with regards to the ring tone (for this, see
paragraph 7.4, item [ Edit Call Group ]).
Settings: here you may determine whether the light indi-
cating a new call must keep ashing after the call or not;
also whether all calls must be kept in the memory or only
the calls you haven’t answered
Press the [ OK ] soft button to conrm your choice
0201234567
Jack
Neighbor A
Option
OK
Settings
Store Number
Call Number
Delete All
Delete Entry
Details

16
5.4 ADDITIONAL INFORMATION:
• The FX-9000 / FX-9000 DUO is suitable for both the DTMF system,
oered by the Dutch PTT, as well as for the FSK system, oered by the
Belgian PTT and the Dutch and Belgian cable companies for as far as
they oer telephony services.
• The Caller-ID function usually requires an additional subscription, for
more information please contact your telephone service provider
• Displaying the name:
- The DTMF system doesn’t send names; the name will only appear
in the display when it’s programmed in the phonebook memory of
the telephone
- However, the FSK system is capable of sending names (please ask
your telephone service provider)
• If the display is showing [UNKNOWN], [PRIVATE], [WITHHELD] or
[0000000000], this subscriber has blocked the transfer of the name
and number.
• Using multiple handsets: deleting the calls in one of the handsets is
applied also to the other handset(s).
• You cannot check the Caller-ID memory with 2 or more handsets
simultaneously.

17
6 VOICEMAIL INDICATION
6.1 INTRODUCTION:
VoiceMail is a service provided to you by your telephone company. Callers
may leave a message for you in this case. You may listen to this message at
a later time. (*)
6.2 NEW VOICEMAIL INDICATION:
If your telephone company supports VoiceMail, based
on the FSK system, it’s possible for you to receive
a notification when somebody has left you a new
message. In the upper part display of your handset, the
VoiceMail symbol ( ) will appear
The voicemail indicator disappears after you’ve listened to the message
• Please contact your telephone company for further questions about the VoiceMail
function.
Calls

18
7 PHONEBOOK MEMORY
7.1 INTRODUCTION:
Each FX-9000 / FX-9000 DUO handset has a phonebook memory with a
capacity of 150 phone numbers of 24 digits max. For each number you may
program a name of 12 characters max. The phonebook memory is linked to
the Caller-ID function; when you receive a call from a contact stored in the
memory with the name and number of this person, the display of the hand-
set will show the caller’s name in addition to the number (however, for this
you must have or be subscribed to the Caller-ID service).
7.2 TO SEARCH AND CALL CONTACTS:
Use and to scroll to [ Phonebook ]
Press the OK soft button
Use and to search for the desired person
Press the phone ‘on’ button to dial the number
Calls
Phonebook
OK
Barber
Niels
Karel P

19
7.3 TO ADD CONTACTS:
Use and to scroll to [ Phonebook ]
Press the OK soft button
Use and to scroll to [ New Entry ]
Press the OK soft button
Use the keypad to input the name
• The available characters are shown in the lower part of the display,
repeatedly press the numeric button to select these characters
• Press the [ Clear ] soft button to delete incorrect characters
Press the OK soft button
Use the keypad to input the name
• Press and hold the 0 button for at least a second to insert a dial-
ling pause (the display will show a -P-)
• Press the [ Clear ] soft button to delete an incorrect input
Press the OK soft button
Calls
Phonebook
OK
New Entry
Barber
Niels
OK
Name:
John R...
OK Clear
Enter Number:
06.....
OK Clear

20
Use and to select the call group to which you’d like
to add this contact, you may choose from:
No Group / Family / Oce / Friends / Apply / VIP / Other
/ General
(See also the next page on how to set the ringer for this group and
how to change the name of each group)
Press the OK soft button
7.4 TO SET THE RINGER AND TO EDIT OR REMOVE CONTACTS:
Use and to scroll to [ Phonebook ]
Press the OK soft button
Use and to search for the desired contact
Press the [ Option ] soft button and use the and
buttons to choose from the following options:
Call Number: to dial the number
Edit Entry: to correct the name or number
or to assign the
contact to another group
View Entry: to check the name, the phone number and
the set call group of the contact
Copy Entry: to copy the selected contact to the other
handset (*)
Group:
OK
Calls
Phonebook
OK
Barber
Corina
Karel P
Option
Copy Entry
View Entry
Edit Entry
Call Number
This manual suits for next models
1
Table of contents
Other Fysic Cordless Telephone manuals