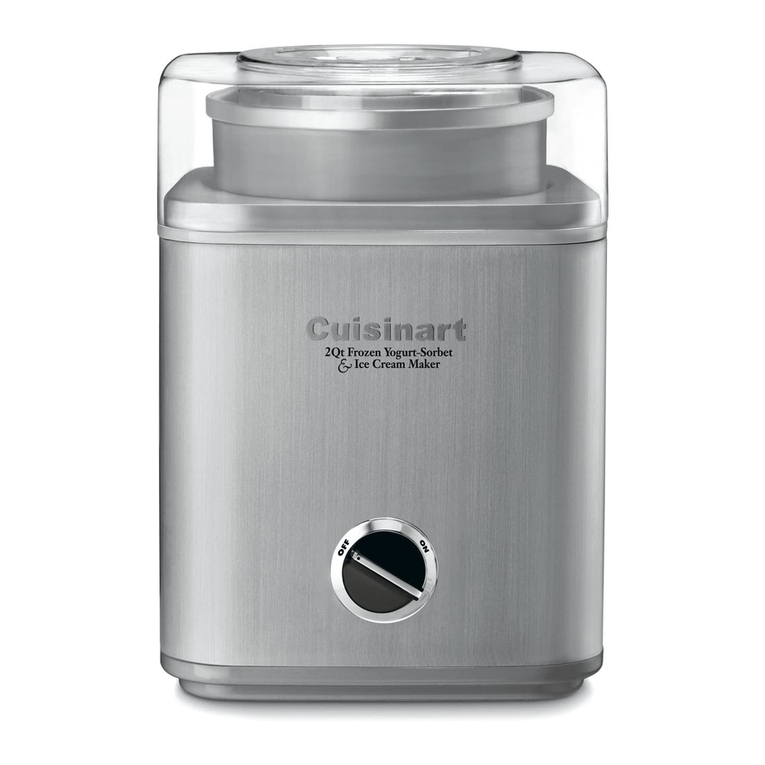
G3 Ferrari CREMOSA User manual

Gelatiera - Ice cream maker
CREMOSA
MANUALE D’USOMOD.:
G20035
Technical model: ICE1526
www.g3ferrari.it
IT EN
USER MANUAL
DE

1
ITA: INDICE
Simbologia………...………………………………………………………………………………………………..…..………………….. p. 2
Avvertenze di sicurezza………...……………………………………………………………………………………………..…… p. 3
Informazioni d’uso………...……………………………………...………………………………………………………………...….. p. 5
Suggerimenti………..….…...…………………………………...……………………….…………….……………………….………… p. 6
G20035…………...…………………...……………………………………………...…………………………………………….…..……. p. 6
Nomenclatura…………….………………...………………………………………….…………………………………………….…… p. 6
Display…………….………………...………………………………………….……………………………………………………….…… p. 6
Installazione…………….………………...………………………………………….…...……………………………………….….…… p. 6
Funzionamento…….……………...………………………………………………...……………….……………………………....…… p. 7
Consigli per un corretto utilizzo………..….…...…………………………..……..………….……………………….…….…… p. 7
Pulizia………...……………………………………...…………………………………...……………..…….………………………..…….. p. 7
Ricettario…………….………………...………………………………………….…………………………………………………….…… p. 7
Caratteristiche tecniche………...……………………………………...…………………………………………………….………. p. 9
Trattamento dei rifiuti delle apparecchiature elettriche
ed elettroniche………...……………………………………...………………………………….………………………...……………... p. 21
ENG: INDEX
Symbols………...…………………….…………...………………………………………………..…………………………….………….. p. 2
G20035…………...………………….…….………………...……………………………………………...………………………….……. p. 6
Safety instructions………...…….……..…….……………………………………………………………………………….………… p. 9
General information………..….………………………………………………………...…………………………………………….. p. 11
Tips for use……………………….…..….…...…………………………………...……………….…….……………………….………… p. 12
Description of parts…………....…………………...……….………………………………………...………………………….……. p. 12
Display………………………………..…………………...……….………………………………………...………………………….……. p. 12
Installation………..….…...…………………………………...........................................……………….……………………….………… p. 12
Operating the unit…………..…….………………...………………………………………..…………………………………….…… p. 13
Suggestions ……………………………….……………………………………………………………………………………………….. p. 13
Cleaning……..……………………………………...……………………………………...……………..………………………………….. p. 13
Recipes…………...…………………...……….……………………………….…………….……………...………………………….……. p. 13
Technical features………...……………………………………………...……………….…………………………………….………. p. 15
Waste of electric and electronic equipment (WEEE
Directive)………………..……………………………………...……………………………………...…………………………………….p. 21
DEUTSCH……………….…………………………...…………………………………...………….......... p. 15

2
CLASSI DI PROTEZIONE /PROTECTION CLASSES
ATTENZIONE
RISCHIO DI SCOSSE ELETTRICHE
NON ESPORRE A PIOGGIA E UMIDITA’
WARNING
ELECTRIC SHOCK RISK
DO NOT EXPOSE TO RAIN OR MOISTURE
ATTENZIONE: NON APRITE L’APPARECCHIO. ALL’INTERNO NON VI SONO COMANDI
MANIPOLABILI DALL’UTENTE NE’ PARTI DI RICAMBIO. PER TUTTE LE OPERAZIONI DI
SERVIZIO RIVOLGERSI AD UN CENTRO DI ASSISTENZA AUTORIZZATO.
Se l’apparecchio ha impresso i simboli sottostanti, significa che le caratteristiche tecniche sono
corrispondenti al simbolo.
Questo simbolo segnala la presenza all’interno del prodotto di componenti operanti ad alta
tensione; non apritelo in nessun caso.
This symbol warns the user that un-insulated dangerous voltage inside the system may
cause an electrical shock. Do not open the case.
Questo simbolo indica che l’apparecchio appartiene alla CIasse I: ciò significa che
l’apparecchio ha una spina che comprende il polo di messa a terra e va usata esclusivamente su
prese provviste di messa a terra.
Class I Appliance symbol. This means the appliance must have the chassis connected to
electrical earth/ground by an earth conductor.
Attenzione: questo simbolo indica all’utente istruzioni importanti da leggere e da rispettare
durante l’utilizzo del prodotto.
Caution: this symbol reminds the user to read carefully the important operations and
maintenance instructions in this owner’s guide.

3
AVVERTENZE DI SICUREZZA
Di seguito sono riportate importanti indicazioni
riguardanti l’installazione, l’uso e la manutenzione;
conservare con cura questo libretto per ogni ulteriore
consultazione; utilizzare il prodotto solo nel modo
indicato dal presente libretto di istruzioni; ogni altro uso è
da considerare improprio e pericoloso; perciò il
costruttore non può essere considerato responsabile nel
caso in cui vi siano danni derivanti da usi impropri,
erronei ed irragionevoli.
Prima dell’uso verificare l'integrità dell'apparecchio: in
caso di dubbio non utilizzarlo e rivolgersi all’assistenza.
Non lasciare gli elementi dell'imballaggio (sacchetti in
plastica, polistirolo espanso, chiodi, graffette, ecc.) alla
portata dei bambini in quanto sono potenziali fonti di
pericolo; inoltre, ricordiamo che questi, devono essere
oggetto di raccolta differenziata.
Accertarsi che i dati di targa siano compatibili con quelli
della rete elettrica; l'installazione deve essere effettuata in
base alle istruzioni del costruttore considerando la
potenza massima indicata in targa; un’errata installazione
può causare danni a persone, animali o cose, per i quali il
costruttore non può essere considerato responsabile.
Se fosse necessario l’uso di adattatori, prese multiple e
prolunghe utilizzare quelli conformi alle vigenti norme di
sicurezza; non superare i limiti di assorbimento indicati su
adattatore e/o prolunghe, nonché quello di massima
potenza marcato sull'adattatore multiplo.
Non lasciare l'apparecchio inutilmente inserito; meglio
staccare la spina dalla rete di alimentazione quando
l'apparecchio non viene utilizzato.
Scollegare sempre l’apparecchio dall’alimentazione se
lasciato incustodito. Le operazioni di pulizia devono
essere effettuate dopo aver staccato la spina.

4
Qualora l’apparecchio sia fuori uso e si sia deciso di non
ripararlo, si raccomanda di renderlo inutilizzabile
tagliando il cavo di alimentazione.
-Non avvicinare il cavo di alimentazione a oggetti
taglienti o a superfici calde e non tirarlo per staccare la
spina. Non lasciarlo penzolare dal piano di lavoro dove
un bambino potrebbe afferrarlo. Non utilizzare il
prodotto in caso di danni al cavo di alimentazione, alla
spina o in caso di cortocircuiti; fare riparare il prodotto
da un centro di assistenza autorizzato.
-Non esporre il prodotto a condizioni atmosferiche
dannose come pioggia, umidità, gelo, ecc. Conservarlo
in luoghi asciutti. Non maneggiare o toccare il prodotto
con mani bagnate o a piedi nudi.
-Questo apparecchio può essere utilizzato da bambini
dagli 8 anni in su e da persone con ridotte capacità
fisiche, sensoriali o mentali o con mancanza di
esperienza o conoscenza se a loro è stata assicurata
un’adeguata sorveglianza oppure se hanno ricevuto
istruzioni circa l’uso in sicurezza dell’apparecchio; le
operazioni di pulizia e di manutenzione non devono
essere effettuate da bambini a meno che non abbiano più
di 8 anni e siano sorvegliati.
-I bambini non devono giocare con l’apparecchio.
-Tenere il prodotto ed il cavo di alimentazione fuori dalla
portata dei bambini sotto 8 anni.
Se il cavo di alimentazione è danneggiato, o in caso di
guasto e/o di cattivo funzionamento non manomettere
l'apparecchio. L'eventuale riparazione deve essere
effettuata dal costruttore o dal suo servizio assistenza
tecnica o comunque da una persona con qualifica
similare, in modo da prevenire ogni rischio. Il mancato
rispetto di quanto sopra può compromettere la sicurezza
dell'apparecchio e far decadere i termini di garanzia.

5
-Questo apparecchio è progettato per uso domestico o
applicazioni simili come: cucine per il personale in
negozi, uffici o altri luoghi di lavoro, per i clienti in
hotel, motel, bed & breakfast o residence.
-L’apparecchio non è progettato per essere usato
attraverso timer esterni o telecomandi. Prima di ogni
utilizzo svolgere il cavo di alimentazione.
-Non sottoporre il prodotto ad urti, potrebbero
danneggiarlo. Utilizzare solo ricambi ed accessori
originali e compatibili.
INFORMAZIONI D’USO
Questo apparecchio è una Macchina per gelato e sorbetto
auto-refrigerante ad uso domestico di Classe I.
-Collegare correttamente l’apparecchio ad una presa di
corrente compatibile.
-Non capovolgere o inclinare oltre un angolo di 45°.
-Per evitare il rischio di scosse elettriche, non versare
acqua su cavo, spina e ventola di aerazione posteriore.
Non immergere l'apparecchio in acqua o altri liquidi.
-Staccare la spina dopo l'utilizzo o prima della pulizia.
-Tenere l'apparecchio ad una distanza di almeno 8
centimetri da altri oggetti per garantire l’ottimale rilascio
di calore. Non usare l'apparecchio vicino a fiamme
libere, fornelli o stufe.
-Non premere il pulsante di accensione frequentemente
(almeno 5 minuti di intervallo da un processo al
successivo) per evitare il danno al compressore.
-Per garantire la massima sicurezza, oggetti in lamiera o
altri oggetti elettrici non possono essere inseriti nel
dispositivo.
-Non accendere l’unità prima di aver installato la pala
miscelatrice, il cestello ed il coperchio.
-La temperatura iniziale degli ingredienti deve essere di
25 ± 5 ℃.Non mettere gli ingredienti in freezer, per

6
evitare che la pala si blocchi durante la preparazione.
-Non rimuovere la pala quando l'apparecchio è in
lavorazione.
-Non conservare per nessuna ragione alcuna sostanza
esplosiva e/o propellenti liquidi infiammabili all’interno
della macchina.
-Per la pulizia, seguire le indicazioni riportate al
paragrafo “Pulizia” del presente libretto.
SUGGERIMENTI PER L’USO
-Al primo utilizzo, si consiglia di lavare accuratamente tutte le parti che entreranno in contatto con il gelato
(la vasca fissa, il cestello estraibile, la pala miscelatrice, il coperchio trasparente ed il coperchio per ricarica,
misurino e cucchiaio).
-Preparate gli ingredienti di una propria ricetta o dal ricettario presente nel libretto.
-Non è necessario congelare la ciotola in anticipo in un congelatore, in quanto questa macchina ha un
compressore incorporato che congela gli ingredienti durante l’uso.
NOMENCLATURA G20035
1. Coperchio di rifornimento
2. Oblò di controllo
3. Cestello removibile
4. Pannello di controllo LCD
5. Comandi digitali
6. Cucchiaio
7. Misurino
8. Pala miscelatrice
DESCRIZIONE DISPLAY
A. Miscelazione
B. Congelamento
C. Temperatura
D. LCD
E. Tempo di lavorazione
F. Pulsante accensione
G. Pulsante di regolazione del
tempo (+)
H. Pulsante di regolazione del
tempo (-)
I. Pulsante Avvio/Stop
INSTALLAZIONE
ATTENZIONE: assicurarsi che il prodotto sia scollegato dalla rete elettrica prima di eseguire le
operazioni descritte in seguito.
-Rimuovere la plastica protettiva e ogni elemento dell’imballaggio, prima di procedere.
-Collocare l’unità su una superfice piana ed in posizione eretta, con l’oblò di controllo (2) rivolto verso
l’alto. Inserire il cestello removibile (3) all’interno della vasca.
-Infilare la pala miscelatrice (8) sull’albero motore in modo tale che sia ben fissata ed incastrata all’asta.
-Posizionare il coperchio trasparente sul’unità, girando l’oblò in senso orario per bloccarlo in posizione.
-Chiudere il coperchio di rifornimento (1).

7
FUNZIONAMENTO
Inserire la spina elettrica in una presa di corrente compatibile (AC 230V ~50Hz) per accendere l’apparecchio.
1. OPERAZIONI DI BASE
[POWER] Premere il tasto per accendere la macchina: il display visualizza "60:00", che significa che il
tempo di funzionamento di default è 60 minuti.
[TIME +] [TIME -] Premere una volta, il tempo aumenta (+) o diminuisce (-) di 1 minuto. Tenendo premuto
il tasto [TIME +], il tempo aumenterà rapidamente; tenendo premuto il tasto [TIME -], il tempo diminuisce
rapidamente. È possibile impostare il tempo di funzionamento a secondo del proprio gusto.
[START/STOP] Dopo aver impostato il tempo, premere il tasto [START/STOP] per avviare il processo.
Durante la fase di produzione del gelato, è possibile premere il tasto [START/STOP] per controllare la lama
di miscelazione o interrompere la lavorazione (il compressore tuttavia continua a funzionare). Non temere
premuto il pulsante per oltre 3 secondi, altrimenti l’unità entra in stato di default.Una volta terminato il conto
alla rovescia, l’unità emette un segnale di avviso e la procedura si interrompe automaticamente. Il display
LCD mostra "00:00" e la retroilluminazione lampeggia.
2. FASE DI RAFFREDDAMENTO PROLUNGATA
Qualora la macchina non venga spenta in 10 minuti dopo il termine del processo di preparazione del gelato, si
attiva automaticamente la funzione di raffreddamento (senza miscelazione) per 10 minuti, per una durata
massima totale di 1 ora, al termine della quale l’unità ritorna allo stato iniziale di stand-by.
3. INTERRUZIONE E REGOLAZIONE DEL TEMPO
È possibile fermare la macchina tenendo premuto il pulsante [START/STOP] per oltre 3 secondi e riportare
l’unità allo stato di stand-by iniziale.
Ogni volta che la macchina è in funzione, è possibile regolare il tempo di funzionamento premendo i pulsanti
[TIME +] o [TIME -]. Premere [TIME +] una volta per aumentare di 1 minuto la durata del processo. Tenere
premuto il tasto per aumentare velocemente (tempo massimo impostabile 60 minuti). Premere il tasto [TIME
-] una volta per diminuire di 1 minuto la durata del processo, tenere premuto il tasto per accellerare la
diminuzione (tempo minimo impostabile 1 minuto).
4. DISPLAY LCD
Durante la lavorazione, il display LCD mostra il conto alla rovescia in secondi (E); la temperatura di
congelamento in alto a destra (C); le icone di congelamento (B) e miscelazione (A).
CONSIGLI PER L’USO
-Poiché il gelato si espande quando si forma, per evitare che fuoriesca dal contenitore, si raccomanda di
accertarsi che gli ingredienti non superino il 60% della capacità del cestello amovibile (3).
-Una volta terminato il processo, togliere il gelato dal cestello utilizzando una paletta di plastica o un
cucchiaio di legno. Non utilizzare una paletta di metallo per evitare il cestello estraibile si graffi.
ATTENZIONE: per evitare scosse elettriche, si consiglia di staccare sempre la spina dalla presa di
corrente prima di servire il gelato.
PULIZIA
ATTENZIONE: staccare la spina dalla presa elettrica prima di procedere con le operazioni di pulizia.
-Non immergere l’apparecchio ed il cavo elettrico in acqua.
-Pulire il corpo esterno con un panno umido non abrasivo, evitando di usare detersivi o detergenti abrasivi o
aggressivi, per non rovinare le parti estetiche dell’apparecchio. Il panno non deve essere troppo bagnato,
poiché se l’acqua penetra nell’apparecchio, può seriamente danneggiarlo.
-Lavare il cestello (3), la pala (8), l’oblò (2) e il coperchio (1) in acqua tiepida, sciacquare ed asciugare
accuratamente prima di rimontarli.
RICETTARIO
GELATO ALLA VANIGLIA (8 porzioni da ½ cuppetta)
Ingredienti: latte intero 1 tazza, 1/2 tazza di zucchero, 3/2 tazze di panna ben fredda, 1-2 cucchiaini di estratto
di vaniglia puro (o a piacere).

8
Procedimento: in una ciotola media, utilizzare un mixer a mano o una frusta per unire il latte e lo zucchero
semolato fino a quando lo zucchero è sciolto, per circa 1-2 minuti a bassa velocità. Aggiungete la panna e la
vaniglia a piacere. Accendere la gelatiera, versare la miscela nella vaschetta usando un misurino con
beccuccio e lasciate mescolare fino al completo addensamento, per circa 50-60 minuti.
Analisi nutrizionale per porzione: Calorie 239 (68% da grassi) - Carboidrati 17g - Proteine 2g –Grassi 18g –
Grassi saturi 11g - Colesterolo 69mg - Sodio 30mg
Menta piperita: omettere la vaniglia e sostituirla con estratto di menta piperita con rapporto 1 a 1½
cucchiaini (o a piacere). Tritate il vostro cioccolato preferito in piccoli pezzi irregolari. Aggiungere il
cioccolato tagliato durante gli ultimi 5 minuti di miscelazione.
Biscotti & Caramelle: Aggiungere ¾ di tazza di biscotti grossolanamenti tritati o il vostre caramelle preferite
(al cioccolato, menta etc.) durante gli ultimi 5 minuti di miscelazione.
GELATO AL CIOCCOLATO (8 porzioni da ½ cuppetta)
Ingredienti: latte intero 1 tazza, 1/2 tazza di zucchero, 240g di cioccolato fondente o semi-dolce tagliato in
piccoli pezzi, 1 tazza di panna ben fredda, 1 cucchiaino di estratto di vaniglia puro.
Procedimento: in un pentolino, riscaldare sul fuoco il latte intero finché non comincia bollire ai bordi. In un
frullatore dotato di lama in acciaio e con funzione ad impulsi, miscelare lo zucchero con il cioccolato finché il
cioccolato è finemente tritato. Aggiungere il latte caldo e mescolare fino ad ottenere un composto ben
amalgamato e liscio. Trasferire il tutto in a una ciotola di medie dimensioni e lasciare che la miscela di
cioccolato si raffreddi completamente a temperatura ambiente. Aggiungete la panna e la vaniglia a piacere.
Accendere la gelatiera, versare la miscela nella vachetta e lasciare lavorare per circa 50 - 60 minuti.
Analisi nutrizionale per porzione: Calorie 370 (60% da grassi) - Carboidrati 34g - Proteine 3g - Grassi 25g -
Grassi saturi 11g –Colesterolo 65mg - Sodio 31mg
Cioccolato alle mandorle: aggiungere 1/2 cucchiaino di estratto di mandorle puro con la vaniglia.
Aggiungere 1/2 - 3/4 di tazza di mandorle tostate tritate o mandorle ricoperte di cioccolato tritato durante gli
ultimi 5 - 10 minuti di funzione Congelamento.
Biscotti al cioccolato: aggiungere 1/2-1 tazza di biscotti tritati durante gli ultimi 5 minuti di funzione
Congelamento.
Cioccolato caramellato con Brownies: aggiungere 1/2-1 tazza di brownies tritati durante gli ultimi 5 minuti
di funzione Congelamento.
Cioccolato al Marshmallow: una volta rimosso il gelatodalla vaschetta per il congelamento, aggiungere i
marshmallow a piacere.
GELATO ALLA FRAGOLA (8 porzioni da ½ cuppetta)
Ingredienti: 250g di fragole mature, 3/2 cucchiai di succo di limone appena spremuto, 1/2 tazza di zucchero, 1
tazza di latte intero, 1 tazze di panna, 1 cucchiaino di estratto di vaniglia puro.
Procedimento In una piccola ciotola, unire le fragole con il succo di limone e 1/3 di tazza di zucchero;
mescolate delicatamente e lasciare macerare le fragole nel succo per 2 ore. In una ciotola media, con un
mixer (circa 1-2 minuti a bassa velocità) o utilizzando una frusta a mano, unire il latte e lo zucchero fino a
quando lo zucchero si è sciolto. Aggiungete la panna più eventuali succhi accumulati dalle fragole e infine la
vaniglia. Accendere la gelatiera, versare la miscela nella vaschetta e lasciare mescolare fino al completo
addensamento per circa 50-60 minuti. Aggiungere fragole affettate (a piacere) durante gli ultimi 5 minuti di
funzione Congelamento.
Nota: questo gelato avrà un aspetto naturale rosa pallido; se si desidera ottenere un rosa più acceso,
aggiungere, con parsimonia, alcune gocce di colorante alimentare rosso fino ad ottenere il colore desiderato.
Analisi nutrizionale per porzione: Calorie 222 (61% da grassi) - Carboidrati 20g - Proteine 2g - Grassi 15g -
Grassi saturi 10g - Colesterolo 57mg - Sodio 26mg
SORBETTO AL LIMONE (8 porzioni da ½ cuppetta)
Ingredienti: 3/2 tazze di zucchero, 3/2 di tazze di acqua, 1 tazza di succo di limone appena spremuto, 1
cucchiaio di scorza di limone finemente tritata.
Procedimento: unire lo zucchero e l'acqua in una casseruola media e portare ad ebollizione a fuoco medio-
alto. Ridurre il fuoco al minimo e lasciare cuocere senza mescolare fino a quando lo zucchero si scioglie
(circa 3-5 minuti). Lasciare raffreddare completamente. Questo semplice sciroppo può essere fatto in anticipo
in grandi quantità per averlo sempre a portata di mano e deve essere conservato in frigorifero fino al momento

9
dell'uso. Aggiungere il succo di limone e la scorza; mescolare per combinare. Accendere la gelatiera, versare
il composto di limone nella vaschetta e lasciare mescolare fino a quando non si è addensato per circa 50-60
minuti.
Analisi nutrizionale per porzione: Calorie 204 (0% di grassi) - Carboidrati 52g –Proteine 19g - Grassi 0g -
Colesterolo 0mg - Sodio 2mg
Sorbetto al pompelmo rosa: sostituire il succo di limone con spremuta di pompelmo rosa e 1 cucchiaio di
scorza di pompelmo tritato finemente alla scorza di limone. Aggiungere 1/4 di tazza di sciroppo di Orzata alla
miscela (è comunemente usata per cocktail come il MaiTai).
GELATO ALLO YOGURT CON CIOCCOLATO (8 porzioni da ½ cuppetta)
Ingredienti: 1 tazza di latte intero, 180g di cioccolato (fondente o dolce) tritato, 2 tazze di yogurt alla vaniglia
magro, 1/4 di tazza di zucchero.
Procedimento: in un frullatore dotato di lama in acciaio, miscelare il latte e il cioccolato fino a che il
composto non è ben amalgamato e liscio (circa 20-30 secondi). Aggiungere lo yogurt e lo zucchero e
miscelare nuovamente per circa 15 secondi. Accendere la gelatiera, versare la miscela nella vaschetta e
lasciare andare per circa 50-60 minuti.
Analisi nutrizionale per porzione: Calorie 222 (31% da grassi) - Carboidrati 36g - Proteine 3g - Grassi 8g –
Grassi saturi 64g - Colesterolo 4mg - Sodio 46mg
CARATTERISTICHE TECNICHE
•Alimentazione: AC 230V ~ 50 Hz, 150 W
•Capacità 1,5 litri
•Con compressore, Temperatura di esercizio (-18 -35°C)
•Silenziosità < 55 dBA
•Display LCD, Timer regolabile e mantenimento della temperatura fino a 60 min
•Accessori: paletta e misurino
ENGLISH: SAFETY INSTRUCTIONS
The following are important notes on the installation, use
and maintenance; save this instruction manual for future
reference; use the equipment only as specified in this
guide; any other use is considered improper and
dangerous; therefore, the manufacturer cannot be held
responsible in the event of damages caused by improper,
incorrect or unreasonable use.
Before use, ensure the equipment is undamaged; if in
doubt, do not attempt to use it and contact the authorized
service center; do not leave packing materials (i.e. plastic
bags, polystyrene foam, nails, staples, etc.) within the
reach of children as they are potential sources of danger;
always remember that they must be separately collected.
Make sure that the rating information given on the
technical label are compatible with those of the electricity

10
grid; the installation must be performed according to the
manufacturer's instructions considering the maximum
power of the appliance as shown on the label; an incorrect
installation may cause damage to people, animals or
things, for which the manufacturer cannot be considered
responsible thereof.
If it is necessary to use adapters, multiple sockets or
electrical extensions, use only those that comply with
current safety standards; in any case do not exceed the
power consumption limits indicated on the electrical
adapter and / or extensions, as well as the maximum
power shown on multiple adaptor.
Do not leave the unit plugged; better to remove the plug
from the mains when the device is not in use. Always
disconnect from power supply if you leave it unattended.
Cleaning operations should be carried out after
unplugging the unit.
If the unit is out of order and you do not want to fix it, it
must be made inoperable by cutting power cord.
-Do not allow the power cord to get closer to sharp
objects or in contact with hot surfaces; do not pull it to
disconnect the plug.
-Do not use the appliance in the event of damage to the
power cord, plug, or in case of short circuits; to repair
the product only address an authorized service center.
-Do not handle or touch the appliance with wet hands or
bare feet. Do not expose the appliance to harmful
weather conditions such as rain, moisture, frost, etc..
Always store it in a dry place.
-This appliance can be used by children of 8 years and
above and persons with reduced physical, sensory or
mental capabilities or lack of experience and knowledge
if they received supervision or instruction concerning
use of the appliance in a safe way and understand

11
hazards involved; children shall not play with the
appliance; cleaning and user maintenance shall not be
made by children without supervision.
-Children must not play with the appliance.
-Keep the appliance and its cord out of reach of children
less than 8 years.
If the power cord is damaged, or in case of failure and / or
malfunction do not tamper with the unit. The reparation
must be done by manufacturer or by service center
authorized by the manufacturer in order to prevent any
risk. Failure to comply with the above may compromise
the unit safety and invalidate the warranty.
-This appliance is intended to be used in household and
similar applications such as: staff kitchen areas in shops,
offices and other working environments; by clients in
hotels, motels and other residential type environments;
farm houses, bed and breakfast type environments.
-The appliance is not intended to be operated by means
of an external timer or separate remote-control system.
-Before every use, unroll the power cord.
-Use original spare parts and accessories only.
Do not subject the product to strong impacts, serious
damages may result.
GENERAL INSTRUCTIONS
This unit is an automatic self-refrigerated Ice-Cream &
Sorbet Maker of Class I, not suitable for professional use.
-Connect the device to a compatible power socket.
-Do not upend or incline it over a 45℃angle.
-To protect against risk of electric shock, do not pour
water on cord, plug and ventilation.
-Keep the appliance 8cm from other objects to ensure the
good heat releasing. Do not use the appliance close by
flames, hot plates or stoves.

12
-Do not immerse in water or any other liquid.
-Unplug the appliance after using or before cleaning.
-Do not switch on the power button frequently (ensure al
least 5 minutes interval) to avoid the damage of the
compressor.
-Metal sheet or electric objects are not allowed to be
inserted into the appliance to avoid fire and short circuit.
-Do not switch on before having installed the accessories.
-The initial temperature of the ingredients should be
25±5℃. Do not put ingredients in the freezer for pre-
freezing them, as it will easily make the blade blocked
before the ice cream is ready.
-Do not remove the blade when the appliance is working.
-Never clean with scouring powders or hard implements.
-Do not store any explosive substance or flammable
liquids such as propellants inside the unit.
TIPS FOR USE
-On first use, you should thoroughly wash all parts that will be in contact with the ice cream (such as the
removable bowl, the mixing blade, the transparent lid and the refill cover, measuring cup and spoon).
-Prepare the ingredients according to your own traditional recipe or following the suggestions at the end of
this user’s manual.
-It is not necessary to freeze the bowl in advance in a freezer, since this ice-cream maker is equipped with a
built-in compressor which is able to freeze the ingredients during use.
DESCRIPTION OF PARTS
1. Refill spout
2. Transparent cover
3. Removable bowl
4. LCD display
5. Control buttons
6. Spoon
7. Measuring cup
8. Mixing blade
DISPLAY
A. Mixing icon
B. Freezing icon
C. Freezing temperature
D. LCD display
E. Time
F. Power on button
G. Time regulation button (+)
H. Time regulation button (-)
I. Start/Stop button
INSTALLATION
CAUTION: ensure that the product is unplugged before performing any of the operations below.
-Remove the protective plastic and each element of the package, before proceeding.
-Place the unit on a flat surface and in an upright position, with the transparent cover (2) facing up.
-Insert the removable bowl (3) inside the machine.
-Install the mixing blade (8) on the drive shaft and secure it.
-Place the transparent cover on the unit, closing it by turning it clockwise.
-Close the refill spout (1).

13
OPERATING
Check voltage to be sure that the voltage indicated on the rating label agrees with your home voltage, then
plug into the correct socket.
1. BASIC OPERATIONS
[POWER] Button: After connecting with the electricity, press the [POWER] button to electrify the machine
and the LCD displays “60:00” which means the default operating time is 60 minutes.
[TIME+] [TIME-] Button: There are two timer buttons [TIME+] and [TIME-]. Press button [TIME+] or
[TIME-] once, the time will increase or decrease by 1 minute. Hold the button [TIME+], to increase rapidly
or hold the button [TIME-], to decrease. You can choose different operating time according to your taste.
[START/STOP] Button: After the time set, press the [START/STOP] button to start the ice cream making
process and the LCD backlight keeps on. During the ice cream making process, you can press
[START/STOP] button to control the mixing blade (The compressor is still working). Note: Pressing time
cannot exceed 3 seconds, otherwise the unit will enter into the initial default status. When the count-down
ends, the operation automatically stops and the unit emits a sound. The LCD displays "00:00" and LCD
backlight flickers at a speed of 1 second.
2. EXTENDED COOLING FUNCTION
When the ice cream making process finishes, the machine runs the COOLING function (no mixing) for 10
minutes for a maximum of 1 hour, then it returns to the initial default status.
3. TIME
You can stop the unit at any time by holding the [START/STOP] button for over 3 seconds, then the unt will
come back into the default status.
Whenever the machine is running, you can adjust the operating time by pressing the [TIME+] or [TIME-]
buttons. Press the [TIME+] button once and the time will increase 1 minute. Press and hold the [TIME+]
button and time will speed up (maximum time is 60:00). Press the [TIME-] button once and the time will
decrease 1 minute. Press and hold the [TIME-] button and the time will speed up (minimum selectred time is
1 min). When the preset time (for example 60 minutes) finishes and the unit stops and returns to stand-by
mode; if you like a harder consistency, you can once again select an operating time by pressing the [TIME +/-
] buttons.
4. LCD DISPLAY
LCD display shows the countdown (E), the freezing temperature (C), freezing (B) and mixing (A) icons.
During ice cream making process, the LCD display will show both these icons. When the mixing function
gets paused or during the extended cooling function, only freezing icon is displayed.
SUGGESTIONS
-Since the ice expands when it is formed, to avoid overflow and waste of ice-cream, please make sure that
the ingredients do not exceed 60% of the removable bowl capacity.
-Once the process is finished, remove the ice cream from the bowl by using a plastic scoop or a wooden
spoon. Do not use a metal scoop otherwise the bowl could be easily scratched.
CAUTION: To avoid risk of electrical shock, you should always unplug the unit from the electrical wall
outlet before serving.
CLEANING - WARNING: Always unplug the appliance from the electrical outlet before cleaning.
Do not immerse the appliance and power cable into the water.
Clean the exterior with a non-abrasive damp, avoid using detergents or abrasive or aggressive cleaning
agents. The cloth should not be too wet, as if water flows inside the cabinet, it can seriously damage the unit.
Wash the removable bowl (3), the blade (8), the lid (1) and the transparent cover (2) in warm water, rinse and
dry them thoroughly before reinstalling.
RECIPE BOOK
VANILLA ICE CREAM (8 cups servings)
Ingredients: 1 cup whole milk, 1/2 cup granulated sugar, 3/2 cups heavy cream (well chilled), 1–2 teaspoons

14
pure vanilla extract.
In a medium bowl, use a hand mixer or a whisk to combine the milk and granulated sugar until the sugar is
dissolved, about 1–2 minutes on low speed. Stir in the heavy cream and vanilla to taste. Turn on the unit, pour
mixture into freezing bowl through ingredient refill lid and let mix until thickened for about 50–60 minutes.
Nutritional analysis per serving: Calories 239 (68% fat) - Carbohydrates17g - Protein 2g - Fat 18g - Sat. fat
11g - Cholesterol 69mg - Sodium 30mg
Mint Chip: omit the vanilla and replace it with 1 to 1-1/2 teaspoons pure peppermint extract (to taste). Chop
your favorite bittersweet or semi-sweet chocolate bar into tiny uneven pieces. Add the chopped chocolate
during the last 5 minutes of “Mixing” procedure.
Cookies & Cream: add 3/4 cup coarsely chopped cookies or your favorite candy (chocolate chip, Mint Oreos
etc…) during the last 5 minutes of “Mixing” procedure..
BASIC CHOCOLATE ICE CREAM (8 cups servings)
Ingredients: 1 cup whole milk, 1/2 cup granulated sugar, 240g or 8 ounces bittersweet or semi-sweet
chocolate (your favorite) broken into 1/2-inch pieces, 1 cup heavy cream (well chilled), 1 teaspoon pure
vanilla extract
Heat the whole milk until it is just bubbling around the edges (this may be done on the stove countertop or in
a microwave oven). With a blender or by using a food processor equipped with metal blades, pulse to process
the sugar with the chocolate until the chocolate is finely chopped. Add the hot milk, process until the mix is
blended and smooth. Transfer in a medium bowl and let the chocolate mixture cool completely. Stir in the
heavy cream and vanilla to taste. Turn the on the ice-cream maker, pour mixture into the freezing bowl
through the lid and let it mix for about 50–60 minutes.
Nutritional analysis per serving: Calories 370 (60% fat) - Carbohydrates 34g - Protein 3g - Fat 25g - Sat. fat
11g - Cholesterol 65mg - Sodium 31mg
Chocolate Almond: add 1/2 teaspoon pure almond extract along with the vanilla. Add 1/2 - 3/4 cup chopped
toasted almonds or chopped chocolate-coated almonds during the last 5–10 minutes of “Freezing” procedure.
Chocolate Cookie: add 1/2 - 1 cup of chopped cookies during the last 5 minutes of “Freezing”.
Chocolate Fudge Brownie: add 1/2 - 1 cup of chopped day old brownies during the last 5 minutes of
“Freezing”.
Chocolate Marshmallow Swirl: after having removed the ice cream to a container, layer it with dollops of
your favorite chocolate sauce and scoops of marshmallow crème.
FRESH STRAWBERRY ICE CREAM (8 cups servings)
Ingredients: 250g or 1 pint fresh ripe strawberries (stemmed and sliced), 3/2 tablespoons freshly squeezed
lemon juice, 1/2 cup sugar, 1 cup whole milk, 1 cups heavy cream, 1 teaspoon pure vanilla extract.
In a small bowl, combine the strawberries with the lemon juice and 1/3 cup of sugar; stir gently and allow to
the strawberries to macerate in the juices for 2 hours. In a medium bowl, use a hand mixer or a whisk to
combine milk with sugar until the sugar is dissolved (about 1–2 minutes at low speed). Stir in the heavy
cream plus any accumulated juices from the strawberries and vanilla. Turn the ice-cream machine on, pour
mixture into the freezing bowl through the lid and let mix until thickened, for about 50–60 minutes. Add
sliced strawberries during the last 5 minutes of “Freezing” procedure.
Note: this ice cream will have a natural pale pink color; for a deeper pink, add some drops of red food
coloring until desired color is achieved.
Nutritional analysis per serving: Calories 222 (61% fat) - Carbohydrates 20g - Protein 2g - Fat 15g - Sat. fat
10g - Cholesterol 57mg –Sodium 26mg
FRESH LEMON SORBET (8 cups servings)
Ingredients: 3/2 cups sugar, 3/2 cups water, 1 cup freshly squeezed lemon juice, 1 tablespoon finely chopped
lemon zest.
Combine sugar and water in a medium saucepan and boil over medium-high heat. Reduce heat to low and
simmer without stirring until the sugar dissolves (about 3–5 minutes). Cool completely. This is natural syrup
and it can be made in larger quantities before starting the operation and kept it refrigerated until ready to use.
When cool, add the lemon juice and zest; stir to combine. Turn the unit on, pour the lemon mixture into the
freezing bowl through the lid and mix until thickened (this will take about 50–60 minutes).

15
Nutritional analysis per serving: Calories 204 (0% fat) - Carbohydrates 52g - Protein 19g - Fat 0g -
Cholesterol 0mg - Sodium 2mg
Fresh Pink Grapefruit Sorbet: substitute lemon juice with 1-1/2 cups freshly squeezed pink grapefruit juice
and lemon zest with 1 tablespoon finely chopped grapefruit zest. Add 1/4 cup Orgeat Syrup to the mixture
(Orgeat Syrup is used for cocktails such as a MaiTai).
CHOCOLATE FROZEN YOGURT (8 cups servings)
Ingredients: 1 cup whole milk, 180g or 6 ounces bittersweet or semisweet chopped chocolate, 2 cups low-fat
vanilla yogurt, 1/4 cup sugar.
Combine milk and chocolate in a blender or using a food processor with the metal blade; process until well
blended and smooth for about 20–30 seconds. Add yogurt and sugar; process until smooth (15 seconds).
Turn on the ice-cream machine, pour mixture into the freezing bowl through the lid and let it mix until
thickened (50–60 mins).
Nutritional analysis per serving: Calories 222 (31% fat) - Carbohydrates 36g - Protein 3g - Fat 8g -
Sat. fat 64g - Cholesterol 4mg - Sodium 46mg
TECHNICAL FEATURES
•Power supply: AC 230V ~ 50Hz, 150 W
•Capacity 1,5 L
•Built-in compressor - Cooling temperature (-18 -35°C)
•Noise < 55 dBA
•LCD display, Timer and cooling function up to 60 mins
•Accessories: spoon and measuring cup
DEUTSCH: HINWEISE:
Verwenden Sie das Gerät nur nach den Anweisungen in
dieser Bedienungsanleitung. Jede anderweitige
Verwendung gilt als unsachgemäß und gefährlich, und
der Hersteller kann für Schäden haftbar gemacht werden,
die durch eine unsachgemäße, falsche oder unvernünftige
Verwendung verursacht werden. Stellen Sie vor der
Verwendung sicher, dass das Gerät unversehrt ist. Im
Zweifelsfall verwenden Sie es nicht und wenden Sie sich
an den Kundendienst.
Verpackungsmaterial (Plastiktüten, Styropor, Nägel,
Klammern) muss für Kinder unzugänglich aufbewahrt
werden, da es eine potenzielle Gefahrenquelle darstellt.
Wir möchten Sie in diesem Zusammenhang auch daran
erinnern, dass Verpackungsabfall der Mülltrennung
zugeführt werden muss.
Stellen Sie sicher, dass die Angaben auf dem Typenschild
mit denen des Stromnetzes übereinstimmen. Die

16
Installation muss gemäß den Anweisungen des Herstellers
unter Berücksichtigung der maximal auf dem Typenschild
angegeben Leistung erfolgen. Eine unsachgemäße
Installation kann zu Verletzungen von Personen, Tieren
oder zu Sachschäden führen, für die der Hersteller nicht
haftbar gemacht werden kann.
Wenn Adapter, Mehrfachsteckdosen und
Verlängerungskabel erforderlich sind, verwenden Sie nur
solche, die die geltenden Sicherheitsstandards erfüllen. In
keinem Fall dürfen die am einfachen Adapter und/oder an
den Verlängerungskabeln angegebenen
Verbrauchsgrenzen sowie die maximale Leistung
überschritten werden, die auf dem Mehrfachadapter
angegeben ist.
- Verwenden Sie das Netzkabel nicht in der Nähe von
scharfen Gegenständen oder heißen Oberflächen und
ziehen Sie den Netzstecker nicht am Netzkabel aus der
Steckdose. Lassen Sie es nicht von der Arbeitsplatte
baumeln, wo ein Kind es halten könnte. Verwenden Sie
das Gerät im Falle von Schäden am Netzkabel, Stecker
oder im Falle von Kurzschlüssen nicht und lassen Sie es
in einer Vertragswerkstatt reparieren.
-Setzen Sie das Gerät keinen ungünstigen
Wetterbedingungen, wie z. B. Regen, Feuchtigkeit, Frost,
aus und bewahren Sie es an einem trockenen Ort auf.
Fassen Sie das Gerät nicht mit nassen Händen an und
verwenden Sie es nicht barfuß.
-Dieses Gerät kann von Kindern ab 8 Jahren und von
Personen mit eingeschränkten körperlichen, sensorischen
oder geistigen Fähigkeiten oder mangelnder Erfahrung
und Kenntnissen verwendet werden, wenn sie
beaufsichtigt oder instruiert wurden, um das Gerät sicher
zu verwenden und die damit verbundenen Gefahren zu
verstehen. Kinder dürfen nicht mit dem Gerät spielen.

17
Reinigung und Benutzerwartung dürfen nicht von
Kindern ohne Aufsicht durchgeführt werden.
- Kinder dürfen nicht mit dem Gerät spielen.
-Vewahren Sie das Gerät und sein Netzanschluss
außerhalb der Reichweite von Kinder unter 8 Jahren.
Wenn das Netzkabel beschädigt ist oder wenn ein Fehler
vorliegt, darf das Gerät nicht manipuliert werden. Jede
Reparatur muss vom Hersteller oder seinem technischen
Kundendienst oder in jedem Fall von einer Person mit
ähnlicher Qualifikation durchgeführt werden, um
jegliches Risiko zu vermeiden. Die Nichtbeachtung der
vorstehenden Bestimmungen kann die Sicherheit des
Geräts beeinträchtigen und die Garantiebedingungen
ungültig machen.
Dieses Gerät ist nur für den Hausgebrauch oder
gleichwertiges bestimmt, in Situationen wie bspw.:
Kantinen in kleinen Firmen oder ähnliche
Arbeitsumgebungen, von Kunden in Hotels, Motels oder
andere Art von touristische Unterkunft, wie ländlicher
oder Wohn –Tourismus.
Das Gerät darf nicht mit einer Zeitschaltuhr oder mit
einem separaten Fernwirksystem betrieben werden
Führen Sie vor jedem Gebrauch das Netzkabel aus.
Setzen Sie das Produkt keinen Stößen aus, es könnte
beschädigt werden. Verwenden Sie nur originale und
kompatible Teile und Zubehör.
ALLGEMEINE HINWEISE
Dieses Gerät ist ein automatischer selbstgekühlter
Eismaschine-& Sorbet Klasse I, für den professionellen
Einsatz nicht geeignet.
-Schließen Sie das Gerät nur an eine vorschriftsmässige
installierte Steckdose an.
-Diese Gerät nicht umdrehen oder neigen Sie es über
einen 45℃Winkel.

18
-Vor elektrischen Schocks zu Schutzen, kein Wasser auf
dem Kabel, Stecker und Belüftung gießen.
-Tauchen Sie das Gerät nie ins Wasser oder andere
Flüssigkeiten. Nach jeder Verwendung und vor dem
reinigen stets den Netzstecker herausziehen.
-Halten Sie das Gerät 8cm von anderen Gegenstände um
eine gute Wärme zu befreien.
-Verwenden Sie keine Zubehörteile, die nicht vom
Hersteller empfohlen wurden. Benutzen Sie das Gerät
nicht in der Nähe von Flammen, heiße Platten oder Öfen.
-Schalten Sie den Kraftknopf nicht häufig ein, (eine
Pause von mindestens 5 Minuten sicherstellen) um
Schäden am Kompressor zu vermeiden.
-Führen Sie kein Metallblech oder anderen elektrischen
Objekten ins Gerät ein, um Feuer und Kurzschluss zu
vermeiden. Schalten Sie den Netzstecker nicht ein, bevor
Sie die Zubehörteile installieren.
-Die Anfangstemperatur der Zutaten sollte 25 ± 5℃sein.
-Legen Sie keine Zutaten in den Tiefkühler um sie vor-
zufrieren, da es leicht die Klinge blockiert, bevor das Eis
bereit ist. Entfernen Sie die Klingen nicht, wenn das
Gerät in Betrieb ist. Niemals mit Scheuerpulver oder
harte Hilfsmittel reinigen.
-Speichern Sie keine explosive Substanz oder leicht
entzündliche Flüssigkeiten wie Treibstoffe in das Gerät.
ANWENDUNGSTIPPS
Bei erster Verwendung, sollten Sie alle Teile die in Kontakt mit dem Eis kommen, (wie die Abnehmbare
Schale, die Klingen, den durchsichtigen Deckel und die Nachfüllungsbedeckung, Messbecher und Löffel)
gründlich waschen.
Vorbereiten Sie die Zutaten entsprechend mit Ihrem eigenen traditionellen Rezept oder folgen Sie die
Vorschläge am Ende dieses Benutzerhandbuchs.
Es ist nicht notwendig, die Schale im Voraus im Tiefkühler zu frieren, da dieses Eishersteller mit einem
eingebauten Kompressor ausgestattet ist, der in der Lage ist, die Zutaten während der Verwendung zu frieren.
BESCHREIBUNG G20035
1. Nachfüllungstülle
2. Transparente Abdeckung
3. Abnehmbare Schale
4. LCD Anzeige
5. Bedientasten
6. Löffel
7. Messbecher
8. Mischenklingen

19
ANZEIGE
A. Mischenikon
B. Einfrierenikon
C. Gefriertemperatur
D. LCD Anzeige
E. Zeit
F. Einschalttaste
G. Zeitregelungstaste (+)
H. Zeitregelungstaste (-)
I. Ein-/Ausschalter
ZUSAMMENBAU/EINBAU
ACHTUNG: achten sie darauf, dass das Produkt abgeschaltet ist, vor der Ausführung irgenwelches
Eingriffs wie unten geschrieben.
-Vor Beginn, entfernen Sie die Plastikschutzhülle und jedes Element des Pakets.
-Stellen Sie die Einheit auf eine flache Oberfläche und in aufrechte Position mit der transparenten
Abdeckung (2), nach open.
-Legen Sie die Abnehmbare Schale (3) auf die Maschine.
-Installieren Sie die Klingen (8) auf die Antriebswelle und sichern.
-Legen Sie die transparente Abdeckung auf das Gerät, schließen durch drehen im Uhrzeigersinn.
-Die Nachfüllungstülle schließen (1).
GEBRAUCH
Prüfen Sie, ob die auf dem Typenschild angegebene Netzspannung mit der Ihres Stromnetzes übereinstimmt,
und dann in die richtige Steckdose stecken.
1. Grundfunktionen
[POWER] Taste: nach dem anschliessen an die Elektrizität, drücken Sie die [POWER] Taste, um die
Maschine zu elektrisieren, das LCD zeigt "60:00" an, dass bedeutet, die Betriebszeit beträgt standarmässig 60
Minuten.
[ZEIT+] [ZEIT-] Taste: es befinden sich zwei Tasten [ZEIT+] und [ZEIT-].Taste [ZEIT+] oder [ZEIT-]
einmal drücken, verlängert/verkürzt die Zeit jeweils um 1 Minute.
Drücken und Halten Sie die [ZEIT+] Taste um rasch zunehmen; die Taste [ZEIT -] halten, zu verringern. Sie
können entsprechend Ihrem Geschmack unterschiedliche Betriebszeiten wählen.
[EIN/AUS] Taste: nach eingestellter Zeit, [[EIN/AUS] Taste drücken, um den Eisherstellungvorgang zu
starten, die LCD-Hintergrundbeleuchtung bleibt aktiv. Sie können während des Eisherstellungsprozess,
[EIN/AUS] Taste drücken, um die Klingen zu kontrolieren. (Der Kompressor arbeitet noch). Hinweis:
Presszeit kann nicht 3 Sekunden überschreiten, anderfalls geht das Gerät in den Anfangszustand zurück.
Wenn der Countdown endet, schaltet sich der Betrieb automatisch aus und das Gerät emitiert ein Ton. Der
LCD zeigt "00:00" und die Hintergrundbeleuchtung des LCD flackert bei einer Geschwindigkeit von 1 Sec.
2. ERWEITERTE KÜHLFUNKTION
Nach dem Abschluss des Eisherstellungvorgangs, läuft die Maschine die KÜHLfunktion (kein Mischen) 10
Minuten für höchstens 1 Stunde, und dann kehrt es in den Anfangsstatus zurück.
ZEIT
Sie können jederzeit das Gerät stoppen durch halten der [EIN/AUS] Taste länger als 3 Sekunden, dann kehrt
das Gerät zu seinem definierten Grundzustand zurück. Jedes Mal wenn die Maschine läuft, können Sie die
Betriebszeit einstellen durch [ZEIT+] oder [ZEIT-] Taste drücken.
[ZEIT+] Taste einmal drücken und die Zeit wird 1 Minute erhöhen. Drücken und Halten Sie die [ZEIT+]
Taste und die Zeit wir schneller (höchste Zeit beträgt 60:00). Die [ZEIT-] einmal drücken und die Zeit wird 1
Minute verringern. Drücken und Halten Sie die [ZEIT-] Taste und die Zeit wird schneller (mindest
ausgewählte Zeit beträgt 1 Min.). Wenn die voreingestellte Zeit endet (zum Beispiel 60 Minuten) und das
Gerät stoppt und kehrt in den Stand by modus zurück; wenn Sie eine härter Konsistenz mögen, können Sie
erneut eine Betriebszeit wählen durch [ZEIT +/-] Taste drücken.
3. LCD DISPLAY/ ANZEIGE
LCD-Anzeige, zeigt das Countdown (E), die Gefriertemperatur (C), einfrieren (B) und mischen (A) Ikons.
Während des Eisherstellungsprozesses zeigt die LCD-Anzeige diese beiden Ikons.
This manual suits for next models
1
Table of contents
Languages: