1.2 Operating for the first time
Before operating the appliance for the first time,
please pay attention to the following notes:
– The appliance must be installed and connected
by a specialist before it is operated for the first
time.
– If an earthing-pin plug is fitted on the
appliance, it must be connected to a socket
outlet with earthing contact that conforms to
regulations.
– The rating plate for this appliance is included
with the instructions on a separate sheet. Store
the rating plate in the same location as your
operating and assembly instructions.
–Conscientiously read through the operating and
assembly instructions before operating the
appliance for the first time.
–Remove the packaging from the appliance and
dispose of it properly.
Pay attention to the fact that there are accessories
in the base of the packaging.
Keep packaging elements out of the reach of
children.
–Thoroughly clean the appliance and
accessories before using them for the first time.
This will eliminate any 'newness' smells and
soiling (see chapter entitled Cleaning and care).
–Tip: you are advised to have the new appliance
added to any existing glass insurance.
– Operation of the appliance must be
discontinued immediately if improper use
produces cracks, breaks or flaws on the cooking
surface, with the result that live parts can come
into contact directly or indirectly with seeping
liquid or if there is a risk of injury. Remove the
mains plug or actuate the corresponding mains
fuses. Inform your after-sales service.
–Before operating the appliance for the first time,
check that the mains connection is in proper
working order.
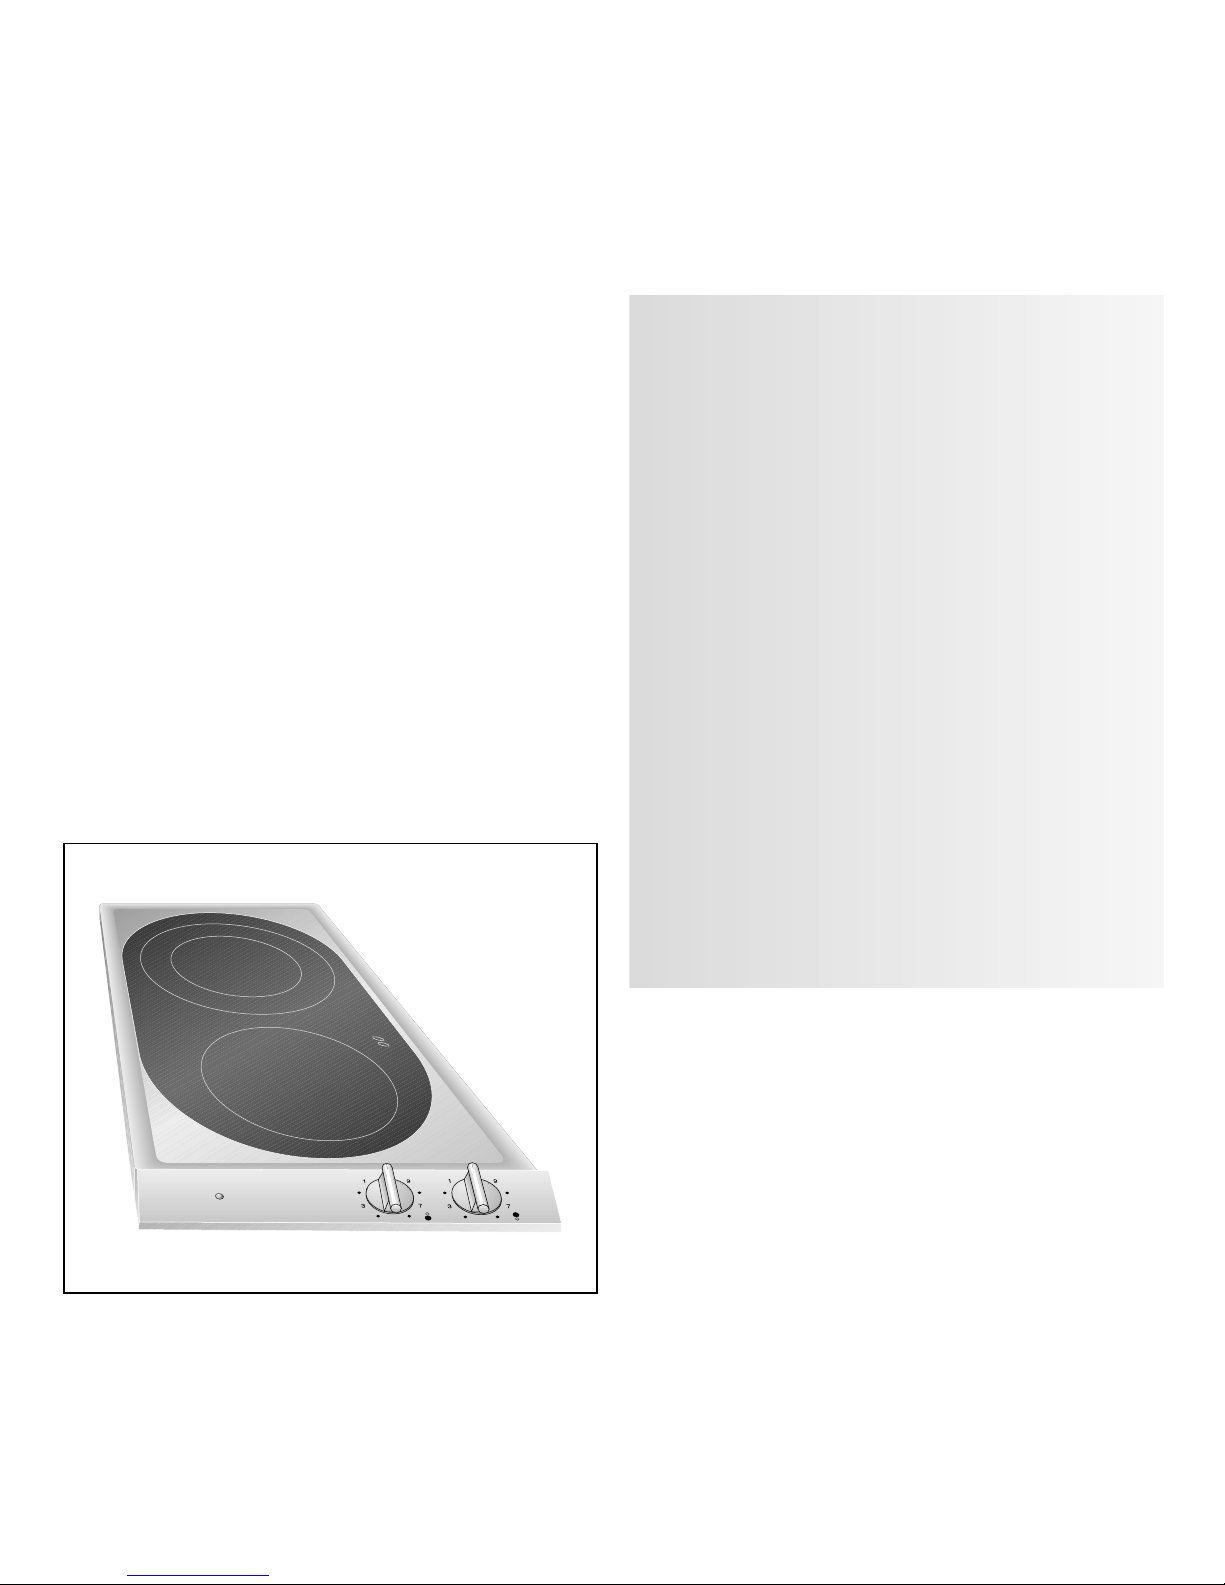
1.3 A out use
–The appliance is intended solely for use in the
household and must not be put to any other uses.
– Use the appliance to prepare meals only. It must
not be used to heat up the room in which it is
installed.
– The glass-ceramic hob must not e used as a
storage surface.
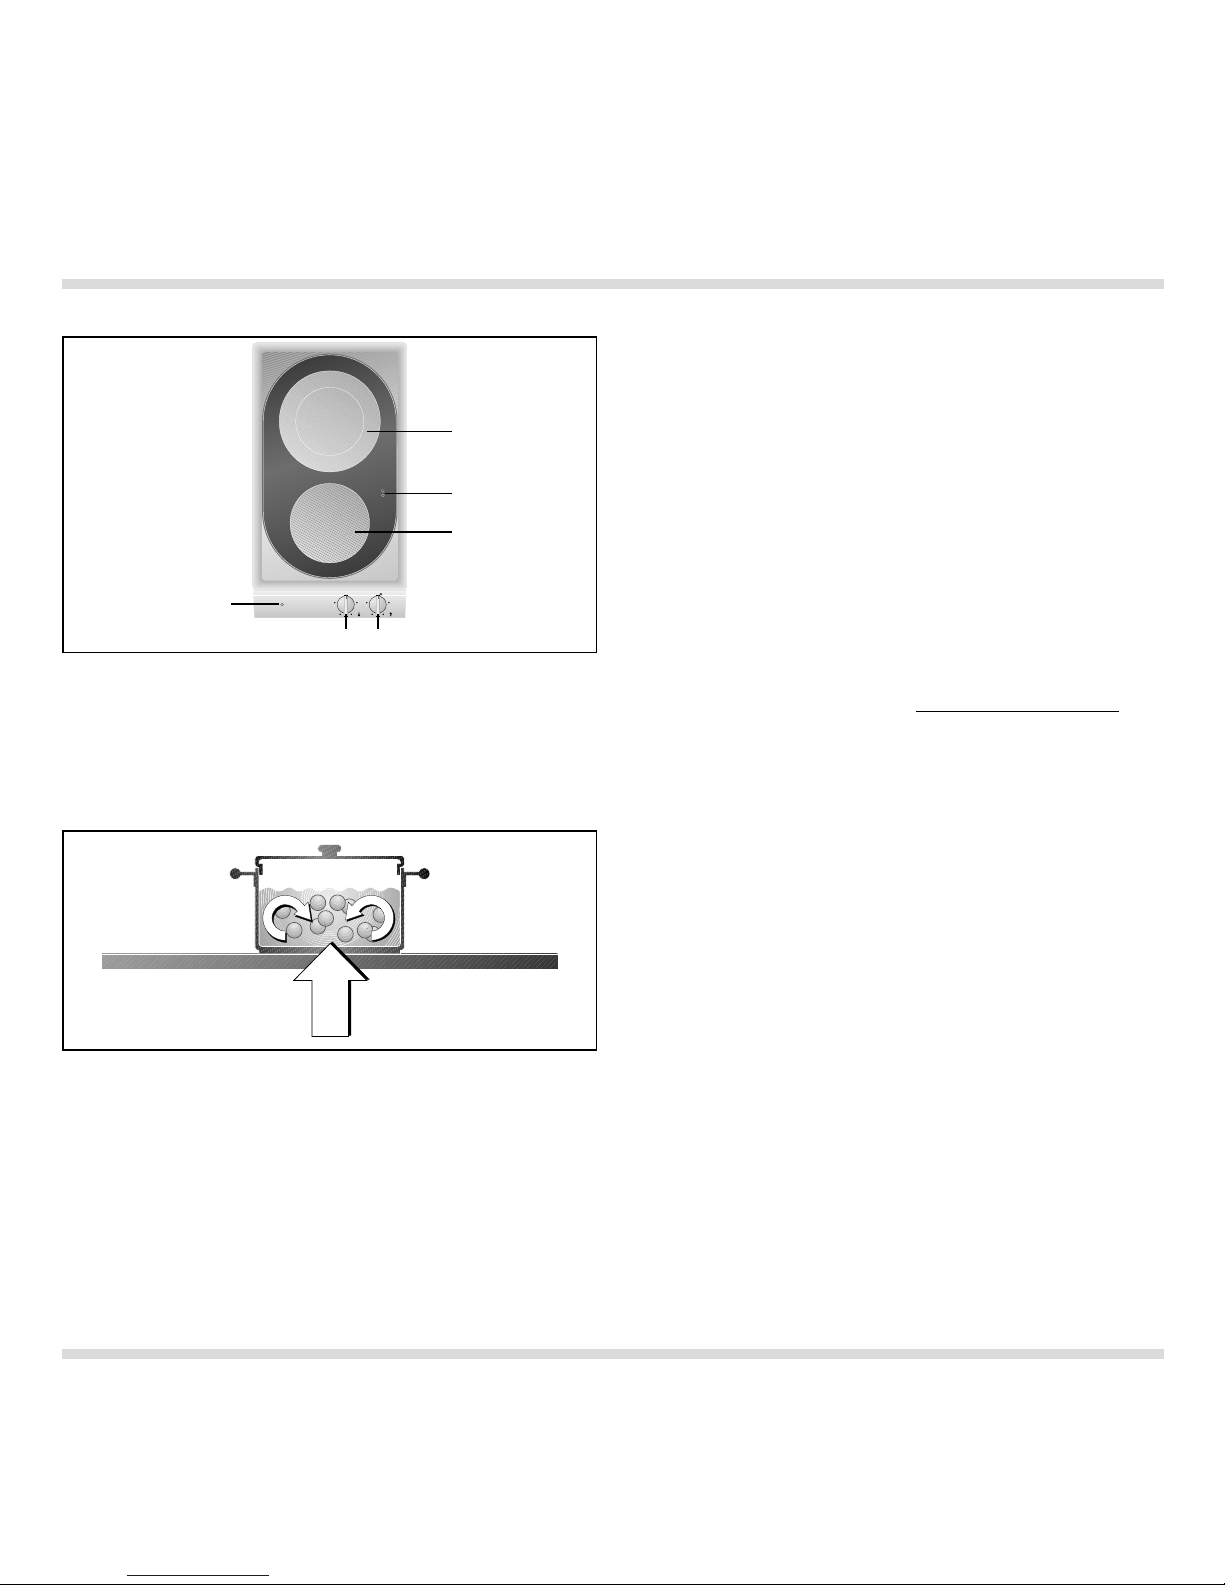
– Place a cooking vessel on the corresponding
hotplate efore operating it. Do not remove the
cooking vessel until you have switched off the
hotplate. The size of pots and pans should
correspond to the size of the hotplate. This will
save you energy and time.
–O serve caution with oils and fats. They may
overheat and burn easily.
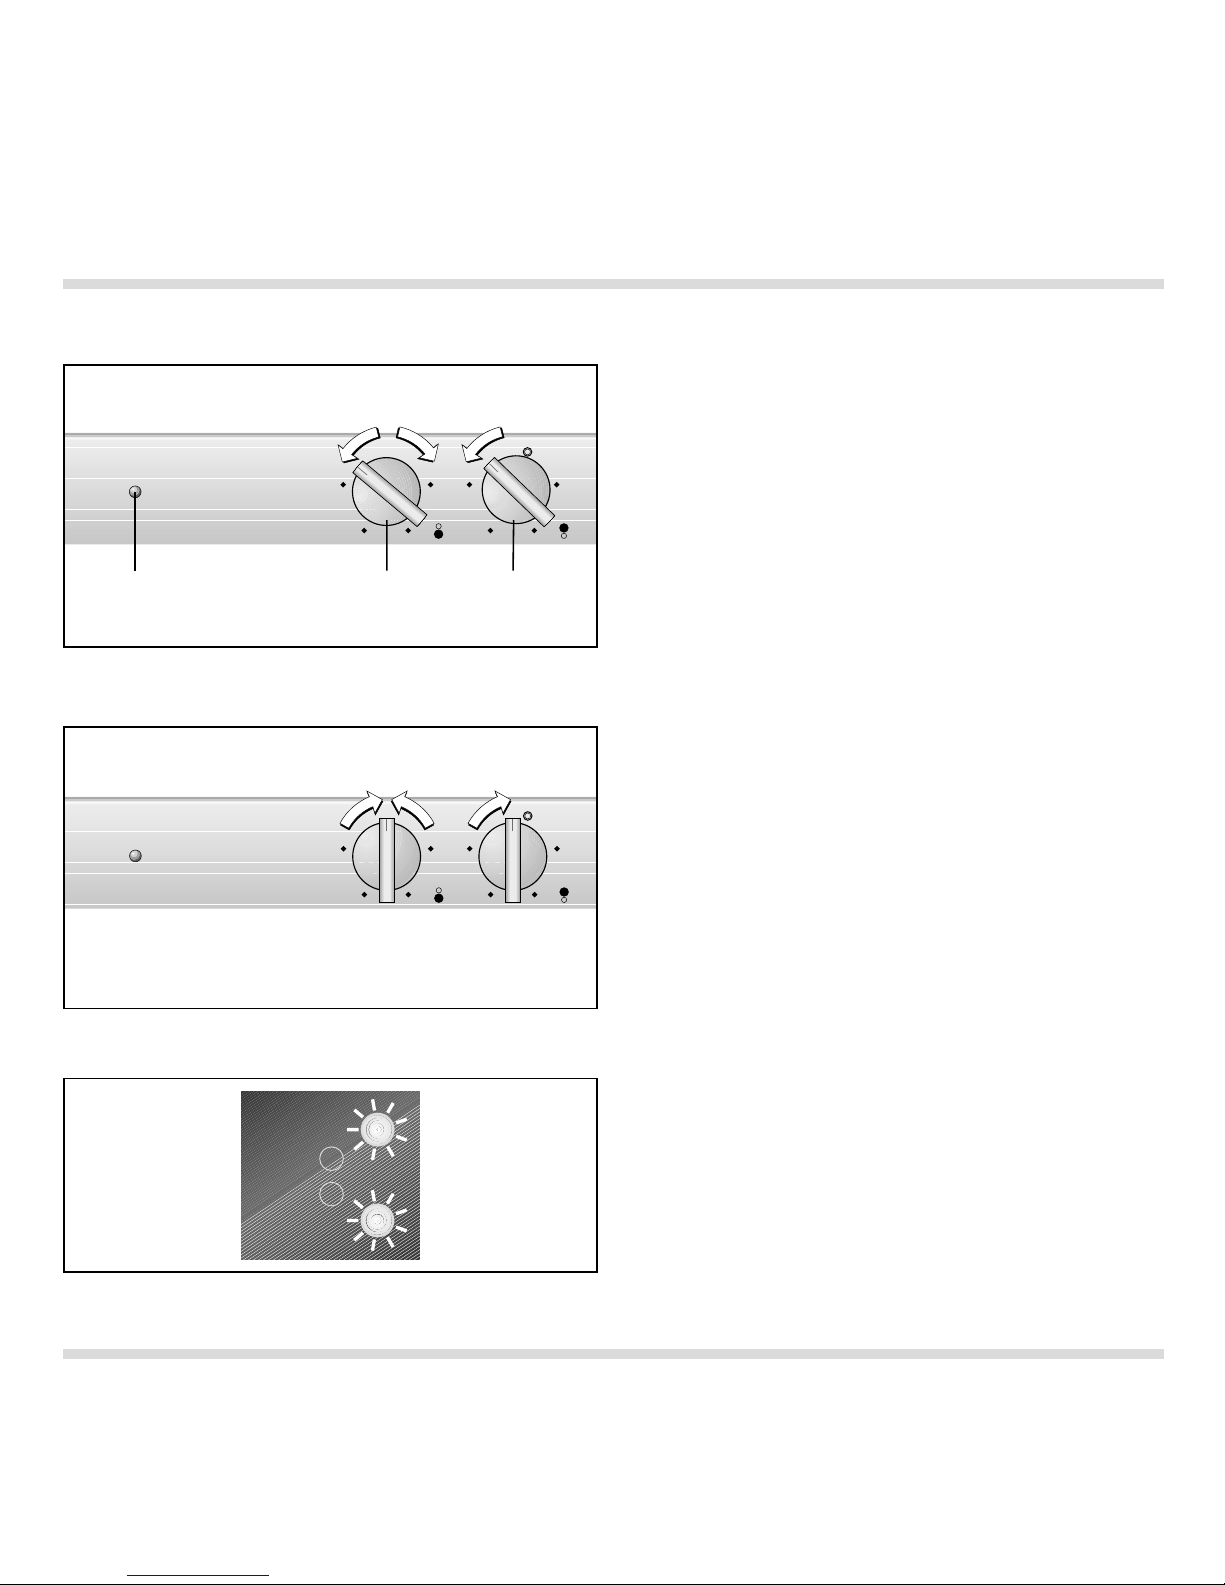
–After use, turn all control knobs to 0.
– In the event of malfunctions, first of all check the
household fuses. If the problem has nothing to
do with the power supply, please contact your
specialist dealer or your local Gaggenau after-
sales service.
– A built-in temperature protection facility
prevents overheating of the appliance.
– Use of aluminium kitchenware or stainless steel
kitchenware with aluminium bases may produce
mother of pearl-coloured stains on your cooker.
These will not have a detrimental effect on
functioning of the cooking surface, though.
The appliance is not suitable for preparing
foodstuffs in aluminium foil or in plastic vessels.
– Use the residual heat to warm up meals, for
example. This will save you energy.
– Remove any spilt food before opening the cover
of the appliance.
–The appliance cover must not be closed after
use until the appliance has cooled down.
4