8
ENGLISH
USE INSTRUCTIONS
The appliance was designed for maxi-
mum ease of use.
The tank contains cold water and,
therefore, filling is absolutley safe and
can be done quickly at any time.
This means you can iron non-stop with-
out any long pauses while waiting for
the boiler to fill.
A shortage of water in the tank is indi-
cated by the indicator-light (9) going
on.
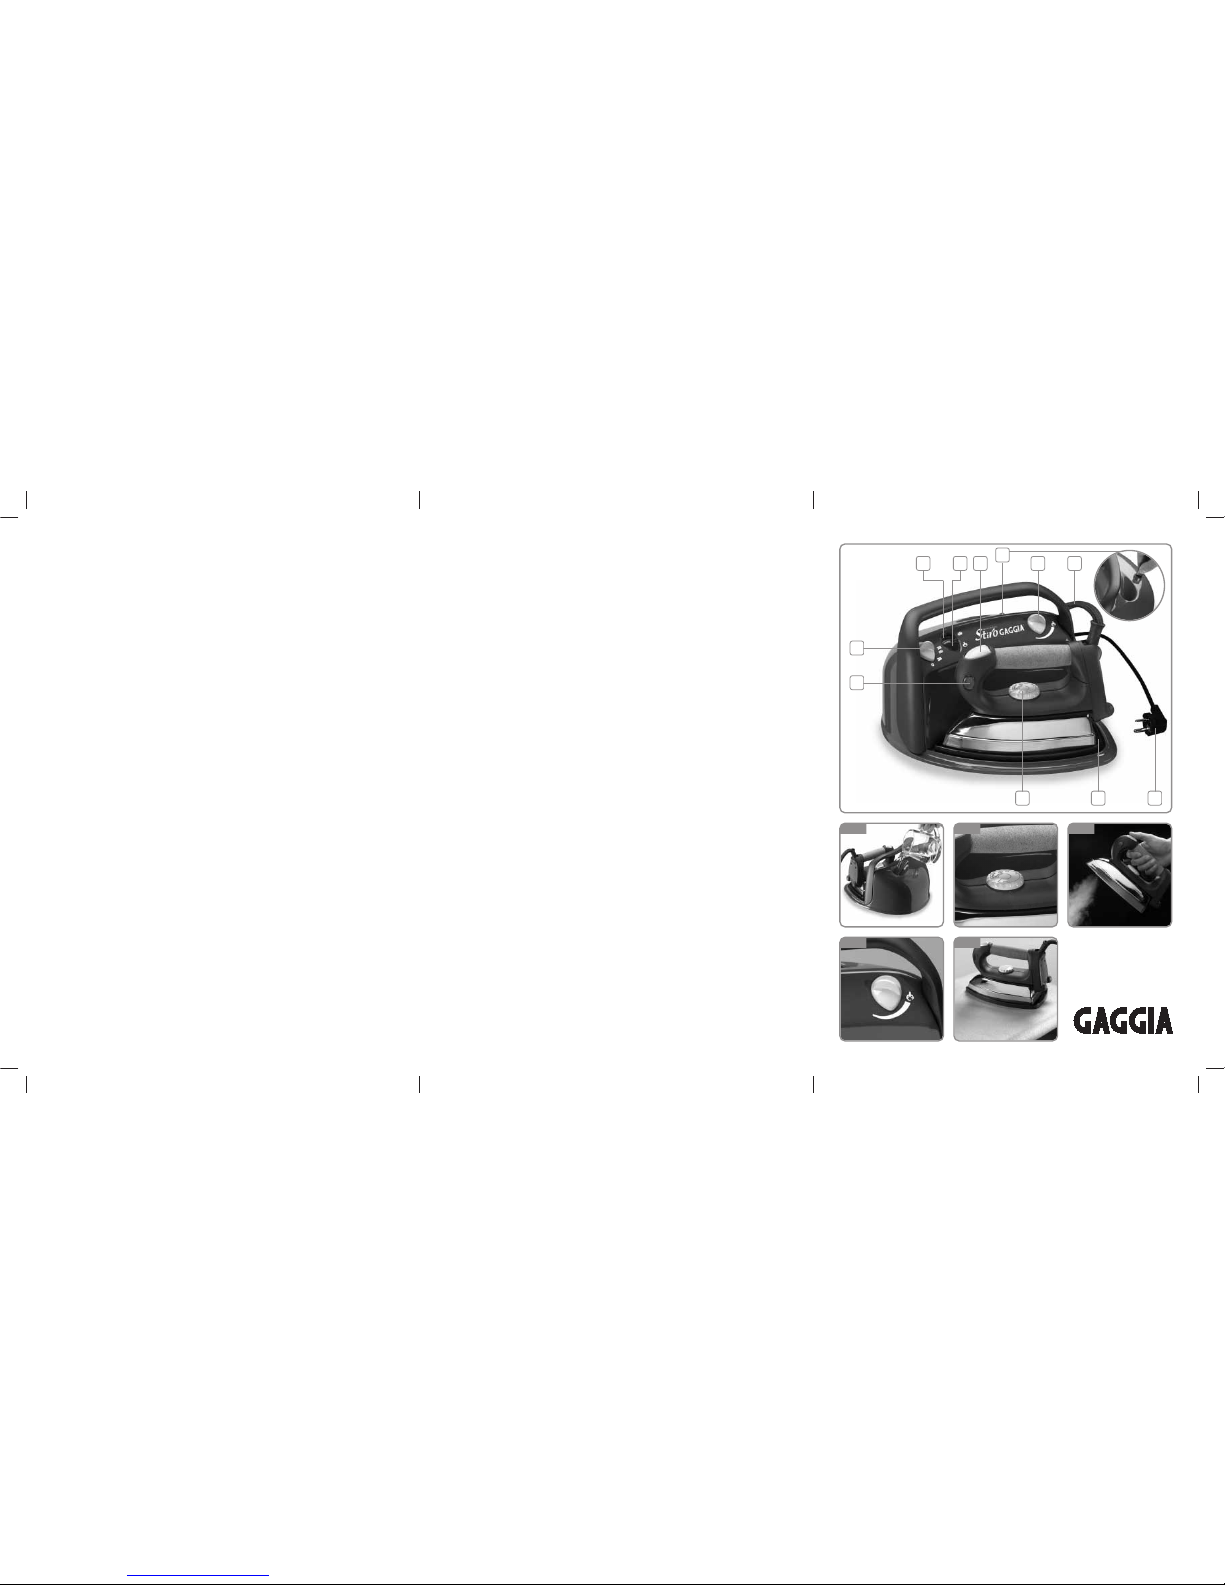
FILLING THE WATER TANK
•Pull up the tank plug (5) (fig. 1) and
fill the tank with about 0.8 litres of
water, taking care not to allow the
tank to overflow.
• Put back the plug (5).
•Fit the power plug (10) into a suit-
able, earthed socket.
• Turn the switch/commutator (4) into
position 1 (supplying power to the
generator + iron) - the steam pres-
sure indicator-light (8) lights up.
HOW TO USE THE IRONING SYSTEM
Steam ironing
•Shift the iron temperature control
knob (2) in the steam zone (see sym-
bol in fig. 2). At this temperature, you
can steam iron any type of fabric.
• Wait for the steam pressure indicator-
light (8) to go off (less than three min-
utes). Press the iron steam control
push-button (1) for the first time to
release the air inside the boiler and
steam tube. During this first opera-
tional stage, some small drops of
water caused by condensation may
come out together with the steam.
We advise you to direct the first jet
toward a cloth. A few moments later,
the steam indicator-light (8) goes off
again and you can begin to iron in
the normal way (fig. 3).
•During operation, the steam pres-
sure indicator-light (8) goes on and
off automatically according to steam
consumption. At this stage, you may
hear the generator buzzing at inter-
vals. This noise is caused by the
pump re-loading water into the boil-
er. Carry on ironing in the normal
way.
• To vary the quantity of steam accord-
ing to type of fabric (depending on
how delicate it is), turn control knob
(7) anticlockwise (to increase) or
clockwise (to reduce) (fig. 4).
•A mat is supplied for parking the
iron. The mat is in high temperature
resistance material, and can be
placed on any surface (fig. 5).
Dry ironing
•For steamless ironing, turn the
switch/commutator to position 2.
•Set the iron’s knob (2) to the
required temperature.
• Wait for the iron indicator-light (3) to
go off. Begin dry ironing without
using the push-button (1) because
no steam is being produced.