manuals.online logo
Brands
  1. Home
  2. •
  3. Brands
  4. •
  5. Galanz
  6. •
  7. Refrigerator
  8. •
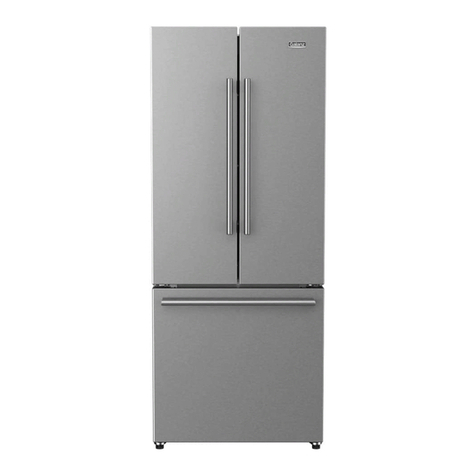
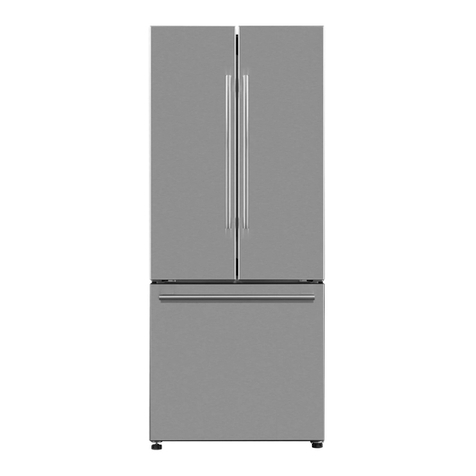
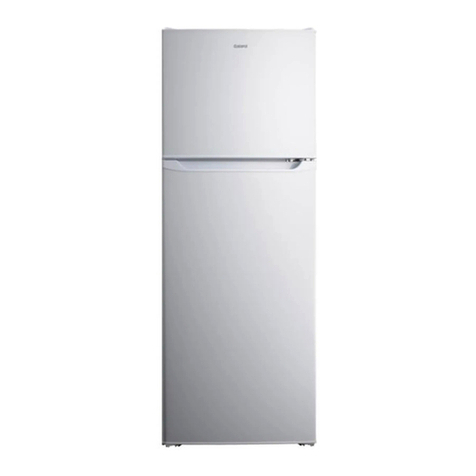
  9. Galanz GLR12B D16 Series User manual

Galanz GLR12B D16 Series User manual

nce,
using
rom
ted
ore
e
e
n it is
at
e fo
r
cturin
g
ng.
moke
©2019 Galanz Americas Limited Company
Model# GLR12B**D16 GLR12B**K16
REFRIGERATOR INSTRUCTION MANUAL
Thank you for purchasing a Galanz product please read this manual carefully for correct usage and safety,
and keep for future reference.For service,support and warranty information,call 800-562-0738.
@2019 Galanz Americas Limited Company.
Safety Warnings ...............................................................................................2
Name And Usage Of Parts ................................................................................ 6
Reverse and install the doors ........................................................................... 7
Product Introduction ........................................................................................9
Handling And Placement ..................................................................................9
Instruction For Usage ....................................................................................10
Maintenance And Cleaning .............................................................................12
Door Handle Installation ................................................................................13
How to install and remove door bin ..................................................................14
Connect Water Supply ...................................................................................15
Usage ............................................................................................................16
Ice Maker ......................................................................................................16
Button Instruction Of Display ......................................................................... 17
Operational Guidance Of Display ....................................................................17
The Setting Of The Cooling Room ................................................................... 17
Operational Guidance Of Display ....................................................................17
The Setting Of The Functions ......................................................................... 18
Lighting And Its Replacement ........................................................................ 18
Non-fault Phenomenon ................................................................................. 19
Faults And Analysis ........................................................................................20
Analysis And Elimination Of Special Phenomena ..............................................20
Technical Parameters .....................................................................................21
Packing List....................................................................................................22
Warranty.........................................................................................................23
CONTENT
CONTENT
1
SAFETY WARNINGS
SAFETY WARNINGS
1. Children should be supervised to ensure that they do not play
with the appliance.
2. If the power cord is damaged, it must be replaced by the
manufacturer, its service agent or similarly qualified persons in
order to avoid a hazard.
3. To avoid a hazard due to instability of the appliance, it must be
leveled in accordance with the instructions.
4. Keep ventilation openings, in the appliance enclosure or in the
built-instructure, clear of obstruction.
5. Do not use mechanical devices or other means to accelerate the
defrosting process, other than those recommended by the
manufacturer.
6. Do not damage the refrigerant circuit.
7. Do not use electrical appliances inside the food storage
compartments of the appliance, unless they are of the type
recommended by the manufacturer.
8. Do not store explosive substances such as aerosol cans with
a flammable propellant in this appliance.
9. This appliance is intended to be used in household and
similar applications such as
– staff kitchen areas in shops, offices and other working
environments;
– farm houses and by clients in hotels, motels and other
residential type environments;
– bed and breakfast type environments;
– catering and similar non-retail applications.
WARNING: Please refer to local regulations
regarding disposal of the appliance for its
flammable refrigerant and blowing gas.
WARNING: The lamp must be replaced by the
manufacturer, its service agent or similarly
qualified persons.
SAVE THESE INSTRUCTIONS
2
SAFETY WARNINGS
SAFETY WARNINGS
To avoid contamination of food, please adhere to the following
instructions:
– Opening the door for long periods can cause a significant
increase of the temperature in the compartments of the
appliance.
– Clean surfaces regularly that can come in contact with food
and accessible drainage systems.
– Store raw meat and fish in suitable containers in the
refrigerator, so that it is not in contact with or drip onto other
food.
– Two frozen-food compartments are suitable for storing
pre-frozen food, storing or making icecream and making ice
cubes.
– If the appliance is left empty for long periods, switch off,
defrost, clean, dry, and leave the door open to to mold
developing within the appliance.
WARNING: Food needs to be packed in bags before putting
into the refrigerator, and liquids need to be packed in bottles
or containers to avoid spills that are difficult to clean.
SAVE THESE INSTRUCTIONS
SAFETY WARNINGS
This marking indicates that this product should not be disposed
of with other household waste. To prevent possible harm to
the environment or human health from uncontrolled waste
disposal, recycle it responsibly to promote the sustainable
reuse of material resources.
3
It is recommended that electrical
appliances such as power outlets,
regulators, microwave ovens and
unstable items (heavy objects,
containers containing water)
should not be placed on the top
of the refrigerator. It is not
allowed to use electrical
appliances in the refrigerator
except our recommended models.
The refrigerator you purchased uses a
power supply voltage of 120V single-
phase AC, with a frequency of 60HZ. It
must be operated with a dedicated
socket (above 10A) and reliably
grounded. Do not remove the third
pin (ground wire) of the power cord.
The power cord plug should be
firmly in contact with the socket,
otherwise it may cause a fire.
When your refrigerator is
disused, please remove the
door and door seal, to avoid
an accident with children
playing with the refrigerator.
Before cleaning and maintenance,
please unplug the power to
avoid electric shock.
SAFETY WARNINGS
SAFETY WARNINGS
SAVE THESE INSTRUCTIONS
4
Do not pull the plug of the
refrigerator by pulling on the power
cord. When the refrigerator is
moved away from the wall, please
operate carefully. Do not roll over or
damage the power cord. Do not
continue to use when the power
line is damaged or the plug is worn,
and must be replaced by the repair
point designated by the
manufacturer.
SAFETY WARNINGS
NAME AND USAGE OF THE PARTS
SAVE THESE INSTRUCTIONS
Strictly prohibit self dismantling
and transforming the refrigerator
as well as damaging the refrigerant
line of refrigerator. When it is found
that the refrigerant line is damaged
or the combustible gas has leaked,
the leakage valve should be closed,
the doors and windows should
be opened and the repair points
specified by the manufacturer should
be contacted in time.
Glass bottles or cans with liquid in
them should not be placed in the
freezer to prevent bursting.
Watch out for children
and make sure they don't
play in the refrigerator.
Besides, do not let
anyone climb, sit, stand
or lean on the refrigerator
door.
Do not touch the cold
surface of the freezer,
otherwise it may cause
frostbite easily due to
low temperature.
Note: the spark generated by pulling the plug
of the power supply may ignite the leaked gas.
USE METHOD AND PRECAUTIONS OF
DIFFERENT COMPARTMENTS
TIPS FOR USE OF REFRIGERATOR COMPARTMENT
3. Raw food and cooked food need to stored in different
containers. In order to prevent bacterial contamination,
raw vegetables and fruits should not be exposed to raw
meat or fish. Vegetables and fruits should be wrapped
by film and stored in the crisper.
2. Raw meat and seafood need to be packed in different
containers and stored for not more than 3 days.
1. The common refrigerating temperature of food stored in
refrigerator is from 39°F to 46°F. In this environment,
cooked meat can not be stored for more than 4 days, and
vegetables should not exceed one week at most. fruits and
CAUTION:
Flammable Gas
This symbol alerts you to take care as the appliance
contains a flammable refrigerant. Do not expose it
to high heat, sparks or open flames
4. Before freezing food, wrap in freezer safe cling, bag or
container. The temperature of freezer is - 0.4°F, In order
to make they taste fresh and delicious, and to lock in the
nutrition of food, the food in the freezer should not be
stored for more than three months.
5
NAME AND USAGE OF PARTS
The picture is for reference only. Please refer to the actual
product for details.
Some features and devices may not be consistent with the
product you purchased.
The specific structures and configuration should be based
on the actual product.
Refrigerating chamber freezing chamber
6
1
2
3
4
5
10
6
7
8
9
11
1. LED Light and Temperature Controller
2. Air Duct Tower
3. Glass Shelf
4. Crisper Drawer
6. Upper Drawer
7. Full Width Tray
8. Lower Drawer
9. Levelling Leg
5. Door Bin
10. Door Handle
11. Ice Storage Bin( on some models)
12. Ice maker(on some models)
12
REVERSE AND INSTALL THE DOORS
7
and keep for future reference. For service, support and warranty i
nfo
rmation, call 800-562-0738.
?2019 Galanz Americas Limited C
ompany
INSTALLATION INSTRUCTIONS
You can choose to open your refrigerator to the right or the
left.
To change the way of opening, please follow the below instructions
Important safety warning: before doing so please unplug and
disconnect the appliance
In addition to the Accessories packed, you still need:
Medium-sized cross screwdriver
Small screwdriver
One more person who can help you would be better.
1.Unplug your refrigerator from the outlet.
2.Open the upper door, and close the bottom drawer.
6. Pry off the screw cover on the top left side of the
refrigerator to uncover the screw holes.
7. Relocate screw cover on the top left side of the refrigerator
to the right top to cover the holes.
3. Take off the protective covers with a Phillips screwdriver
through the back side, and save the protective covers.
4. Take off the 3 shelf-tapping screws, and save them.
5. Push the top hinge forward, remove the door and set it aside.
8. Remove the right-hand screw hole plug and Swap the
handle position from left to right. See the handle installation
instructions for door handle installation steps.
REVERSE AND INSTALL THE DOORS
8
and keep for future reference. For service, support and warranty irmation, call 800-562-0738.
?2019 Galanz Americas Limited C
pany
9. Remove the right middle hinge (storage), the left screw hole plug,
the left screw hole plug and put them into the right side. Install the left
middle hinge at the left screw hole. (The left middle hinge is packed in
the box with the accessories).
10. Take off the right door closer and fix the left closer
in the other side of the upper door.
11. Place the top hige on top of the cooler door and line
up the top hinge with holes on top of the refrigerator.Use
three screws to replace the hinge.Then tighten the
screws.Force-fit protective covers over top hinge.
PRODUCT INTRODUCTION
Do not place in area that gets below 41°F and do not use
in area that will get wet.
Please pull the power plug and remove all the food in
the fridge when handling.
Use tape to fix the movable parts of refrigerator, like
glass shelves of fridge, vegetable crisper and freezer
drawer. Close the door and fix it with adhesive tape so
as not to be opened when moving.
It is not appropriate to lift sideway or reverse the
refrigerator during the handling. If you have to tilt, the
inclination between the cabinet and the ground should
not be less than 45 degrees. Do not use the
mobile pulley on the prone scratched floor, it may
scratch the floor.
The refrigerator should be placed on a
flat and solid surface.
Do not use the foam pad of the
refrigerator to make it higher. If there is a
slight instability, the adjustable foot of
the front of the refrigerator can be
adjusted. Rotate the adjustable foot
clockwise to raise the height of the
refrigerator and reduce the height by
counterclockwise.
Refrigerator should be placed in a
dry, well ventilated place. The
sides and back of the refrigerator
should be retained more than 4 inch
of space, and the top to retain
more than 10 inch of space.
Refrigerator should not be placed in wet places.
If the refrigerator is accidentally splashed with water or
other dirt, please clean it with a soft cloth.
Refrigerator should be placed far
away from any heat source and
space of direct sunlight, so as not
to affect the performance of the
refrigerator.
HANDLING AND PLACEMENT
>10 inch
>4 inch
>4 inch
The refrigerator you purchased uses R600a
refrigerants that are very flammable. When you are
transporting and placing the refrigerator, please avoid
collisions or violent shocks to prevent
damage of the refrigeration system or fire accidents.
Do not hold the handles to move the refrigerator in the
process of transportation. You should lift the
refrigerator from the bottom.
9
PRODUCT INTRODUCTION
INSTRUCTION FOR USAGE
All the packaging components,
including the foam pad (which cannot
be used to make the refrigerator
higher) and the adhesive tape used
for fixing accessories, must also be
removed. Check the
accessories and information, as well
as the items in the package according
to the packing list in the instructions.
Responsible disposal of the appliance
DANGER. Risk of child entrapment: When discarding
a refrigerator, make
sure to take off the door and the
spring action or bolt catch. Leave the shelves in
place so that children cannot easily climb in, get
trapped inside and suffocate.
After the power supply is switched
on, the refrigerator will continue to
work for a long time in order to
reach the predetermined
temperature. During this time,
please try to reduce the number of
times you open the doors. For the
first and a longer working time,
the noise of the refrigerator may
be slightly louder, and the
temperature of both sides may be
higher. After a period of time, when
the refrigerator is fully cooled, it can
be used and put food into.
At the end of its working life, do not throw this appliance
out with your household trash. Electrical and
electronic appliances contain materials and substances
which, if handled or disposed of incorrectly, could be
potentially hazardous to the environment and human
health.
Observe any local requlations regarding the disposal of
electrical consumer goods and dispose of it
appropriately for recycling and recovery of the
refrigerant. This appliance contains the flammable
refrigerant isobutane (R600a) and cyclopentane (R141b)
in the cabinet insulation, and must be disposed of in a
separate waste collection. Contact your local authorities
for advice on recycling facilities in your area
Take care not to damage the pipework at the back of the
appliance before or during transportation so that the
refrigerant gas cannot escape. The plug must be
rendered useless and the cable cut off directly behind
the appliance or the machine to prevent misuse
10
Note: Refrigerators cannot be transported upside
down or laying flat. If they are transported incorrectly,
refrigerators must be placed upright for 2 hours before
they can be plugged in.
PRODUCT INTRODUCTION
Please do not rush to connect the power supply after the
stable placement and cleanness of the refrigerator. It
should be stand for at least 2 hours, and then switch on the
power to ensure the normal operation of the refrigerator.
Place the refrigerator in the right place (see the foregoing
points for attention), and make a full cleaning of the
refrigerator before use (refer to the latter section of
cleaning methods).of the refrigerator.
Note: The power cord should not be pressed by
the refrigerator itself and other heavy objects, so
as to avoid damaging the power line and causing
accidents.
The temperature of refrigerating chamber is usually
around 32-50°F, which is used to store fresh food for a
short time, such as vegetables, fruits and beverages,etc..
Refrigerated food should be wrapped in plastic wrap and
placed evenly on the shelf to prevent taint of odor or
excessive evaporation of moisture.
The storage of goods in the refrigerating chamber should
not be too dense. It should leave proper space for the cold
air circulation.
Hot food should be cooled to room temperature and then
put into the fridge.
Radish or similar food should cut off leaves to prevent
nutrition from being absorbed by leaves. The eggs are
stored on the egg rack by standing vertically, so that the
storage period can be extended.
The amount of fresh food placed in the freezer should not
exceed the freezing capacity listed in the technical
parameters of the refrigerator.
Note: It should be noted that food should not
obstruct the air outlet when storing food, so as not
cause bad circulation of the cool air and affect
normal performance of the refrigerator.
to
the
Minimize the number of opening and closing times to
reduce the loss of cold air. So that the storage period
can be extended.
Frozen foods should not be refrozen after thawing. They
should be eaten as quickly as possible.
Use sealed packages or fresh-keeping bags to freeze food
as far as possible, so that they can be stored for a longer
time and can reduce freezer burn on the food chamber.
After a loss of power, please reduce the number of open
doors, and try not to put in the new food ( to prevent the
temperature in the cabinet to pick up faster).
If a power outage is known change pick up to rise, you
should make more ice cubes that placed in a watertight
container, and put them in the upper of the refrigerating
chamber.
11
INSTRUCTION FOR USAGE
If the refrigerator needs to be stopped for a long time, the
power plug should be removed, the power
should be cut off, and the refrigerator should be cleaned
according to the method described above. In general, do
not block up the refrigerator, otherwise it will affect the
service life of the refrigerator.
When the refrigerator is not in use, please open the door to
prevent the bad smell from the residue of the food in the
refrigerator.
The food that can be washed is best to be stored after
cleaning and drying.
The freezing drawer is used for storing something that need to
be preserved for a long time, such as meat, fish and so on.
Package the food to be frozen as flat as possible to facilitate
freezing and thawing.
After pulling off the power, it should be kept the refrigerator
at least 5 minutes apart before it is reenergized. vertically,
so that the storage period can be extended.
PRODUCT INTRODUCTION
USAGE
MAINTENANCE AND CLEANING
Defrost
This product is frost-free refrigerator, and there is no
need for manual defrosting.
Cleaning
The refrigerator should be cleaned often to avoid
unpleasant smells.
Note: Do not spray the water directly when
cleaning, so as not to affect the insulation
performance of electrical components. Use a
dry rag when cleaning electrical components
such as switch and light.
Note: Do not use hard brushes, wire brushes,
detergents, gasoline, lacquer thinner, acetone
and other organic solvents, hot water or acid,
alkali to clean the refrigerator.
Before cleaning, you must remove
the plug.
Use a soft towel or sponge dipped in warm water (neutral
detergent can be added) to clean the cabinet except the
door seal. When the door seal is cleaned, you must use
rinsing and wipe it with dry cloth.
12
1. Before the refrigerator door handle is installed (note:
the anchor bolts of the handle are in the accessory
bag, and all steps should be performed at the right and
left two mounting positions simultaneously.
2. Screw the locating bolt into the bolt
hole of the door body and secure it.
3. Loosen the locking screw inside the handle part with a
hexagonal wrench first, then align the handle with the
positioning bolt and insert it into the positioning bolt
(note: the handle locking screw is installed facing down).
4. Wait until the handle fits perfectly with the door
body, and then use a hexagonal wrench to tighten
the locking screw inside the handle part.
DOOR HANDLE INSTALLATION
PRODUCT INTRODUCTION
13
PRODUCT INTRODUCTION
HOW TO INSTALL AND REMOVE DOOR BIN
Remove door bin:
2. Maintain the first step push up
at the same time, disengage the
right side, and continue to take the
tray off upward.
1. Apply force along the arrow
direction to deform the right
side of the tray.
←
←
5. Repeat the previous steps for the 2nd
freezer drawer, finish installing the handle.
14
6. Repeat the previous steps for the
Refrigerator door.
Installing door bin:
1. Place the tray above the mounting position and force the
door up to the bottom, completing the installation when
it cannot continue to move down.
←
WARNING: Connect to potable water supply only.
CONNECT WATER SUPPLY(GLR12B**K16)
What you need:
15
PRODUCT INTRODUCTION
1. Basic tools:adjustable wrench,flat blade screwdriver,and
Phillips TM screwdriver.
2. Access to a household cold water line with water pressure
between 20 and 120 psi.
3. A water supply line made of 1/4inch(6.4mm)OD, copper tubing,
PVC or Braided Stainless. To determine the length of connector
needed,you will need to measure the distance from the ice maker
inlet valve at the back of the refrigerator to your cold water pipe.
Then add approximately 7 feet(2.1 meters), so the refrigerator can
be moved out for cleaning.
4. A shutoff valve to connect the water supply line to your
household water system. DO NOT use a self-piercing type
shutoff valve.
5. A compression nut and ferrule(sleeve)for connecting the water
supply line to the ice maker inlet valve.
NOTE: Before making the connection to the refrigerator, be sure
that the refrigerator power cord is not plugged into the wall
outlet.
1. Place end of water supply line into sink or bucket. Turn On
water supply and flush supply line until water is clear. Turn OFF
water supply at shut off valve.
2. Remove the plastic flexible cap from the water valve inlet.
3. Place the compression nut and ferrule(sleeve) onto the end of
the tubing.
4. Insert the end of the water supply line into the connection as far as
possible. While holding the tubing, tighten the fitting.
5. Turn ON water supply at shutoff valve and tighten any
connections that leak.
water supply line
1/4"Comperession nut
Ferrule
(Sleeve)
Water inlet
Water valve
Plastic water tubing
to ice maker fill tube
After turning on your refrigerator, the ice will start
to be made between 12 and 24 hours.
The ice maker produces 3.5 lbs ice per day,
depending on the temperature of the
freezer, the times in which the door opens,
and other conditions (amount of food
in the freezer, etc).
In order to turn on/off the ice maker, press
the power button for 2 seconds.
Power Button
Sensor
The ice maker will fill up (and start making ice) between 12 and 24
hours after the refrigerator is turned on.
Throw away the first batch of ice. Make sure that nothing
interferes with the sensor.
When the ice reaches the sensor, the ice maker will stop making
ice immediately.
It’s normal that some ice gets stuck. If the ice is not used
frequently, the older cubes of ice will be opaque in color, smaller,
and with a strange flavor.
The ice maker is not producing ice or not
enough ice.
- If it is new installation. Wait 12 to 24 hours after
icemaker installation for ice production to begin. It will
take 72 hours for full ice production.
- Check if the refrigerator is connected to a water supply
or the supply shut off valve is turned on.
-Reverse osmosis filtration systems can reduce the water
pressure below the minimum amount and result in
icemaker issues.
-A kink in the line can reduce water flow. Straighten the
water source line.
-Confirm ice maker is in the ON position.
-The recommended temperature for the freezer
compartment for normal ice
production is 0°F. If the freezer temperature is warmer, ice
production will be affected.
-If the doors are not properly closed, ice production will
be affected.
Ice Maker (on some models)
USAGE
16
USAGE
USAGE
USAGE
BUTTON INSTRUCTION OF DISPLAY
The below picture is a schematic diagram of an electronic
display.
refrigeration button
freeze button
function button
OPERATIONAL GUIDANCE OF DISPLAY
Button instruction
“refrigeration” button: adjust the setting temperature of
refrigerating chamber (press down to adjust temperature).
“freeze” button: adjust the setting temperature of freezing
chamber (press down to adjust temperature).
“function” button: with each click (within 5 seconds), the
corresponding function icon flickers, and then switch among
holidays - quick freezing- intelligence successively (press
down is effective). No operation within 5 seconds will end.
Note: Each effective keystroke operation is
accompanied by a buzz, flashing once per second.
THE SETTING OF THE COOLING ROOM
Warning: The temperature will be set finally and
the flash will disappear without setting operation
over 5 minutes.
The LED display turns bright when the door is open. Push the
'refrigeration' button. The buzzer rings. Then the refrigerating
room turns into the setting condition. The temperature patterns
turn flash and the temperature of the refrigerating room will
update by pushing the button once time, which the
temperature will recycle From “33°F” — “45°F”.
OPERATIONAL GUIDANCE OF DISPLAY
The setting of the freezing room
The LED display turns bright when the door is open. Push
the 'freeze' button. The buzzer rings. Then the freezing room
turns into the setting condition. The temperature turns flash
and the temperature of the freezer room will update by
pushing the button once time, which the temperature will
recycle from “-8°F” — “5°F”.
Warning: The temperature will be set successfully
and the flash will disappear if stop setting over 5
minutes.
17
Freeze temperature
area display
Function mode
area display
Refrigeration
temperature display
USAGE
Warning: As for the holiday, quick freezing and
smart modes, the refrigerator cannot work in two
or three modes but only one mode.
Warning: The temperature of the refrigerating
room cannot be regulated in holiday or smart
mode; while the temperature of the freezing room
cannot be regulated in smart or quick freezing
mode.
LIGHTING AND ITS REPLACEMENT
When the door of refrigerating chamber opens, the LED
light turns on.
When the lighting is damaged, please remove the lampshade
first and then replace the LED lighting.
The specific operations are shown in the following diagram:
Note: In the smart mode, the temperature of cooling
room and freezer room change as the change of the
environmental temperature and regulate the
temperature automatically.
Warning: Push the “function” button, exit the smart
mode, and all functions pattern disappear, then it
exit the setting of function modes. regulate the
temperature automatically.
Entering the quick freezing mode: Push the “function”
button. When the quick freezing pattern turns
bright, it is in the quick freezing mode.
Flashing 5 times
Exiting the quick freezing mode: Push the “function” button.
When the quick freezing pattern disappears, it is
exiting the quick freezing mode.
Disappear
Note: In quick freezing mode, the temperature of freezer
room is fixed at low temperature, and it cannot be regulated.
It will exit the quick freezing mode within 24 hours after
finishing freezing.
Entering the smart mode: Push the “function” button.
When the smart pattern turns bright, it is in the
smart mode.
Flashing 5 times
Exiting the smart mode: Push the “function” button.
When the smart pattern disappears, it is exiting the smart
mode.
Disappear
The setting of the functions
The LED display turns bright when the door is open. Push
the “function” button. Then it turns into the condition of
setting functions.
Entering the holiday mode: Push the “function” button.
When the holiday pattern turns bright, it is in
the holiday mode.
Flashing 5 times
Exiting the holiday mode: Push the “function” button.
When the holiday pattern disappears, it is exiting the
holiday mode.
Disappear
Note: in holiday mode, the temperature of the refrigerating
compartment is fixed at “63 ° F”, and the temperature cannot
be regulated. (This control only for the refrigerator
compartment, not the freezer compartment).
USAGE
18
USAGE
USAGE
1.Please move the lampshade and the thermostat out 3-5mm
in the direction of the arrow.
2.Take out the lamp shade and thermostat downwards.
the arrow.
3.Pull the connection terminal, use the screwdriver to remove
the LED light board and replace it.
Note: If the LED lamp is abnormal, it should be
replaced by professionals. Do not take dismantling
and replace it privately in order to avoid damage.
NON-FAULT PHENOMENON
Condensation of appearance: When the humidity of the
surrounding of refrigerator is large, the condensation on the
surface of the cabinet is a normal phenomenon.
The heating of both sides of the cabinet and the frame
around the door of freezing chamber: The heating will be
obvious in start-up operation and summer. This is the
normal work of the refrigerator, and there is no effect on the
food in the cabinet.
Long-term operation of compressor: When the refrigerator
is first used, it takes a long time to work to reduce the
temperature to a set value, and the compressor will run
intermittently after the stable operation of refrigerator.
Surface heating when the compressor is running: When the
compressor works normally, the surface temperature is high,
which is a normal phenomenon. Do not touch it with your
hands.
The sound of flowing water: It is a normal phenomenon for the
sound of refrigerant flowing in the pipeline.
The sound of evaporator and piping: When the refrigerator
runs, with changeable temperature, evaporator and pipe will
make a sound due to thermal expansion and contraction.
Overheat alarm of freezing room: It is caused by high
temperature inside the cabinet for the first electrification. The
alarm will be automatically cancelled when the temperature
drops.
19

This manual suits for next models

1

Other Galanz Refrigerator manuals

Galanz RFFK006R Operator's manual

Galanz

Galanz RFFK006R Operator's manual

Galanz GLR12TWEEFR User manual

Galanz

Galanz GLR12TWEEFR User manual

Galanz GLR76TBKE User manual

Galanz

Galanz GLR76TBKE User manual

Galanz GL35S5 User manual

Galanz

Galanz GL35S5 User manual

Galanz GLR16FS2K16 User manual

Galanz

Galanz GLR16FS2K16 User manual

Galanz RFFK003R Operator's manual

Galanz

Galanz RFFK003R Operator's manual

Galanz GLR33MBKE02 User manual

Galanz

Galanz GLR33MBKE02 User manual

Galanz GL31BK User manual

Galanz

Galanz GL31BK User manual

Galanz BCD-215V-62H User manual

Galanz

Galanz BCD-215V-62H User manual

Galanz GL27BK User manual

Galanz

Galanz GL27BK User manual

Galanz GLR10TBKF User manual

Galanz

Galanz GLR10TBKF User manual

Galanz GL17BK User manual

Galanz

Galanz GL17BK User manual

Galanz BC-47 - 53F User manual

Galanz

Galanz BC-47 - 53F User manual

Galanz GLR46TS1E User manual

Galanz

Galanz GLR46TS1E User manual

Galanz BCD-472WTE-53H User manual

Galanz

Galanz BCD-472WTE-53H User manual

Galanz RFFK002B Operator's manual

Galanz

Galanz RFFK002B Operator's manual

Galanz GLR10TS5EF User manual

Galanz

Galanz GLR10TS5EF User manual

Galanz GL17BK User manual

Galanz

Galanz GL17BK User manual

Galanz GLR33MRDR10 User manual

Galanz

Galanz GLR33MRDR10 User manual

Galanz GLR12TBKF User manual

Galanz

Galanz GLR12TBKF User manual

Galanz GL43BK User manual

Galanz

Galanz GL43BK User manual

Galanz GLR18FS5M16 User manual

Galanz

Galanz GLR18FS5M16 User manual

Galanz GLR10TWEF User manual

Galanz

Galanz GLR10TWEF User manual

Galanz GLR12B Series User manual

Galanz

Galanz GLR12B Series User manual

Popular Refrigerator manuals by other brands

Mitsubishi Electric MR-WX61Z operating instructions

Mitsubishi Electric

Mitsubishi Electric MR-WX61Z operating instructions

Traulsen R & ASeries owner's manual

Traulsen

Traulsen R & ASeries owner's manual

Beko CN158235ZX user manual

Beko

Beko CN158235ZX user manual

White-Westinghouse WWSS2601KW3 Use & care manual

White-Westinghouse

White-Westinghouse WWSS2601KW3 Use & care manual

Beko TSE 1262 user manual

Beko

Beko TSE 1262 user manual

U-Line 29R supplementary guide

U-Line

U-Line 29R supplementary guide

AEG SKB612F1AF user manual

AEG

AEG SKB612F1AF user manual

Zanussi ZFC 40/36FF Instruction booklet

Zanussi

Zanussi ZFC 40/36FF Instruction booklet

Samsung RL43T series user manual

Samsung

Samsung RL43T series user manual

Oster OS-BNFME21200VD instruction manual

Oster

Oster OS-BNFME21200VD instruction manual

CSI BRUTE Series User manual and product specifications

CSI

CSI BRUTE Series User manual and product specifications

Summit Appliance Accucold CP133 instruction manual

Summit Appliance

Summit Appliance Accucold CP133 instruction manual

Dacor RF36NDFSS use and care manual

Dacor

Dacor RF36NDFSS use and care manual

Haier HSW08 - 02-02 user manual

Haier

Haier HSW08 - 02-02 user manual

EAS Electric EMC1851AW instruction manual

EAS Electric

EAS Electric EMC1851AW instruction manual

Sanyo MPR-414F - Commercial Solutions Refrigerator instruction manual

Sanyo

Sanyo MPR-414F - Commercial Solutions Refrigerator instruction manual

Electrolux IK3026SR user manual

Electrolux

Electrolux IK3026SR user manual

Samsung RF23BB8 Series user manual

Samsung

Samsung RF23BB8 Series user manual

manuals.online logo
manuals.online logoBrands
  • About & Mission
  • Contact us
  • Privacy Policy
  • Terms and Conditions

Copyright 2025 Manuals.Online. All Rights Reserved.