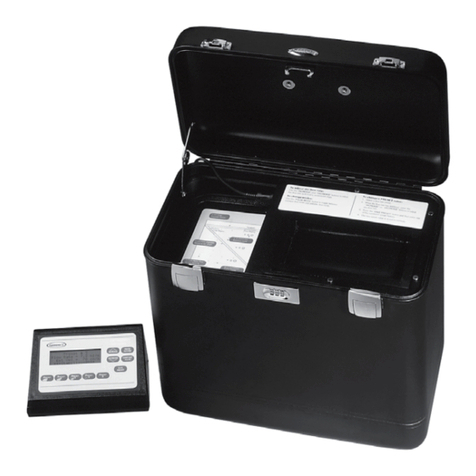
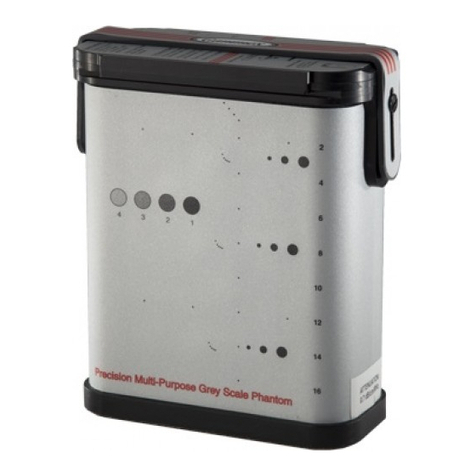
Gammex 404GS LE User manual

404GS LE
Precision Small Parts
Grey Scale Phantom
Gammex
User’s Guide

2
Table of Contents
Introduction.............................................................................................................................3
Caringforyour404GSLE.......................................................................................................4
Scanning your 404GS LE .................................................................................................5
AGuidedTourofyour404GSLE.............................................................................................6
EvaluatingthePhantom..........................................................................................................7
Target Specifications.........................................................................................................12
Cystic Targets....................................................................................................................12
GreyScaleTargets..................................................................................................................12
PinTarget..............................................................................................................................12
ResolutionTargetGroup.......................................................................................................12
Phantom Specifications.....................................................................................................14
Physical Specification........................................................................................................14
Tissue Mimicking Background Material...............................................................................14
LowScatter(Anechoic)Cysts................................................................................................14
GreyScaleTargets..................................................................................................................14
HarmonicImaging.................................................................................................................15
System Linearity................................................................................................................17
Quantitative Measurement.................................................................................................19
Baseline Test.....................................................................................................................19
SubsequentTests.................................................................................................................19
Qualitative Measurement...................................................................................................20
Phantom Desiccation.........................................................................................................21
Charts and Graphs..............................................................................................................21
Product Warranty...............................................................................................................22
Sales and Service...............................................................................................................23

3
Introduction
The 404GS LE phantom is designed to measure the image quality of small parts and
intra-cavity ultrasound scanning systems. With added grey scale targets, this small parts
phantom can also be used to measure contrast, temporal resolution and system linear-
ity. This Small Parts Phantom permits precise measurements of resolution for testing
for:
• Axial and lateral resolution targets at 1, 3.5 and 6 cm for precise resolution mea-
surements
• Low scatter cyst imaging at 1, 2 and 4 mm
• Attenuation coefficients of either 0.5 or 0.7 dB/cm/MHz
• 7 mm cyst to evaluate system noise and distortion and 7 mm grey scale targets of
-6 dB, +6 dB and high scatter relative to the background.
Limitations of Use
The 404GS LE is designed to be used to aid in the Quality Control testing and monitor-
ing of ultrasound instruments only. The 404GS LE is not to be used to make diagnostic
decisions.

4
Caring for your 404GS LE
Phantom comes ready to scan. Do not remove surface material.
Store your 404GSLE with cover closed securely.
Always attach the scanning surface cover and store the phantom out of direct sunlight
when it is not in use.
Store your 404GS LE at 35º–105ºF (2º–40ºC).
Freezing temperatures will damage the phantom and high temperatures will accelerate
desiccation.
Weigh your 404GS LE to monitor desiccation.
Weigh the phantom when you first receive it and then every 6 months. Record the
values on the data sheet.
Do not drop or damage the phantom.
Return the phantom for inspection and/or repair if it has been dropped or damaged.
Physical damage to the case will cause premature desiccation.
Gammex recommends annual servicing of your 404GS LE to ensure proper operation.
Our qualified service technicians will check for desiccation and provide any needed
rejuvenation, scanning/certification to original specifications, and repairs.

5
Scanning your 404GS LE
• Always place the phantom on a stable, level surface for scanning.
• The phantom comes ready to scan. Do not peel off the surface material.
• Use water or a generous amount of coupling gel to ensure good transmission.
Do not use mineral oil, baby oil or lanolin-based gels as a coupling medium.
Poor transmission is a result of insufficient coupling.
• Do not press the transducer into the scanning surface. This damages the
scanning surface and will shorten the life of the phantom. For curved transduc-
ers, use water or a thick gel layer.
• Clean the scanning surface immediately after use. Use a soft cloth or paper
towel and soap and water, if needed.
Caution:
Do not press the transducer
into the scanning surface.

6
A Guided Tour of your 404GS LE
The 404GS LE Precision Small Parts Phantom is an instrument for measuring the
image quality of small parts and intra-cavity ultrasound scanning systems. The tissue
mimicking gel in the 404GS LE is ultrasonically similar to human tissue. This allows the
use of normal scanner control settings and ensures that the performance measured
with the phantom closely approximates the scanner’s performance in a clinical exam-
ination.
Scanning is the best way to familiarize yourself with the features and functions of the
404GS LE. A guided tour of the phantom is provided on the following pages.

7
Evaluating the Phantom
Remember
A 4.5 MHz probe will provide a good overall view of the phantom for this demonstration.
1. Turn the handle out of the way and slide the cover off the phantom.
2. To couple with water, fill the dam with distilled water. For a better image quality,
use gel.
3. Rest the transducer on the scanning surface. Adjust the scanner to display the
full depth of the phantom.
You may notice that the tissue echoes near the bottom of the phantom fade
into noise. The depth at which usable echoes disappear is called the depth of
penetration. The depth markers on the phantom label will help you determine
the depths of the targets.
• The phantom comes ready to scan. Do not peel off the surface
material.
• Never press the transducer into the scanning surface.
• Always clean and dry the scanning surface after each use. Never leave
coupling gel or water on the scanning surface for more than a few
hours.
• Do not use mineral oil, baby oil, or lanolin-based gels as a coupling
medium.

8
4. Move the transducer across the scanning surface while observing the locations of
the targets.
Notice how the smooth texture of the tissue mimicking gel emphasizes image
non-uniformities and artifacts, making them easier to detect. Scanning an area
without targets is a good way to test for image uniformity.
Decrease gain controls to highlight pin targets.
5. Scan the vertical pin targets and freeze the image. Use the electronic calipers to
measure the distance between two of the vertical pin targets. Repeat for two of
the horizontal pin targets. The vertical pins have 5 mm spacing while the horizon-
tal pins have 10 mm spacing.
Use the pin targets to determine vertical distance accuracy and horizontal dis-
tance accuracy. Note that the highest dead zone pin you can see should be the
point of reference not the scanning surface.
6. Freeze an image of the resolution target group at 1 cm. Examine the horizontal
row of pins at the top of the target group. The pins that are closest together
without touching indicates the scanner’s lateral resolution.

9
Repeat this procedure with the other resolution target groups. Notice how lateral reso-
lution is narrowest in the focal zone. For a transducer whose focal zone is in the area
between the resolution targets, an alternate test can be performed.
Freeze an image of the vertical pin targets. Use the electronic calipers to measure the
horizontal width of the pin targets in the near, mid and far fields of the image.
Notice how the pin targets are narrowest in the focal zone. The pin width demonstrates
the width of the ultrasound beam at that depth and approximates the lateral resolution
of the scanner.
7. Decrease the image depth and examine the resolution target group at 1 cm.
Notice how the images of the lower pin targets may begin to merge. The
smallest distance between two pins that can be clearly resolved with no vertical
overlap is called the scanner’s axial resolution.

10
Pin targets are resovled axially if an imaginary horizontal line can be drawn
between the targets without touching either target. The targets on the left are not
resolved. The targets on the right are resolved.
Examine the other resolution target groups and compare the resolution at various
depths. Axial resolution may change with depth.
8. Scan the nearest cystic target group. Each target should be round with a clean
black appearance and well defined edges. Bright specular echoes at the top and
bottom of the targets are normal.
Measure the dimensions of the 4 mm cystic target to check the image geometry.
Use the calipers to measure from top to bottom and side to side. Repeat with the
other cystic target groups as part of the cyst imaging test.
9. Decrease image depth to the minimum and examine the dead zone target group.
The dead zone targets can be used to measure lateral resolution in the extreme
near field of the transducer.
Note: The highest dead zone pin you can see should be the point of
reference for all measurements – not the scanning surface.
10. Scan the four grey scale targets and observe the difference in their grey levels.
Adjust the gain control and observe how this affects the brightness of the targets.
Unresolved Resolved

11
Notice how noise in the anechoic target becomes apparent as the gain
increases. If your system has image “post-processing” capabilities, observe how
the contrast between targets changes with different settings.
Adjust the gain control to the lowest noise level. This is the point at which you
eliminate noise in the anechoic cyst (lower the gain until it just disappears).
Record this gain setting and use it for future grey scale measurements. Freeze
the image and visually evaluate the grey scale targets. Match each target with a
step on the grey bar in the image. Make a hard copy and compare the hard copy
with the image on the scanner.
11. When you are done scanning the phantom, empty the water dam or completely
clean off the coupling gel with a soft cloth or paper towel. Replace the cover and
secure by lifting the handle to protect the phantom.

12
Target Specifications
Cystic Targets
Diameters..........................................................................................................1,2,4and7mm
Placement...............................................................................................1,3,3.5and6cmdeep
Grey Scale Targets
Diameter..............................................................................................................................7mm
Placement....................................................................................................................3cmdeep
Pin Targets
Diameter...........................................................................................................................0.1mm
Verticalspacing..........................................................................................5mmat1–9cmdeep
Horizontalspacing................................................................................10mmat1and5cmdeep
Resolution Target Groups
........................................................................................................1,3.5and 6cmdeep
All acoustic measurements made at 4.5 MHz, 22ºC.
Due to our philosophy of continuous quality improvement,
all specifications are subject to change.

13

14
Phantom Specifications
Physical Specifications
Weight......................................................................................Approx.1.75 kg (3 lbs. 13 oz.)
Dimensions...........................................................................................17x8.25 x15.875 cm
....................................................................................................(6.75x3.25x6.25in.)
Scanning surface........................................................................................Composite film
Case material...................................................................................................ABS plastic
Pin target material...............................................................................Nylon monofilament
Tissue Mimicking Background Material
Water-based gel with appearance of human tissue.
Speed of sound............................................................................................1540±10 m/s
Temperaturedependence of speed of sound.........................................................1.5 m/s/ºC
Attenuation coefficient..................................................................0.7±0.05 dB/cm/MHz
..........................................................................................0.5±0.05 dB/cm/MHz
................................................................................ refer to phantom side label
Low Scatter (Anechoic) Cysts
Speed of sound................................................................................................1540±10 m/s
Temperaturedependence of speed of sound.........................................................1.5 m/s/ºC
Attenuation coefficient.................................................................0.05±0.01 dB/cm/MHz
Grey Scale Targets
Speed of sound.................................................................................................1540±10 m/s
Temperaturedependence of speed of sound.........................................................1.5 m/s/ºC
Contrast (in dB).....................................-6, +6 and high scatter relative to background
All acoustic measurements made at 4.5 MHz, 22ºC.
Due to our philosophy of continuous quality improvement,
all specifications are subject to change.

15
Harmonic Imaging
Harmonic imaging has become an important addition to the medical ultrasound commu-
nity. Harmonic imaging is when a pulse is sent from the transducer at a nominal (fun-
damental) frequency, but the signal received by the transducer is twice that frequency,
which is the second harmonic. The result is that better resolution is attained at any given
depth than if the reception had been at the fundamental frequency, as in conventional
ultrasound.
There are three tissue properties that determine the effectiveness of harmonic imaging:
1. pulse propagation speed
2. attenuation (rate of pulse energy loss with depth)
3. the value of the nonlinearity parameter: B/A
In order for phantoms to present valid resolution results for harmonic imaging, these
three properties must adequately correspond to human tissue. Attenuation increases
with frequency and much of the propagation involves the fundamental frequency, so in
harmonic imaging, there is enhanced resolution without as much attenuation as there
would be if the higher frequency were used to generate the pulses at the transducer.
So, higher frequency resolution occurs for greater depths within the subject than if
conventional ultrasound was used.
The ratio of B/A quantifies the rate of transfer with respect to propagation distance of
ultrasonic fundamental frequency energy to harmonic frequencies. The greater the
amplitude, the greater the energy transfer rate; thus, the beam profile for the harmonic
is smaller than for the fundamental, which means better lateral and elevational resolu-
tion.
Tissue-mimicking phantoms will be appropriate for assessing harmonic imaging only
if B/A for the tissue-mimicking material in the phantom adequately approximates that
of soft tissues. Recently, we have developed the capacity to measure the value of B/A
for the tissue-mimicking materials in Gammex phantoms and have found it to lie in the
range for human soft tissue, meaning B/A is between 6 and 71.
_______________________________________
1Gong, X. F., Zhu, Z. M., Shi, T., Huang, J. H. (1989) Determination of the acoustic
nonlinearity parameter in biological media using FAIS and ITD methods, J. Acoust. Soc.
Am. 86 (1), pp 1-5.

16
Grey Scale Applications
Metastases are sometimes slightly hyperechoic or hypoechoic compared with the sur-
rounding tissue. If the scanner is not measuring grey levels accurately, the metastases
may not be detected. The Quantitative Measurement ensures that the grey level signal
is measured consistently. The Qualitative Measurement ensures that grey levels are
displayed on the monitor consistently. By performing these tests, the user can determine
the optimal system settings for measuring grey levels, which can then be used in clinical
applications.

17
System Linearity
Ultrasound systems use special processing circuits to translate the amplitude of echoes
into brightness levels on the video monitor. These circuits use mathematical functions
that often produce an S-shaped curve when graphed. As shown in the figure below,
each echo level produces a corresponding brightness level on the monitor.
An S-shaped curve is used to translate echo levels into brightness levels on the video
display. Notice how each echo level, –X, 0 and +X dB produce the corresponding bright-
ness values B–, Boand B+.
As long as the shape of the curve remains constant, the contrast, or difference in
brightness between different echo levels, will remain constant. If the shape of the
S-curve changes, the relative image brightness for each echo level will also change.
For example, image post-processing techniques help the user identify subtle tissue
variations by modifying the shape of the S-curve to emphasize certain ranges of echo
levels. Degradation in the system hardware can also affect the shape of the curve and
produce unexpected variations in the contrast between echo levels. The distortion in the
information displayed to the user may affect the interpretation of the ultrasound image.
This is why it is important to do quality measurement with as little post-processing as
possible. An example of these distortions is shown on the following page.

18
Changes in the shape of the S-curve result in different brightness levels for the same
echo levels. Notice how the positions of the original brightness levels B–, Boand B+
have moved to B–1, Bo1and B+1.
Changes in the system response can be identified by measuring the average pixel
value of the grey scale targets and the background material as displayed on the video
monitor. Pixel values can be estimated by eye or measured with image analysis tools
provided on some ultrasound instruments or computers equipped with video “frame
grabbers” and special software.

19
Quantitative Measurement
A target’s brightness level can be most accurately measured using electronic methods.
The user defines a region of interest and the scanner determines the average pixel
value. To reduce the effect of speckle and small variations in the targets, several
measurements are taken and averaged.
Note: If your system does not have a region of interest (ROI) tool, you will not be able
to perform this test. As an alternative, refer to the Qualitative Measurement section of
this document (on page 20).
Note: All values determined by the quantitative measurement test depend on scanning
technique. Great care should be taken to perform the test in the same manner each
time.
Method
Define a region of interest and measure the average echo level.
Procedure
Baseline Test
1. Scan the grey scale targets and display them as large as possible. Freeze the
image.
2. Measure the echo level of the anechoic target. Adjust the system gain so that the
measurement is approximately 1. This ensures that the system’s noise floor is
barely reaching the visible level.
3. Record this setting and reuse for all subsequent tests.
Subsequent Tests
1. Scan the grey scale targets and display them as large as possible. Adjust the
system control settings as recorded on the data sheet.
2. Freeze the image and place the region of interest (ROI) tool completely inside the
grey scale target image. The ROI should be approximately 2/3 – 3/4 the diameter
of the circle, and it should be centered in the circle.
3. Measure and record the echo level of each target.

20
4. Measure and record the echo level of the background material directly beside
the anechoic target. Use as close to the same ROI as the target as possible.
Unfreeze the image.
5. Perform this process three times and record the average echo level for each grey
scale target and for the background material on the data sheet.
Analysis
Contact your service engineer if target 2, 3, or 4 varies from the baseline by 10% or
more.
Qualitative Measurement
Video monitors on most ultrasound systems contain a “grey bar” which shows the grey
levels available for display. Grey bars normally contain between sixteen and sixty-four
steps of increasing brightness. Pixel values can be estimated by locating a grey bar step
that approximates the brightness of the region of interest.
Note: It is absolutely critical that all system control settings be precisely reproduced for
these tests. Errors will introduce variations in your data and potentially invalidate your
results.
Method
Assign a step on the grey bar to each grey scale target and the background.
Procedure
1. Assign a unique number to each grey level on the grey bar.
2. Scan the grey scale targets and display them as large as possible. Freeze the
image.
3. For each target, determine which step on the grey bar is the same brightness as
the target and record this number on the data sheet. Do the same for the back-
ground material directly beside the anechoic target. Keep a print out of the image
for reference.
Analysis
Contact your service engineer if any target varies from the baseline by more than two
steps.
Table of contents
Other Gammex Measuring Instrument manuals