GardenCare WORLD W40 User manual

Warning: These instructions must be read and fully understood before
using your new Gardencare Cultivator. They are designed for your safety.
Operators Manual
Cultivator

FOREWORD
Thank you for purchasing WORLD W40 Mini Tiller.
This manual covers operation and maintenance of the W40 Mini tiller. All information in this
publication is based on the latest product information available at the time of approval for printing.
We reserve the right to make changes at any time without notice and without incurring any
obligation.
No part of this publication may be reproduced without written permission.
This manual should be considered a permanent part of the tiller and remain with it if it is resold.
Pay special attention to statements preceded by the following words.
DANGER
Indicates a strong possibility of severe personal injury or death if instructions are not followed.
CAUTION
Indicates a possibility of personal injury or equipment damage if instructions are not followed.
NOTE
Indicates a possibility of equipment damage if instructions are not followed.
WARNING
The W40 tiller is designed to give safe and dependable service if operated according to
instructions. Read and understand the Owner’s Manual before operating the tiller. Failure to do so
could result in personal injury or equipment damage.
NOTE
If a problem arises or if you have any questions about the tiller, please consult an authorized
WORLD dealer.

1
CONTENTS
1. SAFETY INSTRUCTIONS · ··········································································· 2
2. SAFETY LABEL LOCATION ········································································· 3
3. MODEL SERIAL NUMBER ············································································4
4. SERVICE ··································································································5
5. APPLYCABLE SCOPE ·················································································5
6. TILLER PARTS ··························································································5
7. PRE OPERATION CHECK ·············································································6
8. OPERATION THE TILLER ·············································································7
9. TILLER OPERATION AND ADJUSTMNT ···························································8
10. MAINTENANCE ·····················································································8
11. TRANSPORTING/STORAGE ······································································10
12. TROUBLESHOOTING ·············································································11
13. SPECIFICATIONS ·················································································12

2
1. SAFETUY INSTRUCTIONS
WARNING
For your safety and safety of others, please pay special attention to these precautions.
Read the manual carefully before operating the tiller.
The
rotating parts are sharp and they turn at high speed. Accident contact can cause serious
injury. Keep your hands and feet away from the parts while engine is running. Wear heavy
gloves to protect your hands from the times when clearing the tines or when inspecting or
replacing the tines.
NOTES
Keep the tiller in good operating condition. Operating a tiller in poor or questionable
condition could result in serious injury.
Be sure all safety devices are in working order and warning labels are in place. These items
are installed for your safety.
Be sure the safety covers are in place.
Know how to stop the engine quickly in case of emergency. Understand the use of all
controls.
Keep a firm hold on the handlebars. The may tend to lift during clutch engagement. Check
the maneuverability of the clutch engagement and disengagement before operation.
Wear sturdy, full-coverage footwear, operating this tiller, barefoot or with open toe shoes or
sandals increase your risk of injury.
Be caution when turning around or pulling facing the tiller.
Child Safety
Keep children indoors and supervised at all times while any outdoor power equipment is
being used nearby. Young children move quickly and are attracted especially by the tiller and
tilling activity.
Never assume children will remain where you last saw them.. Be alert and turn the tiller off if
children enter the area.
Children should never be allowed to operate the tiller even under adult supervision.
Thrown Object Hazard
Objects hit by the rotating tines can be thrown from the tiller with great force, and may cause
severe injury.
Before tilling, clear the tilling area of sticks large stones,wire,glass,ect. Till only in daylight.

3
Pieces thrown from worn or damage-tines can cause serious injury. Always inspect the tines
before using the tiller.
Gasoline is extremely flammable, and gasoline vapor can explode. Use extreme care when
handling gasoline.
NOTES
Refuel in a well-ventilated area with the engine stopped. Allow the engines to cool
before refueling. Fuel vapor or spilled fuel may be ignited.
The engine and exhaust system become very hot during operation and remain hot for a
while after stopping. Contact with hot engine components can cause burn injuries and
can ignite some materials.
Avoid touching a hot engine or exhaust system.
Allow the engine to cool before performing maintenance or storing the tiller indoors.
Carbon Monoxide Poisoning Hazard
Exhaust contains poisonous carbon monoxide, a colorless and odorless gas. Breathing
exhaust can cause loss of consciousness and may lead to death.
If you run the engine in an area that is confined or even partially enclosed, the air you
breathe could contain a dangerous amount of exhaust gas. To keep exhaust gas from building
–up, provide adequate ventilation.
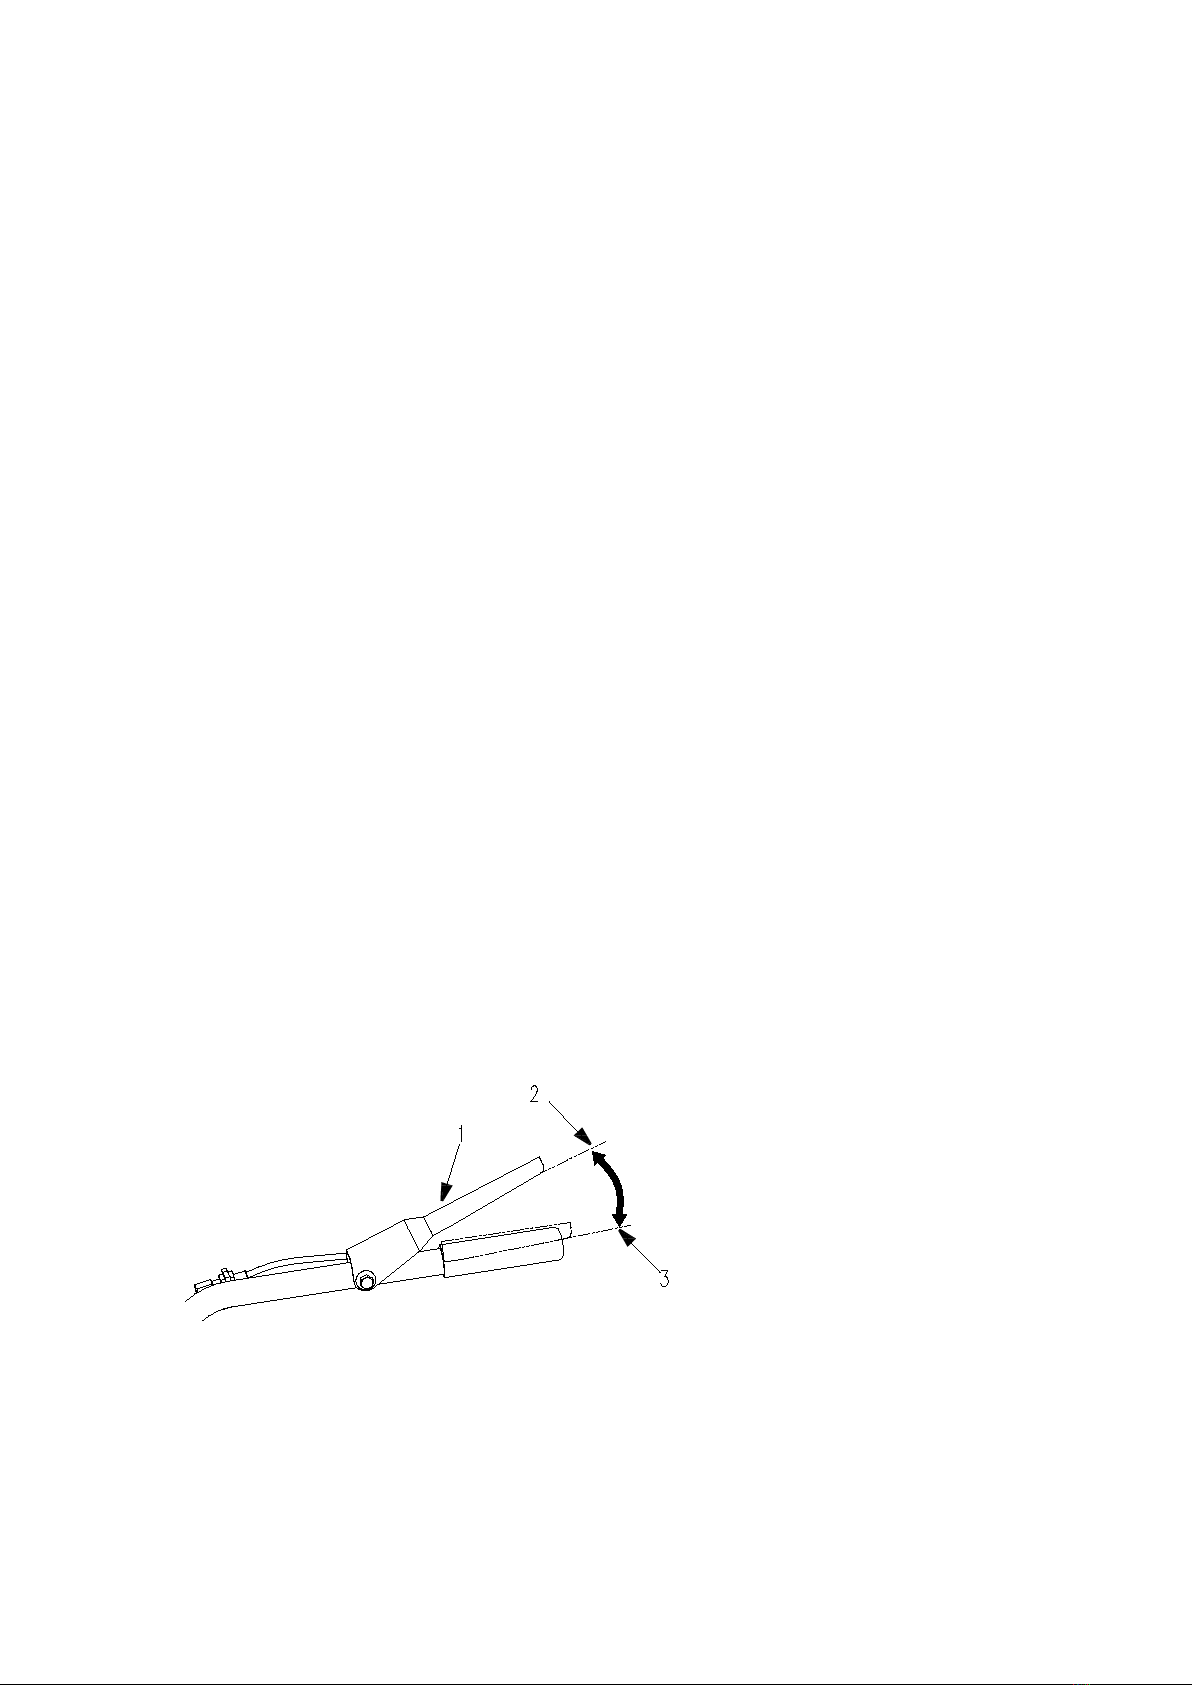
Operation on Slope
When tilling on slopes, keep the fuel tank less than 2/3 full to minimize fuel spillage.
Be very careful when changing the direction of the tiller on a slope.
Do not use the tiller on a slope of more than 10°.
WARNING
The maximum safe grade angle shown is for reference purpose only and should be
determined according to the type of the tool, before starting the engine, check that the tiller is
not damaged and in good condition. For your safety of others, exercise extreme care when using
the tiller up or down hill.
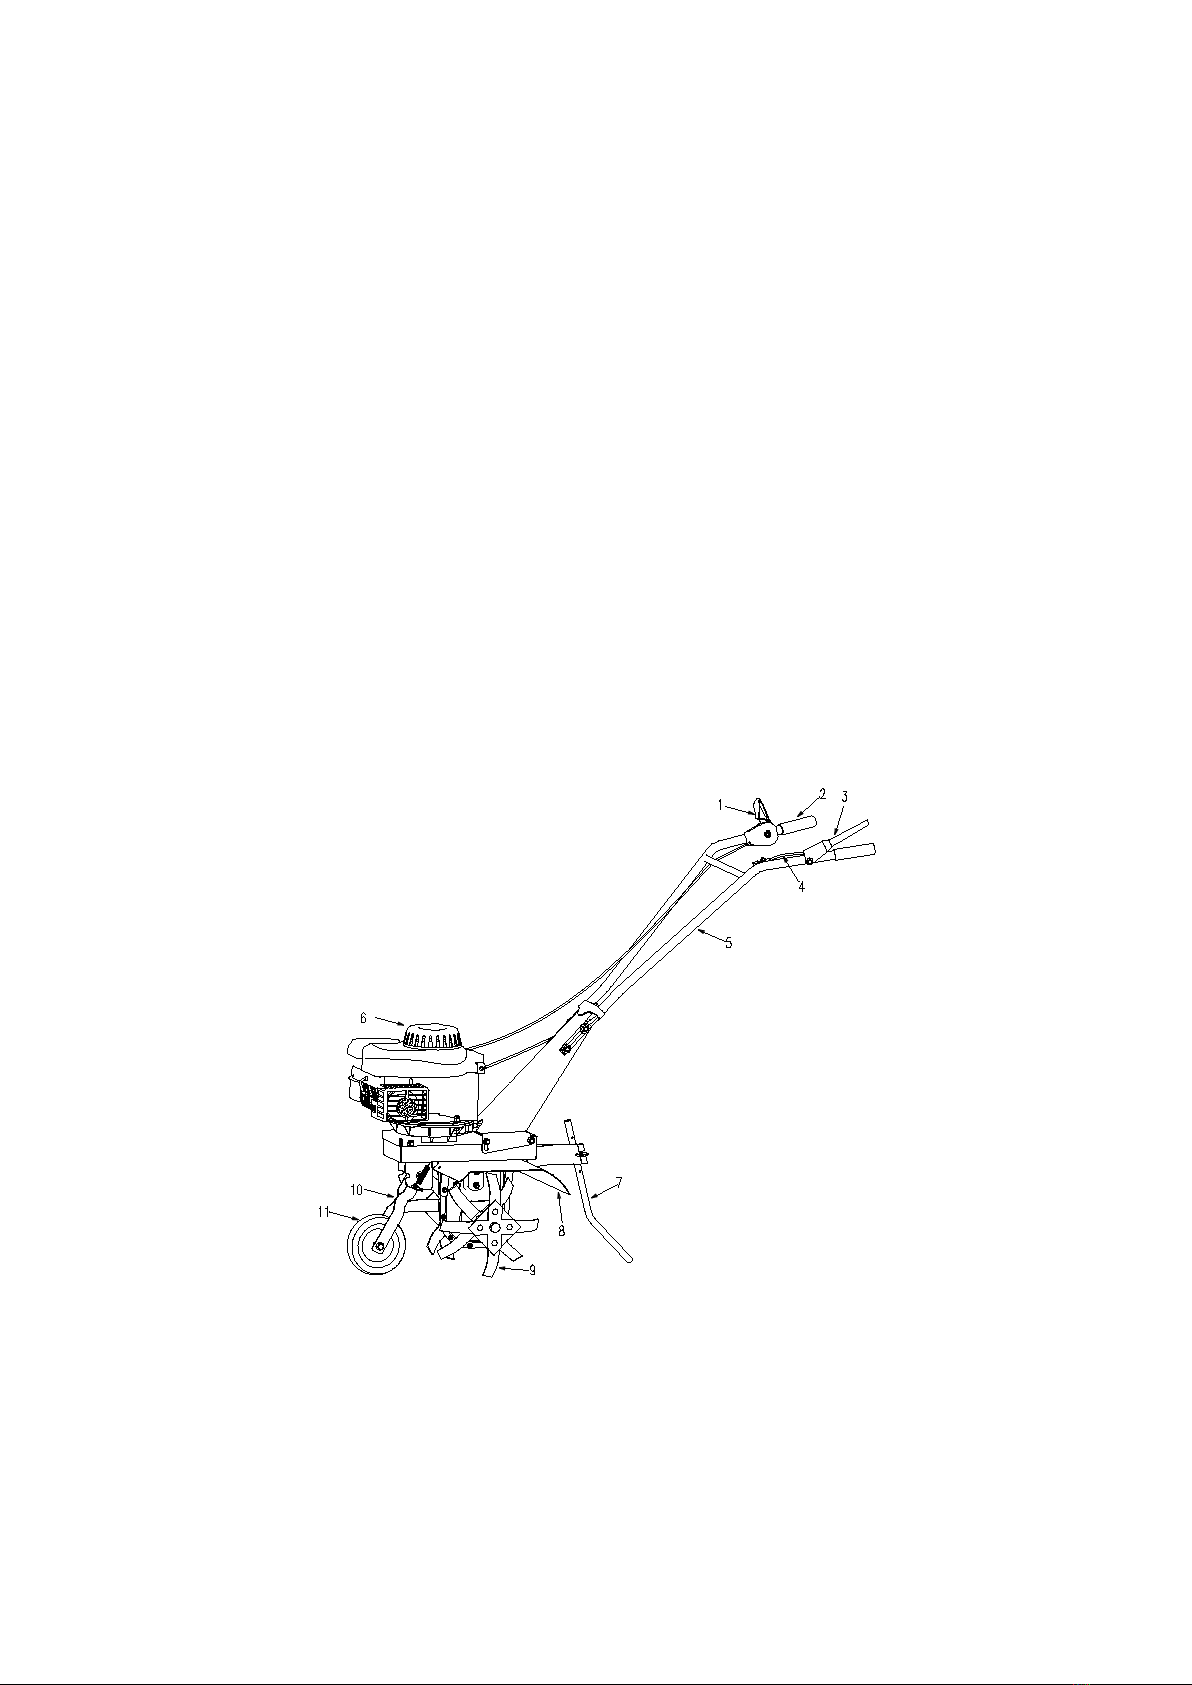
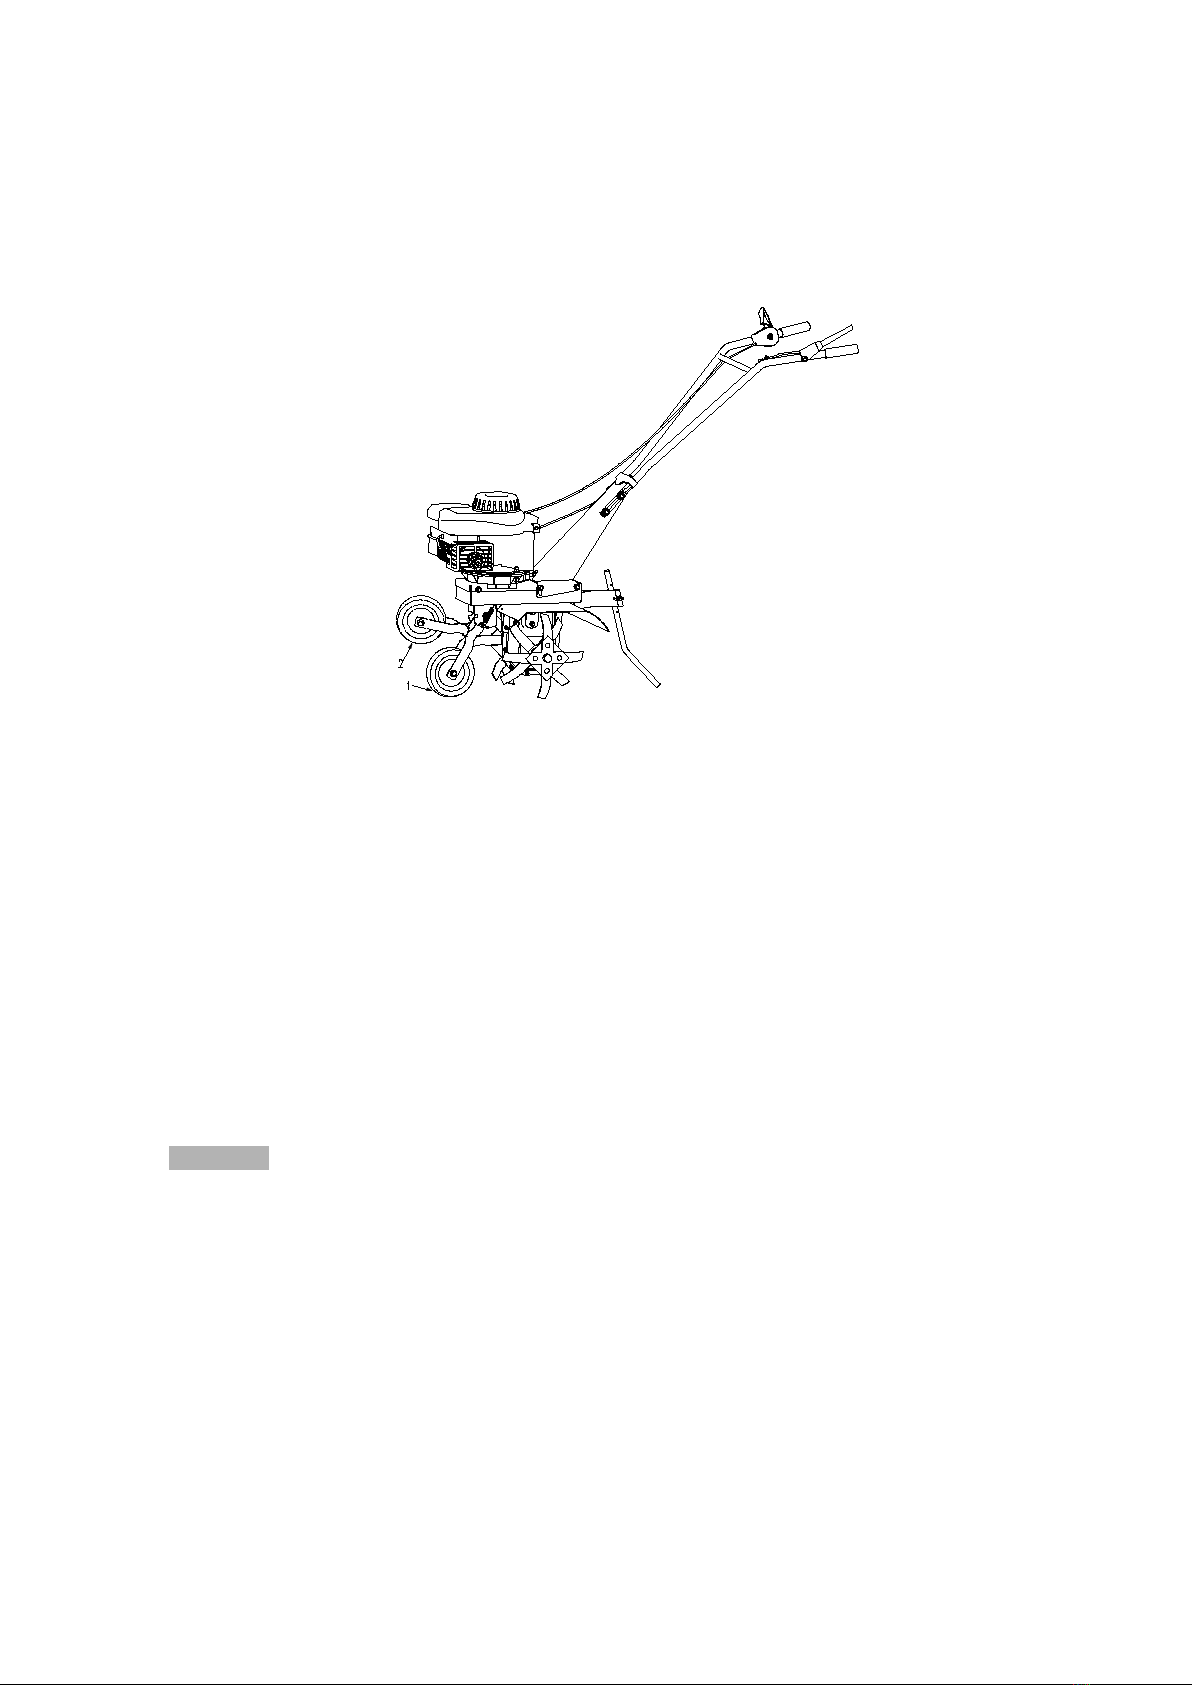
2 SAFETY LABEL LOCATION
These labels position, shown in the below right corner from your operation side.
These labels warn you of potential hazards can cause serious injury. Read the labels and safety
notes and precautions described in this manual carefully.
If a label comes ff or become hard to read, contact your WORLD dealer for a replacement.

4
FIG 1
3 MODELAND SERIES NUMBER
The manual is very important. Be familiar with the manual is useful for assembly, operation and
maintenance. When you first using the tiller, must complete the warranty card based on the
warranty items, which is useful for later maintenance.
The model plate shows the model & series number of the tiller. WORLD make the warranty just
according to your model & series number.
▲Each tiller has its own model plate, the stick position shown in the below left corner from your
operation side.
▲Format of the model plate shown in FIG 2
FIG 2
▲Complete the model & serial number in the warranty card.

5
4. SERVICE
Contact your dealer if you have any questions on assembly, operation and maintenance. Before
your calling, be sure the model number and serial number has been confirmed. If the information
is correct, you will get timely service.
5 APPLYCABLE SCOPE
The Mini -tiller is suitable for cultivating the sandy soil and clayey soil of canopied vegetables
base and dry land, for weedy and deep plots, remove the weeds before using the Mini-tiller to
cultivate the land.
6.TILLER PARTS
FIG3
1. Throttle Control Assembly
7. Drag Bar
2. Handle Grip
8. Mud Cover
3. Drive Clutch Lever
9. Blade Assembly
4. Cable Unit
10. Cater Yoke
5. Handle Bar & Console
11. Caster Wheel
6. Engine

6
7. PRE OPERATION CHECK
Pre operation check is so important, it relative to :
◆Working efficiency
◆Working safety and convenience
◆Working in good condition.
1. ENLGINE IOIL
DANGER : Running the engine with low level will cause serious engine damage.
◆Remove the oil filler cap and wipe the dipstick clean
◆Insert the kip stick into the oil filler neck, but do not screw it in.
◆If the level is low, fill to the oil filler neck with the recommended oil.
Use high-detergent, premium quality 4-stroke engine oil
CAUTION: Using non-detergent oil or 2-stroke engine oil could shorten the engine’s service life.
2. TRANSMISSION GEAR OIL
◆Place the tiller on a level surface and remove the oil filler cap.
◆The oil should be level with the lower edge of the oil filler hole.
◆Add high quality engine oil if the level is low.
3.FUEL
◆Use unleaded fuel only
◆Never use an oil\gasoline mixture or dirty gasoline. Avoid getting dirt, dust or water in the
fuel tank.
CAUTION: do not fill over the red level line.
WARINING
Gasoline is extremely flammable and is explosive under certain conditions.
Refuel in a well-ventilated area with the engine stoped. Do not smoke or allow flames or
sparks in the area where the engine is refueled or where gasoline is stored.
Do not overfill the fuel tank (there should be no fuel in the filler neck). After refueling, make
sure the tank cap is closed properly and securely.
Be careful not to spill fuel when refueling. Spilled fuel or fuel vapor may ignite. If any fuel is
spilled, make sure the area is dry before starting the engine.
Avoid repeated or prolonged contact with skin or breathing of vapor.
Never use gasoline containing alcohol, or never use gasohol that contains more than 10%
ethanol.
NOTES
Fuel system damage or engine performance problems resulting from the use of fuels that
contain alcohol is not covered under the warranty. WORLD can not endorse the use of fuels
containing methanol since evidence of their suitability is as yet incomplete.

7
Before buying fuel from an unfamiliar station, try to find out if the fuel contains alcohol, if it
does, confirm the type and percentage of alcohol used. If you notice any undesirable
operating symptoms while using a gasoline that contains alcohol, or one that you think
contains alcohols, switch to a gasoline that you know does not contain alcohol.
4. Tools and Attachments
To install a tool or attachment on the tiller follow the instructions furnished with the tool or
attachment. Ask you dealer for advice if you encouter any problem or difficulty in installing a tool
or attachment.
8. OPERATION THE TILLER
1. STARTING THE ENGINE
CAUTION: Be sure the clutch is disengaged to prevent sudden uncontrolled movement when
the engine starts.
The clutch is engaged by pulling in the clutch level and disengaged by releasing the level.
◆Put the tiller on the hard & even ground
◆Use choke to start the engine, put the throttle control in the choke position
◆Pull the starter grip lightly until resistance is felt then pull briskly.
CAUTION: do not allow the starter grip to snap back against the engine. Return it gently to
prevent damage to the starter.
If uses choke to start the engine, after engine warming, put the throttle into normal position.
Warm start , with normal speed to start the engine.
2. CLUTCH (SEE FIG4)
Pulling in the clutch lever, the tiller move, and stop by releasing the lever.
CAUTION: Slow down before operating the clutch lever.
1
.
Drive Clutch Lever
2.Engaged
3.Disengaged
FIG 4

8
9. TILLER OPERATION AND ADJUSTMENT
1. Front wheel Adjustment (See FIG 5 )
FIG 5
Use a front wheel to move the tiller on road, lift the handlebars up and ground the front wheel.
2. Tips:
◆Should the machine jerk forward while tilling, press down the handlebars, if the machine will not
move forward, move the handlebars from side to side.
◆Turn: the proper method of negotiating a turn during a tilling operation is to lower the handlebars
to bring the gravity centre toward the rear and then make the turn. This will permit a turn to be
made with relative ease.
3 .Normal operating angle
Lower the handle slightly so the front of the machine is raised about 6-8°.
C
CA
AU
UT
TI
IO
ON
N:
Do not use the tiller with a rotor whose radius is in excess of 150 mm.
Allowing any one to operate this tiller without proper instruction may result in
injury.
When the rotor is clogged with mud, pebble etc, immediately stop the engine and
clean the rotor in a safe place. Be sure to wear heavy gloves when cleaning the rotor.
To prevent damage, check the tiller any signs of damage or other faults, each time the tiller is used
after it has been operated last.
10. MAINTENANCE
The purpose of the maintenance schedule is to keep the tiller in the best operating condition.
Inspect or service as scheduled in the table below.

9
WARNING Shut off the engine before performing any maintenance. If the engine must be
run,make sure the area is well ventilated. The exhaust contains poisonous carbon monoxide gas.
Maintenance Schedule
REGULAR SCHEDUE
ITEM Dialy
Every
month or
20 Hrs.
Every
3 months
or 50 rs.
Every
6 months
or 100 rs.
Every
year or
300 Hrs.
Engine Oil
Check Lever
●
Change ●
Air Cleaner
Check ●
Clean ●
Spark Plug Clean – Readjust ●
Transmission
Gear oil
Check Lever
●
Fuel Clean ●
Clutch Cable Adjust ● ●
Throttle Cable Adjust ●
Belt Tension Adjust ● ●
2. Changing oil
Drain the oil while the engine is still warm to assure rapid complex draining
1. Remove the oil filler cap ,and drain the oil.
2. Refill the oil and check the level.
3. Wash your hands with soap and water after handling used oil.
NOTE: Please dispose of used motor oil in a container that is compatible with the environment.
We suggest you take it in a sealed container to your local service for reclamation. Do not throw it
in the trash or pour it on the ground.
3. Air cleaner service
A dirty cleaner will restrict air flow to the carburetor. To prevent carburetor malfunction. Service
the air cleaner regularly. Service more frequently when operating the engine in extremely dusty
areas.
WARNING Never use gasoline or low flash point solvents for cleaning the air cleaner element.

10
A fire or explosion could result in.
CAUTION: Never run the engine without the air cleaner. Rapid engine wear will be the result.
4. Spark plug service
To ensure proper engine operation, the spark plug must be properly gapped and free of
deposits.
a. Remove the spark plug cap.
WARNING If the engine has been running, the muffler will be very hot. Be careful not to touch
the muffler.
b. Visually inspect the spark plug. Discard it if the insulator is cracked or chipped.
c. Measure the plug gap with a feeler gauge. The gap should be 0.7-0.8mm (0.028-0.31 in),
correct as necessary by bending the side electrode.
d. Attach the plug washer.
e. Tighten a new spark plug 1/2 turn with the wrench to compress the washer, if you are reusing
a plug, it should only take 1/2- 1/4turn after the plug seats.
CAUTION:
The spark plug must be securely tightened. An improperly tightened plug can become very hot
and possible damage the engine. Never use a spark with an improper heat range.
5 .Clutch Cable Adjustment
Measure the free play at the level tip
Free play:3-8mm(0.1-0.3in)
If the free play is incorrect, loosen the lock
nut and turn the adjusting bolt in or out as
required.
After adjustment, tighten the lock nut securely. Then
start the engine and check for proper clutch level
operation.
1) LOCK NUT
2) ADJUSTING BOLT
FIG 6
11. TRANSPORTING/STORAGE
WARNING When transporting the tiller, turn the fuel valve OFF and keep the tiller level to
prevent fuel spillage. Fuel vapor or spilled fuel maybe ignited.
Before storing the unit for an extended period.
1. Be sure the storage area is free of excessive humidity and dust.
2. Drain the fuel

11
WA R N ING Gasoline is highly flammable and explosive under certain conditions. Do not smoke
or allow flames or sparks in the area.
3. Pull the starter grip until resistance is felt. Continue pulling until the
notch on the starter puller aligns with the hole on the recoil starter.
4. Change engine oil.
5. Cover tiller with plastic sheet.
Do not place the tiller with the handlebars on the ground. It will cause the oil entering
the cylinder or the fuel spillage.
12.TROUBLESHOOTING
PROBLEM REASON MEASULEMENT
ENGINE
WILL NOT
START
Blade is engaged Push down the handlebar
Spark plug wire disconnected Connect the wire to the spare plug
The throttle is not in the start position Push the throttle in the start position
Fuel lever is low or fuel is not clean Add clean fuel
Clog in the fuel line Fluent the fuel line
Spark plug
Clean spark, check the spark gapped
or replace a new one
Gasoline reach the carburetor Push the throttle with the highest
speed, pull out the engine starter
frequently
ENGINE
FLAMEOUT
Operate in the choke and start position Put the throttle in the highest speed
position
Spark plug wire is not tight Tighten the spark plug wire
Clog in the fuel line
Fluent the fuel line, then add clear
fuel
Clog in the fuel tank cap output hole Clean the cap output hole
Fuel is dirty Drain the fuel, add clean fuel.
Air cleaner is dirty Clean or replace it
Carburetor Make the testing
ENGINE
OVERHEAR
Engine oil lever is low
Add lubrication in the crankcase
Air circulate Clean air director
Carburetor
Make the testing
ENGINE
UNSTABLY
AS WORKING
WITH HIGH
SPEED
Spark plug gap
Readjust the spark plug gap
Idle speed of carburetor is not
according to the manual
Readjust the idle speed according to
the engine manual

12
FLAME-OUT
AS ENGINE
WITH IDLE
SPEED
Spark plug is worn, ignition gap is to
wide
Readjust the ignition frequency or
replace the new spark plug
Carburetor
Make the testing
Air cleaner is dirty
Clean or replace it
13
.
SPECIFICATIONS
Model W40
Dimensions (mm) 1370*500*1000
Net / Gross Weight (KGS) 30 /32
Working Width (mm) 400
Working Depth (mm)
≥ 100
Clutch Belt Tension
Transmission
One Speed
Table of contents
Popular Tiller manuals by other brands

Stanley
Stanley SGT-25-450-H Original instructions

Kunz
Kunz Till-Ease 2148 Owner's manual with assembly instructions

Western Auto
Western Auto Wizard MTD2105A98 Operation and service instructions

Schiller
Schiller Mantis 7566A Parts and Operator's Manual

Billy Goat
Billy Goat AE401 owner's manual

Craftsman
Craftsman 917.297031 owner's manual