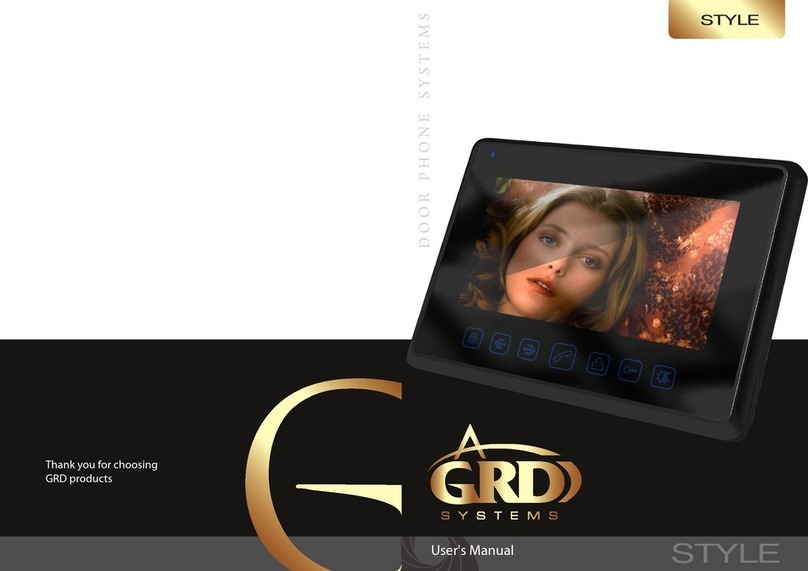
Gardi Systems Magic Touch User manual

Magic Touch
Magic Touch
User's Manual
Thank you for choosing
GARDI products

Magic Touch
User's Manual
Благодарим за выбор
продукции GARDI
21
Package
Monitor – 1pc.
Wall mounting bracket – 1pc.
Table mounting bracket – 1pc.
Power supply cords – 2pcs.
Door panel cords – 2pcs.
Camera cords – 4pcs.
Sub monitor cords – 3pcs.
Micro-bra tissue – 1pc.
User's manual – 1pc.
1
4
3
2
1. Display
2. Dynamic
3. Call/End Call
4. Open door
5. Cancel
6. Mute
7. Microphone
Keys
6
5
Characteristics:
• 4 monitors conection into the system
• 2 door panels connection
• 4 cameras connection
• Brightness, contrast and colorness tuning separately for each door
panel and camera
• 7” Touch Screen
• 300 photos memory with ability to copy into USB flash card
• 20 call melodies with ability to update
• door lock management
Specication:
Display 7" TFT-matrix with Touch Screen
Resolution 800х480
Power Supply (internal) 100-240V (50-60Hz)
Power Consumption 18 W
Door Panels system 4-wires
Cameras system Analog
Dimensions 280mm(W)> х 170mm(H) х 40mm(D)
7

Magic Touch
User's Manual
Благодарим за выбор
продукции GARDI
43
Installation instructions
A) Cable connection
1. Connect the monitor to the camera according to the wiring diagram.
2. Carefully insert the wires to the terminal, taking care that the 2 bare wires do not touch.
B) Installation height
Recommended installation height is approximately 140cm for monitor unit and 150cm
for outdoor camera.
C) Installation of the monitor
1. Fix the wall mounting bracket in the best place by using screws and plugs.
2. Carefully place the indoor monitor against the bracket and gently push down the
monitor so that the pins on the bracket engage in the slots on the rear of the monitor.
Cable choosing recomendations:
If cable length between monitor and door panel not more than 30m then you can use
4-wire or 6-wire cable with 0,75 sq.mm. area of one wire. If this length exceeds 30m then
you should use coaxial cable for video (for example RG69), all other connections 4-wire or
6-wire cable with 1,0 sq.mm. area of one wire can be used.
ATTENTION!
Depending on monitor system conguration (from 1 to 4 monitors in one system) ID
settings should be setted correctly (how to set„ID Settings” see page 19 of the manual).
Main monitor which have all door panels and cameras should have Master„ID Setting”.
Additional monitors should have such „ID Settings”: SUB Phone 1, SUB Phone 2, SUB
Phone 3.
Wiring Diagram:
Рис. 1. Schematic diagram for connection of 2 door panels with locks and 4 cameras to the MAGIC
TOUCH monitors system
Magic Touch (MASTER)
Main monitor
AD-1
GND
PWR-1
VD-1
AD-2
GND
PWR-2
VD-2
VD-3
GND
AD-3
VD-4
GND
AD-4
VD-5
GND
AD-5
VD-6
GND
AD-6
Door panel 1
Door panel 2
Сamera 1
Сamera 2
Сamera 3
Сamera 4
Door panel
Lock
Lock
AD
GND
PWR
VD
AD
GND
PWR
VD
VD_IN
GND
485-
Audio-
Audio+
485+
NC
NC
VD_OUT1
GND
485-
Audio-
Audio+
485+
NC
NC
VD_OUT2
GND
485-
Audio-
Audio+
485+
NC
NC
VD_OUT3
GND
485-
Audio-
Audio+
485+
NC
NC
Magic Touch (SUB Phone 1)
Additional monitor 1
AD-1
GND
PWR-1
VD-1
AD-2
GND
PWR-2
VD-2
VD-3
GND
AD-3
VD-4
GND
AD-4
VD-5
GND
AD-5
VD-6
GND
AD-6
Door panel 1
Door panel 2
Сamera 1
Сamera 2
Сamera 3
Сamera 4
VD_IN
GND
485-
Audio-
Audio+
485+
NC
NC
VD_OUT1
GND
485-
Audio-
Audio+
485+
NC
NC
VD_OUT2
GND
485-
Audio-
Audio+
485+
NC
NC
VD_OUT3
GND
485-
Audio-
Audio+
485+
NC
NC
Magic Touch (SUB Phone 3)
Additional monitor 3
AD-1
GND
PWR-1
VD-1
AD-2
GND
PWR-2
VD-2
VD-3
GND
AD-3
VD-4
GND
AD-4
VD-5
GND
AD-5
VD-6
GND
AD-6
Door panel 1
Door panel 2
Сamera 1
Сamera 2
Сamera 3
Сamera 4
VD_IN
GND
485-
Audio-
Audio+
485+
NC
NC
VD_OUT1
GND
485-
Audio-
Audio+
485+
NC
NC
VD_OUT2
GND
485-
Audio-
Audio+
485+
NC
NC
VD_OUT3
GND
485-
Audio-
Audio+
485+
NC
NC
Magic Touch (SUB Phone 2)
Additional monitor 2
AD-1
GND
PWR-1
VD-1
AD-2
GND
PWR-2
VD-2
VD-3
GND
AD-3
VD-4
GND
AD-4
VD-5
GND
AD-5
VD-6
GND
AD-6
Door panel 1
Door panel 2
Сamera 1
Сamera 2
Сamera 3
Сamera 4
VD_IN
GND
485-
Audio-
Audio+
485+
NC
NC
VD_OUT1
GND
485-
Audio-
Audio+
485+
NC
NC
VD_OUT2
GND
485-
Audio-
Audio+
485+
NC
NC
VD_OUT3
GND
485-
Audio-
Audio+
485+
NC
NC
Сamera1
Сamera 2
Сamera 3
Сamera 4
Door panel
UTP Cable: CAT5e
Coaxial Cable (Video)

Magic Touch
User's Manual
Благодарим за выбор
продукции GARDI
65
Keyboard
Answer Button
- Press Answer Button to answer visitor’s call.
- Cancellation of Mute function on Mic. Mute.
Cancel Button
- Press to end a talk with a visitor.
Door Open Button
- Press Door Open Button to open the door during a call, a talk or monitoring.
Not Disturb & Mute Button
- Press this button to mute the MIC during a talk or mute the dynamic in standby mode.
Green LED Indication (under the Answer button)
- LED constantly ON --> Not disturb
- LED ashes --> New photo in the memory
Main display description
CALL
Talking with a guest trough a door camera or to the other Magic Touch Unit.
CCTV
Monitoring the door camera and outside through cameras.
PHOTO VIEW
Viewing the images captured through door camera or CCTV camera.
SETUP
Setting Magic Touch functions listed under.
Call
How to answer call from door camera
1. Door1 ①activates when a call is made from Door1 ①and screen displays video from Door1
①. Press this button to monitor Door1 camera without a call.
2. Door2 ②activates when a call is made from Door2 ②and screen displays video from Door2
②. Press this button to monitor Door2 camera without a call.
3. Press SwitchCall ③to transfer a talk to the other Magic Touch during a talk.
4. To select Video source, Press Video Select ④Button. Video source will be displayed as below
Door1 or Door2 --> CCTV1 --> CCTV2--> CCTV3 --> CCTV4
(Depends on CCTV SETUP, sequence can be changed)
5. Press Call/End Call ⑤Button to start or end a call a call. After a call, main screen will be
displayed.
6. Press Open the Door ⑥Button to open the door. Video from door camera turns o after 10
seconds and display main display.
7. Press Take a Picture ⑦Button to capture current image on the display during a call or a talk.
8. Press Mic. ⑧Button to set Mute On, O.
9. Press Speak ⑨Button to set Speak Mute On, O.

Magic Touch
User's Manual
Благодарим за выбор
продукции GARDI
87
Call
10. Press Volume ⑩Button to adjust volume.
The monitoring or video from door camera lasts 30 seconds and a talk last 60 seconds from
answering moment.
Sub Phone
How to communicate between Magic Touch Units
1. Other connected Magic Touch IDs are displayed on the screen.
2. Select one of 4 IDs ①and Press Call/End Call ②Button to call the selected Magic Touch Unit. To
cancel the call, press Call/End Call ②again.
3. Door1 ③or Door2 ④Buttons will be activated when a call is made by door 1 or door2 during a
call or a talk with a sub-unit. Press the Call/End Call ②Button to receive a call from a door camera
then current call or talk with sub-unit will be canceled and the image from the door camera will be
displayed.
4. Press Mic. Button ⑤to set Mute On, O.
5. Press Speak Button ⑥to set Mute On, O.
6. Press Volume ⑩Button to adjust volume.
CCTV
How to monitor video from door cameras and CCTV cameras.
1. Select and Press a button of Door1①~ CCTV4⑥to monitor selected camera for 30 seconds.
2. Press Take a picture button⑦to capture the current image.
3. Press Speak Button⑧to set Mute On, O.
4. Press Volume Button⑨to adjust the volume.

Magic Touch
User's Manual
Благодарим за выбор
продукции GARDI
109
Photo view - Large view
How to see the captured photos in large viewing size.
1. Press a button of Door1①~ CCTV4 ⑥to see captured photo.
2. Press Home button ⑦to exit.
3. Press Small View Button ⑧to reduce the viewing photo size.
4. Press Delete Button ⑨to delete the current photo.
5. Press Delete All Button ⑩to delete all captured photos.
6. Press Down/Up Button ⑪to see previous photo or next photo.
Photo view – Small view
How to see the captured 4 photos in small viewing size.
1. Press a button of Door1 ①~ CCTV4 ⑥to see captured photo.
2. Press Home button ⑦to exit.
3. Press Large View Button ⑧to enlarge the viewing photo size.
4. Press Delete Button ⑨to delete the current photo.
5. Copy to USB Button ⑩to copy all photos into USB Memory stick. (Plug in USB Memory stick
beforehand)
6. Press Down/Up Button ⑪to see previous 4 photos or next 4 photos.
See USB Memory Conguration part.

Magic Touch
User's Manual
Благодарим за выбор
продукции GARDI
1211
Setup
How to select and set the sub-functions on the unit
Date/Time
Audio
Video
Sound update
Clean Screen
Password
ID names
ID settings
Language
Touch calibration
Initialization
Software update
System info
CCTV settings
Date/Time
How to set Date and Time.
1. Press Date Button ①to set Date then Press OK Button ③. Date Input Format is
DD / MM / YYYY.
2. Press Time Button ②to set Time then Press OK Button ③. Time Input Format is HH / MM.
3. Press OK Button ④to save setting.

Magic Touch
User's Manual
Благодарим за выбор
продукции GARDI
1413
Audio
How to set the volume of Bell sound, Talk volume with Door camera and the other Magic
Touch (subphone) and audio from CCTV camera.
1. Press one of Door1 ①~ CCTV4 ⑦button to check the saved Bell music and volume level of
each equipment.
2. Press Plus (+), Minus (-) Button to adjust Bell Volume, Talk Volume, Listen Volume. Adjust
range : 0 ~ 100
3. Press OK Button ⑧to save settings.
Only Listen volume can be adjustable for CCTV 1 ~ 4.
Video
How to set the level of Brightness, Contrast, and Saturation of video from Door camera and
CCTV camera.
1. Press one of Door1 ①~ CCTV4 ⑥Button to see video on screen.
2. Press Plus (+), Minus (-) Button to adjust level of Brightness, Contrast, and Saturation. Adjust
range: 0 ~ 100 Step: 0 ~ 100
3. Press OK Button ⑧to save settings.

Magic Touch
User's Manual
Благодарим за выбор
продукции GARDI
1615
USB Memory Conguration
USB Memory conguration to update Software , Sound and to save picture is shown above.
Software
This folder contains Magic Touch Software.
Put Software update le here.
Sound
This folder contains Magic Touch Melody le.
Put Melody update le here.
Picture
This folder will contain captured pictures from Door camera or CCTV camera.
Attention: USB Memory stick should be formatted in FAT16 system, other case monitor can't
recognize USB Memory stick!
Attention: Be aware of capital letter and small letter when making folder.
MagicTouch -> Image, Picture, Software, Sound
Sound update
How to update Call melody from Door camera and the other Magic Touch (sub phone).
1. Plug in USB Memory stick which contains melody les into the slot of unit.
2. Enter Sound Update menu and then enter password. Default password: 1234
2. Press Delete Button ①or Add Button ②to delete or add melody les into Magic Touch.
3. Magic Touch can store maximum 20 melodies and Free ③indicates available space to add
new melodies.
4. Press OK Button ④to save settings.
5. Check again AUDIO setting after Sound Update.
See USB Memory Conguration part.
Attention: USB Memory stick should be formatted in FAT16 system, other case monitor can't
recognize USB Memory stick!

Magic Touch
User's Manual
Благодарим за выбор
продукции GARDI
1817
Clean Screen
How to clean Touch screen.
1. Press Start Button ①then touch function will be suspended for 15 seconds for cleaning.
2. ②shows the remaining time.
3. Return to main screen after time-out.
Password
How to set the password.
Put password in order ①--> ②--> ③
1. Put current password in Current ①then press OK Button ④.
2. Put new password in Change ②and press OK Button ④.
3. Put new password in Conrm ③and press OK Button ④.
4. Press OK Button ⑤to save.
* Default password: 1234

Magic Touch
User's Manual
Благодарим за выбор
продукции GARDI
2019
ID names
How to rename ID of Master unit and Sub Phone 1, 2, 3.
1. Press the desired unit to be renamed among Master ①~ SubPhone3 ④.
2. Select and Press one of desired name on the blue bar.
3. Press OK Button ⑤to save change.
The same ID name cannot be duplicated in other unit.
ID settings
How to set the ID of current unit.
Select one ID among Master, Sub Phone1, Sub Phone2, Sub Phone.
1. Select one ID among Master ①~ SubPhone3 ④for the current unit.
2. Press OK Button ⑤to save setting.
The same ID setting cannot be duplicated in other unit.
Language
How to select the language of Magic Touch.
1. Press ENGLISH Button ①or RUSSIAN Button ②.
2. Press OK Button ③to save setting.
3. Unit will restart after language selection.

Magic Touch
User's Manual
Благодарим за выбор
продукции GARDI
2221
Touch Calibration
How to calibrate the Touch coordinates.
Use this function only when Touch coordinates does not t.
1. Enter password before enter Touch Calibration menu. Default password: 1234
2. Press Start Button ①to calibrate the Touch coordinates.
3. Follow the instruction on the screen as shown below and touch + mark exactly from ①to
⑤.
Initialization
How to initialize all the setting of Magic Touch
Choose this function and enter the password, then conrm initialization.
After initialization all settings will be reseted. Default password: 1234
Software Update
How to update the software of Magic Touch
The system will reboot after update.
1. Plug in USB Memory stick before update.
2. Enter password. Default password: 1234
3. Press Start Button ①to start update.
After Reboot the new version info will displayed.

Magic Touch
User's Manual
Благодарим за выбор
продукции GARDI
2423
System Info
How to check System Information of current software
Enter the menu and you can see such information as: Madel Number, Hardware Version, Boot
Loader Version, Operating System Version and Software Version.
CCTV Settings
How to set whether to use CCTV
1. Check Used, Unused box
2. Press OK Button ①to save settings.
Safety Instructions
1. Do not install near other electronic equipment such as computers, TV, video recorder as this
may cause radiated interference to the unit.
2. Do not disassemble the unit.
3. Do not spray water on the indoor unit. Do not keep the outdoor unit where it will be exposed
to extreme moisture.
4. Do not overload mains wall outlets or extension cords.
5. Do not drop or shock the unit, dropping can result in failure to operate. Circuit boards can
crack and may not survive the impact.
6. Remove the power cord from the wall socket when unit is not used for long periods
7. Do not place any naked ames (e.g. lighted candles) on the apparatus.
8. Do not place objects lled with water (e.g. vases) on the apparatus.
9. Do not cover the ventilation holes with clothing, paper, curtains etc.
10. Keep minimum distance 5cm around the apparatus for sucient ventilation.
11. This apparatus is designed for moderate climates. Do not use in high humidity, dusty or
dirty areas. The electronics may be contaminated. Any moving parts will wear prematurely.
12. To disconnect or isolate the unit, switch o at the socket or remove plug from wall socket.
Please ensure the plug and socket is easily accessible.
13. Do not store in hot or cold areas. Extreme hot or cold temperatures can shorten the life of
electronic devices and can distort/melt certain plastics or may cause malfunction.
14. Do not use harsh chemicals, cleaning solvents or strong detergents. To clean, wipe with a
damp cloth from time to time.
Warranty
Warranty period is 12 months from purchaseing.
Warranty void if unit was damaged by the fault of the custumer.
Warranty void if the sticker on the backside of the unit was broken.
Life time of the unit depends on it's maintainance and carefull using.

Magic Touch
User's Manual
Благодарим за выбор
продукции GARDI
2625
Contents
Package..................................................................................................................................................................... 1
Keys............................................................................................................................................................................ 1
Characteristics........................................................................................................................................................ 2
Specication........................................................................................................................................................... 2
Installation instuctions........................................................................................................................................ 3
Wiring Diagram...................................................................................................................................................... 4
Keyboard.................................................................................................................................................................. 5
Main Display Description................................................................................................................................... 5
Call.............................................................................................................................................................................. 6
Sub phone............................................................................................................................................................... 7
CCTV.......................................................................................................................................................................... 8
Photo view (Large View)..................................................................................................................................... 9
Photo view (Small View)................................................................................................................................... 10
Setup....................................................................................................................................................................... 11
Date/Time.............................................................................................................................................................. 12
Audio....................................................................................................................................................................... 13
Video........................................................................................................................................................................ 14
USB memory conguration............................................................................................................................. 15
Sound update....................................................................................................................................................... 16
Clean screen.......................................................................................................................................................... 17
Password................................................................................................................................................................ 18
ID name.................................................................................................................................................................. 19
ID setting................................................................................................................................................................ 19
Language............................................................................................................................................................... 20
Touch calibration................................................................................................................................................ 21
Initialization.......................................................................................................................................................... 22
Software upgrade............................................................................................................................................... 22
System Info............................................................................................................................................................ 23
CCTV setting......................................................................................................................................................... 23
Safety Instructions.............................................................................................................................................. 24
Warranty................................................................................................................................................................. 24
Notes
Table of contents
Other Gardi Systems Intercom System manuals