INSTRUCTIONS FOR COMBO ROOF RAKE ASSEMBLY
Phone: 651-459-9795
St. Paul Park, Minnesota 55071 Website: www.garelick.com
Rev F 7/14
ASSEMBLY INFORMATION:
Check parts against parts list.
Read instructions completely before starting
assembly.
SNOW RAKE ASSEMBLY INSTRUCTIONS:
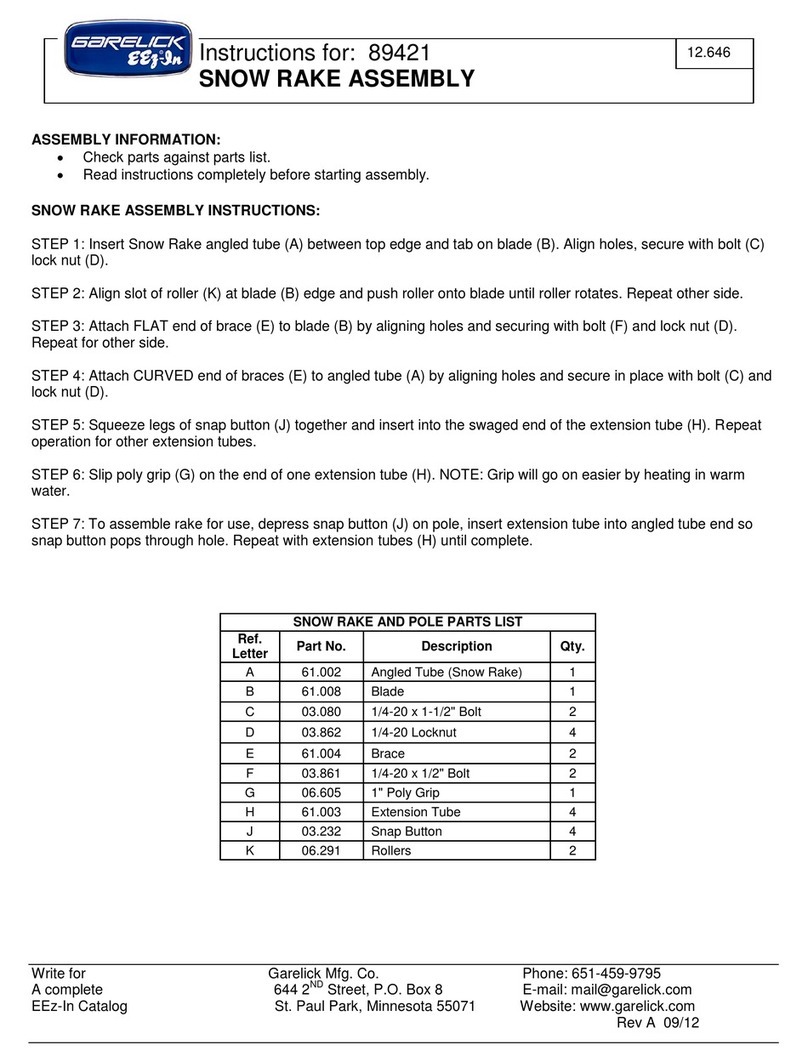
STEP 1: Insert Snow Rake angled tube (A) between
top edge and tab on blade (B). Align holes, secure with
bolt (C) lock nut (D).
STEP 2: Align slot of roller (K) at blade (B) edge and
push roller onto blade until roller rotates. Repeat other
side.
NOTE: PLACING ROLLERS IN HOT WATER FOR 5
MINUTES WILL MAKE INSTALLATION EASIER.
STEP 3: Attach FLAT end of brace (E) to blade (B) by
aligning holes and securing with bolt (F) and lock nut
(D). Repeat for other side.
STEP 4: Attach CURVED end of braces (E) to angled
tube (A) by aligning holes and secure in place with bolt
(C) and lock nut (D).
STEP 5: Squeeze legs of snap button (J) together and
insert into the swaged end of the extension tube (H).
Repeat operation for other extension tubes.
STEP 6: Slip poly grip (G) on the end of one extension
tube (H). NOTE: Grip will go on easier by heating in
warm water.
STEP 7: To assemble rake for use, depress snap
button (J) on pole, insert extension tube into angled
tube end so snap button pops through hole. Repeat
with extension tubes (H) until complete.
LEAF BRUSH ASSEMBLY INSTRUCTIONS:
STEP 1: Insert angled tube end (N) through brush (M).
Align bolt holes, insert bolt (O) through bottom side of
brush between bristles, and secure in place with lock
nut (D).
STEP 2: Attach FLAT end of brace (E) to brush (M) by
aligning holes and securing in place with a ¼-20 x 1-
1/2” bolt (C), ¼” washer (L), and a ¼-20 lock nut (D).
Repeat for other side.
STEP 3: Attach CURVED end of braces (E) to angled
tube (N) by aligning holes and secure in place with bolt
(C) and lock nut (D).
STEP 4: Depress snap button and remove Snow Rake
(if attached). Then depress snap button and slide
Brush Assembly onto poles.
SNOW RAKE AND POLE PARTS LIST


