manuals.online logo
Brands
  1. Home
  2. •
  3. Brands
  4. •
  5. Garmin
  6. •
  7. GPS
  8. •
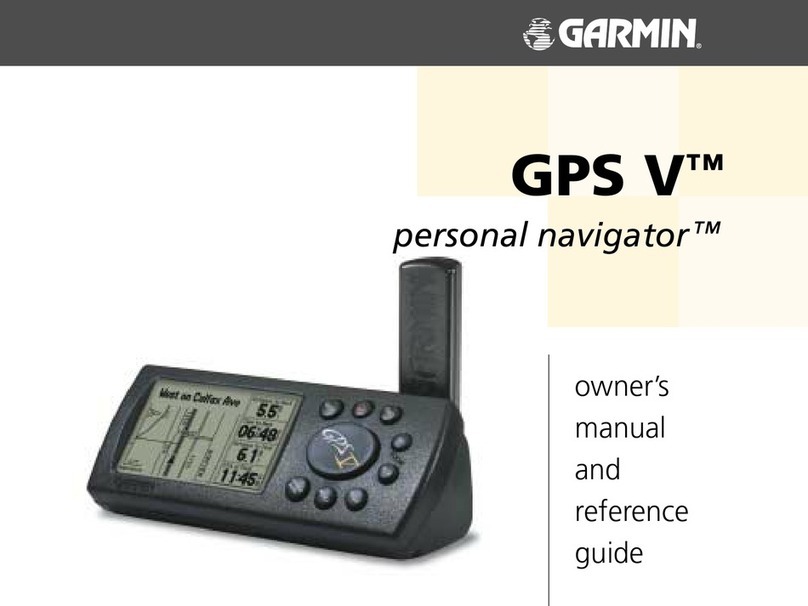
  9. Garmin GPSMAP 2006 User manual

Garmin GPSMAP 2006 User manual

owner’s
manual
and
reference
guide
chartplotters
(GPSMAP 2006C and 2010C shown)
GPSMAP 2006/2010
2006-2010 Cover.indd 2/27/02, 9:05 AM1
2006-2010 Cover.indd 2/27/02, 9:05 AM2
GARMIN®, Autolocate®, GPSMAP®
and TracBack® are registered
trademarks and MapSourceTM and
BlueChartTM are trademarks o
GARMIN Ltd. or its subsidiaries and
may not be used without the express
permission o GARMIN.
Fishing Hots Spots® is a registered
trademark o Fishing Hots Spots, Inc.
© Copyright 2001-2002 GARMIN Ltd. or its subsidiaries. All Rights Reserved
GARMIN I ter atio al, I c., 1200 East 151st Street, Olathe, KS 66062, U.S.A.
Tel. 913/397.8200 or 800/800.1020 Fax 913/397.8282
GARMIN (Europe) Ltd., U it 5, The Quadra gle, Abbey Park I dustrial Estate, Romsey SO51 9AQ,
U.K.
Tel. 44/1794.519944 Fax 44/1794.519222
GARMIN Corporatio , No. 68, Ja gshu 2 d Road, Shijr, Taipei Cou ty, Taiwa
Tel. 886/2.2642.9199 Fax 886/2.2642.9099
Except as expressly provided herei , o part of this ma ual may be reproduced, copied, tra smitted,
dissemi ated, dow loaded or stored i a y storage medium, for a y purpose without the express
prior writte co se t of GARMIN. GARMIN hereby gra ts permissio to dow load a si gle copy of
this ma ual a d of a y revisio to this ma ual o to a hard drive or other electro ic storage medium
to be viewed a d to pri t o e copy of this ma ual or of a y revisio hereto, provided that such
electro ic or pri ted copy of this ma ual or revisio must co tai the complete text of this copyright
otice a d provided further that a y u authorized commercial distributio of this ma ual or a y
revisio hereto is strictly prohibited.
I formatio i this docume t is subject to cha ge without otice. GARMIN reserves the right to
cha ge or improve its products a d to make cha ges i the co te t without obligatio to otify a y
perso or orga izatio of such cha ges or improveme ts.
February 2002 Part Number 190-00241-00 Rev. B Pri ted i Taiwa
Introduction
Foreword
I
2006-2010 Cover.indd 2/27/02, 9:05 AM3
i
Preface
Co gratulatio s o choosi g o e of the most adva ced mari e avigatio systems available! The
GARMIN GPSMAP 2006/2006C/2010/2010C utilizes the prove performa ce of GARMIN GPS a d full
featured mappi g to create a u surpassed mari e avigatio chartplotter.
To get the most out of your ew avigatio system, take the time to go through this operator’s
ma ual a d lear the operati g procedures for your u it. This ma ual covers both the mo ochrome
a d color models of the GPSMAP 2006 a d 2010. This ma ual is broke dow i to two sectio s for
your co ve ie ce.
Sectio O e i troduces you to the GPSMAP 2006/2010 a d provides a Getti g Started tour so that you
may become more familiar with the u it. This sectio will provide you with a basic worki g k owledge
ecessary to use the u it to its fullest pote tial.
Sectio Two is divided i to sectio s that provide detailed refere ces to the adva ced features of the
GPSMAP 2006/2010. This allows you to co ce trate o a specifi c topic quickly a d ca be used to look up
detailed i formatio about the GPSMAP 2006/2010.
Introduction
Customer Service &
Product Registration
Check the Garmin Web Site (www.garmin.com) or links to
Product Support and Product FAQ’s
Customer Service Product Registration
Have the external serial number o your GPSMAP 2006/2010
handy and connect to our website (www.garmin.com). Look or
the Product Registration link on the Home page. Also, be sure
to record your serial number in the area provided on page iii
o this manual.
GARMIN’s Customer Service Department can be reached
Monday-Friday 8am to 5pm Central Standard Time.
By phone at— 1-800-800-1020
By email at— sales@garmin.com
Software License Agreement
BY USING THE GPSMAP 2006/2010, YOU AGREE TO BE BOUND BY THE TERMS AND CONDI-
TIONS OF THE FOLLOWING SOFTWARE LICENSE AGREEMENT. PLEASE READ THIS AGREEMENT
CAREFULLY.
GARMIN gra ts you a limited lice se to use the software embedded i this device (the “Software”) i
bi ary executable form i the ormal operatio of the product. Title, ow ership rights a d i tellectual
property rights i a d to the Software remai i GARMIN.
You ack owledge that the Software is the property of GARMIN a d is protected u der the U ited States
of America copyright laws a d i ter atio al copyright treaties. You further ack owledge that the structure,
orga izatio a d code of the Software are valuable trade secrets of GARMIN a d that the Software i
source code form remai s a valuable trade secret of GARMIN. You agree ot to decompile, disassemble,
modify, reverse assemble, reverse e gi eer or reduce to huma readable form the Software or a y part
thereof or create a y derivative works based o the Software. You agree ot to export or re-export the
Software to a y cou try i violatio of the export co trol laws of the U ited States of America.
2006-2010 Intro.indd 2/27/02, 9:08 AM1
ii
Introduction
Warnings and Cautions
F
The GPS system is operated by the U ited States gover me t, which is solely respo sible for its accuracy
a d mai te a ce. The system is subject to cha ges which could affect the accuracy a d performa ce of all GPS
equipme t. Although the GARMIN GPSMAP 2006/2010 is a precisio electro ic NAVigatio AID (NAVAID), a y
NAVAID ca be misused or misi terpreted a d, therefore, become u safe.
The electro ic chart is a aid to avigatio a d is desig ed to facilitate the use of authorized gover me t charts,
ot replace them. O ly offi cial gover me t charts a d otices to mari ers co tai all i formatio eeded for safe
avigatio – a d, as always, the user is respo sible for their prude t use.
Use the GPSMAP 2006/2010 at your ow risk. To reduce the risk of u safe operatio , carefully review a d
u dersta d all aspects of this Ow er’s Ma ual—a d thoroughly practice operatio usi g the simulator mode prior
to actual use. Whe i actual use, carefully compare i dicatio s from the GPSMAP 2006/2010 to all available
avigatio sources, i cludi g the i formatio from other NAVAIDs, visual sighti gs, charts, etc. For safety, always
resolve a y discrepa cies before co ti ui g avigatio .
FCC Compliance
The GPSMAP 2006/2010 complies with Part 15 of the FCC i terfere ce limits for Class B digital devices FOR
HOME OR OFFICE USE. These limits are desig ed to provide reaso able protectio agai st harmful i terfere ce i
a reside tial i stallatio , a d are more stri ge t tha “outdoor” requireme ts.
Operatio of this device is subject to the followi g co ditio s: (1) This device may ot cause harmful
i terfere ce, a d (2) this device must accept a y i terfere ce received, i cludi g i terfere ce that may cause
u desired operatio .
This equipme t ge erates, uses a d ca radiate radio freque cy e ergy a d, if ot i stalled a d used i
accorda ce with the i structio s, may cause harmful i terfere ce to radio commu icatio s. However, there is
o guara tee that i terfere ce will ot occur i a particular i stallatio . If this equipme t does cause harmful
i terfere ce to radio or televisio receptio , which ca be determi ed by tur i g the equipme t off a d o , the
user is e couraged to try to correct the i terfere ce by reorie ti g or relocati g the receivi g a te a, i creasi g the
separatio betwee the equipme t a d receiver a d/or co ecti g the equipme t i to a outlet o a circuit differe t
from that to which the receiver is co ected. Co sult the dealer or a experie ced radio/TV tech icia for help.
The GPS GPSMAP 2006/2010 does ot co tai a y user-serviceable parts. Repairs should o ly be made by a
authorized GARMIN service ce ter. U authorized repairs or modifi catio s could result i perma e t damage to the
equipme t, a d void your warra ty a d your authority to operate this device u der Part 15 regulatio s.
CAUTION: IT IS THE USER’S RESPONSIBILITY TO
USE THIS PRODUCT PRUDENTLY. THIS PRODUCT IS
INTENDED TO BE USED ONLY AS A NAVIGATIONAL
AID AND MUST NOT BE USED FOR ANY PURPOSE
REQUIRING PRECISE MEASUREMENT OF DIRECTION,
DISTANCE, LOCATION, OR TOPOGRAPHY.
MAP DATA INFORMATION: One o the goals o GARMIN
is to provide customers with the most complete and accurate
cartography that is available to us at a reasonable cost. We
use a combination o governmental and private data sources,
which we identi y as required in product literature and copyright
messages displayed to the consumer. Virtually all data sources
contain inaccurate or incomplete data to some degree. This is
particularly true outside the United States, where complete and
accurate digital data is either not available or prohibitively
expensive.
2006-2010 Intro.indd 2/27/02, 9:08 AM2
iii
I
Introduction
Warranty &
Serial Number
LIMITED ARRANTY
This GARMIN product is warra ted to be free from defects i materials or workma ship for o e year from
the date of purchase. Withi this period, GARMIN will at its sole optio , repair or replace a y compo e ts
that fail i ormal use. Such repairs or replaceme t will be made at o charge to the customer for parts or
labor, provided that the customer shall be respo sible for a y tra sportatio cost. This warra ty does ot
cover failures due to abuse, misuse, accide t or u authorized alteratio or repairs.
THE WARRANTIES AND REMEDIES CONTAINED HEREIN ARE EXCLUSIVE AND IN LIEU OF ALL
OTHER WARRANTIES EXPRESS OR IMPLIED OR STATUTORY, INCLUDING ANY LIABILITY ARISING
UNDER ANY WARRANTY OF MERCHANTABILITY OR FITNESS FOR A PARTICULAR PURPOSE,
STATUTORY OR OTHERWISE. THIS WARRANTY GIVES YOU SPECIFIC LEGAL RIGHTS, WHICH MAY
VARY FROM STATE TO STATE.
IN NO EVENT SHALL GARMIN BE LIABLE FOR ANY INCIDENTAL, SPECIAL, INDIRECT OR CONSE-
QUENTIAL DAMAGES, WHETHER RESULTING FROM THE USE, MISUSE, OR INABILITY TO USE
THIS PRODUCT OR FROM DEFECTS IN THE PRODUCT. Some states do ot allow the exclusio of
i cide tal or co seque tial damages, so the above limitatio s may ot apply to you.
GARMIN retai s the exclusive right to repair or replace the u it or software or offer a full refu d of the
purchase price at its sole discretio . SUCH REMEDY SHALL BE YOUR SOLE AND EXCLUSIVE REMEDY
FOR ANY BREACH OF WARRANTY.
To obtai warra ty service, co tact your local GARMIN authorized dealer. Or call GARMIN Customer
Service at o e of the umbers show below, for shippi g i structio s a d a RMA tracki g umber. The
u it should be securely packed with the tracki g umber clearly writte o the outside of the package.
The u it should the be se t, freight charges prepaid, to a y GARMIN warra ty service statio . A copy of
the origi al sales receipt is required as the proof of purchase for warra ty repairs.
GARMIN I ter atio al, I c. GARMIN (Europe) Ltd.
1200 East 151st Street U it 4, The Quadra gle, Abbey Park I dustrial Estate
Olathe, Ka sas 66062, U.S.A. Romsey, SO51 9AQ, U.K.
Pho e: 913/397.8200 Pho e: 44/1794.519944
USA O ly: 800/800.1020 FAX: 44/1794.519222
FAX: 913/397.0836
The GARMIN GPSMAP 2006/2010 has no user-serviceable
parts. Should you ever encounter a problem with your unit,
please take it to an authorized GARMIN dealer or repairs.
The GPSMAP 2006/2010 is astened shut with screws. Any
attempt to open the case to change or modi y the unit in any
way will void your warranty and may result in permanent
damage to the equipment.
Serial Number
Use this area to record the serial number (10-digit number
located in the back o the unit) in case it is lost, stolen, or needs
service. Be sure to keep your original sales receipt in a sa e
place or attach a photocopy inside the manual.
Serial Number:
2006-2010 Intro.indd 2/27/02, 9:08 AM3
iv
Introduction
Capabilities
Desig ed for detailed electro ic charti g capability, the GARMIN GPSMAP 2006/2010 are powerful
avigatio devices that ca give you the avigatio i formatio you eed:
Precision Performance
• The GPSMAP 2006/2010 features a high-co trast, te level gray, 640 x 480 LCD display with
adjustable co trast a d backlighti g.
• The GPSMAP 2006C/2010C features a high resolutio , 256 color, 640 x 480 color LCD display
with adjustable bright ess.
• GPS 17N: 12-cha el parallel receiver tracks a d uses up to 12 satellites for fast, accurate positio i g
• DGPS; USCG a d WAAS capable
• Fully gasketed, high-impact plastic alloy case, waterproof to IEC 529-IPX-7
Advanced Navigating and Plotting
• 3000 alpha umeric waypoi ts with selectable ico s a d comme ts
• Built-i worldwide basemap i cludes detailed ocea , river a d lake coastli es, cities, U.S. i terstates,
state highways a d built-i tide i formatio from over 3,000 tide statio s arou d the USA coastli e,
Alaska, Hawaii, wester Ca ada a d several Caribbea Isla ds.
• 50 reversible routes with up to 50 waypoi ts each
• E ha ced mappi g with a additio al data card a d GARMIN’s BlueChart or MapSource PC products
• Coordi ates: Lat/Lo , UTM/UPS, Lora TD, plus sixtee grids, i cludi g Maide head
• TracBack route feature which allows you to quickly retrace your track log to a starti g positio
• Built-i simulator mode
2006-2010 Intro.indd 2/27/02, 9:08 AM4
v
Introduction
Table of Contents
Introduction............................................................i-vi
Customer Service & Product Registratio .............i
War i gs a d Cautio s .......................................ii
Warra ty a d Serial Number..............................iii
Capabilities ........................................................ iv
Table of Co te ts ................................................ v
“How To” I dex.................................................. vi
Section ne: Getting Started .............................. 1-13
Looki g at the GPSMAP 2006/2010 ....................1
Lear i g the Keypad ...........................................2
Quick Start Tour - Lear i g the Basics.................3
Mai Pages ..........................................................4
Activati g the Simulator ......................................5
Creati g Waypoi ts.............................................6
E teri g Data ......................................................7
Basic Navigatio ..................................................9
I itializi g the GPSMAP 2006/2010..................12
Section Two: Reference ..................................... 14-60
Map Page a d Optio s.......................................14
Map Page Co fi guratio ...............................16
Compass Page a d Optio s ...............................22
Numbers Page a d Optio s...............................23
Highway Page a d Optio s ...............................23
Waypoi ts .........................................................25
Creati g........................................................25
Reviewi g a d Editi g..................................26
Proximity......................................................29
Goi g to a Desti atio .......................................31
TracBack.......................................................32
MOB.............................................................34
Routes ...............................................................35
Creati g........................................................35
Route List Page .............................................37
Reviewi g a d Editi g..................................38
Active Route Page..............................................42
Fi d Feature......................................................43
Mai Me u Page................................................45
GPS I fo Tab ................................................46
Tide Tab .......................................................50
Trip Tab........................................................51
Celestial Tab .................................................52
Tracks Tab ....................................................53
Time Tab ......................................................54
Pages Tab......................................................54
System Tab ...................................................55
U its Tab......................................................56
Commu icatio Tab .....................................60
Alarms Tab ...................................................61
Appendices........................................................ 62-74
Appe dix A: Time Offsets..................................62
Appe dix B: Messages .......................................63
Appe dix C: Map Datums .................................65
Appe dix D: Navigatio Terms..........................67
Appe dix E: I stalli g Data Cards.....................69
Appe dix F: Specifi catio s/I terfaci g ..............70
Appe dix G: Packi g List/Accessories ...............71
Appe dix H: I dex............................................72
2006-2010 Intro.indd 2/27/02, 9:08 AM5
vi
Introduction
“How To” Index
The list to the right is provided to help you quickly fi nd some
o the more important procedures you will use on your new
GPSMAP 2006/2010.
TO DO THIS: SEE PAGE(S):
Tur the u it o or off . . . . . . . . . . . . . . . . . . . . . . . . . . . . . . . . . . . . . . . . . 2, 3, 12
I itialize the GPS receiver (fi rst time use) . . . . . . . . . . . . . . . . . . . . . . . . . . . . . 12-13
Adjust scree co trast or backlighti g . . . . . . . . . . . . . . . . . . . . . . . . . . . . . . . . . . 3
E teri g data . . . . . . . . . . . . . . . . . . . . . . . . . . . . . . . . . . . . . . . . . . . . . . . . . . . 5, 7
Lear how to operate the u it’s fu ctio keys. . . . . . . . . . . . . . . . . . . . . . . . . . . . . 2
Mark your prese t locatio as a waypoi t . . . . . . . . . . . . . . . . . . . . . . . . . . . . 6, 25
Go to a desti atio . . . . . . . . . . . . . . . . . . . . . . . . . . . . . . . . . . . . . . . . . . . . . 10, 31
Create a d use a route . . . . . . . . . . . . . . . . . . . . . . . . . . . . . . . . . . . . . . . . . . . . . 35
Lear about the Map page . . . . . . . . . . . . . . . . . . . . . . . . . . . . . . . . . . . . . . 4, 9, 14
Pa usi g the map arrow . . . . . . . . . . . . . . . . . . . . . . . . . . . . . . . . . . . . . . . . . 9, 14
Zoom i or out o the Map page . . . . . . . . . . . . . . . . . . . . . . . . . . . . . . . . . . . 9, 16
Reco fi gure the Map page display . . . . . . . . . . . . . . . . . . . . . . . . . . . . . . . . . . 16-21
Access the Mai Me u . . . . . . . . . . . . . . . . . . . . . . . . . . . . . . . . . . . . . . . . . . . 5, 45
Cha ge u its of measure (statute, autical, metric) . . . . . . . . . . . . . . . . . . . . . . . 56
Cha ge the displayed time (zo e) . . . . . . . . . . . . . . . . . . . . . . . . . . . . . . . . . . . . 54
Setup Lora TD . . . . . . . . . . . . . . . . . . . . . . . . . . . . . . . . . . . . . . . . . . . . . . . . 58-59
View tide i formatio . . . . . . . . . . . . . . . . . . . . . . . . . . . . . . . . . . . . . . . . . . . . . . 50
View celestial i formatio . . . . . . . . . . . . . . . . . . . . . . . . . . . . . . . . . . . . . . . . . . 52
Set Alarms . . . . . . . . . . . . . . . . . . . . . . . . . . . . . . . . . . . . . . . . . . . . . . . . . . . . . . 62
Use the Fi d fu ctio . . . . . . . . . . . . . . . . . . . . . . . . . . . . . . . . . . . . . . . . . . . . . . 43
View a u it message . . . . . . . . . . . . . . . . . . . . . . . . . . . . . . . . . . . . . . . . . . . . . . . 62
2006-2010 Intro.indd 2/27/02, 9:08 AM6
1
Getting Started
Main Page Sequence
1
Getting Started
So t Keys Data Entry Keys
Data Card Slots
Function Keys
Power/Data Cable Port Data Port
or uture use
Mounting Knobs
Looking at the 2006/2010
2006-2010 Intro.indd 2/27/02, 9:08 AM1
2
Getting Started
Main Page Sequence
2
Getting Started
2006/2010 Keys
Function Keys
The
IN
Key — adjusts the map scale to show a smaller area with more detail. (Zooms i )
The
UT
Key —
adjusts the map scale to show a larger area with less detail. (Zooms out)
The
PAGE
Key —
cycles the u it through the mai display pages i seque ce a d retur s the display
from a subme u page.
The
QUIT
Key — cycles the u it through the mai display pages i a reverse seque ce, restores the
previous value i a data e try fi eld, or ca cels a u i te ded fu ctio such as a GOTO.
The
ENTER/MARK
Key —
selects a highlighted me u optio . Whe e teri g data, it allows you to i itiate
e try, a d the to accept the selected value(s). It also marks the curre t locatio as a waypoi t whe
pressed a d held for more tha o e seco d.
The
MENU
Key —
displays the Mai Me u.
The
NAV
Key — displays a selectio list allowi g the user to select a avigatio optio .
The
FIND
Key — allows you to quickly access User Waypoi ts, a d other items used for avigatio .
The
M B
Key — immediately stores the locatio a d gives the optio of setti g direct avigatio .
The
P WER ( )
Key — is used to tur the u it o a d off a d to activate the backlight.
The
ARR W KEYPAD ( )
— is used to select (highlight) me u optio s a d e ter data. It co trols the
Left/Right a d Up/Dow moveme t of the cursor.
Data Entry Keys
The Data E try Keys are used whe e teri g alpha- umeric data i the u it, such as a waypoi t ame.
The Data E try Keys ca be used i co ju ctio with the ARRO KEYPAD. To select the fi rst letter press
the key o ce, to select the seco d letter press the key twice, to select the third letter press the key three
times, or to select the umber press the key four times. Whe you have correct letter or umber selected,
pause a d the u it will adva ce the cursor to the ext character automatically.
Soft Keys
The Soft Keys are located alo g the bottom of the display a d are used to select optio s for the page
that is displayed. To select a optio , press the Soft Key below it.
2006-2010 Intro.indd 2/27/02, 9:08 AM2
3
Getting Started
Main Page Sequence
3
Getting Started
Main Page Sequence
Contrast Adjustment on Monochrome Units Only
2006/2010 Basic Operation
Before movi g ahead to the features of the GPSMAP 2006/2010, you will eed to lear basic opera-
tio s. Ma y times throughout this ma ual you will be prompted to press a key. Whe i structed, press,
the release the key. If the key eeds to be held dow , the i structio s will prompt you.
Turning the GPSMAP 2006/2010 N:
1. Press the P WER ( ) key.
As the u it powers o , a War i g Page is displayed. After readi g the War i g Page, press the
ENTER/MARK key to display the GPS I fo o power-up wi dow. (This wi dow will be covered at the
e d of the Getti g Started sectio .) Press the ENTER/MARK key to co ti ue to the Map Page.
Adjusting the Contrast and Backlight
The 2006/2010 mo ochrome versio s have adjustme ts for the Co trast a d Backlighti g, the color
versio s do ot have a Co trast adjustme t.
Adjusting the Contrast on Monochrome Units:
1. Press the P WER ( ) key to display the Contrast/Backlight Adjustment Window.
2. Press the ARR W KEYPAD left to decrease lighten) the Contrast
3. Press the ARR W KEYPAD right to increase darken) the Contrast.
The Backlight ca be tur ed off for operatio i su light or i creased i steps to produce the right
lighti g for the situatio .
Activating the Backlight:
1. Press the P WER ( ) key to activate the Backlight Adjustment Window.
2. To increase the backlighting, press the ARR W KEYPAD up.
3. To decrease the backlighting, press the ARR W KEYPAD down.
TIP:
After the Backlight Adjustment Window is activated, pressing the P WER key repeatedly will cycle
through the backlight settings three steps.
2006-2010 Intro.indd 2/27/02, 9:08 AM3
4
Getting Started
Main Page Sequence
4
Getting Started
Main Page Sequence
I
First let’s take a look at the Mai Display Pages as they come from the factory. There are fi ve pages:
the Map Page, Compass Page, Numbers Page, Highway Page a d the Active Route Page. Whe the u it is
tur ed o the fi rst Mai Page displayed is the Map Page.
To scroll through the Main Display Pages:
1. Press the PAGE key. Each time the PAGE key is pressed the GPSMAP 2006/2010 will display the next
Main Page.
2. The QUIT key acts like the PAGE key in reverse. Each time the QUIT key is pressed, the next Main Page
will be displayed in a reverse sequence.
While lear i g the basic operatio of the GPSMAP 2006/2010, let’s put the u it i to its Simulator
Mode. The Simulator Mode is great for practici g with the u it. Whe the u it is i Simulator Mode, it will
ot accept GPS i put, but will simulate satellite avigatio . Whe i the Simulator Mode, the GPSMAP
2006/2010 CAN NOT be used for actual avigatio .
NOTE: Do not try to navigate while using the Simulator Mo e. When the GPSMAP
2006/2010 is using the built-in simulator, the unit is not accepting GPS input. The unit will,
however, simulate actual satellite navigation.
PAGEPAGEPAGEPAGE
QUIT QUIT QUIT QUIT
Map Page Compass Page Numbers Page Highway Page Active Route Page
2006-2010 Intro.indd 2/27/02, 9:08 AM4
5
Getting Started
Main Page Sequence
5
Getting Started
Using the Built-in Simulator
Activating the Simulator Mode:
1. Press the MENU key.
2. With the ‘GPS Info’ tab displayed, at the lower left of the display will be a S FT KEY label ‘Start
Simulator’, press the S FT KEY that corresponds with this option. Choose ‘No’ to the retail demonstration
and press ENTER/MARK.
3. The “Simulator Setup” window will be displayed.
There are six parameters that ca be set for the simulator: “Curre t Time”, “Curre t Date”, “Track
Co trol”, “Track”, “Speed”, a d “Set Positio ” (SOFT KEY). We eed to cha ge the “Curre t Time” a d
“Curre t Date” setti gs.
There are two methods that you ca use whe e teri g alpha- umeric data, o e is the
ARRO KEYPAD a d the other is the DATA ENTRY keys. We will use the ARRO KEYPAD for
setti g the Curre t Time a d Curre t Date. See page 7 for i structio s usi g the DATA ENTRY keys.
Current Time:
1. Using the ARR W KEYPAD, highlight the “Current Time” fi eld and press the ENTER/MARK key.
2. Using the Right/Left function of the ARR W KEYPAD, place the highlight on the correct digit to begin
entering the current time.
3. Using the Up/Down function of the ARR W KEYPAD, scroll through the list until the correct number is
displayed. Press the ARR W KEYPAD to the right to highlight the next digit.
4. Continue this process until the correct “Current Time” is displayed then press the ENTER/MARK key
to accept the new time.
Current Date:
1. Using the ARR W KEYPAD, highlight the “Current Date” fi eld and press the ENTER/MARK key.
2. Using the Right/Left function of the ARR W KEYPAD, place the highlight on the correct digit to begin
entering the Current Date.
3. Using the Up/Down function of the ARR W KEYPAD, scroll through the list until the correct number is
displayed. Press the ARR W KEYPAD to the right to highlight the next digit.
4. When the month is highlighted the Up/Down function of the ARR W KEYPAD will scroll through a list of
the months. Select the current month then move to the next digit.
5. Continue entering the date, when fi nished, press the ENTER/MARK key to accept the new date.
Select this SOFT KEY to start the Simulator
A ter the ‘Start Simulator’ SOFT KEY has been pressed, the
“Simulator Setup” window will be displayed. Set the current
time and date, and change the “Track Control” to ‘User Track’.
When fi nished press the QUIT key to begin simulation.
2006-2010 Intro.indd 2/27/02, 9:09 AM5
6
Getting Started
Main Page Sequence
6
Getting Started
Creating Waypoints
The Simulator is ow set up a d ready to use!
Let’s review what we have covered so far:
1. The PAGE and QUIT key will cycle through the Main Pages, the PAGE key in a forward direction and
the QUIT key in reverse.
2. To select a fi eld or option use the Right/Left and Up/Down functions of the ARR W KEYPAD to control
the cursor or highlight.
3. To activate a fi eld or option, place the highlight over the item and press ENTER/MARK.
4. Use the ARR W KEYPAD to scroll through alpha-numeric character lists when entering data.
Creating aypoints
There will be ma y times that you will eed to e ter data i the GPSMAP 2006/2010, a example is
ami g a waypoi t. We have already take a brief look at e teri g data, but let’s practice some more.
Through this exercise we will create a ew waypoi t, ame the waypoi t, a d assig a symbol to
the waypoi t. The term “Waypoi t” may be ew to you. You will fi d the term “Waypoi t” is used
freque tly whe talki g about avigatio . A “Waypoi t” is a positio stored i the u it’s memory, that
ca be used for avigatio . Waypoi ts are used for direct avigatio , or you ca use several waypoi ts
to build a route.
Creati g, “Marki g” a waypoi t i the 2006/2010 is really very easy. The u it has to be tur ed o a d
receivi g at least three satellite sig als or i Simulator Mode to mark a waypoi t.
Marking your present position as a Waypoint:
1. Press and hold the ENTER/MARK key more than 1 second) until the ‘New Waypoint’ window is displayed.
Whe you hold the ENTER/MARK key, the GPSMAP 2006/2010 captures its curre t locatio a d
displays the ‘New Waypoi t’ wi dow. You ca see that the u it assig ed a square as the default symbol
a d a umber as the default ame. The ‘OK’ butto is highlighted, pressi g the ENTER/MARK key
will store the ew waypoi t usi g the default setti gs for the symbol a d ame, but let’s cha ge them
for practice.
Changing the symbol:
1. Using the ARR W KEYPAD, highlight the symbol fi eld, then press the ENTER/MARK key. This will
display a list showing all of the available symbols.
Symbol Field
Name Field
Comment Field
(up to 20 characters)
Captured Location
Distance and Direction
rom Captured Location
Depth Field
2006-2010 Intro.indd 2/27/02, 9:09 AM6
7
Getting Started
Main Page Sequence
7
Getting Started
DATA ENTRY keys
Select the ‘In ormation’ symbol, enter the name “Practice 1”,
and enter the comment “First Waypoint”.
Entering Data
2. Using the ARR W KEYPAD, highlight the ‘Information’ symbol and then press the ENTER/MARK key.
We will e ter a ew waypoi t ame usi g the DATA ENTRY keys. Each DATA ENTRY key has
multiple characters assig ed to it. Pressi g the key o e time will select the fi rst character, twice will select
the seco d character, three times the third character, a d four times will select the umber assig ed to the
key. The o ly DATA ENTRY key that does ot have four characters is the “+, -, 0” key.
Whe e teri g data usi g the DATA ENTRY keys, press the key repeatedly u til the correct character
is selected, the pause briefl y or press the ext letter/ umber from a differe t key. The u it will automati-
cally move the cursor to the ext placeholder.
Changing the name:
1. Using the ARR W KEYPAD, highlight the Name fi eld and then press the ENTER/MARK key. This will
activate the fi eld with the highlight on the fi rst placeholder.
2. Press the ARR W KEYPAD to the left to clear the fi eld.
3. We will name this waypoint “PRACTICE 1”, press the DATA ENTRY key labeled “P, Q, R, 6” one time to
set the letter “P”. If you are entering a letter/number from the same key, pause briefl y and the unit will
move to the next placeholder automatically. Otherwise, press the next letter/number from a different key.)
4. Press the same key three times to set the letter “R”. Continue entering the name until “PRACTICE” is
spelled.
5. To move the cursor to the right one space, press the ARR W KEYPAD to the right one time.
6. Finish the waypoint name by selecting the number “1”.
7. Press the ENTER/MARK key to accept the new name.
Directly below the Name fi eld is a Comme t Field. You ca e ter a comme t of up to twe ty digits
about the waypoi t i this fi eld. For some more practice, e ter “First Waypoi t” i the comme t fi eld.
Entering a Comment:
1. Highlight the ‘Comment’ fi eld and press the ENTER/MARK key.
2. Using the ARR W KEYPAD and DATA ENTRY keys, enter “FIRST WAYPOINT”.
3. Press the ENTER/MARK key to accept the comment.
2006-2010 Intro.indd 2/27/02, 9:09 AM7
8
Getting Started
Main Page Sequence
8
Getting Started
The SOFT KEYS are located under the display on the ront o
the unit. The SOFT KEYS are used to change display options
and show menus or the Main Page that is currently displayed.
Labels showing the unction o the SOFT KEYS are located
along the bottom o the display. To select the unction, press the
SOFT KEY located directly below it.
Soft Keys
Now that you have fi ished modifyi g the waypoi t you will eed to save it to the Waypoi t List.
To Save the Waypoint:
1. Using the ARR W KEYPAD, highlight the ‘OK’ button at the bottom of the “New Waypoint” window.
2. Press the ENTER/MARK key to save the waypoint.
Data Entry Tips:
1. Remember that you can use both the ARR W KEYPAD and DATA ENTRY keys to enter data.
2. When using the ARR W KEYPAD, if you press and hold the key, the unit will scroll through the
alpha-numeric list quickly.
3. When using the DATA ENTRY keys, press the key the appropriate number of times for the character that
you want to display. The number is always last.
Soft Keys
The SOFT KEYS are located alo g the bottom of the u it u der the display. The SOFT KEYS are
used to perform fu ctio s or display me us specifi c to the page that is displayed. The labels showi g
the fu ctio of each key are alo g the bottom of the display just above the correspo di g SOFT KEY.
To perform the listed fu ctio press the SOFT KEY. If the fu ctio i the label is “Grayed Out”, that
fu ctio is ot curre tly available.
Press the PAGE or QUIT key u til the Map Page is displayed. To see how the SOFT KEYS work
we will hide a d show the ‘Numbers’ Fields located alo g the right side of the scree a d display the
Map Setup Me u.
To Hide the Numbers:
1. Press the S FT KEY located below ‘Hide Nmbrs’ at the bottom of the display.
You should ow have a map that covers the e tire display from left to right. Now let’s redisplay the
‘Numbers’.
To Display the Numbers:
1. Press the S FT KEY located below ‘Show Nmbrs’ at the bottom of the display.
2006-2010 Intro.indd 2/27/02, 9:09 AM8
9
Getting Started
Main Page Sequence
9
Getting Started
Basic Navigation
Map Pointer
To Display the Map Setup Menu:
1. Press the S FT KEY located below the ‘Set Up Map’ tag located at the bottom of the display.
The Map Setup Page Me u will be displayed. The Map Setup Page will be discussed i detail i the
Refere ce Sectio of this ma ual. Now let’s retur to the Map Page.
To Return to the Map Page:
1. Press the QUIT key.
Remember that SOFT KEYS are used to quickly access optio s or fu ctio s for the Mai Page that
is displayed. The optio s or fu ctio s assig ed to a SOFT KEY may be differe t for every page that
is displayed.
Basic Navigation
The mai use of a GPS is to be able to avigate to a k ow positio . We have already created a
waypoi t usi g the ENTER/MARK key, let’s create a other waypoi t usi g the Map Poi ter, a d the
begi avigatio to that poi t.
Press the PAGE key u til the Map Page is displayed. Press the IN key several times u til the Map
Scale located at the bottom right of the display reads “2 m”. This will “Zoom I ” o the map showi g
a smaller area i more detail.
The ARRO KEYPAD co trols the Map Poi ter. The Map Poi ter origi ates from the curre t GPS
locatio , represe ted by the tria gle i the middle of the display.
To Display the Map Pointer:
1. Press the ARR W KEYPAD in any direction.
Usi g the ARRO KEYPAD you ca move the Map Poi ter arou d the map. As you move the Map
Poi ter arou d the map, the directio a d dista ce of the Map Poi ter from the curre t GPS locatio
will be displayed i the i formatio bar alo g the top of the display. Move the Map Poi ter u til it is
approximately two miles from the curre t GPS locatio .
2006-2010 Intro.indd 2/27/02, 9:09 AM9
10
Getting Started
Main Page Sequence
10
Getting Started
Basic Navigation
To Create a Waypoint Using the Map Pointer:
1. With the Map Pointer at the desired location not on a road or map feature), quickly press and release
the ENTER/MARK key. Holding the ENTER/MARK key for more than one second will mark your present
location. See pg. 6) The “New Map Waypoint” Page will be displayed.
Cha ge the waypoi t ame to “MAP 1”, a d assig the ‘I formatio ’ symbol. Save the waypoi t by
highlighti g the ‘OK’ butto a d pressi g the ENTER/MARK key. Press the QUIT key to hide the Map
Poi ter a d ce ter the display o the curre t GPS locatio .
Navigating to a waypoint
Whe you begi avigatio to a waypoi t, the GPS sets a straight li e course to that poi t. The u it
will draw a Course Li e o the display betwee the curre t GPS locatio a d the desti atio waypoi t.
You may use a y of the mai pages for avigatio . All of these pages are discussed i detail i the Refere ce
sectio of this ma ual. For this exercise, let’s use the Highway Page.
Going to a waypoint:
1. Press the NAV key.
2. Highlight ‘Go To Point’ and press the ENTER/MARK key.
3. Highlight ‘Waypoints’ and press the ENTER/MARK key. This will display the ‘Select Waypoint’ window.
From this window you can select waypoints “By Name”, or by “Nearest From Current Location”. Select the
tab ‘By Name’ using the ARR W KEYPAD.
4. Using the ARR W KEYPAD, scroll through the list until the waypoint “Map 1” is highlighted. Press the
ENTER/MARK key to display the “Waypoint Review” Page.
5. With the ‘Go To’ button highlighted, press the ENTER/MARK key to begin navigation.
For a GPS to avigate it has to be movi g. Whe the Compass Page or Highway Page is displayed a d
the u it is i the Simulator Mode, you ca set a simulated speed by pressi g the ARRO KEYPAD ‘Up’.
Each time the ARRO KEYPAD is pressed ‘Up’ the simulated speed will i crease by te k ots. Pressi g
the ARRO KEYPAD ‘Dow ’, will decrease the simulated speed by the same amou t.
Press the PAGE key u til the Compass Page is displayed. Alo g the right side of the display there
are four data fi elds, the top fi eld is the Speed. Press the ARRO KEYPAD ‘Up’ o e time to set a
speed of 10 k ots.
2006-2010 Intro.indd 2/27/02, 9:09 AM10
11
Getting Started
Main Page Sequence
11
Getting Started
Compass Page — Heading directly toward the destination
waypoint. When the Bearing Pointer is aligned with the vertical
line in the Compass Ring then you are on a direct course to
your destination.
Compass Page — showing o course about 40°. Turn le t until
the Bearing Pointer is aligned with the vertical line to get back
on course.
Compass Page
Using the Compass Page
Located o the Compass Page are the Beari g Poi ter, a d a Compass Ri g. Whe you are movi g, the
Beari g Poi ter poi ts toward your desti atio , while the Compass Ri g refl ects the directio that you
are traveli g. I short, whe you are headed directly toward your desti atio , the Beari g Poi ter will
poi t toward the top of the display, alig ed with the vertical li e displayed i the Compass Ri g. If you
are ot headi g toward your desti atio , the Beari g Poi ter will tur , co ti ui g to poi t toward your
desti atio . To head toward your desti atio , tur u til the Beari g Poi ter is realig ed with the vertical
li e i the Compass Ri g.
The GPSMAP 2006/2010 will allow you to simulate a tur so you ca see what will happe .
To simulate a turn:
1. Press the ARR W KEYPAD to the right until the Compass Ring has changed about 40°.
The Beari g Poi ter should ow be poi ti g to the left. This is exactly what will happe duri g actual
avigatio . To get back o course, press the ARRO KEYPAD to the left, simulati g a left tur . Whe
the Beari g Poi ter is alig ed with the vertical li e i the Compass Ri g, you are headed directly toward
the desti atio waypoi t.
Co gratulatio s you should ow have e ough experie ce to use the basic fu ctio s of your GPSMAP
2006/2010. E joy your ew GPSMAP 2006/2010 a d tha k you for choosi g GARMIN.
2006-2010 Intro.indd 2/27/02, 9:09 AM11

Other manuals for GPSMAP 2006

4

Other Garmin GPS manuals

Garmin nuvi 885 Instruction manual
Garmin

Garmin nuvi 885 Instruction manual

Garmin Zumo TM 500/550 User manual

Garmin

Garmin Zumo TM 500/550 User manual

Garmin GPSMAP 5000 Series User manual

Garmin

Garmin GPSMAP 5000 Series User manual

Garmin APPROACH CT10 User manual

Garmin

Garmin APPROACH CT10 User manual

Garmin nuvi 350 Owner's manual

Garmin

Garmin nuvi 350 Owner's manual

Garmin aera 1900111700 User manual

Garmin

Garmin aera 1900111700 User manual

Garmin DEZL OTR610 User manual

Garmin

Garmin DEZL OTR610 User manual

Garmin Colorado Series User manual

Garmin

Garmin Colorado Series User manual

Garmin nuvi 5000 User manual

Garmin

Garmin nuvi 5000 User manual

Garmin zumo 350LM User manual

Garmin

Garmin zumo 350LM User manual

Garmin StreetPilot C580 - Automotive GPS Receiver User manual

Garmin

Garmin StreetPilot C580 - Automotive GPS Receiver User manual

Garmin GPSMAP 76Cx User manual

Garmin

Garmin GPSMAP 76Cx User manual

Garmin GPSMAP 76 series User manual

Garmin

Garmin GPSMAP 76 series User manual

Garmin GPSMAP 168 Sounder User manual

Garmin

Garmin GPSMAP 168 Sounder User manual

Garmin GPSMAP 400 series User manual

Garmin

Garmin GPSMAP 400 series User manual

Garmin eTrex Legend H User manual

Garmin

Garmin eTrex Legend H User manual

Garmin 1620 User manual

Garmin

Garmin 1620 User manual

Garmin eTrex 10 User manual

Garmin

Garmin eTrex 10 User manual

Garmin GPSMAP 376C User manual

Garmin

Garmin GPSMAP 376C User manual

Garmin RINO 700 User manual

Garmin

Garmin RINO 700 User manual

Garmin DEZL 580 User manual

Garmin

Garmin DEZL 580 User manual

Garmin GPS III User manual

Garmin

Garmin GPS III User manual

Garmin Oregon300 Guide

Garmin

Garmin Oregon300 Guide

Garmin GPS 400W User manual

Garmin

Garmin GPS 400W User manual

Popular GPS manuals by other brands

Peiying PY-GPS9000 owner's manual

Peiying

Peiying PY-GPS9000 owner's manual

Masibus GPS MASTER CLOCK MC-1-M user manual

Masibus

Masibus GPS MASTER CLOCK MC-1-M user manual

Magellan RoadMate 3000T - Automotive GPS Receiver manual

Magellan

Magellan RoadMate 3000T - Automotive GPS Receiver manual

AMG-Sicherheitstechnik AMGoTrack manual

AMG-Sicherheitstechnik

AMG-Sicherheitstechnik AMGoTrack manual

VDO PN 1000 - manual

VDO

VDO PN 1000 - manual

Dual XGPS190 owner's manual

Dual

Dual XGPS190 owner's manual

Velocitek SpeedPuck user manual

Velocitek

Velocitek SpeedPuck user manual

MTM 900M Series installation guide

MTM

MTM 900M Series installation guide

VMS Touring 600 quick start guide

VMS

VMS Touring 600 quick start guide

astra telematics AT100 Quick installation guide

astra telematics

astra telematics AT100 Quick installation guide

StarGPS GPS-NX01 user guide

StarGPS

StarGPS GPS-NX01 user guide

RUPTELA HCV5 Series quick start guide

RUPTELA

RUPTELA HCV5 Series quick start guide

Polaris FR-1516 troubleshooting guide

Polaris

Polaris FR-1516 troubleshooting guide

Tyco Electronics A1037-A user manual

Tyco Electronics

Tyco Electronics A1037-A user manual

SecuLife SOS100 user guide

SecuLife

SecuLife SOS100 user guide

Bushnell Yardage Pro XG user manual

Bushnell

Bushnell Yardage Pro XG user manual

Alpine Blackbird PMD-B200P owner's manual

Alpine

Alpine Blackbird PMD-B200P owner's manual

MeiTrack GT30i user manual

MeiTrack

MeiTrack GT30i user manual

manuals.online logo
manuals.online logoBrands
  • About & Mission
  • Contact us
  • Privacy Policy
  • Terms and Conditions

Copyright 2025 Manuals.Online. All Rights Reserved.