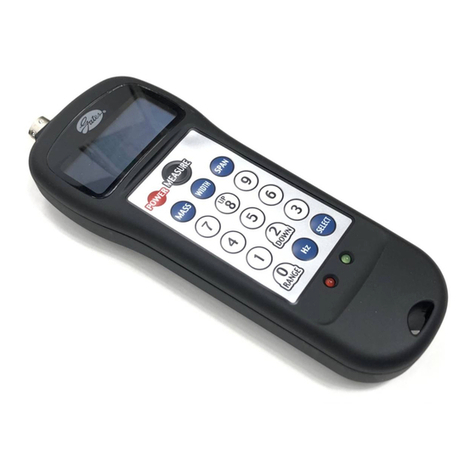
Gates Unitta Asia U-507 Installation manual

Contents
1. Note on safety P1
P3
P4
P5
P7
P8
2. Overview, note, and checking item
in defective measurement
3. Measurement principle of U-507
4. Explanation of each part of U-507
5. Operation procedure of U-507
6. Input procedure of data
6-1 Input of unit mass
7. List of preinstalled belt type unit mass
6-2 Input of belt width or the number of belts (ribs)
6-3 Input of span length
8. Unit mass list of timing belt made
by Gates Unitta Asia
9. Unit mass list of V-belt made by Gates
10. List of standard installation tension of
timing belt made by Gates Unitta Asia
P9
P10
11. List of U-507 specification
12. Guarantee and after-sales service
P12
P11
P13
Thank you for purchasing our Gates Unitta Asia Company's
Sonic Belt Tension Meter U-507.
This manual describes operation procedure of U-507.
Please read this manual thoroughly before
use in order to make full use of functions.
Sonic Belt Tension Meter

1
Danger
■Read this "Note on safety" well enough before use in order to use the unit properly.
Keep this manual carefully after reading through.
■Note described here is for preventing danger to user or other people and damage
to property, so be sure to observe.
■Classified marking below describes the degree of danger and damage caused
when you do not observe the description and use the unit in a wrong mann
1.Note on safety Be sure to observe them.
This marking shows that "imminent
danger is present which leads to
death or serious injury" when the
unit is used in a wrong mann
Warning
This marking shows that "possibility
is present which leads to death or
serious injury" when the unit is
used in a wrong manne
Caution
This marking shows that
"possibility of injury is present and
only physical damage is likely"
when the unit is used in a wrong
mann
■The classified pictorial marking below shows description to be observed
This marking shows "prohibition" of what must not be performed
This marking shows "forcing" of what must be performed.
Do not give strong shock and do not throw
the unit.
・Incompliance may lead to failure and fire.
Do not use the unit in a place where
inflammation or explosion is possible.
・When this unit is used in a place where
inflammable gas such as propane gas or
gasoline or dust is generated, it may lead
to explosion or fir
Do not disassemble or modify the unit.
・Incompliance may lead to fire, injury, and
electric shock.
Never expose the unit to any liquid such as
water and solvent. Do not use the
microphone in an environment where water
or grease may depos
Warning

2
Caution
Do not store the unit in a place of much
moisture or dust or place of high
temperature.
・Incompliance may lead to trouble.
Do not use or leave the unit in a place of
high temperature exposed to direct sunlight
or in a vehicle under the hot sun.
・Incompliance may lead to deformation or
trouble of equipment
Do not place the unit on any unstable place
such as shaky table or tilted place.
・The unit may drop and cause injury and
trouble.
In measuring the tension, always make
sure that the machine is stopped by turning
off motor power supply or the lik
The arm of flexible arm microphone is a
universal pipe, but must not be bent at an
acute angle. In addition, do not bend the
pipe within 20 mm from the top of
microphone and at the root of connector.
Further, do not hold and pull strongly or
turn the microphone (sensor) and the arm.
Do not hold and pull strongly or turn the
microphone (sensor) of cord type
microphone and electromagnetic sensor.
When it starts thundering while using this
unit outdoors, turn off power at once and
move to a safe place.
・Incompliance may lead to thunderbolt
and electric shock.
Do not use solvent (such as thinner and
benzene) in taking care of the main body.

3
2. Overview, note, and checking item in defective measurement
The sonic belt tension meter (U-507) enables non-contact,
simple, and accurate measurement of installation tension
which is greatly related to belt function by analyzing sonic
wave.
Sonic wave is generated by flipping the belt span with the
belt standing still, and it is captured by the sensor and
processed by high performance computer, and belt tension is
displayed in digital mode.
■Overview
■Overview & checked item in measurement malfunction (when unsuccessful)
[Measurement mode is not established or data fluctuates significantly.]
Item
*If measurement is still unsuccessful after retrial of the procedure above, contact us or the dealer you purchased this unit.
Phenomenon Estimated cause (Assumed causes) Checked item
"Error" is displayed
or Measurement
mode is not
established, or LED
(red) is on.
Output fluctuates
greatly.
●Tension value
doesn,t come out
dispite a few of trials.
Otherwise, only
"Measurement
standby" is displayed
after the 3rd time and
on.
(In case of frequency
mode)
●The value
changes greatly in
every measurement.
●The value
responds sensitively
to the noise around
(background noise)
other than measured
value.
●"0" is entered to the entry
parameters (unit mass, width, and
span).
●Tension value has 6 digits or
more.
●Measurement frequency range is
incorrect.
●Measurement frequency exceeds
5000 Hz.
●Exhaustion of battery
●Microphone is in contact with the
belt for a moment during
measurement.
●Automatic gain adjustment is
insufficient.
●Check the detail of entry item.
(Enter an appropriate value to the
item that "0" is input.)
●Tension is not measured although
frequency is displayed.
●Change of measurement
frequency range (switching LOW
and STANDARD, switching
STANDARD and HIGH)
●Check whether measurement
frequency is in excess of 5000 Hz or
not.
●Indication of battery life
(When the battery display is as
shown on the right: )
●Try measurement again at a
appropriate distance where
microphone is not in contact.
●Turn off power once at a
measurement place, and turn on
again.
(Turn on power with microphone
installed, and press "MEASURE"
button over one second later.)

4
Fig. 1 Oscillation attenuation of timing belt
Fig. 2 U-507 relation between measured value and actual tension
2
150
100
50
0
0
100
200
300
400
500
600
100 200 300 400 500 600
50
100
150
Timing belt:
3GT tooth shape x 3 mm wide
(V)
0
-2
TIME A LIN
80
m
S
3.Measurement principle of U-507
When a belt tensed between pulleys is subjected to impact
and vibrated, it oscillates first with an irregular waveform
containing high frequency component and impact component
as shown in figure 1, but soon oscillates with a intrinsic
regular waveform.
U-507 tension meter was created in consideration of well-
known phenomenon described above, but the belt and wire
attenuate in a very short time, and no simple device has
existed which captures the cycle of such basic waveform.
However, a unique data processing method was developed
which captures oscillation frequency making full use of
microcomputer, and an attempt was successful to catch the
cycle of such waveform rather easily.
This system detects oscillation waveform with a microphone,
and the microcomputer processes the data and converts to
characteristic frequency. "Horizontal oscillation of string" set
on the tension meter described on the right in calculating the
belt tension.
Here, the belt and the wire have a rigidity, which is different
from the string, therefore U-507 measurement displayed is
somewhat higher than the actual tension under the affected
condition.
Therefore it is allowed to obtain correction factor by strict
calibration test and incorporate it to the data input, thereby
displaying more accurate tension.
An example of calibration result of U-507 measurement and
actual tension is shown below:
Calculation formulaTo = 4 x M x W x S2x f2x 10-9
Where,
Therefore, it is required to input the length of span to be
measured and the mass of belt (unit mass x width) by use of
numeric key
3GT belt
Actual tension (N)
11. Actual tension (N)
U-507 measured value (N)
U-507 measured value (N)
:Span length 86 mm
:Span length 154 mm
:Span length 365 mm
:Span length 365 mm
[9 mm wide]
Standard installation
tension of belt
9 mm wide
Typical tension when
stretching again
Typical
installation
tension
Standard installation
tension of belt
6 mm wide
[6 mm wide]
V riffed belt (3PK) belt
:Span length 102 mm
:Span length 201 mm
:Span length 400 mm
To: Tension (N)
M: Unit mass (g/mm wide x m long)
W: Belt width or number of ribs (wires) (mm/R)
S: Measured span length (mm)
f: Horizontal characteristic frequency (Hz)

5
One-touch
connector
Concave and convex connector has a slit mark and easily snaps into place when pushed in with such mark aligned. In
disconnecting, hold the collar of connector on sensor side and pull, and it can be disconnected in one-touch simple
operation.
1
Power button When "POWER" button is pressed, power is turned on. In turning off power, continue to press "POWER" button about
one second. This instrument employs auto power-off function to turn off power in about five minutes from the last
measurement, so if power is off during use, press "POWER" button again.
2
4.Explanation of each part of U-507 Main part
Measurement sensor microphone /
flexible arm system microphone
(standard specification)
11
One-touch connector
1
"MEASURE" button
10
Power button
2
Cord system microphone
(option)
12
LCD screen with backlight
3
SPAN button
7
Select button
Power supply:AAA type x 2 pieces)
4
Hz button
(switching between frequency
and tension modes)
8
L E D
(left : red, the right : green)
WIDTH button
6
MASS button
(unit mass)
5
0-button
(frequency range switching)
9
UP DOWN button
5

6
1. Press "MEASURE" button to set up auto trigger mode.
*Initial display status is
Measurement thereafter is started by receiving signals from the sensor.
*Displays during measurement.
*After turning on power, allow an interval of 1 second or longer before pressing "MEASURE" button
for automatic gain adjustment.
2. When the belt type is changed, press "MEASURE" button to start measurement.
3. When measurement frequency range is changed, press "MEASURE" button to start measurement in changed
frequency range.
"MEASURE"
button
10
The following two types are available.
The microphone itself has a small diameter of 12.5 mm attaching flexible pipe system, and can be positioned with
single hand from the main body, and it is useful in a place where the main body cannot be placed on floor such as a
manufacturing site. Compatible with entire measurable frequency band: 10 - 5000Hz.
Note: Do not hold and twist the microphone and connector area.
Measurement
sensor microphone/
flexible arm system
microphone
(standard
specification)
11
LCD screen
with backlight
3
●Belt type and unit mass are displayed when this button is held down one second or
longer.Choose a desired belt type by use of "UP" and "DOWN" button, and determine
by "MEASURE" button. (See page 9 for preinstalled unit mass.)
*Display unit : g/m.
*CAT (rough standard), tension, and frequency are displayed only when belt type is chosen by MASS button.
5
Select button ●Press SELECT button to choose any desired input number displayed in power-on.
20 memory functions selectable from No. 0 to 19
*Call out numbers sequentially forward by pressing SELECT button, and press any number to jump to designated
number. Here, when you call out No. 10 or larger, press the number continuously.
4
WIDTH button ●Choosing "WIDTH" button enables input of belt width with use of numeric key.
Allowed input capacity: 000.1 - 999.9 mm/R
*Enter the number of ribs for V belt.
6
SPAN button ●Choosing "SPAN" button enables input of measurement span length with use of numeric key.
7
Hz button
(switching
between
frequency and
tension modes)
●Pressing "Hz" button enables choosing between
measurement tension display and measurement frequency
display.
*Display changes every time this button is pressed.
●In addition, holding down Hz button enables dual display
with tension and frequency. However, CAT display is
available only when inputting from preinstalled data.
(Displays only for timing belt.)
*Displayed CAT value for tension and frequency are
slightly different from standard installation tension of toothed
belt on page11. Use them as a rough standard.
8
0-button
(frequency range
switching)
Hold down "0" button one second or longer to change measurement frequency range.
HIGH………………500〜5000Hz
STANDARD………10〜600Hz
LOW ………………10〜50Hz
Choose a range with UP and DOWN button, and determine with "MEASURE" button.
In selecting 600Hz or above, the range must be switched to "HIGH range".
Determine with "MEASURE" button.
9
The microphone itself has a small diameter of 12.5mm attaching cord system. It enables measurement in any use
such as in congested places hard to measure. Conpatible with entire measurable frequency band: 10 - 5000Hz.
Cord system
microphone
(option)
12
S No. 1
M 9 9 9 .9 g/m
W 9 9 9 .9 mm/R
S 9 9 9 9 mm
Display of measured tension
Double display of measurement tension
and frequency
Dual display of measured
frequency and catalog frequency Double display of measurement
tension and catalog tension
Display of measurement frequency
S No. 2 2GT
TENSION
99900 N
Measurement
frequency level
H:HIGH
S:STANDARD
L:LOW
Memory No.
Measured tension
*In measurement of belt type
Remaining battery
[Overview of LCD indication pattern]
*Displayed only when
input from preinstallation
Example of display indication unit mass, belt width,so span.
●Displays tension value, etc.
●Displays tension by three significant digits from 0.01 to 99900.
●Displays frequency by three significant digits from 10.0 to 5000 Hz.
●When the tension measurement result is out of the standard
speciffcation, LED (red) turns on and "ERROR" is displayed.
* When tension exceeds its range after measurement result is
displayed, the value for the last 2times are displayed, and retrial is
prompted by "peep" sound.
●Battery mark is displayed when battery is consumed.
(When remaining voltage is low, the battery mark blinks, as well as
"LOW BATT" blinks.)
●Backlight is always on.
However, it will turns off if it mot in use is not used for one minute, and
will resume when operated again.
S No 02 2GT
1.5GT 0.91
2
33GT 2.5
2GT 1.3
MASS button
(unit mass)
UP DOWN button
S No 01 5GT
RESULT
TEN N
S No 01 5GT
RESULT
FREQ Hz
S No 01 5GT
FREQUENCY
CAT Hz
RES Hz
S No 01 5GT
RESULT
FREQ Hz
TEN N
S No 01
HIGT
LOW
STANDARD
S No 01 5GT
TENSION
CAT N
RES N

7
Set up the microphone. Choose an optimum microphone and fix in the main body with
one-touch connector.
1
Turn on power. "POWER" button - PUSH No.□
No.□
No.0→ No.1
No.1→ No.2
No.0→ No.2
2
Choose an input number with the select
button and numeric key.
Ex: Choose one from No. 0 to No. 2.
"SELECT" button - PUSH
[Number is forwarded sequentially every time "SELECT" button
is pressed. 0 →1 →・・18 →19 →0 →1 →2. In addition,
you can jump to any designated number by pressing a number
with numeric key.]
1. Selecting procedure
"SELECT" button - PUSH (1st time)
"SELECT" button - PUSH (2nd time)
2. Selecting procedure
"2" button - PUSH
When "SELECT" button is pressed during the following
procedure (during display of unit mass, belt width, span length
input, and measured value), the number being chosen is
displayed.
3
When inputting a unit mass manually
Ex: Input 2.5g/mm wide x meter long
[See page 9 for input data.]
When inputting the unit mass from belt
type.
Ex: Select 3GT.
Input the belt width.
Ex: Input 25.4 mm.
[See page 8 for input data.]
"MASS" button - PUSH
[ Input the unit mass (g/mm W x m L) in the order of blinking
position on display screen by use of numeric key. If input is
mistaken, press "MASS" button again to return the cursor to
the first.]
"0" button - PUSH
"0" button - PUSH
"2" button - PUSH
"5" button - PUSH
"MASS" button, PUSH (holding down for one second or more)
[Have belt types displayed on screen, and choose a belt type
with "UP" button and "DOWN" button.]
"DOWN" button - PUSH
Place highlighted portion on 3GT.
Press "MEASURE" button for selecting.
3GT is displayed on screen.
M=□□□.□g/m
"Allowable input capacity:
0.1 - 999.9 g/mm x m]
M=0□ □ .□g/m
M=00□ .□g/m
M=002.□g/m
M=002.5g/m
4-1
4-2
"WIDTH" button - PUSH
[Do the same as described above. When data above allowable
capacity is input, the cursor returns to the first, and input of data
is requested again.]
"0" button - PUSH
"2" button - PUSH
"5" button - PUSH
"4" button - PUSH
W=□□□.□mm/R
"Allowable input capacity:
000.1 - 999.9 mm"
W=0□ □ .□mm/R
W=02□ .□mm/R
W=025.□mm/R
W=025.4mm/R
5
Input the span length.
[See page 8 for input data.]
"SPAN" button - PUSH
[Do the same as described above.]
S=□□□□mm
"Allowable input capacity:
0001 - 9999 mm"
6
Displays tension.
Result is displayed as well as peep sound emitted and LED
(green) turns on in 1.5 sec after reception of belt vibration sound.
*When LED (red) turns on, see "checking item" in measurement
malfunction on page 3.
T = 122N
"Displays from 0.01 to
99900N in three significant
digits"
8-1
Displays frequency.
Displays frequency after measurement
of tension.
"Hz" button - PUSH
[ Displays frequency corresponding to the measured tension.
When "Hz" button is pressed once again, the display returns to tension mode.]
f=235Hz
"Displays from 10.0 to 5000
Hz in three significant digits"
8-2
Start measurement.
1. Bring the measurement microphone closer in the vicinity of span
center of measurement target as far as it is out of contact with the
belt (measurement target).
2. "MEASURE" button - PUSH: LED (green) blinks and LCD
displays .
3. Flip the belt span with a finger etc. to vibrate the wire: LCD
displays .
The following measurement is performed by the microphone
receiving sound without use of measure button for the 2nd time
and on.
Since measurement is started by the microphone receiving sound,
measurement is started as well even by a noise if it has a relatively
stable sound pressure.
Result is displayed as well as peep sound emitted and LED (green)
turns on in 1.5 sec after reception of belt vibration sound.
In measurement for the 2nd
time and after, previous data
is displayed first. Intorn the
measurement data is
renewed at the same time as
peep sound.]
7
Procedure
Description Operation Display screen
5.Operation procedure of U-507
S No 02 2GT
1.5GT 0.9
3GT 2.5
2GT 1.3

8
6.Input procedure of data
6-1.Input of unit mass
[See table-1, table-2, and table-3.]
●Timing flat belt
Input the mass per width (mm) x length (m) in "g/mm W x m L"
for unit mass.
Data of capacity can be input by four significant digits, i.e. three
digits of integer and one digit below decimal point from 000.1 up
to 999.9 g/mm W x m L.
●Timing V-belt
(Input of belt unit mass from preinstalled data)
When "MASS" button is held down (longer than one second),
belt type is displayed on LCD. Scroll the display with UP button
("2") or DOWN button ("8") until the letter of desired belt type is
highlighted. Then press "MEASURE" button for determining.
●V, V-ribbed belt and wire
Input the mass per meter of length in "g/m length" for unit mass.
Data of capacity can be input by four significant digits, i.e. three
digits of integer and one digit below decimal point from 000.1 up
to 999.9 g/m L. Unit mass corresponds to one piece for V-belt
and wire, and one rib for V-ribbed belt.
Note) Unit mass of U-507, U-505, and U-305 is 10 times the
input of conventional type U-303 since the input unit has been
changed.
Therefore, when a value is input in conventional unit mass
(g/cm2), measured tension is displayed in 1/10. (Display of
measured frequency is not changed.)
6-2.Input of belt width or
the number of belts (ribs)
●Timing flat belt
Data of belt width can be input by four significant digits, i.e.
three digits of integer and one digit below decimal point in
millimeters from 000.1 to 999.9 mm.
●V, V-ribbed belt and wire
Input one (piece) of V-belt and wire.
Input the number of ribs of V-ribbed belt.
6-3. Input of span length
Span length is a distance between contacts with pulley, and can
be calculated by the following equation accurately. Alternatively,
measure the distance between pulley contacts with a measuring
tape for facilitation.
where,
s: Span length (mm)
C: Distance between axes (mm)
Dp: Large pulley pitch outer diameter (mm)
dp: Small pulley pitch outer diameter (mm)
S= C − (Dp−dp)
4
22

9
1
2
3
●
List of timing belt unit mass specified as standard configuration
Timingbelt
HTDbelt
GTbelt
4PolychainGT2belt 5Carryflextimingbelt
6Nonstandardpitchbelt
7Urethanebelt
Tooth type
Pitch(mm)
MXL
2.032
1.2
XXL(50)
3.175
1.4
XL
5.080
2.1
DXL
5.080
1.9
L
9.525
3.1
DL
9.525
3.3
H
12.700
3.8
DH
12.700
4.4
XH
22.225
11.1
XXH
31.750
14.8
Unit mass
(g/mm with×m length)
Tooth type
Pitch(mm)
Unit mass
(g/mm with×m length)
Tooth type
Pitch(mm)
Unit mass
(g/mm with×m length)
Tooth type
Pitch(mm)
Unit mass
(g/mm with×m length)
Tooth type
Pitch(mm)
Unit mass
(g/mm with×m length)
Tooth type
Pitch(mm)
Unit mass
(g/mm with×m length)
Tooth type
Pitch(mm)
Unit mass
(g/mm with×m length)
3M-HTD
3.000
2.4
D3M-HTD
3.000
2.3
5M-HTD
5.000
3.8
D5M-HTD
5.000
4.2
8M-HTD
8.000
6.1
D8M-HTD
8.000
6.3
EV14M
14.000
8.7
14M-HTD
14.000
10.0
D14M-HTD
14.000
11.9
20M-HTD
20.000
12.8
8M-GT
8.000
4.7
14M-GT
14.000
8.0
XL
5.080
1.7
L
9.525
2.6
C8YU
8.000
5.2
H
12.700
3.4
T5
5.000
1.8
T10
10.000
3.6
101
1.5875
1.0
102
2.0320
1.3
103
2.1167
1.3
104
2.8222
1.0
111
1.4111
1.1
109
2.1167
1.1
181
2.8222
0.9
25
6.3500
1.7
9109
15.4473
3.0
UMXL
2.032
0.9
UXL
5.080
1.6
1.5GT
1.500
0.9
2GT
2.000
1.3
3GT
3.000
2.5
D3GT
3.000
2.5
5GT
5.000
4.0
D5GT
5.000
4.3
EV8YU
8.000
5.1
D8YU
8.000
5.4
8YU
8.000
5.2
See the description of MASS button on page 5 and 6 for selecting. Input a value manually by use of unit mass list on the next
page as for special pitch and special belt which are not described below.
7.List of preinstalled belt type unit mass
■Table-2: Unit mass only for U-507/505 and U-305
Data of unit mass can be input by four significant digits, i.e. three digits of integer and one digit below decimal point in g/mm W x
m L from 0.1 to 999.9 g/mm W x m L.
8.Unit mass list of timing belt made by Gates Unitta Asia
Note) Input a value 10 times the unit mass list value (g/cm)
used for present U-303.
MXL
XL
DXL
L
DL
H
DH
XH
XXH
1.2
2.1
1.9
3.1
3.3
3.8
4.4
11.1
14.8
3M
D3M
5M
D5M
8M
D8M
14M
D14M
20M
2.4
2.3
3.8
4.2
6.1
6.3
10.0
11.9
12.8
1.5GT
2GT
3GT
D3GT
5GT
D5GT
8YU
D8YU
8MGT
0.9
1.3
2.5
2.5
4.0
4.3
5.2
5.4
4.7
14MGT
EV8M
EV14M
8.0
5.1
8.7
3VX
5VX
8VX
J(V)
K(V)
L(V)
A(V)
B(V)
C(V)
59.8
165.6
525.6
8.6
20.0
30.4
103.2
166
298.8
D(V)
E(V)
3VXPB
5VXPB
5MPF
7MPF
11MRF
534.6
734.4
75.7
210.9
10.5
25.7
52.1
Display
Timingbelt(Standardconstruction) Vbelt
Unitmass
Display
Unitmass
Display
Unitmass
Display
Unitmass
Display
Unitmass
Display
Unitmass
■Table-1: List of unit mass of toothed belt and V-belt
Display Belttype Display Belttype Display Belttype Display Belttype
8MGT
14MGT
PolychainGT28M
PolychainGT214M
3VXPB
5VXPB
3VXPowerdband
5VXPowerdband
5MPF
7MPF
Polyflex5M
Polyflex7M
11MRF Polyflex11M
(unit:g/mm width x m length) unit mass: Mass per meter length of one rib(g/m length)

10
[M (g/m length) = Mass per meter length of one rib (g/m length) x Tension correction factor]
1SuperHCtype
2Polyflextype
3MicroVtype
4StandardVtype
Input item
WEIGHT
(Mass x compensation
coefficient
per 1 rib 1m length)
Input item
WEIGHT
(Mass x compensation
coefficient
per 1 rib 1m length)
Input item
WEIGHT
(Mass x compensation
coefficient
per 1 rib 1m length)
Input item
WEIGHT
(Mass x compensation
coefficient
per 1 rib 1m length)
3VXSingle
68.0×0.88=59.8
3VXPowerband
87.0×0.87=75.7
5VXSingle
182.0×0.91=165.6
5VXPowerband
237.0×0.89=210.9
8VSingle
657.0×0.8=525.6
5M
11.0×0.95=10.5
7M
27.0×0.95=25.7
11M
56.0×0.93=52.1
Jsection
9.0×0.95=8.6
Lsection
32.0×0.95=30.4
PKsection
21.0×0.95=20.0
A
120.0×0.86=103.2
B
200.0×0.83=166.0
C
360.0×0.83=298.8
D
660.0×0.81=534.6
E
1020.0×0.72=734.4
V-belt has a rather high rigidity, and difference is generated between the actual tension and measured value which requires
correction in the range of standard installation tension. Therefore multiply the mass per meter length of one rib of belt by tension
correction factor obtained by calibration by use of the formula below, and employ the resultant value as a WEIGHT value.
9.Unit mass list of V-belt made by Gates
■Table-3: Unit mass only for U-507/505 and U-305
*Contact us for unit mass of toothed belt for automobile engine and V-ribbed belt for driving automobile engine auxiliary equipment.

11
3Carryflextimingbelt
4PolychainGT2belt
Shown below are standard tensions. Use them when working condition (actual load) is unknown.
Recommended installation tension Calculate the installation tension by the following each time depending on working condition (actual load).
Correction factor (m) list
*Contact us as for 20M type.
10.
List of standard installation tension of timing belt made by Gates Unitta Asia
1Timingbelt
2GT&HTDbelt
1.5GT
1.5 2.0 2.5 3.0 4.0 6.0
N 3.4 4.4 5.6 7.8 12.4 19.7
9.0 12 15 20 25 30 40 50 55 60 70 85 100 115 130
2GT 4.3 5.5 6.4 9.4 15.8 25.2 34.6 44.1N
3GT・3 M 29 44 59 74 98 123 147 196N
5GT・5 M 55 76 96
210
137 178 220 302N
8YU・8 M 235 294 343 500 701 765 892N
14M 441 618 902 1190N
EV14M
150 170
N
XL
12.7
(50)(75)(100)(125)(150)(200)(250)(300)(400)
19.1
L
H
25.4 31.8 38.1 50.8 63.5 76.2 101.6
N 162 216 270 324 431 539 647 863
44 67N88111 132 177 221 265 353
N253749628398123 147 196
T5
T10
CF8YU
10152025304050 75
N
N
129 173 216 259 345 431 647 863
N20293949597898 147
60 80
235 294 343 500 637 1290
765 1025
196
100
8MGT
14MGT
N
N
MIN
MAX
MIN
MAX
210155125 260 310 410 520 625 730 830
440325260 545 650 860 1090 1310 1530 1740
530 795 1060 1325 1590 1855 2650 30502120 3445
1110 1670 2230 2780 3340 3895 5565 64054450 7235
201512 25 30 40 50 60 70 100 11580 130
8MGT
14MGT
0.0950.0710.057 0.119 0.143 0.190 0.283 0.285 0.333 0.380
0.158 0.237 0.316 0.395 0.474 0.553 0.632 0.790 0.909 1.027
201512 25 30 40 50 60 70 100 11580 130
Carryflextimingbelt
3
width
(mm)
width
(mm)
Tooth
type
width
(mm)
Tooth
type
Tooth
type
width
(mm)
width
(mm)
Tooth
type
width
(mm)
Tooth
type
MXL
3.2 4.8 6.4
(25)(31)(37)(50)(75)(100)(150)(200)(250)(300)(400)(500)(600)(700)(800)(900)( 1000)
7.9 9.5
N 2.9 5.0 7.6 10.3 11.8 16.2
XL
L
H
XH
XXH
N 13.7 19.2 24.5 34.3 54.9 75.0 116
N 52.0 89 128 280 412203
N 217 312 1390668486 1030 1760 2110
N 909 1410 2000 2540 3050 3560 4120 4670 5200
N 1110 1760 2480 3190 3830 4460 5100 5770 6430
12.7 19.1 25.4 38.1 50.8 76.2
344
851
63.5 101.6 127.0 152.4 177.8 203.2 228.6 254.0
3190278023802090
1480
1790
1100
1470
560 740 1100 1400 380034002900250021001800
373
637
EV8YU 280 350 420 600 920 1100N 1300760
775
20
2.3
Recommended installation tension calculation formula: Tst (N)
Tst = 405 x Pm / V + m x V2
Pm: Load power (kW)
m: Correction factor
L: Belt length (mm)
V: Belt speed (m/s)
s: Span length (mm)

12
■Body of tension meter
■Accessory
・Power supply: (AAA type x 2 pieces) Alkaline dry cell is recommended.
・Outer dimension: 160 (H) x 59 (W) x 26 (D)
・Mass: 120 g
・Use and storage temperature range: -10ーC to 50ーC, below 80% (free from condensation)
11.List of U-507 specification
1) Flexible arm type microphone
・ Microphone outer diameter: 12.5 mm
・ Total length: 170 mm
・ Measurable frequency band: 10 Hz - 5000 Hz
* Common to present U-303, 305, and 505
2) Carrying soft case
・ Capable of containing the body of tension meter, flexible arm type microphone, etc.
3) Alkaline dry cell: AAA type x 2 pieces
4) U-507 operation manual
5) Inspection acceptance certificate
6) Certificate
[Option]
1) Cord type microphone
・ Microphone diameter: 12.5 mm
・ Total length: 1m
・ Measurable frequency band: 10 Hz - 5000 Hz
As for installation tension of our toothed belt, no difference is generated between the measured value of U-507 and actual
tension in the measurement range of note 1) - 3) below, and it is not necessary to set any tension correction factor.
Note 1) In measuring the installation tension, basically set the belt on the machine and turn it several times to make the machine
familiar, and measure the tension of 2 spans on belt tension side and loosening side and take the average. When tension of 2
spans is different more than 30% approx, adjust them almost equal and measure again.
Note 2) Measure with a span having the length more than 20 times the tooth pitch.
(Because a value higher than actual tension is displayed when the span is so short as to be affected by rigidity of belt itself.)
Note 3) Set the tension range more than 1/3 of standard installation tension.
(Because a value higher than actual tension is displayed when the tension is so low as to be affected by rigidity of belt itself.)
Measurement in an extremely low tension range is sometimes impossible as is seen from the measurement principle of this
tension meter.
Note 4) It is reasonably estimated that some difference from actual tension is generated as for special belt such as wide belt for
transport and back-ribbed belt, so that simple calibration is required for checking tension which needs precision comparatively.
As for experienced machine, install the belt by a procedure provided for corresponding machine, certify the frequency with
U-507 tension meter, and set the same frequency thereafter, thus controlling the tension.

13
Thanks for purchasing our sonic wave belt tension meter (U-507).
This instrument (body) is guaranteed for 1 year (6 months as for sensor), and any failure found during this period attributed to us
will be repaired free of charge.
Contact our sales department or agency for repairing failure. (Use the enclosed certificate.)
When certification is required, direct the sensor to the transmitter which emits stable frequency sound from 10 to 5000 Hz, and
measure in the same way as measurement of tension, which enables certification easily.
Tension meter certifying device (U-305-OS1) is also in market.
If you contact our sales department, we will certify the unit with charge.
12.Guarantee and after-sales service
TOKYO branch 2-12 AKASAKA 2-CHOME MINATO-KU TOKYO 107-0052 ,JAPAN
TEL:03-3586-2791 FAX:03-3586-2792
NAGOYA branch 17-23 MEIEKIMINAMI 1-CHOME NAKAMURA-KU NAGOYA 450-0003, JAPAN
TEL:052-589-1331 FAX:052-566-2006
Contact the following for inquiry and order.
HEAD OFFICE 4-26 SAKURAGAWA 4-CHOME,NANIWA-KU OSAKA 556-0022,JAPAN
TEL:06-6563-1284 FAX:06-6563-1285


HEAD OFFICE 4-26 SAKURAGAWA 4-CHOME,NANIWA-KU OSAKA 556-0022,JAPAN
TEL:06-6563-1284 FAX:06-6563-1285
July 15, 2005 2,000 parts .D
Table of contents
Other Gates Unitta Asia Measuring Instrument manuals
