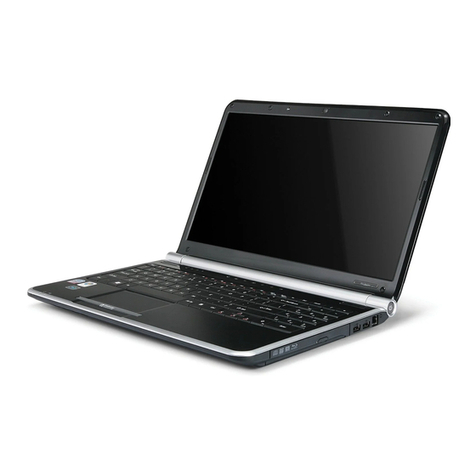
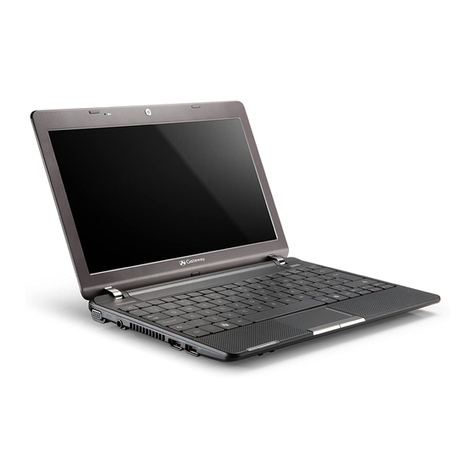
Gateway Solo 2200 User manual

User’s Guide 1

2 Gateway Solo™ 2200 Multimedia Notebook
Contents
Legal notices .............................................................. 4
Specifications .............................................................. 6
If you don’t read anything else . . . Read this! ....................................... 8
System Overview.......................................... 9
Outside the System ......................................................... 10
Inside the System .......................................................... 12
Getting Started .......................................... 13
Connecting the Power ...................................................... 14
Powering up the System ..................................................... 15
Power button setting .................................................... 15
Batteries ................................................................ 17
Charging/discharging the battery pack ........................................ 17
Battery status .......................................................... 17
LCD Display .............................................................. 19
Keyboard ................................................................ 20
Key combinations/hot keys ................................................ 20
EZ Pad Pointing Device ...................................................... 24
Customizing the EZ Pad .................................................. 25
Windows 95 ............................................................. 26
Start button ........................................................... 27
Task bar .............................................................. 27
If you need additional help: ................................................ 27
Modularity/Connectivity ................................... 29
Battery Pack Bay........................................................... 30
Modular Option Bay ........................................................ 31
Modular CD-ROM, floppy disk drive, and battery pack ............................. 31
Swapping modules ...................................................... 32
External Floppy Drive Adapter ................................................. 33
Hard Disk Drive ........................................................... 34
Memory ................................................................ 35
PC Cards ................................................................ 37
Connections ........................................................... 38
FastIR port ............................................................ 38
Gateway Solo™ mini-docking station ............................................ 39
Gateway Solo™ docking station ................................................ 40

User’s Guide 3
Using the System ........................................ 41
Built-in Microphone/Stereo Speakers ............................................. 42
Making an Audio Recording .................................................. 43
Playing a MIDI file .......................................................... 44
Playing external MIDI modules or keyboards .................................. 47
Using the Composite Video Out port ............................................ 48
Using Fast IR Port .......................................................... 48
Playing an Audio CD ....................................................... 49
Using a Modem ........................................................... 50
Advanced Topics ......................................... 51
Power-Saving Modes ....................................................... 52
Standby mode ......................................................... 52
Suspend/Resume mode................................................... 52
Rebooting ............................................................ 52
Setup Menus ............................................................. 53
Main menu ........................................................... 54
Advanced menu ........................................................ 56
Security menu ......................................................... 58
Power menu .......................................................... 61
Exit menu ............................................................ 63
Popup Status Display ....................................................... 64
Port/IRQ Configurations ..................................................... 65
Accessories ............................................. 67
Maintenance/Troubleshooting .............................. 69
Care and Maintenance ...................................................... 70
Virus Checking ............................................................ 71
Hard Drive Utilities ......................................................... 72
Disk defragmenter ...................................................... 72
ScanDisk ............................................................. 72
Reformatting the Hard Disk Drive ............................................... 73
Troubleshooting ........................................................... 74
Start up .............................................................. 74
General .............................................................. 75
Frequently asked questions ................................................ 76
Important Information ...................................................... 78
Calling Gateway 2000 U.S. ................................................ 79
Calling Gateway 2000 outside the U.S. ........................................ 79
Index .................................................. 80

4 Gateway Solo™ 2200 Multimedia Notebook
Legal notices
Gateway Solo™
2200 Multimedia Notebook Gateway 2000®
User’s Guide 610 Gateway Drive
Copyright © 1996 North Sioux City, SD 57049 USA
All rights reserved
This book is protected by copyright and all rights are
reserved. No part of it may be reproduced or transmit-
ted by any means or in any form without prior written
consent from Gateway 2000.
The information in this manual has been carefully
checked and is believed to be accurate. However,
Gateway 2000 assumes no responsibility for any
inaccuracies that may be contained in this manual. In
no event will Gateway 2000 be liable for direct,
indirect, special, incidental, or consequential damages
resulting from any defect or omission in this manual,
even if advised of the possibility of such damages.
In the interest of continued product development,
Gateway 2000 reserves the right to make improve-
ments in this manual and the products it describes at
any time, without notice or obligation.
Trademark acknowledgments
AnyKey, cow spot motif, CrystalScan, Destination,
Gateway 2000, HandBook, RIDE, Store-On-A-Disc,
TelePath, Vivitron, stylized “G” design, and motto
“You’ve got a friend in the business” are registered
trademarks of Gateway 2000. ColorBook, EZ Pad, EZ
Point, Family PC, Gateway 2000 Duoline, Gateway
2000 Solo, GW2K, and Liberty are trademarks of
Gateway 2000. Intel is a registered trademark of Intel
Corporation. Microsoft, MS, MS-DOS, and Windows are
trademarks or registered trademarks of Microsoft
Corporation. All other product names mentioned
herein are used for identification purposes only, and
may be the trademarks or registered trademarks of
their respective companies.
FCC statement
Note: This equipment has been tested and found to
comply with the limits for a Class B digital device
pursuant to Part 15 of the FCC Rules. These limits are
designed to provide reasonable protection against
harmful interference in a residential installation. This
equipment generates, uses, and can radiate radio
frequency energy and, if not installed and used in
accordance with the instructions, may cause harmful
interference to radio communications. However, there is
no guarantee that interference will not occur in a
particular installation. If this equipment does cause
harmful interference to radio or television reception,
which can be determined by turning the equipment off
and on, the user is encouraged to try to correct the
interference by one or more of the following measures:
uReorient or relocate the receiving antenna
uIncrease the separation between the equipment
and receiver
uConnect the equipment into an outlet on a circuit
different from that to which the receiver is con-
nected
uConsult an experienced radio/TV technician for
help.
Caution: Changes or modifications not expressly
approved by the party responsible for compliance could
void the user’s authority to operate the equipment.
To meet FCC requirements, shielded cables are required
to connect this device to any other Class B certified
device.
INDUSTRY CANADA Notice — For the customers in Canada
This apparatus complies with the Class B limits for radio noise
emissions set out in Radio Interference Regulations.
INDUSTRIE CANADA Notice — Pour les utilisateurs au Canada
Cet appareil est conforme aux normes Classe B pourbruits
radioélectriques, spécifiés dans le Règlement sur le broullage.

User’s Guide 5
Cautions and Warnings
Caution: Danger of explosion if battery is incorrectly
replaced. The battery can pose a fire or chemical burn
hazard if mistreated. Do not disassemble, heat above
60°C (140°F), or incinerate. Replace only with the
same or equivalent type recommended by the manu-
facturer. Dispose of used batteries promptly and
according to the manufacturer’s instructions.
Attention: Il y a danger d’explosion s’il y a replacement
incorrect de la batterie. Remplacer uniquenment avec
une batteries du meme type ou d’un type
recommande par le constructeur. Mettre rebut les
batteries usagees conformement aux instructions du
fabricant.
Vorsicht: Explosionsgefahr bei unsachgemäßem
Batteriewechsel. Originalbatterien nur durch gleiche
oder vom Hersteller empfohlene Batterien ersetzen.
Gebrauchte Batterien an Gateway 2000 zurücksenden.
Advarsel: Eksplosjonsfare ved feilaktig skifte av batteri.
Benytt samme batteritype eller en tilsvarende type
anbefalt av apparatfabrikanten. Brukte batterier
kasseres i henhold til fabrikantens instruksjoner.
Caution: Replace the cord if it becomes damaged. U.S.
and Canadian replacement cords must be UL-approved
(CSA certified in Canada) type SPT-2, 18 AWG, 2-
conductor cord with permanently attached NEMA type
1-15P plug at one end and a permanently attached S1
connector body on the other. Cord length may not
exceed 15 feet. Outside the U.S. and Canada the cord
must be rated for at least 250VAC at 10 amps, and
must indicate international safety agency approval. The
plug must be a type appropriate for the country of use.
Obtain replacement cords at an authorized service
center. The replacement must be of the same type and
voltage rating as the original cord.
Vorsicht: Beschädigte Kabel ersetzen. Ersatzkabel in den
USA und Kanada müssen folgende Bedingungen
erfüllen: UL-anerkannter (in Kanada CSA-zertifizierter)
SPT-2 Typ, 18 AWG, 2-Leiter-Kabel mit fest installiertem
NEMA-Typ-1-15P-Stecker und fest installierter
Anschlußdose am anderen Ende, max. 4,57 m Länge.
Außerhalb der USA und Kanada gelten folgende
Bedingungen: Kabel für mindestens 250 V
Wechselstrom bei 10 A, anerkannt durch internationale
Sicherheitsbehörde, landesspezifischer Stecker.
Ersatzkabel nur im Fachhandel erwerben. Nur
Ersatzkabel des gleichen Typs und für die gleiche
Spannung (Voltzahl) wie das Originalkabel verwenden.
Warning: Always plug the cord into an easily accessible
outlet near the equipment so that unplugging the cord
is an easy way to shut off power.
Do not attempt to disassemble the AC adapter. The AC
adapter has no user-replaceable or user-serviceable
parts inside. The AC adapter has dangerous voltages
that can cause serious personal injury or death. Return
defective AC adapters to Gateway 2000.
The AC adapter is intended for use with a computer.
Both must meet EN 60950.
Achtung: Netzkabel stets in eine gut zugängliche
Steckdose nahe der Ausrüstung einstecken, um durch
einfaches Ziehen des Steckers jederzeit die
Stromversorgung unterbrechen zu können.
Den Adapter unter keinen Umständen
auseinanderbauen. Der Adapter enthält keine vom
Benutzer zu ersetzenden oder zu wartenden
Bestandteile. Die Spannung im Adapter kann beim
Auseinanderbau zu Verletzungen oder Tod führen.
Beschädigte Adapter an Gateway 2000 zurücksenden.
Der Adapter ist für den Gebrauch mit einem Computer
bestimmt. Adapter und Computer müssen die Norm
EN 60950 erfüllen.
Environmental considerations
Your Gateway Solo 2200 Multimedia Notebook has
been engineered to provide many years of reliable
service. However, you should give it the same reason-
able care and protection that you would any other
electronic equipment. Damage caused by dropping the
Gateway Solo 2200 Multimedia Notebook, impact with
another object, or immersion in liquids is not covered
by the warranty. Never expose the Gateway Solo 2200
Multimedia Notebook to rain, snow, or moisture. Avoid
locations with high levels of dirt, dust, or smoke.
Inourefforttousenature’sresourcesefficientlyand
wisely,Gateway2000printsallmanualsonrecycled
papersthatmeettheminimumrequirementsestablished
bytheFederalEPAinitsguidelinesforrecycledpaper
products.
Printedin the United States ofAmerica
CAUTION: DO NOT OPEN. NO USER SERVICEABLE PARTS INSIDE.
ATTENTION: NE OUVRIER PAS. PARTIS RÉPARABLES UNIQUEMENT Á L'USINE.
VORSICHT: NICHT ÖFFNEN. ENTHÄLT KEINE VOM BENUTZER ZU
WARTENDEN BESTANDTEILE.
Part # SYSMAN037AAUS
8501164
MAN US SYS SL22 USR GDE
1/97

6 Gateway Solo™ 2200 Multimedia Notebook
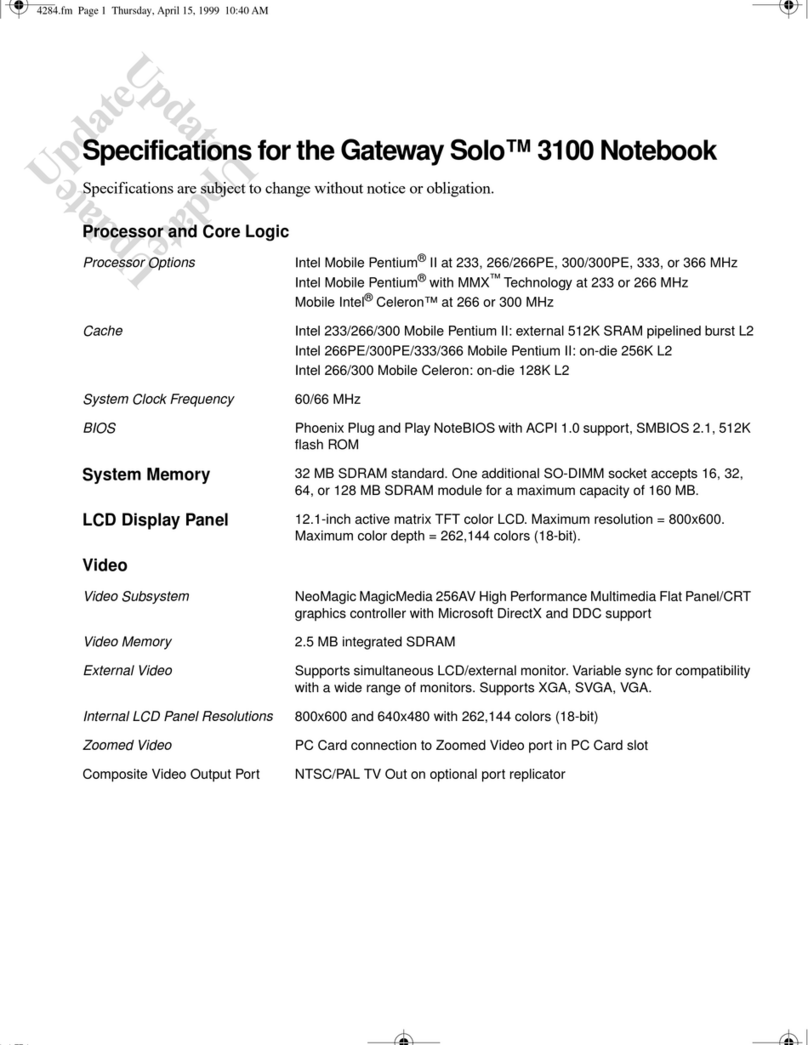
Specifications
(Specifications are subject to change without notice or obligation.)
CPU
Intel Pentium™ 120, 133, 150 MMX or 166 MHz MMX, TCP packaging
Cache
256K pipelined burst level 2
RAM
EDO; 16MB minimum, expandable to 80MB
Core logic
Intel 82430MX (Mobile Triton I), PCI bus
Clock frequency
50/60/66MHz
BIOS
Phoenix; 256KB Flash ROM
LCD panel size
11.3″TFT, 12.1″TFT
LCD panel resolution
SVGA 800 ×600
LCD panel color depth
TFT: 65,536 colors (16-bit) at SVGA resolution;
External video
Supports simultaneous LCD/External monitor
External video resolution
640 ×480 with 64 million colors to 1280 ×1024 with 256 colors
Video
Chips & Technologies 65554 with DCI/Direct draw capability, GUI motion
video acceleration, continuous X/Y upscaling to 1024×768, and an
enhanced Bit-BLT engine
Video interface
32-bit PCI bus with 64-bit memory interface
Video memory
2MB EDO RAM
Zoomed video
PC Card connection to zoomed video port
Keyboard
85 keys (U.S.), full size 19mm pitch; 2.7mm travel; provides same functions
as standard Windows 95 AT keyboard; US, UK English, German, French,
and Japanese available
Mouse/Pointer
EZ Pad integrated pointer; PS/2-type connector for external mouse
External ports
Fast IR port, serial port (16550A-compatible), parallel (bi-directional, EPP,
ECP), video, PS/2 keyboard/mouse, docking station connector, PC Card
Type III or two Type I or II card socket, line in, speaker out, and microphone
Battery pack
Li-Ion 35Whrs, 14.4V; or NiMH 33.6Whrs, 9.6V; Batteries can be ”warm-
swapped“ in the battery bay without rebooting. Recharges in system.
Conforms to APM 1.2 standard
Second battery
A second battery can be installed and charged in the modular drive bay
Battery life
Approximately 2.5 hours with one battery and Advanced Power Manage-
ment (APM) enabled
Battery charge time
3.0 hours for either battery pack type

User’s Guide 7
AC adapter
19VDC, 45W output; auto voltage adjustment between 100 and 240V
Modular drive bay
Internal 1.44MB 3.5″floppy drive, 5″CD-ROM drive, or battery pack
Hard disk drive
Removable; accepts 2.5″, 12.5mm hard disk drive; 810MB, 1.0GB, 1.3GB
and 2GB
Hard disk controller
Enhanced IDE, on PCI bus
Floppy disk drive
Removable; 1.44MB 3.5″floppy drive; ”hot-swappable“ with optional
second battery pack; optional adapter allows external connection
CD-ROM drive
Removable; 8X; XA mode 2 and CD enhanced compatible
Audio chipset
ESS ES1878S audio chip, ES938 sound effects chip, ES690 wavetable
synthesizer chip
Speakers
Speakers built-in to palm rest
Microphone
Omnidirectional microphone under LCD panel on right
Docking solutions
Several solutions offered, including a mini-docking station with the follow-
ing: one serial, one parallel, VGA output, DC-in, line in, microphone in,
headphones out, PS/2 keyboard, PS/2 mouse, MIDI/game port, PC Card
slots for one Type III or two Type II; ”hot-dockable“
Accessories
AC adapter; IR (infrared) module; Nickel Metal Hydride (NiMH) battery,
lithium-Ion (Li-Ion) battery; docking station solutions; automobile DC
adapter; hard drives; memory modules; external floppy disk drive adapter;
leather carrying case, nylon carrying case; external speakers; modem;
ethernet cards
Dimensions
(W ×D ×H) 11.3″×8.97″×1.93″(288mm ×228mm ×49mm)
Weight
System weight: 6.9 lbs with battery and CD-ROM drive
Traveling weight: 7.7 lbs with battery, CD-ROM drive and AC adapter
Operating temperature
5 to 35°C
Storage temperature
-20 to 60°C
Operating humidity
20 to 80%; noncondensing relative humidity
Storage humidity
8 to 90%; noncondensing relative humidity
Operating altitude
8000 feet; nonpressurized
(Doesnot refer to pressurized commercial aircraft)
Storage altitude
40,000 feet; nonpressurized
Certification
FCC Class B, UL1950, TUV/EN60950, CSA 22.2
ManyGateway2000productsarecustomengineeredbyoursupplierstoGateway2000specifications,andmayvary
withsimilarly marketedproducts.

8 Gateway Solo™ 2200 Multimedia Notebook
If you don’t read anything else . . . Read this!
Your Gateway Solo™ 2200 Multimedia Notebook provides all the power and
multimedia capabilities of a full-size desktop system, yet allows you the
convenience of a lightweight portable notebook.
The Gateway Solo 2200 contains the following special features:
Wavetable Synthesis — One of two options for playing MIDI files, the
wavetable synthesizer uses digital samples (recordings) of actual instruments
for a more realistic sound quality.
System Modularity — The system has a modular option bay that accepts
either a floppy disk drive module, a CD-ROM module or an additional battery
pack.
Floppy Disk Drive Module — An optional external adapter allows you to use
the floppy disk drive module and CD-ROM at the same time, or use the
floppy disk drive module with an additional battery pack.
Memory Modules — Install additional modules with ease.
Hard Drive Modules — To swap out the hard drive with another hard drive.
Optional Docking Solutions — Use to save time by plugging in peripherals
and leaving them plugged in. The docking solutions easily connect to the
rear of the system, enabling all attached peripherals.
Dual Battery Operation — To operate with two batteries at the same time,
install one battery pack in the battery bay and an optional second battery
pack in the modular option bay. This option is ideal when you travel, provid-
ing additional hours of uninterrupted use.
Backup Password Protection — Selecting this option from the Security menu
in the Setup menus will allow you to access your system if you have forgot-
ten your password. Place and store the supervisor password on a diskette in
a hidden file.
Popup Status Display — Through a set of hot key options you can monitor
battery status, temporarily change the power management level, view AC
adapter connection, view mute function enabled/disabled, change volume
settings, or change brightness levels.
Zoomed Video — The video information for most PC Cards goes through
the CPU or system bus, taking up additional processing time. Zoomed video
routes the video information directly to the video card, freeing up the proces-
sor for other tasks.

User’s Guide 9
1
System Overview
Outside the System.................. 10
Inside the System ................... 12

10 Gateway Solo™ 2200 Multimedia Notebook
Outside the System
Take a quick tour of the system to familiarize yourself with the options
available.
Figure 2. Bottom View
Rubber footRubber foot Retaining pin guide hole:
For optional docking station. Retaining pin guide hole:
For optional docking station.
Battery bay
release latch Expansion memory
access panel Hard drive
access cover
Modular option bay
release latch
Cover latch
Modular option bay:
CD-ROM module installed.
Battery bay
Figure 1. Front View

User’s Guide 11
Floppy/Parallel Port:
Connect an external floppy
disk drive or other parallel
device here.
240-Pin Docking Station Port:
Connect optional docking station
solutions here. VGA Port:
Connect any standard
monitor here.
Serial Port:
Connect any serial
device here.
Power Connector:
Connect the AC
adapter here.
Figure 3. Rear View
Figure 5. Left Side View
Mic:
Connect an external
microphone here (disables
internal microphone).
Line in:
Connect
external audio
source here.
Figure 4. Right Side View
PC Card eject buttons
Hard drive access
PC Card slots:
Accepts two Type I
or Type II cards or
one Type III card.
Headphones:
Connect headphones or
external speakers here
(disables built-in speakers).
Fast IR port:
Place the transmitter/receiver within
two feet so it can “see” the port. Kensington lock slot
Composite Video out
port:(RCA phono jack
connector)
PS/2 port:
Connect an
external mouse or
keyboard here.

12 Gateway Solo™ 2200 Multimedia Notebook
Inside the System
Pad Lock LED Scroll Lock LED Floppy disk
drive LED Hard disk
drive LED
Caps Lock LED
Figure 7. System LEDs
Battery charging
power LED
Power button
Full-sized keyboard:
Windows 95 keys and
special function keys.
Stereo speakers
Stereo speakers
Modular option bay:
Floppy disk drive
module installed,
accepts CD-ROM or
second battery.
Battery bay
EZ Pad™ pointing device:
Controls the cursor like a
mouse.
LCD color display:
11.3-inch TFT, or
12.1-inch TFT
System LEDs
Figure 6. Interior View
Power LED
Built-in microphone

User’s Guide 13
2
Getting Started
Connecting the Power ............... 14
Powering Up the System ............. 15
Batteries .......................... 17
LCD Display....................... 19
Keyboard ......................... 20
EZ Pad............................ 24
Windows 95 Basics.................. 26

14 Gateway Solo™ 2200 Multimedia Notebook
Connecting the Power
The first time you use the Gateway Solo™ 2200 Multimedia Notebook, use
the AC adapter to fully charge the battery and provide the system with a
constant supply of power.
Caution: Replace the power cord if it becomes damaged. The replacement
cord must be of the same type and voltage rating as the original cord.
To connect the AC adapter to the system:
1. Plug the AC adapter into the system’s power connector.
2. Connect the power cord to the AC adapter.
3. Plug the power cord into an electrical outlet.
Figure 8. AC Power Connection
Warning: Do not attempt to disassemble the AC adapter. The AC adapter
has no user-replaceable or user-serviceable parts inside. The AC adapter has
dangerous voltages that can cause serious personal injury or death. Return
defective AC adapters to Gateway 2000.
AC adapter
Power cord

User’s Guide 15
Powering up the System
Slide the latch on the front face of the system to the right to release the
cover, and open up the system. The power button is located in the upper left
corner on the notebook surface.
The power button on your system is preset in On/Off mode. However, you
can set it to function either inOn/Off orSuspend/Resume mode. This setting
affects the manner in which your system operates.
Figure 9. Locating the Power Button
Power button setting
When the power button setting in the Power menu is On/Off and:
uthe system is off, press the power button to turn
On
the computer.
uthe system is on, press the power button to turn the computer
com-
pletely Off
.
Remember, turning the system completely off when the power button is
set forOn/Off mode causes every part of the computer to power down.
Any unsaved work will be lost!
Pressing the power button will
reboot
the
system.
When the power button setting in thePower menu is Suspend/Resume
and:
uthe system is off (in Suspend mode), press the power button to
Resume
power
to the computer.
uthe system is on, press the power button to cause the computer to enter
Suspend mode
.
Power button

16 Gateway Solo™ 2200 Multimedia Notebook
uPress and hold the power button for two seconds to turn the system
completely Off
.
Caution: Any unsaved work can be lost if you hold the power button down
for too long.
Remember, when the system is on and set forSuspend/Resume mode, press-
ing the power button does not completely turn off the computer and
the
system does not reboot
. You must press and hold the power button for
two seconds to completely power down the system.
To check/change the power button setting:
1. Turn the system on.
2. Press the F2 key when you see the message Press <F2> to access
SETUP in the lower left corner of the display, before Windows 95 loads,
to access the Setup menus. The system beeps, then theMain menu
appears.
3. Using the Right Arrow key, move to thePower menu.
4. The first available option isPowerbuttonmode:. If the setting displayed is
the one you want, go to Step 6.
5. Press theSpacebar to change the setting.
6. Press theESC key to access theExit menu.
7. PressEnter toSavechanges&exit, then pressEnter again, or use the
Down Arrow key to select any other option.

User’s Guide 17
Batteries
When you first receive your system, the ”smart“ battery is installed in the
battery bay, but will not have a full charge. The battery bay is located in the
right front panel of the system. We recommend that you perform the ”learn-
ing cycle“ test outlined in this section. This test ”teaches“ the battery to hold a
longer charge, increases the accuracy of battery gauging and extends the
battery’slife.
Charging/discharging the battery pack
The battery must be installed in the notebook and connected to an AC
power source to charge completely. The battery will charge if the system is
operating, as long as the AC adapter is properly connected. For twice the
battery life, you can install an optional second battery pack in the modular
option bay. The notebook can run on a fully charged battery for about two
and a half hours of normal use before the battery needs recharging.
Two options are offered for powering your Solo: the Lithium Ion (Li-Ion) and
the Nickel Metal Hydride (NiMH). Both need the same Learning Cycle,
require about three hours to fully charge, and are interchangeable.
Note: Your battery performance may vary, depending on power manage-
ment settings and usage.
To perform a learning cycle test on the battery pack:
1. Charge the battery
until the charge light (LED) goes out
. You can check
the charge by pressing theFn key together with theF2 (Popup) key,
which activates the popup window and should read “FUL.”
2. Fully discharge the battery pack. Disconnect the AC adapter. Be sure the
CMOS option “Battery low suspend:” is disabled, then run the notebook
until it shuts off (using battery power only).
3. Begin charging the battery pack. Once the notebook has shut off from
Step 2, connect the AC adapter and wait for the charging LED to light.
At this point, the Learning Cycle is complete.
Battery status
You can check battery status several ways.
u Click onStart,Settings andControlPanel. Double click on thePowericon.
You can view the battery status and set power preferences from this

18 Gateway Solo™ 2200 Multimedia Notebook
screen, which stay in effect until they are changed in Windows. Click on
theXin the upper right corner of the screen to close it.
u Press theFn key together with the F2 (Popup) key, or theF5 (PM) key.
Thepowerstatusdisplay appears in the upper left corner of the display.
This display monitors battery status, power management selection, and
mute function status. BAT1 monitors the status of the battery pack in the
battery bay. BAT2 monitors the status of the optional second battery
pack, which can be installed in the modular option bay. After four sec-
onds of inactivity, the display will disappear.
u Position the cursor over thepowercord (AC) orbattery icon in the lower
right corner of the task bar. A battery status screen will appear. Moving
the cursor anywhere on the display causes the screen to disappear.
u Click twice on thepowercord orbattery icon in the lower right corner of
the task bar. A more detailed battery status screen will appear. Click on
theXin the upper right corner of the screen to close it.
When the battery level gets low:
u The system emits three beeps
u The battery charging power LED flashes
u Thebattery icon in the lower right of the task bar has a red ”X“ over it
u Thepowerstatusdisplay appears, flashing a warning in the upper left
corner of the display
u TheLowBattery screen appears, advising you to change your battery or
switch to AC power immediately to prevent losing your work.
Once the battery pack is fully discharged, reconnect the AC adapter to the
notebook to recharge the battery.

User’s Guide 19
LCD Display
The Gateway Solo™ 2200 Multimedia Notebook features a built-in, backlit,
color LCD display. This display is either an 11.3-inch TFT or 12.1-inch TFT
display. Each of these SVGA displays provides sharp, crisp resolution and
crystal clear color.
Figure 10. LCD Display
Tilt the system’s entire cover forward or backward to adjust the viewing
angle. Press the Fn key together with theUp Arrow and Down Arrow keys to
control display brightness.
Pressing theFn key together with theF1 (Display Off) key will toggle off the
display and save power. Press any key to reactivate the display.
A few small dots of color may occasionally appear on the screen. This is
normal and does not affect the overall screen image.
Connect an external monitor to the computer through the VGA port on the
rear of the system or the VGA port on the optional mini-docking station.
Press theFn key with theF3 (LCD/CRT) key to toggle between active
displays.
Note: This system ships with theAutodimwithbatteryonly feature enabled.
Auto dim cuts LCD power 50% when the system is operating on battery
power.

20 Gateway Solo™ 2200 Multimedia Notebook
Keyboard
The Gateway Solo™ 2200 Multimedia Notebook features an 85-key key-
board. To provide the full functionality of a 101/102-key keyboard, many of
these keys have been assigned alternate functions, including shortcut keys
for Windows®95 and Popup Status Display menus. Connect an external
keyboard through the PS/2 port on the rear of the system, or the PS/2 (key-
board) port on the optional docking solutions.
Hot Function Keys
Windows 95
Start Button
Key
Windows 95
Start Button
Key
Numeric
Keypad
Fn Key
Figure 11. Keyboard
Key combinations/hot keys
For normal key functions:
uPress the key alone to get standard lower case letters, numerals and
punctuation marks.
uPress the key together with theShift key to get standard upper case
letters and symbols.
Windows 95
Menu Key Brightness keys
Table of contents
Other Gateway Laptop manuals

Gateway
Gateway M-6873h User manual

Gateway
Gateway M275 User manual

Gateway
Gateway MX7118 Parts list manual

Gateway
Gateway LT 1000 User manual

Gateway
Gateway P-6301 User manual

Gateway
Gateway MX6025h User manual

Gateway
Gateway M680 User manual

Gateway
Gateway Solo 9300 Quick start guide

Gateway
Gateway MX7118 User manual

Gateway
Gateway MT6704h User manual

Gateway
Gateway MX6243m User guide

Gateway
Gateway M-1408j User manual

Gateway
Gateway 200 User manual

Gateway
Gateway ML6227q User manual

Gateway
Gateway NV55S02U User manual

Gateway
Gateway 450ROG User manual

Gateway
Gateway 450ROG User manual

Gateway
Gateway 400VTX User instructions

Gateway
Gateway MX6450 User manual

Gateway
Gateway LT21 series User manual