Gateway 30 inch LCD TV User manual

User Guide
Gateway 30 inch LCD TV


i
www.gateway.com
Contents
1 Introducing Your Gateway LCD TV . . . . . . . . . . . . . . . . . . . . . . . . . . . . . . . 1
Package contents . . . . . . . . . . . . . . . . . . . . . . . . . . . . . . . . . . . . . . . . . . . . . . . . . . . 2
Features . . . . . . . . . . . . . . . . . . . . . . . . . . . . . . . . . . . . . . . . . . . . . . . . . . . . . . . . . . . 3
Front panel controls . . . . . . . . . . . . . . . . . . . . . . . . . . . . . . . . . . . . . . . . . . . . . . . . . . 4
Back panel connections . . . . . . . . . . . . . . . . . . . . . . . . . . . . . . . . . . . . . . . . . . . . . . . 5
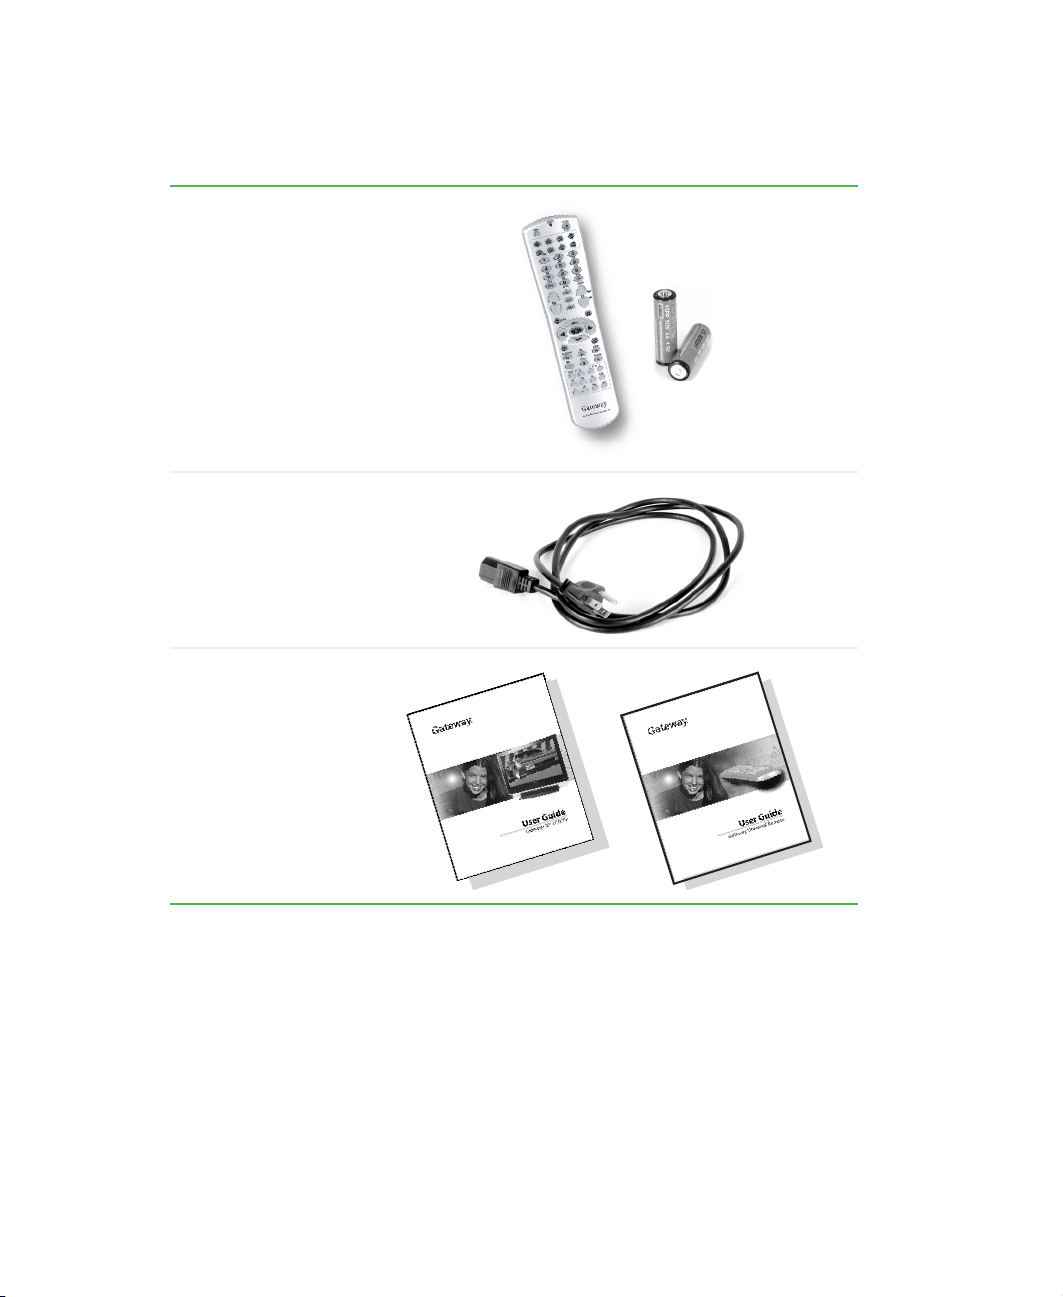
Accessories . . . . . . . . . . . . . . . . . . . . . . . . . . . . . . . . . . . . . . . . . . . . . . . . . . . . . . . . 6
2 Watching TV . . . . . . . . . . . . . . . . . . . . . . . . . . . . . . . . . . . . . . . . . . . . . . . . . . . . . 7
Connecting your satellite set-top box . . . . . . . . . . . . . . . . . . . . . . . . . . . . . . . . . . . . 8
Using component video . . . . . . . . . . . . . . . . . . . . . . . . . . . . . . . . . . . . . . . . . . . . 8
Connecting off-air TV or cable TV . . . . . . . . . . . . . . . . . . . . . . . . . . . . . . . . . . . . . . . 9
Turning on the power . . . . . . . . . . . . . . . . . . . . . . . . . . . . . . . . . . . . . . . . . . . . . . . . 10
Watching a TV program . . . . . . . . . . . . . . . . . . . . . . . . . . . . . . . . . . . . . . . . . . . . . . 11
3 Connecting Other Components . . . . . . . . . . . . . . . . . . . . . . . . . . . . . . . . . 13
Understanding video connections . . . . . . . . . . . . . . . . . . . . . . . . . . . . . . . . . . . . . . 14
Connecting your DVD player . . . . . . . . . . . . . . . . . . . . . . . . . . . . . . . . . . . . . . . . . . 15
Using component video . . . . . . . . . . . . . . . . . . . . . . . . . . . . . . . . . . . . . . . . . . . 15
Using S-Video . . . . . . . . . . . . . . . . . . . . . . . . . . . . . . . . . . . . . . . . . . . . . . . . . . 16
Using composite video . . . . . . . . . . . . . . . . . . . . . . . . . . . . . . . . . . . . . . . . . . . 17
Connecting your HDTV set-top box . . . . . . . . . . . . . . . . . . . . . . . . . . . . . . . . . . . . . 18
Using component video . . . . . . . . . . . . . . . . . . . . . . . . . . . . . . . . . . . . . . . . . . . 18
Using VGA video . . . . . . . . . . . . . . . . . . . . . . . . . . . . . . . . . . . . . . . . . . . . . . . . 19
Connecting your VCR or video camera . . . . . . . . . . . . . . . . . . . . . . . . . . . . . . . . . . 20
Using S-Video . . . . . . . . . . . . . . . . . . . . . . . . . . . . . . . . . . . . . . . . . . . . . . . . . . 20
Using composite video . . . . . . . . . . . . . . . . . . . . . . . . . . . . . . . . . . . . . . . . . . . 21
Connecting external amplified speakers . . . . . . . . . . . . . . . . . . . . . . . . . . . . . . . . . 22
Connecting an external receiver or amplifier . . . . . . . . . . . . . . . . . . . . . . . . . . . . . . 23
Connecting a computer . . . . . . . . . . . . . . . . . . . . . . . . . . . . . . . . . . . . . . . . . . . . . . 24
Using DVI video . . . . . . . . . . . . . . . . . . . . . . . . . . . . . . . . . . . . . . . . . . . . . . . . . 24
Using VGA video . . . . . . . . . . . . . . . . . . . . . . . . . . . . . . . . . . . . . . . . . . . . . . . . 25
4 Adjusting Your LCD TV Settings . . . . . . . . . . . . . . . . . . . . . . . . . . . . . . . . 27
Understanding viewing features . . . . . . . . . . . . . . . . . . . . . . . . . . . . . . . . . . . . . . . 28
Viewing modes . . . . . . . . . . . . . . . . . . . . . . . . . . . . . . . . . . . . . . . . . . . . . . . . . 28
Picture-in-Picture (PIP) mode . . . . . . . . . . . . . . . . . . . . . . . . . . . . . . . . . . . . . . 29
Using the on-screen display . . . . . . . . . . . . . . . . . . . . . . . . . . . . . . . . . . . . . . . . . . 31
OSD menus and options . . . . . . . . . . . . . . . . . . . . . . . . . . . . . . . . . . . . . . . . . . 32
Using parental controls . . . . . . . . . . . . . . . . . . . . . . . . . . . . . . . . . . . . . . . . . . . . . . 36
Setting parental controls . . . . . . . . . . . . . . . . . . . . . . . . . . . . . . . . . . . . . . . . . . 36
Setting a password . . . . . . . . . . . . . . . . . . . . . . . . . . . . . . . . . . . . . . . . . . . . . . 39

ii www.gateway.com
Using key lockout . . . . . . . . . . . . . . . . . . . . . . . . . . . . . . . . . . . . . . . . . . . . . . . . 40
Using IR lockout . . . . . . . . . . . . . . . . . . . . . . . . . . . . . . . . . . . . . . . . . . . . . . . . . 41
Setting the sleep timer . . . . . . . . . . . . . . . . . . . . . . . . . . . . . . . . . . . . . . . . . . . . . . . 41
5 Maintenance and Troubleshooting . . . . . . . . . . . . . . . . . . . . . . . . . . . . . . 43
Important safeguards . . . . . . . . . . . . . . . . . . . . . . . . . . . . . . . . . . . . . . . . . . . . . . . .44
Cleaning and maintenance . . . . . . . . . . . . . . . . . . . . . . . . . . . . . . . . . . . . . . . . . . . . 45
Cleaning the screen . . . . . . . . . . . . . . . . . . . . . . . . . . . . . . . . . . . . . . . . . . . . . . 45
Cleaning the exterior . . . . . . . . . . . . . . . . . . . . . . . . . . . . . . . . . . . . . . . . . . . . . 46
Troubleshooting . . . . . . . . . . . . . . . . . . . . . . . . . . . . . . . . . . . . . . . . . . . . . . . . . . . . 46
Telephone support . . . . . . . . . . . . . . . . . . . . . . . . . . . . . . . . . . . . . . . . . . . . . . . 48
A Safety, Regulatory, and Legal Information . . . . . . . . . . . . . . . . . . . . . . 49
Index . . . . . . . . . . . . . . . . . . . . . . . . . . . . . . . . . . . . . . . . . . . . . . . . . . . . . . . . . . . . . . 55

Chapter 1
1
Introducing Your Gateway
LCD TV
■Package contents
■Features
■Controls and connections
■Accessories

2www.gateway.com
Package contents
Along with your LCD TV, the packaging box contains the following items:
Remote control and
two AA batteries
Power cord
LCD TV user guide
and remote control
user guide

3
www.gateway.com
Features
Your LCD TV features:
■A bright, flicker-free image
■Automatic conversion of film content for correct display with minimal screen noise
■Accurate color processing
■High-definition component video input that automatically synchronizes the display to
match the incoming source
■Picture-in-picture (PIP) mode that lets you watch two programs simultaneously
■HDTV signal compatibility using an external HDTV decoder with VGA, DVI, or
component video outputs
■Digital zoom modes get rid of “black bars” around the display image
■Built-in internal amplifier and speakers
■A built-in Digital Visual Interface (DVI) to eliminate the need for digital-to-analog
conversion with HDCP.
■1280 × 768 SXGA support for computer input
■720p and 1080i support for HDTV signals
■Audio and composite video output that lets you watch a program on a separate
television or VCR.

4www.gateway.com
Front panel controls
Button Description
Remote control sensor Receives signals from the remote control. Do not block.
Power/Status LED Turns your LCD TV on and off. When you turn your LCD TV on or
off, wait three seconds before pressing this button again.
■Not lit - No AC power detected. The power cord is not connected.
■Solid yellow - Your LCD TV is off.
■Solid green - Your LCD TV is on.
Auto Automatically adjusts the display to the best settings in VGA and
DVI modes.
OSD active: Accepts an on-screen display (OSD) menu item. For
more information, see “Using the on-screen display” on page 31.
Volume and Increases or decreases the volume.
OSD active: Adjusts on-screen display (OSD) options. For more
information, see “Using the on-screen display” on page 31.
Channel and Changes the channel.
OSD active: Selects on-screen display (OSD) options. For more
information, see “Using the on-screen display” on page 31.
Menu Opens and closes the on-screen display (OSD).
Input Switches between available input sources.
Input
Auto
Menu
Channel
and
Volume
and
Power
Remote
control sensor

5
www.gateway.com
Back panel connections
Connector Description
Service Connects to a wired remote. For more information, see the documentation
on the Gateway Web site at support.gateway.com/support/manlib/.
DVI/Audio In Connects to a DVI audio/video device, such as a computer or set-top box.
VGA/Audio In Connects to a VGA audio/video device, such as a computer or set-top box.
Component HDTV In Connects to a component audio/video device, such as an HDTV set-top box.
(480i, 480p, 720p, and 1080i)
Component DVD In Connects to a component DVD player. (480i/480p only)
AV In Connects to two composite or S-Video audio/video devices, such as a VCR.
Antenna Connects to a VHF/UHF antenna or cable TV.
AV Out Connects to an audio/video device, such as a receiver or television.
DVI/Audio In
VGA/Audio In
Component HDTV In
Antenna
AV In AV Out
Component DVD In
Service

6www.gateway.com
Accessories
You can purchase these optional accessories for your LCD TV:
■Cable kits. Gateway cable kits consist of high-quality gold cables of various lengths,
including:
■DVI-D video cable
■RCA audio cable
■RCA component video cable
■RCA composite video cable
■S-Video cable
■VGA video cable
■Wall mount kit. The wall mount kit contains all of the required hardware for mounting
your LCD TV on your wall. (Gateway recommends you use a qualified installer.) For
more information, see the Wall Mount Installation Guide at support.gateway.com.
Contact Gateway for these and other accessories.

Chapter 2
7
Watching TV
■Connecting a satellite dish
■Connecting cable TV or an off-air
antenna
■Turning on your LCD TV
■Watching a TV program

8www.gateway.com
Connecting your satellite set-top box
Using component video
To connect your satellite set-top box using component video:
1Make sure that the power button on your LCD TV is turned off.
2Connect the green Y jack on the back of your satellite set-top box to the
COMPONENT HDTV green Y jack on the back of your LCD TV.
3Connect the red PRor CR jack on the back of your satellite set-top box to the
COMPONENT HDTV red PR/CRjack on the back of your LCD TV.
4Connect the blue PBor CBjack on the back of your satellite set-top box to the
COMPONENT HDTV blue PB/CBjack on the back of your LCD TV.
5Connect the red (R) and white (L) audio jacks on the back of your satellite set-top
box to the COMPONENT HDTV R and L audio-in jacks on the back of your LCD TV.

9
www.gateway.com
Connecting off-air TV or cable TV
To connect off-air TV or cable TV using coaxial (RF) audio and video:
1Make sure that the power button on your LCD TV is turned off.
2Connect the coaxial (RF) connector from your antenna or cable box to the Ant.
connector on the back of your LCD TV.
If you have connected a VCR to the Ant. connector on the back of your LCD TV, connect
your off-air TV or cable TV cable to the Ant. connector on the back of your VCR.
Warning If an outdoor antenna or cable system is connected to your LCD TV,
make sure that the antenna or cable system is correctly grounded.
For more information, see “Television antenna connectors protection
(for systems fitted with TV/cable TV tuner cards)” on page 51.
- OR -

10 www.gateway.com
Turning on the power
To turn on the power:
1Connect the power cord to the power cord connector on the back of your LCD TV,
then plug the other end of the power cord into a correctly grounded electrical outlet
or surge protector.
2Press the power button.
Warning For added protection during a lightning storm or when your LCD TV
is left unattended or unused for long periods of time, unplug it from
the wall outlet and disconnect the antenna or cable system.
Power button

11
www.gateway.com
Watching a TV program
To watch a TV program, make sure that:
■Any cable, satellite, or off-air antenna connections are secure.
■The power cord is plugged into a correctly grounded electrical outlet or surge protector.
To watch a TV program:
1Press the power button on the front of your LCD TV. The Status LED on the front
turns green.
2Select TV using the INPUT button on the front of your LCD TV if you are watching a
cable TV box or off-air antenna.
- OR -
Select HDTV using the INPUT button on the front of your LCD TV if you are watching
your satellite dish.
You should be able to see a picture. If you do not, make sure that all connections are
secure and you have selected the correct video input source.
3Press the CH and buttons on the front of your LCD TV to change the channel.
You can also use your remote control to change these settings. For more information, see
your remote control user guide.
To make additional adjustments to your LCD TV, see “Adjusting Your LCD TV Settings”
on page 27.
Important The CH and buttons on the front of the television do not work
if you are watching a program using HDTV input.

12 www.gateway.com

14 www.gateway.com
Understanding video connections
Your LCD TV has four types of standard video connections. You should use the best
connection available to get the best display. For example, if your DVD player supports a
component video connection, connect the DVD player to your LCD TV using component
video instead of composite video or S-Video.
Warning To prevent electrical shock, unplug your LCD TV before connecting
any external components. To restart your LCD TV, see “Turning on
the power” on page 10.
Connection Quality Cable and Connector Description
Basic Coaxial (RF). The video and audio signals are
both carried in one cable (the other three
connection types only handle video, and
require separate connections for sound).
Coaxial is the only way to connect an antenna
to your LCD TV.
Good Composite. The video signal is carried through
a single “pin.” This connection method is the
one that is most commonly found on devices.
Better S-Video. The video signal is split into two
signals, black-and-white and color. Text
displayed on-screen through this connection
will be noticeably sharper than composite or
coaxial (RF).
Best Component. The video signal is split into three
signals, two color, and one black-and-white.
Use component video to take advantage of the
superior picture provided by signal sources as
HDTV and DVD.

15
www.gateway.com
Connecting your DVD player
Using component video
To connect your DVD player using component video:
1Make sure that the power button on your LCD TV is turned off.
2Connect the green Y jack on the back of your DVD player to the DVD green Y jack
on the back of your LCD TV.
3Connect the red PRor CRjack on the back of your DVD player to the DVD red PR/CR
jack on the back of your LCD TV.
4Connect the blue PBor CBjack on the back of your DVD player to the DVD blue
PB/CBjack on the back of your LCD TV.
5Connect the red (R) and white (L) audio jacks on the back of your DVD player to the
DVD R and L audio-in jacks on the back of your LCD TV.
6Restart your LCD TV. See “Turning on the power” on page 10.
7Select DVD using the INPUT button on the front of your LCD TV.
You should be able to see a picture. If you do not, make sure that all connections are
secure and you have selected the correct video input source.
Important You can connect 480i (interlaced) and 480p (progressive scan) DVD
players in this way. You cannot use 480p as a Picture-in-Picture (PIP)
source.

16 www.gateway.com
Using S-Video
To connect your DVD player using S-Video:
1Make sure that the power button on your LCD TV is turned off.
2Connect the S-Video jack on the back of your DVD player to the AV2/S IN S-VIDEO
jack on the back of your LCD TV.
3Connect the red (R) and white (L) audio jacks on the back of your DVD player to the
AV2/S IN R and L audio-in jacks on the back of your LCD TV.
4Restart your LCD TV. See “Turning on the power” on page 10.
5Select AV2/S using the INPUT button on the front of your LCD TV.
You should be able to see a picture. If you do not, make sure that all connections are
secure and you have selected the correct video input source.
Other manuals for 30 inch LCD TV
3
This manual suits for next models
1
Table of contents
Other Gateway LCD TV manuals

Gateway
Gateway 30 inch LCD TV User manual

Gateway
Gateway 23-inch User manual

Gateway
Gateway 23-inch User manual

Gateway
Gateway 18-inch LCD TV User manual

Gateway
Gateway 17-inch User manual

Gateway
Gateway 23-inch General instructions

Gateway
Gateway GTW-L17M103 User manual

Gateway
Gateway 17-inch User manual

Gateway
Gateway 30 inch LCD TV User manual

Gateway
Gateway 13-inch User manual