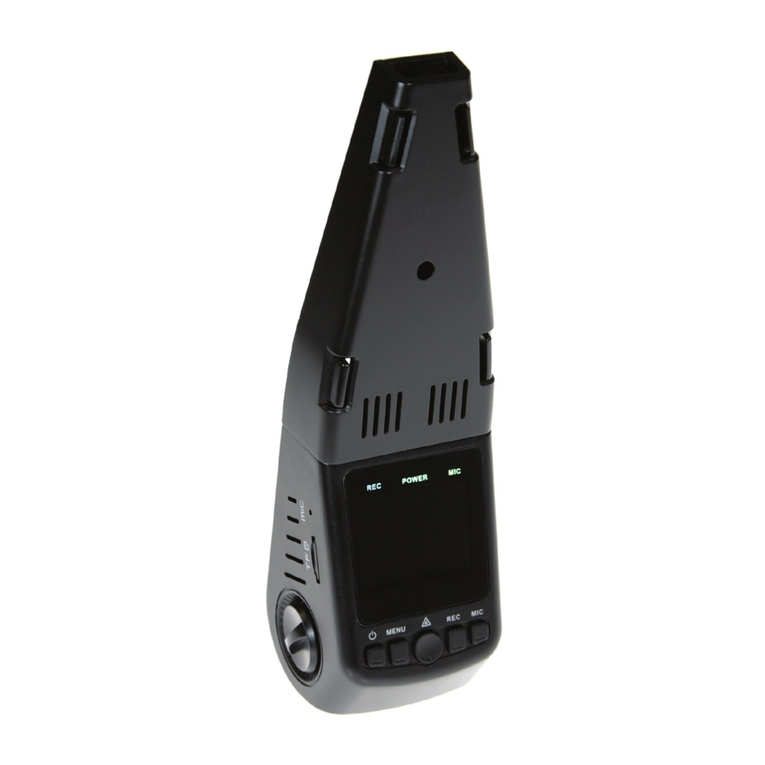
Gator HDDVR186 User manual

HDDVR186 Instruction Manual
Thank you for purchasing our Gator DVR. In order to help you
operate it correctly, please read this instruction carefully before
using.
1. 1.8 inch L D display
2. Lens
3. Night vision lamp
4. Working indicator(Blue)/ harging indicator (Red)
5. Video/ amera button
6. Power/Mode button
7. USB output
8. Battery cover
9. Reset
10. TF card slot
11.Microphone
12.Bracket hole
13.Speaker
14.Menu
15. Up/ Night vision lamp on/off
16. Down/ L D on/off
Accessories
Manual
Mount
USB cable
ar charger(input: 12V/24V output:5V)
OPERATION
A.Built-in battery
onnect car charger: Whilst charging the red indicator lamp is
bright. When charge is complete, the display window will show
the battery icon as full.
B Connected with Car Charger
After the car starts, the DVR will automatically enter video
recording mode, charging at the same time. When the car has
been shut down, the product will continue working for 15 seconds
before automatically shutting down and saving the previous
recorded files.
Note: This machine can be used only with the car charger with
output 5V!
Features:
DVR with record / camera / preview function
Recording mode
Press the power key for 3secs to enter recording mode (Note:
please insert MicroSD before using). then the figure 00:00 : 00 on
the right bottom of the screen will turn to red from white.
Recorded files are stored in the card and press the record button
to stop recording. Then red digital time will display in white.
B) Camera mode
Power on and press Mode button and enter the camera mode,
press the camera button to take pictures.
C) Preview mode
Power on and press mode key twice to enter the preview mode
Press up/down key to select the folder preview, press the record
button into the directory, and then press recording button to
"Play / Pause"
PC CAMERA mode:
Press the Menu key to enter the USB function, press Button OK
to confirm. A "webcam" "disk drive" will appear. Use Up/Down to
select "Network amera", press OK to enter button P AMERA
mode. onnect USB cable with the computer, it will appear P
camera icon on the display interface.
USB Mode
onnect the product with computer by USB cable, [My computer]
will occur removable disk, the file is stored at Removable
Disk/D IM/100 DS IM. At the moment, the file of the product can
be downloaded to the computer.
Menu Function Settings
Power on and enter recording mode. Press button menu and
enter into setting interface. Use up / down buttons to select the
listed settings and press OK button for confirmation and menu
button for exit.
1) Resolution:VGA
2) Time stamp: On/Off
3) Motion detect: On/off
4) ycle shooting: off 1 min 3 min 5 min 10 min
5) Voice recording: On/Off
Power on and press mode button to enter camera mode. Use up /
down buttons to select the listed settings and press OK button for
confirmation and menu button for exit.
1) Resolution:VGA
Power on and press mode button twice to enter preview mode.
Use up / down buttons to select the listed files and press OK
button for confirmation and menu button for exit.

1) Delete: Next menu/ ancel/Execution
2) Miniature: Next menu/ ancel/Execution
3) Volume: 0 1 2 3 4 5 6
Under the three menu options: record, camera and preview,
press the menu twice times, it will enter the same setting menu.
Use up / down buttons to select the listed settings and press OK
button for confirmation and menu button for exit.
1) Format:Next menu, ancel, Execute
2) Language: English / Simplified hinese / Traditional hinese /
Japanese / Korean etc, total 12 languages.
3)Auto off:off 1Min 3Min 5Min Off
4)System reset:next menu, ancel, Execute
5)Light frequency:50Hz/60Hz
6)Date setting:next menu/date setting 2013/01/19 00 :07
7) USB function: P camera / disk drive
File download
1) onnect USB cable to P and DVR.
2) It will appear “removable disk” in My computer.
3) Download the files in the folder D IM/100DS IM
Note
1) Please insert MicroSD card before recording
2) Under recording mode, loop recording can be selected.
When the memory card is full, the camera will continue
recording.
Note: At this moment, old files in the camera will be
overwritten one by one. In order to avoid the old files being
deleted, the camera provides 3 minutes / 5 minutes / 10
minutes / 15 minutes as storage time.
3) When the polymer battery time, DVR screen will display "low
battery" message, 20 Seconds after the DVR will
automatically save the file and automatically shut down.
4) When recording, please don’t take out MicroSD card to
avoid system failure.
Specifications
Main chip Sunplus GPL32630A
lens G 0308 0.3M pixels amera
Memory 4*16
Screen 1.8inch TFT screen
Video
resolution
640*480
File Format Image : JPEG
Video : AVI
Work mode Record/ amera/Playback
color effects Standard
ontinuous
loop recording
Supported
Power off file
recovery
Supported
motion
detection
function
Supported
Year, month,
day hour,
minute
Supported
arrier media MicrSD: 1GB-32GB
Multi-language
support
English / Simplified hinese / Traditional
hinese / Japanese / Russian / French /
Germany / Italian / Spanish /
Portuguese/Korean
USB function 1. harge
2. Memory card
3. P camera
Power rechargeable polymer battery 3.7V
500mAh
ar harger 5V/800 mAh
Note: Night lights turned on, shooting objects with a reflective
surface will have reflective, exposure. Please use with caution!
Operating Tips
The DVR is similar to a computer, in case not working, please
follow these steps: find cylindrical objects less than Dia.1mm,
press RESET hole, DVR will restart and work normally!
No further notice will be given for any modification of the
technical specification
Technical Assistance
If you need assistance seng up or using your
Gator product now or
in the future, call Gator Support.
Australia
TEL: 0 – 8587 8898
FAX: 0 – 8587 8866
Mon-Fri 9am – 5pm AEST
Please retain this user guide for future
reference.
Other manuals for HDDVR186
1
Table of contents
Other Gator DVR manuals
Popular DVR manuals by other brands
HiSilicon
HiSilicon ES-M525 Series User's operation manual
Mitsubishi Electric
Mitsubishi Electric DX-TL16U user manual
Motorola
Motorola DCT6412 DUAL-TUNER DVR AND HD SET-TOP - MICROSOFT... user manual

Magnavox
Magnavox ZC352MW8 owner's manual

Vivitar
Vivitar DVR 882HDv2 user manual

Comelit
Comelit PROFESSIONAL Series instruction manual
