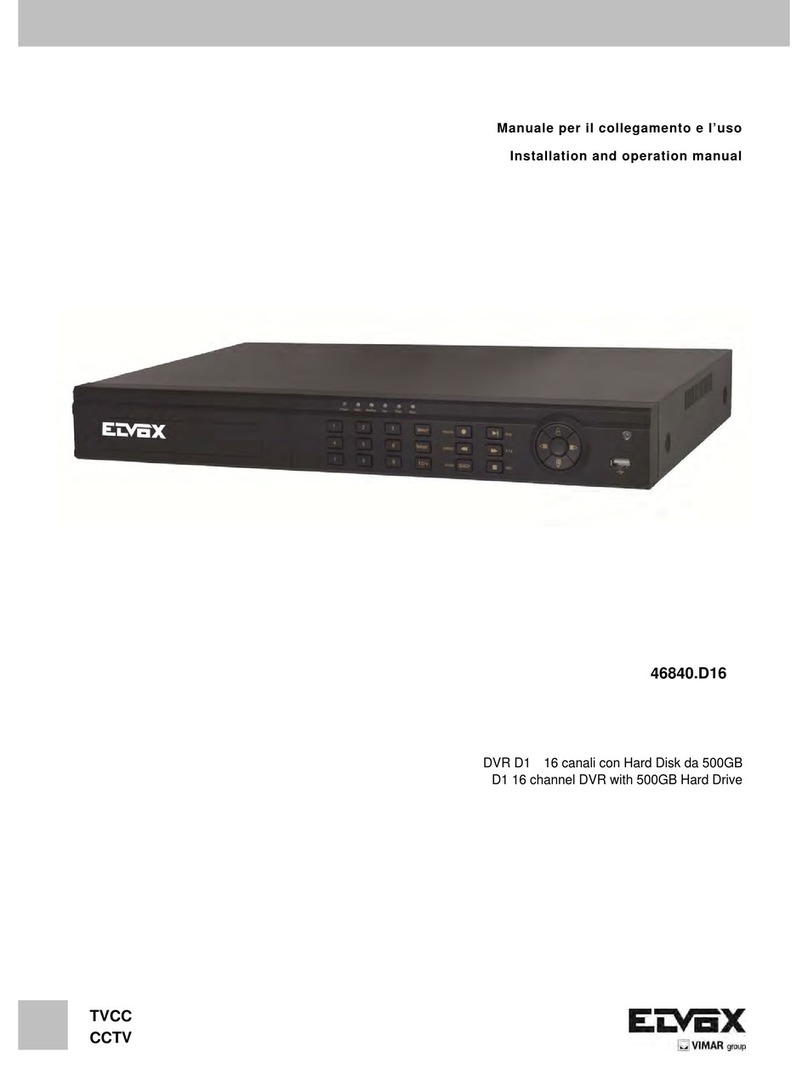
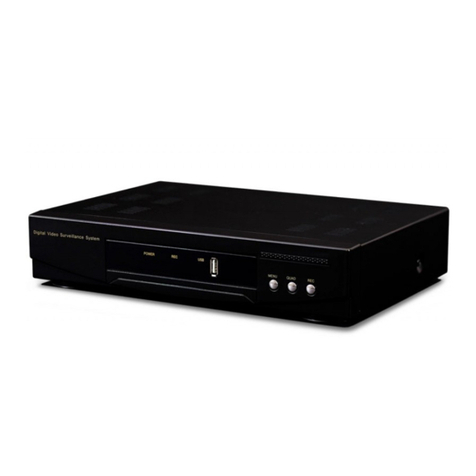
HiSilicon ES-M525 Series Mounting instructions

1
ES-M525 MDVR
User Operation Manual V1.0
Notation Convention
For the symbols that appear in the document, the description is as follows.
Symbol
Description
Description
Descriptive texts indicate supplements and explanations to the main text.
Attention
Attention texts indicate to remind users of some important operations or prevent
potential injuries and property damage.
Warning
Warning texts indicate potential risks. If not avoided, they may cause injury,
equipment damage, or business interruption.
Dangerous
Dangerous text indicates that there is a high potential risk. If not avoided, it may
cause serious personal injury or death.
Precautions for Safe Use
Note
Please read the equipment operation manual carefully before using the equipment, and strictly
follow the operation instructions during operation.
Wireless network antennas and satellite positioning antennas must be installed near the roof or
windshield of the car window and be protected from lightning, and ensure that no objects are
covered or blocked.
This device is a precision electronic device. There are no user-serviceable parts inside. Please do
not disassemble or assemble it privately.
If you have any questions or need any help, please contact the technical staff of our company or
authorized distributors.

2
Contents
Chapter 1 Safety Warning.............................................................................................. 6
Chapter 2 Product Overview.......................................................................................... 7
2.1. Product Description.......................................................................................... 7
2.2. Product Main Functions................................................................................... 8
2.3. Product Specifications...................................................................................... 8
HiSilicon (Hi3520D).........................................................................................9
2.4. Out-of-Product Features................................................................................. 10
2.4.1. Overall Appearance...............................................................................10
2.4.2 Rear Panel Interface............................................................................... 11
Chapter 3 Installation Instructions............................................................................... 13
3.1 Installation Considerations.............................................................................. 13
3.2 Installation Environment................................................................................. 13
3.3 Installation Tools............................................................................................. 14
3.4 Install Equipment.............................................................................................14
3.4.1 Install TF Card....................................................................................... 14
3.4.2 Install 4G Card.......................................................................................15
3.4.3 Install the Antenna................................................................................. 15
Chapter 4 Wiring Instructions...................................................................................... 16
4.1 Power Wiring...................................................................................................16
4.1.1 Delayed Shutdown.................................................................................16
4.1.2 Timer Shutdown.....................................................................................17
4.2 Alarm Input......................................................................................................17
4.3 Alarm Output................................................................................................... 17
4.4 IO-COM.......................................................................................................... 17
Chapter 5 Active Safety Function Details.................................................................... 18
5.1 DMS Driving Analysis System....................................................................... 18
5.2 Face Recognition............................................................................................. 18
5.3 ADAS Lane Safety Warning............................................................................19

3
Chapter 6 Terminal Operation Guide........................................................................... 19
6.1 Remote Rontrol Function Keys Guide............................................................ 19
Chapter 7 System Operation and Settings....................................................................21
7.1 User Login....................................................................................................... 21
7.2 System Operation and Settings........................................................................21
7.2.1 Main Menu.............................................................................................22
7.2.2 General Settings.....................................................................................22
7.2.3 Date and Time........................................................................................23
7.2.4 Terminal Management........................................................................... 24
7.2.5 Server settings........................................................................................25
7.2.6 4G Settings.............................................................................................26
7.3.1 Power On /Off Settings..........................................................................27
7.3.2 Bubiao Protocol..................................................................................... 28
7.3.3 National Protocol Parameter.................................................................. 29
7.3.4 Log Search............................................................................................. 30
7.3.5 Parameter Management......................................................................... 30
7.4 Equipment Management..................................................................................31
7.4.1 PTZ........................................................................................................ 31
7.4.2 Serial Port Management.........................................................................31
7.4.3 Other Peripherals................................................................................... 32
7.5 Network Management..................................................................................... 33
7.5.1 Central Settings......................................................................................33
7.5.2 Lan Management................................................................................... 34
7.5.3 WIFI Management................................................................................. 34
7.5.4 4G settings............................................................................................. 35
7.6 Record and Storage..........................................................................................35
7.6.1 Basic Information.................................................................................. 36
7.6.2 Main Stream...........................................................................................37
7.6.3 Sub stream..............................................................................................38

4
7.6.4 Timing record.........................................................................................40
7.6.5 Storage Management............................................................................. 41
7.6.6 Channel Management............................................................................ 41
7.6.7 Video playback.......................................................................................42
7.7 AI and Alarm................................................................................................... 42
7.7.1 I/O Alarm............................................................................................... 43
7.7.2 Speed......................................................................................................44
7.7.3 Acceleration........................................................................................... 45
7.7.4 Voltage................................................................................................... 46
7.7.5 DMS.......................................................................................................46
7.7.6 APC........................................................................................................47
7.8 Systems and Security.......................................................................................48
7.8.1 Time Setting...........................................................................................48
7.8.2 Volume Setting.......................................................................................49
7.8.3 Password Setting....................................................................................50
7.8.4 About Device......................................................................................... 50
7.8.5 Display................................................................................................... 51
7.9.1 System Information................................................................................52
7.9.2 GPS Information.................................................................................... 52
7.9.3 Store Status............................................................................................ 53
7.9.4 Power status........................................................................................... 53
7.9.5 The Interface Status............................................................................... 54
7.9.6 Network Information............................................................................. 54
Chapter 8 DMS/ADAS Test.........................................................................................55
8.1 DMS Camera Installation................................................................................ 55
8.2 DMS Camera Calibration................................................................................ 56
8.3 DMS Face Recognition................................................................................... 57
8.4 ADAS lane Detection Installation................................................................... 57
8.5 ADAS Lane Test..............................................................................................58

5
FCC
Statement
This
equipment
has
been
tested
and
found
to
comply
with
the
limits
for
a
Class
B
digital
device,
pursuant to part 15 of the FCC Rules. These limits are designed to provide reasonable
protection against harmful interference in aresidential installation. This equipment generates,
uses and can radiate radio frequency energy and, if not installed and used in accordance with
the instructions, may cause harmful interference to radio communications. However, there is no
guarantee that interference will not occur in aparticular installation. If this equipment does
cause harmful interference to radio or television reception, which can be determined by turning
the equipment off and on, the user is encouraged to try to correct the interference by one or
more of the following measures:
•Reorient or relocate the receiving antenna.
•Increase the separation between the equipment and receiver.
•Connect the equipment into an outlet on acircuit different from that to which the receiver is
connected.
•Consult the dealer or an experienced radio/TV technician for help.
Caution: Any changes or modifications to this device not explicitly approved by manufacturer
could void your authority to operate this equipment.
This device complies with part 15 of the FCC Rules. Operation is subject to the following two
conditions: (1) This device may not cause harmful interference, and (2) this device must accept
any interference received, including interference that may cause undesired operation.
RF Exposure Information
This equipment complies with FCC radiation exposure limits set forth for an uncontrolled
environment. This equipment should be installed and operated with minimum distance 20cm
between the radiator and your body.

6
Chapter 1 Safety Warning
In order to enable users to use this series of products in a long-term, safe and satisfactory manner,
please read the following warnings before installing and using the products:
1All installation and maintenance must be performed by professional technicians
2The normal working voltage range of the equipment is DC 9V~36V. Please pay attention to the
power input and the stability of the power input circuit. The output cannot be short-circuited.
3The device outputs 12V voltage externally, which is only used for camera power supply, and no
non-recommended equipment should be connected
4Correctly connect the ground wire of the device to the ground wire of the vehicle to form a loop
5The equipment should be installed in a dry and ventilated environment, avoid moisture, rain, and
the vehicle's clean flushing position, and keep the equipment away from heat, dust and strong magnetic
fields
6Please install the equipment on the vehicle where the vibration is weak as much as possible to
improve the stability of the equipment and extend the service life
7No sundries can be stacked within 20cm of the installation equipment, and no heavy objects can
be placed under pressure to ensure a heat dissipation environment
8The storage devices and modules on the device do not support Hot Swap. Please do not plug and
unplug the storage devices or modules when the device is powered.
9Please regularly maintain the storage device hard disk or SD card: copy the video data to the
computer and format it to protect and extend the performance and service life of the storage device
10 Do not open or disassemble the device without the guidance of professional and technical
personnel

7
Chapter 2 Product Overview
2.1. Product Description
ES-M525 series product is a cost-effective and extensible device specially developed for vehicle video
surveillance and remote monitoring. It adopts high-speed processor and embedded operating system,
combined with the most advanced H.265 compatible H.264 video compression/decompression
technology, network technology, GPS Beidou positioning technology in the IT field. ITH-M525 series
products can realize 5-channel AHD720P/1080P full-frame recording,
CIF/HD1/D1/AHD720P/ADH1080P multiple recording formats can be selected, local recording and
wireless data uploading, car driving information recording, and central software can realize alarm
linkage The central monitoring, remote management and playback analysis of the company are
committed to the expansion of the Internet of Vehicles.
ITH-M525 series products have simple appearance, beautiful appearance, super anti-vibration, flexible
and convenient installation, powerful functions and high reliability.

8
2.2. Product Main Functions
Functional
Category
Function Description
Wireless
communication
4G realizes remote real-time monitoring, video download, parameter configuration,
remote upgrade, remote control and other data communication
Video Cassette
4AHD720P/1080P, backward compatible with ADH720P/D1/HD1/CIF
Support PAL system, NTSC system;
Video OSD overlay, such as time, channel name, license plate number, GPS, vehicle
speed...
Support storage device full automatic coverage and alarm recording file protection
Storage device
Support pre-allocated file system storage to ensure that video files are not lost
Dual TF card storage, support single card 256GB capacity
Replay
Support local 4-channel audio and video synchronous playback
Support PC playback analysis tool
Support remote search and playback
Support traditional playback functions such as play, pause, frame play, slow play, fast
forward, and rewind
Driving Record
It can record driving information such as vehicle speed, GPS data, temperature and fuel
level;
The switch value can be collected through the reserved 4 switch value input ports;
Support local recording and viewing of driving information
Support remote real-time upload and historical record search and view
2.3. Product Specifications
Product functional specification list
ITH-M525 series parameter list

9
Model
ITH-M525
ITH-M525-P
Operating
System
Linux 3.10
Hardware
Platform
HiSilicon (Hi3520D)
Number of
Cores
Dual-core ARM Cortex A7
CPU Frequency
1.3GHz
Running
memory
512M RAM
Storage
Memory
2*TF, single card max support 256GB
Driver Face
Recognition
Not support
Support
Driving
Behavior
Analysis
Not support
Support
ADAS
Not support
Support
Video Input
4CH AHD1080P/720P
4CH AHD1080P/720P
(Including 1CH face recognition + 1CH ADAS)
Video Encoding
H.265/H.264 compatible
Encoding
Capabilities
1080P 60F or 720P/120F
VOIP Intercom
support (optional, requires DMS camera)
Gravity Sensor
3-axis gyroscope
Switch
4CH input/1CH output
Interface
1 piece
RS485 Interface
1 piece
Network
4G Full Netcom

10
Standard
WIFI
Built-in wifi module, with APP installation and commission
Upgrading
Method
Supports upgrading via TF card and remote platform
Power
Consumption
<6W (no peripherals)
Input Power
Wide power supply design, support DC9~36V
Operating
Temperature/Hu
midity
-25℃~75℃/10~95%RH
Static Protection
Withstand 6KV contact discharge, 10KV air discharge
Thermal
Protection.
Cooling holes are reserved on both sides, and the metal base for heat dissipation
Dimensions
90mm*90mm*30mm(L×W×H)
2.4. Out-of-Product Features
2.4.1. Overall Appearance

11
I. Infrared and Card Slot
The front panel functions of the device are shown in Figure 1-1.
Figure 1-1 Front Panel Interface Diagram
The external buttons and interface diagram on the front panel are shown in Figure 1-2.
Table 1-1 Front Panel Interface Description
Number
Denomination
Definition
/
Card Board
Fix with screws
1
Communication
4G communication card data
transmission
2
Micro-USB
Upgrade debugging interface
3
IR Infrared
Receive remote control
4
Storage
TF card storage video
Description
"/" in the above table means no mark
2.4.2 Rear Panel Interface
The interface on the rear panel of the device is shown in Figure 1-2

12
Figure 1-2 Rear Panel Interface
The description of each interface on the rear panel of the device is shown in Table 1-2
Table 1-2 Rear Panel Interface Description
Number
Panel
Interface
Definition
1
Power
Support DC9-36V wide voltage
2
4G
4G antenna interface
3
GPS
GNSS positioning interface
4
AV/IN1-IN2
(720P\1080P)
Audio and video channel support (720P\1080P)
5
AV/IN3-IN4
Audio and video channel support (720P\1080P)
6
AV—OUT
CVBS audio and video output interface
7
EXT、
Extended RS485, RS232, CAN signal, MIC signal, impulse,
SPK+ power amplifier, including +12V voltage output
8
EXT.2
Expansion interface, input and IO_IN*4

13
Chapter 3 Installation Instructions
3.1 Installation Considerations
Basic Requirements for Installation
All electrical work must comply with the latest electrical regulations, fire regulations and related
regulations in the place of use.
Be sure to turn off the power of all related equipment during installation.
Description
Cable Requirements
It is recommended that the installation cable is in the same direction as the original vehicle cable, and
the wiring shall be installed along the original trunking of the vehicle and bound to the original vehicle
cable.
Make the wiring neat and concealed to prevent the driver and passengers from breaking.
3.2 Installation Environment
Preparation Before Installation
Take the device out of the package, check that the device and accessories are not damaged or missing,
and then start installing the device.
Attention
Be sure to disconnect the power supply when disassembling, wiring, etc.
Environmental Requirements
Before the recorder is installed, it is necessary to carry out the deployment reconnaissance and planning
of the installation location and wiring to ensure the safety and stability of the power supply and wiring.
At the same time, the convenience and rationality of wiring need to be considered.
Anti-vibration: Choose a place with weak vehicle vibration (such as behind the driver's seat or behind
the passenger's seat), away from the engine.
Heat dissipation: Ensure that the equipment is far away from the heat source on the vehicle and

14
installed in a well-ventilated location to facilitate heat dissipation.
Space: Reserve the space needed for air circulation, heat dissipation, flip cover, etc.
Placement angle: Place the forensic host horizontally. Any other angle installation method may damage
the equipment.
Fixing: It is recommended to use the national standard M4 combination screw to fix it. All fixing
screws must be tightened in place to avoid loosening after long-term driving and bumping, causing the
recorder to fall
Description
The specific installation position is adjusted according to the on-site model, and it is necessary to watch
the surveillance video and view the vehicle status easily
3.3 Installation Tools
Please prepare anti-static gloves and a Phillips screwdriver before installation.
3.4 Install Equipment
Please bring your own SIM card and SD card for installation.
3.4.1 Install TF Card
The TF card is located on the front panel of the recorder and is used to store data. The installation steps
of the TF card are as follows:
Attention
Please power off before unplugging and inserting the TF card
Insert the TF card and press the TF card to the bottom. After hearing a click, the installation is
successful.
Description
If you need to insert a TF card into the card slot 1, please insert it with the notch to the left and the

15
metal piece facing up. The TF card slot 2 is inserted in the opposite way to the TF card 1.
3.4.2 Install 4G Card
Attention
Please power off before unplugging and inserting the SIM card
If you choose to use the 3G/4G function, please install the 3G/4G card and 3G/4G antenna. The 3G/4G
card slot is located on the front panel of the recorder and the antenna interface is located on the rear
panel. The installation steps are as follows:
Insert the 4G card into the card slot with the metal downward notch facing to the left, and
gently press the 3G/4G card to the bottom. After hearing a click, it means the installation is
successful.
Fix the front panel with screws
3.4.3 Install the Antenna
Tighten the 3G/4G antenna nut at the antenna interface to complete the installation.
Description
For positioning or navigation, please install the satellite positioning antenna in the same way.
Please install the 3G/4G antenna and positioning antenna in the proper position according to the actual
situation on site, and complete the installation by connecting the cable through the corresponding
interface of the device. The antenna installation instructions are as follows:
1The antenna must be placed vertically with the signal receiving end facing upward.
2When the remaining cable is long, it can be rolled into a loop and bundled to avoid affecting the
received signal.
3The 4G antenna is installed on non-metallic objects such as the windshield or seat back in the car,
and a distance of more than 50 cm from metal objects.
4The positioning antenna is recommended for roof installation
1) In case of special circumstances, when the positioning antenna needs to be installed in the
car, the following specifications must be followed.

16
2) Installed on the lower edge platform of the front windshield of the vehicle and fixed with
neutral silica gel.
3) When adjusting the antenna position, ensure that at least 4 satellites have a signal strength of
more than 35 dB.
Chapter 4 Wiring Instructions
4.1 Power Wiring
Attention
In order to ensure the correct wiring, please ask the vehicle manufacturer for the connection
method of the start switch before connecting, so as to prevent the wrong connection and damage
the equipment.
When taking electricity from the car, please install the car fuse on the positive pole of the
power supply. Please consult the car manufacturer for the specific installation method.
The power connection mode of the recorder can be selected according to the shutdown operation.
If you need to delay the shutdown after the vehicle is turned off, please select the delayed
shutdown connection.
If you need to shut down in a fixed period of time, please select the timing switch
connection
Description
Please refer to the "Operation Manual" for the function configuration of timer switch and delayed
shutdown.
4.1.1 Delayed Shutdown
The power supply of the host has three red, black and yellow wires. The red and black wires are
directly connected to the car battery, the red wire is connected to the positive electrode, the black wire
is connected to the negative electrode, and the yellow wire is connected to the ignition wire (ACC). If
the red wire and the yellow wire are tested indoors, they can be connected together. Positive pole, then
directly use DC12V power supply,
Detect the power cord connection is normal, normal start then the power lamp is blue.
Connect the output line AV-OUT to the display and connect the corresponding equipment to the

17
terminal to confirm whether the connection is correct
The following figure shows the test wiring and the actual loading power supply wiring:
Note: ITH-M525 has no physical switch button, it can be turned on when the power is turned on, and turned off
when the power is disconnected
4.1.2 Timer Shutdown
For timing shutdown configuration, please refer to "Operation Manual"
4.2 Alarm Input
When the recorder is required to perform alarm linkage for vehicle information (such as opening and
closing doors, etc.), alarm input wiring and configuration can be performed.
Alarm Input (ALARM IN): Connect to the vehicle's corresponding high and low level signals as the
recorder alarm input signal, which can be linked to the alarm output for alarm.
Description
For the function configuration of the alarm input, please refer to the "Operation Manual".
4.3 Alarm Output
The device has 4 alarm inputs and 1 alarm output interface. The alarm input detection is all level
detection, which can be connected to various vehicle driving states, such as brake, steering, vehicle
switch, alarm button flat output, and the drive capacity is 200mA. To connect a device with a higher
power, an external relay must be connected. The alarm output wiring diagram is shown in Figure 2-8.
When the brake plate is stepped on, the MDVR can detect the high level, otherwise it will be low, and
the alarm output is Electricity
4.4 IO-COM
When the recorder is required to link the braking, steering and reversing actions of the vehicle,
IO-COM wiring and configuration can be performed. ITH-M525 supports IO alarm 4CH inputs and
1CH output, and CAN bus 1CH input.
Step 1: The alarm I/O interface is connected to the extension cable.
Step 2: Connect the IN interface to the vehicle braking, reversing and steering information collection
interface.

18
Description
For IO related function configuration, please refer to "Operation Manual".
Chapter 5 Active Safety Function Details
5.1 DMS Driving Analysis System
Distracted driving, identifying bad driving behaviors such as watching the driver from left to
right.
Make phone calls, identify the calling behavior of the driver.
Smoking, identify the smoking behavior of the driver.
Closing eyes, Identify the driver's eye-closing behavior while driving.
Yawning, identify the yawn behavior of the driver while driving.
Voice alarm prompts for illegal behaviors without seat belts.
5.2 Face Recognition
Driver identification.
Driver changes, detect and record driver change events.
Driving time statistics, realizing overtime driving alarm.
Voice alarm for drivers suspected of dangerous driving behavior.

19
5.3 ADAS Lane Safety Warning
FCW (Forward Collision Warning), which judges the potential collision risk by sensing and
calculating the distance between the vehicle and the preceding vehicle during driving, and
immediately issues a warning.
Safe distance warning, the distance of the vehicle ahead is detected by the ADAS algorithm, when
the vehicle is too close to the vehicle in front, the driver will be warned immediately
LDW (Lane Departure Warning) detects the position of the vehicle in the lane through the ADAS
algorithm, and warns the driver when the vehicle presses or is about to press, to prevent traffic
accidents caused by lane departure.
Chapter 6 Terminal Operation Guide
6.1 Remote Rontrol Function Keys Guide
LOGIN
When the recorder has a password, press
the LOGIN button to enter the password.
Since the system does not have recovery
and reset functions, please remember the
password.
Power button
0-9 Number Keys
Switch to single-screen display, press
number keys on the setting interface to
input directly
0 and 9 keys take into account the volume,
brightness and other functions to quickly
set the entrance
INFO
Through the shortcut key operation under
the screen, you can check the module
status, alarm status, version number and
recording disk status

20
田key
There are 4 screens by default when
starting up. Under the monitoring screen, it
is used to switch between four screens,
eight screens and single screen; press the
field key to display 8 screens; press the
number keys 1, 2, 3, 4, 5, 6, 7, 8 Switch to
single screen CH1, CH2, CH3, CH4, CH5,
CH6, CH7, CH8 respectively
Up, down, left and right arrow keys
The left and right arrow keys have both
playback video fast forward and fast
reverse functions. There are four levels:
2X, 4X, 8X, 16X;The default 4 screens
will be displayed at boot, press the up and
down keys to switch between 1-4 and 5-8
channels.
【OK】
Enter Keys
/‖
Pause playback and single-step playback
keys when playing back image data, each
press can play one step, press the playback
button to return to normal playback speed;
Press the test mode selection page once in
the standby interface;
PLAY
Start playback button (the still picture is
displayed when the picture is paused);
RETURN
Return to the previous submenu. Finally
exit the setting menu and exit to the
monitoring screen;
CANCEL
Delete key/backspace
+ — 号
Enter the backspace and forward keys in
the edit box; volume control keys
F1、F2、F3、F4
Spare key
This manual suits for next models
3
Table of contents
