Gbook 1340B User manual

1
Android Mobile Internet Device
Setup & Quick Start Guide
Thank you for purchasing the GBOOK 1340B NETBOOK. The operational guidelines below are a
quick and convenient guide to its main functions providing the user with trouble free use for
business and pleasure. This guide has been designed to help setup your unit, but is not designed
as a complete Android reference manual. Please read the instructions carefully before use.
Spotbuy cannot support the Google Android Operating System or any of the programs the user
may download or install. For Android support, we suggest you visit the Android forums on-line or
visit www.android.com.

2

3
•
•
•
•
•
•
•
•
•
•
•
•
•
•
•
•
•
•
.
4
GBOOK 1340B NETBOOK
Processor VIA8850—Cortex A9—1.5Ghz with Mail400 GPU
Memory DDRIII RAM: 1GB, speed up to 1333MHz
Storage Built-in flash memory 8GB. Support for SD card, max capacity of 32GB
Networking IEE802.11B/G wireless network + RJ45 Ethernet Port
USB 1 x USB2.0 OTG high speed interface port
Other Ports 1 each SD card, HDMI, Headphone Port, Microphone; DC Power Port
Camera Front position, 1.3 Megapixel
Audio 3.5mm headphone jack; Stereo speakers
Screen Size 13.3inch; 16 9, WVGA 1280 x 800; 16 million colors
Battery Built-in lithium polymer battery 7000mAH
User Interface Android 4.1 / 80 Key Keyboard
OS Google Android 4.1.1
Music Files Supports: MPEG / MP3 / WMA / AAC / WAV
Video Files Supports: FULL HD, MPEG1/2/4,XViD,DiVX4,H264,MJPEG 1080P
Formats: MKV / WMV / MPG / DAT / VOB / AVI / MOV / ISO / MP4 / FLV
Contents GBOOK device / AC wall charger / User Manual
Photo Files Formats: JPEG / BMP / GIF / PNG
GETTING TO KNOW THE GBOOK HARDWARE
Product Specifications
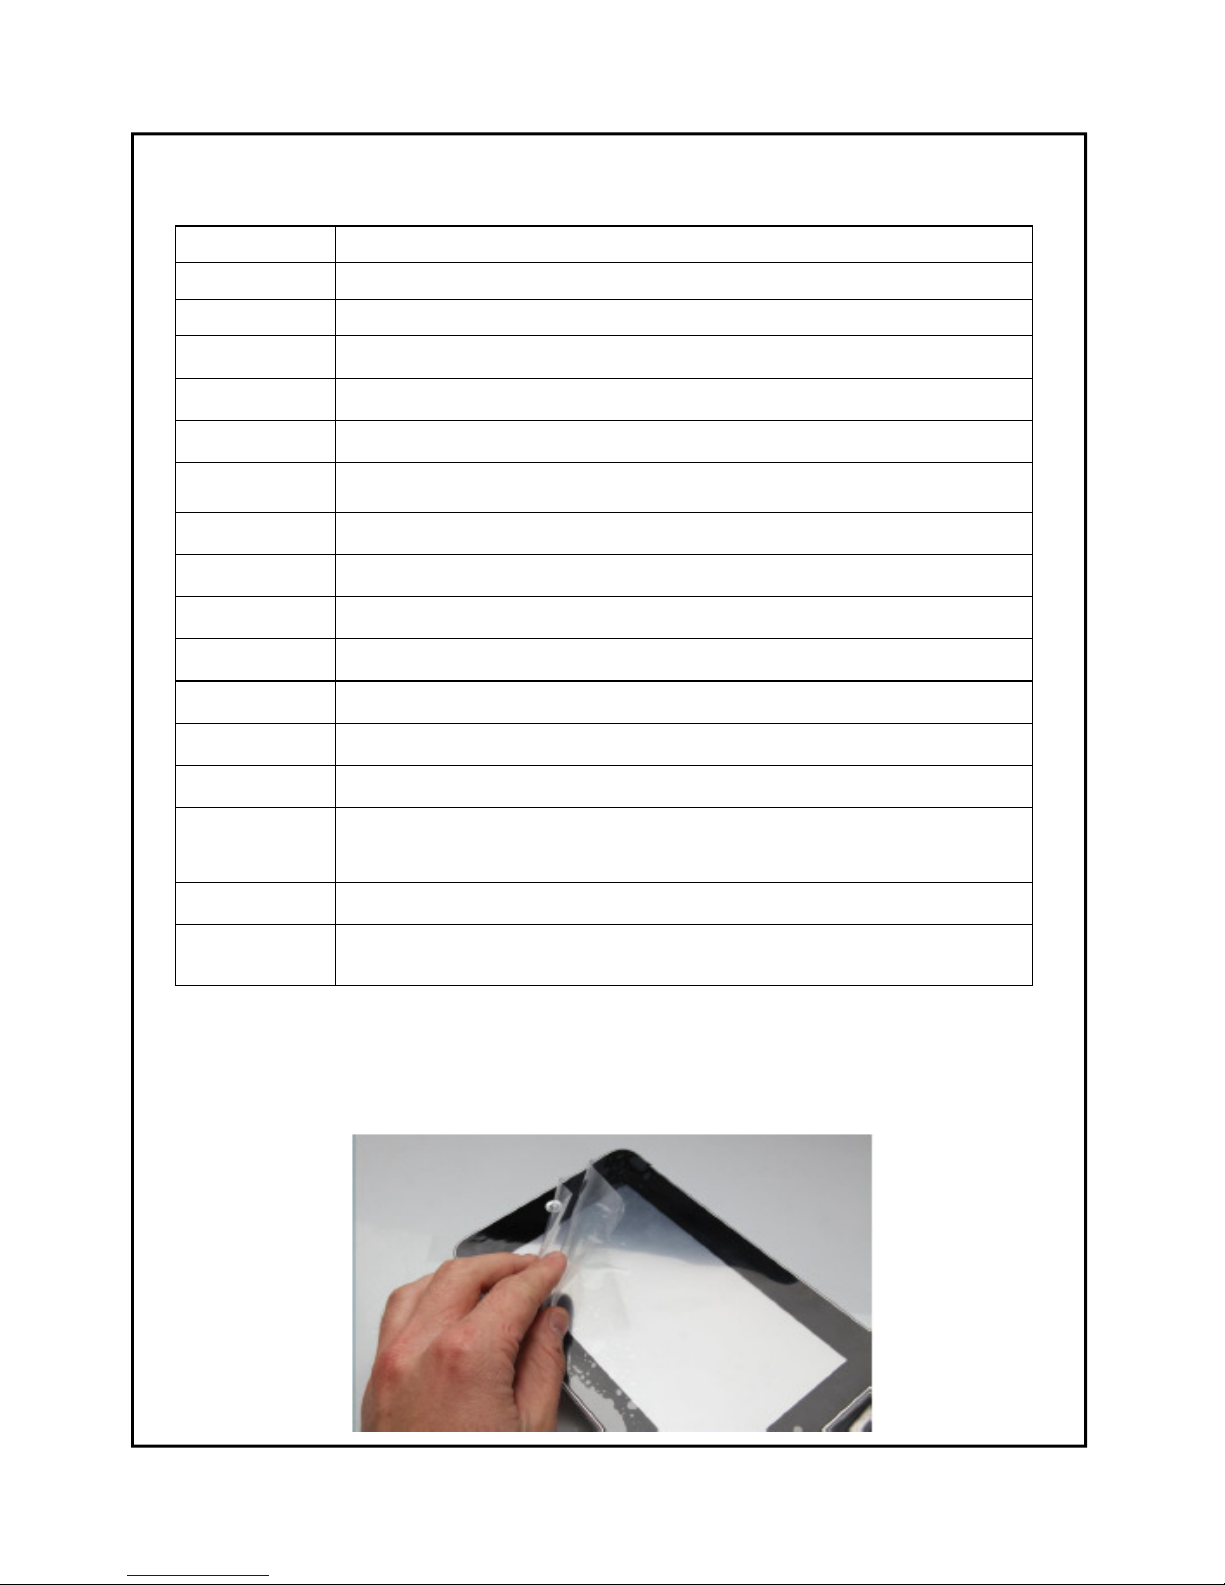
IMPORTANT INFORMATION:
BEFORE USE, MAKE SURE YOU
REMOVE ANY PROTECTIVE FILM FROM THE SCREEN IF FITTED

5
FRONT VIEW OF THE UNIT
1. Camera
2. 13.3” LCD with LED Backlight
3. Power Switch (illuminates green when unit is on)
4. Keyboard – 80 key version.
5. Touch pad with the left and right buttons.
6. Indicator status:-
When you turn the computer on, this power indicator (red) light will illuminate. While data is being
saved to memory, it will begin to flash. After power down, the LED will turn off.
When lit indicates the Caps Lock is active.
7. After connecting the AC power supply, the red light indicates the unit’s battery is being
charged, when charging is complete, the red light will turn off.
8. When the blue light is on means the WIFI has been activated.
7 8
6
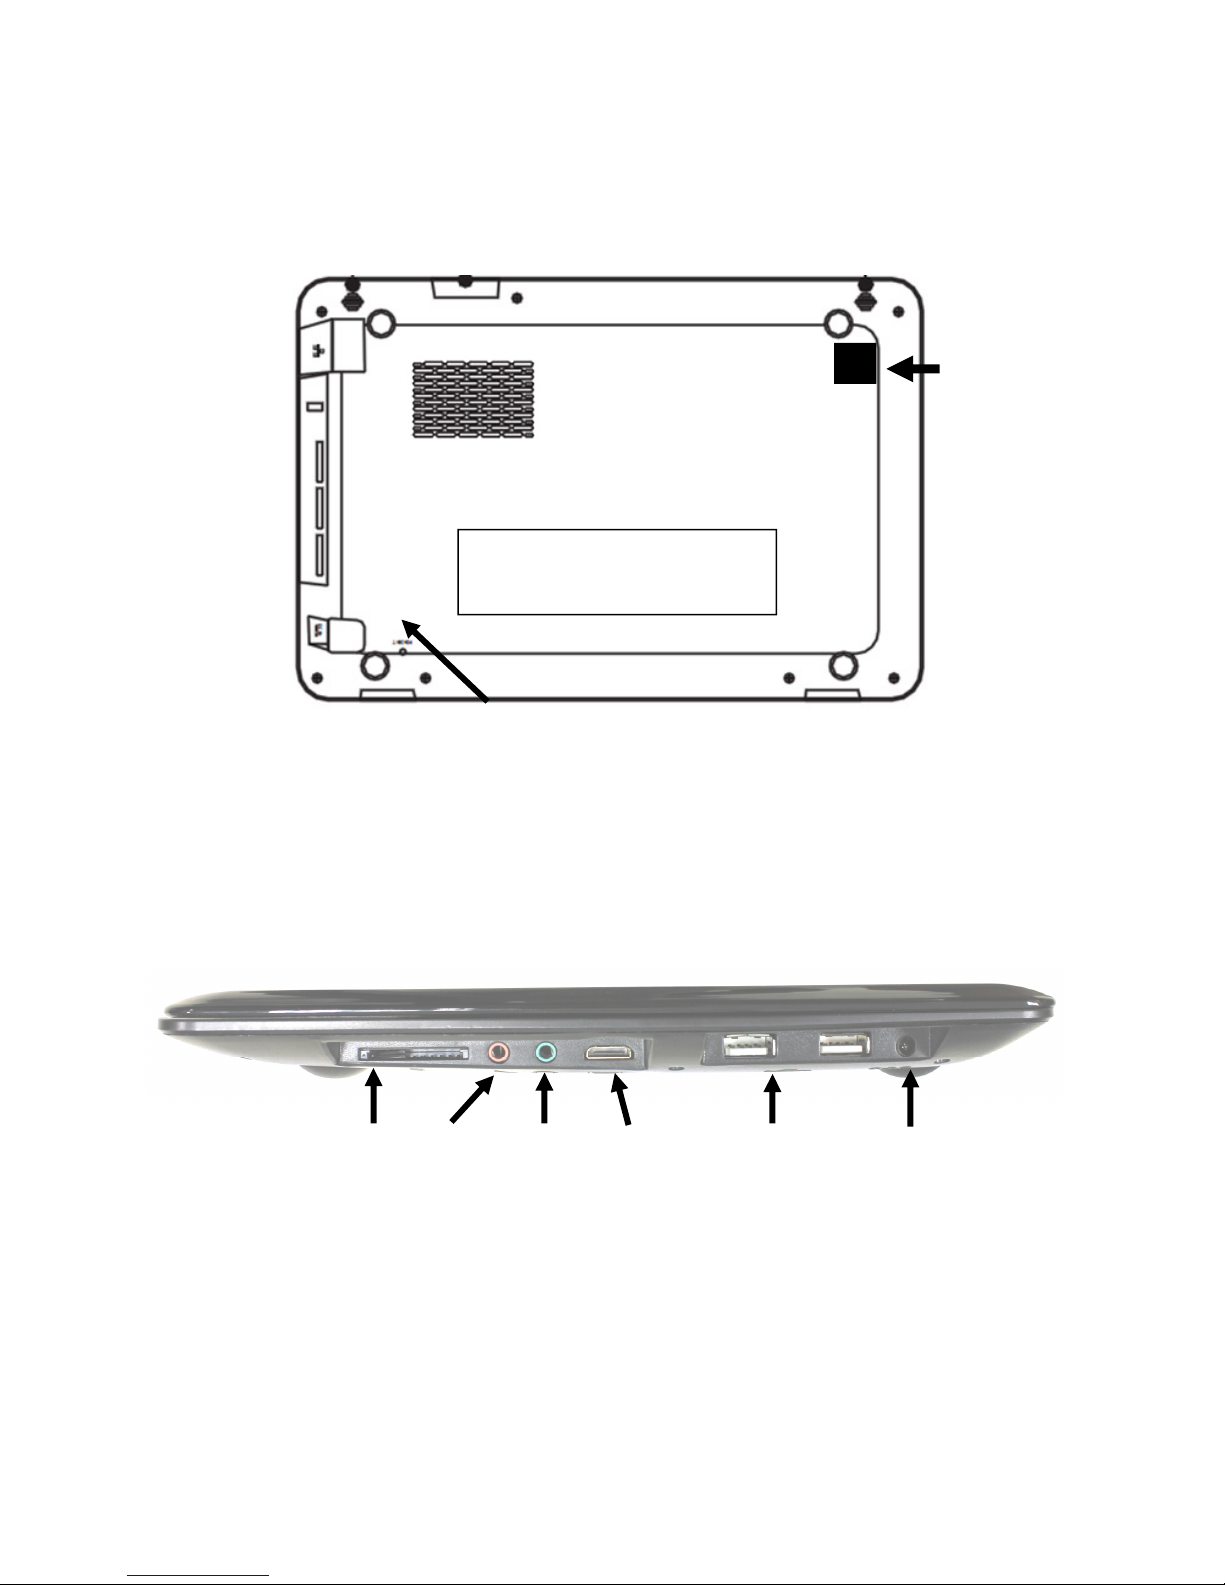
BOTTOM VIEW OF THE UNIT
RESET
BATTERY COMPARTMENT
ETHERNET
PORT
RIGHT SIDE VIEW OF THE UNIT
SD CARD
SLOT
HDMI
PORT
MICRO
PHONE
EAR
PHONE
USB
PORTS
DC
PORT

7
Battery Charging
The unit has an internal charging battery. We suggest to charge up the battery overnight using the
supplied wall charger before first use. This will help keep the battery integrity.
CHARGING THE BATTERY
Plug in the wall adapter to the DC port of the unit. You will notice battery charge LED on the front of
the unit will light up red.
Note: During Battery Charging, you can operate the unit. The charging time will be longer when
operating and charging at the same time.
Startup / Shutdown / Sleep / Reset
STARTUP: Press and hold the power button for 2-5 seconds until you see the screen startup, then
release. The system will begin the startup process, and then enters the Android Operating System at
the default home interface. If the unit is “locked” … press the right mouse button to unlock it.
SHUTDOWN: Press and hold the power button for 3-4 seconds until this screen appears:
To Power off, tap OK.. To cancel the Power Down, select Cancel.
STANDBY MODE ON/OFF: To enter Standby mode, press the power button and release quickly
and you will see the unit’s screen turn off. (Can also be done by pressing Fn + End). Standby mode
puts the unit to “sleep” without complete power down. This helps extend battery life by turning off the
screen. To exit Standby Mode and operate the unit once more, press and hold the power button for
approx. 2-3 seconds, then release. The screen will re-appear in locked mode.
To Unlock the unit , press the right mouse button.
You can adjust the time elapsed for the unit to automatically enter Standby mode in the settings
menu – Select Settings / Display / Sleep. Then choose between 15 seconds and 30 minutes from
the menu. Standby mode is used in order to conserve battery consumption during a period of non
use / activity.

8
RESET BUTTON: If Android stops un-expectantly, press the reset button to reset the device. Reset
will erase all user data currently in memory on the device. (Note: Using the RESET function will not
erase any Applications or Android itself etc)
The device supports up to a maximum 32GB SD card.
☆
☆ ☆
☆
☆
☆ ☆
☆ DO NOT insert and remove the SD Card repeatedly in a short me as this may cause damage
to the card and or to any data on the card.
We recommend using major brands of memory cards
to avoid incompability.. If your SD card is not recognized format it using your PC as FAT32 and
try again. If its is sll not recognized replace the SD card.
Your unit has a touch pad as well as left and right mouse buttons (either side of the touch pad) similar
to most Netbooks / Notebooks as well as up / down / left / right cursor keys.
To operate the Android software on your unit, you can follow any of these conventions:-
⇒
Move the mouse pointer by using the touch pad or the cursor keys.
⇒
Press the left mouse button to select any icon or item
⇒
Press the right mouse button to select the Menu icon
⇒
Press and hold the left mouse button while using the touch pad to “drag” any items
⇒
Press the Return key to select anything if it is highlighted.
⇒
Press the Fn key + PgUp / Home / PgDn / End keys for these functions:-
Fn + PgUp = Move up within menus and screens a page each time
Fn + PgDn = Move down within menus and screens a page each time
Fn + Home = Go to Opening Screen at any time
⇒
Fn + End = Switch unit into sleep mode
= Press this key to reveal a System Menu
FUNCTION KEYS
F1 F2 F3 F4 F5 F6
BROWSER CAMERA MUSIC VIDEO PHOTO CALC
F7 F8 F9 F10 F11 F12
BRIGHTNESS BRIGHTNESS RECORD FILE GOOGLE SETTINGS
INCREASE DECREASE FROM MIC BROWSER ACCOUNTS

9
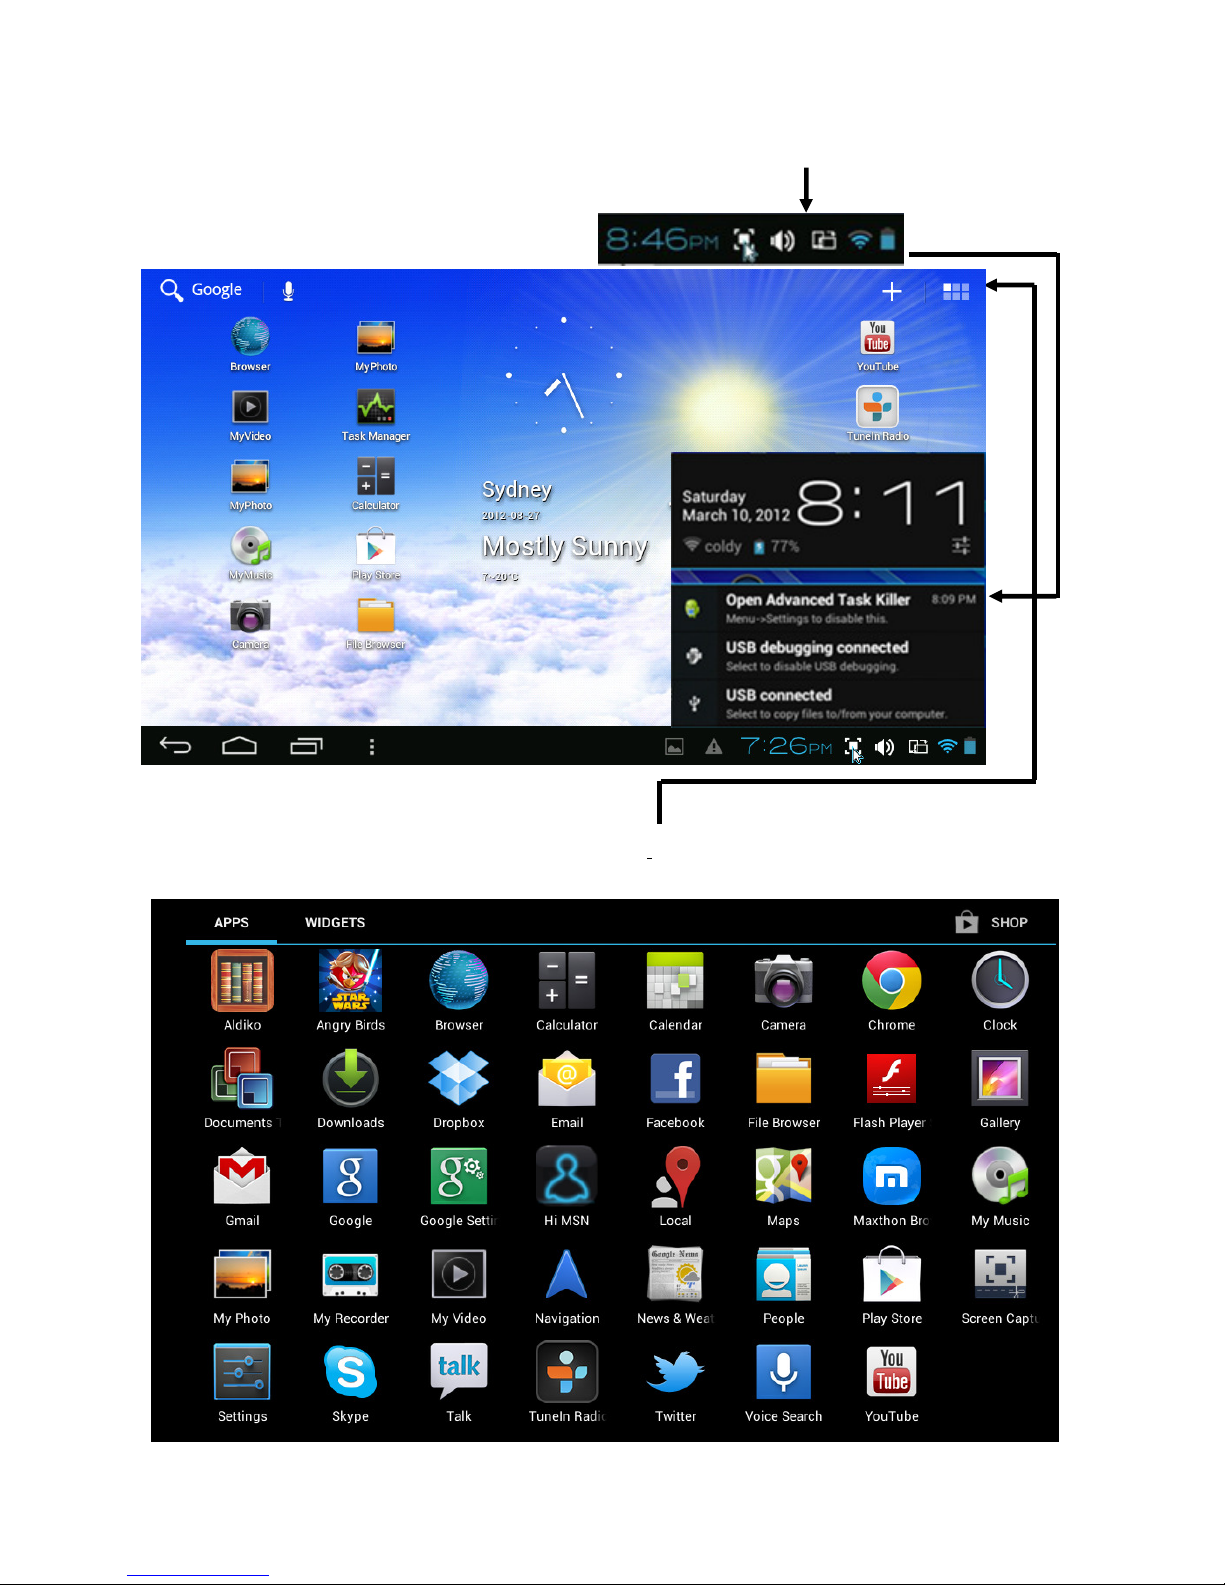
DESKTOP – Overview:
Click once on any applicaon icon to launch it.
Le- click and hold and then slide icons to reposion them on
the screen using the touch pad.
Le- click and hold and then slide
icons to reposion them onto the Desktop screen you would like it to be on.
Le- click and hold an icon unl you see an X appear on
the top centre of the screen. Without releasing the icon slide it onto the X and it will be deleted
from the Desktop.
Note this does not delete or uninstall the applicaon; it simply removes the icon from the
Desktop.
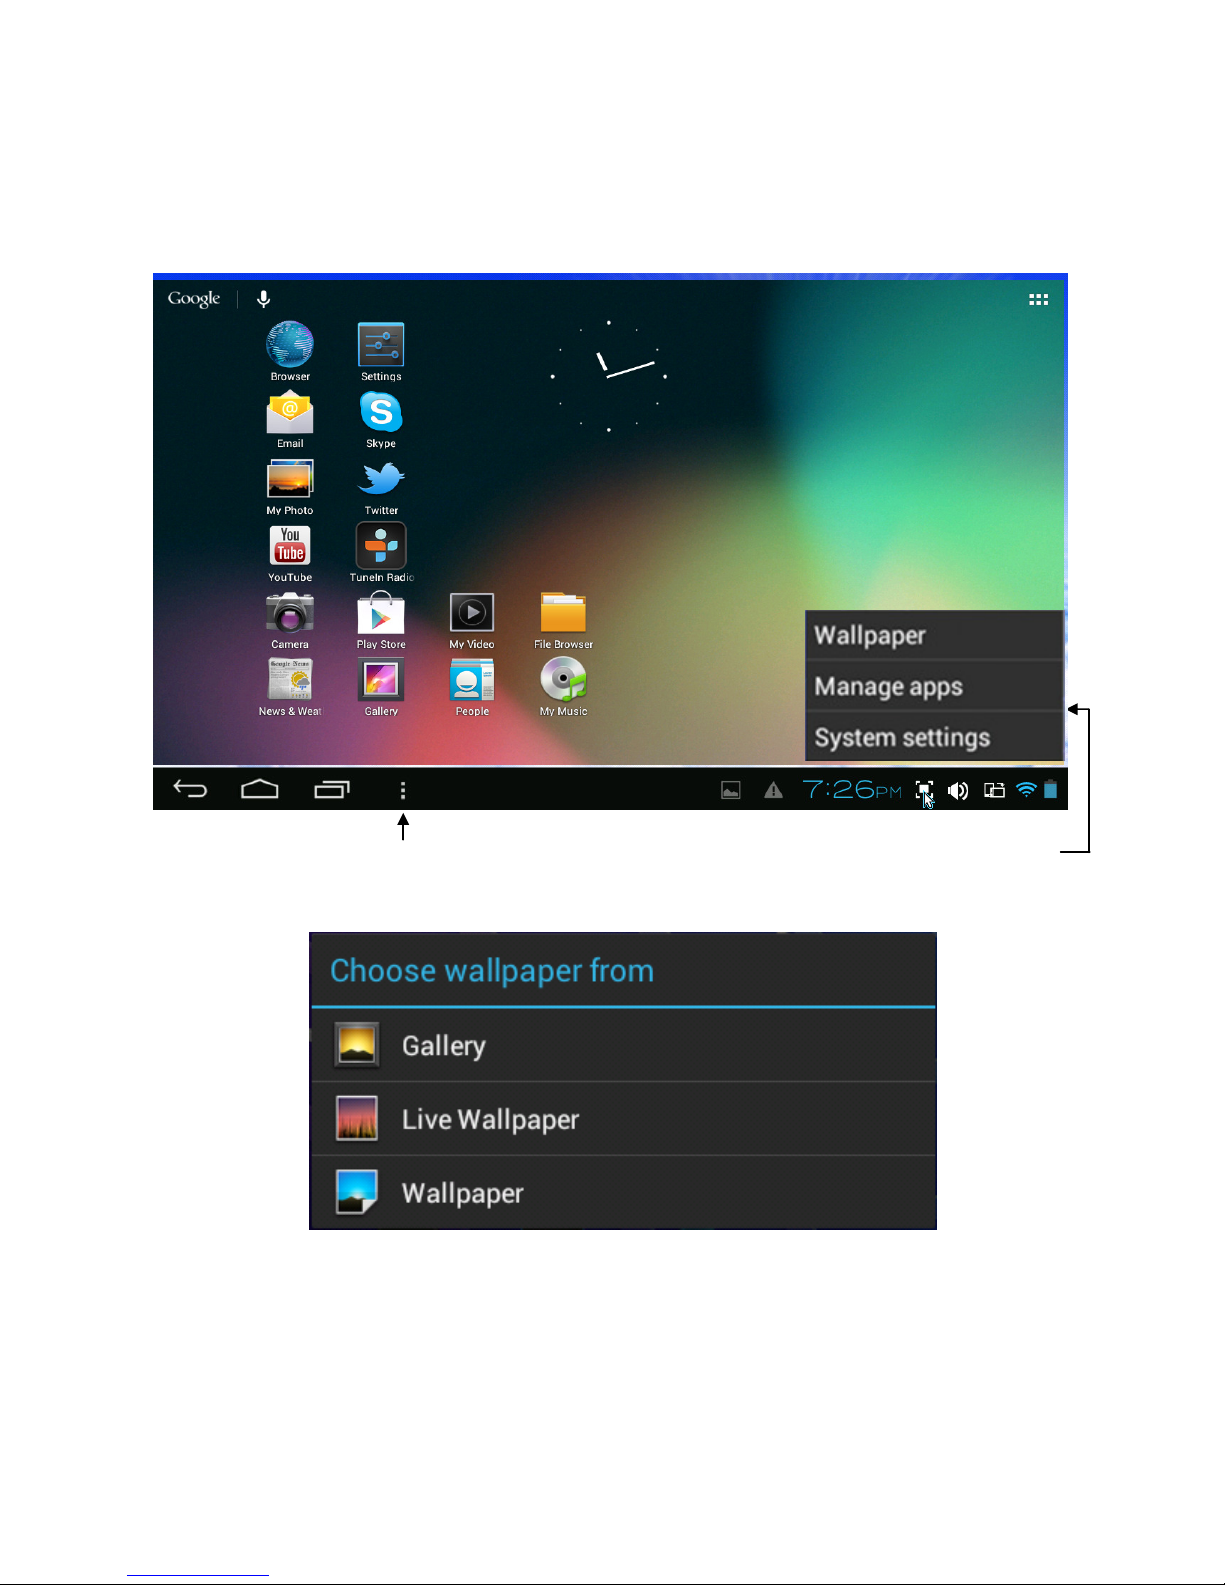
10
TAP THIS TO DISPLAY THIS
Wallpaper: Select this to show the Wallpaper Selection Menu:

11
12
Select the bottom right portion of the screen to reveal (NOTIFICATIONS) which will
show you anything else currently being addressed by the unit.

13
SETTING UP YOUR UNIT FOR THE FIRST TIME
Before using the unit, we strongly recommend setting up all the necessary items
first. By doing this, you are assured all is set up correctly to provide trouble free
use.
After the completion of a normal start, the Android opening screen will be displayed.
(See the picture below).
To start setting up your unit, select MENU then SETTINGS to reveal this screen:
WIFI SETUP FOR THE FIRST TIME:
Click and slide “Wi-FI” to the right to turn on the Wi-Fi feature. (it may already be
switched to on)
14
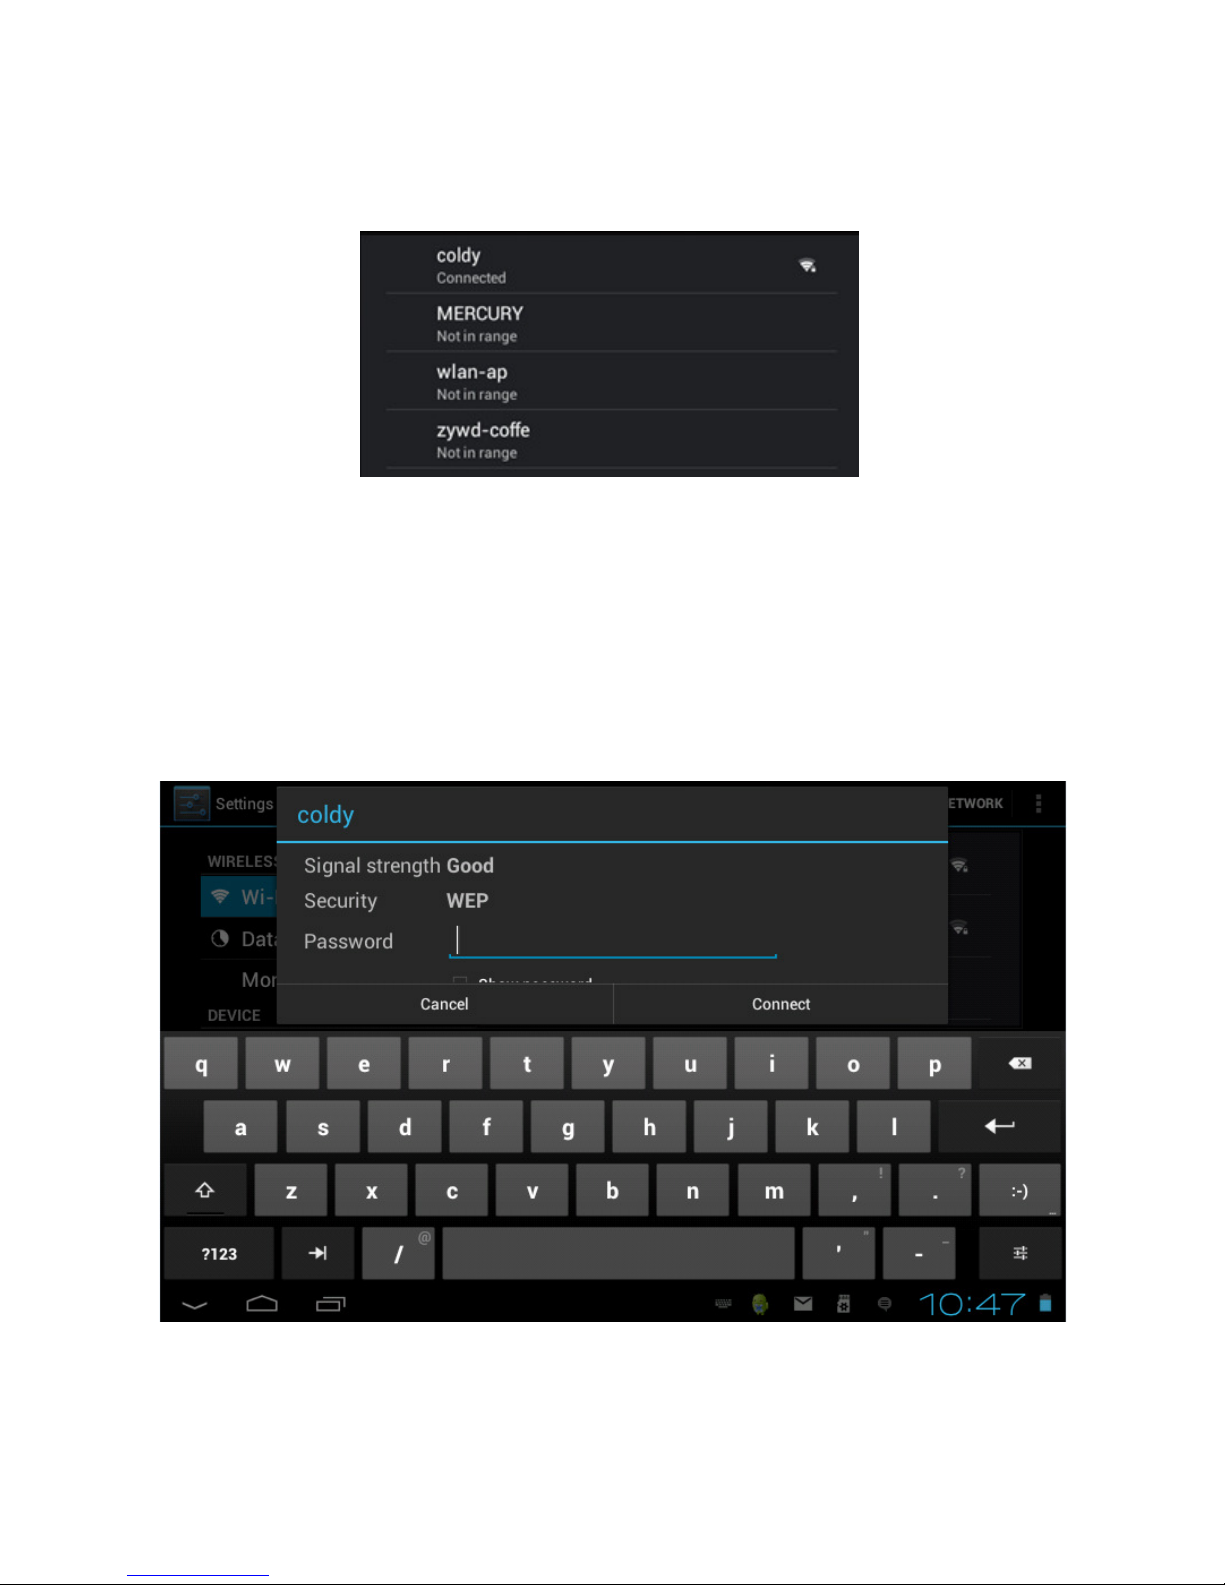
The unit will find all available WIFI in the surrounding area that is within range of the unit
and list them on the right side of the screen:
Select your WIFI name to reveal this screen: (For this example, we are using coldy)
Type in your WIFI password and press Connect.
NOTE: The WIFI password MUST be 100% correct. On some WIFI, it is
also case sensitive. If you input an incorrect password, the unit will not
connect.
You now have WIFI connection.

15
If the unit reports “no connection” .. or “connection failed” … the most common cause of
this is that the Password was typed incorrectly.
To try again, select your WIFI name, press FORGET; turn the WIFI off and on, to start
the procedure again.
NOTE:- Once you have connection the first time, you not need to go through this
procedure again as all settings and connections are now saved to the unit’s software.
For any future WIFI use, you just need to turn the unit on to reconnect automatically
(Assuming you are in the same WIFI Hot Zone and you have not manually turned WIFI
off)
SETTING THE SOUND:
Tap the Sound menu item to adjust the type of sounds you prefer and the volumes.
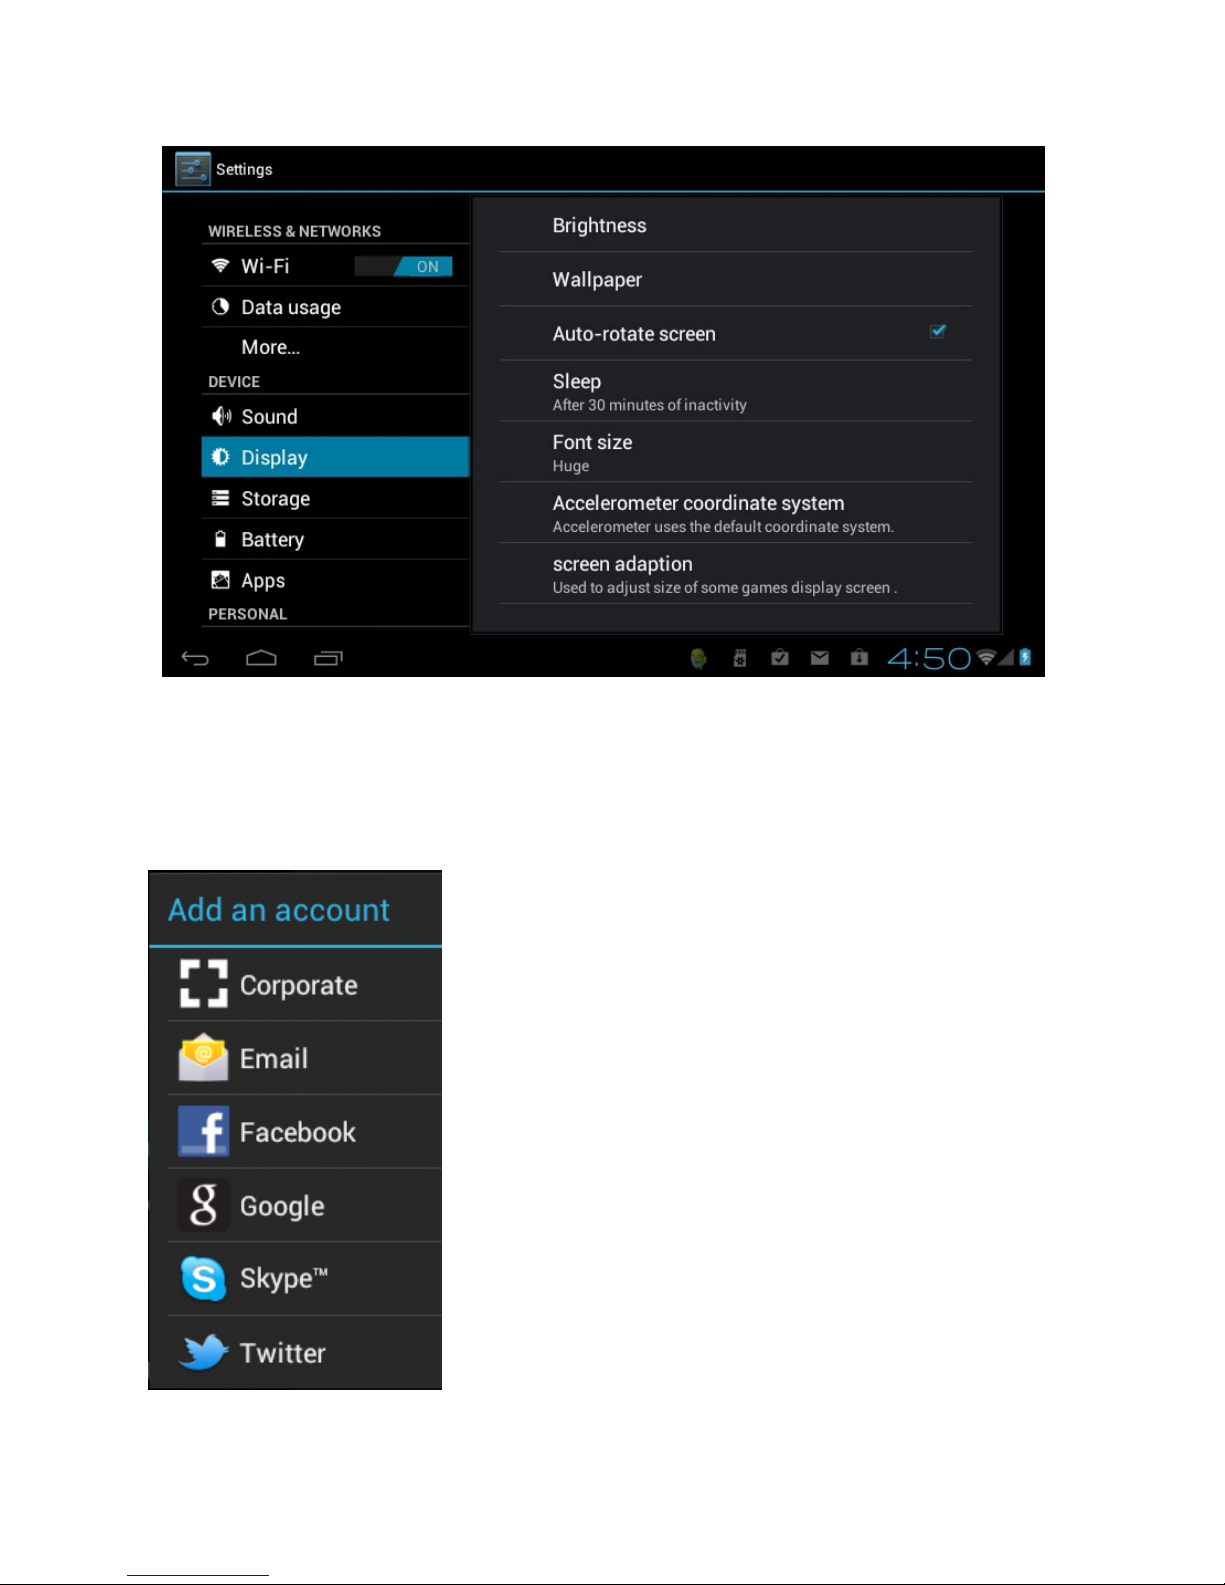
ADJUSTING THE DISPLAY:
Tap the Display menu item to adjust the displays levels and screen behavior.
Please refer to the screen shot below:
16
SETTING UP YOUR COMMUNICATION ACCOUNTS
You can setup many different type of Accounts. Scroll down the left side of the screen
and tap Accounts and sync, then select ADD ACCOUNT
(TOP RIGHT OF SCREEN)
Below please find the screen that will appear and a description of each type of account:
Setup a Corporate email using Microsoft Exchange
Setup POP email such as Hotmail or MSN etc
Setup and / or sync your Facebook account
Setup and / or sync your Gmail email account
Setup and / or sync a Skype account
Setup and / or sync a Twitter account
17
From the menu, select the “Email” icon to enter the e-mail client. See screen below:
example). Press Return, type in your password and press Next. Then you will see this
screen:

18
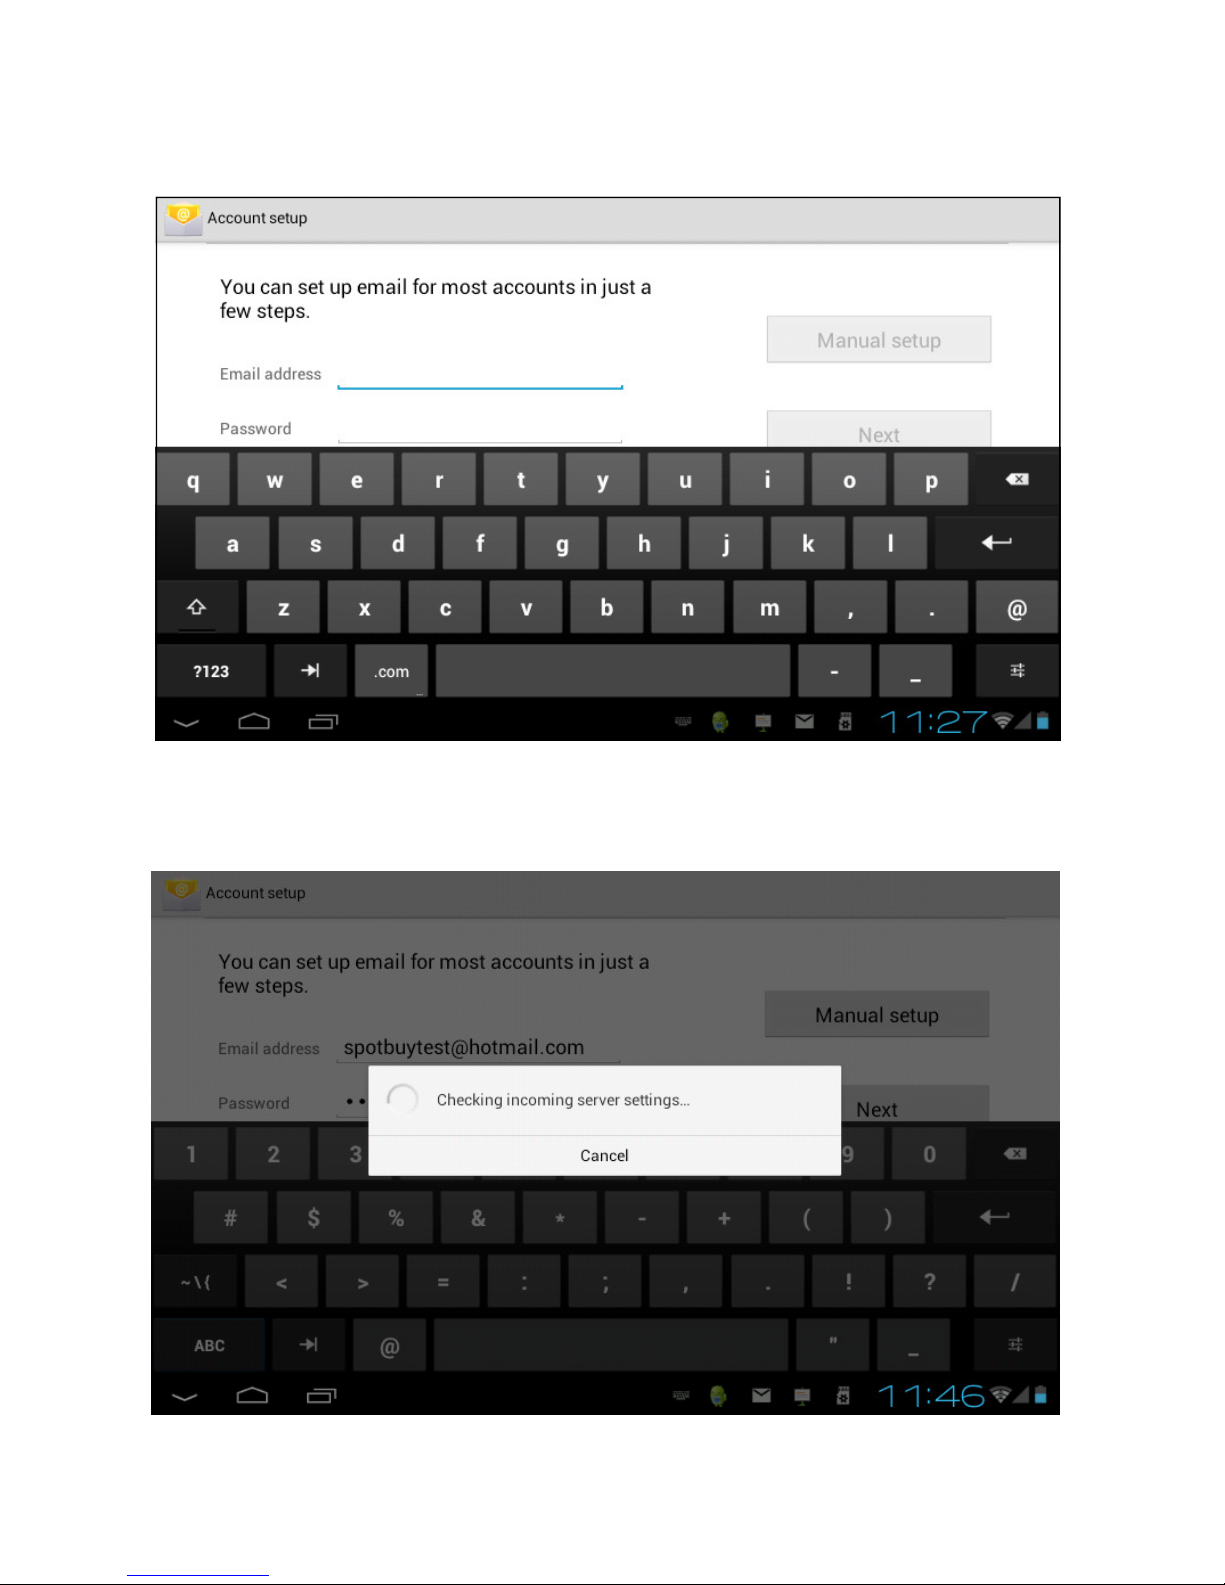
The first time you do this, it will ask to configure the account information as shown
below:
To use E-mail, you will need to have an email account already setup with an email
provider such as Hotmail or Yahoo etc. To set your email account, you will need to be
network connected before you can proceed.
Then press Next to complete. You will see this screen pop up:
To set up a GMAIL account, it is very similar. Select Google from the menu to see this
screen:

19
Select Sign in (if you already have a Gmail account) .. See screen below:
or select Create to open a new account. Then, follow the Google screens to create it.

20
SETTING THE TIME AND DATE
Select Date and Time menu option to set all your preferred parameters on this screen:
Go to each of the items listed on the right to set it up as per the time zone you are in and
as you prefer it.
Tap on Language & input. Under KEYBOARD & INPUT METHODS, check the default
is set to English (US) - Android Keyboard. If not, select it and you will see this pop-up:
Select English (US) to make sure your unit is set to English. (It may be the only choice)
Table of contents


