GBS Elettronica Puma Technical manual


Operation Instruction
PUMA
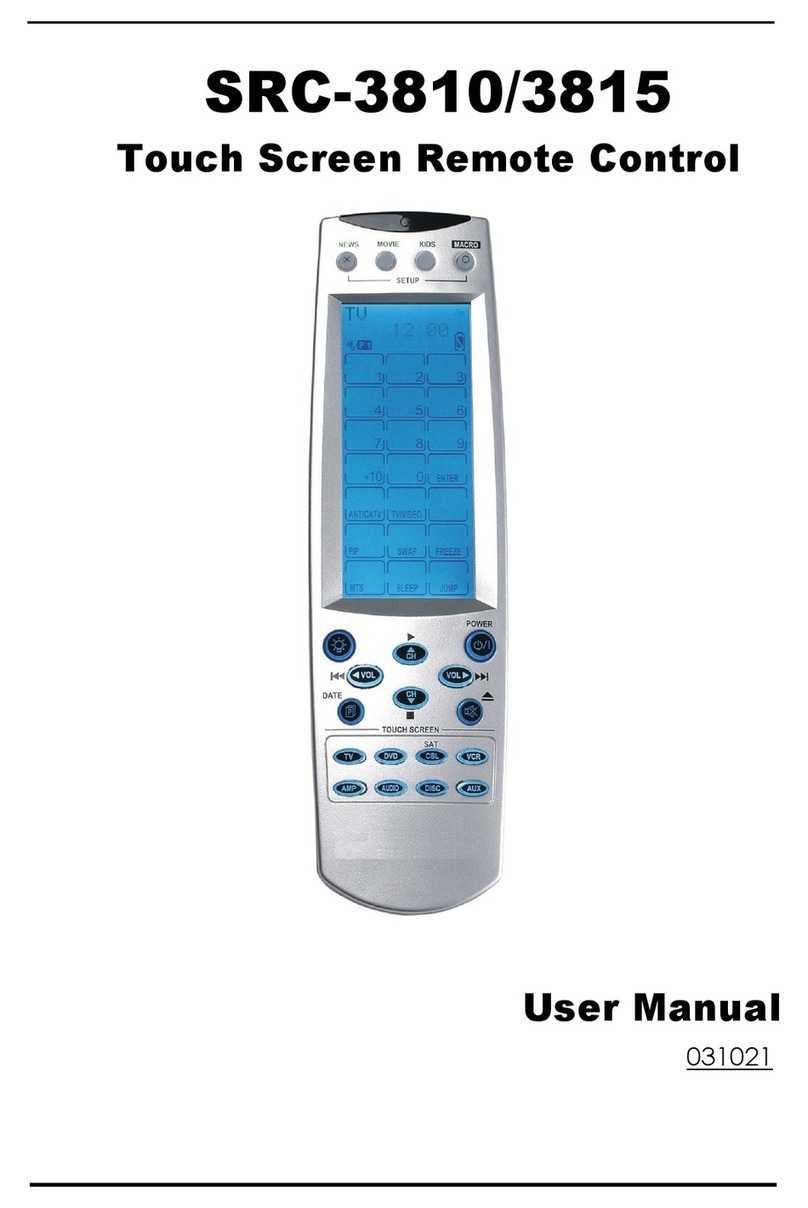
Thank you for your purchase the PUMA Touch Screen
Universal Remote Control. The
universal remote control has the stylish design with transparent
buttons and shiny surface, it contains one
of the largest infrared code library obtainable in Europe for 4
different devices.
For preprogrammed code, all you have to do is to choose the
device which you wish to control (for
example TV) and it’s 3-digit code numbers from the brand
code list (for example 003 under Lifetec TV).
After you set up . it will remember all the data what you set up
permanently even you remove the batteries
later.
The 4 in 1 universal remote control is suitable for practically
almost all common brands of television set ,
DVR and DVD player (DVD), digital and analogue satellite
receiver and cable box and DVB, viedeo
rcorder (VCR), It can operate all main functions of your
device.
You can use Auto Search to scan the code library in case of
you can’t find your device brand in the code
list.
Besides,this universal remote control also can learn a new
code from a original remote control to
supplement the codes in case of it’s shortage.
Volume lock can fix VOL+/VOL- button to only control
amplifier for your home theater.
Device lock can fix the device against changing by a new set
up until you unlock it.
Macro function makes several sequent operations with one
button for your home theater.
All the set up data will be stored in back up memory
permanently, you don’t need to be worry about data
loss when you replace battery.
Please enjoy the time with this new intelligent touch screen
universal remote control.
Device Code Assignment
Bank for Device Initial code Set-up confine Total of codes
TV TV 042 001-383 383
VCR VCR 026 001-172 172
CBL/SAT Satellite,Cable Box,DVB 251 001-341 341
DVD DVD,DVR 012 001-180 180
Total codes:1645
Realize the Buttons

SET—For you start to set up the universal remote control.
Learn—Used to setup learning functions.
Light Lets you control the touch screen back light.
TV、VCR、CBL/SAT,DVD、—Let you select the device you
want to control.
POWER—Turns the device on and off .
0-9—The number keys operate the same as on your original
remote control, and maybe also used for
entering device codes when set up.
ENTER—Works like as the entering on your original remote.
TV/AV—Works like the TV/Video key on your original TV
remote, and TV/SAT key on your original
satellite remote A.B in cable and CD modes.
MENU —Works like the Menu or OSD (on-screen display) or
Memory key on your original remote
control.
CH± —Works like the Channel Up and Down keys on your
original remote control.
VOL± —Control the volume like the Volume Up and Down on
your original remote control.
Mute To mute the sound
REW(fast reverse)
PLAY (operate your DVD, CD etc)
FFWD (fast forward)
REC (Record)
STOP (terminating your operation)
PAUSE
,OK,EXIT Works like as the
UP,DOWN,LEFT,RIGHT,OK,EXIT Keys
on your original remote control for menu function .
RED,GREEN,YELLOW and BLUE: for TV Fast Text.
Television video
TV and text mixed
Teletext mode
Page hold
M1,M2, Lets you make sequent operation for you home
theater.
Set up
Make sure that 3 new batteries have been inserted correctly
into your new universal remote control unit.
To make your remote control ready for use, you need to carry
out one of the following steps:
A. Set up by Brand Code
1. Switch on the device, which you would like to control (e.g.
TV set).

2. In the back section of this manual, find out the correct brand
name and code no. in the code list for your
device what you want to control (e.g. Lifetec 003,010,062, …).
Note: the codes must be in the column for the corresponding
device group (TV).
3. Hold down the SET key and actuate the device key (e.g.
TV1) at the same time. The LED will be on at
the moment. Then release the pressed both keys.
4.You must enter into the 3-digit device code (e.g. 003 for
Lifetec TV) within 10 seconds now. If no entry
within 10 seconds, the setting up mode is terminated
automatically.
5.The LED goes out if the code has been accepted by the
universal remote control. If the LED flashes twice,
that means the code may be wrong, and the universal remote
control remains in set-up mode, you should
enter into the correct code from the list again in time.
6.Check the function of the keys on remote control. If most of
keys on your new remote control do not
function correctly, try another 3-digit device code (e.g. 010…)
from the list under the same brand.
Repeat step 3 to 6 until all the basic functions operate correctly.
Once you satisfy the code, that means you have already got
correct set up for the device.
Remark: To leave set up mode, press the device key (e.g.
TV1). Or if you do not actuate any keys
within 10 seconds, it will be terminated automatically.
You may set up more than one device on the new remote
control. Before you operate your new
remote control, please press the requested device key first (e.g.
TV1), so the remote control is surely at
the proper device status, otherwise it may control the wrong
device which did not requested by you.
B. Set up by Automatic Search
If setting up by brand name and codes is unsuccessful, or you
can not find your brand name in the list,
you can use the Automatic Search to find the correct code for
your remote control.
1.Switch on the device that you like to control. If it is a video
recorder, please insert a video cassette.
2.Point the remote control at your device. Press the SET and
the device (e.g. TV) keys
simultaneously and hold them down for 3 seconds. Then the
LED flashes, that means it is in Automatic
Search now.

3.The OFF signal is automatically transmitted to the device
from the remote control (code scan). Once the
device (e.g. TV) switches off, immediately press any key
(except SET key) to stop the Automatic
Search.
4.Switch on the device again by pressing the POWER key.
Check the function of the other keys on the
remote control. If all the keys do not function (that means you
may not stop the search in time), or most
of keys’ operation is not good enough, you can start the search
again (see steps 2–4) to find out a
suitable code to fit your device completely.
If most of keys’ function properly, that means your setting up
is successful, press the device key (e.g.
TV1) again to save the code and finish the set up.
Remark: To abort the Automatic Search, press any key
(except set key). The LED lamp will go out and
the search is terminated. When remote control searches through
all different type of codes, and the LED
will turn off, then the remote control will quit from search
process automatically.
C. Setting up by Manual Search
If setting up with brand name and codes is unsuccessful, you
can also use the Manual Search to find the
correct code for operating your device.
1.Switch on the device that you like to control. If it is a video
recorder, insert a video cassette.
2.Point the remote control at your device. Press down and hold
the SET key and press the device key (e.g.
TV) in a short time (less than 3 seconds, otherwise it goes to
Automatic Search), then release the both
keys pressed.
3. The LED will be on at the moment and the remote control is
then in setting-up mode.
4.Actuate the POWER key (ON/OFF key) about every 2
seconds. (If the device being sought is a video
recorder, DVD player, CD player, AUX etc., you can press the
PLAY button also.), the device button
now flashes, that means it is in Manual Search mode.
5.Once the searched device switches off (or react), test the
functions of other keys (don’t press POWER
key, in case it goes to next code) on the remote control. If most
of them do not function properly, press
the POWER key about every 2 seconds again to search the next
reactive code (continues the Manual
Search, see step 4-5).

If you feel most of keys on the remote control work good
enough, you can save the code by pressing
the device key (e.g. TV) to finish the Manual Search.
Remark: The Manual Search will be automatically terminated
if no entry within 30 seconds.
D. Set up by Learning
The LEARNING function is used to supplement the
preprogrammed codes. The standard code list may
provide most of functions needed, but you can add a small
number of additional functions on it. Or you can
add a new code from a original remote control which is
shortage in the code list.
In learning mode, you must prepare a another original remote
control from where you will take the codes.
Please use fresh batteries for both the Learning Remote Control
and the Original Remote Control.
1.Press down and hold the Learn key and press the device
what you wanted to learn(e.g. DVD), then
release the both pressed keys. The LED on your new remote
control blinks and then the remote control is
in learning mode for DVD codes.
2. Press and release the target button which you want to learn
(e.g.POWER), the LED lights up.
3. Point the original remote control to the receiver LED(as the
same as it’s transmitter LED) on your new
remote control, the both remotes facing each other by
approximately 30mm apart.
4. Press and hold the source button on your original remote
control (e.g.POWER) until the LED on your
new remote control blinks 2 times and lights up 2 seconds, then
blinks again. (That means you have
learnt POWER singnal from the original remote,and you new
remote control is in learning again for next
learning.) If there is a learning problem, the light blinks 4 times
and lights up for 2 seconds then blinks,
(That means you failed to learn POWER singnal from the
original remote, and your new remote control
is in learning again for next learning.)
5. Repeat Step 2 to 4 to learn more bottons.
Remark:
1. If you want the learning mode to be exited, Press and release
Device key.
2. In learning mode .you must be less than 30 mm between 2
remotes, and the 2 remotes must be put in a
straight line.

3. It will eixt the learning mode if you don’t press any key in
30 seconds .
4. You can press SET and 4 together to delete all buttons you
have learnt under the device button, the LED
will flash 2 times to confirm it.
5. If the memory is full, LED blink 4 times then quit for
learnning.
6. The last singal learnt will overwrite the previous signal.
7. About 100 commands can be stored in this remote control
and about 40 commands can be learnt for one
device.
Other Functions
A. Display the Device Code:
The device codes, which has been set up in your new remote
control, can be called up
as following:
1. Press the SET key and hold it down, now actuate number
key 1 to display the 100th position of the 3-
digit code. Count the numbers when the LED flashes. If the
LED doesn’t flash, that means the digit is
ZERO.
2.Similarly, press the SET key and hold it down, at the same
time actuate number key 2 to display the
10th position of the 3-digit code.
3.Press the SET key and hold it down, at the same time
actuate number key 3 to display the 1st position of
3-digit code.
Example for Code 108:
1. Press SET and ―1‖
LED flashes 1 time.
2. Press SET and ―2‖
LED flashes 0 times , no flashes.
3. Press SET and ―3‖
LED flashes 8 times.
B. Volume lock
This function makes you very convenient when you only use
one device to adjust volume. For example,
you may use your amplifier as your main volume control, then
you can use this function to fix the volume
and mute key to AMP, no matter which device you used (even
you use TV1, DVD, VCR etc), the volume
and mute key on remote control still control the volume and
mute of your amplifier.
1. Press the device button which you want to lock. E.g. AMP

2. Press SET and 5,the current VOL and mute will be locked,
LED flashes two times to confirm it.
Remark: you can press SET and 6 to unlock it.
C. Write-protection of Device Codes:
To protect the device codes from being inadvertently
overwritten / deleted, you can carry out the
following:
1. Press the device key (e.g. TV) that you would like to protect
on your remote control.
2. Press and hold down the SET key and press the 7 key at the
same time. Then release the both pressed
keys, the LED will flash twice and the code is then protected
from being overwritten/deleted.
Note: To cancel write protection,please press the SET key and
hold it down, and activate the 8 key at the
same time, and then release the both pressed keys. The LED
flashes twice and the protection have been
cancelled.
D.Set up Macro:
Macro function let you make sequent operation for you home
theater. Please press M1 key ( or M2 key),
and then release it. The remote control will send out a sequent
IR commands that you programmed before.
You can set up a Macro by following below steps:
1. Press and hold down the SET key and press the M1 key at
the same time. then release it and the LED on
that means it is in the setting up mode.
2. You can select the device and function key for a sequent
operation what you enjoyed. (e.g.:
TV+POWER+MUTE+TV/AV, DVD+PLAY,
VCR+RECORD, etc. That means you want to turn on
the TV and shut off its sound, switch TV and input to AV port,
DVD start to play disc, VCR begins to
record at the same time. )
3. Press the M1 key to save the setting, LED then exit to
current setup state.
E.Reset / Delete Function:
To delete the codes which have been set up in the remote
control, press and hold down the SET key, then
press the 0 key simultaneously for more than 3 seconds and
then release the both pressed keys. The LED
will flash twice and all the set up data and all learn commands
in the remote control are deleted.
Remark: Please don’t operate this function if you don’t want to
delete all the settings.

Istruzioni per l’uso
PUMA
Grazie per aver acquistato il Telecomando Universale PUMA
Touch Screen. Il telecomando universale ha un elegante design
con tasti trasparenti e superficie brillante, contiene uno dei
maggiori pacchetti di codici che si possono ottenere in Europa
per 4 diversi apparecchi.
Per il codice preprogrammato, tutto quello che dovete fare è
scegliere l’apparecchio che intendete controllare (ad esempio la
TV) e i suoi numeri di codice a 3 cifre dalla lista dei codici
delle marche (ad esempio 003 sotto Lifetec TV).
Dopo la configurazione, tutti i dati configurati rimarranno in
memoria permanentemente, anche se rimuoverete le batterie.
Il telecomando universale 4 in 1 è adatto praticamente per tutte
le comuni marche di apparecchi televisivi, lettori DVR e DVD
(DVD), ricevitori satellitari digitali ed analogici e cable box e
DVB, videoregistratori (VCR). Può controllare tutte le
principali funzioni dei vostri apparecchi.
Potete usare la Ricerca Automatica per fare la scansione del
pacchetto di codici nel caso non riusciate a trovare la marca del
vostro apparecchio nella lista dei codici.
Inoltre, questo telecomando universale può anche imparare un
nuovo codice da un telecomando originale per incrementare i
codici in caso di indisponibilità.
Volume lock può bloccare il tasto VOL+/VOL- per controllare
solo l’amplificatore del vostro home theater.
Device lock può bloccare l’apparecchio per evitare una nuova
configurazione a meno che non venga disattivata questa
funzione.
La funzione Macro esegue diverse operazioni consecutive con
un tasto per il vostro home theater.
Tutti i dati configurati saranno conservati nella memoria di
back up permanentemente, non dovrete preoccuparvi di
eventuali perdite di dati quando sostituirete le batterie.
Godetevi il nuovo telecomando universale intelligente touch
screen.
Assegnazione Codice Apparecchio
Serie per Configurazione iniziale Codice Apparecchio confine
Totale codici
TV TV 042 001-383 383
VCR VCR 026 001-172 172
CBL/SAT Satellite, Cable Box, DVB 251 001-341 341
DVD DVD,DVR 012 001-180 180
Totale codici:1645

Spiegazione dei tasti
SET—Per iniziare a configurare il vostro telecomando
universale.
Learn—Si usa per configurare le funzioni di apprendimento.
Light Permette di controllare la retroilluminazione del touch
screen.
TV, VCR, CBL/SAT, DVD —Permette di selezionare
l’apparecchio che si intende controllare.
POWER—Accende e spegne l’apparecchio.
0-9—I tasti numerici hanno la stessa funzione del vostro
telecomando originale, e possono essere usati anche per
inserire i codici degli apparecchi durante la configurazione.
ENTER—Funziona come il tasto enter del vostro telecomando
originale.
TV/AV—Funziona come il tasto TV/Video del vostro
telecomando TV originale, e come il tasto TV/SAT del vostro
telecomando originale per il satellite A.B nelle modalità cavo e
CD.
MENU —Funziona come il tasto Menù o OSD (on-screen
display) o Memory del vostro telecomando originale.
CH± —Funziona come i tasti Channel Up e Down del vostro
telecomando originale.
VOL± —Controlla il volume come i tasti Volume Up e Down
del vostro telecomando originale.
Mute Per attivare la modalità silenziosa.
REW (indietro veloce)
PLAY (avvia il vostro DVD, CD etc)
FFWD (avanti veloce)
REC (Registrazione)
STOP (termina le operazioni)
PAUSE
,OK,EXIT Funziona come i tasti
UP,DOWN,LEFT,RIGHT,OK,EXIT del vostro
telecomando originale per le funzioni del menù.
ROSSO,VERDE,GIALLO e BLU: per Televideo.
Television video
TV e testo misto
Modalità Teletext
Mantieni pagina
M1, M2, Vi consente di eseguire operazioni consecutive per il
vostro home theater.
Set up
Assicuratevi di aver inserito 3 batterie nuove nel vostro nuovo
telecomando universale
Perché il vostro telecomando sia pronto per l’uso, dovrete
effettuare una delle seguenti operazioni:

A. Configurazione con Codice Marca
1. Accendete l’apparecchio che intendete controllare (es.
apparecchio TV).
2. Sul retro di questo manuale, trovate il nome corretto della
marca e il numero di codice nella lista dei codici per
l’apparecchio che intendete controllare (es. Lifetec
003,010,062, …).
Nota: i codici devono trovarsi nella colonna corrispondente al
gruppo degli apparecchi (TV).
3. Tenete premuto il tasto SET e azionate il tasto
dell’apparecchio (es. TV1) contemporaneamente. Si accenderà
subito il LED. Rilasciate entrambi i tasti premuti.
4. Dovrete inserire il codice apparecchio di 3 cifre (es. 003
per TV Lifetec) entro 10 secondi. Se non inserirete nulla entro
10 secondi, la modalità configurazione terminerà
automaticamente.
5. Il LED si spegne se il codice è stato accettato dal
telecomando universale. Se il LED lampeggia due volte,
significa che il codice potrebbe essere errato, e il telecomando
universale resta in modalità configurazione; dovrete inserire di
nuovo il codice corretto scegliendolo dalla lista in tempo.
6. Controllate il funzionamento dei tasti sul telecomando. Se la
maggior parte dei tasti del vostro nuovo telecomando non
funziona correttamente, provate un altro codice apparecchio di
3 cifre (es. 010…) scegliendolo dalla lista sotto la stessa marca.
Ripetete i passi da 3 a 6 finché tutte le principali funzioni
saranno correttamente funzionanti.
Una volta trovato il codice esatto, significa che avete
correttamente configurato il telecomando per l’apparecchio.
Nota bene: Per uscire dalla modalità configurazione, premete
il tasto dell’apparecchio (es. TV1). Oppure se non attivate
nessun tasto entro 10 secondi, terminerà automaticamente.
Potete configurare più di un apparecchio sul vostro nuovo
telecomando. Prima di utilizzare il vostro nuovo telecomando,
siete pregati di premere prima il tasto apparecchio richiesto
(es. TV1), in modo che il telecomando si trovi sicuramente allo
status dell’apparecchio corretto, altrimenti potrebbe interagire
con l’apparecchio sbagliato contro la vostra volontà.
B. Configurazione con la Ricerca Automatica
Se la configurazione con il nome della marca e i codici non va
a buon fine, o se non riuscite a trovare il nome della vostra
marca nella lista, potete usare la Ricerca Automatica per
trovare il codice corretto per il vostro telecomando.
1. Accendete l’apparecchio che intendete controllare. Se è un
videoregistratore, inserite una videocassetta.

2. Puntate il telecomando verso il vostro apparecchio. Premete
il tasto SET e quello dell’apparecchio (es. TV)
simultaneamente e tenete premuto per 3 secondi. Il LED
lampeggia, indica che si è avviata la Ricerca Automatica.
3. Il segnale OFF viene trasmesso automaticamente
all’apparecchio dal telecomando (code scan). Una volta che
l’apparecchio (es. TV) si spegne, premete immediatamente
qualsiasi tasto (eccetto il tasto SET) per arrestare la Ricerca
Automatica.
4. Accendete di nuovo l’apparecchio premendo il tasto
POWER. Controllate il funzionamento degli altri tasti sul
telecomando. Se non funziona nessun tasto (significa che non è
stata arrestata in tempo la ricerca), o la maggior parte dei tasti
non è sufficientemente funzionante, potete riavviare di nuovo
la ricerca (passi 2-4) per trovare un codice completamente
adatto per il vostro apparecchio.
Se la maggior parte dei tasti funziona correttamente, significa
che la configurazione è andata a buon fine, premete di nuovo il
tasto dell’apparecchio (es. TV1) per salvare il codice e
terminare la configurazione.
Nota bene: Per annullare la Ricerca Automatica, premete
qualsiasi tasto (eccetto il tasto set). Il LED si spegnerà e la
ricerca sarà arrestata. Quando il telecomando cerca tra tutti i
diversi tipi di codice, e il LED si spegne, allora il telecomando
terminerà automaticamente il processo di ricerca.
C. Configurazione con Ricerca Manuale
Se la configurazione con il nome della marca e i codici non va
a buon fine, potete anche usare la Ricerca Manuale per
trovare il codice corretto per utilizzare il vostro apparecchio.
1. Accendete l’apparecchio che intendete controllare. Se è un
videoregistratore, inserite una videocassetta.
2. Puntate il telecomando verso il vostro apparecchio. Premete
il tasto SET e quello dell’apparecchio (es. TV)
simultaneamente e tenete premuto per un breve tempo (meno
di 3 secondi, altrimenti parte la Ricerca Automatica), quindi
rilasciate entrambi i tasti premuti.
3. Il LED si accenderà subito e il telecomando entrerà in
modalità configurazione.
4. Premere il tasto POWER (tasto ON/OFF) circa ogni 2
secondi. (Se l’apparecchio che si cerca è un videoregistratore,
un lettore DVD, un lettore CD, AUX ecc, potete anche premere
il tasto PLAY), il tasto dell’apparecchio ora lampeggia, indica
che è in modalità Ricerca Manuale.
5. Una volta che l’apparecchio ricercato si spegne (o reagisce),
testate le funzionai di altri tasti (non premete il tasto POWER,

altrimenti andrà al codice successivo) sul telecomando. Se la
maggior parte dei tasti non funziona correttamente, premete
nuovamente il tasto POWER circa ogni 2 secondi per cercare il
nuovo codice reattivo (prosegue la Ricerca Manuale, vd. Passi
4-5).
Se vi sembra che la maggior parte dei tasti del telecomando
funzioni in maniera soddisfacente, potete salvare il codice
premendo il tasto dell’apparecchio (es. TV) per terminare la
Ricerca Manuale.
Nota bene: La Ricerca Manuale terminerà automaticamente se
non si inserisce nulla entro 30 secondi.
D. Configurazione con Apprendimento
La funzione APPRENDIMENTO si usa per incrementare i
codici preprogrammati. La lista dei codici standard dovrebbe
fornire la maggior parte delle funzioni richieste, ma potete
aggiungere alcune funzioni aggiuntive. Oppure potete
aggiungere un nuovo codice da un telecomando originale non
disponibile nella lista dei codici.
Nella modalità apprendimento, dovete avere a disposizione un
altro telecomando originale dal quale prendere i codici.
Si raccomanda di usare batterie cariche sia per il Telecomando
che Apprende sia per il Telecomando Originale
1. Premere e mantenere premuto il tasto Learn e premere il
tasto dell’apparecchio da cui si vuole apprendere (es. DVD),
poi rilasciare entrambi i tasti premuti. Il LED sul vostro nuovo
telecomando lampeggia e il vostro telecomando è in modalità
apprendimento per i codici DVD.
2. Premere e lasciare il tasto obiettivo dell’apprendimento (es.
POWER), il LED si accende.
3. Puntare il telecomando originale verso il ricevitore LED (lo
stesso per il trasmettitore LED) sul vostro nuovo telecomando,
con i due telecomandi uno di fronte all’altro ad una distanza di
circa 30 mm.
4. Premere e tenere premuto il tasto fonte sul vostro
telecomando originale (es. POWER) finché il LED sul vostro
nuovo telecomando non lampeggia 2 volte e si accende per 2
secondi, per poi lampeggiare di nuovo. (Significa che avete
imparato il segnale POWER dal telecomando originale, e che il
vostro nuovo telecomando è pronto per imparare la nuova
funzione). Se c’è un problema nell’apprendimento, la luce
lampeggia 4 volte e si accende per 2 secondi, poi lampeggia.
(Significa che l’apprendimento del segnale POWER dal
telecomando originale è fallito, e che il vostro nuovo
telecomando è pronto per imparare una nuova funzione).
5. Ripetere i passaggi da 2 a 4 per apprendere altri tasti.

Nota bene:
1. Se volete uscire dalla modalità apprendimento. Premete e
lasciate il tasto Apparecchio.
2. Nella modalità apprendimento ci deve essere una distanza di
massimo 30 mm tra i 2 telecomandi, e i 2 telecomandi devono
trovarsi su una linea retta.
3. La modalità apprendimento termina se non si preme nessun
tasto entro 30 secondi.
4. Potete premere insieme SET e 4 per cancellare tutti i tasti
appresi sotto il tasto dell’apparecchio, il LED lampeggia 2
volte per conferma.
5. Se la memoria è piena, il LED lampeggia 4 volte poi esce
dalla modalità apprendimento.
6. L’ultimo segnale appreso si sovrascriverà al precedente
segnale.
7. Si possono immagazzinare circa 100 comandi in questo
telecomando e possono essere appresi 40 comandi per ogni
apparecchio.
Altre funzioni
A. Mostra il Codice Apparecchio:
I codici apparecchio, che sono stati configurati nel vostro
nuovo telecomando possono essere richiamati come segue:
1. Premere il tasto SET e tenere premuto, poi azionare il tasto 1
per vedere la posizione delle centinaia del codice a 3 cifre.
Contare i numeri quando il LED lampeggia. Se il LED non
lampeggia, significa che la cifra è zero.
2. Analogamente, premere il tasto SET e tenere premuto, allo
stesso tempo azionare il tasto 2 per vedere la posizione delle
decine del codice a tre cifre.
3. Analogamente, premere il tasto SET e tenere premuto, allo
stesso tempo azionare il tasto 3 per vedere la posizione delle
unità del codice a tre cifre.
Esempio per il Codice 108:
1. Premere SET e ―1‖
Il LED lampeggia 1 volta.
2. Premere SET e ―2‖
Il LED lampeggia 0 volte, nessun lampeggiamento.
3. Premere SET e ―3‖
Il LED lampeggia 8 volte.
B. Volume lock
Questa funzione è molto utile quando si usa un solo
apparecchio per regolare il volume. Ad esempio, potete usare il

vostro amplificatore come controllo volume principale, per cui
potete usare questa funzione per bloccare il tasto volume e il
tasto mute in AMP, indipendentemente da quale apparecchio
usate (anche se usate TV1, DVD, VCR etc), il tasto volume e il
tasto mute sul telecomando continueranno a controllare il
volume del vostro amplificatore.
1. Premere il tasto apparecchio che si vuole bloccare. Es. AMP
2. Premere SET e 5, l’attuale VOL e mute saranno bloccati, il
LED lampeggia due volte per conferma..
Nota bene: premere SET e 6 per sbloccare..
C. Protezione contro la sovrascrittura dei Codici
apparecchio:
Per proteggere i codici apparecchio da sovrascrittura o
cancellazione, potete fare quanto segue:
1. Premere il tasto apparecchio (es. TV) che volete proteggere
sul vostro telecomando.
2. Premere e mantenere premuto il tasto SET e premere il tasto
7 allo stesso tempo. Poi lasciare entrambi i tasti premuti, il
LED lampeggia due volte e il codice è protetto da
sovrascrittura o cancellazione.
Nota: per eliminare la protezione contro la scrittura, premere il
tasto SET e tenere premuto, contemporaneamente premere il
tasto 8, poi rilasciare entrambi i tasti premuti. Il LED
lampeggia due volte e la protezione è stata rimossa
D. Configurazione Macro:
La funzione Macro consente di fare operazioni consecutive per
il vostro home theater. Premere il tasto M1 (o il tasto M2), e
poi lasciarlo. Il telecomando invierà una serie di comandi IR
precedentemente programmati.
Si può configurare una Macro seguendo i seguenti passaggi:
1. Premere e tenere premuto il tasto SET e allo stesso tempo
premere il tasto M1, poi lasciare, il LED indica che è attiva la
modalità configurazione.
2. Si può selezionare l’apparecchio e il tasto funzione per
l’operazione consecutiva desiderata (es.:
TV+POWER+MUTE+TV/AV, DVD+PLAY,
VCR+RECORD, etc. Significa che volete accendere la TV ed
eliminare l’audio, cambiare l’input da TV ad AV, avviare il
DVD per leggere un disco, mentre il VCR inizia
contemporaneamente a registrare).
3. Premere il tasto M1 per salvare la configurazione, il LED
esce all’attuale stato di configurazione.
E.Funzione Reset / Delete:

Per cancellare i codici che sono stati configurati nel
telecomando, premere e tenere premuto il tasto SET, poi
premere contemporaneamente il tasto 0 per più di 3 secondi e
poi rilasciare entrambi i tasti premuti. Il LED lampeggia due
volte e tutti i dati configurati e i comandi appresi nel
telecomando saranno cancellati.
Nota bene: si prega di non utilizzare questa funzione se non si
intende cancellare la configurazione.

Mode d’emploi
PUMA
Merci d’avoir acheté la Télécommande Universelle PUMA
Digital Touch Screen. La télécommande universelle a un
design élégant avec des touches transparentes et une surface
brillante, elle contient un des paquets de codes les plus
importants qui peuvent être trouvés en Europe pour 4 appareils
différents.
Pour le code préprogrammé, il vous suffit de choisir l’appareil
que vous souhaitez contrôler (par exemple la TV) et ses
numéros de code à 3 chiffres dans la liste des codes des
marques (par exemple 003 sous Lifetec TV).
Après la configuration, toutes les données configurées resteront
en mémoire de façon permanente, même si vous ôterez les
piles.
La télécommande universelle 4 en 1 convient pratiquement
pour toutes les marques communes d’appareils télévisés,
lecteurs DVR et DVD (DVD), récepteurs satellite numériques
et analogiques, câble et DVB, magnétoscopes (VCR). Elle peut
contrôler toutes les fonctions principales de vos appareils.
Vous pouvez utiliser la Recherche Automatique pour
procéder à l’exploration du paquet de codes dans le cas où vous
ne réussiriez pas à trouver la marque de votre appareil dans la
liste des codes.
En outre, cette télécommande universelle peut même
apprendre un nouveau code d’une télécommande originale,
pour augmenter le nombre de codes en cas d’indisponibilité.
Volume lock peut bloquer la touche VOL+/VOL- pour
contrôler uniquement l’amplificateur de votre home theater.
Device lock peut bloquer l’appareil pour éviter une nouvelle
configuration à moins que cette fonction ne soit désactivée.
La fonction Macro effectue diverses opérations consécutives
avec une touche pour votre home theater.
Toutes les données configurées seront conservées dans la
mémoire de back up de façon permanente, vous ne devrez pas
vous inquiéter des pertes de données éventuelles lorsque vous
remplacerez les piles.
Profitez de votre nouvelle télécommande universelle
intelligente à écran tactile.
Attribution du Code de l’Appareil
Série pour Configuration initiale du Code de l’Appareil avec
Total des codes
TV TV 042 001-383 383
VCR VCR 026 001-172 172
CBL/SAT Satellite, Cable Box, DVB 251 001-341 341

DVD DVD,DVR 012 001-180 180
Total codes : 1645
Explication des touches
SET
—
Pour commencer à configurer votre télécommande
universelle.
Learn
—
Pour configurer les fonctions d’apprentissage.
Light
—
Permet de contrôler le rétro-éclairage de l’écran tactile.
TV, VCR, CBL/SAT, DVD —Permet de sélectionner l’appareil
que vous souhaitez contrôler
POWER—Allume et éteint l’appareil.
0-9
—
Les touches numériques ont la même fonction que sur votre
télécommande originale et peuvent être aussi utilisées pour
saisir les codes des appareils durant la configuration.
ENTER—Fonctionne comme la touche entrée de votre
télécommande originale.
TV/AV—Fonctionne comme la touche TV/Video de votre
télécommande TV originale, et comme la touche TV/SAT de
votre télécommande originale pour le satellite A.B dans les
modalités câble et CD.
MENU —
—
Fonctionne comme la touche Menu ou OSD (on-
screen display) ou Memory de votre télécommande originale.
CH± —Fonctionne comme les touches Channel Up et Down
de votre télécommande originale.
VOL± —Contrôle le volume comme les touches Volume Up
et Down de votre télécommande originale.
Mute Pour activer la modalité silencieuse (sourdine).
REW(arrière rapide)
PLAY (démarre la lecture de votre DVD, CD, etc.)
FFWD (avance rapide)
REC (enregistrement)
STOP (termine les opérations)
PAUSE
,
OK
,
EXIT Fonctionne comme les touches
UP
,
DOWN
,
LEFT
,
RIGHT
,
OK
,
EXIT de votre télécommande
originale pour les fonctions du menu.
ROUGE,
,
VERT, JAUNE et BLEU : pour le Télétexte.
Television video
TV et texte mixte
Modalité Télétexte
Maintenir la page
M1, M2 Ces deux touches vous permettent d’effectuer des
opérations consécutives pour votre home theater.
Set up
Assurez-vous d’avoir inséré 3 nouvelles piles dans votre
nouvelle télécommande universelle.

Pour que votre télécommande soit prête pour l’emploi, vous
devrez effectuer une des opérations suivantes :
A. Configuration avec le Code Marque
1. Allumez l’appareil que vous souhaitez contrôler (ex. appareil
TV).
2. Au verso de ce manuel, vous trouverez le nom correct de la
marque et le numéro de code dans la liste des codes pour
l’appareil que vous souhaitez contrôler (ex. Lifetec
003,010,062, …).
Note : les codes doivent se trouver dans la colonne qui
correspond au groupe des appareils (TV).
3. Appuyez et gardez enfoncée la touche SET et appuyez
simultanément sur la touche de l’appareil (ex. TV1), le témoin
s’allumera immédiatement. Relâchez les deux touches.
4. Vous devrez saisir le code appareil de 3 chiffres (ex. 003
pour TV Lifetec) endéans 10 secondes. Si vous ne saisissez
rien endéans 10 secondes, la modalité configuration se termine
automatiquement.
5. Le témoin s’éteint si le code a été accepté par la
télécommande universelle. Si le témoin clignote deux fois, cela
signifie que le code pourrait être erroné, et la télécommande
reste en modalité configuration ; vous devrez saisir à nouveau
le code correct en le choisissant à temps dans la liste.
6. Contrôlez le fonctionnement des touches sur la
télécommande. Si la plupart des touches de votre nouvelle
télécommande ne fonctionnent pas correctement, essayez un
autre code appareil de 3 chiffres (ex. 010…) en le choisissant
dans la liste sous la même marque.
Répétez les étapes 3 à 6 jusqu’à ce que toutes les fonctions
principales fonctionnent correctement.
Une fois trouvé le code exact, vous avez configuré
correctement la télécommande pour l’appareil.
Nota bene : Pour quitter la modalité configuration, appuyez
sur la touche de l’appareil (ex. TV1). Si vous n’activer aucune
touche endéans 10 secondes, la modalité configuration se
termine automatiquement.
Vous pouvez configurer plus qu’un appareil sur votre nouvelle
télécommande. Avant d’utiliser votre nouvelle télécommande,
veuillez appuyer d’abord sur la touche de l’appareil souhaité
(ex. TV1), de manière à ce que la télécommande se trouve
certainement à l’état du bon appareil, autrement elle pourrait
interagir avec un autre appareil contre votre volonté.

B. Configuration avec la Recherche Automatique
Si la configuration avec le nom de la marque et les codes ne
réussit pas, ou si vous ne réussissez pas à trouver le nom de
votre marque dans la liste, vous pouvez utiliser la Recherche
Automatique pour trouver le code correct pour votre
télécommande.
1. Allumez l’appareil que vous souhaitez contrôler S’il s’agit
d’un magnétoscope, introduisez une cassette vidéo.
2. Pointez la télécommande vers votre appareil. Appuyez
simultanément sur la touche SET et sur celle de l’appareil (ex.
TV) et gardez-les enfoncées pendant 3 secondes. Le témoin
clignote en indiquant que la Recherche Automatique a
démarré.
3. Le signal OFF est transmis automatiquement à l’appareil par
la télécommande (code scan). Une fois que l’appareil (ex. TV)
s’éteint, appuyez immédiatement sur une touche
quelconque (à l’exception de la touche SET) pour arrêter la
Recherche Automatique.
4. Allumez à nouveau l’appareil en appuyant sur la touche
POWER. Contrôlez le fonctionnement des autres touches sur la
télécommande. Si aucune touche ne fonctionne (parce que la
recherche n’a pas été arrêtée à temps) ou si plusieurs touches
ne fonctionnent pas correctement, vous pouvez redémarrez la
recherche (étapes 2-4) pour trouver un code qui convient
totalement pour votre appareil.
Si la plupart des touches fonctionnent correctement, la
configuration a réussi. Appuyez à nouveau sur la touche de
l’appareil (ex. TV1) pour sauvegarder le code et terminer la
configuration.
Nota bene : Pour annuler la Recherche Automatique, appuyez
sur une touche quelconque (à l’exception de la touche Set). Le
témoin s’éteindra et la recherche s’arrêtera. Lorsque la
télécommande cherche parmi tous les types de codes différents
et que le témoin s’éteint, alors la télécommande termine
automatiquement le processus de recherche.
C. Configuration avec la Recherche Manuelle
Si la configuration avec le nom de la marque et les codes ne
réussit pas, vous pouvez également utiliser la Recherche
Manuelle pour trouver le code correct pour utiliser votre
appareil.
1. Allumez l’appareil que vous souhaitez contrôler S’il s’agit
d’un magnétoscope, introduisez une cassette vidéo.
2. Pointez la télécommande vers votre appareil. Appuyez
simultanément sur la touche SET et sur celle de l’appareil (ex.
TV) et gardez-les enfoncées pendant un court moment (moins
Table of contents
Languages:
Other GBS Elettronica Remote Control manuals
Popular Remote Control manuals by other brands
RCA
RCA RCR312W owner's manual
Adam
Adam S Series Operation manual
Universal Remote Control
Universal Remote Control ORION MX-850 owner's manual
Honeywell Home
Honeywell Home HVC20A1000 manual
Lundell Plastics
Lundell Plastics 01T0DL instruction manual

Champion
Champion 18029 Owner's manual & operating instructions
