gbSoundlab TubeMUv2 User manual
TubeMUv2 | User's Guide
1
!
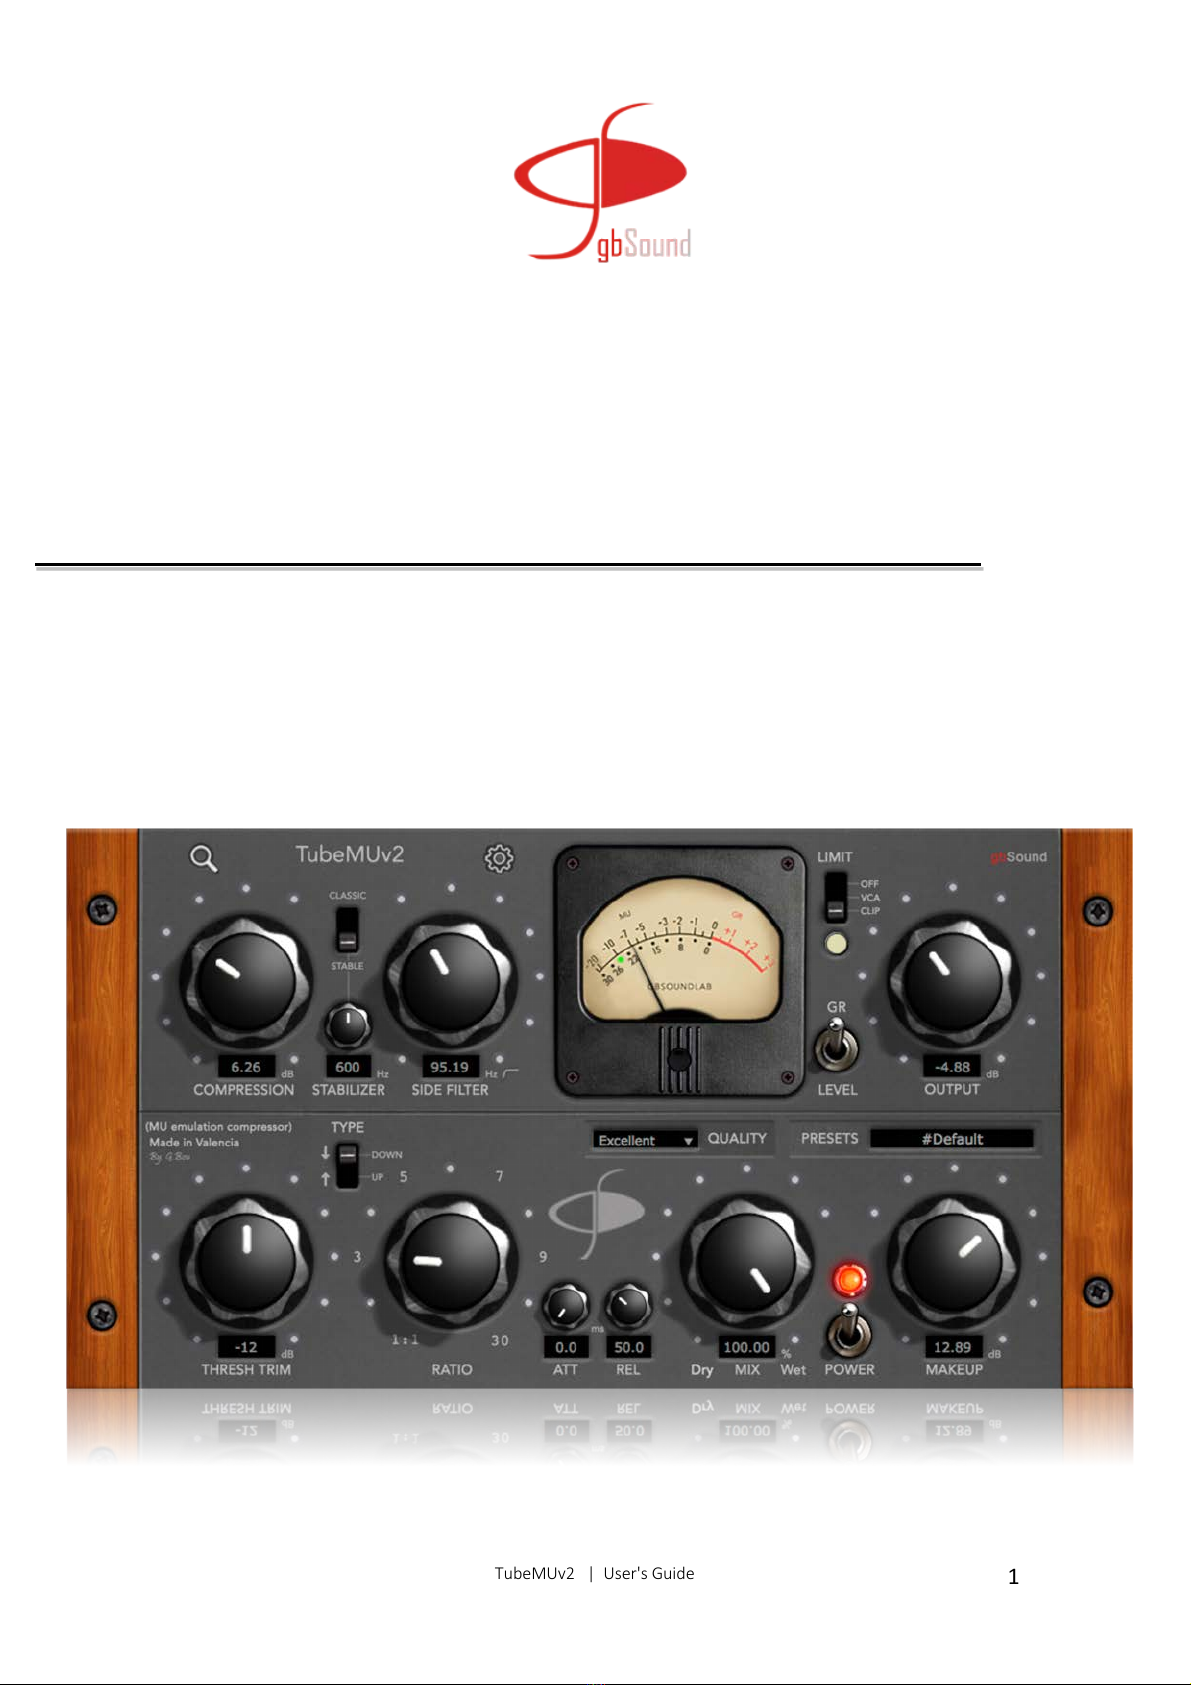
Tube MUv2
VARIABLE-MU EMULATION COMPRESSOR
Classic compressor / Stable compressor
User's Guide

TubeMUv2 | User's Guide
2
TABLE OF CONTENTS
CHAPTER 1 – INTRODUCTION
1.1 Welcome
1.2 Product Description
CHAPTER 2 – CONTROLS
2.1 “COMPRESSION/THRESH TRIM/SIDE FILTER/RATIO/STABILIZER/TYPE”
2.1b “RESPONSE CURVES”
2.1c. “GAIN REDUCTION AND SIDE CHAIN SCHEME”
2.2 “VUMETER/LIMITER/OUTPUT/GR - LEVEL”
2.3 “MIX/POWER/MAKEUP”
2.4 “QUALITY SELECTOR/RESIZE /PRESETS”
CHAPTER 3 - OPERATION GUIDE
!
!
!
!
!
!
!
!
!
!

TubeMUv2 | User's Guide
3
Chapter 1 – Introduction
1.1 Welcome
Thank you for purchasing this gbSoundlab product. We advise you to take the time to
read this manual to get the best performance from TubeMUv2.
1.2 Product description
TubeMUv2, It is a vintage compressor, with many improvements with reference to the
first version and, which emulates the RMS generated in this type of device equipped
with variable «MU» factor valves, these being designed in principle for radiofrequency.
The gain variation is achieved by polarizing the "grids of the first two triode or pentode
valves" with a negative voltage. The higher the signal amplified by the internal
sidechain circuit, the higher the control voltage, and therefore the greater the gain
reduction. The uniformity of the signal is given by its "Feedback" control circuit and for
this reason, this type of processor has the hallmark of musicality.
These compressors behave completely differently from the others, such as the Optical,
VCA, FET, and Diode Bridge, the latter also very similar to the “Variable – Mu” but with
greater distortion
Several new controls have been incorporated into this second version of TubeMU,
achieving greater flexibility in adjusting any sound source. Now we can choose
between the response of an older conventional compressor “CLASSIC” or another with
greater precision “STABLE”. We can also select the compression upwards “UPWARD”
or downwards “DOWNWARD”. The latter is the most similar to the response of
variable mu valve compressors.
With TubeMUv2, we will obtain a uniform compression, thanks to the emulation of the
sidechain and the feedback curve of the MU-variable models, generating a smooth
cohesion, to embellish any track or final master.
TubeMUv2 retains part of the architecture of the first TubeMU, but is now more
tamed and cleaner for the demands of today's production. A second compression
section has been implemented to free up the low frequencies, or simply make use of it
creatively, depending on how STABILIZER is set. In addition, a quality control based on
the number of samples per period has been implemented.
TubeMUv2, is for sure the most malleable compressor in your tool drawer. And don't
worry if you don't know if it will be optimal for this style or that. TubeMUv2 is an all-
rounder.
TubeMUv2 | User's Guide
4
Chapter 2 – Controls
2.1 – COMPRESSION / THRESH TRIM / SIDE FILTER / RATIO / STABILIZER / TYPE
COMPRESSION: It acts by amplifying and, at the same time, compressing the input
signal.
THRESH TRIM: It is key in the “COMPRESSION” adjustment. With it we will adjust the
sensitivity of the sidechain signal detector. It has a range from 0 to -24dB.
STABILIZER: Adjusts the crossover frequency of the parallel process for low
frequencies. It is dedicated to the “STABLE” selection only.
SIDE FILTER: Select the working frequency of the sidechain. The adjustment is
intuitive, depending on the amount of low frequencies that we want to compress, or
exclude from the process. It is active, in both “CLASSIC” and “STABLE” modes.
TYPE: It allows us to adjust the compression up “UPWARD” and the compression down
“DOWNWARD”. The latter is very linear, with a very smooth and progressive curve.
UPWARD, is more oscillating.
RATIO: Compression ratio, with a range of 1:1, 2:1, 3:1, 4:1, 5:1, 6:1, 7:1, 8:1, 9:1, 10:1,
30: 1.
ATT: Attack adjustment from 0 to 100ms.
REL: Release adjustment from 25 to 100ms.
TubeMUv2 | User's Guide
5
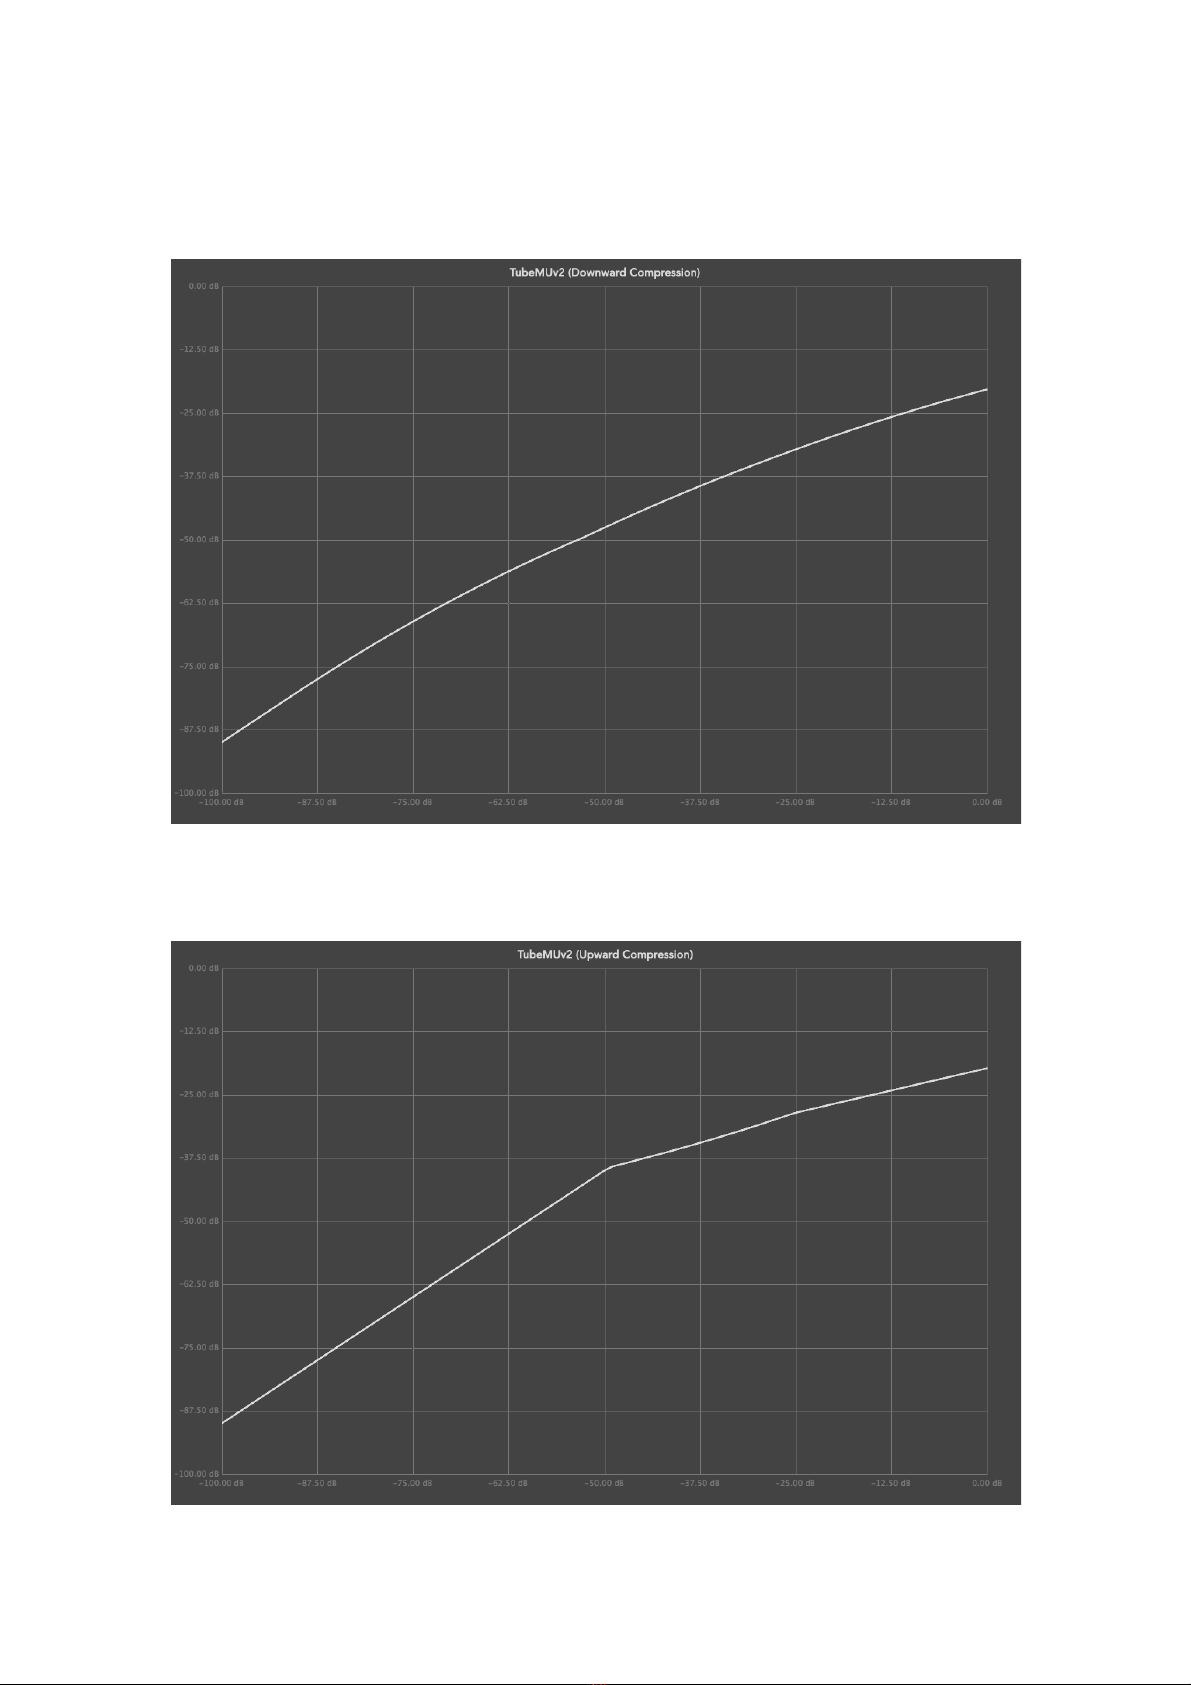
2.1b – RESPONSE CURVES
Downward compression
Upward compression
Table of contents
Other gbSoundlab Music Equipment manuals


