gc Labolight DUO User manual
Instructions for Use
Gebrauchsanweisung
Mode d'emploi
Istruzioni per l'uso
Instrucciones de uso
Instrukcja obsługi
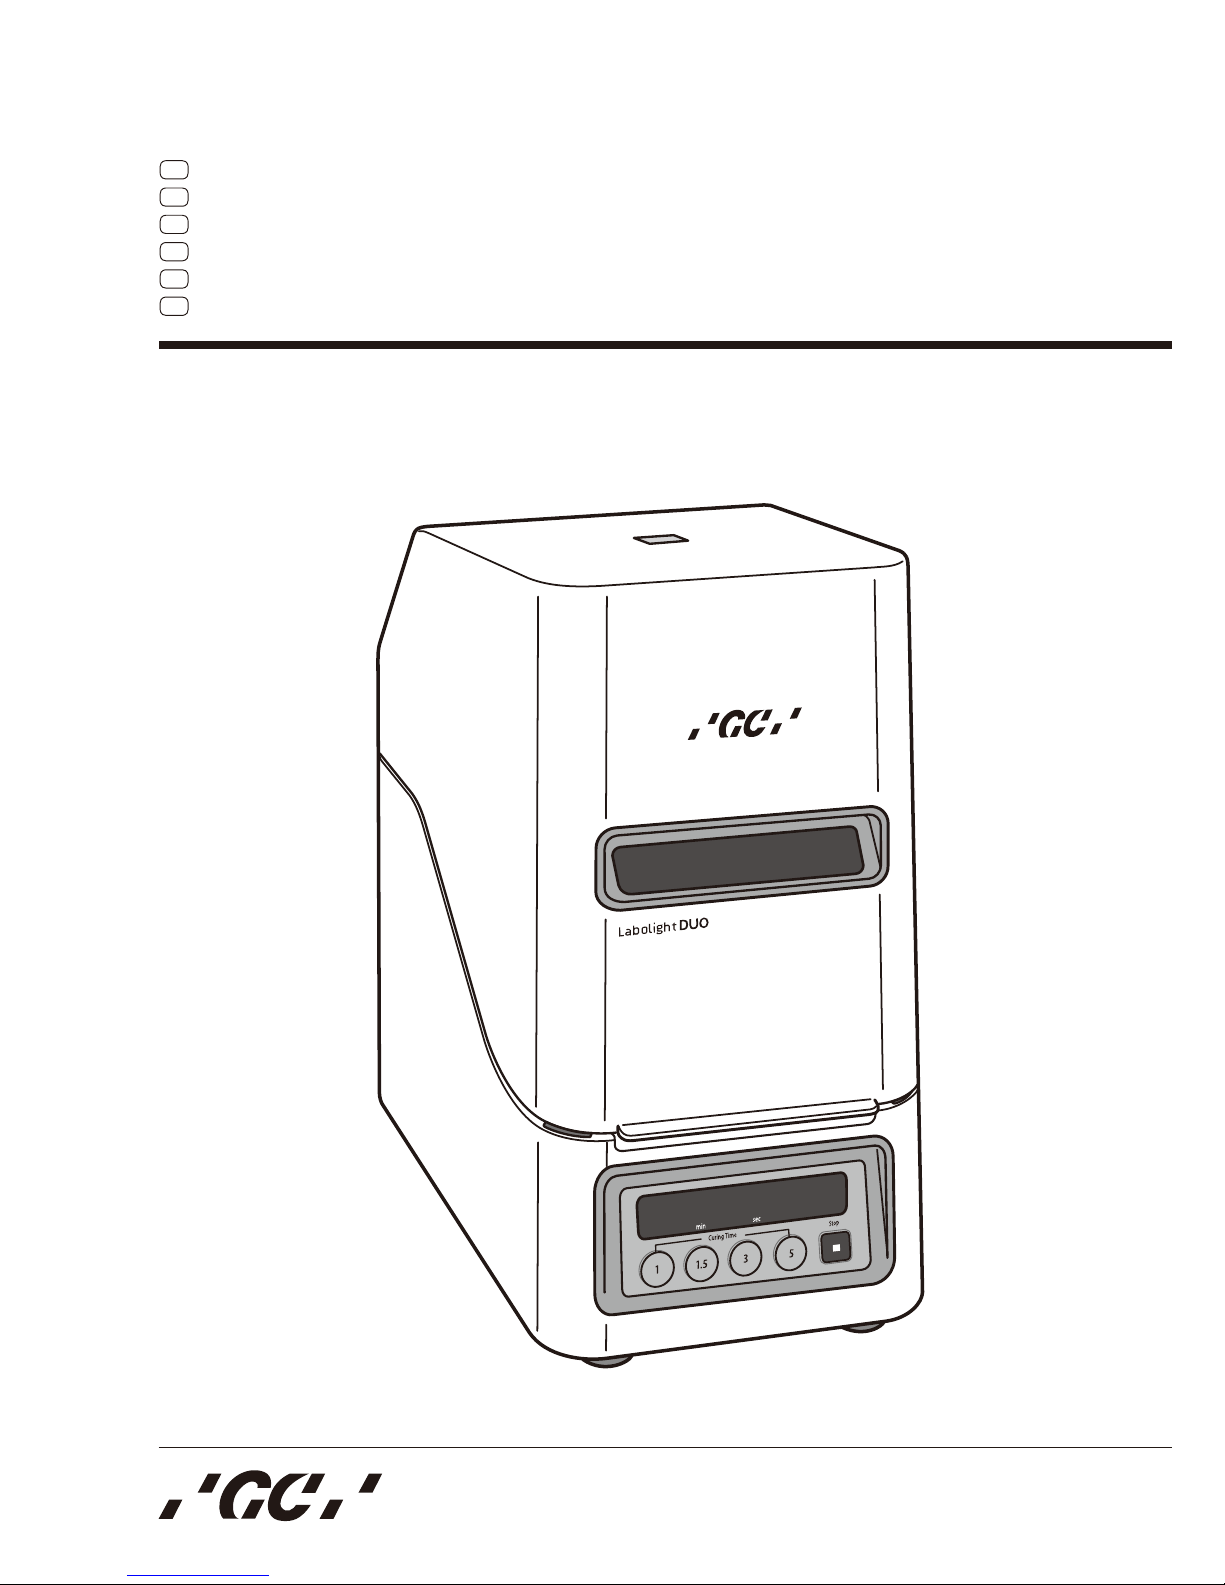
Labolight DUO
EN LED Dual Mode Light Curing Unit for Indirect Composite Resin
DE Lichthärtungs-Gerät mit dualer LED-Lichtquelle für indirekte Komposite
FR Unité lumineuse LED à mode dual pour la photopolymérisation des résines composites indirectes
IT Lampada LED a foto-polimerizzazione duale per resine composite da restauro indiretto
ES Unidad de Fotopolimerización LED dual para resinas de composite indirecta
PL Dwumodułowa lampa LED do polimeryzacji świetlnej żywic kompozytowych w technice pośredniej

Instructions for Use
Prior to use, carefully read
the instruction for use.
Labolight DUO
LED DUAL MODE LIGHT CURING UNIT FOR INDIRECT COMPOSITE RESIN
EN
EN 1
EN

Instructions for Use
Prior to use, carefully read
the instruction for use.
Labolight DUO
LED DUAL MODE LIGHT CURING UNIT FOR INDIRECT COMPOSITE RESIN
EN
EN 1
EN

Table of contents
1. Introduction.......................................................................................................................................... EN 4
1.1 Intended use .................................................................................................................................. EN 4
1.2 Features......................................................................................................................................... EN 4
1.3 Symbols ......................................................................................................................................... EN 5
2. For Safe Use of the Unit....................................................................................................................... EN 6
3. Product Description.............................................................................................................................. EN 8
3.1 Content of the package .................................................................................................................. EN 8
3.2 Names and functions of Parts......................................................................................................... EN 9
3.2.1 Main body ................................................................................................................................ EN 9
3.2.2 Control panel.......................................................................................................................... EN 10
3.2.3 AC adapter and Power cord ................................................................................................... EN 11
3.2.4 Rating Plate/Caution Label..................................................................................................... EN 11
4. Installation Method............................................................................................................................. EN 12
4.1 Transportation .............................................................................................................................. EN 12
4.2 Unpacking.................................................................................................................................... EN 12
4.3 Installation.................................................................................................................................... EN 12
4.4 Assembly...................................................................................................................................... EN 13
4.5 Startup and Checkup.................................................................................................................... EN 14
4.6 Stoppage and Storage.................................................................................................................. EN 15
5. Use Method........................................................................................................................................ EN 16
5.1 Basic use method......................................................................................................................... EN 16
5.2 Step mode.................................................................................................................................... EN 17
5.3 Full mode ..................................................................................................................................... EN 18
5.4 Use method of the Curing stand set ............................................................................................. EN 20
6. Maintenance ...................................................................................................................................... EN 21
6.1 Checkup....................................................................................................................................... EN 21
6.2 Cleaning and Replacement of parts.............................................................................................. EN 21
6.2.1 Cleaning method of respective portions.................................................................................. EN 22
6.2.2 Method of removing/remounting the Step mode switch cover ................................................. EN 23
6.2.3 Method of replacing the lens cover......................................................................................... EN 23
7. Troubleshooting ................................................................................................................................. EN 25
8. Warranty and Repair .......................................................................................................................... EN 27
9. Disposal............................................................................................................................................. EN 28
10. Specifi cations..................................................................................................................................... EN 28
EN 2
EN
EN 3
Table of contents
1. Introduction.......................................................................................................................................... EN 4
1.1 Intended use .................................................................................................................................. EN 4
1.2 Features......................................................................................................................................... EN 4
1.3 Symbols ......................................................................................................................................... EN 5
2. For Safe Use of the Unit....................................................................................................................... EN 6
3. Product Description.............................................................................................................................. EN 8
3.1 Content of the package .................................................................................................................. EN 8
3.2 Names and functions of Parts......................................................................................................... EN 9
3.2.1 Main body ................................................................................................................................ EN 9
3.2.2 Control panel.......................................................................................................................... EN 10
3.2.3 AC adapter and Power cord ................................................................................................... EN 11
3.2.4 Rating Plate/Caution Label..................................................................................................... EN 11
4. Installation Method............................................................................................................................. EN 12
4.1 Transportation .............................................................................................................................. EN 12
4.2 Unpacking.................................................................................................................................... EN 12
4.3 Installation.................................................................................................................................... EN 12
4.4 Assembly...................................................................................................................................... EN 13
4.5 Startup and Checkup.................................................................................................................... EN 14
4.6 Stoppage and Storage.................................................................................................................. EN 15
5. Use Method........................................................................................................................................ EN 16
5.1 Basic use method......................................................................................................................... EN 16
5.2 Step mode.................................................................................................................................... EN 17
5.3 Full mode ..................................................................................................................................... EN 18
5.4 Use method of the Curing stand set ............................................................................................. EN 20
6. Maintenance ...................................................................................................................................... EN 21
6.1 Checkup....................................................................................................................................... EN 21
6.2 Cleaning and Replacement of parts.............................................................................................. EN 21
6.2.1 Cleaning method of respective portions.................................................................................. EN 22
6.2.2 Method of removing/remounting the Step mode switch cover ................................................. EN 23
6.2.3 Method of replacing the lens cover......................................................................................... EN 23
7. Troubleshooting ................................................................................................................................. EN 25
8. Warranty and Repair .......................................................................................................................... EN 27
9. Disposal............................................................................................................................................. EN 28
10. Specifi cations..................................................................................................................................... EN 28
EN 2
1. Introduction
Thank you very much for purchasing our Labolight DUO.
Note
− Follow these Instructions for Use prepared for proper and safe use of the unit. Store the Instructions for
Use in a place easily accessible.
WARNING
■ Be sure to observe the description of the Instructions for Use to ensure safety of the user and proper use
of the unit. If the unit is used in a manner not specifi ed by this instructions, the protection provided by the
unit may be impaired.
We as a manufacturer are not responsible for any event such as damage caused by use incompatible with this
unit or noncompliant with these instructions.
1.1 Intended use
The unit is used for light-curing dental composites.
WARNING
■ Only personnel qualifi ed for dental treatment are allowed to use the unit.
Note
● Only use Labolight DUO for dental composites, as it is essentially designed for this purpose.
1.2 Features
1) Labolight DUO is a curing unit for dental professionals using LEDs as a light source.
2) Labolight DUO is mounted with 12 blue LEDs and 3 violet LEDs, enabling curing of any GC’s composite
product.
3) Labolight DUO allows preliminary curing with the door open (step mode).
EN 4
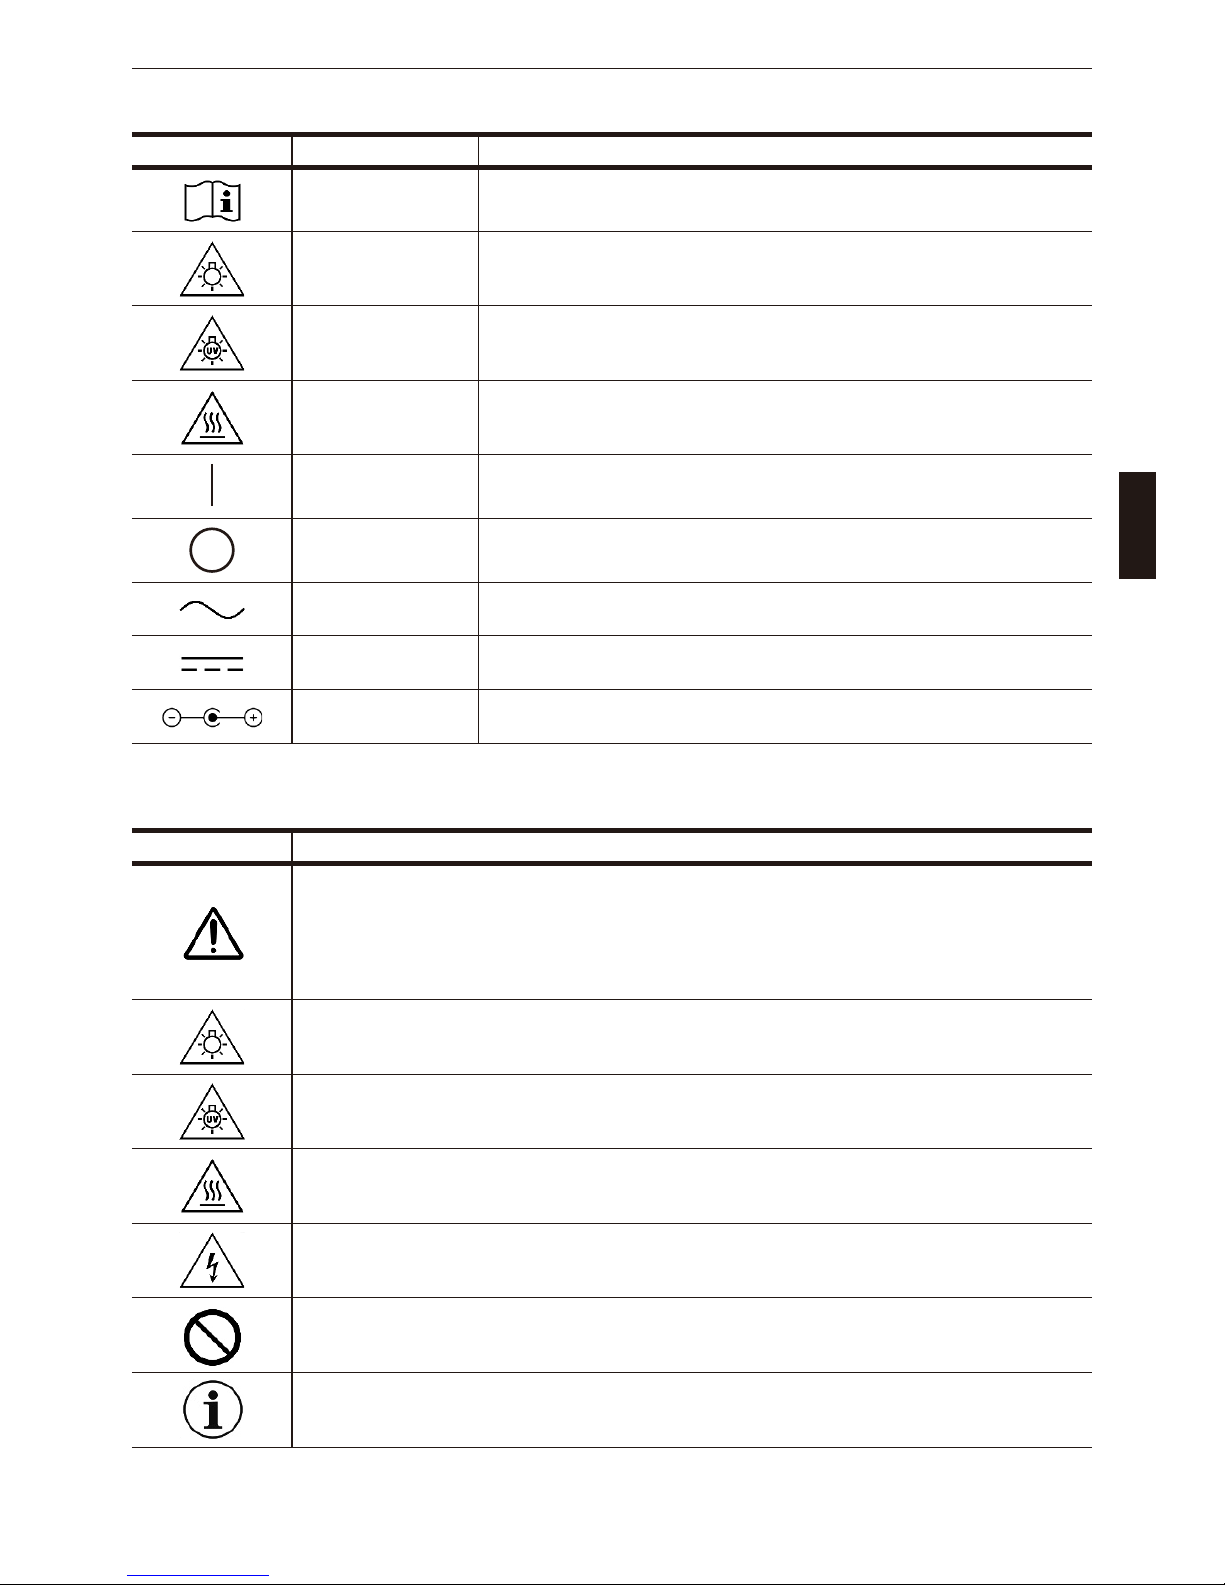
1.3 Symbols
The symbols provided on this unit indicate the following meanings:
Symbols Provision locations Meanings
Caution Label Consult instruction for use.
Caution Label
CAUTION : Visible radiation
Possibly hazardous optical radiation emitted from this product. Do not stare
at operating lamp. May be harmful to the eyes.
Caution Label
NOTICE : Ultraviolet radiation
UV emitted from this product. Minimise exposure to eyes or skin. Use
appropriate shielding.
LED Unit
CAUTION : Surface may be hot.
■ Do not touch the LED unit and its surroundings after using the unit for a
long time. Otherwise, burn injury could be caused.
Main Switch ON (Power)
Main Switch OFF (Power)
AC adapter Alternating current
Rating Plate
AC adapter Direct current
Rating Plate
AC adapter Polarity of Direct current power connector
*For names of respective portions, see Chapter 3.
The symbols appearing in these instructions indicate the following meanings:
Symbols Meanings
WARNING:
- As there is a risk of serious personal injury or property damage, be sure to use the unit by
observing the description of the warning.
CAUTION:
- As there is a possibility of minor personal injury or property damage, be sure to use the unit by
observing the description of the caution.
CAUTION : Visible radiation
Possibly hazardous optical radiation emitted from this product.
Do not stare at operating lamp. May be harmful to the eyes.
NOTICE : Ultraviolet radiation
UV emitted from this product.
Minimise exposure to eyes or skin. Use appropriate shielding.
CAUTION : Surface may be hot.
CAUTION : Risk of electric shock.
Prohibition
Notes : Important information and notes for using this unit
EN
EN 5
1. Introduction
Thank you very much for purchasing our Labolight DUO.
Note
− Follow these Instructions for Use prepared for proper and safe use of the unit. Store the Instructions for
Use in a place easily accessible.
WARNING
■ Be sure to observe the description of the Instructions for Use to ensure safety of the user and proper use
of the unit. If the unit is used in a manner not specifi ed by this instructions, the protection provided by the
unit may be impaired.
We as a manufacturer are not responsible for any event such as damage caused by use incompatible with this
unit or noncompliant with these instructions.
1.1 Intended use
The unit is used for light-curing dental composites.
WARNING
■ Only personnel qualifi ed for dental treatment are allowed to use the unit.
Note
● Only use Labolight DUO for dental composites, as it is essentially designed for this purpose.
1.2 Features
1) Labolight DUO is a curing unit for dental professionals using LEDs as a light source.
2) Labolight DUO is mounted with 12 blue LEDs and 3 violet LEDs, enabling curing of any GC’s composite
product.
3) Labolight DUO allows preliminary curing with the door open (step mode).
EN 4

2. For Safe Use of the Unit
Observe the following warnings and cautions for using the unit safely.
WARNING
■ Only personnel qualifi ed for dental treatment are allowed to use the unit.
■ Light-sensitive personnel such as those allergic to light are prohibited to use the unit. In addition, care
must be taken for irradiation light not to shine on light-sensitive people such as those allergic to light.
■ Personnel equipped with a heart pacer should not use the unit.
Otherwise, the pacer could malfunction.
■ When repairing a prosthesis removed from patient’s oral cavity, disinfect it prior to placement in the unit.
Otherwise, infection could be caused. If fl ammable disinfectant is used (e.g. Isopropyl alcohol based),
there is risk of ignition/explosion if lamp is started with vapors in the chamber.
■
Never disassemble or modify the unit. Otherwise, heat generation, ignition, or rupture could be caused.
■ Be sure to observe the description of the Instructions for Use to ensure safety of the user and proper use
of the unit. If the unit is used in a manner not specifi ed by this instructions, the protection provided by the
unit may be impaired.
RISK GROUP 2 (IEC 62471)
CAUTION
Possibly hazardous optical radiation emitted from this product.
Do not stare at operating lamp. May be harmful to the eyes.
■ Do not directly look at the irradiation light. Otherwise, eyes could be damaged.
■ Do not look in the unit for monitoring irradiation light in the step mode. Otherwise, eyes could be damaged.
■ Avoid continuously looking at refl ected lights by appropriately taking intermission when working on the unit
in the step mode for a rather long time. Otherwise, discomfort could be felt.
■ Do not continuously look inside the curing chamber through the window for a long time in the full mode.
Otherwise, discomfort could be felt.
■ Wear suitable protective equipment such as glasses that cut off light with a wavelength of 500 nm or less
when continuously working on the unit for a long time or if you are sensitive to light or have a cataract or
damaged retina, for example.
■ Do not irradiate light on an object located closer to the light source than being recommended. Otherwise,
the object could be heated.
NOTICE
UV emitted from this product.
Minimise exposure to eyes or skin. Use appropriate shielding.
■ Do not bring your hands close to the irradiating light source. Otherwise, burn injury could be caused.
■ When irradiating a prosthesis in the step mode, avoid locating your hands between the light source and
the turntable as much as possible by using a crown clamp, for example. Otherwise, tanning could be
caused due to a prolonged use.
Symbols Meanings
Refer to this instructions for use.
Disconnect mains plug from electrical outlet.
Connect an earth terminal to the ground.
EN 6
CAUTION
■ Do not touch the LED unit and its surroundings after using the unit for a long time. Otherwise, burn injury
could be caused.
■ Maintenance, if intended after a prolonged use, should be conducted after the unit temperature suffi ciently
lowers.
CAUTION
< General >
■ Take care to ensure the stability of the unit in relation to inclination, vibration, and impact, for example.
■ In case the unit fails or damages, stop using the unit immediately, turn off the main switch, and pull out the
power plug.
■ Do not attempt to repair the failed unit by yourself but request an expert to do it after providing an
appropriate indication thereon.
■ Do not use the unit with wet hands. Otherwise, the unit could fail.
■ Do not splash water (or other liquids) on the unit.
■ Do not handle liquid or metal powder in the curing chamber. In case liquid or dangerous material
accidentally enters into the chamber, stop using the unit and request for repair.
< Installation, assembly, and storage >
■ Do not install the unit in a place where chemicals are stored or gas is generated.
■ Do not place fl ammable objects near the main body. Otherwise, fi re could be caused.
■ Do not place any equipment susceptible to light or heat in the unit’s surroundings.
■ Pay attention to the power source in terms of its frequency, voltage, and allowable current (or power
consumption).
■ Use the attached dedicated power cord and AC adapter.
< Usage >
■ Do not open/close the door swiftly. Otherwise, the door or the object inside the curing chamber could be
damaged.
■ When opening/closing the door, do not allow your hand or part of your body or the object to enter into
below the door or the gap. Otherwise, personal injury or property damage could be caused.
■ Do not touch the rotating turntable. Otherwise, your fi ngers could be caught or the turntable could be
damaged.
■ If anything is caught by the turntable, stop the turntable rotation by pressing the stop switch or turning off
the main switch before removing the caught object.
■ Clean off contamination of the lens cover or replace the contaminated cover. Otherwise, the contaminated
portion is heated to cause deformation or melting of the cover.
■ Arrange an object subject to curing with its curing surface facing the light source.
■ Set curing time suitably for the use material.
■ Be sure to verify the material for perfect curing upon the completion of curing. In case of insuffi cient curing,
additionally irradiate light.
■ Do not directly hold and cure a composite in hands in the step mode. Otherwise, burn injury could be
caused by the hot composite.
■ Do not remove a composite immediately after curing directly with hands in the full mode.
Otherwise, burn injury could be caused by the hot composite.
< Maintenance >
■ Be sure to perform regular checkup of the equipment and components.
■ Be sure to clean the curing chamber regularly, as otherwise, the contaminated chamber could not exercise
suffi cient curing performance. If fl ammable disinfectant is used (e.g. Isopropyl alcohol based), there is risk
of ignition/explosion if lamp is started with vapors in the chamber.
■ Replace the lens cover regularly. Otherwise, the performance could be deteriorated due to aging and
contamination.
■ If the unit is used without the lens cover mounted, the performance could be deteriorated due to
insuffi cient protection of the lens. Be sure to use the unit with the cover mounted.
EN
EN 7
2. For Safe Use of the Unit
Observe the following warnings and cautions for using the unit safely.
WARNING
■ Only personnel qualifi ed for dental treatment are allowed to use the unit.
■ Light-sensitive personnel such as those allergic to light are prohibited to use the unit. In addition, care
must be taken for irradiation light not to shine on light-sensitive people such as those allergic to light.
■ Personnel equipped with a heart pacer should not use the unit.
Otherwise, the pacer could malfunction.
■ When repairing a prosthesis removed from patient’s oral cavity, disinfect it prior to placement in the unit.
Otherwise, infection could be caused. If fl ammable disinfectant is used (e.g. Isopropyl alcohol based),
there is risk of ignition/explosion if lamp is started with vapors in the chamber.
■
Never disassemble or modify the unit. Otherwise, heat generation, ignition, or rupture could be caused.
■ Be sure to observe the description of the Instructions for Use to ensure safety of the user and proper use
of the unit. If the unit is used in a manner not specifi ed by this instructions, the protection provided by the
unit may be impaired.
RISK GROUP 2 (IEC 62471)
CAUTION
Possibly hazardous optical radiation emitted from this product.
Do not stare at operating lamp. May be harmful to the eyes.
■ Do not directly look at the irradiation light. Otherwise, eyes could be damaged.
■ Do not look in the unit for monitoring irradiation light in the step mode. Otherwise, eyes could be damaged.
■ Avoid continuously looking at refl ected lights by appropriately taking intermission when working on the unit
in the step mode for a rather long time. Otherwise, discomfort could be felt.
■ Do not continuously look inside the curing chamber through the window for a long time in the full mode.
Otherwise, discomfort could be felt.
■ Wear suitable protective equipment such as glasses that cut off light with a wavelength of 500 nm or less
when continuously working on the unit for a long time or if you are sensitive to light or have a cataract or
damaged retina, for example.
■ Do not irradiate light on an object located closer to the light source than being recommended. Otherwise,
the object could be heated.
NOTICE
UV emitted from this product.
Minimise exposure to eyes or skin. Use appropriate shielding.
■ Do not bring your hands close to the irradiating light source. Otherwise, burn injury could be caused.
■ When irradiating a prosthesis in the step mode, avoid locating your hands between the light source and
the turntable as much as possible by using a crown clamp, for example. Otherwise, tanning could be
caused due to a prolonged use.
Symbols Meanings
Refer to this instructions for use.
Disconnect mains plug from electrical outlet.
Connect an earth terminal to the ground.
EN 6

3. Product Description
3.1 Content of the package
13
12
11
109
8
76
54
3
2
1
Objekthalter Set
2 5
12
17
No. Contents Quantity
1
Labolight DUO Main body 1
2
AC adapter 1
3
Power cord 1
4
Turntable 1
5
Tray 1
6
Curing
stand
set
Curing stand holder 2
7
Curing Plate 1
8
Curing Stand 1
9
Silicone post for anterior 4
10
Silicone post for posterior 3
11
Metal post 4
12
Clip 1
13
Lens cover (Spare/3-pack) 1
Instruction for Use 1
EN 8

3.2 Names and functions of Parts
3.2.1 Main body
2 5
12
17
3
1
5
4
2
6
3
1
5
4
2
6
No. Name
[A-1] Door
[A-2] Upper housing
[A-3] Window
[A-4] Handle
[A-5] Control panel
[A-6] Lower housing
[A-7] Visor fixing plate
[A-8] Visor
[A-9] Curing Chamber
[A-10] LED Unit (Upper/Middle/Lower)
[A-11] Tray
[A-12] Turntable
[A-13] Door cushioning(buffer)
[A-14] Step mode switch
[A-15] Turntable axis
[A-16] Step mode switch cover
[A-17] Step mode switch plate
[A-18] Blue LED
(4 lamps circumferentially on each unit)
[A-19] Violet LED
(1 lamp at the center on each unit)
[A-20] Lens
[A-21] Lens cover
[A-22] Lens cover holder
[A-23] Power connector
[A-24] Main Switch
[A-25] Main Switch stay (Back plate)
[A-26] Base plate
[A-27] Rubber foot
[A-28] Rating Plate
[A-29] Caution Label
[A-6]
[A-5]
[A-2]
[A-3][A-1]
[A-10]
[A-14]
[A-7]
[A-8]
[A-9]
[A-11]
[A-12]
[A-13]
[A-16]
[A-18]
[A-20]
[A-10]
[A-29]
[A-28]
[A-23][A-26]
[A-27]
[A-24]
[A-25]
[A-22]
[A-21]
[A-19]
[A-15]
[A-17]
[A-4]
EN
EN 9
3. Product Description
3.1 Content of the package
13
12
11
109
8
76
54
3
2
1
Objekthalter Set
2 5
12
17
No. Contents Quantity
1
Labolight DUO Main body 1
2
AC adapter 1
3
Power cord 1
4
Turntable 1
5
Tray 1
6
Curing
stand
set
Curing stand holder 2
7
Curing Plate 1
8
Curing Stand 1
9
Silicone post for anterior 4
10
Silicone post for posterior 3
11
Metal post 4
12
Clip 1
13
Lens cover (Spare/3-pack) 1
Instruction for Use 1
EN 8
3.2.2 Control panel
[B-7][B-8]
[B-6]
[B-5]
[B-4]
[B-1]
[B-2]
[B-3]
No. Name Information
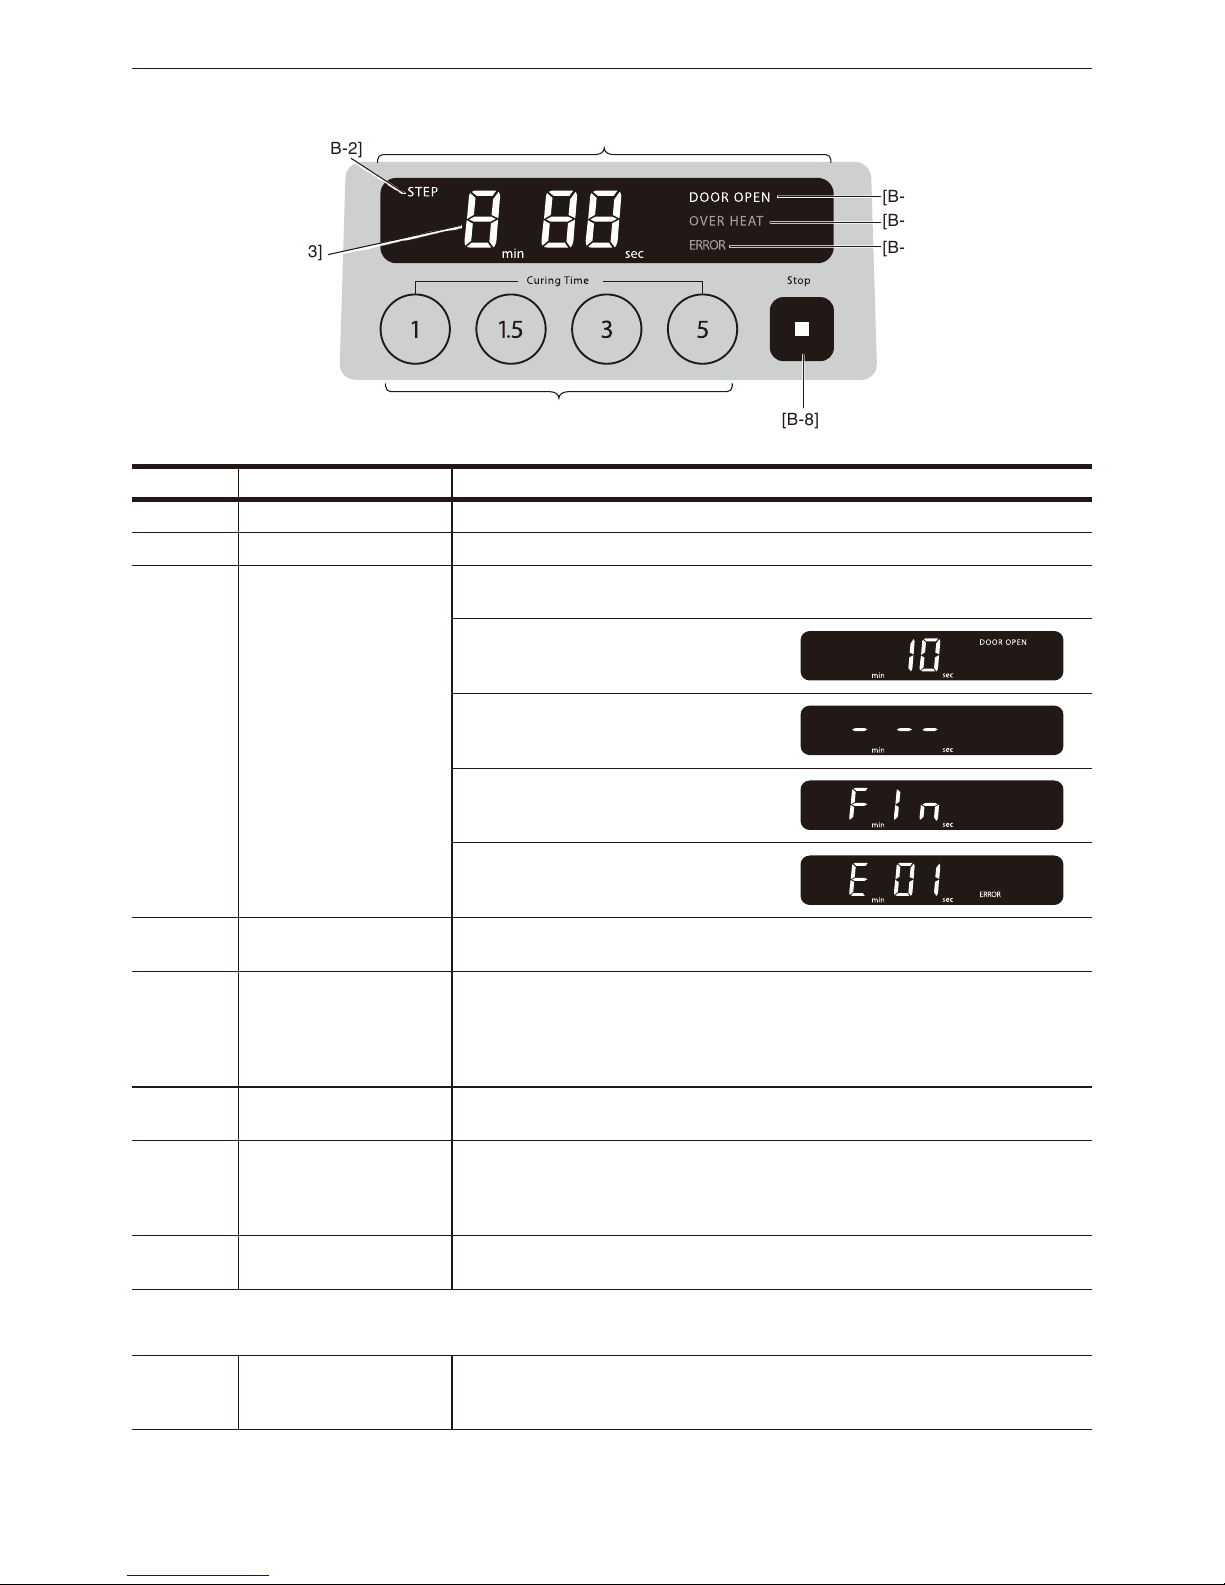
[B-1] Display Displays statuses of various devices.
[B-2] Step mode indicator Lit during irradiation in the step mode.
[B-3] Time display
− Displays remaining time of irradiation in the step or full mode.
− Blinking display of time indicates a temporary halt.
Standby status with the door opened
(= standby status in the step mode)
Standby status with the door closed
(= standby status in the full mode)
When the full mode is properly
completed, “Fin” is displayed.
If an error occurs, an errornumber is
displayed.
[B-4]Door open indicator Unlit: Indicates the door closed.
Lit: Indicates the door opened.
[B-5]Over heat indicator
Blinking: Temperature alarm
− Alerts high temperature of LEDs due to continuous use.
− Ensure a sufficient intermission, as the LEDs are nearly overheated.
Lit: Overheat
− Lit if irradiation is temporarily halted due to high LED temperature.
[B-6]Error indicator Lit if an error occurs.
(For details of errors, see Chapter 7, “Troubleshooting.”)
[B-7]Curing time key
(1/1.5/3/5)
A press starts irradiation in the full mode.
The time of irradiation is 1, 1.5, 3, and 5 minutes, respectively.
Successive presses add time, enabling continuous irradiation for as long as
10 minutes.
[B-8]Stop key Press it when stopping irradiation in the step or full mode or when resetting a
temporary halt.
Other operating unit
[A-13]Step mode switch
A press starts irradiation for 10 seconds in the step mode.
Successive presses add time, enabling continuous irradiation for as long as
30 seconds.
EN 10

3.2.3 AC adapter and Power cord
2 5
12
17
Power cord
AC plug
DC plug
Power indicator
: Lit when the AC adapter is supplied
with power from a power suply.
AC adapter
3.2.4 Rating Plate/Caution Label
< Rating Plate of the Main body >
< Caution Label of the Main body >
EN
EN 11
3.2.2 Control panel
[B-7][B-8]
[B-6]
[B-5]
[B-4]
[B-1]
[B-2]
[B-3]
No. Name Information
[B-1] Display Displays statuses of various devices.
[B-2] Step mode indicator Lit during irradiation in the step mode.
[B-3] Time display
− Displays remaining time of irradiation in the step or full mode.
− Blinking display of time indicates a temporary halt.
Standby status with the door opened
(= standby status in the step mode)
Standby status with the door closed
(= standby status in the full mode)
When the full mode is properly
completed, “Fin” is displayed.
If an error occurs, an errornumber is
displayed.
[B-4]Door open indicator Unlit: Indicates the door closed.
Lit: Indicates the door opened.
[B-5]Over heat indicator
Blinking: Temperature alarm
− Alerts high temperature of LEDs due to continuous use.
− Ensure a sufficient intermission, as the LEDs are nearly overheated.
Lit: Overheat
− Lit if irradiation is temporarily halted due to high LED temperature.
[B-6]Error indicator Lit if an error occurs.
(For details of errors, see Chapter 7, “Troubleshooting.”)
[B-7]Curing time key
(1/1.5/3/5)
A press starts irradiation in the full mode.
The time of irradiation is 1, 1.5, 3, and 5 minutes, respectively.
Successive presses add time, enabling continuous irradiation for as long as
10 minutes.
[B-8]Stop key Press it when stopping irradiation in the step or full mode or when resetting a
temporary halt.
Other operating unit
[A-13]Step mode switch
A press starts irradiation for 10 seconds in the step mode.
Successive presses add time, enabling continuous irradiation for as long as
30 seconds.
EN 10
4. Installation Method
4.1 Transportation
Note
● Care should be taken for avoiding impact on the unit by arranging it at level during transportation.
● Use dedicated packing materials.
For the safe disposal and recycling of the packaging, please ensure that all packing materials are properly
disposed of according to current recycling regulations.
4.2 Unpacking
Verify all components are delivered prior to installation and assembly (see Section 3.1, “Content of the
package”). In addition, check for any damage of the unit during transportation.
Contact the dealer or GC in case any missing or damaged component is found.
4.3 Installation
1) Install the unit with care being taken for the following:
− Place the unit on a level and fi re-resistant bench or platform.
− For temperature, humidity, and atmospheric pressure in the use environment, see Chapter 9,
“Specifi cations.”
− For dimensions and weight of the unit, see Chapter 9, “Specifi cations.”
Area of installation: Approx. 200mm × 350mm
CAUTION
■ Do not install the unit in a place where chemicals are stored or gas is generated.
■ Do not place fl ammable objects near the main body. Otherwise, fi re could be caused.
■ Do not place any equipment susceptible to light or heat in the unit’s surroundings.
CAUTION
■ Take care to ensure the stability of the unit in relation to inclination, vibration, and impact, for example.
Note
● When carrying the main body, hold it on the bottom by both hands with the door closed.
● Use the unit indoor.
● Install the main body on a level place.
● Install the unit in a place where not receiving any adverse effect from direct sunlight, dust, dampness, air
containing salt and sulfur, or a heater nearby.
● Install the unit in a place where no water splashes.
● Install the unit in a well-ventilated place.
2) Verify that a movable range of the door is ensured.
CAUTION
■ When opening/closing the door, do not allow your hand or part of your body or the object to enter into
below the door or the gap. Otherwise, personal injury or property damage could be caused.
EN 12

4.4 Assembly
1) Pull the door slowly and rotationally upward by holding the handle.
2) Set the turntable in alignment with the turntable shaft.
*Six aligning positions are provided at an interval of 60 degrees where
the turntable can be pushed deeply to the bottom. Select one of the six
positions.
3) Set a tray in the concave provided on the top surface of the turntable.
12
10
7
9
8
11
CAUTION
■ When opening/closing the door, do not allow your hand or part of your
body or the object to enter into below the door or the gap. Otherwise,
personal injury or property damage could be caused.
4) Connect the power cord to the AC adapter.
5) Connect the DC plug of the AC adapter to the power connector located on
the rear surface of the main body.
6) Connect the power cord to the 3P outlet(100-240 AC).
* see Chapter 10 ,“Specifi cations”.
7) Verify that the power indicator is lit on the AC adapter.
"If unlit, recheck the connections
12
10
7
9
8
11
CAUTION
■ Be sure to provide grounding when connecting the power plug.
CAUTION
■ Pay attention to the power source in terms of its frequency, voltage, and allowable current (or power
consumption).
■ Use the attached dedicated power cord and AC adapter.
Note
● Only use genuine parts and accessories. Using other than genuine parts and accessories will cause
termination of warranty and no more liability from GC.
EN
EN 13
4. Installation Method
4.1 Transportation
Note
● Care should be taken for avoiding impact on the unit by arranging it at level during transportation.
● Use dedicated packing materials.
For the safe disposal and recycling of the packaging, please ensure that all packing materials are properly
disposed of according to current recycling regulations.
4.2 Unpacking
Verify all components are delivered prior to installation and assembly (see Section 3.1, “Content of the
package”). In addition, check for any damage of the unit during transportation.
Contact the dealer or GC in case any missing or damaged component is found.
4.3 Installation
1) Install the unit with care being taken for the following:
− Place the unit on a level and fi re-resistant bench or platform.
− For temperature, humidity, and atmospheric pressure in the use environment, see Chapter 9,
“Specifi cations.”
− For dimensions and weight of the unit, see Chapter 9, “Specifi cations.”
Area of installation: Approx. 200mm × 350mm
CAUTION
■ Do not install the unit in a place where chemicals are stored or gas is generated.
■ Do not place fl ammable objects near the main body. Otherwise, fi re could be caused.
■ Do not place any equipment susceptible to light or heat in the unit’s surroundings.
CAUTION
■ Take care to ensure the stability of the unit in relation to inclination, vibration, and impact, for example.
Note
● When carrying the main body, hold it on the bottom by both hands with the door closed.
● Use the unit indoor.
● Install the main body on a level place.
● Install the unit in a place where not receiving any adverse effect from direct sunlight, dust, dampness, air
containing salt and sulfur, or a heater nearby.
● Install the unit in a place where no water splashes.
● Install the unit in a well-ventilated place.
2) Verify that a movable range of the door is ensured.
CAUTION
■ When opening/closing the door, do not allow your hand or part of your body or the object to enter into
below the door or the gap. Otherwise, personal injury or property damage could be caused.
EN 12
4.5 Startup and Checkup
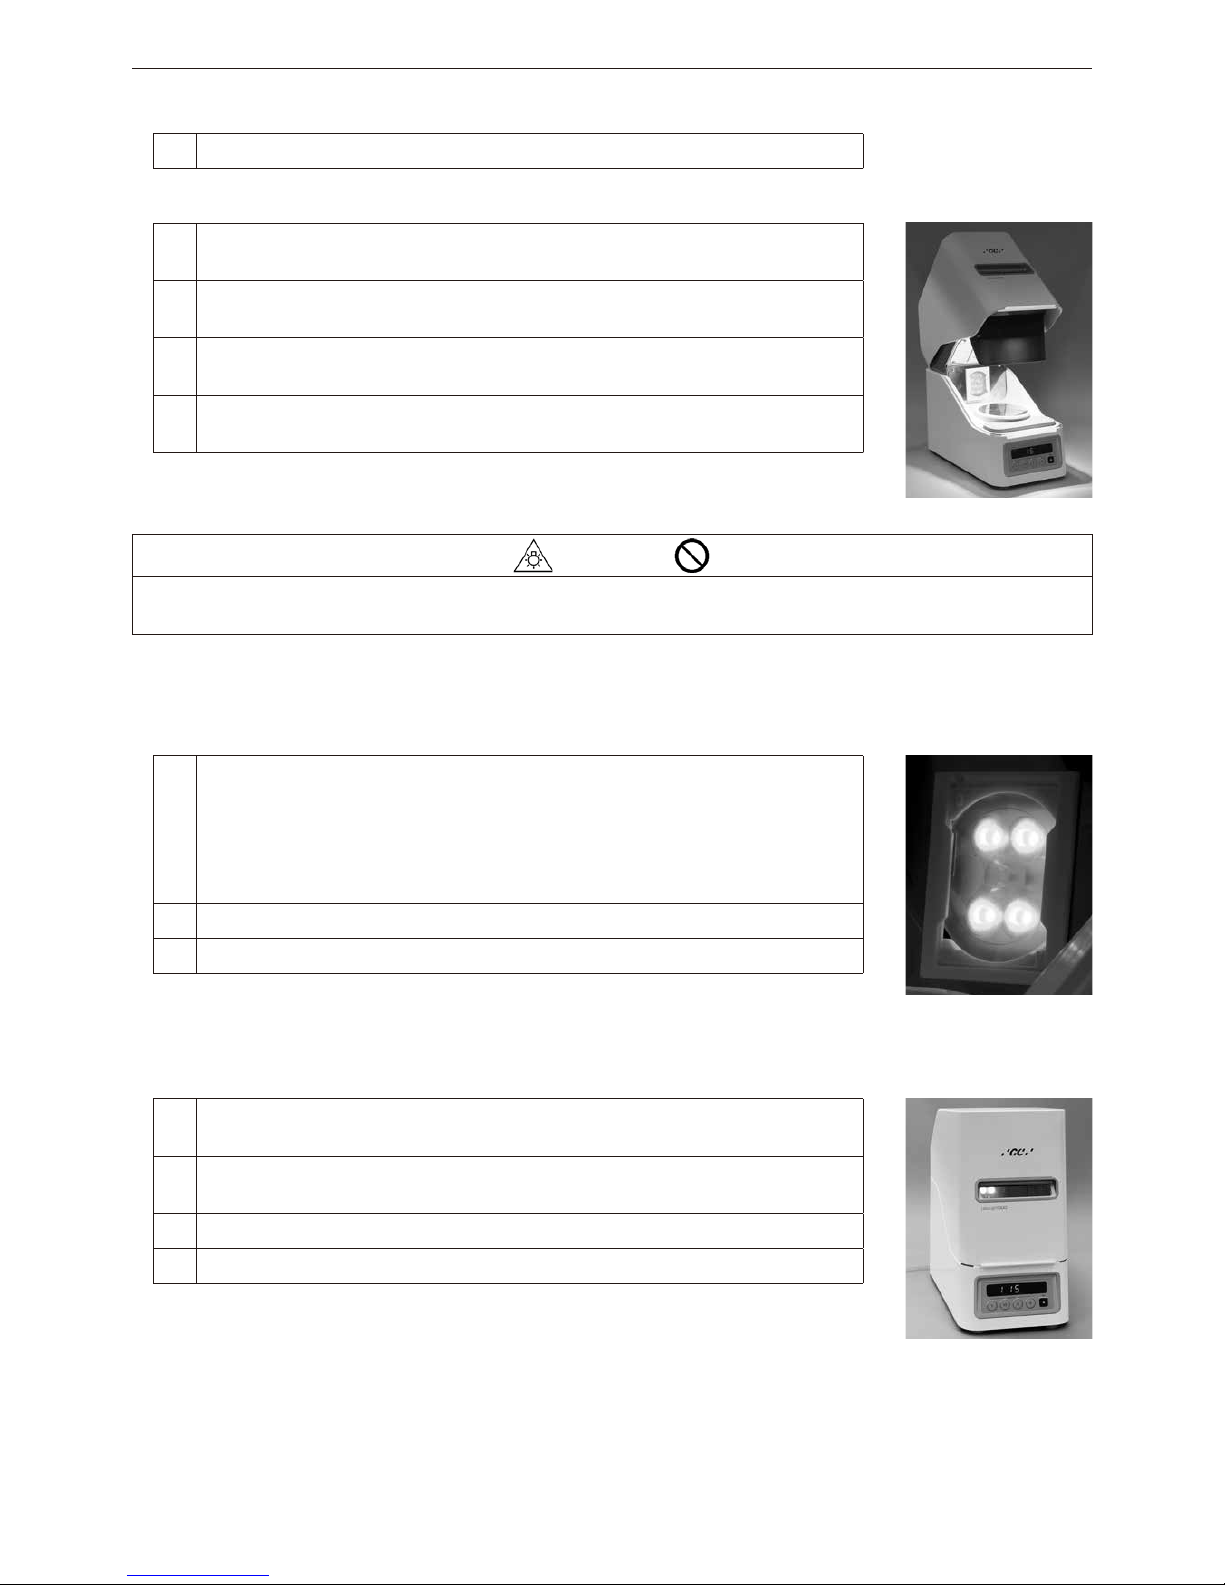
1) Turn on the main switch with the door closed to verify the following:
Time appears on the display. (see Item 3.2.2)
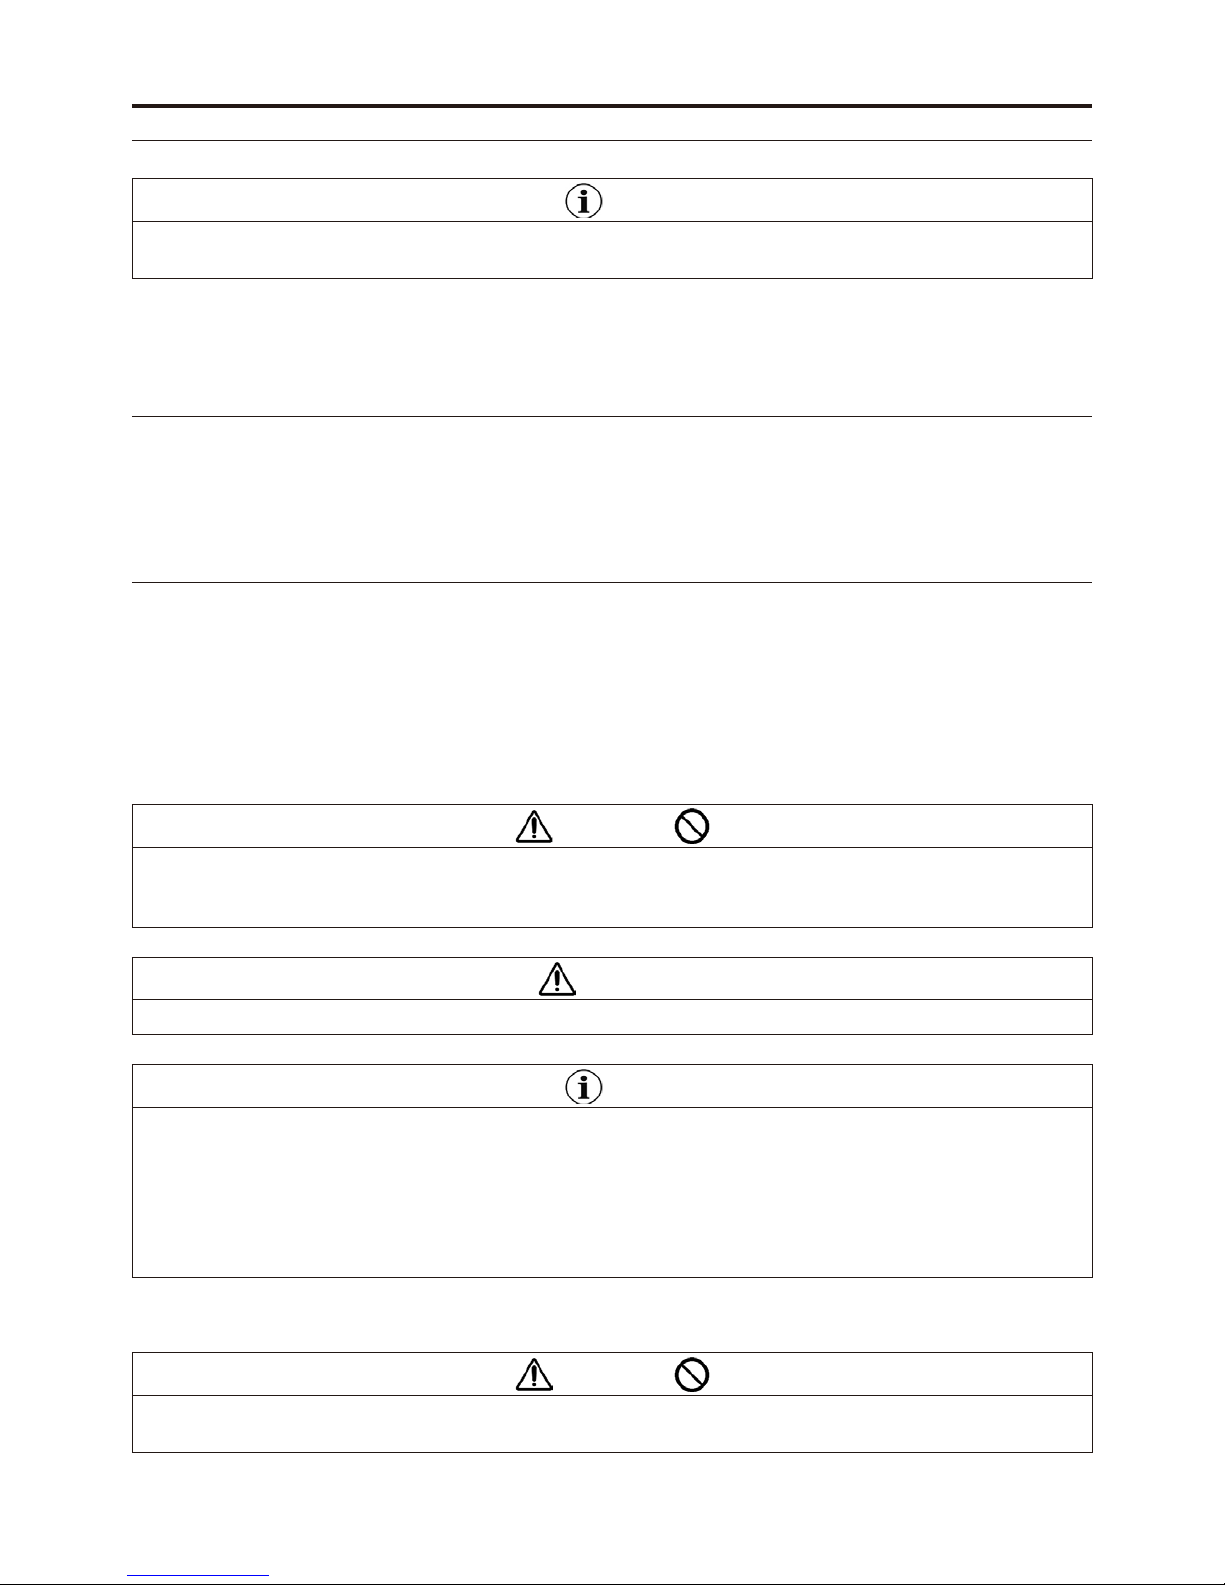
2) Press the step mode switch once with the door opened to verify the following:
The step mode switch can be pressed. When released, the switch returns
to the original position.
The LEDs only in the upper row are lit.
*Do not directly look at the LEDs during this operation.
The step mode indicator is lit on the display.
The time indicated on the display is counted down by 10 seconds.
No strong irradiation or refl ection light shines on surrounding people or
objects.
*If any fault is observed with the unit, press the stop key to stop irradiation.
CAUTION
■ Despite the low emission rate, do not look in the unit for monitoring irradiation light in the step mode. Do
not introduce any object which might impose light into the eyes. Otherwise, eyes could be damaged.
3) Press the curing time key (one minute) with the door opened to verify the following:
* Complete the verifi cation within 20 seconds since the unit is stopped due to determination of an open door
error if the time longer than 20 seconds elapses.
At least any one of the four blue LEDs in each of the upper, middle, and
lower rows is lit dimly.
*The violet LED is unlit at this time.
*At least any one of the four LEDs being lit is acceptable even though
in a very rare case, the LED may not be lit at all due to only faint
current flowing.
The turntable rotates.
Irradiation stops in 20 seconds.
*If any fault is observed with the unit, press the stop key to stop irradiation.
4) Press the curing time key (one minute) with the door closed to verify the following:
The LEDs in the middle and lower rows are lit when observing through the
window.
The turntable rotates when observing through the window.
(If making a judgment is diffi cult, use the appended curing stand.)
The displayed time is counted down.
Irradiation stops in one minute.
*If any fault is observed with the unit, press the stop key to stop irradiation.
EN 14
CAUTION
■ Do not continuously look inside the curing chamber through the window for a long time in the full mode.
Otherwise, discomfort could be felt.
CAUTION
■ In case the unit fails or damages, stop using the unit immediately, turn off the main switch, and pull out the
power plug.
Note
● Before using the unit after a prolonged stoppage, be sure to verify that the unit operates normally and
safely.
4.6 Stoppage and Storage
1) Close the door and turn off the main switch.
Note
● When not using the unit for a long time, unplugging the power cord is recommended for energy saving.
CAUTION
■ Do not insert or pull out the plug with wet hands. Otherwise, electric shock could be caused.
■ When disconnecting cords, do not exert excessive force thereon by, for example, holding them for pullout.
2) Clean the unit to prepare for smoothly starting the next operation (see Chapter 6, “Maintenance”).
CAUTION
■ Be sure to clean the curing chamber regularly, as otherwise, the contaminated chamber could not exercise
suffi cient curing performance.
3) Store the unit with care for the following:
− For temperature, humidity, and atmospheric pressure in the storage environment, see Chapter 9,
“Specifi cations.”
CAUTION
■ Take care to ensure the stability of the unit in relation to inclination, vibration, and impact, for example.
Note
● Install the unit in a place where not receiving any adverse effect from direct sunlight, dust, dampness, air
containing salt and sulfur, or a heater nearby.
● Install the unit in a place where no water splashes.
EN
EN 15
4.5 Startup and Checkup
1) Turn on the main switch with the door closed to verify the following:
Time appears on the display. (see Item 3.2.2)
2) Press the step mode switch once with the door opened to verify the following:
The step mode switch can be pressed. When released, the switch returns
to the original position.
The LEDs only in the upper row are lit.
*Do not directly look at the LEDs during this operation.
The step mode indicator is lit on the display.
The time indicated on the display is counted down by 10 seconds.
No strong irradiation or refl ection light shines on surrounding people or
objects.
*If any fault is observed with the unit, press the stop key to stop irradiation.
CAUTION
■ Despite the low emission rate, do not look in the unit for monitoring irradiation light in the step mode. Do
not introduce any object which might impose light into the eyes. Otherwise, eyes could be damaged.
3) Press the curing time key (one minute) with the door opened to verify the following:
* Complete the verifi cation within 20 seconds since the unit is stopped due to determination of an open door
error if the time longer than 20 seconds elapses.
At least any one of the four blue LEDs in each of the upper, middle, and
lower rows is lit dimly.
*The violet LED is unlit at this time.
*At least any one of the four LEDs being lit is acceptable even though
in a very rare case, the LED may not be lit at all due to only faint
current flowing.
The turntable rotates.
Irradiation stops in 20 seconds.
*If any fault is observed with the unit, press the stop key to stop irradiation.
4) Press the curing time key (one minute) with the door closed to verify the following:
The LEDs in the middle and lower rows are lit when observing through the
window.
The turntable rotates when observing through the window.
(If making a judgment is diffi cult, use the appended curing stand.)
The displayed time is counted down.
Irradiation stops in one minute.
*If any fault is observed with the unit, press the stop key to stop irradiation.
EN 14

5. Use Method
5.1 Basic use method
Note
● Verify normal operation of the unit prior to use.
● Pay special attention to the following during use of the unit:
- Monitor the entire unit for any fault at all times.
- In case of any fault found on the unit, take appropriate action such as shutting down the unit.
WARNING
■ Light-sensitive personnel such as those allergic to light are prohibited to use the unit. In addition, care
must be taken for irradiation light not to shine on light-sensitive people such as those allergic to light.
■ Personnel equipped with a heart pacer should not use the unit.
■ Otherwise, the pacer could malfunction.
WARNING
■ When repairing a prosthesis removed from patient’s oral cavity, disinfect it prior to placement in the unit.
Otherwise, infection could be caused.
1) Turn on the main switch and verify that something appears on the time display.(see Item 3.2.2)
2) Cure a composite in the step mode (see Section 5.2) or full mode (see Section 5.3).
CAUTION
■ Do not directly look at the irradiation light. Otherwise, eyes could be damaged.
■ Do not irradiate light on an object located closer to the light source than being recommended. Otherwise,
the object could be heated.
■ Do not bring your hands close to the irradiating light source. Otherwise, burn injury could be caused.
CAUTION
■ Wear suitable protective equipment such as glasses that cut off light with a wavelength of 500 nm or less
when continuously working on the unit for a long time or if you are sensitive to light or have a cataract or
damaged retina, for example.
CAUTION
■ To operate the switch, use your fi ngers but not any sharp tool.
CAUTION
■ When opening/closing the door, do not allow your hand or part of your body or the object to enter into
below the door or the gap. Otherwise, personal injury or property damage could be caused.
CAUTION
■ Arrange an object subject to curing with its curing surface facing the light source.
■ Set curing time suitably for the use material.
■ Be sure to verify the material for perfect curing upon the completion of curing. In case of insuffi cient curing,
additionally irradiate light.
■ Clean off contamination of the lens cover or replace the contaminated cover. Otherwise, the contaminated
portion is heated to cause deformation or melting of the cover.
EN 16
3) After use, close the door and turn off the main switch. (see Section 4.6)
CAUTION
■ Do not touch the LED unit and its surroundings after using the unit for a long time. Otherwise, burn injury
could be caused.
Note
● When not using the unit for a long time, unplugging the power cord is recommended for energy saving.
5.2 Step mode
Note
●Use the step mode only for pre-curing.
1) Open the door and verify the door open indicator being lit.
(Standby status in the step mode)
2) Place an object subject to curing in the recommended curing position (described below) and press the Step
mode switch.
- Light irradiation only by upper LEDs immediately starts and remaining time appears on the time display.
- Ten seconds is added to the remaining time by additionally pressing the Step mode switch with light
irradiation in progress.
- The maximum 30 seconds of addition is possible.
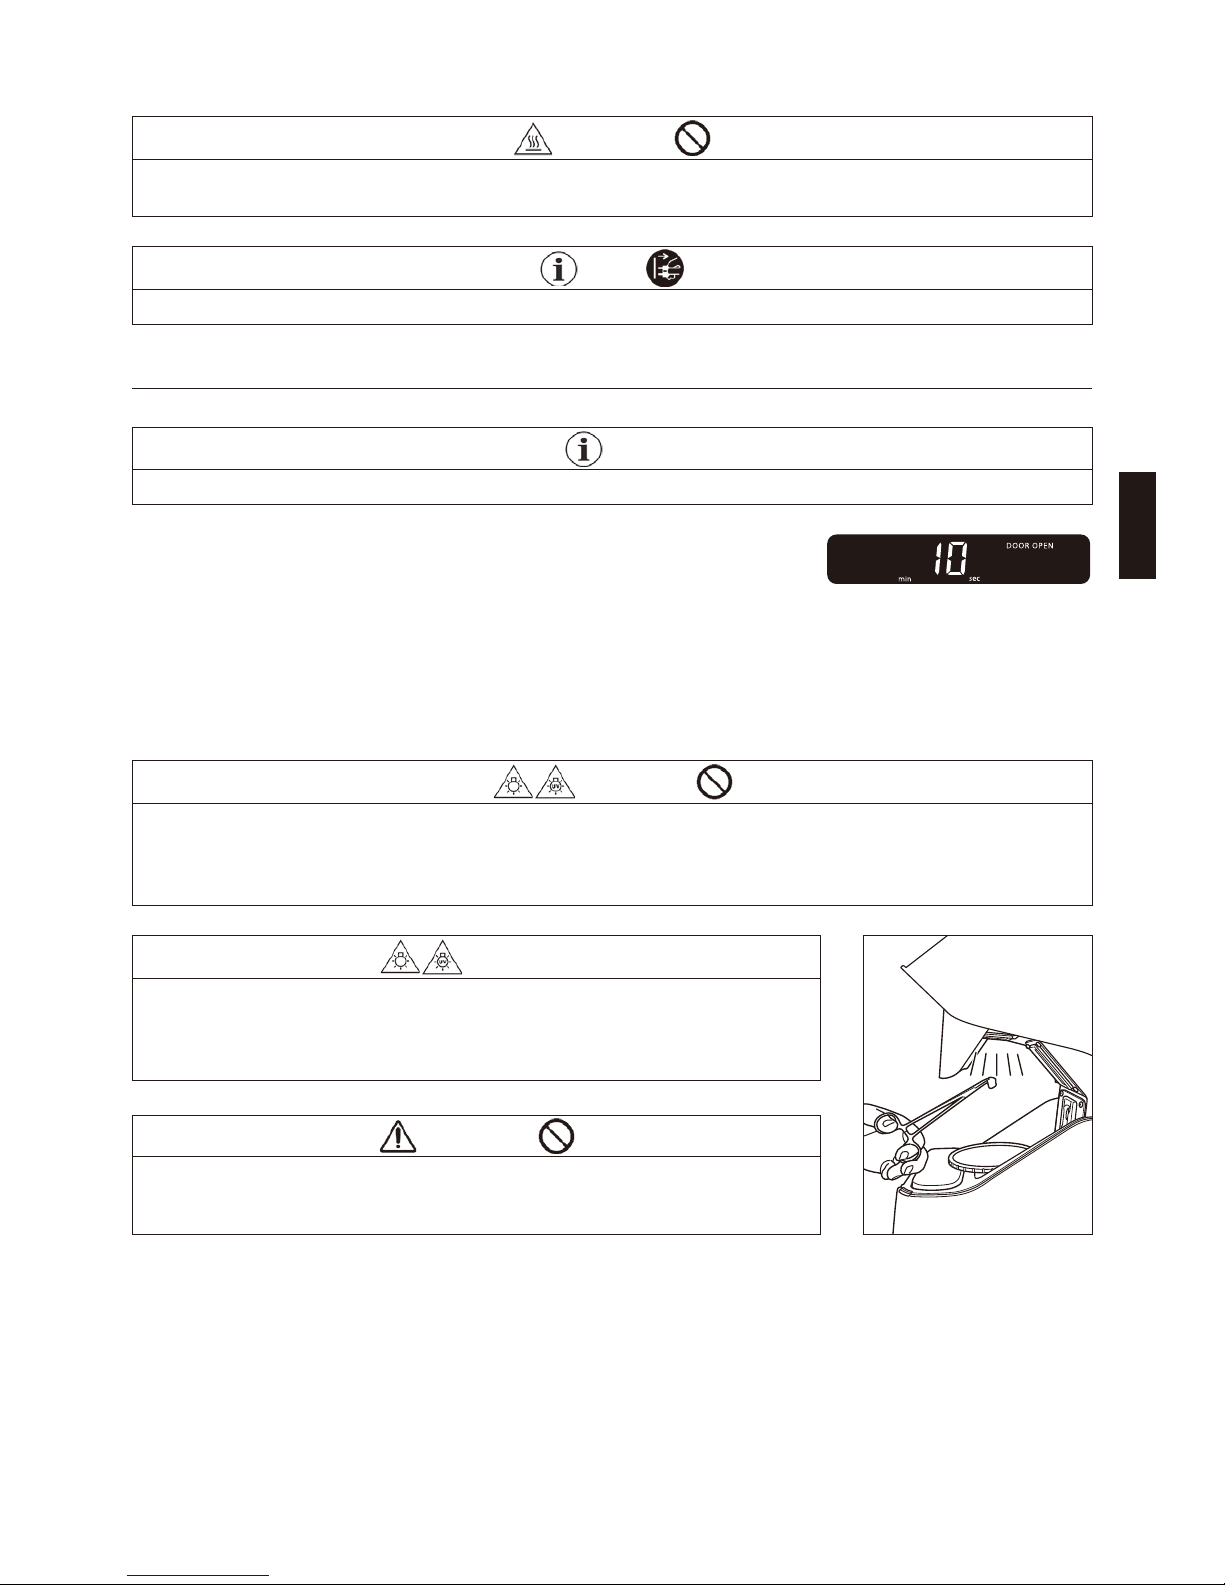
CAUTION
■ Do not look in the unit for monitoring irradiation light in the step mode. Otherwise, eyes could be damaged.
■ Avoid continuously looking at refl ected lights by appropriately taking intermission when working on the unit
in the step mode for a rather long time. Otherwise, discomfort could be felt.
■ Do not bring your hands close to the irradiating light source. Otherwise, burn injury could be caused.
CAUTION
12
10
7
9
8
11
■When irradiating a prosthesis in the step mode, avoid locating your hands
between the light source and the turntable as much as possible by using
a crown clamp, for example. Otherwise, tanning could be caused due to a
prolonged use.
CAUTION
■ Do not directly hold and cure a composite in hands in the step mode.
Otherwise, burn injury could be caused by the hot composite.
3) Upon the completion of light irradiation, remove the object subject to curing.
*Using the unit for a long time may result in blinking of the overheat indicator due to excessively high
temperature of LEDs (temperature warning). With the occurrence of temperature warning, taking intermission
for the period equivalent to the previous curing time is recommended.
*A further rise in temperature will result in a forced stop of operation for allowing the LEDs to cool down,
thereby irradiation being disabled.
EN
EN 17
5. Use Method
5.1 Basic use method
Note
● Verify normal operation of the unit prior to use.
● Pay special attention to the following during use of the unit:
- Monitor the entire unit for any fault at all times.
- In case of any fault found on the unit, take appropriate action such as shutting down the unit.
WARNING
■ Light-sensitive personnel such as those allergic to light are prohibited to use the unit. In addition, care
must be taken for irradiation light not to shine on light-sensitive people such as those allergic to light.
■ Personnel equipped with a heart pacer should not use the unit.
■ Otherwise, the pacer could malfunction.
WARNING
■ When repairing a prosthesis removed from patient’s oral cavity, disinfect it prior to placement in the unit.
Otherwise, infection could be caused.
1) Turn on the main switch and verify that something appears on the time display.(see Item 3.2.2)
2) Cure a composite in the step mode (see Section 5.2) or full mode (see Section 5.3).
CAUTION
■ Do not directly look at the irradiation light. Otherwise, eyes could be damaged.
■ Do not irradiate light on an object located closer to the light source than being recommended. Otherwise,
the object could be heated.
■ Do not bring your hands close to the irradiating light source. Otherwise, burn injury could be caused.
CAUTION
■ Wear suitable protective equipment such as glasses that cut off light with a wavelength of 500 nm or less
when continuously working on the unit for a long time or if you are sensitive to light or have a cataract or
damaged retina, for example.
CAUTION
■ To operate the switch, use your fi ngers but not any sharp tool.
CAUTION
■ When opening/closing the door, do not allow your hand or part of your body or the object to enter into
below the door or the gap. Otherwise, personal injury or property damage could be caused.
CAUTION
■ Arrange an object subject to curing with its curing surface facing the light source.
■ Set curing time suitably for the use material.
■ Be sure to verify the material for perfect curing upon the completion of curing. In case of insuffi cient curing,
additionally irradiate light.
■ Clean off contamination of the lens cover or replace the contaminated cover. Otherwise, the contaminated
portion is heated to cause deformation or melting of the cover.
EN 16

< Recommended curing position in the step mode >
Dia. 40 mm
Dia. 40 mm
+/
-
10 mm
Place a composite within the hatched area as shown
in the diagram.
(Hatched area: Inside the circle of about 40mm
diameter directly above the turntable and besides
±10mm from the visor rim)
5.3 Full mode
1) Open the door and place an object subject to curing on the turntable (see Section 5.4).
Note
● Use the turntable to irradiate light on a composite entirely.
● When concurrently curing multiple composites, arrange them such that no shade is formed on each other.
2) Upon verifying the door open indicator being unlit, close the door.
(Standby status in the full mode)
3) Select and press a Curing timer key that matches recommended time for the object subject to curing .
- Light irradiation immediately starts and remaining time appears on the time display.
- By additionally pressing the Curing timer key with light irradiation in progress, time corresponding to the
key is added to the remaining time. The maximum 10 minutes of addition is possible.
Note
● In the full mode, monitor the turntable rotation through the window.
CAUTION
■ Do not continuously look inside the curing chamber through the window for a long time in the full mode.
Otherwise, discomfort could be felt.
■ Do not irradiate light on an object located closer to the light source than being recommended. Otherwise,
the object could be heated.
CAUTION
■ If anything is caught by the turntable, stop the turntable rotation by pressing the stop switch or turning off
the main switch before removing the caught object.
* For stopping curing in the middle of the process, press the stop key. A standby status is established
accordingly.
* A temporary halt of curing is established by opening the door during curing or pressing the timer key with the
door remaining opened. In this event, only the blue LEDs are dimly lit and the turntable continues to rotate.
- In 15 seconds, alert sound starts and in 20 seconds, error sounds and operation stops.
- By closing the door within 20 seconds, the temporary halt is released and full mode irradiation restarts.
EN 18
Table of contents
Languages:
Popular Lighting Equipment manuals by other brands


Fiessler
Fiessler TLCT operating manual

INIM Electronics
INIM Electronics CNSA01 quick start guide

Beamz Pro
Beamz Pro SB400IP user manual

Ayra
Ayra Ero Minibeam 12 user manual

Generac Power Systems
Generac Power Systems Magnum MLT6SC owner's manual

Larson Electronics
Larson Electronics WAL-HL-2000W-240V instruction manual

Zodiac
Zodiac R0537600 instructions

LITESHEET
LITESHEET BriteCor AC BTS Series installation manual

Genie
Genie TL 04 Operating instruction

Feniex
Feniex COBRA MINI M-2111 Installation and operational guide

Vision & Control
Vision & Control DL60x60-G525/24V Instructions for use

Ultra Products
Ultra Products ULT31352 brochure