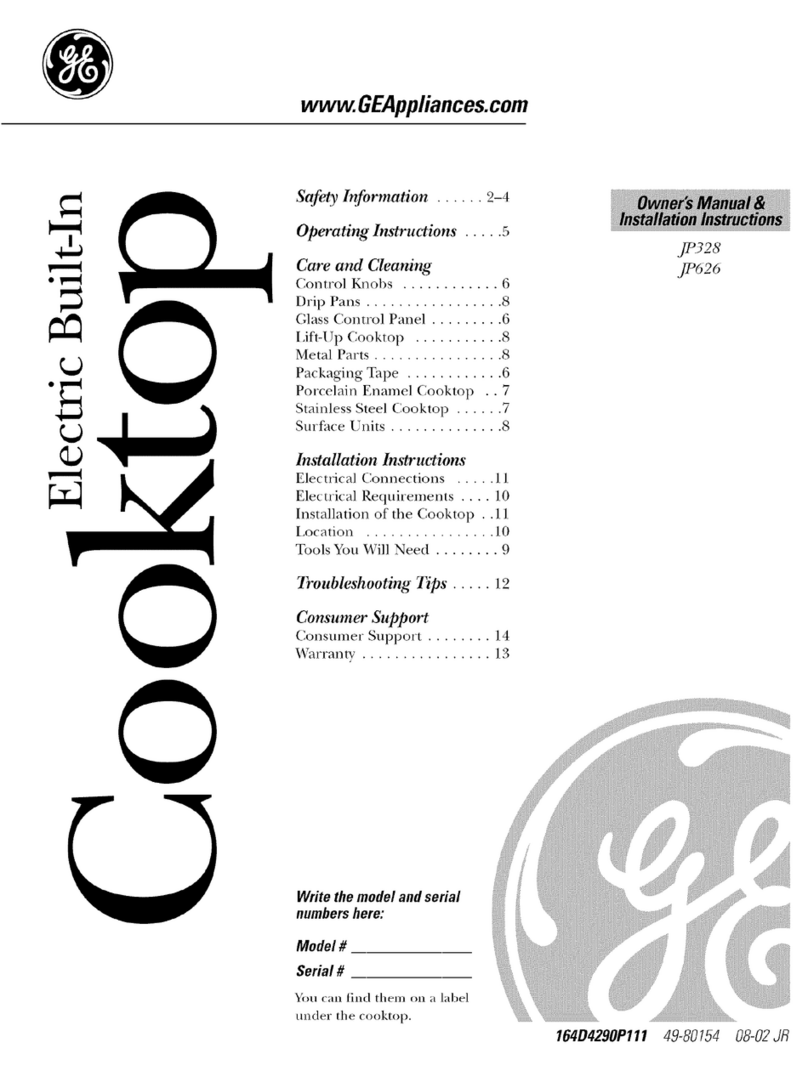
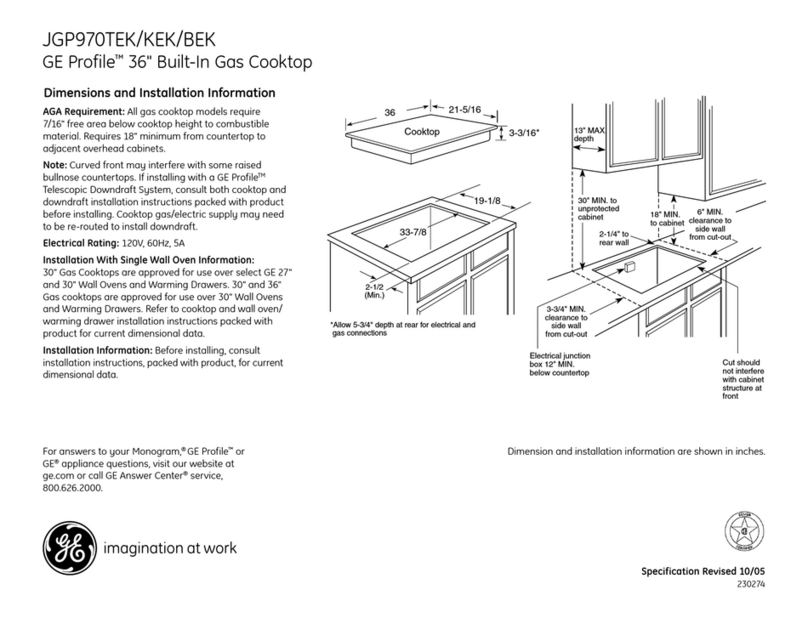
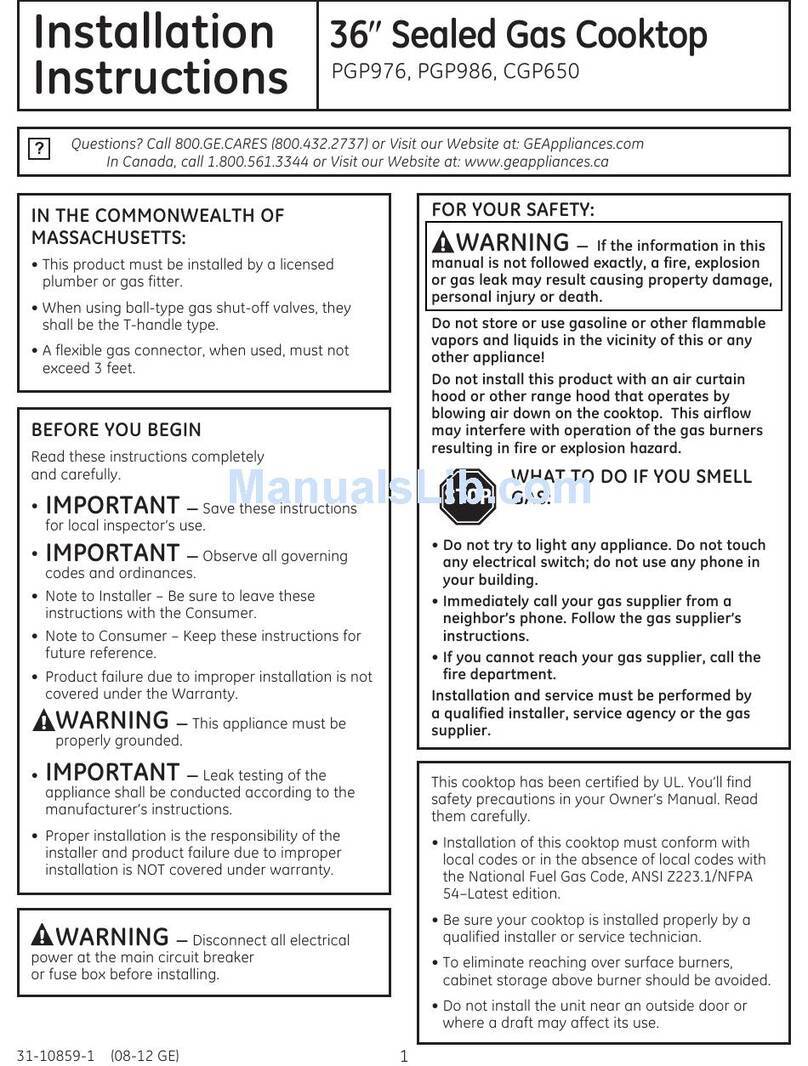
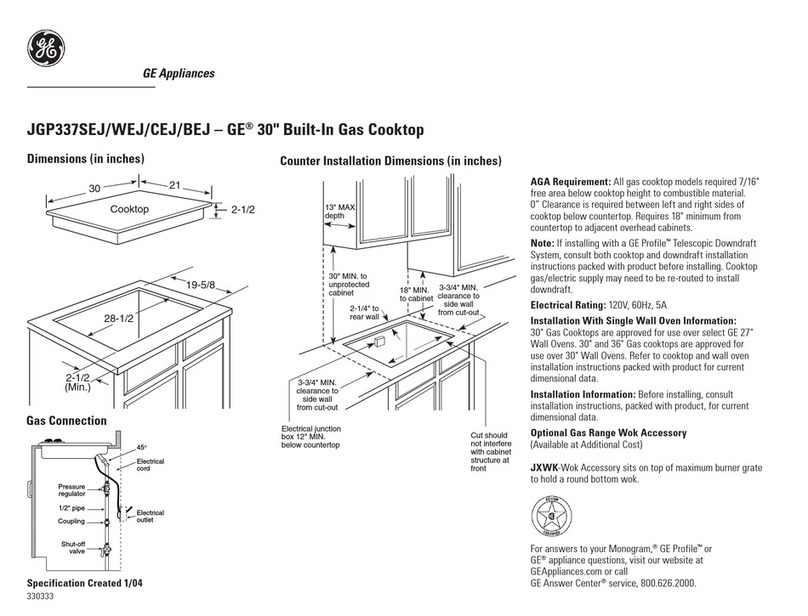
GE CGP350 User manual

GEAppliances.com
U3
C3
LD
I
0
U3
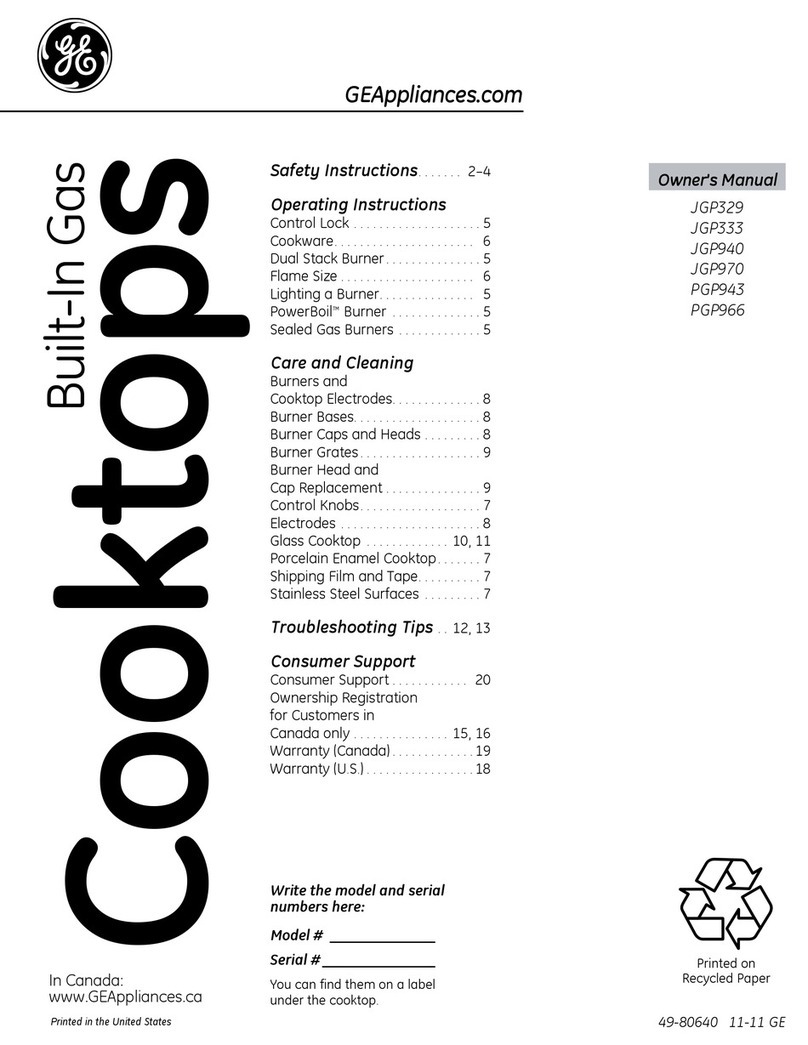
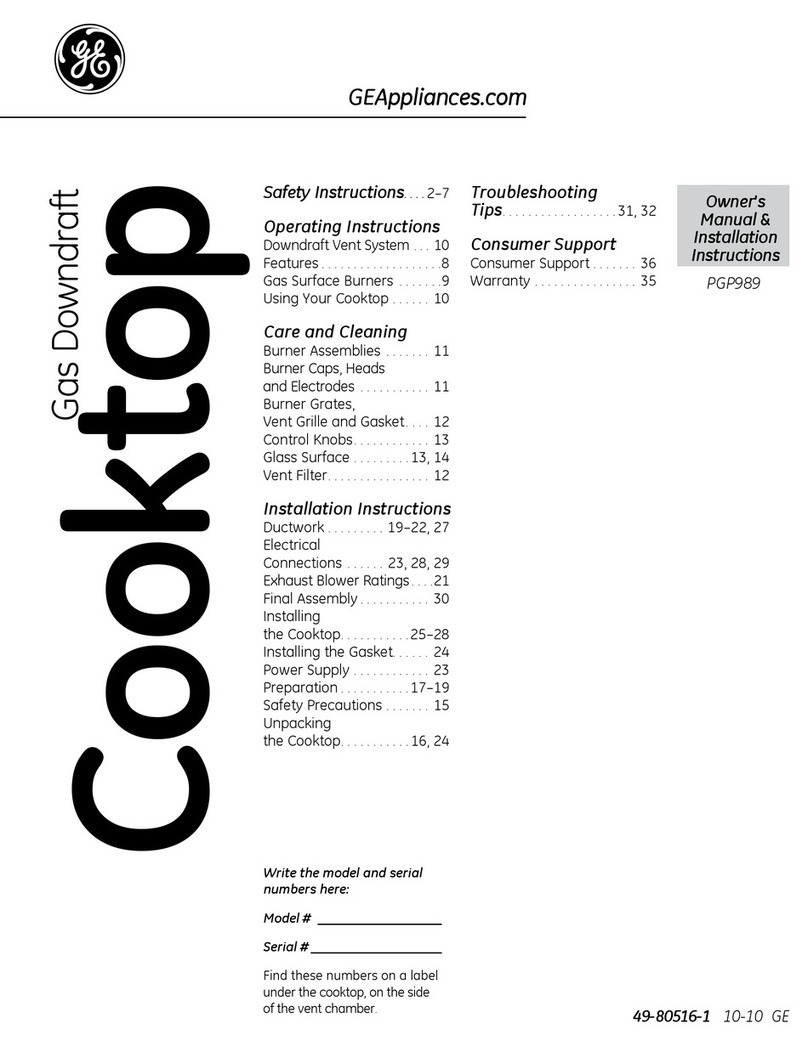
Safety Instructions ....... 2-4
Operating Instructions
Control Lock .................... 5
Cookware ...................... 6
Flame Size ..................... 6
Griddle .......................... 7
Lighting a Burner ............... 5
Lighting the Griddle Burners ..... 7
PowerBoil T"Burner .............. 5
Sealed Gas Burners ............. 5
Care and Cleaning
Burners and
Cooktop Electrodes .............. 9
Burner Bases.................... 9
Burner Grates .................. 10
Burner Head and
Cap Replacement .............. ZO
Control Knobs ................... 8
Griddle ......................... 11
Porcelain Enamel Cooktop ....... 8
Shipping Film and Tape .......... 8
Stainless Steel Surfaces ......... 8
Troubleshooting Tips ...... 12
Consumer Support
Consumer Support .... Back Cover
Ownership Registration for
Customers in Canada only.. 13, 14
Warranty (Canada) ............. 17
Warranty (U.S.) ................. 16
CGP350
CGP650
PGP955
PGP959
PGP976
PGP986
Plaque de Cuisson
A Gaz
La section frangaise commence _la page 19
Estufas
Con Sistema de Gas lncorporado
La secci6n en espa_ol empieza en la p6gina 33
In Canada:
www.electromenugersge.cu
Printed in the United States
Write the model and serial
numbers here:
Model #
Serial #
You can find them on a label
under the cooktop.
Printed on
Recycled Paper
49-80661 07-12 GE

IMPORTANT SAFETY INFORMATION.
READ ALL INSTRUCTIONS BEFORE USING.
i^ i
l,,,, WARNING I mfthe information in this manual is not followed exactly, a fire or
explosion may result causing property damage, personal injury or death.
Do not store or use gasoline or other flammable vapors and liquids in the vicinity of this or any
other appliance.
Do not install this product with air curtain hood or other range hood that blows air down on the
cooktop. Airflow may interfere with operation of gas burners resulting in fire or explosion hazard.
WHAT TO DO IF YOU SMELL GAS
Do not try to light any appliance.
Do not touch any electrical switch; do not use any phone in your building.
Immediately call your gas supplier from a neighbor's phone. Follow the gas supplier's
instructions.
If you cannot reach your gas supplier, call the fire department.
Installation and service must be performed by o qualified installer, service agency or the gas supplier.
[AWARNING ]IP1PORTANTSAFETYNOTICE
The California Safe Drinking Water and Toxic Enforcement Act requires the Governor of California to publish alist of
substances known to the state to cause cancer, birth defects or other reproductive harm, and requires businesses to warn
customers of potential exposure to such substances.
Gas appliances can cause minor exposure to four of these substances, namely benzene, carbon monoxide, formaldehyde
and soot, caused primarily by the incomplete combustion of natural gas or LP fuels. Properly adjusted burners, indicated
by abluish rather than a yellow flame, will minimize incomplete combustion. Exposure to these substances can be
minimized by venting with an open window or using a ventilation fan or hood.
2 SAVE THESE INSTRUCTIONS

GEAppliances.com
IAWARNING ]GENERAL SAFETY INSTRUCTIONS
[WARNING j
NEVER use this appliance as a space heater to heat
or warm the room. Doing so may result in carbon
monoxide poisoning and overheating of the cooktop.
Use this appliance for its intended purpose as described
in this owneCs manual.
iiiiiil
iiiiiiili_
Have your cooktop installed and properly grounded by
a qualified installer in accordance with the provided
installation instructions. Any adjustment and service
should be performed only by a qualified gas cooktop
installers or service technicians. Do not attempt to
repair or replace any part of your cooktop unless it is
specifically recommended in this manual.
Your cooktop isshipped from the factory set for use
with natural gas. It can be converted for use with LP
gas. If required, these adjustments must be made by a
qualified technician in accordance with the installation
instructions and local codes. The agency performing this
work assumes responsibility for the conversion.
! Have the installer show you the location of the cooktop
gas shut-off valve and how to turn it off if necessary.
Plug your cooktop into a 120-volt grounded outlet
only. Do not remove the round grounding prong from
the plug. If in doubt about the grounding of the home
electrical system, it isyour responsibility and obligation
to have an ungrounded outlet replaced with a properly
grounded, three prong outlet in accordance with the
National Electrical Code. Do not use on extension cord
with this appliance.
Before performing any service, unplug the cooktop
or disconnect the power supply at the household
distribution panel by removing the fuse or switching off
the circuit breaker.
iiiil}i
Be sure all packing materials are removed from the
cooktop before operating to prevent ignition of these
materials.
Do not leave children alone or unattended in an
area where an appliance is in use. They should never
be allowed to climb, sit or stand on any part of the
appliance.
Do not store items of interest to children above a
cooktop-children climbing on the cooktop to reach
items could be seriously injured.
Use only dry pot holders-moist or damp pot holders on
hot surfaces may result in burns from steam. Do not let
pot holders touch surface burners, burner grate, or oven
heating element. Do not use a towel or other bulky cloth
in place of pot holders.
Be careful not to touch hot surfaces of the cooktop.
Potentially hot surfaces include burners, grates, cooktop.
Do not heat unopened food containers. Pressure could
build up and the container could burst, causing an
injury.
Cook meat and poultry thoroughly-meat to at least an
internal temperature of 160°F and poultry to at least
an internal temperature of 180°F. Cooking to these
temperatures usually protects against foodborne illness.
SAVE THESE INSTRUCTIONS s

IMPORTANT SAFETY INFORMATION.
READ ALL INSTRUCTIONS BEFORE USING.
]A WARNING jKEEPFLAMMABLE MATERIALSAWAY FROM THE COOKTOP
Do not store or use flammable materials near the
cooktop, including paper, plastic, pot holders, linens,
wall coverings, curtains, drapes and gasoline or other
flammable vapors and liquids.
Never wear loose-fitting or hanging garments while
using the appliance, Avoid storing commonly used
items in cabinets above the range and be careful when
reaching over the range. Clothing in close proximity to
burners or hot surfaces may ignite causing severe burns.
Do not let cooking grease or other flammable materials
accumulate in or near the cooktop. Grease on the
cooktop may ignite.
Clean ventilating hoods frequently. Grease should not
be allowed to accumulate on the hood or filter.
IAWARNINGI INTHE EVENT OF A FIRE,TAKE THE FOLLOWING STEPS
TO PREVENT INJURYAND FIRESPREADING:
Do not use water on grease fires. Never pick up a
flaming pan. Turn the controls off. Smother a flaming
pan on a surface burner by covering the pan completely
with a well-fitting lid, cookie sheet or flat tray. If
necessary, use a multi-purpose dry chemical or foam-
type fire extinguisher.
[A WARNING iCOOKTOP SAFETYINSTRUCTIONS
Never leave the surface burners unattended at medium
or high heat settings. Foods, especially oily foods, may
ignite resulting in fire that could spread to surrounding
cabinets.
_:,Never leave oil unattended while frying. If allowed to
heat beyond its smoking point, oil may ignite resulting
in fire that may spread to surrounding cabinets. Use a
deep fat thermometer whenever possible to monitor oil
temperature.
To avoid oil spillover and fire, use a minimum amount of
oil when shallow pan-frying and avaid caaking frazen
foads with excessive amounts of ice.
To minimize the possibility of burns, ignitian of
flammable materials and spillage, the handle of a
container should be turned toward the center of the
range withaut extending aver nearby burners.
When preparing flaming foods under a hood, turn the
fan on.
iiiiiil
iiiiiiili_
Use praper pan size and avoid pans that are unstable
or easily tipped. Select cookware that is matched to the }
size of the burner. Burner flames should be adjusted so
that they do not extend beyond the bottom of the pan.
Excessive flame may be hazardous. }
Always use the LITEposition when igniting the burners
and make sure the burners have ignited.
When usingglass/ceramic cookware, make sure it is
suitable for cooktop service;others may breakbecause
of sudden change in temperature.
Do not use a wok with a round metal support ring. the
ring may trap heat and block air to the burner resulting
in a carbon monoxide hazard.
Do not attempt to lift the cooktop. Doing so may
damage the gas tubing to the surface burners resulting
in a gas leak and risk of fire.
When disabling Control Lockout, make sure the surface
controls are set to the OFF position. This will prevent
unintended gas flow from the burners.
Do not use aluminum foil to cover the grates or line
any part of the cooktop. Doing so may result in carbon
monoxide poisoning, overheating of the cooktop
surfaces, or a potential fire hazard.
4 SAVE THESE INSTRUCTIONS

Using the cooktop burners. GEAppliances.com
Throughout this manual, features and appearance may vary from your model.
Control Lock
To lock the cooktop and prevent unwanted use,
turn the control lock knob counterclockwise to
LOCKED.An indicator light will glow to show
that the cooktop is locked.
When locked,the cooktop will sound if any
control knob isset to any position other than
OFF.
Tounlock,turn the control lock knobto
UNLOCKED.
i
How to Light a Burner
Hake sure the control lock knob is in the
UNLOCKEDposition and all 3 grates are
installed.
Your cooktop burners are lit by electric ignition,
eliminating the needfor standing pilot lights
with constantly burning flames.
Pushthe control knob down and turn it to the
LifE position.After the burner ignites,turn
the knob to adjust the flame size.Toturn the
burner off,turn the knob clockwiseas far as it
will go,to the OFF position.
Checkto be surethe burner you turn on is
the one you want to use.
Besureyou turn the control knob to OFF
when you finish cooking.
Incase of a power failure, you can light the
burnerswith u match. Holda lit match to
the burner;then push in and turn the control
knob to the LITEposition.Useextreme
caution when lighting burners this way.
Burnersin usewhen an electrical power
failure occurswill continue to operate
normally.
Donot operate the burner for an extended
period of time without cookware on the
grate. Thefinish on the grate may chip
without cookware to absorb the heat.
Besurethe burners and grates are cool
beforeyou placeyour hand, a pot holder,
cleaning cloths or other materials on them.
Sealed Gas Burners
Thesmallest burner in the right rear (onall
models)and the left rear burner (onsome
models)are the simmer burners. Theseburners
can be turned down to LO for a very low setting.
They provide precisecooking performance for
delicate foods such as saucesor foods that
require low heat for a long cooking time.
Themedium (left and right front or left front
and rear)and the large (rightfront) burners (on
some models) are the general-purpose burners
that can be turned down from HI to LOto suit a
wide range of cooking needs.
PowerBoil TM Burner
Theextra large center burner hasspecial
PowerBoil T"settings.Thisfeature should only be
usedwith cookware 12" or larger in diameter,
and flumes should never be allowed to extend
up the sidesof the cookware. Thisfeature is
designedto quickly bring large amounts of
liquid in pots 12" or larger in diameter to a boil.
Thetri-ring burner (onsome models)can also
be turned down to LO for a very low simmer
setting.

Using the cooktop burners.
How to Select Flume Size
Forsafe handling of cookwam,neverlet the
flames extend up the sidesof the cookware.
Watch the flame, not the knob, asyou reduce
heat.Theflame size on a gas burner should
match the cookware
you are using.
Anyflame larger than the bottom of the
cookware iswasted and only servesto heat the
handle.
Use a fiat-bottomed wok.
Wok This Wuy
Werecommend that you usea 14-inch or
smaller flat-bottomed wok.Theyare available at
your localretail store.
Onlya flat-bottomed wok should be used.
Make surethe wok bottom sitsflat on the
grate.
Donot usea wok support ring.Placingthe
ring over the burner or grate may cause the
burner to work improperly, resulting in carbon
monoxide levelsabove allowable standards.
Thiscould be dangerous to your health.
Cookwure
Aluminum: Medium-weight cookware is
recommended because it heats quickly and
evenly.Host foods brown evenly in aluminum
cookware. Usesaucepanswith tight-fitting
lidswhen cooking with minimum amounts of
water.
Enamelware: Under some conditions, the
enamel of some cookware may melt. Follow
cookware manufacturer's recommendations
for cooking methods.
Gloss: Thereare two types of glasscookware:
those for oven useonly and those for cooktop
cooking (saucepans,coffee and tea pots).Glass
conducts heat very slowly.
Cast Iron: If heated slowly, most cookware will
givesatisfactory results.
HeatproofGlass-Ceramic: Canbe usedfor
either surface or oven cooking. It conducts
heat very slowlyand cools very slowly. Check
cookware manufacturer's directions to be sure
it can be usedon a gas cooktop.
Stoinless Steel'. This metal alone has poor
heating properties and isusually combined
with copper, aluminum or other metals for
improved heat distribution. Combination metal
cookware usuallyworks satisfactorily if it is
usedwith medium heat asthe manufacturer
recommends.
Home Cunning Tips
Be sure the canner is centered over the burner.
To prevent burns from steam or heat, use
caution when canning.
Userecipes and procedures from reputable
sources.Theseare available from
manufacturers such as Ball®and Kerr®and the
Department ofAgriculture ExtensionService.

Using the griddle, conpGp986,CGPSO,PGP959,CGP350modelsonlyl GEAppIioncescom
Your preseusoned griddle (onsome models)
provides an extra-large cooking surface for
meats, pancakes or other food usually prepared
in a frying pun or skillet.
NOTE:Yourgriddle will discolor over time
asit becomesseasoned with use.
NOTE:Donot clean thegriddle in theself-cleaning
oven.
[IkWARN INGiFire.ozord
Foodshould be cooked on the griddle using
the griddle control knob in the griddle
zone only. This operates the front end
rear burners ut the correct heat settings.
Operating the front or rear burners
seperotely may result in high griddle
temperatures that could ignite food.
Use cure when cooking greasy foods. Spilled
grease may result in fire.
Never place or store any items on the
griddle, even when it is not in use. Heat from
surrounding burners can heat the griddle
end may result in fire.
Piece end remove the griddle only when ell
grates end griddle ere cool end ell surface
units (]re turned OFF.
How to Insert the Griddle
This griddle can only be used with the left
rear and front burners. To insert the griddle,
remove the left grate and place the griddle
legs on top of the black rubber bumpers.
®8H_
o
8oo
How to Light the Griddle Burners
Hake sure the control knob is in the
UNLOCKEDposition and the griddle is
installed.
Pushthe control knob corresponding to
the left rear burner down and turn counter-
clockwise to the first LITEposition. After the
left rear burner ignites, turn the knob to the
second LITE position. Once the left front
burner ignites, turn the knob in the GRIDDLE
control zone to adjust the flames uniformly.
Be sure to turn the control knob to OFF
when finished cooking
Only use the zone marked GRIDDLEwhen
the griddle is installed.
Using the Griddle
Host griddled foods require cooking on a preheated surface.
Preheat griddle according to this guide, then switch to the
desired cook setting.
Donot useoilonthegriddlefor extendedlengthsoftime.
Permanentstainingand/orcrazelinesonthe surfacecouldresult.
Do not overheat the griddle. Leavingthe griddle burner on at
HIfor an extended amount of time without food can damage
the griddle.
Donot useserrated or dull knivesto cut foods on griddle.
Preseusoned Griddle for Models PGP959, PGP986,
CGP350, CGP650
Type of Food Preheat Conditions Cook Setting
W@rmiRg Torti
Care and cleaning of the cooktop.
Be sure electrical power is off and all surfaces are cool before cleaning any part of the cooktop.
How to Remove Protective Shipping Film
Carefullygraspa cornerof the protective
shippingfilm with your fingers and slowlypeel
itfrom the appliancesurface.Donot useany
sharpitemsto removethe film.Removeallof the
film beforeusingthe applianceforthe first time.
To assure no damage isdone to the finish of
the product, the safest way to remove the
and Packaging Tape
adhesive left from packaging tape on new
appliances isan application of a household
liquid dishwashing detergent. Applywith a soft
cloth and allowto soak.
NOTE:Theadhesivemust be removed from
all parts beforeusingthe cooktop. It cannot be
removed if it isbakedon.
Pull the knob straight up off the stem.
Control Knobs
Thecontrol knobs may beremoved foreasier
cleaning.
Make surethe knobs are in the OFFpositions
and pull them straight off the stems for
cleaning.
Theknobs can be cleaned in a dishwasher or
they may also be washed with soapand water.
Makesurethe insidesofthe knobs are dry
before replacing.
Replacethe knobs in the OFF position to
ensure proper placement.
Porcelain Enamel Surfaces (onsomemodels)
Theporcelain enamel finish issturdy but
breakable if misused.Thisfinish isacid-
resistant. However,any acidic foods or food
with high sugar content spilled(such asfruit
juices,tomato or vinegar) should not be
permitted to remain on the finish.
If acidsspill on the cooktop while it ishot, use
a dry paper towel or cloth to wipe it up right
away. When thesurfacehas cooled,wash with
an all-purpose cleanerand water. Rinsewell
Forother spillssuch asfat spatterings,wash with
soapand water or an all-purposecleaner after
the surfacehascooled. Rinsewell. Polishwith a
dry cloth.
NOTE:Forstainlesssteelcooktopsreferto the
Stainlesssteelsurfacesection
Stainless Steel Surfaces (onsome models)
Do not use asteel wool pad; it will scratch the
surface.
IMPORTANT: APPLY A PROTECTIVE COAT
OF CERAMA BRYTE®PART#WBO2T10111
STAINLESS STEELBRIGHTENER BEFORE USING.
Thiswill helpyou to maintain the brightness
and appearance of your stainless steel range.
Inorder to avoid any discolorations and/or
grease stains,we recommend cleaning and
removing any spills,spots and greasefrom
the range after use.
It isimportant to usea soft cloth or paper
towel every time the range iscleanedto
avoid any scratches.
Readcarefully the instructions on the back of
the Brightener for better results.
Cleaning Instructions:
1. Removegrates.
2. Wash usingwarm, soapy water:
Wet soft cloth or paper towel (avoidusing
excessivewater).
Wipe the surface inthe direction of the grain
(following the steel lines).
Rinseand wring out a soft cloth or paper
towel and dry the range.
3. Apply a degreaser that does not contain
sodium hydroxide or stainless steel cleaner
(follow instructions).
4. Apply Cerama Bryte®StainlessSteel
Brightener(follow instructions).
5. Repeatsteps2-4 as many times as needed.
6. Putgrates back in place.
Followthese instructions for any stainless steel
surface on your range.
DONOT USEfor cooktop orstainless steel
parts cleaning:
. Caustic lye(sodium hydroxide)or cleaners
containing this chemical
. Hard or steelwool pads
Abrasive materials or chemicals
Toinquire about purchasing stainlesssteel
appliance cleaneror polish,or to find the
location of a dealer nearest you, pleasecallour
toll-free number:
National Parts Center 800.626.2002(U.S.)
800.661.1616(Canada)
GEAppliances.com(U.S.)
www.GEAppliances.ca (Canada)

CAUTION:
DO NOT OPERATE A BURNER
WITHOUT ALL BURNER PARTS
IN PLACE.
Electrode ,__
or
Electrode -@
Tri-ringbase
Consome models)
GEAppliances.com
Burner Caps and Heads
Turn all controls off before removing burner
parts.
INOTE:Before removing the burner caps
and heads, remember their size and
location. Replace them in the same
location after cleaning.
The burner assembliesshould always be
kept clean. Spilloversshould be cleaned
immediately; they can clog the openings in the
burner assemblies.
Removethe burner grates, burner caps and
burner headsfor easy cleaning.
Wash burner caps and burner headsin hot,
soapy water and rinsewith clean running
water. You may scour with a plastic scouring
pad to remove burned-on food particles.
Usea sewing needleor twist tie to unclog the
small holes in the burner head, if required.
To remove burned-on food, soak the burner
heads in a solution of mild liquid dishwashing
detergent and hot water for up to 20-30
minutes, if required. Formore stubborn stains,
usea toothbrush.
If the spillwent insidethe burner head
assembly,wash it under running water. Shake
to remove any excesswater. Air dry and make
surethe small ignitor holesare open.
NOTES:
Donot wash any burner parts in a
dishwasher.
Donot usesteel wool or scouring powders
to cleanthe burners.
Burner Bases
Theburner bases can not be removed for
cleaning.
Tocleanthe burner bases,referto the Porcelain
EnamelSurfacesor StainlessSteelSurfaces
section,depending on your model.
Makesurethat nowater gets intothe burner
basesand the brassgasorifices.
Wipe cleanwith a damp cloth. Allowthem to
dry fully before using.
Cooktop Electrode
Clean this metal part
Do not clean this
white ceramic part
with an emery board
NOTE: Do not attempt to remove
the electrode from the cooktop.
Electrodes
Theelectrode of the spark igniter isexposed
beyond the surface of the burner base.When
cleaning the cooktop, be careful not to snag the
electrode of the spark igniter with your cleaning
cloth. Damage to the igniter could occur.
Becareful not to push in any cooktop controls
while cleaning the cooktop. A slight electrical
shock might result which could causeyou to
knock over hot cookware.
Make surethat the white ceramic electrodes
in the cooktop are clear of soil and dry.Clean
the metal part of the electrode with a soft cloth.
Forstubborn, hardened soil,clean the metal
portion of the electrode with an emery board.
Do not clean the white ceramic portion ofthe
electrode with the emery board. It isacceptable
to clean the white portion of the electrode with
a soft cloth, but not with an emery board.
Before reassemblingthe surface burners, push
down on each of the white ceramic electrodes
to make surethey are pressed against the
burner bases.
NOTE:Do not attempt to remove the electrode
from the cooktop or any screws from the burner
head or burner base.

Care and cleaning of the cooktop.
J
Burner cap properly seated
Burner cap notproperly seated
Burner Head and Cap Replacement
Replace the burner head onto the burner base,
making sure that the head is properly oriented
over the burner base and the electrode. Make
sure to place the correct burner head on the
correct burner base and that the burner head
sits level on the burner base. The burner heads
are not interchangeable.
Make sure the slot in the burnerhead is positioned
over the electrode. The burner cap has three to
four pins. When replacing the cap, make sure
none of the pins sits in the stability chamber. The
burner caps are not interchangeable.
Tri-Ring Burner
PGP986,CGP650,PGP963,CGP350
(Center burner only)
StabiFty Burner head __ /1 _/
chamber _--_
tJurner Electrode
10
Appearance may vary.
Burner Grates
Your range hasthree professional-style
grates.Thesegrates are position-specific.For
maximum stability, these grates shouldonly be
used in their proper position.
Cleaning Grates -Soap and Water
Lift grates out when cool.Grates should be
washed regularly and, after spillovers.Wash
them in hot, soapy water and rinsewith clean
water. When replacingthe grates, be surethey
are positioned securelyover the burners.
Cleaning Grates--Self-Clean Oven
Toget rid of burned-on food, you may usethe
self-clean cycleof your oven ifyour oven has
self-clean racks. Removeany burnt-on food
particles prior to placing the grates in the oven.
NOTE:Usecaution when removing thegrates
from the ovenafter theself-dean cyclehas
ended.Thegrates may still be hot.
Forheavily-soiledgrates,you may noticesome
white ashonthe grate.Wipeitoff with a damp
cloth after thegrate cools.Ifwhite spotsremain,
removethem with a soap-filledscouringpad and
rinsethoroughlywith a vinegarandwater mixture.
Thesedepositsare usually a salt residuethat
cannot be removed bythe clean cycle.
Cleaning Grates--Dishwasher
The grates may be cleaned in the dishwasher.
Remove any burnt-on food particles prior to
placing the grates inthe dishwasher. Place them
on the lowest rack of the dishwasher and run on
a "heavy duty" cycle,
Do not operate a burner for an extended period
of time without cookware on the grate. The
finish on the grate may chip without cookware
to absorb the heat.
Although the grates are durable,they will
gradually losetheir shine,regardless of the
best care you can givethem. This isdue to their
continual exposure to high temperatures and
abrasion by the cookware.
Support Bumpers
If one or more of the circular siliconegrate
support bumpers inthe cooktop are missing or
damaged, replacement parts can be obtained
by calling 1.800.GE.CARES.
Toinsert the new bumpers, simply insert the
cone shaped end and pushdown while gently
twisting or rocking the bumper.

GEAppliances.com
Cast-Iron Griddle (on PGP986, CGP650, PGP959, CBP350 Models)
Rinsewith hot water (do not usesoap),and
dry thoroughly.
Beforecooking, prepare the surface with
cooking spray or vegetable oil.
After cooking, cleanthe griddle with a stiff
brush and hot water. Usingsoap isnot
recommended and harshdetergents should
never be used.
B Towel dry immediately and apply a light coat
of cooking spray or vegetable oilwhile the
griddle ishot.
Storein a cool, dry place.
Donot wash in the dishwasher.
Griddle Preceutions
If something has spilled under the griddle, it
should be cleaned up as soon as possibleto
prevent "baked on" food soil.
Donot allow greaseto accumulate under the
griddle as it can be a fire hazard.Clean under
the griddle as soon asit iscool. Cleanwith
hot soapy water.
Donot placegriddle in the microwave.
Always turn off all surface burners before
removing the griddle.Use caution when
handling a hot griddle.
NOTE:Donot cleanthegriddle in the self-
cleaningoven.
11

Before you call for service...
Troubleshooting Tips
gave time and money! Review the charts on these pages
first and you may not need to coil for service.
Possible Causes What To Do
Burners have yellow or The combustion quality of
yeflow-tipped flames burner flames needs to be
determined visually.
. Usethe illustrations belowto determine ifyour burner
flames are normal. If burner flames looklike A, call for
service.Normal burner flames should look likeB or C,
depending on the type of gasyou use.With LPgas, some
yellow tipping on outer cones isnormal.
A-Yellow flames B-Yellow tips C-Soft blue flames
Call for service on outer cones Normal for natural
Normal for LPgas gas
Control knobs Knob isn't pushed down. . Toturn from the OFF position, push the knob down
will not turn and then turn.
Burners do Plug on cooktop is not . Hake sure electrical plug is plugged into a live,properly
not light completely inserted in the grounded outlet.
electrical outlet
Gassupply not connected . Seethe Installation Instructions that came with your
or turned on. cooktop.
A fuse in your home may be • Replacethe fuse orresetthe circuit breaker.
blown or the circuit breaker
tripped.
Burner parts not replaced . Seethe Careand cleaningof the cooktop section.
correctly.
The electrodes under the • Seethe Coreand cleaningof the cooktop section.
burners are soiled.
The white ceramic electrodes • Seethe Coreand cleaningof the cooktop section.
are not securely seated under
the burners.
Cooktop is locked. • Unlockthe cooktop.Seethe Usingthe cooktop
burners section.
The igniter hole (on some . Seethe Coreand cleaningof the cooktop section.
models) is plugged.
Ticking soundof Control knob is still . Turnthe knob out of the LITEposition to the desired
igniter persists after in the LITE position, setting.
burner lights Turn the burner off and relight. If ticking is still
present, call for service.
Burner flames very
large or yellow Improper air to gas ratio. . If cooktop is connected to LPgas, check all steps
in the Installation Instructions that came with
your cooktop.
Cooktop makessound The cooktop is locked
when a control knob ion some models).
is turned on
. Turn the control lock knob to UNLOCKED.
12

Pleaseplacein envelopeand mail to:
Veuillezmettredans uneenveloppeet envoyez_ :
OWHERSHIPREGISTRATIOH
P.O, BOX1780
MISSISSAUGA,OHTARJO
L4Y4G1
(FORCAHADIAHCOHSUMERSOHLY)
13

R' B
For Canadian
Customers
Pour les
Consommateurs
Canadiens
Z
rr"
Z
U_l
rr"
C3
Z
iii
z
z
S
Pleaseregisteryourproducttoenableustocontactyou
inl_eremoteeventasafetynoticeisissuedforthisproduct
andtoallowforefficientcommunicationundertheterms
ofyourwarranty,shouldtheneedarise.
REGISTERON-LINE: wvvvv.geappliances.ca MAILTO:
ENREGISTREMENTSURINTERNETA: wwvv.electromenagersge.ea POSTER/_,:
D[] MISS/MLLE.MR'/MD[] Ms,MRS'/MME'FIRSTNAME/PRI_NOM LASTNAME/NOM
STREETNO/NORUE STREETNAME/RUE
CITY/VILE
Veuillezenregistrerv_e produitafindenouspermet_ede
communiqueravecvoussijamaisunavisdesOcurit6concemant
ceproduit_tait6misetdecommuniquerfacilementavecvousen
vertudevotregara_e,silebesoins'enfaitse_r.
P.O.BOX1780,MISSISSAUGA
ONTARIO,L4Y461
AF. NO/APP./RR#
PROVINCE POSTALCODE/POSTAL
AREACODE/IND.REG.[TELEPHONE JE-MAIL
DIDYOUPURCHASEA SERVICECONTRACTFORTHISAPPUANCE? YES/OUI [] IFYES/SIOUI:EXPIRATION
Y/A M D/J
AVEZ-VOUSACHETEUN CONTRATDESERVICEPOURCETAPPAREIL? NO/NON []
NAME OFSELLINGDEALER/NOM DU MARCHAND MODEL! MODI_LE
SERIAL/SI_RIE
INSTALLAq]ONDA"_/DATED'INSTALLATION
Y/A M D/J CORRESPONDENCE [] ENGUSH
CORRESPONDANCE [] FRANCAIS
[] Ido notwishtoreceiveanypromotionaloffersregardingthisproduct.
[] Jened_sirepasrecevoird'offrespromotionnellesconcemantceprodui_
14

Notes. GEAppliances.com
15

GE Gas Coo op Warranty. CForCustomerstheUnitedStates)
All warranty service provided by our Factory Service
Centers, or an authorized Customer Care ®technician.
To schedule service, visit us on-line at GEAppliances.com,
or call 800.GE.CARES (800.432.27371. Please have serial
number and model number available when calling for service.
Staple your receipt here.
Proof of the original purchase
date is needed to obtain
service under the warranty.
One Year
From the dote of the
originoiureh Se
GE Will Replace:
Any part of the cooktop which foils due to odefect in materials or workmanship.
Duringthis limited one:veer warranty, GEwill alsoprovide, free of charge, oil lobar
and related service costs to replace the defective port.
Service trips to your home to teach you how to use
the product.
Improper installation, delivery or maintenance.
Product damage or failure of the product if it is abused,
misused, modified, usedfor other than the intended
purpose, or used commercially.
Replacement of house fuses or resetting of circuit
breakers.
Damage to the product caused by accident, fire, floods
or acts of God.
Incidental or consequential damage caused by possible
defects with this appliance.
Damage caused after delivery.
Product not accessible to provide required service.
EXCLUSION OF IMPLIED WARRANTIES--Your sole and exclusive remedy is product repair as provided in this Limited
Warranty. Any implied warranties, including the implied warranties of merchantability or fitness for a particular
purpose, are limited to one year or the shortest period allowed by law.
This warranty is extended to the original purchaser and any succeeding owner for products purchased for
home use within the USA. If the product is located in an area where service by a GE Authorized Servicer is not
available, you may be responsible for a trip charge or you may be required to bring the product to on Authorized
GE Service location for service. In Alaska, the warranty excludes the cost of shipping or service calls to your home.
Some states do not allow the exclusion or limitation of incidental or consequential damages. This warranty
gives you specific legal rights, and you may also have other rights which vary from state to state. To know
what your legal rights are, consult your local or state consumer affairs office or your state's Attorney
General.
Warranton General Electric Company, Louisville, KY 40225
16

Gas Cooktop Warranty. CrorCustomersCanadal
All warranty service provided by our Factory Service
Centresor an authorized Customer Care ®technician. To
schedule service, visit us on-line at www.GEAppliances.ca
or call 1.800.561.3344. Please have serial number and model
number available when calling for service.
Mabe Will Replace:
Staple your receipt here.
Proof of the original purchase
date is needed to obtain
service under the warranty.
Fromthe date of the
original purchase
Anypart of the cooktop which fails due to a defect in materials or workmanship.
Duringthis limited one:year warranty, Mabewill also provide, free of charge, all labor
and related service coststo replace the defective part.
Service trips to your home to teach you how to use
the product.
Improper installation, delivery or maintenance.
Product damage or failure of the product if it is abused,
misused, modified, usedfor other than the intended
purpose, or used commercially.
Replacement of house fuses or resetting of circuit
breakers.
Damage to the product caused by accident, fire, floods
or acts of God.
Incidental or consequential damage caused by possible
defects with this appliance.
Damage caused after delivery.
,, Product not accessible to provide required service.
EXCLUSION OF IMPLIEDWARRANTIES--Your sole and exclusive remedy is product repair as provided in this Limited
Warranty. Any implied warranties, including the implied warranties of merchantability or fitness for a particular
purpose, are limited to one year or the shortest period allowed by law.
This warranty is extended to the original purchaser and any succeeding owner for products purchased in Canada
for home use within Canada. In-home warranty service will be provided in areas where it is available and deemed
reasonable by Mabe to provide.
Some provinces do not allow the exclusion or limitation of incidental or consequential damages, so the above
exclusion may not apply to you. This warranty gives you specific legal rights, and you may also have other rights
which vary from province to province. To know what your legal rights are in your province, consult your local or
provincial consumer affairs office.
Warrantor: Mabe Canada Inc.,
Burlington, Ontario
17

Notes.
28

Instructions de s@curit@.... 20-22
Instructions de fonctionnement
Verrouillage des contr61es .......... 23
Casseroles ........................ 24
Taille de la flamme ................ 24
Plaque chauffante ................. 25
Comment allumer un brQleur ...... 23
BrOleur PowerBoilTM ................. 25
BrOleurs au gaz scell6s ............. 23
Comment allumer les brQleurs
de la plaque chauffante .......... 23
Entretien et nettoyage
BrQleurs et #lectrodes
de la plaque de cuisson .......... 27
Bases de brQleur ................... 27
Grilles de brQleur ................... 29
Remplacement de la t_te
et du Capuchon de brQleur ....... 28
Boutons de commande ............. 26
Plaque en fonte .................... 29
Plaques avec porcelaine
6maill6e .......................... 26
Film et ruban adh6sif
d'exp6dition ...................... 26
Surfaces en acier inoxydable ........ 26
D@pannage ...................... so
SoutJenau consommateur
Soutien au consommateur ........ 32
Garantie ........................... 31
Transcrivez les num@ros
de mod@leet de s@rieici :
ModUle #
S#rie #
Vous lestrouverez sur une 6tiquette
appos6e sous la plaque.
19

J
INFORFIATIONS IMPORTANTES SUR LA SECURITE.
LIRE TOUTES LES INSTRUCTIONS AVANT UTILISATION.
i, AVERTISSEMENTi Si vous ne suJvezpas exactement lesinformationscommuniqu_es
dans ce manuel, un incendie ou une explosion peut se produire entraTnant des dommages _ votre
proprietY, des blessures corporelles ou m_me la mort.
-- Ne pc]s entreposer ou utiliser de I'essence ou d'c]utres combustibles 6 proximit6 de cet (]ppc]reil ou
tout autre appareil.
- Ne p(usinstaller ce produit si I'on utilise une hotte 6 rideau d'air ou une hotte de cuisini6re
soufflant I'air au-dessus de la surface de cuisson. Le d6bit d'air peut nuire au fonctionnement des
brQteurs 5 gaz et repr6sente un risque d'incendie ou d'explosion.
QUE FAIRE SI VOUS SENTEZ L'ODEUR DE GAZ
Ne pos tenter d'ollumer tout outre opporeil.
Ne pus toucher tout interrupteur _lectrique; ne pus utiliser le t616phone duns votre r_sidence.
Appeler imm_diatement votre fournisseur de gaz 8 partir du t_l_phone d'un voisin. Suivre
les instructions du fournisseur.
Sivous ne pouvez pus rejoindre le fournisseur de guz, uppeler le service des incendies.
- L'installution et I'entretien doivent _tre ex6cut6s par un sp_cialiste quulifi6, une compugnie
ussurunt I'entretien de ce type d'uppureil ou par le fournisseur de guz.
[AAVERTISSEMENTiAVIS IMPORTANTSURLA SdLCURITE
Le d6cret de Io Culifornie sur Io consommution d'eou de table et I'upplicution des r6gles sur les produits toxiques exige
que le gouverneur de cet 6tat publie une liste des substances connues pour causer le cancer, des malformations 6 lu
nuissunce et uutres dommuges du mSme type. Ce d6cret exige que les lubricants overtissent leur clientele quunt 6 leur
exposition potentielle 6 ces produits.
Les uppureils fonctionnunt uu guz peuvent causer une exposition mineure 6 quutre de ces substances, soit le benz_ne,
I'oxyde de curbone, le formaldehyde et lu suie qui sont cuus6es principulement par lu combustion incomplete du guz
nuturel ou du guz LP.Le bon r6gluge des brQleurs indiqu6 par une flumme de couleur plut6t qu'une flummejuune
minimiseru une combustion incomplete. L'exposition 6 ces substances peut _tre r6duite par I'ouverture d'une fenStre,
I'utilisation d'un ventilateur ou d'une hotte.
2o SAUVEGARDERCESINSTRUCTIONS
This manual suits for next models
5
Table of contents
Languages:
Other GE Cooktop manuals

GE
GE Profile PP989DNBB User manual

GE
GE Monogram ZHU30RBM User manual

GE
GE Monogram ZGU384N User manual

GE
GE JP362 Series User manual

GE
GE JGP389 Training manual

GE
GE Profile PP945 Manual

GE
GE Profile PHP900DM Manual

GE
GE JP939 User manual

GE
GE JP3030*J series How to use

GE
GE Digital Radiant Cooktop User manual
Popular Cooktop manuals by other brands

Bosch
Bosch PBH615B90A User instructions

Frigidaire
Frigidaire FEC30C4ACB parts catalog

Electrolux
Electrolux 168233 Specification sheet

Electrolux
Electrolux E30IC75FSS - 30 Inch Drop-In Induction... installation instructions

Philco
Philco PHS 316 user manual

Elba
Elba INDUCTION BUILT-IN COOKTOP Instructions for the use - installation advices