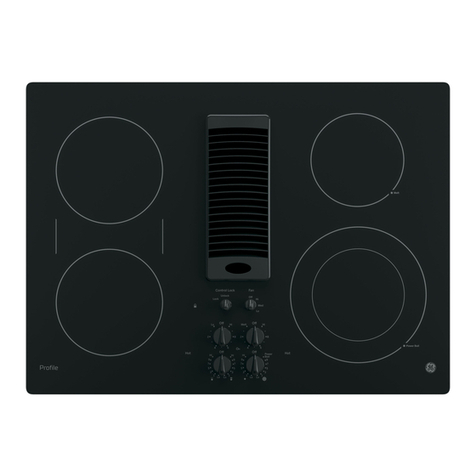
GE PP9830 User manual

Write the model and serial
numbers here:
Model #_________________
Serial # _________________
Find these numbers on a label
under the cooktop.
ESPAÑOL
Para consultar una version en
español de este manual de
instrucciones, visite nuestro sitio de
internet GEAppliances.com.
OWNER’S MANUAL AND
INSTALLATION INSTRUCTIONS
COOKTOP
Radiant Downdraft
49-2001160 Rev. 0 09-22 GEA
PP9830
GE is a trademark of the General Electric Company. Manufactured under trademark license.
ENGLISH
SAFETY INFORMATION ............3
USING THE COOKTOP
Cooktop Features.........................6
Surface Burners ..........................7
Cookware for Radiant
Glass Cooktop .........................10
CARE AND CLEANING
Cleaning the Cooktop .................... 11
Cleaning the Glass Cooktop ...............12
INSTALLATION INSTRUCTIONS ..14
Before You Begin ........................14
Unpacking the Cooktop ..................16
Installation Preparation ...................17
Cooktop Installation .................... 20
TROUBLESHOOTING TIPS.........25
LIMITED WARRANTY ..............26
ACCESSORIES ......................27
CONSUMER SUPPORT .............28

249-2001160 Rev. 0
THANK YOU FOR MAKING GE APPLIANCES A PART OF YOUR HOME.
Whether you grew up with GE Appliances, or this is your first, we’re happy to have you in the family.
We take pride in the craftsmanship, innovation and design that goes into every GEAppliances
product, and we think you will too. Among other things, registration of your appliance ensures that we
can deliver important product information and warranty details when you need them.
Register your GE appliance now online. Helpful websites and phone numbers are available in the
Consumer Support section of this Owner’s Manual. You may also mail in the pre-printed registration
card included in the packing material.

49-2001160 Rev. 0 3
READ AND SAVE THESE INSTRUCTIONS
IMPORTANT SAFETY INFORMATION
READ ALL INSTRUCTIONS BEFORE USING THE APPLIANCE
SAFETY INFORMATION
WARNING Read all safety instructions before using the product. Failure to follow these instructions may result
in fire, electrical shock, serious injury or death.
WARNING GENERAL SAFETY INSTRUCTIONS
Ŷ 8VHWKLVDSSOLDQFHRQO\IRULWVLQWHQGHGSXUSRVHDV
described in this Owner’s Manual.
Ŷ +DYH\RXUFRRNWRSLQVWDOOHGDQGSURSHUO\JURXQGHG
by a qualified installer, in accordance with the
Installation Instructions.
Ŷ $Q\DGMXVWPHQWUHSDLURUVHUYLFHQRWVSHFLILFDOO\
recommended in this manual should be performed
ONLY by a qualified cooktop installer or service
technician.
Ŷ %HIRUHSHUIRUPLQJDQ\VHUYLFHXQSOXJWKHFRRNWRS
or disconnect the power supply at the household
distribution panel by removing the fuse or switching
off the circuit breaker.
Ŷ %HVXUHDOOSDFNLQJPDWHULDOVDUHUHPRYHGIURPWKH
cooktop before operating to prevent ignition of these
materials.
Ŷ 'RQRWOHDYHFKLOGUHQDORQHRUXQDWWHQGHGLQDQ
area where an appliance is in use. They should
never be allowed to climb, sit or stand on any part
of the appliance.
Ŷ CAUTION 'RQRWVWRUHLWHPVRILQWHUHVWWR
children in cabinets above a range/rangetop —
children climbing on the range to reach items could
be seriously injured.
Ŷ 'RQRWDOORZDQ\RQHWRFOLPEVWDQGRUKDQJRQWKH
rangetop.
Ŷ 8VHRQO\GU\SRWKROGHUV²PRLVWRUGDPSSRW
holders on hot surfaces may result in burns from
VWHDP'RQRWOHWSRWKROGHUVWRXFKKRWVXUIDFH
XQLWVRUKHDWLQJHOHPHQWV'RQRWXVHDWRZHORU
other bulky cloth in place of pot holders.
Ŷ 1HYHUXVH\RXUDSSOLDQFHIRUZDUPLQJRUKHDWLQJ
the room.
Ŷ 'RQRWWRXFKWKHVXUIDFHHOHPHQWV7KHVHVXUIDFHV
may be hot enough to burn even though they are
GDUNLQFRORU'XULQJDQGDIWHUXVHGRQRWWRXFK
or let clothing or other flammable materials contact
the surface units or areas nearby the surface units;
allow sufficient time for cooling first. Other surfaces
of the appliance may become hot enough to cause
burns. Potentially hot surfaces include the cooktop
and areas facing the cooktop.
Ŷ 'RQRWKHDWXQRSHQHGIRRGFRQWDLQHUV3UHVVXUH
could build up and the container could burst,
causing an injury.
WARNING KEEP FLAMMABLE MATERIALS AWAY FROM THE COOKTOP
Ŷ WARNING FIRE HAZARD: Never leave
the range unattended with the cooktop ON. Keep
flammable items away from the cooktop. Turn off all
controls when done cooking. Failure to follow these
instructions can result in fire, serious injury or death.
Ŷ $OZD\VNHHSFRPEXVWLEOHZDOOFRYHULQJVFXUWDLQVRU
drapes a safe distance from your cooktop.
Ŷ 'RQRWSODFHRUVWRUHLWHPVWKDWFDQPHOWRUFDWFK
fire on the glass cooktop, even when it is not
being used. Keep appliance area clear and free
from combustible materials, gasoline, and other
flammable vapors and liquids. If the cooktop is
inadvertently turned on, they may ignite. Heat from
the cooktop or oven vent after it is turned off may
cause them to ignite also.
Ŷ 'RQRWSODFHPHWDOOLFREMHFWVVXFKDVNQLYHVIRUNV
spoons, and lids on the cooktop surface since they
can get hot.
Ŷ 1HYHUZHDUORRVHILWWLQJRUKDQJLQJJDUPHQWVZKLOH
using the appliance. These garments may ignite if
they contact hot surfaces causing severe burns.
Ŷ'RQRWOHWFRRNLQJJUHDVHRURWKHUIODPPDEOH
materials accumulate on or near the cooktop.
Grease on the cooktop may ignite.
Ŷ&OHDQYHQWLODWLQJKRRGVIUHTXHQWO\*UHDVHVKRXOG
not be allowed to accumulate on the hood or filter.

449-2001160 Rev. 0
SAFETY INFORMATION
READ AND SAVE THESE INSTRUCTIONS
IMPORTANT SAFETY INFORMATION
READ ALL INSTRUCTIONS BEFORE USING THE APPLIANCE
WARNING RADIANT COOKTOP SAFETY INSTRUCTIONS
Ŷ WARNING NEVER operate the top surface
cooking section of this appliance unattended.
%RLORYHUVFDXVHVPRNLQJDQGJUHDV\VSLOORYHUVWKDW
may catch on fire. Failure to follow this warning
statement could result in fire, explosion, or burn
hazard that could cause property damage, personal
injury, or death.
Ŷ )RRGVHVSHFLDOO\RLO\IRRGVPD\LJQLWHUHVXOWLQJLQ
fire that could spread to surrounding cabinets. If a
fire should occur, keep away from the appliance and
immediately call your fire department.
Ŷ 1HYHUOHDYHRLOXQDWWHQGHGZKLOHIU\LQJ,IDOORZHG
to heat beyond its smoking point, oil may ignite
resulting in fire that may spread to surrounding
FDELQHWV'2127$77(03772(;7,1*8,6+$1
OIL/GREASE FIRE WITH WATER.
Ŷ 'RQRWXVHZDWHURQJUHDVHILUHV1HYHUSLFNXS
a flaming pan. Turn the controls off. Smother a
flaming pan on a surface unit by covering the pan
completely with a well-fitting lid, cookie sheet or flat
tray, or use a multipurpose dry chemical or foam-
type fire extinguisher.
Ŷ 8VHDGHHSIDWWKHUPRPHWHUZKHQHYHUSRVVLEOHWR
monitor oil temperature. To avoid oil spillover and
fire, use the minimum amount of oil when using a
shallow pan-frying and avoid cooking frozen foods
with excessive amounts of ice.
Ŷ 8VHSURSHUSDQVL]H²VHOHFWFRRNZDUHKDYLQJ
flat bottoms large enough to cover the surface
heating element. The use of undersized cookware
will expose a portion of the surface unit to direct
contact and may result in ignition of clothing. Proper
relationship of cookware to surface unit will also
improve efficiency.
Ŷ :KHQXVLQJJODVVFHUDPLFFRRNZDUHPDNHVXUH
it is suitable for cooktop service; others may break
because of sudden change in temperature.
Ŷ 7RPLQLPL]HWKHSRVVLELOLW\RIEXUQVLJQLWLRQRI
flammable materials and spillage, the handle of a
container should be turned toward the center of the
range without extending over nearby surface units.
Ŷ :KHQSUHSDULQJIODPLQJIRRGVXQGHUDKRRGWXUQ
the fan on.
Ŷ 8VHFDUHZKHQWRXFKLQJWKHFRRNWRS7KHJODVV
surface of the cooktop will retain heat after the
controls have been turned off.
Ŷ ,ISRZHULVORVWWRDQHOHFWULFFRRNWRSZKLOHDVXUIDFH
unit is ON, the surface unit will turn back on as
soon as power is restored. In the event of power
loss, failure to turn all surface unit knobs to the OFF
position may result in ignition of items on or near the
cooktop, leading to serious injury or death.
Ŷ $YRLGVFUDWFKLQJRULPSDFWLQJWKHJODVVFRRNWRS
'RLQJVRPD\OHDGWREURNHQJODVV7KHFRRNWRS
can be scratched with items such as knives, sharp
instruments, rings or other jewelry, and rivets on
clothing.
Ŷ 'RQRWFRRNRQDEURNHQFRRNWRS,IJODVVFRRNWRS
should break, cleaning solutions and spillovers
may penetrate the broken cooktop and create a
risk of electric shock. Contact a qualified technician
immediately.
Ŷ 'RQRWSODFHRUVWRUHLWHPVWKDWFDQPHOWRUFDWFK
fire on the glass cooktop, even when it is not being
used. If the cooktop is inadvertently turned on, they
may ignite. Heat from the cooktop after it is turned
off may cause them to ignite also.
Ŷ 8VHFHUDPLFFRRNWRSFOHDQHUDQGQRQVFUDWFK
cleaning pad to clean the cooktop. Wait until the
cooktop cools and the indicator light goes out before
cleaning. A wet sponge or cloth on a hot surface can
cause steam burns. Some cleaners can produce
noxious fumes if applied to a hot surface.
NOTE: Sugar spills are an exception. They should
be scraped off while still hot using an oven mitt and
a scraper. See the Cleaning the Glass Cooktop
section for detailed instructions.
Ŷ 5HDGDQGIROORZDOOLQVWUXFWLRQVDQGZDUQLQJVRQWKH
cleaning cream label.
Ŷ 1HYHUXVHWKHJODVVFRRNWRSVXUIDFHDVDFXWWLQJ
board.
49-2001160 Rev. 0 5
SAFETY INFORMATION
READ AND SAVE THESE INSTRUCTIONS
IMPORTANT SAFETY INFORMATION
READ ALL INSTRUCTIONS BEFORE USING THE APPLIANCE
How to Remove Protective Shipping Film and Packaging Tape
Carefully grasp a corner of the protective shipping film
with your fingers and slowly peel it from the appliance
VXUIDFH'RQRWXVHDQ\VKDUSLWHPVWRUHPRYHWKHILOP
Remove all of the film before using the appliance for the
first time.
To assure no damage is done to the finish of the
product, the safest way to remove the adhesive from
packaging tape on new appliances is an application of
a household liquid dishwashing detergent. Apply with a
soft cloth and allow to soak.
NOTE: The adhesive must be removed from all parts. It
cannot be removed if it is baked on.
Consider recycling options for your appliance packaging
material.
PROPER DISPOSAL OF YOUR APPLIANCE
'LVSRVHRIRUUHF\FOH\RXUDSSOLDQFHLQDFFRUGDQFHZLWK)HGHUDODQG/RFDO5HJXODWLRQV&RQWDFW\RXUORFDO
authorities for the environmentally safe disposal or recycling of your appliance.
WARNING COOK MEAT AND POULTRY THOROUGHLY
Cook food thoroughly to help protect against foodborne illness. Minimum safe food temperature
recommendations can be found at IsItDoneYet.gov and fsis.usda.gov8VHDIRRGWKHUPRPHWHUWRWDNHIRRG
temperatures and check several locations.

649-2001160 Rev. 0
USING THE COOKTOP: Cooktop Features
Cooktop Features
/HIW5HDU6XUIDFH8QLW
%ULGJH6XUIDFH8QLW
/HIW)URQW6XUIDFH8QLW
4. Vent Grille
5. Vent Filter (below the vent grille)
5LJKW5HDU6XUIDFH8QLW
'XDO6XUIDFH8QLW
8. Model and Serial Number Label (under the cooktop)
/HIW5HDU6XUIDFH8QLW&RQWURO
/HIW)URQW6XUIDFH8QLW&RQWURO
11. Left Side Hot Surface Indicator Lights
(one for each surface unit)
12. Vent Fan Speed Control
13. Control Lock Knob
14. Right Side Hot Surface Indicator Lights
(one for each surface unit)
'XDO6XUIDFH8QLW&RQWURO
5LJKW5HDU6XUIDFH8QLW&RQWURO
6XUIDFH8QLW2Q,QGLFDWRU/LJKW
Throughout this manual, features and appearance may vary from your model.
Feature Index (Features and appearance may vary)
4516
378
2
9
13
17
12
11
10 15
16
14

49-2001160 Rev. 0 7
Surface Burners
USING THE COOKTOP: 6XUIDFH%XUQHUV
Radiant Surface Units
The control for the radiant surface unit can be set
anywhere between LO and HI for an unlimited number
of heat settings. With the infinite switch the surface
unit cycles on and off to maintain your selected control
setting.
To bring liquids to a boil faster, use a lid to cover the pan.
The control knob must be pushed down and turned
from the OFF position. When the control knobs are in
any position other than off, they may be turned without
pushing down.
%HVXUH\RXWXUQWKHFRQWURONQRERIIZKHQ\RXILQLVK
cooking. You will feel a click at the OFF position.
The surface unit ON indicator
light will glow when any
surface unit is on.
The HOT surface indicator
light will glow when the glass
surface is hot and will remain
on until the surface has cooled.
Home Canning Tips
%HVXUHWKHFDQQHULVFHQWHUHGRYHUWKHVXUIDFHXQLW
Make sure the carrier is flat on the bottom.
To prevent burns from steam or heat, use caution when
canning.
8VHUHFLSHVDQGSURFHGXUHVIURPUHSXWDEOHVRXUFHV
7KHVHDUHDYDLODEOHIURPPDQXIDFWXUHUVVXFKDV%DOO®
and Kerr®DQGWKH'HSDUWPHQWRI$JULFXOWXUH([WHQVLRQ
Service.
)ODWERWWRPHGFDQQHUVDUHUHFRPPHQGHG8VHRIZDWHU
bath canners with rippled bottoms may extend the time
required to bring the water to a boil.
About the radiant surface units
The radiant cooktop features heating units beneath a
smooth glass surface.
NOTE: A slight odor is normal when a new cooktop is
used for the first time. It is caused by the heating of new
parts and insulating materials and will disappear in a
short time.
The cooktop has Rapid Response surface units. The
cooktop will automatically heat up or cool down to
desired power level setting in the quickest time possible.
While the surface units are on, you may not see them
glow red during certain heat up or cool down conditions.
Cooktop temperatures increase with the number of
surface units that are on. With 3 or 4 units turned on,
surface temperatures are high. Always use caution when
touching the cooktop.
Even after the surface units are turned off, the glass
cooktop retains enough heat to continue cooking. To
avoid over-cooking, remove pans from the surface units
when the food is cooked. Avoid placing anything on the
surface unit until it has cooled completely.
Ŷ :DWHUVWDLQVPLQHUDOGHSRVLWVDUHUHPRYDEOHXVLQJ
the cleaning cream or full strength white vinegar.
Ŷ 8VHRIZLQGRZFOHDQHUPD\OHDYHDQLULGHVFHQWILOP
on the cooktop. The cleaning cream will remove this
discoloration.
Ŷ 'RQ¶WVWRUHKHDY\LWHPVDERYHWKHFRRNWRS,IWKH\
drop onto the cooktop, they can cause damage.
Ŷ 'RQRWXVHWKHVXUIDFHDVDFXWWLQJERDUG
Never cook directly on the glass.
Always use cookware.
Always place the pan in the center of
the surface unit you are cooking on.
'RQRWVOLGHFRRNZDUHDFURVVWKH
cooktop because it can scratch
the glass. The glass is scratch-
resistant, not scratchproof.
%HVXUH\RXWXUQWKHFRQWURONQRE
to OFF when you finish cooking.
SURFACE
COOKING
OFF CENTER
DRAGGING

849-2001160 Rev. 0
Surface Burners (Cont.)
USING THE COOKTOP:6XUIDFH%XUQHUV
Dual Surface Unit
The right front surface unit has 2 cooking sizes to select
from so you can match the size of the unit to the size of
the cookware you are using.
To use the large (9-inch) surface unit, turn the knob
clockwise to and select the desired setting. The unit
will heat the entire area contained by the larger circle.
To use the small (6-inch)
surface unit, turn the knob
counterclockwise to and
select the desired setting. The
unit will only heat the area
inside the smaller circle.
Bridge Surface Unit
Make sure the pan rests flat on the glass cooktop and
it is not resting on the trim. If you notice poor cooking
performance, move the pan to make sure it is flat on
the cooktop.
To use the bridge burner, turn the burner knob to and
select the desired setting. The unit will heat the front
surface burner and the bridge.
Choose pans that match the circle/bridge area as closely
as possible.
To use only the front surface
unit, turn the burner knob to
and select the desired setting.
The unit will only heat the front
surface burner.
You can create an oblong
heated area by using the left
rear unit in addition to the front
unit bridge combination.
Surface Elements Cycle On and Off
Surface elements will cycle on and off to maintain the
temperature you have selected.
All radiant surface elements have a temperature limiter
that protects the glass cooktop from getting too hot.
The temperature limiter may cycle the elements off
while cooking if:
Ŷ 7KHSDQERLOVGU\
Ŷ 7KHSDQERWWRPLVQRWIODW
Ŷ 7KHSDQLVRIIFHQWHU
Ŷ 7KHUHLVQRSDQRQWKHHOHPHQW
Selecting Cooktop Settings
Choose the element/burner that is the best fit to the
cookware size. Each element/burner on your new
cooktop has its own power levels ranging from low to
high. Power level settings necessary for cooking will
vary depending on the cookware being used, the type
and quantitiy of the food, and the desired outcome.
In general:
Ŷ
8VHORZHUVHWWLQJVIRUPHOWLQJKROGLQJDQG
simmering.
Ŷ
8VHKLJKHUVHWWLQJVIRUKHDWLQJTXLFNO\VHDULQJDQG
frying.
When keeping foods warm, confirm selected setting is
sufficient to maintain food temperature above 140°F.
Larger elements are not recommended for melting.
Power boil elements are best suited for boiling water,
particularly with pots that are 9" or larger.
Small 6"
surface unit
setting Large 9"
surface unit setting
Front
%XUQHUDQG
%ULGJH
Front
%XUQHU
only
Hi boiling quickly
frying
searing
reducing
simmering
holding
melting
Low

49-2001160 Rev. 0 9
Control Lock-Out for Surface Units
To activate control lock-out, turn the Control Lock knob
to LOCK. This will prevent surface units from heating.
An indicator light will glow to show that they are locked.
The downdraft fan will remain operable with control
lockout engaged.
In the locked position, the cooktop will produce an
audible sound if any surface unit control knob is engaged
or moved to a position other than OFF.
USING THE COOKTOP:6XUIDFH%XUQHUV
Surface Burners (Cont.)
Hot Light Indicator
A hot surface indicator light (one for each cooking
element) will glow when the glass surface is hot
and will remain on until the surface has cooled to
temperature that is safe to touch.
How to Operate the Vent System
The built-in vent system helps remove cooking vapors,
odors and smoke from foods prepared on the cooktop.
To operate the downdraft vent system, turn the vent
IDQVSHHGFRQWURONQREWR+,0('RU/2DVQHHGHG
Continuous use of the vent system while cooking helps
keep the kitchen comfortable and less humid, reducing
cooking odors and soiling moisture that normally
creates a frequent need for cleaning.
Hot surface
indicator lights

10 49-2001160 Rev. 0
Cookware for Radiant Glass Cooktop
NOTE: Follow all cookware manufacturer’s recommendations when using any type of cookware
on the ceramic cooktop.
The following information will help you choose cookware which will give good performance on
glass cooktops.
Stainless Steel:
Recommended.
Aluminum:
Heavy weight recommended.
Good conductivity. Aluminum residues sometimes
appear as scratches on the cooktop but can be removed
LIFOHDQHGLPPHGLDWHO\%HFDXVHRILWVORZPHOWLQJSRLQW
thin weight aluminum should not be used.
Copper Bottom:
Recommended.
Copper may leave residues which can appear as
scratches. The residues can be removed, as long as
the cooktop is cleaned immediately. However, do not let
these pots boil dry. Overheated metal can bond to glass
cooktops. An overheated copper bottom pot will leave
a residue that will permanently stain the cooktop if not
removed immediately.
Porcelain Enamel on Cast Iron:
Recommended if bottom of pan is coated.
Porcelain Enamel on
Steel:
Not recommended.
Heating empty pans can cause
permanent damage to cooktop
glass. The enamel can melt and
bond to the ceramic cooktop.
Glass-ceramic:
Not recommended.
Poor performance. Will scratch
the surface.
Stoneware:
Not recommended.
Poor performance. May scratch
the surface.
Cast Iron:
Not recommended—unless
designed specifically for glass
cooktops.
Poor conductivity and slow to
absorb heat. Will scratch the
cooktop surface.
Check pans for flat bottoms
by using a straight edge.
Pans with rounded, curved,
ridged or warped bottoms
are not recommended.
USING THE COOKTOP: Cookware for Radiant Glass Cooktop
For Best Results
Ŷ 3ODFHRQO\GU\SDQVRQWKHVXUIDFHHOHPHQWV'RQRW
place lids on the surface elements, particularly wet lids.
Ŷ 'RQRWXVHZRNVWKDWKDYHVXSSRUWULQJV7KLVW\SHRI
wok will not heat on glass surface elements.
Ŷ We recommend that you use only a flat-bottomed
wok. They are available at your local retail store. The
bottom of the wok should have the same diameter as
the surface element to ensure proper contact.
Ŷ Some special cooking procedures require specific
cookware such as pressure cookers, deep-fat fryers,
etc. All cookware must have flat bottoms and be the
correct size.
Ŷ Avoid allowing foods to boil dry as some cookware
may stick to the cooking surface, causing permanent
damage to the cooktop.
'RQRWSODFHZHWSDQVRQ
the glass cooktop.
'RQRWXVHZRNVZLWKVXSSRUW
rings on the glass cooktop.
8VHIODWERWWRPHGZRNVRQ
the glass cooktop.

49-2001160 Rev. 0 11
Cleaning the Cooktop
Vent Grille
%HIRUHFOHDQLQJWKHYHQWJULOOHEHVXUHWKHH[KDXVW
blower is turned off.
To clean the vent grille, remove it from the cooktop by
lifting it up and off. Wipe with a damp cloth. If necessary,
the vent grille can be washed in the sink.
8VHGLVKZDVKLQJOLTXLGIRUFOHDQLQJ
'RQRWXVHDEUDVLYHFOHDQHUV
They will damage the vent
grille’s finish.
'RQRWFOHDQWKHYHQWJULOOHLQ
the dishwasher.
Vent Filter and Chamber
The filter is held in place at an angle with a hold bump.
Lift the filter up and out of the vent opening diagonally.
To clean the filter, swish it in hot, soapy water. Rinse
well and dry thoroughly.
Do not operate the vent without the filter in place.
To clean the vent chamber, use hot, soapy water. Rinse
ZLWKFOHDQZDWHUDQGGU\WKRURXJKO\'RQRWXVHDEUDVLYH
cleaners; they will damage the finish. Replace the filter
after it is cleaned and dry.
Remove and replace the filter diagonally
through the vent opening.
To order replacement filters, see the
Accessories section.
Vent
Chamber
Vent Filter
When replacing the filter, make sure
it rests, at an angle, on the supports
in the vent opening.
Control Knobs
The control knobs may be removed for easier cleaning.
Make sure the knobs are in the Off positions and pull
them straight off the stems for cleaning.
To clean the knobs, place them in a dishwasher or wash
with soap and water. Rinse with clean water. Make sure
the insides of knobs are dry before replacing.
Replace the knobs in the Off
position to ensure proper
placement.
Stainless Steel Surfaces (on some models)
'RQRWXVHDVWHHOZRROSDGLWZLOOVFUDWFKWKHVXUIDFH
To clean the stainless steel surface, use warm sudsy
water or a stainless steel cleaner or polish. Always wipe
the surface in the direction of the grain. Follow the cleaner
instructions for cleaning the stainless steel surface.
To inquire about purchasing cleaning products including
stainless steel appliance cleaner or polish, see the
Accessories section.
CARE AND CLEANING: Cleaning the Cooktop
Flat
Molded flat area
The control knobs may be
removed for easier cleaning.

12 49-2001160 Rev. 0
Cleaning the Glass Cooktop
Glass Cooktop
To maintain and protect the surface of your glass
cooktop, follow these steps:
%HIRUHXVLQJWKHFRRNWRSIRUWKHILUVWWLPHFOHDQLW
with a ceramic glass cooktop cleaner. This helps
protect the top and makes cleanup easier.
2. Regular use of a ceramic glass cooktop cleaner will
help keep the cooktop looking new.
3. Shake the cleaning cream well. Apply a few drops
of a ceramic glass cooktop cleaner directly to the
cooktop.
8VHDSDSHUWRZHORUDQRQVFUDWFKFOHDQLQJSDGIRU
ceramic glass cooktops to clean the entire cooktop
surface.
8VHDGU\FORWKRUSDSHUWRZHOWRUHPRYHDOOFOHDQLQJ
residue. No need to rinse.
NOTE: ,WLVYHU\LPSRUWDQWWKDW\RX'2127KHDWWKH
cooktop until it has been cleaned thoroughly.
Clean your cooktop after each
VSLOO8VHDFHUDPLFJODVV
cooktop cleaner.
Ceramic
Cooktop
Cleaner
For cleaning videos and
instructions, scan the QR code
with your device.
Burned-On Residue
NOTE:'$0$*(WR\RXUJODVVVXUIDFHPD\RFFXULI\RX
use scrub pads other than those recommended.
1. Allow the cooktop to cool.
2. Spread a few drops of a ceramic glass cooktop
cleaner on the entire burned residue area.
8VLQJDQRQVFUDWFKFOHDQLQJSDGIRUFHUDPLFJODVV
cooktops, rub the residue area, applying pressure as
needed.
4. If any residue remains, repeat the steps listed above
as needed.
5. For additional protection, after all residue has been
removed, polish the entire surface with a ceramic
cooktop cleaner and a paper towel.
8VHDQRQVFUDWFKFOHDQLQJSDGIRU
ceramic glass cooktops.
Heavy, Burned-On Residue
1. Allow the cooktop to cool.
8VHDVLQJOHHGJHUD]RUEODGHVFUDSHUDWDSSUR[LPDWHO\
a 45° angle against the glass surface and scrape the
soil. It will be necessary to apply pressure to the razor
scraper in order to remove the residue.
3. After scraping with the razor scraper, spread a few drops
of a ceramic glass cooktop cleaner on the entire burned
UHVLGXHDUHD8VHDQRQVFUDWFKFOHDQLQJSDGWRUHPRYH
any remaining residue.
4. For additional protection, after all residue has been
removed, polish the entire surface with a ceramic
glass cooktop cleaner and a paper towel.
The ceramic glass cooktop scraper and all recommended
supplies are available through our Parts Center. See
Accessories and Consumer Support sections.
NOTE:'RQRWXVHDGXOORUQLFNHGEODGH
CARE AND CLEANING: Cleaning the Glass Cooktop

49-2001160 Rev. 0 13
CARE AND CLEANING: Cleaning the Glass Cooktop
Cleaning the Glass Cooktop (Cont.)
Metal Marks and Scratches
%HFDUHIXOQRWWRVOLGHSRWVDQGSDQVDFURVV\RXU
cooktop. It will leave metal markings on the cooktop
surface.
These marks are removable using a ceramic cooktop
cleaner with a non-scratch cleaning pad for ceramic
cooktops.
2. If pots with a thin overlay of aluminum or copper
are allowed to boil dry, the overlay may leave black
discoloration on the cooktop.
This should be removed immediately before heating
again or the discoloration may be permanent.
NOTE: Carefully check the bottom of pans for roughness
that would scratch the cooktop.
%HFDUHIXOQRWWRSODFHDOXPLQXPEDNLQJVKHHWVRU
aluminum frozen entrée containers on a hot cooktop
surface. It will leave shiny dots or markings on the
cooktop surface. These markings are permanent and
cannot be cleaned off.
Damage from Sugary Spills and Melted Plastic
Special care should be taken when removing hot substances to avoid permanent damage of the glass surface.
Sugary spillovers (such as jellies, fudge, candy, syrups) or melted plastics can cause pitting of the surface of your
cooktop (not covered by the warranty) unless the spill is removed while still hot. Special care should be taken when
removing hot substances.
%HVXUHWRXVHDQHZVKDUSUD]RUVFUDSHU
'RQRWXVHDGXOORUQLFNHGEODGH
1. Turn off all surface units. Remove hot pans.
2. Wearing an oven mitt:
D8VHDVLQJOHHGJHUD]RUEODGHVFUDSHUWRPRYH
the spill to a cool area on the cooktop.
b. Remove the spill with paper towels.
3. Any remaining spillover should be left until the surface
of the cooktop has cooled.
'RQ¶WXVHWKHVXUIDFHXQLWVDJDLQXQWLODOORIWKH
residue has been completely removed.
NOTE: If pitting or indentation in the glass surface has
already occurred, the cooktop glass will have to be
replaced. In this case, service will be necessary.

14 49-2001160 Rev. 0
If you have questions, call 800.GE.CARES or visit our website at: GEAppliances.com.
Installation
Radiant Downdraft Cooktop
Instructions PP9830
WARNING %HIRUHEHJLQQLQJWKHLQVWDOODWLRQ
switch power off at the service panel and lock the
service disconnecting means to prevent power from
being switched on accidentally. When the service
disconnecting means cannot be locked, securely
fasten a prominent warning device, such as a tag,
to the service panel.
WARNING To reduce the risk of fire, use only
metal ductwork.
BEFORE YOU BEGIN
Read these instructions completely and
carefully.
• IMPORTANT –Save these
instructions for local inspector’s use.
•IMPORTANT –Observe all governing
codes and ordinances.
•IMPORTANT –Remove all packing
and material and literature before connecting gas
and electrical supply to cooktop.
•IMPORTANT –To avoid damage to
your cabinets, check with your builder or cabinet
supplier to make sure that the materials used will
not discolor, delaminate or sustain other damage.
This product has been designed in accordance
ZLWKWKHUHTXLUHPHQWVRI8/DQG&6$,QWHUQDWLRQDO
and complies with the maximum allowable wood
cabinet temperatures of 194°F (90°C).
• Note to Installer –%HVXUHWROHDYHWKHVH
instructions with the Consumer.
• Note to Consumer – Keep these instructions for
future reference.
• Servicer – The electrical diagram is located inside
the cooktop.
• Proper installation is the responsibility of the
installer.
• Product failure due to improper installation is not
covered under the Warranty.
CUTTING THE COUNTERTOP
If you are installing the cooktop in a solid surface
material such as granite, quartz or any other natural
or synthetic solid surface, we recommend that the
cutout be prepared by a professional cabinet or
coutertop installer.
Cooktop cutouts in wood or wood -laminate
countertops may be able to be prepared using a
saber saw and electric drill.
MATERIALS YOU MAY NEED
'XFWWDSH
• Sheet metal screws
'XFWZRUNWRVXLWWKHDSSOLFDWLRQ
• Junction box
• Strain relief clamp for 1/2" trade size conduit
• Wire nuts
TOOLS YOU WILL NEED
• Safety Glasses
• Saw
• Pencil
• Measuring tape
or scale
• Carpenter’s square
• Electrician's Pliers
• Adjustable wrench
or socket set (7/16”
socket and ratchet)
• 'ULOODQGGULOOELW
• 1/4” nut driver
• Flat blade screwdriver
INSTALLATION INSTRUCTIONS

49-2001160 Rev. 0 15
INSTALLATION INSTRUCTIONS
Installation Instructions
IMPORTANT SAFETY INSTRUCTIONS
The cooktop has been design certified by
8QGHUZULWHUV/DERUDWRULHV8/$VZLWKDQ\
appliance generating heat, there are certain safety
precautions you should follow.
• %HVXUH\RXUFRRNWRSLVLQVWDOOHGSURSHUO\E\D
qualified installer or service technician.
• The cooktop must be electrically grounded in
accordance with local codes, or in their absence,
with the National Electrical Code ANSI/NFPA No.
70 or the Canadian Electric Code, CSA C22.1-02.
• Improper installation, adjustment, alteration,
service or maintenance can cause injury or
property damage. Refer to this manual. For
assistance or additional information, consult a
qualified installer, service agency, manufacturer
(dealer) or the gas supplier.
• 'LVFRQQHFWHOHFWULFDOVXSSO\EHIRUHVHUYLFLQJ
• To eliminate the risk of burns due to reaching over
heated surface elements, cabinet storage located
above the surface units should be avoided. If
cabinet storage space is to be provided, the risk
can be reduced by installing a range hood that
projects horizontally a minimum of 5" beyond the
bottom of the cabinets. Cabinet installation above
a cooktop may be no deeper than 13".
• Make sure the wall coverings around the cooktop
can withstand heat generated by the cooktop up to
200°F.
• If a 30" clearance between cooking surface and
overhead combustible material or metal cabinets
cannot be maintained, protect the underside of the
cabinets above the cooktop with not less than 1/4"
insulating millboard or gypsum board at least 3/16"
thick covered with 28 gauge sheet steel or 0.020"
thick copper.
• Clearance between the cooking surface and
protected cabinets MUST NEVER BE LESS
THAN 24” The vertical distance from the plane
of the cooking surface to the bottom of adjacent
overhead cabinets extending closer than 1" to the
plane of the cooktop sides must not be less than
18”.
• When cutting or drilling into wall or ceiling, do not
damage electrical wiring and other hidden utilities.
• 'XFWHGIDQVPXVWDOZD\VEHYHQWHGWRWKH
outdoors.
WARNING
EXHAUST BLOWER
SAFETY WARNING
Sufficient air is needed for proper combustion and
exhausting of gases through the flue (chimney) of
fuel burning equipment to prevent back drafting.
Follow the heating equipment manufacturer’s guide
lines and safety standards, such as those published
by the National Fire Protection Association (NFPA),
the American Society for Heating, Refrigeration
and Air Conditioning (ASHRAE) and the local code
authorities. when applicable, install any make up
(replacement) air system in accordance with local
building code requirements. Visit GEAppliances.com
for available makeup air solutions.
ELECTRICAL REQUIREMENTS
This appliance must be supplied with the proper
voltage and frequency, as listed in these Installation
Instructions, and connected to an individual,
properly grounded branch circuit, protected by a
40-amp circuit breaker or time delay fuses.
All wire connections must be made in accordance
with local codes and properly insulated. Check
with your local utility for governing electrical codes
and ordinances. In the absence of local electrical
codes, the National Electrical Code, ANSI/NFPA
No. 70 – Latest Edition, governing electric range
installations, must be followed.
A copy of the National Electrical Code can be
obtained by writing to:
National Fire Protection Association
%DWWHU\PDUFK3DUN
Quincy, MA 02260
Effective January 1, 1996, the National Electrical
Code requires that new, but not existing,
construction utilize a four-conductor connection to
an electric range. When installing an electric range
in new construction, follow the instructions in NEW
&216758&7,21$1')285&21'8&725
%5$1&+&,5&8,7&211(&7,21
You must use a three-wire, single-phase AC
208Y/120 Volt or 240/120 Volt, 60 Hertz electrical
system with separate ground. If you connect to
aluminum wiring, properly installed connectors
approved for use with aluminum wiring must be
used.

16 49-2001160 Rev. 0
Installation Instructions
UNPACKING YOUR COOKTOP
CAUTION '2127/,)7
FROM VENT OPENING OR
%803*/$66
Check to be sure that all packing materials
and tape have been removed. This will include
tape on control knobs (if applicable), adhesive
tape, wire ties, cardboard and protective plastic.
Failure to remove these materials could result
in damage to the appliance once the appliance
has been turned on and surfaces have heated.
INSTALLATION INSTRUCTIONS
Vent Grille
Cleaning Cream
Sheet Metal
Screws (9)
(8-18 x 3/8") Foam Gasket Tape
%ORZHU$VVHPEO\DQG0RXQWLQJ
Nuts (10-32 keps – nuts with lock
washers attached)
%ORZHU
Plenum Vent
Filter
Ceramic
Cooktop
Cleaner
CAUTION
GLASS IS FRAGILE
DO NOT BUMP EDGE
OF GLASS DURING
INSTALLATION
Sheet Metal
Screws (2)
(10-16 x 1/2”)
+ROG'RZQ
%UDFNHWV
30" COOKTOP (DIMENSIONS FOR REFERENCE ONLY)
Unit shown fully assembled.
Unit must be vented to the outside!
201»2”
22”
283»4”
21»2”
(29»16” SS)
217»8”
(2115»16” SS) 293»4”
(2913»16” SS)

49-2001160 Rev. 0 17
INSTALLATION INSTRUCTIONS
Installation Instructions
INSTALLATION PREPARATION
1. PREPARING FOR INSTALLATION
Positioning the cooktop
The cooktop is designed to look best when centered
in a cabinet at least 30" wide.
The exhaust vent beneath the cooktop must be
located between wall studs or floor joists so that the
ductwork may be installed properly.
At least 5 1/2” must be allowed between side edges
of the cooktop and adjacent walls.
Avoid placing cabinets above the cooktop unit, if
possible, in order to reduce the hazards caused by
reaching over heated surface units. If cabinets are
placed over the cooktop, the risks can be reduced
by installing a range hood that projects horizontally
a minimum of 5 inches beyond the bottom of the
cabinets.
If the cabinetry is used above the cooktop, allow
a minimum 30" clearance between the cooking
surface and the bottom of the unprotected cabinet.
If the clearance between the cooktop and the
cabinetry is less than 30", the cabinet bottom must
be protected with a flame retardant millboard at least
1/4" thick, or gypsum board at least 3/16" thick, covered
with 28 gauge sheet steel or 0.020" thick copper.
Clearance between the cooktop and the protected
cabinetry MUST NEVER BE LESS THAN 24".
EXCEPTION: Installation of a listed microwave
oven or cooking appliance over the cooktop shall
conform to the installation instructions packed with
that appliance.
Working areas adjacent to the cooktop should have
an
15" minimum clearance between the countertop and the
bottom of the cabinet. If the clearance is less than 15”, the
adjacent cabinets should be at least 5 1/2” from the side
edge of the cooktop
2. PREPARING THE BASE CABINET
This cooktop is designed to fit easily into a variety
of cabinets. However, the combined installation
of a downdraft vent and a cooktop require careful
consideration.
Some cabinets may require modifications.
This installation requires a 24” min. deep
cabinet base.
The cabinet must be at least 30” wide.
Preparing a cabinet that is against a wall
In some cabinets, the sides may need to be
VFRRSHGRUFXWGRZQ»´DVVKRZQDQGWKH
corner braces removed in order to accommodate
the unit.
In 75 cm and 90 cm frameless European cabinets,
WKHEDFNSDQHOPD\QHHGWREHFXWGRZQ»´WR
accommodate the unit.
Preparing a peninsula or island-type cabinet
In a peninsula or island type cabinet, the sides may
need to be scooped or cut down, and the corner
braces removed in order to accommodate the unit.
13" max.
depth of
unprotected
overhead
cabinets
6" min.
clearance from
cutout to side
walls
30" min. clearance
from countertop
to unprotected
overhead surface
15" min. height
from countertop to
nearest cabinet on
either side of the
unit
53»4
”
Approx.
53»4
”
Approx.
for European
cabinets

18 49-2001160 Rev. 0
Installation Instructions
INSTALLATION PREPARATION (Cont.)
5. PREPARING FOR DUCTWORK
VENTING
NOTE: 'XFWZRUN0867EHYHQWHGWRRXWVLGH'2
NOT vent into a wall, ceiling, crawlspace, attic or
any concealed space.
Cut hole in cabinet wall or floor as appropriate for
your installation. Make sure exhaust duct is located
between wall studs or floor joists.
NOTE: When cutting or drilling into wall or ceiling,
do not damage electrical wiring and other hidden
utilities. Make sure that any opening/cutout in the
wall behind the appliance and in the floor under the
appliance are sealed properly.
20 5/8" ±1/8"
1 7/8"min.
25" 28 7/8" ±1/8"
2 3/8"
min.
91»8
”
183»4
”
101»8
”
61»8
”
Rear Wall Venting 'RZQZDUG9HQWLQJ
INSTALLATION INSTRUCTIONS
4. PREPARING THE COUNTERTOP
The countertop must have a deep flat surface
to accommodate the cooktop and the vent.
Countertops with a rolled front edge and backsplash
may not provide the flat surface area required.
A 1/2” wide flat area is required around the edge
of opening for support of the unit. The cooktop
unit must be level and sit squarely into countertop
opening.
Carefully cut countertop opening according to the
GLPHQVLRQVVKRZQLQWKHLOOXVWUDWLRQ%HVXUHWKDW
opening is cut squarely, with sides parallel to each
other and rear exactly perpendicular to sides.
4. PREPARING THE COUNTERTOP
(CONT.)
For island installation, maintain 1 7/8” minimum
from cutout to front edge; 2 3/8” minimum from
cutout to back edge; and 6” minimum from cutout to
side edges of countertop.
25” min. flat
surface area
required
3. ROUGH PREPARATION OF
JUNCTION BOX
CAUTION FOR PERSONAL SAFETY,
REMOVE HOUSE FUSE OR OPEN CIRCUIT
BREAKER BEFORE PREPARING JUNCTION BOX.
Install an approved junction box within shaded area
shown in diagram. Junction box must be at least
»´EHORZWRSRIFDELQHW
Run conductors from residence wiring to junction box
according to local electrical codes.
16"
9" 4"
20”
101»2”
C
L

49-2001160 Rev. 0 19
INSTALLATION INSTRUCTIONS
Installation Instructions
INSTALLATION PREPARATION (Cont.)
7. PREPARE FOR DUCTWORK
'HWHUPLQHWKHEHVWURXWHIRUGXFWZRUNLWFDQEHURXWHG
in a variety of ways depending on the kitchen layout.
IMPORTANT: The downdraft air discharge outlet
IRUWKLVXQLWLV»´[´UHFWDQJXODU3ODQGXFWLQJ
accordingly.
Typical duct arrangement countertop series.
To maximize the ventilation performance of the vent
system:
1. Minimize the duct run length and number of
transitions and elbows.
2. Maintain a constant duct size.
3. Seal all joints with duct tape to prevent any leaks.
'RQRWXVHDQ\W\SHRIIOH[LEOHGXFWLQJ
If needed, install any make up (replacement) air
system in accordance with local building code
requirements. Visit GEAppliances.com for available
makeup air solutions.
• Optional duct arrangement under concrete slab.
PVC duct should be used if installing under a poured
concrete slab.
• Install ductwork so the piece of duct nearest the
downdraft unit slots INTO the next piece of the duct.
Secure the joints with self-tapping screws and apply
duct tape around the joints to ensure an airtight seal.
Inside wall
cabinet
8SLQVLGHZDOOWRURRIRU
overhang 'LUHFWO\WRRXWVLGH
%HWZHHQIORRUMRLVWV Through cabinet toe space
Peninsula or island Peninsula
Outside
wall cabinet NOTE: PVC sewer pipe type PSM 12454-B
Schedule 40 ASTM D1785.
Wall Cap Concrete
Slab
6″(15 cm)
Dia. PVC
Sewer Pipe
6″(15 cm)
Dia. Metal
Duct
Pack tightly with gravel
or sand completely
around pipe
3-1/4″x 10″Rectangular
to 6″Round Transition
6″(15 cm)
Dia. 90°
Metal Elbow
6″(15 cm) Dia.
Metal Duct
16″
(40.6 cm)
Max.
12″
(30 cm)
Min.
6″
(15 cm)
Dia. PVC
Coupling
6″(15 cm) Dia.
PVC Sewer Pipe
Elbow
6″(15 cm) Dia.
PVC Sewer Pipe
Elbow
6″(15 cm)
Dia. PVC
Sewer
Pipe
6″
(15 cm)
Dia.
PVC
Coupling
30′-0″(9.14 m) Max.
Duct Tape
Over Seam and Screw
Screw
Air
Flow
6. BLOWER TO DUCTWORK ALIGNMENT
In general, the use of flexible ducting is discouraged
because it can cause severely restricted airflow.
However, if the blower outlet and the floor or wall
duct location do NOT align well, then flexible
METAL ducting can be used to adapt to an offset.
Good alignment without use of flexible ducting is best.
NOTE:
•
'RQRWH[FHHGWKHPD[LPXPUHFRPPHQGHGRIIVHWRI´
'RQRWDOORZWKHIOH[LEOHGXFWLQJWRNLQNRUFROODSVH
'RVWUHWFKWKHIOH[LEOHGXFWLQJDVPXFKDVSRVVLEOH
to eliminate as much of the corrugation as possible.
$»´[´UHFWDQJOHWR´URXQGWUDQVLWLRQGXFWLV
available at your local building supply store.
NOTE: Illustrations are for planning purposes only.
6" Max.
Centerline
to
Centerline
Offset
%DFN9HQWLQJ
(Requires 31»4” x 10")
%RWWRP9HQWLQJ

20 49-2001160 Rev. 0
Installation Instructions
8. INSTALLING THE FOAM
GASKET
'RQRWLQVWDOOWKHFRRNWRSLQWRWKHFRXQWHUWRS
without installing the foam gasket as shown. It
protects the bottom edge of the glass from the
countertop and seals the cooktop against spills.
Remove the cooktop along with its shipping pad
from the shipping box. Remove the shipping block
from the downdraft vent opening and place it under
the shipping pad to provide level support.
CAUTION */$66,6)5$*,/('2127
%803('*(2)*/$66'85,1*,167$//$7,21
Locate the foam gasket tape
included with your cooktop.
Smooth rough edges of the cutout.
Peel off the white backing to install
the foam gasket tape on the bottom
side of the cooktop glass.
Foam Gasket Installation Notes:
• The foam gasket tape should be installed within
´RIWKHHGJHRIWKHJODVV'RQRWVWUHWFKRU
twist the foam gasket tape.
CAUTION Failure to install foam gasket
tape greatly increases the potential of breaking the
cooktop glass when installing, especially in Corian®
or granite countertops.
Center vent shipping block – place
under the shipping pad to provide
level support
INSTALLATION PREPARATION (Cont.)
8. INSTALLING THE FOAM
GASKET (Cont.)
8VHFDUHQRWWRVWUHWFKWKHIRDPJDVNHWWDSHZKLOH
it is installed or it will not stay in place.
'RQRWSODFHIRDPJDVNHWWDSHRYHUWKHPHWDO
flanges.
%XWWKHIRDPJDVNHWWDSHHQGVWRJHWKHUDWHDFK
corner without overlapping.
• Trim the foam gasket tape to length without
stretching.
• Mitre cut outside corners of foam gasket tape
slightly if necessary for appearance.
'RQRWVFUDWFKWKHJODVVZKLOHFXWWLQJWKHIRDP
gasket tape.
8QGHUVLGH
of Glass Foam
Gasket
Tape
1»8
”
max. to
Glass Edge
INSTALLATION INSTRUCTIONS
9. INSTALLING THE COOKTOP
CAUTION
'2127/,)7)520
VENT OPENING.
Lift the cooktop by the
glass side edges as
shown.
NOTE: 'RQRWXVHWKH
glass top vent opening to lift or move the cooktop
into position.
Lower the cooktop into the countertop opening,
guiding it into position. Glass is fragile—do not
allow it to drop onto the countertop. Support from
the underside and lower slowly.
Carefully remove your fingers one corner at a time
to lower the cooktop into position.
Once the unit is placed in countertop; visually
inspect the cooktop and counter, appearance or
alignment concerns.
COOKTOP INSTALLATION
Other manuals for PP9830
3
Table of contents
Languages:
Other GE Cooktop manuals

GE
GE PP9830 Original instructions

GE
GE Profile PHP900 User manual

GE
GE JGP328SEKSS - 30" B/I Gas CKTP Manual

GE
GE JDP39 User manual

GE
GE 169166 User manual

GE
GE JGP640 Training manual

GE
GE Monogram ZGU36L4D User manual

GE
GE JGP337 Operating instructions

GE
GE JP670 Installation instructions

GE
GE JGP989 Original instructions
Popular Cooktop manuals by other brands

Blanco
Blanco BCC640T instruction manual

Frigidaire
Frigidaire GLEMF397DBA Wiring diagram

Miele
Miele KM 6324-1 Operating and installation instructions

KitchenAid
KitchenAid KECC501BAL0 installation instructions

Bosch
Bosch NIT8053UC - 30in 4 Burner Induction Cooktop use and care manual

Fisher & Paykel
Fisher & Paykel CG301D installation instructions