•Cambie la posición o la ubicación de la antena (quiere decir la antena de la radio o de la televisión que está recibiendo la interferencia).
•Cambie la posición o cambie la ubicación y aumente la distancia entre el equipo de telecomunicaciones y la antena receptora
de la radio o de la televisión que está recibiendo la interferencia.
•Conecte el equipo de telecomunicaciones a una toma en un circuito diferente del circuito al cual la antena receptora esté conectada.
Si estas medidas no eliminan la interferencia, favor de consultar a su distribuidor o a un técnico de radio/televisión experto por
otras sugerencias. También, la Comisión Federal de Comunicaciones (FCC) ha preparado un folleto muy útil, “How To Identify and
Resolve Radio/TV Interference Problems” (“Como Identificar y Resolver Problemas de Interferencia de Radio/Televisión”). Este
folleto se puede obtener del U.S. Goverment Printing Office, Washington, D.C. 20402. Favor de especificar el número 004-000-00345-4
cuando haga su pedido.
COMPATIBILIDAD CON AUDÍFONOS
Se juzga que este teléfono es compatible con audífonos, en base a las normas de la FCC.
El número de la US está ubicado en el fondo de la base.
El numero REN esta ubicado en el fondo de la base.
INTRODUCCIÓN
Su teléfono inalámbrico está diseñado para darle flexibilidad en el uso y un rendimiento de alta calidad. Para
aprovechar al máximo su nuevo teléfono inalámbrico, sugerimos que se tome unos minutos ahora mismo para
leer todo este manual de instrucciones.
IMPORTANTE: Como los teléfonos inalámbricos operan con electricidad, usted debe tener por lo menos
un teléfono en su casa que no sea inalámbrico, en caso de una interrupción de corriente.
CUIDADO: Cuando utilice equipo telefónico, hay instrucciones básicas de seguridad que siempre deben
seguirse. Refiérase a la guía de INSTRUCCIONES DE SEGURIDAD IMPORTANTESprovista con este
producto y guárdela para referencia futura.
ANTES DE COMENZAR
LISTA DE PARTES
Asegúrese de que su paquete incluye los artículos mostrados aquí:
Teléfono Inalámbrico de
900 MHz con 40 Canales
Guía del Usuario
Creamos cosas buenas para la vida.
INFORMACIÓN SOBRE LA APROBACIÓN DE EQUIPO
El equipo de su teléfono esta aprobado para la conexión con la red TelefónicaPública (Public Switched Telephone Network) y cumple con
los requisitos establecidos en las secciones 15 y 68 de las Reglas y Regulaciones de la FCC y con los Requerimientos Técnicos para
Equipos de TerminalesTelefónicas (Technical Requirements for TelephoneTerminal Equipment), publicado por ACTA.
1Notificación a la Compañía Telefónica Local
En la parte de abajo de este equipo hay una etiqueta que indica, entre otra información, el número de US y el Número de
Equivalencia de Timbres (REN) para este equipo. Usted debe, cuando sea requerido, proveer esta información a su compañía
telefónica.
El REN es útil para determinar el número total de artefactos que Ud. puede conectar a su línea telefónica, todavía asegurando
que todos estos artefactos sonarán cuando se llame su número telefónico. En la mayoría de las áreas (pero no en todas), el
total de los números REN de todos los artefactos conectados a una línea no debe exceder 5. Para estar seguro del número
total de artefactos que Ud. pueda conectar a su línea (determinado por el REN), Ud. deberá ponerse en contacto con su
compañía telefónica local.
Cualquier enchufe y conexión que se utilice para conectar este equipo al cableado del edificio y a la red telefónica, debe estar
en conformidad con el reglamento de la FCC Parte 68 que ha sido adoptado por la ACTA. Un cable telefónico y un enchufe
modular que han sido aprobados y están en conformidad con dicho reglamento han sido provistos con este producto. Están
diseñados para ser conectados a un enchufe modular compatible, que también esté en conformidad. Para más detalles, vea
las instrucciones para la instalación.
NOTAS:
•No se puede usar este equipo con un teléfono de previo pago proveído por la compañía telefónica.
•Las líneas compartidas son sujetas a las tarifas del estado, y por eso, es posible que Ud. no pueda usar su propio equipo
telefónico si Ud. estuviera compartiendo la misma línea telefónica con otros abonados.
•Se debe notificar la compañía telefónica cuando se desconecte permanentemente su teléfono de la línea.
•Si su casa tiene algún equipo de alarma especial conectado a la línea telefónica, asegúrese que la instalación de este
producto no desactive su equipo de alarma. Si usted tiene alguna pregunta sobre qué puede desactivar su equipo de
alarma, consulte a su compañía telefónica o a un instalador calificado.
2Derechos de la Compañía Telefónica
Si su equipo causase algún problema en su línea que pudiera dañar la red telefónica, la compañía telefónica siempre que sea
posible le avisará de la posible interrupción temporal de su servicio. En caso que la compañía no pudiera avisarle de antemano y
hubiera necesidad de tomar tal acción, la compañía telefónica podrá interrumpir su servicio inmediatemente. En caso de tal
interrupción telefónica temporal la compañía debe : (1) darle aviso al momento de tal interrupción temporal de servico, (2)
concederle a Ud. la oportunidad de corregir la situación, (3) informarle a Ud. de sus derechos de presentar una questa a la Comisión
de acuerdo con los procedimientos dictados en la Subparte E de la Parte 68 de las Regulaciones y Reglas de la FCC.
La compañía telefónica puede hacer los cambios en sus instalaciones de comunicación, en equipos, en sus funcionamientos o
procedimientos que digne necesarios para el manejo de sus negocios y que no sean incompatibles con las Reglas y
Regulaciones de l a FCC. Si estos cambios pudieran alterar el uso o el funcionamiento de su equipo telefónico, la compañía
telefónica deberá darle aviso adecuado en escrito para que Ud. goce de un servico ininterrumpido.
INFORMACIÓN DE INTERFERENCIAS
Este artefacto cumple con la Parte 15 de las Reglas de la FCC. Su funcionamiento es sujeto a las dos condiciones siguientes: (l) Este
artefacto no puede causar interferencia dañosa, y (2) Este artefacto debe aceptar cualquier interferencia recibida, incluyendo
interferencia que puede causar un funcionamiento no deseado.
Este equipo ha sido probado y cumple con los límites para un artefacto digital de la Clase B, de conformidad con la Parte 15 de las
Reglas de la FCC. Estos límites han sido diseñados para proporcionar una protección razonable contra una interferencia dañosa
que pueda existir en una instalación doméstica.
Este equipo genera, usa y puede radiar la energía de frecuencia de una radio y, si no fuera instalado y usado de acuerdo con las
instrucciones, puede causar interferencia dañosa a las transmisiones radiales. Sin embargo, no hay garantía que la interferencia
no ocurrirá en una instalación en particular.
Si este equipo causa en efecto una interferencia dañosa a la recepción de la radio o de la televisión, lo cual puede ser determinado
apagando y prendiendo el equipo, le animamos a Ud. de tratar de corregir la interferencia por medio de una (o más) de las
sugerencias siguientes:
AuricularBase
ATLINKS USA, Inc.
101 West 103rd Street
Indianapolis, IN 46290
© 2004 ATLINKS USA, Inc.
Trademark(s) ® Registered
Marca(s) Registrada(s)
Cable de corriente AC Cable de línea telefónica
TALK
redial memory program
ringer
channel
offon
flash
abc
2
jkl
5
tuv
8
oper
0
def
3
mno
6
wxyz
9
#
1
ghi
4
pqrs
7
*
VOL
tone pause
+-
INSTALACIÓN SOBRE SUPERFICIE PLANA PARA HACER UNA LLAMADA
Después de la programación inicial, coloque el auricular sobre la base para cargar la batería durante 12
horas. Para hacer una llamada:
•Oprima el botón de TALK antes de llamar.
•Oprima el botón de TALK o coloque el auricular en la base para colgar.
PARA RECIBIR UNA LLAMADA
Para contestar una llamada, oprima el botón para hablar (“TALK”) y empiece a hablar.
INDICADOR LUMINOSO DE USO
El teléfono está activado (“ON/ in use”) cuando el botón “TALK” en el auricular está iluminado.
REPETICIÓN
Oprima el botón para hablar (“TALK”), después oprima el botón para volver a marcar el último número que
usted marcó (hasta de 32 dígitos). Si usted obtiene una señal de ocupado, y quiere seguir marcando ese
número, únicamente oprima nuevamente el botón para volver a marcar (“redial”) (usted no tiene que apagar
el teléfono y volver a activarlo).
FLASH
Utilice el botón “flash” para activar un servicio especial, como Llamada en Espera o para transferir una
llamada, que le son disponibles a través de su compañía telefónica.
SUGERENCIA: Si usted oprime el botón “TALK” para activar servicios especiales como llamada en espera,
usted colgará el teléfono. Oprima en su lugar el botón “flash.”
VOLUMEN
Los botones de volumen (“VOLUME”) (flechas hacia la izquierda y derecha) controlan el volumen del
micrófono del auricular.
SELECTOR DE TIMBRE (RINGER)
El selector del timbre en el auricular puede estar en la posición de encendido (ON) o apagado (OFF). Si el
selector está en la posición de apagado, el aparato no timbrará.
MARCADO POR TONO ODEDISCO
Este ajuste le permite seleccionar la modalidad para marcar por tono (“touch-tone”) o pulso (rotatorio). El
teléfono está pre-programado para uso de tono. Para programar la modalidad de marcado en tono o pulso:
1. Oprima y sostenga el botón de programa hasta que escuche el tono.
2. Oprima el botón “*tone” para seleccionar modalidad de marcado por Tono, u oprima “#pause” para
seleccionar modalidad de marcado por Pulso.
3. Oprima nuevamente el botón para programar. Usted escuchará un tono de confirmación.
TONO TEMPORAL
Si usted tiene servicio de pulso (rotatorio), y quiere tener acceso a los servicios especiales como llamada
en espera que requieran marcado por tono (como transacciones bancarias o servicios de larga distancia),
usted puede utilizar esta función para hacer su teléfono temporalmente compatible con el marcado por
tono.
1. Oprime el botón de TALK, y llama a la línea de información del banco.
2. Oprime el botón de *tone después de que contesten su llamada.
3. Sigue las instrucciones verbales para completar la transacción.
4. Cuelga cuando termine. Y el teléfono regresa al servicio de pulso rotatorio).
LOCALIZACIÓN DEL AURICULAR
Oprima el botón localizador (“page”) en la base para localizar un auricular
extraviado. Cuando usted oprime el botón localizador (“page”), el auricular emite un
timbre y el indicador en el auricular y el indicador de localizador/ en uso de la base
parpadea. Oprima el botón “TALK” cuando usted haya localizado el auricular. Oprima
el botón “TALK” cuando usted haya localizado el auricular. La señal del localizador
consta de tres timbres cada dos segundos durante dos minutos. Para cancelar el
localizador, oprima nuevamente el botón localizador (“page”).
NOTA: Usted puede aún localizar el auricular con el timbre apagado.
BOTÓN DE CANAL
Si alguna vez experimenta cualquier interferencia o no se escucha con claridad, oprima el botón
“channel” en el auricular para avanzar a otro canal.
MEMORIA
Almacena hasta diez números telefónicos de 20 dígitos en la memoria para marcado rápido.
PARA GUARDAR UN NÚMERO EN LA MEMORIA
1. Asegúrese de que el teléfono esté apagado (“OFF”) y oprima el botón “memory.”
2. Oprima cualquier tecla de número (0-9) para guardar el número teléfónico en esta ubicación de la
memoria.
3. Oprima el botón “memory.”
4.Utilice el teclado para inscribir un número (hasta de 20 dígitos) que usted quiera almacenar en esa
localización de memoria.
5. Oprima nuevamente el botón “memory” para confirmar.
PARA CAMBIAR UN NÚMERO GUARDADO
Siga el procedimiento en PARA ALMACENAR UN NUMERO EN LA MEMORIA, excepto que remplace el
número viejo con uno nuevo.
PARA GUARDAR UNA PAUSA EN LA MEMORIA
Use el botón #pause para insertar una pausa cuando se necesite una demora en la secuencia de llamado
(por ejemplo, cuando tenga que marcar el 9 para obtener una línea externa o deba marcar códigos de
acceso para su línea de información bancaria). Cada pausa se toma en cuenta para límite de 20 dígitos.
Si necesita marcar el 9 para obtener una línea externa y quiere guardar un número en la memoria sin tener
que marcar el 9 cada vez:
1. Asegúrese de que el teléfono esté apagado (“OFF”) y oprima el botón “memory.”
2. Oprima cualquier tecla de número (0-9) para guardar el número telefónico en esa ubicación de la
memoria.
3. Oprima nuevamente el botón de memoria (“memory”).
4. Inscriba el número 9 (o cualquier otro número adecuado) para tener acceso a una línea externa.
5. Oprima el botón #pause .
6. Inscriba el número telefónico que usted quiera almacenar en la memoria.
7. Oprima nuevamente el botón “memory” para confirmar.
CONSEJO: Si usted necesita una pausa más larga, oprima el botón de pausa (“ PAUSE #”) dos veces.
PARA MARCAR UN NÚMERO ALMACENADO
1. Asegúrese de que el teléfono esté encendido (ON), simplemente oprimiendo el botón para hablar
(“TALK”).
2. Oprima el botón de memoria (“memory”).
3. Oprima el número (0-9) para la localización de memoria deseada. El número se marca
automáticamente.
IMPORTANTE: Si usted hace llamadas de prueba a números de emergencia almacenados en la
memoria, permanezca en la línea y explique brevemente al operador la razón de su llamada.
También, es buena idea hacer estas llamadas fuera de las horas más congestionadas, como temprano
por la mañana o tarde por la noche.
CAMBIO DE LA BATERÍA
Asegúrese de que el teléfono esté apagado (OFF) antes de cambiar la batería.
1. Quite la puerta del compartimento de batería.
2. Desconecte el cordón del paquete de batería y saque el paquete de batería del
auricular.
3. Inserte el nuevo paquete de batería y conecte el cordón al enchufe dentro del
auricular.
4. Vuelva a colocar la puerta del compartimento de la batería.
5. Coloque el auricular en la base para cargarlo. Si no carga la batería del auricular
correctamente (durante 12 horas) cuando instale el teléfono por primera vez y/o
cuando instale un nuevo paquete de baterías, pondrá en peligro el rendimiento a
largo plazo de la batería.
NOTA: Si la batería no está instalada adecuadamente en el auricular, o si el paquete de
las baterías no está conectado adecuadamente dentro del compartimiento, el indicador
para hablar en el auricular parpadea cuando el auricular es colocado sobre su sitio en
la base.
CUIDADO: Para reducir el riesgo de fuego o lastimaduras personales, utilice únicamente la batería
que aparece en la lista en el manual de instrucciones.
PRECAUCIONES DE SEGURIDAD PARA LA BATERÍA
•No queme, desarme, mutile, o agujere. Igual que otras baterías de este tipo, materiales tóxicos pueden
escaparse y causarle daño.
•Para reducir el riesgo de fuego o daño personal, use unicamente la batería indicada en la Guía del
Usuario.
•Mantenga las baterías fuera del alcance de los niños.
•Quite las baterías si va a guardar el aparato durante más de 30 días.
Observación: el Sello RBRC de la pila utilizada en su producto ATLINKS USA indica que
participamos en un programa para recoger y reciclar las pilas de níquel cadmio que se realiza
en todos los Estados Unidos. Para más información sírvase llamar al 1-800-8-BATTERY o entre
en contacto con su centro local de reciclaje.
SEÑALES SONORAS DEL AURICULAR
Señal Significado
Un tono de gorgeo largo Usted tiene una llamada entrante (con el timbre –“ringer”- activado
–“ON”).
Tres tonos largos El auricular está siendo localizado
Un tono corto cada Advertencia de baja batería
catorce segundos
INDICADOR LUMINOSO DEL BOTÓN PARA HABLAR
Señal Significado
Iluminado constante Teléfono está en uso
Parpadeo rápido Usted tiene una llamada entrante o localizador
Un parpadeo cada Advertencia de baja batería
catorce segundos
Parpadea cada dos segundos No hay batería instalada en el auricular, o la batería no está
conectada adecuadamente en el enchufe dentro del
compartimiento de las baterías.
GUÍA PARA DETECTAR PROBLEMAS
En caso de dificultad, por favor consulte la siguiente guía de detección de problemas antes de hablar con
el departamento de servicio.
Problema Solución
No hay tono de marcar • Revise la instalación: ¿Está el cable de corriente de la base
conectado en un enchufe que funciona?
¿Están los indicadores luminosos en el auricular y en la base
iluminados? ¿Está el indicados del auricular en uso/carga
iluminado? ¿Está el cordón de la línea telefónica conectado a la
unidad de la base y al enchufe de la pared?
•Desconecte la base del enchufe de la pared y conecte otro
teléfono al mismo enchufe. Si no hay tono de marcar en el
segundo teléfono, el problema pudiera ser con el alambrado o
con el servicio local.
•¿Está el auricular fuera del alcance de la unidad de base? Acérquelo
a la unidad de base.
•Cerciórese que la batería se cargó bien (12 horas).
•¿Se instaló correctamente el paquete de batería?
•Si el teléfono continúa sin funcionar, desconecte el cable de
corriente y quite el paquete de la batería. Después re-conecte el
cable de corriente y re-instale el paquete de la batería. Coloque
el auricular en la base durante 10 segundos para que le permita
al aparato reinicializarse.
Hay tono de marcar pero • Asegúrese de que el selector de tono/pulso
no puede llamar está programado correctamente.
El auricular no timbra • Asegúrese de que el selector del timbre (“ringer”) en el auricular
esté encendido (ON).
•Pudiera tener demasiadas extensiones telefónicas en su línea.
Trate de desconectar algunos teléfonos.
•Vea las soluciones de "No hay tono de marcar."
No puede escuchar la • Oprima los botones de volumen (“VOLUME”).
conversación telefónica (flechas hacia la izquierda y derecha) para controlar el volumen
al nivel deseado.
Se experimenta estática, • Cambie de canal.
ruido o atenuación • ¿Está el auricular fuera del alcance? Acérquese a la base.
intermitente • ¿Se necesita cambiar de lugar la base?
•Cargue la batería del auricular.
•Cerciórese que la base no está conectada en el mismo enchufe que
otro aparato doméstico.
El alcance es menor de • Oprima el botón channel durante la
lo normal conversación para seleccionar un nuevo canal.
El teléfono marca en pulso • Asegúrese de queTELÉFONO esté en
cuando está en modalidad modalidad de tono.
de tono.
El teléfono no marca hacia • Asegúrese de queTELÉFONO esté en
afuera cuando está en modalidad de pulso.
modalidad de pulso.
La batería no retiene la •Asegúrese que usted haya cargado la batería
carga suficientemente durante 12 horas; usted puede esperar tener
aproximadamente siete horas de tiempo para hablar.
•Cerciórese que los contactos de su batería, tanto del auricular
como la base están haciendo contacto y que están limpios; que
no tienen basura o pelusa.
•Cuando el auricular está en su sitio sobre la base, verifique que
el indicador de uso/carga de la base esté iluminado.
No se puede llamar desde
•¿Programó bien las teclas de memoria?
la memoria • ¿Siguió la secuencia correcta de marcado?
•Asegúrese de que el selector de tono/pulso está programado
correctamente.
La unidad se congela y •Si el teléfono continúa sin funcionar, desconecte
No hay comunicación el cable de corriente y quite el paquete de la
entre la base y el auricular batería. Después re-conecte el cable de corriente y re-instale el
paquete de la batería. Coloque el auricular en la base durante
10 segundos para que le permita al aparato reinicializarse.
•Si ocurre un apagón eléctrico y el auricular no está en la
base, deberá ponerse el auricular nuevamente en la base
cuando regrese la corriente eléctrica.
GARANTÍA LIMITADA
Lo que cubre su garantía:
•Defectos de materiales o de trabajo.
Por cuánto tiempo después de la compra:
•Un año, a partir de la fecha de compra.
(El periodo de garantía para unidades arrendadas se inicia con la primera renta o 45 días de la fecha del
embarque a la firma de arrendamiento, lo que ocurra primero).
Lo que haremos:
•Proporcionarle una unidad nueva o, a nuestra opción, una reacondicionada. La unidad de intercambio
quedará bajo garantía por el resto del periodo de garantía del producto original.
Cómo obtener servicio:
•Empaque bien la unidad, incluyendo todos los cables, etc., que originalmente venían con el producto. Se
recomienda usar el cartón y materiales de empaque originales.
•“Prueba de compra como factura o recibo de compra, que ofrezca evidencia de que el producto está dentro
del periodo de garantía, debe ser presentado para obtener servicio bajo garantía.” Para compañías de
arrendamiento, se requiere como evidencia el primer contrato de renta.También escriba claramente su
nombre, dirección y la descripción del defecto. Mande vía UPS o un servicio de paquetería equivalente a:
ATLINKS USA, Inc.
c/o Thomson multimedia Inc.
11721 B Alameda Ave.
Socorro,Texas 79927
•Pague cualquier cargo que le facture el Centro de Intercambio por servicio que no esté cubierto por garantía.
•Asegure su empaque para prevenir pérdida o daño. ATLINKS no acepta responsabilidad en caso de
pérdida o daño.
•Un aparato nuevo o uno remozado se le enviará con los cargos pagados.
Lo que
no
cubre la garantía:
•Instrucciones al cliente. (Su manual de propietario le proporciona la información con respecto a las
instrucciones de operación y los controles del usuario. Cualquier información adicional debe obtenerse con
su agente de ventas.
•Ajustes de instalación y de preparación del servicio.
•Baterías.
•Daño por mal uso o negligencia.
•Productos que han sido modificados o incorporados a otros productos.
•Productos comprados o que han recibido servicio fuera de los Estados Unidos.
•Desastres naturales, por ejemplo y sin limitarse a ellos, daños por relámpagos.
Registro del Producto:
•Por favor llene y envíe por correo laTarjeta de Registro del Producto que se embarcó con su producto. Hará
más fácil que hagamos contacto con usted si fuera necesario. No se requiere la devolución de la tarjeta para
tener la cobertura de la garantía.
Limitaciones sobre la Garantía:
•LA GARANTÍA ESPECIFICADA ANTERIORMENTEES LA ÚNICA GARANTÍA APLICABLE A ESTE PRODUCTO.
CUALQUIER OTRA GARANTÍA, EXPRESA O IMPLÍCITA (INCLUYENDOTODAS LAS GARANTÍAS IMPLÍCITASDE
MERCADO O DE SALUD PARA CUALQUIER PROPÓSITO) SON CONSIDERADAS NOVÁLIDAS. NINGUNA
INFORMACIÓN VERBAL O ESCRITA OTORGADA PORATLINKS USA,INC., SUS AGENTES, O EMPLEADOS
SERÁ CONSIDERADA PARA CREAR UNA GARANTÍA NI PARA AUMENTAR BAJO NINGUNA CIRCUNSTANCIA
LA COBERTURA DE ESTA GARANTÍA.
•LA REPARACIÓN O REEMPLAZO DE UN PRODUCTO COMO SE ESPECIFICA BAJO ESTA GARANTÍAES EL
REMEDIO EXCLUSIVO DEL CONSUMIDOR. ATLINKS USA, INC. NO SE HACE RESPONSIBLE POR DAÑOS
INCIDENTALES, DAÑOS DERIVADOS COMO CONSECUENCIA DEL USO DE ESTE PRODUCTO, O COMO
RESULTADO DEL INCUMPLIMIENTO DE CUALQUIER GARANTÍA IMPLÍCITA O EXPRESA DE ESTE PRODUCTO.
LA INVALIDEZ DE LAS GARANTÍAS O LASGARANTÍAS LIMITADAS ESTÁN REGLAMENTADAS POR LAS
LEYES DEL ESTADO DE INDIANA. EXCEPTO POR EL ALCANCE ESTABLECIDO POR LAS LEYES APLICABLES,
CUALQUIER GARANTÍA IMPLÍCITA DE MERCADO O DE SALUD PARA CUALQUIER PROPÓSITO, EN ESTE
PRODUCTO ES LIMITADAAL PERÍODO DE GARANTÍA ESPECIFICADO ANTERIORMENTE.
Cómo se Relaciona la Ley Estatal a esta Garantía:
•Algunos estados no permiten la exclusión ni limitación de daño incidental o derivado de alguna consecuencia,
o la limitación con respecto al período de tiempo que debe aplicarse para garantías implícitas, por lo tanto las
limitaciones y exclusiones mencionadas anteriormente pueden no ser aplicables para usted.
•Esta garantía le ofrece derechos legales específicos, y usted puede tener otros derechos legales que varían
de estado a estado.
Si compró su producto fuera de los Estados Unidos:
•Esta garantía no se aplica. Vea a su distribuidor para información sobre la garantía.
C
ÓMO
O
BTENER
S
ERVICIOS
DE
M
ANTENIMIENTO
Este producto puede únicamente ser reparado por el fabricante o sus agentes de reparación autorizados. Cualquier cambio o
modificación no aprobados expresamente por ATLINKS USA, Inc. podría ser motivo de anulación de la autoridad del usuario para
operar este producto. Para recibir instrucciones sobre cómo obtener servicios de mantenimiento, por favor consulte la garantía
incluida en esta Guía, o llame a Información para el Usuario, 1-800-448-0329.
O envíe sus preguntas a:
ATLINKS USA, Inc.
Gerente, Servicio al Consumidor
P.O.Box 1976
Indianápolis, IN 46206
Adjunte su recibo al folleto, para futura referencia, o anote la fecha en la que se compró o recibió este producto como regalo. Esta
información será valiosa si se llegase a requerir durante el período de garantía.
Fecha de compra________________________Nombre de la tienda____________________________________________________
CORTE EN LA LÍNEA PERFORADA. ✂
FORMULARIO PARA HACER PEDIDOS DE ACCESORIOS
DESCRIPCIÓN
Cable de corriente AC 5-2616 5-2617 $19.95
Batería de repuesto 5-2459 5-2459 $9.95
Broche de cinturón 5-2555 5-2552 $7.95
TALK
redial memory program
ringer
channel
off on
flash
abc
2
jkl
5
tuv
8
oper
0
def
3
mno
6
wxyz
9
#
1
ghi
4
pqrs
7
*
VOL
tone pause
+-
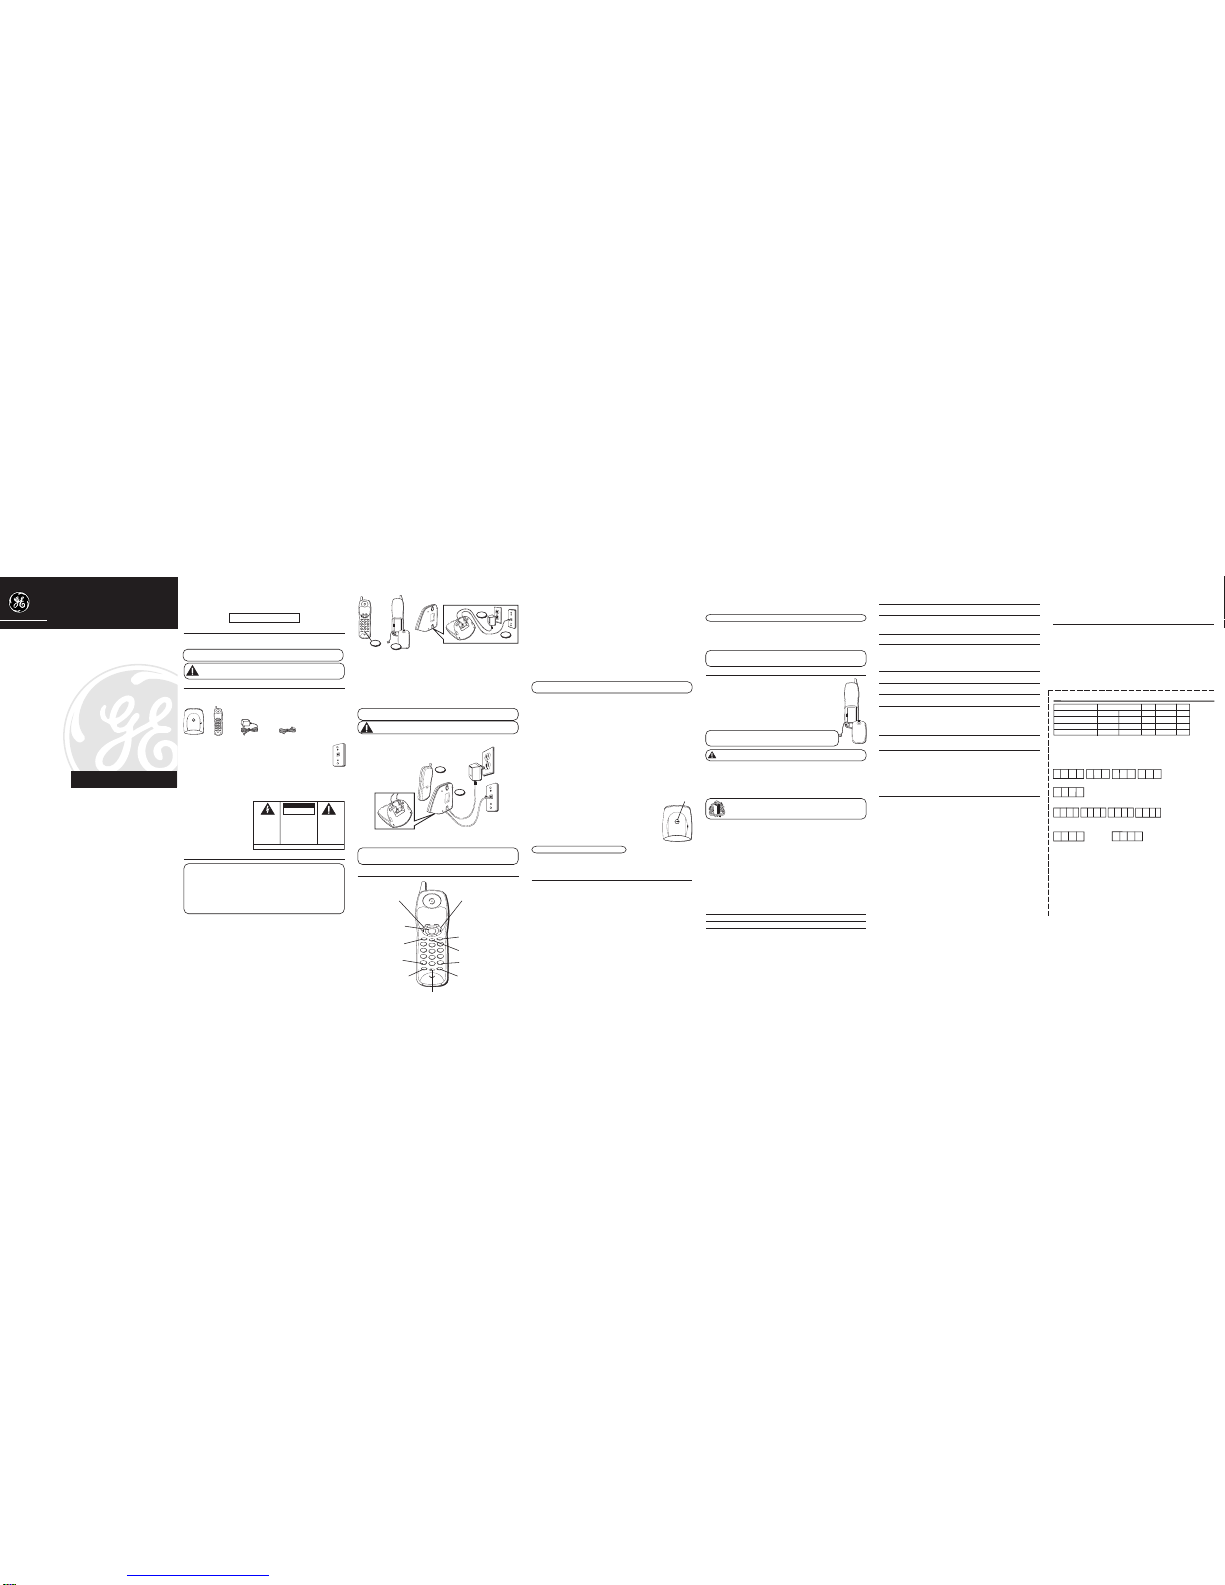
Botón para hablar
(“TALK”)
Botón para volumen
(“volume +”)
Botón para volver a
marcar (“redial”)
Botón para programar
(program)
Botón para memoria
(“memory”)
VEA ADVERTENCIAEN LA PARTE POSTERIOR/BASE DEL PRODUCTO.
RIESGODE SACUDIDA
ELÉCTRICANO ABRA
ADVERTENCIA: PARA PREVENIR
EL RIESGO DE UNFUEGO O DE UNA
SACUDIDA ELECTRICA, NO EXPONGA
ESTE APARATO A LA LLUVIA OA LA
HUMEDAD.
EL RELÁMPAGOY LA
PUNTADE FLECHA
DENTRO DEL TRIÁNGULO
ES UNA SEÑAL DE
ADVERTENCIA,
ALERTÁNDOLE A UD. DE
QUE HAY"VOLTAJE
PELIGROSO" DENTRO DEL
PRODUCTO.
CUIDADO: PARA REDUCIR
EL RIESGO DE UNA SACUDIDA
ELÉCTRICA, NO QUITE LA
CUBIERTA (O PARTE
POSTERIOR) NO USE PARTES
DE REPUESTO DENTRO.
CONSULTE A ALGUNA
PERSONA CALIFICADA DEL
SERVICIO DE REPARACIONES.
EL SIGNO DE
EXCLAMACIÓN DENTRO
DEL TRIÁNGULO ES UNA
SEÑAL DE
ADVERTENCIA,
ALTERTÁNDOLEA UD. DE
QUE EL PRODUCTO, TRAE
INCLUCIDO,
INSTRUCTIONES MUY
IMPORTANTES.
ATTENTION:
Botón para volumen
(“volume -”)
Para ordenar, llame al 1-800-338-0376 (únicamente para accesorios) o complete este formulario.
____________________________________________________________________
Firma autorizada
Mi tarjeta vence el:
Copie el número que aparece arriba
de su nombre en la tarjeta Master Card.
Para compras con tarjeta de crédito
Para tramitar las órdenes pagadas con tarjeta de crédito, se requiere el número completo de su tarjeta de crédito,
la fecha de vencimiento y su firma.
Copie el número completo de su cuenta de su tarjeta VISA.
*Los precios están sujetos a cambios sin previo aviso.
Total de la mercancía....................................$_______________
Impuestos sobre la venta..............................$_______________
La ley nos requiere que cobremos el impuesto sobre la venta apropiado para cada estado, condado y área individuales a las
cuales se envíe la mercancía.
De preferencia, use VISA o Master Card o Discover. Los cheques o giros postales se aceptan únicamente en moneda
estadounidense. No se hacen envíos COD (de pago contra reembolso) ni se acepta efectivo. Todos los accesorios están sujetos a
disponibilidad. Cuando se aplique, enviaremos un modelo más reciente.
Embarque/Envío.......................................$_______________
Monto total incluido.................................$_______________
Envíe el formulario de pedido y giro postal o cheque (en moneda estadounidense) a nombre de Thomson
multimedia Inc. a:
Thomson multimedia Inc.
Mail Order Department
P.O . Box8419
Ronks, PA 17573-8419
Nombre_______________________________________________________
Dirección_____________________________________Depto.____________
Ciudad________________Estado________ Código Postal_________
Número Telefónico durante el Día ( )_______________________
Copie el número completo de su cuenta de su tarjeta
MasterCard o Discover.
26928
Modelo 26928D
55906060 (Rev. 0 E/S)
04-03
Impreso en China
REQUISITOS DE CONEXIÓN
Para conectar el teléfono se necesita un enchufe modular telefónico RJ11, que es el tipo de enchufe más
común y se parece al ilustrado. Si usted no tiene este tipo de enchufe, llame a su compañía telefónica local
para preguntar cómo conseguirlo.
SISTEMA DIGITAL DE SEGURIDAD
Su teléfono inalámbrico usa un sistema de seguridad digital para evitar el timbrado falso, el uso no autorizado y
cargos a su línea telefónica.
Cuando usted coloca el auricular en la base, el aparato verifica su código de seguridad. Después de una
interrupción de corriente, o de reemplazar la batería, usted debe colocar el auricular en la base
aproximadamente 20 segundos para re-programar el código.
INSTALACIÓN YPROGRAMACIÓN
NOTA SOBRE LA INSTALACIÓN: Algunos teléfonos inalámbricos operan a frecuencias que pueden
causar interferencia con aparatos de televisión, hornos de microondas, hornos, o videocaseteras que se
encuentren cerca de este aparato. Para minimizar o evitar dicha interferencia, la base del teléfono
inalámbrico no debe ser colocada cerca o encima de la televisión, de un horno de microondas, o de la
videocasetera. Si dicha interferencia continúa, mueva el teléfono lejos del aparato eléctrico causante de la
interferencia. Algunos otros accesorios para la comunicación pueden utilizar frecuencias de 900 MHz para
comunicarse, y si no están adecuadamente instalados, estos aparatos pueden interferir entre sí, o con su
aparato de teléfono nuevo. Si usted teme tener problemas con esta interferencia, refiérase al manual de
instrucciones de dichos accesorios para ver cómo puede programar los canales para evitar esta
interferencia. Los accesorios típicos que pueden utilizar la frecuencia de 900 MHz para comunicarse
incluyen transmisores inalámbricos de audio o video, redes inalámbricas para computadoras, sistemas
telefónicos inalámbricos con varios auriculares, y algunos teléfonos inalámbricos de largo rango.
INFORMACIÓN IMPORTANTE PARA LA INSTALACIÓN
•Nunca instale cableado telefónico durante una tormenta de relámpagos.
•Nunca toque cables o terminales no aislados, a menos que la línea telefónica haya sido desconectada
en la interfaz de la red.
•Utilice precaución cuando instale o modifique líneas telefónicas.
•Nunca instale enchufes telefónicos en localizaciones mojadas, a menos que el enchufe esté
específicamente diseñado para mojarse.
Botón para marcar por
tono (“*tone”)
Botón de canales
(“channel”) Botón para servicios
(“flash”)
Botón para pausa
(“#pause”)
Selector del timbre (“ringer”)
Botón localizador
(“page”)
NÚMERO DE CATÁLOGO PRECIO* CANTIDAD TOTAL
otro 26928GE1
Mi tarjeta vence:
$5.00
Por favor asegúrese de haber llenado este formulario por completo.
TALK
redial memory program
ringer
channel
off on
flash
abc
2
jkl
5
tuv
8
oper
0
def
3
mno
6
wxyz
9
#
1
ghi
4
pqrs
7
*
VOL
tone pause
+-
3
12
4
1
2
1. Programe el selector del timbre (“RINGER”) (en el auricular) en la posición de encendido (ON).
2. Instale la batería del auricular.
•Quite la puerta del compartimiento de las baterías.
•Conecte el enchufe del paquete de las baterías en el enchufe dentro del compartimiento.
•Vuelva a colocar la puerta del compartimeiento en su sitio y el auricular en su sitio sobre
la base.
3. Conecte el cable de corriente dentro del enchufe en la parte de abajo de la base y el otro extremo en
un enchufe de corriente eléctrica. Cuando el auricular esté colocado sobre la base, el indicador de
uso/ carga se ilumina para verificar que la batería está cargando.
4. Conecte el cable de línea telefónica en el enchufe marcado “TEL LINE” en la parte de abajo de la base
y el otro extremo en un enchufe modular.
NOTA: El teléfono automáticamente se programa en la modalidad para marcar de tono (touch-tone). Para
cambiar a la modalidad de pulso (rotatorio), vea la sección “Para Marcar por Tono/Pulso.” Si usted no sabe
qué tipo de servicio tiene, verifique con su compañía telefónica.
CUIDADO: Utilice únicamente el cable de corriente ATLINKS USA , Inc. 5-2616 (negro) o
5-2617 (gris) que es compatible con esta unidad. El uso de otros cables de corriente puede resultar
en daño al aparato.
INSTALACIÓN SOBRE PARED
1. Deslice los agujeros para montaje sobre los postecitos en la placa para montaje sobre pared y deslice el
aparato firmemente hacia abajo a que ajuste en su sitio. (La placa de pared no está incluida).
2. Coloque el auricular sobre la base.
NOTA: Si la batería no está instalada adecuadamente en el auricular, o si el paquete de las baterías no está
conectado adecuadamente dentro del compartimiento, el indicador para hablar en el auricular parpadea
cuando el auricular es colocado sobre su sitio en la base.
PUNTOS BÁSICOS DEL TELÉFONO INALÁMBRICO