2. Select a database, folder, and route.
The app displays the Route Configuration window.
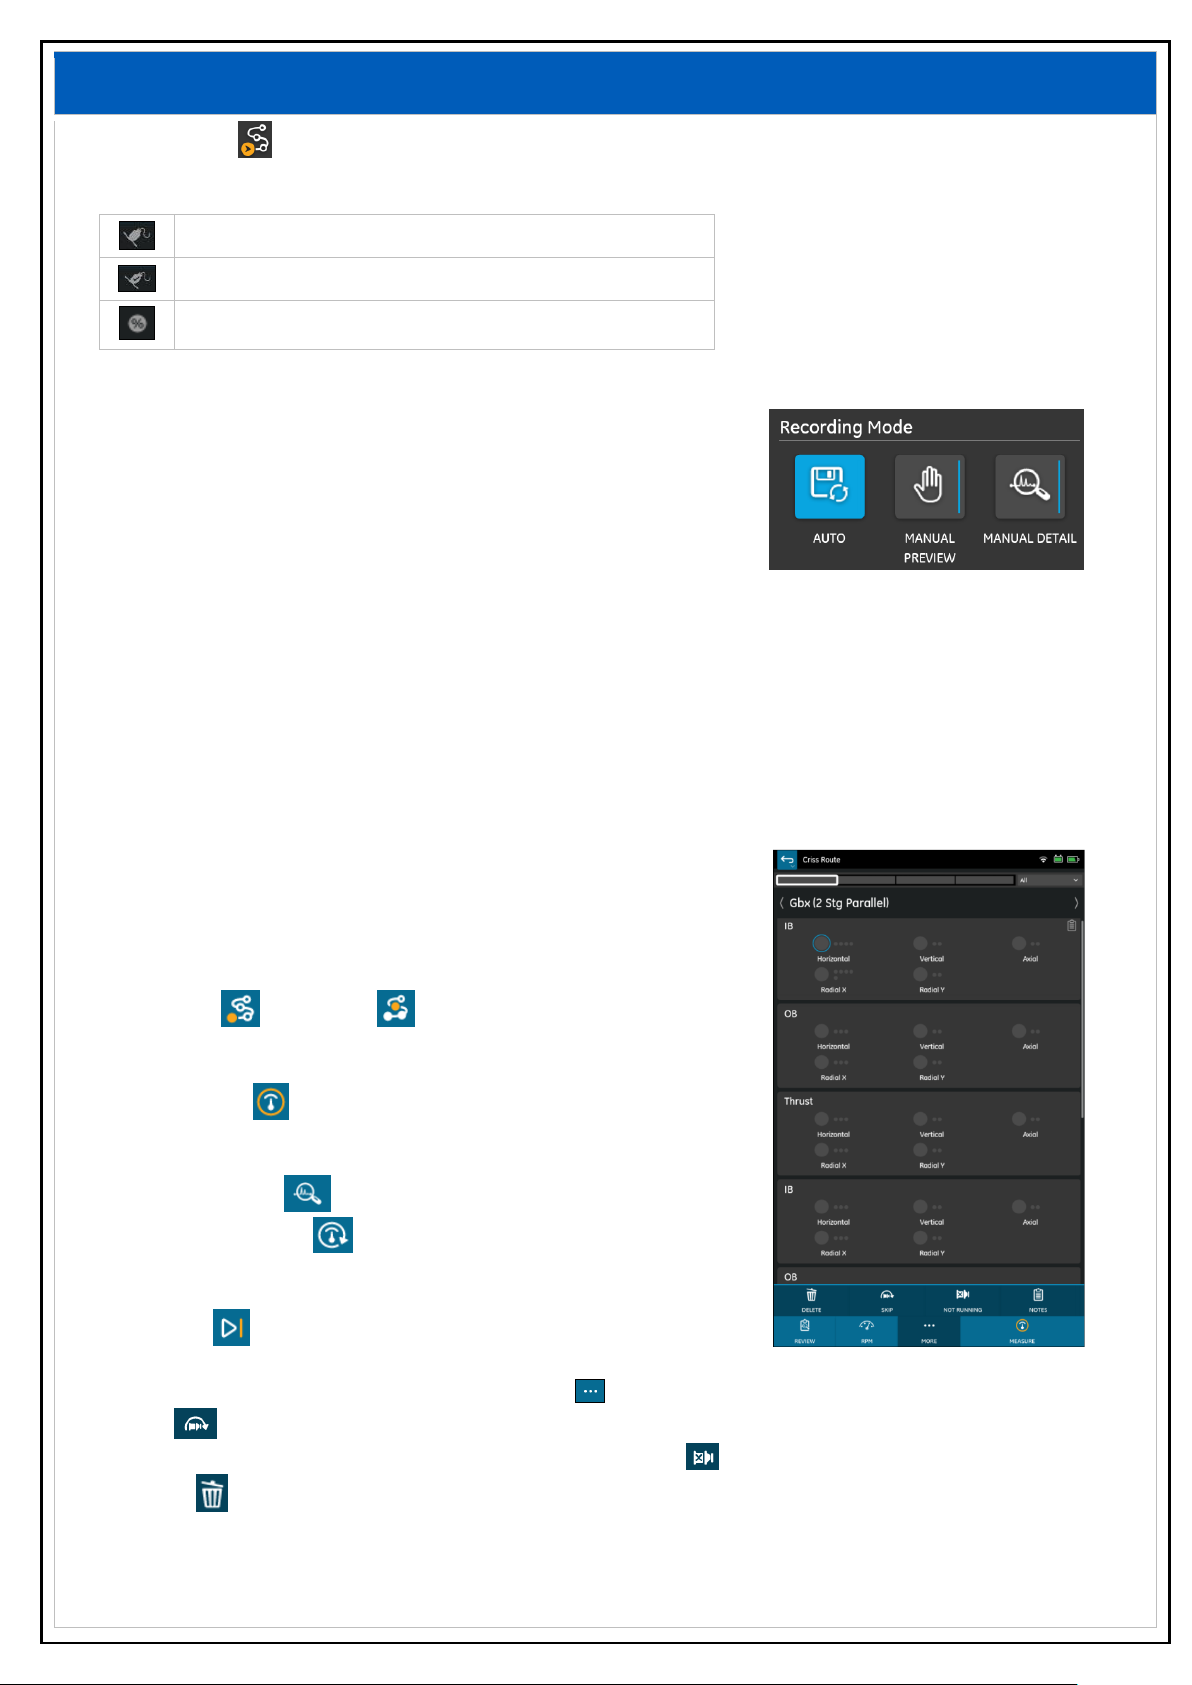
3. Select a recording mode.
Auto
S1 Collector steps through all measurements at the current point
and displays the overall result for each measurement.
Manual Preview
The app displays overall results for each measurement.
Analyze or remeasure before proceeding to the next measurement.
Manual Detail
The app displays detailed results for each measurement.
Analyze or remeasure before proceeding to the next measurement.
4. Select Sensors to assign a sensor to a channel.
The app displays the Sensor Setup window.
5. Select a channel for each connected sensor.
The app displays the Sensors window.
6. Select a sensor from the list of available sensors.
7. Select Done. The app displays the Route Configuration window.
8. Select START or RESUME .
The app displays the Route Details window.
9. Select MEASURE to start recording the selected point.
After each recording, the app displays the Measurement Summary
window with these options:
Select ANALYZE to view a graph of the recording.
Select REMEASURE to retake the recording.
The new recording will overwrite the previous one.
10. Select NEXT .
The app saves the recording and begins the next one.
You can take a recording sequentially or use MORE to access the following options:
Skip recording a machine on a route.
Toggle the status of a machine from running to not running and vice versa.
Delete saved recordings for a machine, a point or an axis.
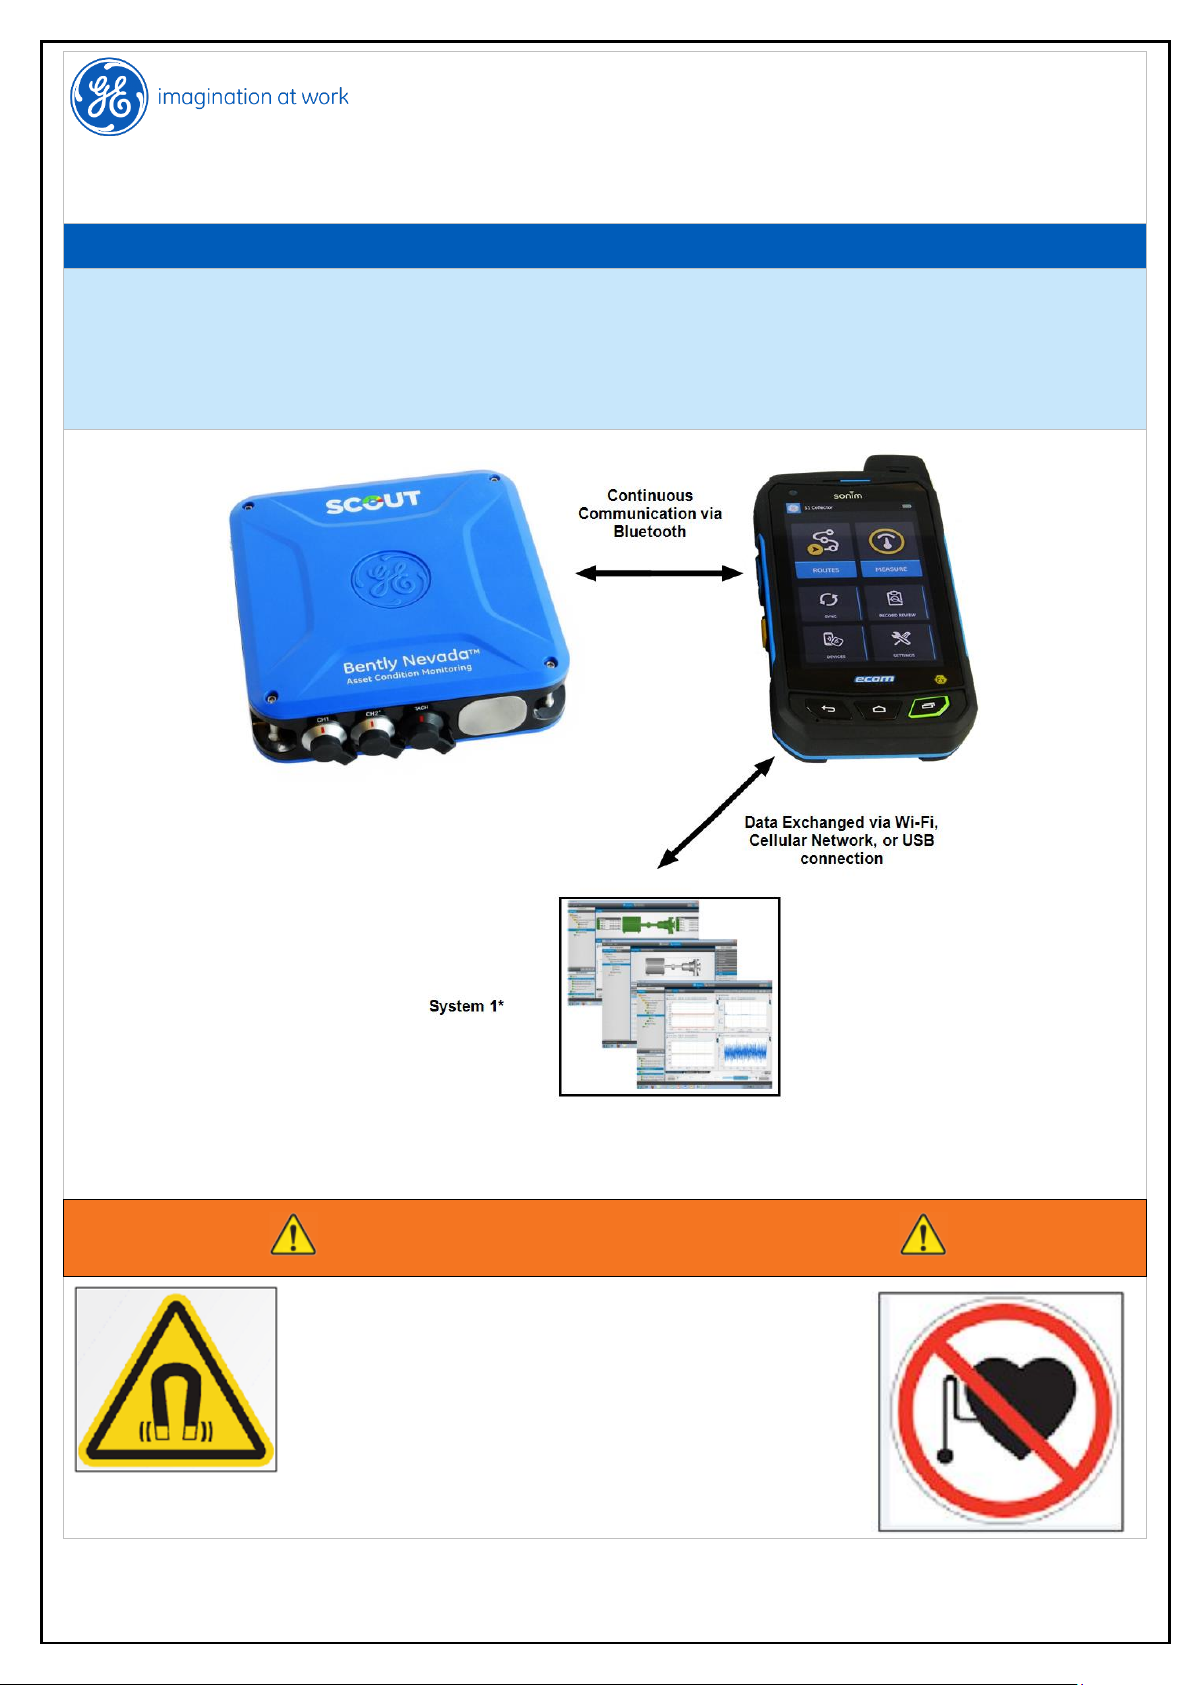
11. Sync the data between the S1 Collector app and System 1*.