GE FUF12 Original instructions

ge.com
Owner’s Manual &
Installation Instructions
Food Freezers
297252000 162D9627P010 49-60567-1 09-08 JR
Safety Information . . . . . . . . . . . . 2–4
Operating Instructions
Care and Cleaning . . . . . . . . . . . . . . .10–12
Defrosting Instructions
(for Manual Defrost Models) . . . . . . . . . . .9
Features . . . . . . . . . . . . . . . . . . . . . . . . . . . . . . .8
Starting the Freezer . . . . . . . . . . . . . . . . . . .5
Installation Instructions
Preparing to Install the Freezer . . . . . . 13
Troubleshooting Tips . . . . . . . .14–16
Normal Operating
Characteristics . . . . . . . . . . . . . . . . . . . . . . .14
Consumer Support
Consumer Support . . . . . . . . . Back Cover
Production Registration for
Customers in Canada . . . . . . . . . . . . 19, 20
Production Registration for
Customers in the U.S. . . . . . . . . . . . . 17, 18
Warranty . . . . . . . . . . . . . . . . . . . . . . . . . . . . 24
Model number: _____________________
Serial number: _____________________
You can find them on a plate either on
the upper left wall inside the freezer
(Upright models) or on the left exterior
wall (Chest models).
La section française commence à la page 25
La sección en español empieza en la página 43
Congelador
de alimentos
Manual del propietario
y instalación
Congélateur
d’aliments
Manuel d’utilisation
et d’installation
Upright—Manual Defrost
Models:
FUM13, FUM14, FUM17,
FUM21
Upright—No-Frost Models:
FUF12, FUF12S, FUF14,
FUF14S, FUF17, FUF17C,
FUF17S, FUF20, FUF20S,
FUF21, FUF21S
Chest—Manual Defrost Models:
FCM5, FCM7, FCM9, FCM15,
FCM20, FCM25

IMPORTANT SAFETY INFORMATION.
READ ALL INSTRUCTIONS BEFORE USING.
WARNING!
Use this appliance only for its intended purpose as described in this Owner’s Manual.
SA ETY PRECAUTIONS
When using electrical appliances, basic safety precautions should be followed, including the following:
■
■T is freezer must be properly installed and located
in accordance wit t e Installation Instructions
before it is used.
■
■Do not allow c ildren to climb, stand or ang
on t e s elves in t e freezer. T ey could damage
t e freezer and seriously injure t emselves.
■
■After your freezer is in operation, do not touc t e
cold surfaces, particularly w en ands are damp
or wet. Skin may stick to t ese extremely cold
surfaces.
■
■Do not store or use gasoline or ot er flammable
vapors and liquids in t e vicinity of t is or any ot er
appliance.
■
■Unplug t e freezer before cleaning, making repairs
or c anging t e lig t bulb.
NOTE: We strongly recommend that any servicing
be performed by a qualified individual.
■
■Turning t e control to t e OFF position does not
remove power to t e lig t circuit on models wit
interior lig t.
■
■Do not refreeze frozen foods w ic ave
t awed completely.
■
■T e maximum amount of food your freezer is
designed to freeze at one time is approximately
3 pounds (1.5 kg) per cubic foot of freezer capacity.
In normal position, your freezer’s temperature
control will maintain sufficiently
low temperatures in t e freezer to freeze
recommended quantities of food.
■
■Caution s ould be used w en removing t e door of
a freezer. Particular caution s ould be used w en
removing t e lid of a C est freezer, as most C est
freezer lids are under spring tension. Contact t e
manufacturer’s representative for a met od of safe
removal.
Consumer Support Troubleshooting Tips Operating Instructions Sa ety Instructions
Installation
Instructions
2

3
Consumer SupportTroubleshooting TipsOperating InstructionsSa ety Instructions Installation
Instructions
USE O EXTENSION CORDS
Because of potential safety hazards under certain conditions, we strongly recommend against the use
of an extension cord.
However, if you must use an extension cord, it is absolutely necessary t at it be a UL-listed (in t e United
States) or a CSA-listed (in Canada), 3-wire grounding type appliance extension cord aving a grounding type
plug and outlet and t at t e electrical rating of t e cord be 15 amperes (minimum) and 120 volts.
DANGER! RISK OF CHILD ENTRAPMENT
PROPER DISPOSAL O THE REEZER
When using electrical appliances, basic safety precautions should be followed, including the following:
C ild entrapment and suffocation are not problems
of t e past. Junked or abandoned refrigerators and
freezers are still dangerous…even if t ey will sit for
“just a few days.” If you are getting rid of your old
refrigerator or freezer, please follow t e instructions
below to elp prevent accidents.
Be ore You Throw Away Your Old
Re rigerator or Freezer:
■Take off t e doors.
■Leave t e s elves in place so t at c ildren may not
easily climb inside.
Re rigerants
All refrigeration products contain refrigerants, w ic
under federal law must be removed prior to product
disposal. If you are getting rid of an old refrigeration
product, c eck wit t e company andling t e
disposal about w at to do.
ge.com

4
Consumer Support Troubleshooting Tips Installation
Instructions Sa ety Instructions
Operating Instructions
IMPORTANT SAFETY INFORMATION.
READ ALL INSTRUCTIONS BEFORE USING.
WARNING!
HOW TO CONNECT ELECTRICITY
Do not, under any circumstances, cut or remove the third (ground) prong from the power cord.
or personal safety, this appliance must be properly grounded.
T e power cord of t is appliance is equipped wit
a 3-prong (grounding) plug w ic mates wit a
standard 3-prong (grounding) wall outlet to minimize
t e possibility of electric s ock azard from t is
appliance.
Have t e wall outlet and circuit c ecked by a qualified
electrician to make sure t e outlet is properly
grounded.
If t e outlet is a standard 2-prong wall outlet, it is
your personal responsibility and obligation to ave
it replaced wit a properly grounded 3-prong wall
outlet.
T e freezer s ould always be plugged into its own
individual electrical outlet w ic as a voltage rating
t at matc es t e rating plate.
T is provides t e best performance and also prevents
overloading ouse wiring circuits w ic could cause a
fire azard from over eated wires.
Never unplug your freezer by pulling on t e power
cord. Always grip plug firmly and pull straig t out
from t e outlet.
Repair or replace immediately all power cords t at
ave become frayed or ot erwise damaged. Do not
use a cord t at s ows cracks or abrasion damage
along its lengt or at eit er end.
W en moving t e freezer away from t e wall, be
careful not to roll over or damage t e power cord.
READ AND OLLOW THIS SA ETY IN ORMATION CARE ULLY.
SAVE THESE INSTRUCTIONS

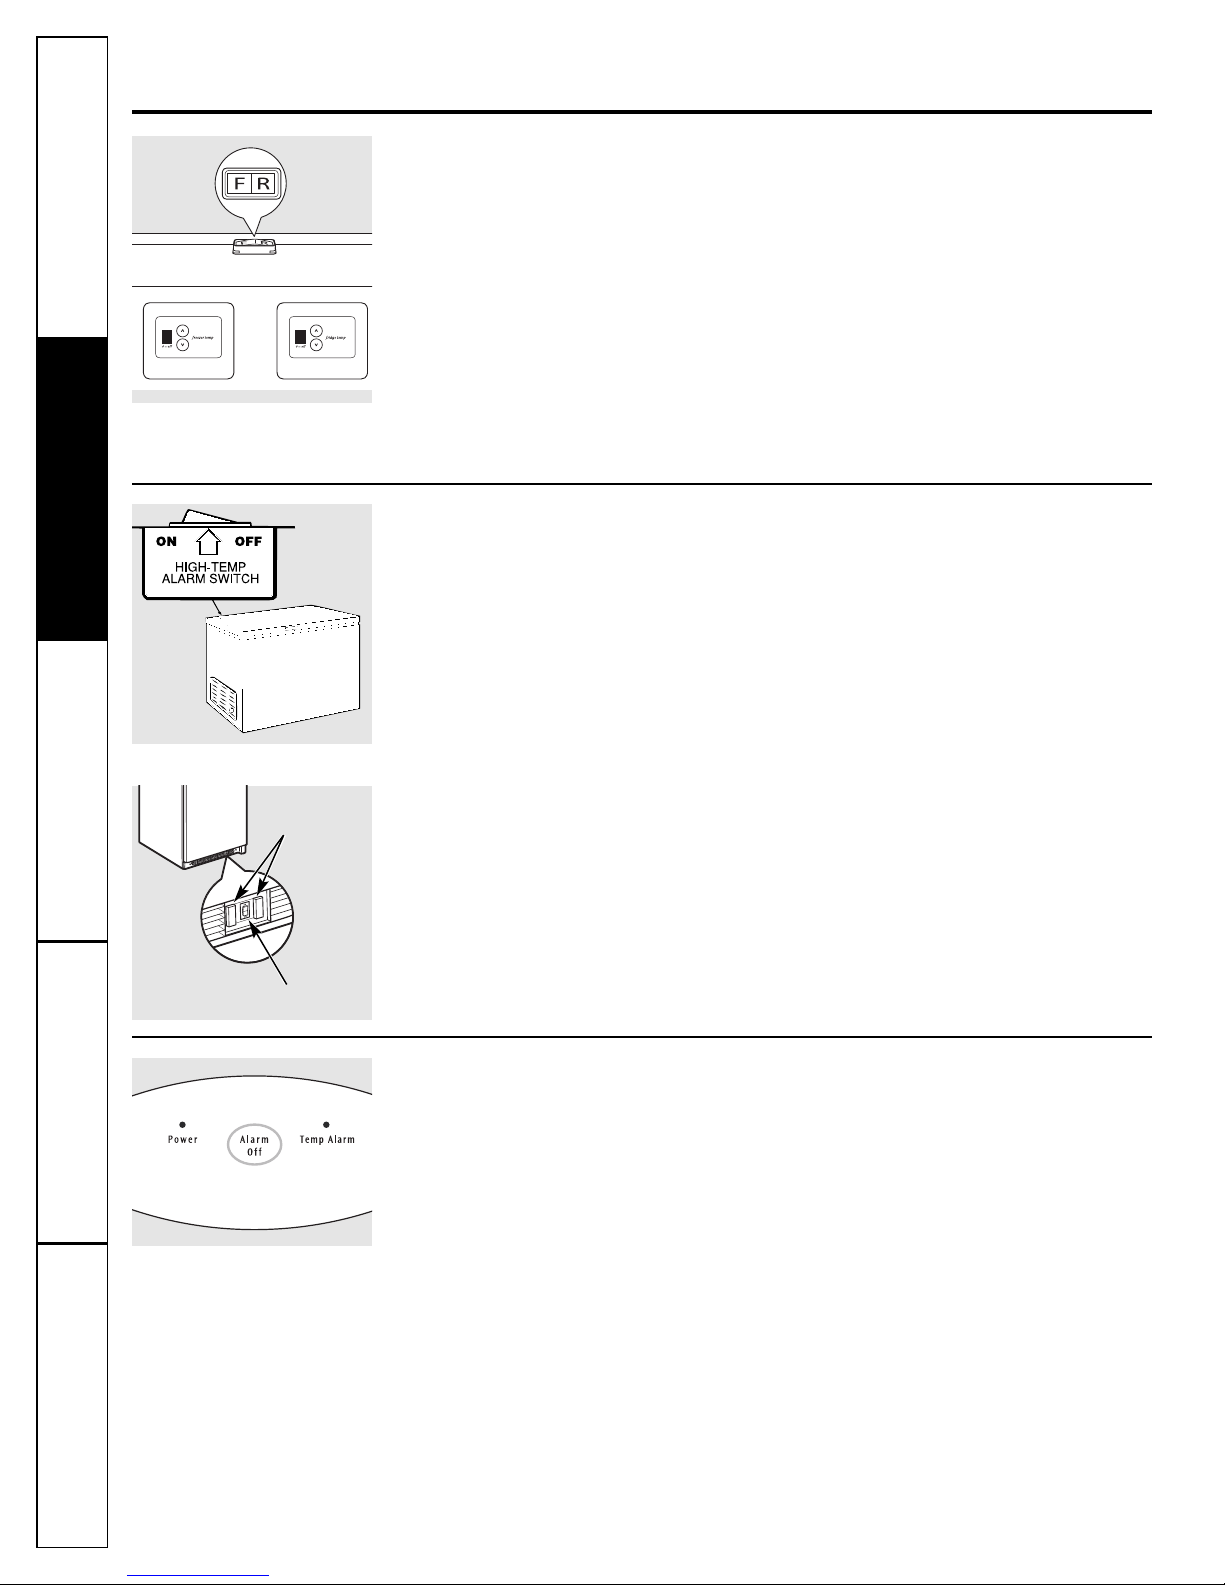
T is electronic temperature control is located on
t e front of t e freezer door. T e temperature is
factory-preset to provide satisfactory food
storage temperatures. To adjust t e temperature
setting, press Colder to decrease temperatures
and Warmer to increase temperatures. Allow
several ours for t e temperature to stabilize
between adjustments.
To turn t e freezer off, press Warmer until t e
display reads “0.” To turn t e freezer on, press
Colder until t e display s ows “4” or t e desired
setting.
To lock t e controls, press Alarm Reset for
3 seconds. T e display will read “L.” To unlock
t e controls, press Alarm Reset for 3 seconds.
T e display will read “U” and t en display
t e current temperature.
T is electronic control as a temperature
alarm feature. If t e inside temperature
exceeds 23°F. An alarm will sound if t e
freezer temperature reac es unsafe levels.
T e alarm operates on ouse old electricity.
If t e power fails, t e alarm will not perform.
W en t e freezer is initially plugged in, t e
red Hi Temp lig t will come on and a buzzer
will sound. T e indicator lig t will stay on until
t e freezer temperature reac es 23°F or
below. To silence t e buzzer, pus Alarm
Reset. If t e temperature in t e freezer goes
above 23°F for any reason, t e Hi Temp lig t
will come on and t e buzzer will sound every
our until t e temperature is below 23°F. To
silence t e buzzer, pus Alarm Reset.
If an “E” appears on t e display, contact your
aut orized service tec nician for repair. T e
freezer will continue to run until serviced.
Consumer SupportTroubleshooting Tips
Operating Instructions
Sa ety Instructions Installation
Instructions
About the operation o your reezer. ge.com
Starting the reezer
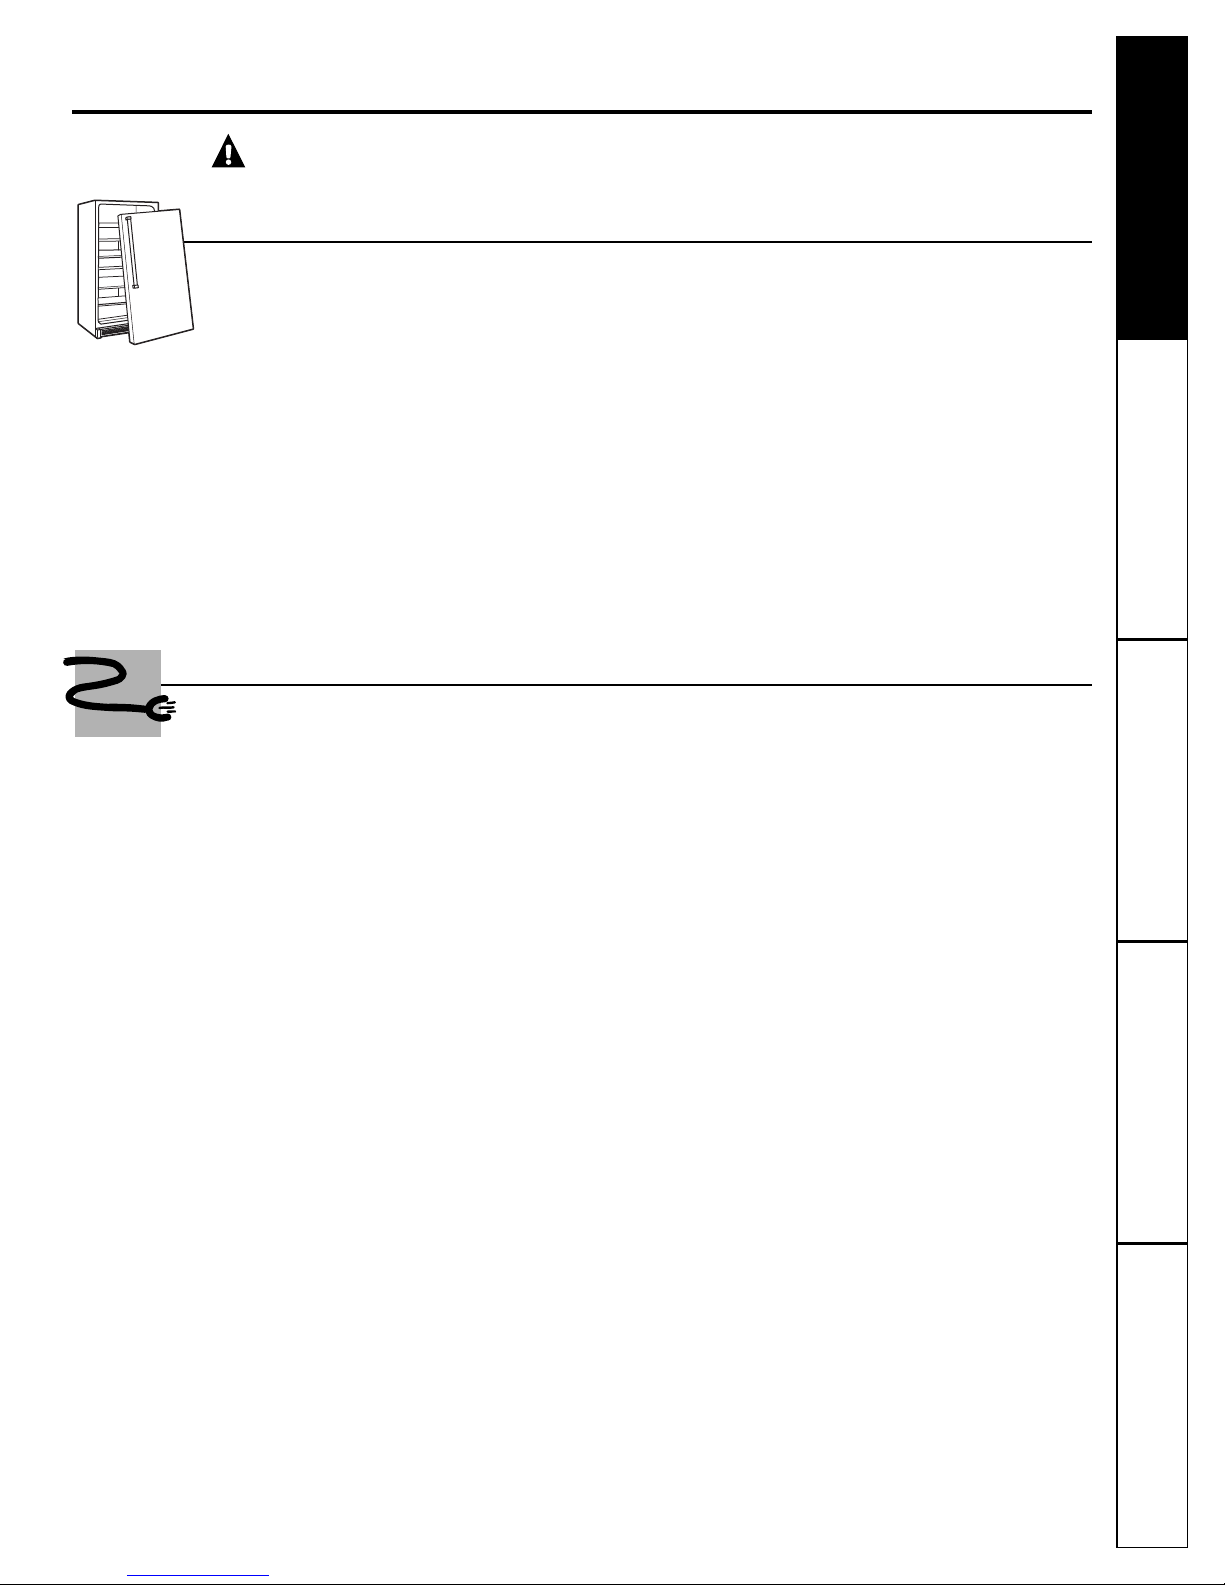
Clean t e inside of t e freezer wit a mild solution of baking soda and water (see Care and Cleaning).
Connect cord to power outlet.
On models wit a Temperature Monitor or Hig -Temp Alarm Switc , set t e switc to t e OFF position.
Make sure t e temperature control is set at 4.
Allow freezer to operate for at least four ours before placing food inside.
On models wit a Temperature Monitor or Hig -Temp Alarm Switc , set t e switc to t e ON position.
6
5
4
3
2
1
5
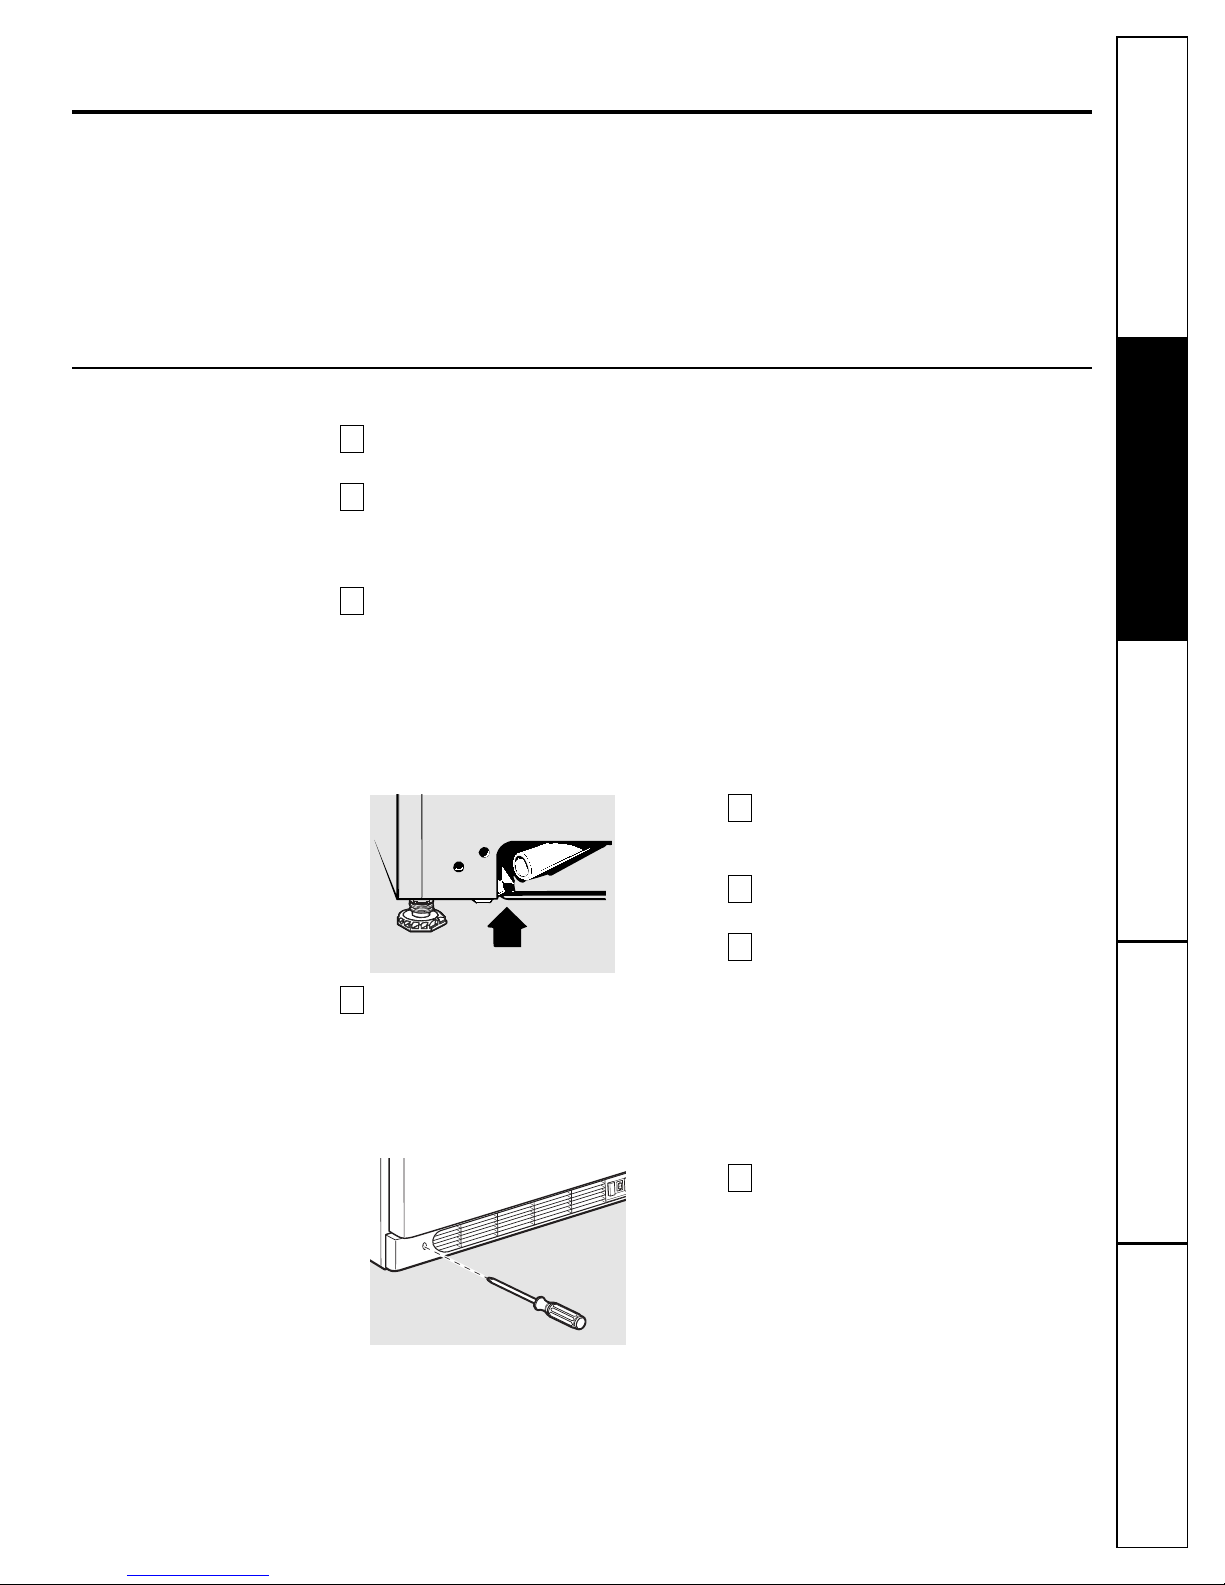
Electromechanical Temperature Control (Chest and some Upright models)
T e electromec anical temperature control
is preset to give satisfactory food storage
temperatures. It is adjustable to provide a
range of temperatures. Allow several ours
for t e temperature to stabilize between
adjustments.
T e electromec anical temperature control is
on t e outside left on t e c est models and
inside t e freezer on uprig t models.
Temperature Control
For safe food storage, allow 4 ours for t e
freezer to cool down completely. T e freezer
will run continuously for t e first several
ours. Foods t at are already frozen may be
placed in t e freezer after t e first few ours
of operation. Unfrozen food s ould NOT be
placed in t e freezer until it as operated for
4 ours. Allow several ours after eac one-
step adjustment for t e freezer temperature
to stabilize.
W en loading t e freezer, freeze only
3 pounds of fres food per cubic foot of
space at a time. Distribute packages evenly
t roug out t e freezer. It is not necessary to
turn t e control knob to a colder setting w ile
freezing food.
Turning t e control to OFF stops t e cooling
process but does not s ut off power to t e
freezer.
Electronic Temperature Control (some Upright rost- ree models)

6
T is feature is designed to provide a warning
if t e inside temperature reac es an unsafe
level. T e Temp Alarm feature operates on
ouse old electricity. It will not function if
ouse old electricity is interrupted.
W en t e freezer is initially plugged in, t e
red Temp Alarm indicator lig t blinks. T e
indicator lig t will continue to blink until t e
freezer as reac ed a safe freezing
temperature. If a malfunction causes an
unsafe temperature inside t e freezer, t e
red lig t will blink and t e buzzer will sound.
To silence t e buzzer, press t e ALARM OFF
button. T e indicator lig t will continue to
blink until a safe freezing temperature is
again reac ed. If t e problem is not solved
wit in twelve (12) ours, t e buzzer will turn
on again. If t e ALARM OFF button is not
pressed, t e buzzer will turn itself off
automatically after 48 ours, but t e red
Temp Alarm lig t will continue to blink.
High-Temp Alarm Switch (on some models)
An alarm will sound if t e freezer
temperature reac es unsafe levels. T e
alarm operates on ouse old electricity. If
t e power fails, t e alarm will not perform.
An ON/OFF switc allows t e temperature
alarm to be deactivated if desired. T e freezer
is s ipped wit t e switc in t e OFF position.
After t e freezer as run long enoug to
lower t e temperature, you may set t e
switc to t e ON position.
CAUTION: Adding more than 3 pounds
(1.5 kg) of warm food per cubic foot of
freezer capacity can trigger the alarm.
To activate the alarm, set t e switc to t e
ON position.
To deactivate the alarm, set t e switc to
t e OFF position.
Convertible Freezer/Re rigerator (some Upright rost- ree models)
T e convertible model can operate as eit er a
refrigerator or a freezer. T e selection is made
using t e switc at t e back of t e unit
marked F and R. Wit t e switc in t e F
position, t e freezer controls below t is switc
and to t e left become active. Wit t e switc
in t e R position, t e refrigerator controls
below t is switc and to t e rig t become
active. Placing t e switc in t e middle
position will turn off t e unit completely and
will disable all cooling functions.
T e temperature on t is model is preset. To
adjust t e temperature, pus t e UP button
for warmer and t e DOWN button for cooler
temperatures. Allow several ours for t e
temperature to stabilize between
adjustments.
W en in t e refrigerator mode, t e Freeze
Control Feature maintains proper interior
refrigerator temperature even if placed in an
area w ere t e temperature is 10
°
F (-12
°
C).
Located on back of lid.
Electronic Temperature Alarm (some Electronic Chest models)
Indicator
Lights
On/Off
Switch
Consumer Support Troubleshooting Tips Installation
Instructions Sa ety Instructions
Operating Instructions
About the operation o your reezer.

ge.com
Freezer Shelves (on some models)
T e spacers (on some models) are used to
secure t e s elves during s ipping. Remove
and discard t e spacers.
Small objects are a choke hazard to
children.
Key-Ejecting Lock (on some models)
T e key for t e spring-loaded lock is
automatically ejected–key will not remain in
lock in eit er t e open or closed position.
Keep the key out of reach of children and
away from the freezer.
Power-On Light (on some models)
T e Power-On Lig t indicates t at t e freezer
is properly connected to t e electrical power.
T e lig t glows even w en t e temperature
control is turned off.
Tilt-Out Shel (some Upright models)
T is s elf is located inside on t e freezer door
and provides additional storage space. To
access an item, tilt t e top of t e “basket”
s elf down.
Slide-Out Basket (some Upright models)
A slide-out basket provides separate storage
space for items t at are difficult to store on
s elves. It is located at t e bottom of t e
freezer. To remove t is basket, pull out and
lift up.
Interior Light
T e interior lig t comes on w en t e freezer
door is opened. To replace t e bulb, set t e
temperature control to OFF and unplug
t e electrical cord. Replace t e bulb by
unscrewing it from t e fixture. Replace
wit t e same size and wattage.
Adjustable Shelves (Upright models)
T e adjustable s elves can be moved to
different levels wit in t e freezer. To move t e
s elf, grasp t e s elf and pus to eit er t e
rig t or t e left to disengage t e ends of t e
s elf from placement oles in t e freezer. Tilt
t e s elf to release t e ot er side. To install
t e s elf, reverse t ese directions.
Some models will ave glass s elves and
some models will ave wire s elves.
Upright Models
Wire Shelf Placement Holes Glass Shelf Placement Holes
Consumer SupportTroubleshooting Tips
Operating Instructions
Sa ety Instructions Installation
Instructions
7

8
Consumer Support Troubleshooting Tips Installation
Instructions Sa ety Instructions
Operating Instructions
About the operation o your reezer.
So t Freeze Zone (some Upright models)
T e Soft Freeze Zone is specifically for foods
suc as ice cream. It is designed to maintain
a ig er temperature t an t e rest of t e
freezer.
Basket Divider (some Upright models)
Organize your freezer basket by using
t e basket dividers supplied. To c ange
t e location, rotate t e divider in a
counterclockwise direction and pull up until it
is free from t e basket. Align t e center of t e
divider wit t e center of t e line in t e
bottom of t e basket as s own in t e figure.
Rotate t e divider clockwise until it snaps into
place.
Crispers (some Upright models)
T e crispers are designed for storing fruits,
vegetables and ot er fres produce. Items
s ould be was ed and drained well before
placing in t e crisper drawers.
One of t e crisper drawers comes equipped
wit a Humidity Control. T is allows you to
control t e umidity wit in t at crisper. T is
can extend t e life of fres vegetables t at
keep best in ig umidity.
Adjustable Door Bins (some Upright models)
T e adjustable door bins provide flexible
storage space. T e number of bins varies by
model.
Wire Shel Bookend (some Upright models)
Use t ese andy bookends to keep various
boxed items stored neatly in your freezer.
To adjust t e location, simply unsnap t e
bookend from t e wire s elf and snap into
t e next desired location.
Lo
Hi

In most climates, defrosting will be necessary
only about twice a year.
To have your freezer operate most
efficiently, do not permit more than 1/2 ″
(13 mm) o rost to accumulate on the
shelves.
To remove frost, scrape wit a plastic or
wood spatula or scraper.
Do not use an ice pick or sharp-edged
instrument as it may damage or scratch
the freezer.
Do not use any electrical device in
de rosting your reezer.
For Complete De rosting
Turn t e temperature control to OFF and
unplug t e freezer.
Remove all food and place it in
corrugated boxes, insulated bags, picnic
coolers, etc. Use towels and newspapers
for insulation as needed.
Wit t e door/lid open, use pans of
ot water to speed loosening of frost.
Remove large pieces before t ey melt.
On models wit out a defrost drain, place
towels or newspapers on t e freezer
bottom to catc t e frost. T e frost will
loosen and fall. Remove towels and/or
newspapers.
a. Some Uprig t models ave a ose
adapter and a drain ose be ind t e
base grille w ic carry t e defrost
water out from t e freezer. Remove
t e base grille; t en remove t e drain
plug and let t e defrost water drain
into a pan.
To remove the base grille (on some
models), remove t e two P illips- ead
screws and pull t e grille away from
t e freezer.
b. Some C est models ave a defrost
water drain at t e front and a ose
adapter t at is packaged in a bag in
t e bottom of t e freezer. Remove
t e drain cap on t e front of t e
freezer, insert t e ose connector
and attac t e ose. Remove t e
drain plug inside t e cabinet.
NOTE: Water may drip from t e
back flange of t e lid cover during
defrosting. T is is normal. Ice builds
up in t e lid insulation w en t e lid is
open for adding or removing food,
and melts during t e defrosting
operation.
Sponge excess water from t e bottom
of t e freezer as it collects to prevent
overflowing.
After defrosting, clean t e inside of t e
freezer (see Care and Cleaning).
a. On Uprig t models, be sure to replace
t e drain plug and return t e drain
tube to its position. Replace t e
base grille.
b. On C est models, replace t e drain
plug inside t e cabinet and t e cap
on t e defrost drain. Fold over and
dry t e gasket on t e inge side of
t e lid.
Plug in t e freezer. Return t e
temperature control to its previous
position and return food to t e freezer.
8
7
6
5
4
3
2
1
Drain Hose
9
De rosting instructions. (for Manual Defrost models) ge.com
Consumer SupportTroubleshooting Tips
Operating Instructions
Sa ety Instructions Installation
Instructions

Consumer Support Troubleshooting Tips Installation
Instructions Sa ety Instructions
Operating Instructions
Care and cleaning o the reezer.
Cleaning Your Freezer
■Outside. Protect t e paint finis . T e finis
on t e outside of t e freezer is a ig
quality, baked-on paint finis . Wit proper
care, it will stay new-looking and rust-free
for years. Apply a coat of appliance polis
wax w en t e freezer is new and t en at
least twice a year. Appliance polis wax
also works well to remove tape residue
from freezer surfaces.
Keep the inish clean. Wipe wit a clean
clot lig tly dampened wit appliance
polis wax or mild liquid dis was ing
detergent. Dry and polis wit a clean, soft
clot . Do not wipe t e freezer wit a soiled
dis was ing clot or wet towel. Do not use
scouring pads, powdered cleaners, bleac ,
or cleaners containing bleac .
CAUTION: Care should be taken in moving
the freezer away from the wall. All types of
floor coverings can be damaged,
particularly cushioned coverings and those
with embossed surfaces.
■Inside. Clean t e inside of your freezer at
least once a year. We recommend t at t e
freezer be unplugged before cleaning. If t is
is not practical, wring excess moisture out
of sponge or clot w en cleaning in t e
vicinity of switc es, lig ts or controls.
Use warm water and baking soda
solution–about a tablespoon of baking
soda to a quart of water. Rinse t oroug ly
wit water and wipe dry. Do not use
cleaning powders or ot er abrasive
cleaners. DO NOT was removable parts in
a dis was er.
An open box of baking soda in t e freezer
will absorb stale freezer odors. C ange t e
box every t ree mont s.
CAUTION: Damp objects stick to cold metal
surfaces. DO NOT touch interior metal
surfaces with wet or damp hands.
CAUTION: reezer must be unplugged to
avoid electrical hazard from power source
when defrosting unit.
Some uprig t freezers are frost-free and
defrost automatically, but s ould be
cleaned occasionally.
10
No De rosting (on No- rost models)
You never ave to defrost your new No-Frost
freezer. It as been pre-set at t e factory to
defrost itself automatically.
Package labels always remain clearly legible,
and packages will remain easy to separate
and remove.
During defrosting, a slig t noise may be
noticed if t e door is opened w ile t e freezer
is in t e automatic defrosting cycle.

11
ge.com
Consumer SupportTroubleshooting Tips
Operating Instructions
Sa ety Instructions Installation
Instructions
To Remove the Freezer Door (on Non-Electronic Control Upright models)
Remove t e plastic inge cover by eit er
lifting it off or folding it back (depending
on model).
Remove t e screws olding t e inge
to t e top of t e cabinet using a
screwdriver, 5/16″socket driver or wrenc
(depending on model).
Remove t e top inge from t e cabinet
and lift t e door up and off t e lower
inge pin. Set t e door aside.
Remove t e two screws from t e bottom
inge.
To replace t e doors, reverse t e order of t e
above instructions.
CAUTION: It is very important that all hinge
screws are securely tightened to ensure a
secure assembly and prevent hinge slippage.
4
3
2
1
(on some models)
Hinge
Screws
Top Hinge
Plastic Hinge
Cover
Lid Removal (on Chest models)
See lid removal instructions on eit er t e
back of t e cabinet or t e inge label.
To Remove the Freezer Door (on Electronic Control Upright models)
T e inge screws are tamperproof.
Please ave an aut orized service
tec nician remove t e door.

Care and cleaning o the reezer.
Preparing or Vacation
To maintain freezer in operation during
vacations, be sure your ouse power is not
turned off. For sure protection of freezer
contents, you may want to ask a neig bor
to c eck t e power supply and freezer
operation every 48 ours.
For extended vacations or absences, you
may prefer to move your frozen foods to a
storage locker temporarily. If your freezer is
to be left empty, disconnect power cord plug
from wall outlet. To prevent formation of
odors, place open box of baking soda in
freezer and leave freezer door/lid open.
W en t e freezer is not operating, it can be
left in an un eated ouse or room wit out
damage to cabinet or mec anism.
Preparing to Move
Disconnect t e power cord plug from t e wall
outlet. Remove foods, defrost (on Manual
Defrost models) and clean t e freezer.
Secure all loose items suc as grille and
s elves by taping t em securely in place
to prevent damage.
Be sure freezer stays in uprig t position
during actual moving and in van. T e
freezer must be secured in van to prevent
movement. Protect outside of freezer wit
blanket.
In Case o Extended Power Failure
■Keep freezer door/lid closed. Your freezer
will keep food frozen for 24 ours provided
warm air is not admitted.
■If freezer is out of operation for 24 ours or
more, add dry ice. Leave ice in large pieces.
Add more ice as required.
WARNING: Handling of dry ice can cause
freezing of the hands—gloves or other
protection is recommended.
■If dry ice is not available, move food to a
frozen food locker temporarily—until power
is restored.
■T e freezer s ould
be located in t e
coolest area of t e
room, away from
eat-producing
appliances or
eating ducts, and
out of direct sunlig t.
■Let ot foods cool to room temperature
before placing in t e freezer. Overloading
t e freezer forces t e compressor to run
longer. Foods t at freeze too slowly may
lose quality or spoil.
■Be sure to wrap foods properly, and wipe
containers dry before placing t em in t e
freezer. T is cuts down on frost buildup
inside t e freezer.
■Freezer s elves s ould not be lined wit
aluminum foil, wax paper or paper
toweling. Liners interfere wit cold air
circulation, making t e freezer less
efficient.
■Organize and label food to reduce door
openings and extended searc es. Remove
as many items as needed at one time, and
close t e door as soon as possible.
Consumer Support Troubleshooting Tips Installation
Instructions Sa ety Instructions
Operating Instructions
12

Preparing to install the reezer. ge.com
Read these instructions completely and care ully.
reezer Location
Your freezer s ould be conveniently located for
day-to-day use in a dry, well-ventilated room.
Do not install t e freezer w ere t e temperature will
go below 0°F or above 110°F, because it will not
maintain proper temperatures.
Be sure to install your freezer on a floor strong
enoug to support it w en it is fully loaded.
T e freezer must be solidly positioned on t e floor
if it is to function at its best. S ims may be used to
accomplis t is w erever t e floor is too uneven.
If t e place selected for t e freezer is damp or moist,
place 2 X 4’s (51 mm X 102 mm) under its entire
lengt to ensure adequate support.
Clearances
On all models, allow 3″(76 mm) on top, back and
sides for proper air circulation.
Adjustable Legs (on Upright models)
Legs at t e front corners of t e freezer s ould
be set so t e freezer is firmly positioned on
t e floor, and t e front is raised just enoug
so t e door closes easily w en opened about
alfway.
Turn right
to lower
Turn left
to raise
Unit Loading (on Upright models)
CAUTION: To allow the door to close and seal
properly, DO NOT let food packages extend
past the front of the shelves.
Level Freezer
Uprig t Models:
Discard crate screws and wood base. Use
a carpenter’s level to level t e freezer from
back to front. Adjust t e plastic leveling feet
in front 1/2 bubble ig er so t e door closes
easily w en left open.
C est Models:
If needed, add metal or wood s ims between
foot pads and floor.
Consumer SupportTroubleshooting Tips
Operating Instructions
Sa ety Instructions Installation
Instructions
13

14
Be ore you call or service…
Troubleshooting Tips
Save time and money! Review the charts on the following
pages first and you may not need to call for service.
Problem Possible Causes What To Do
Freezer does not Temperature control •Move t e control to a temperature setting.
operate or Power-On in OFF position.
Light is not on Freezer is unplugged. •Pus t e plug completely into t e outlet.
The fuse is blown/circuit •Replace fuse or reset t e breaker.
breaker is tripped.
Freezer starts/stops Door/lid left open. •C eck to see if package is olding door/lid open.
too requently Too frequent or too long
door/lid openings.
Temperature control •See About the operation of your freezer.
set too cold.
Freezer operates Door/lid left open. •C eck to see if package is olding door/lid open.
too long Too frequent or too long
door/lid openings.
Temperature control •See About the operation of your freezer.
set too cold.
nadequate air circulation •See Preparing to install the freezer.
space around cabinet.
Room or outside weather is hot. •It’s normal for t e freezer to work arder under t ese
conditions.
Freezer has been disconnected •It takes 4 ours for t e freezer to cool down completely.
recently for a period of time.
Large amounts of warm or hot •Warm food will cause t e freezer to run more until t e
food have been stored recently. desired temperature is reac ed.
Normal operating characteristics.
These things are normal and
do not indicate a need for service.
■A warm cabinet exterior as t e refrigeration system transfers eat from t e inside to t e outside t roug t e
exterior cabinet walls.
■T e sound of t e ig -efficiency compressor motor.
■On No-Frost models, t e sound of water dripping as it melts from t e evaporator and escapes to t e drain pan
during defrost cycle.
■On No-Frost models, t e sound of t e fan circulating air wit in t e interior of t e cabinet providing a consistent
temperature t roug out.
Consumer Support Troubleshooting Tips Installation
Instructions Sa ety Instructions
Operating Instructions

ge.com
Problem Possible Causes What To Do
Noisy operation Floor may be weak, causing •Placing 2 X 4’s (51 mm X 102 mm) under t e lengt of
or cabinet vibrates freezer to vibrate when t e freezer will elp support it and may reduce vibration.
compressor is on.
Cabinet is not positioned •Adjust legs (on Uprig t models). See Preparing to
solidly on floor. install the freezer. Or use s ims for uneven floor.
Freezer is touching the wall. •Level freezer or move slig tly. See Level reezers.
Freezer temperature Door/lid left open. •C eck to see if package is olding door/lid open.
too warm Too frequent or too long
door/lid openings.
Temperature control is set •Turn control to a colder setting. Allow several ours for
too warm. t e temperature to stabilize.
Large amounts of water or hot food
•Wait until t e freezer as ad a c ance to reac its
may have been stored recently. selected temperature.
Freezer has been disconnected •Freezer requires 4 ours to cool down completely.
recently.
Foods de rosting Temperature control •Move t e control to a temperature setting.
in OFF position.
Freezer is unplugged. •Pus t e plug completely into t e outlet.
The fuse is blown/circuit •Replace fuse or reset t e breaker.
breaker is tripped.
Door/lid left open. •C eck to see if package is olding door/lid open.
Too frequent or too long
door/lid openings.
Freezer temperature Temperature control •See About the operation of your freezer.
too cold set too cold.
Moisture orms on Not unusual during •Wipe surface dry.
outside o cabinet periods of high humidity.
Door may not be seating properly, •See Preparing to install the freezer.
causing cold air from inside the
freezer to meet warm moist air
from the outside.
Interior light does No power at outlet. •Replace fuse or reset t e breaker.
not work Freezer is unplugged. •Pus t e plug completely into t e outlet.
(on some models)
Light bulb burned out. •Replace bulb.
Door/lid won’t ully Legs need adjusting. •See Preparing to install the freezer.
close by itsel Package holding door/lid open.
Slow starting time Built-in overload protection.
a ter being o
Excessive rost Door/lid left open. •C eck to see if package is olding door/lid open.
buildup Too frequent or too long
door/lid openings.
Not unusual during
periods of high humidity.
Consumer SupportTroubleshooting Tips
Operating Instructions
Sa ety Instructions Installation
Instructions
15

16
Consumer Support Troubleshooting Tips Installation
Instructions Sa ety Instructions
Operating Instructions
Be ore you call or service…
Problem Possible Causes What To Do
Freezer external sur ace The external freezer walls can be •T is is normal w ile t e compressor works to transfer
temperature is warm as much as 30°F warmer than eat from inside t e freezer cabinet.
room temperature.
Louder sound levels Modern freezers have increased •T is is normal. W en t e surrounding noise level is low,
whenever reezer is on storage capacity and more stable you mig t ear t e compressor running w ile it cools
temperatures. They require a t e interior.
high-efficiency compressor.
Longer sound levels Freezer operates at higher •T is is normal. Sound will level off or disappear as
when compressor pressures during the start of freezer continues to run.
comes on the ON cycle.
Popping or cracking sound
Metal parts undergo expansion and
•T is is normal. Sound will level off or disappear as
when compressor comes on
contraction, as in hot water pipes. freezer continues to run.
Bubbling or gurgling
Refrigerant (used to cool freezer) is
•T is is normal.
sound, like boiling water circulating throughout the system.
Moisture orms on inside Weather is hot and humid, which •T is is normal.
reezer walls increases internal rate of frost
buildup.
Door may not be seating properly. •See Preparing to install the freezer.
Door is kept open too long, or is •Open t e door less often.
opened too frequently.
Odors in reezer nterior needs to be cleaned. •Clean interior wit sponge, warm water and baking soda.
Foods with strong odors are in •Cover t e food tig tly.
the freezer.

17
General Electric Company
Warranty Registration Department
P.O. Box 32150
Louisville, KY 40232-2150
GE Service Protection Plus™
GE, a name recognized worldwide for quality and dependability toget er wit Assurant Solutions, offers you
Service Protection Plus™—compre ensive protection on your appliances.*
Benefits nclude:
• Prompt, reliable service from GE Aut orized Servicers
• Convenient ours designed to suit your busy sc edule
• Quality replacement parts
• T e dependability of GE, a name recognized and trusted worldwide
• Ask about our interest-free payment plans
With Service Protection Plus you can expect:
• An extended service plan t at limits unexpected repair bills
• Service coverage for most major brands
• Unlimited service calls for t e lengt of your contract, or credit toward a replacement product
• Service coverage for covered operating parts and labor on appliances and ome electronics t at fail during normal single family
ouse old use
• Your satisfaction is our goal. We strive to provide you wit excellent service in a professional and timely manner.
Place your confidence in GE and call us in the U.S. toll-free at 1.800.626.2224 for more information.
*Most brands covered up to 15 years old in the continental U.S.
SPP is a trademark of General Electric Company.
Please place in envelope and mail to:
✁Cut ere

Consumer Product Ownership Registration
mportant
Mail
Today!
GE Consumer & ndustrial
Appliances
General Electric Company
Louisville, KY 40225
ge.com
First
Name
Mr. ■■Ms. ■■Mrs. ■■Miss ■■
Street
Address
City State
Date Placed
In Use
Mont Day Year
Zip
Code
Apt. #
Last
Name
P one
Number __
Consumer Product Ownership Registration
Dear Customer:
T ank you for purc asing our product and t ank you for placing your confidence in us.
We are proud to ave you as a customer!
Follow these three steps to protect your new appliance investment:
mportant: f you did not get a registration card with your
product, detach and return the form below to
ensure that your product is registered, or register
online at www.ge.com.
123
Model Number Serial Number
✁Cut ere
Complete and mail
your Consumer
Product Ownership
Registration today.
Have t e peace of
mind of knowing we
can contact you in
t e unlikely event of
a
safety modification.
After mailing t e
registration below,
store t is document
in a safe place. It
contains information
you will need s ould
you require service.
Our service number is
800.GE.CARES
(800.432.2737).
Read your Owner’s
Manual carefully.
It will elp you
operate your new
appliance properly.
Model Number Serial Number
E-mail Address*
18
* Please provide your e-mail address to receive, via e-mail, discounts, special offers and ot er important
communications from GE Appliances (GEA).
■■ C eck ere if you do not want to receive communications from GEA’s carefully selected partners.
FAILURE TO COMPLETE AND RETURN THIS CARD DOES NOT DIMINISH YOUR WARRANTY RIGHTS.
For information about GEA’s privacy and data usage policy, go to www.ge.com and click on “Privacy
Policy” or call 800.626.2224.

19
OWNERSHIP REGISTRATION
P.O. BOX 1780
MISSISSAUGA, ONTARIO
L4Y 4G1
(FOR CANADIAN CONSUMERS ONLY)
Please place in envelope and mail to:
Veuillez mettre dans une enveloppe et envoyez à :

20
This manual suits for next models
64
Table of contents
Languages:
Other GE Freezer manuals