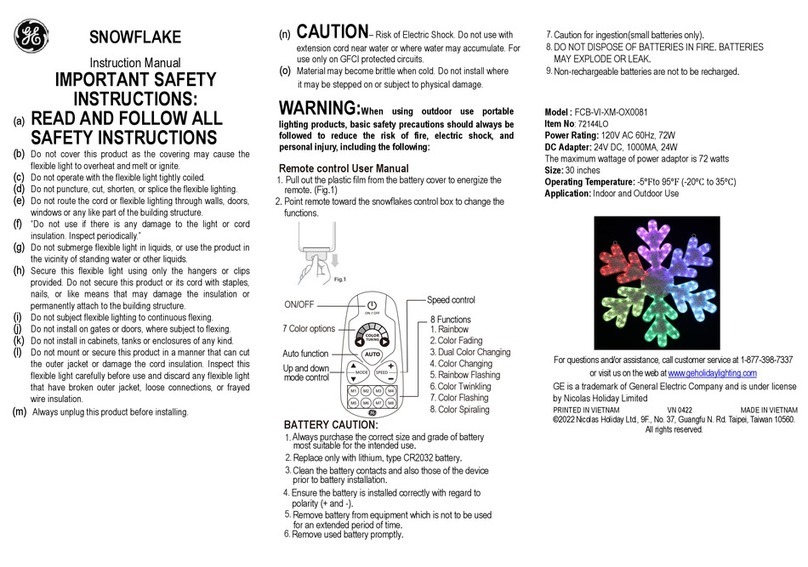
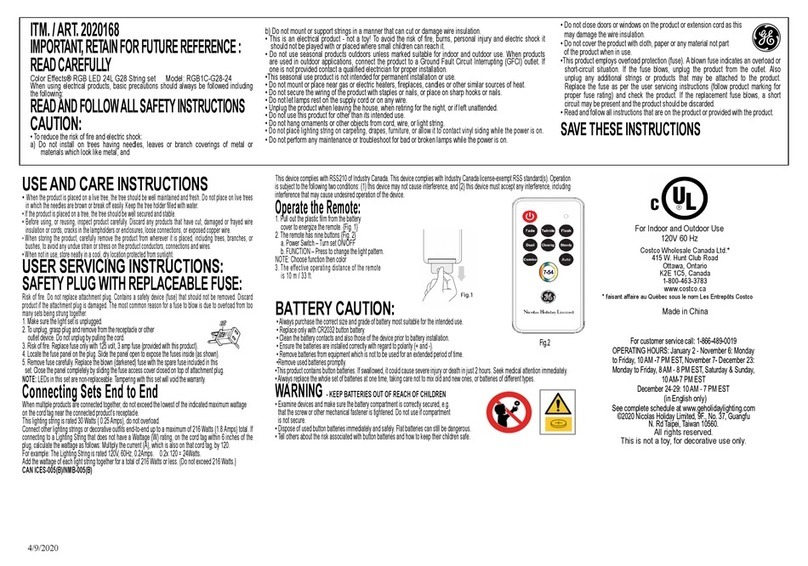
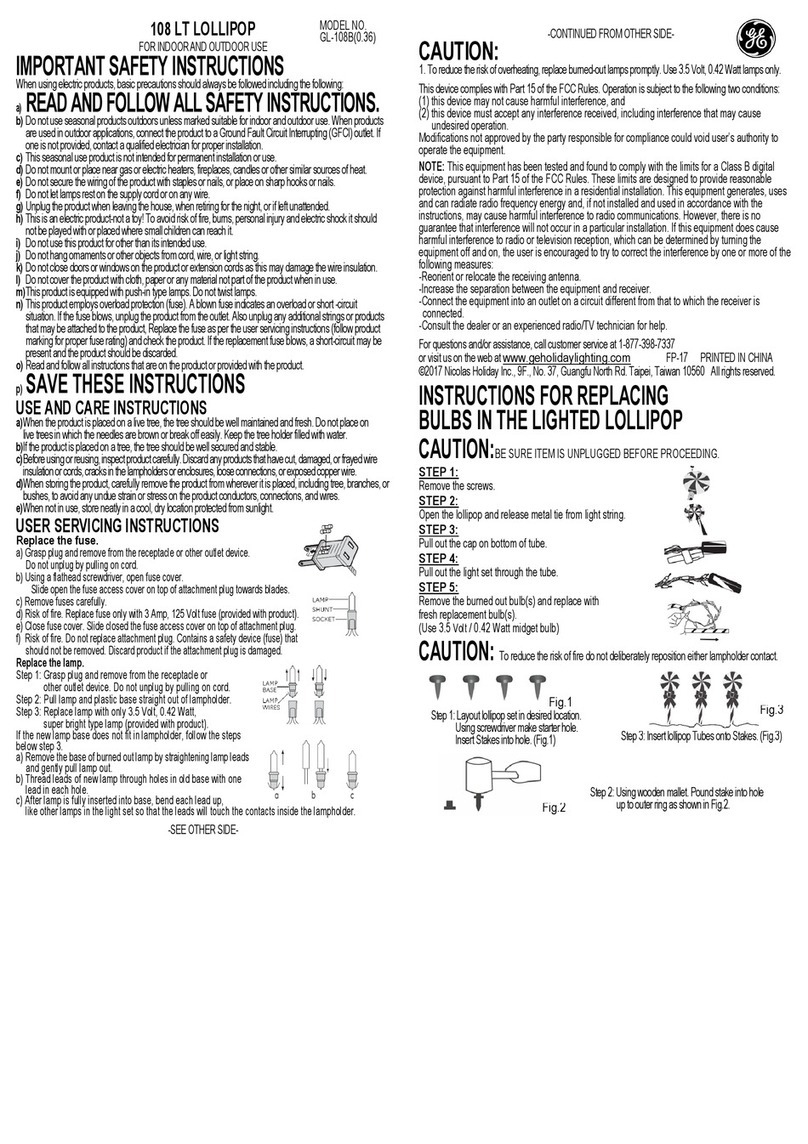
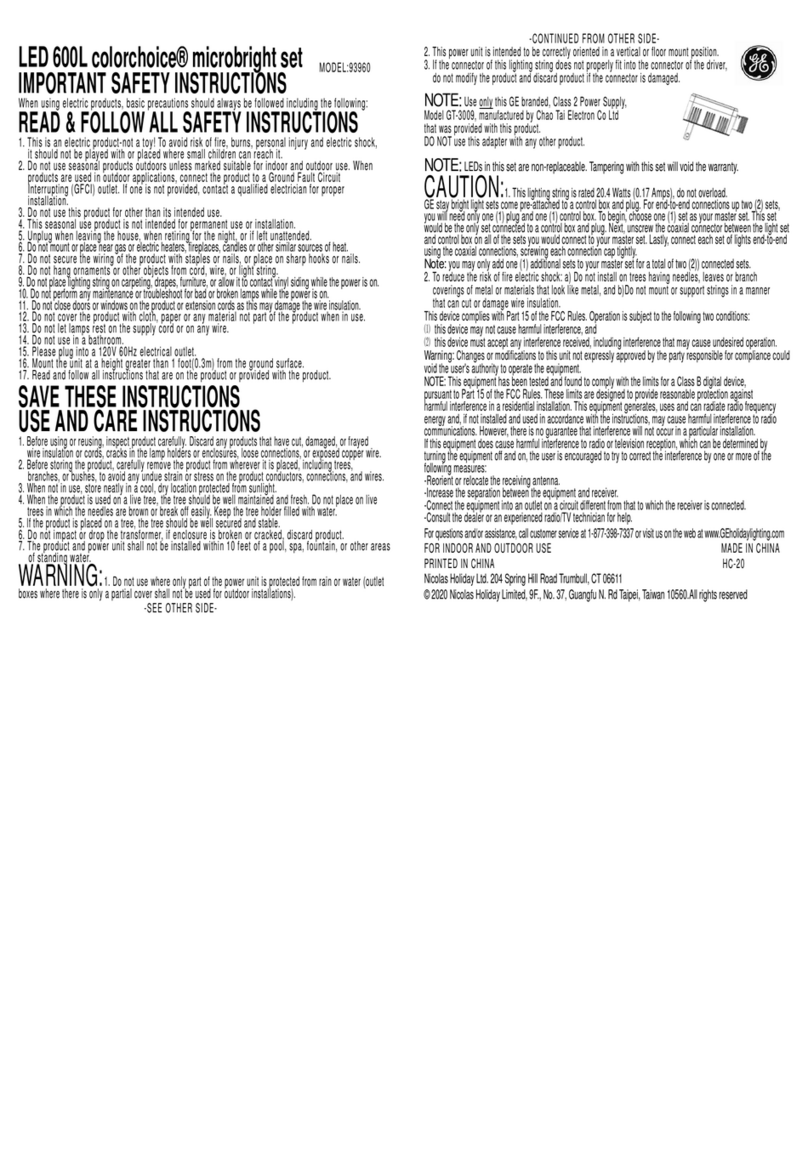
manuals.online logo
Brands
  1. Home
  2. •
  3. Brands
  4. •
  5. GE
  6. •
  7. Home Lighting Accessories
  8. •
  9. GE String-A-Long FPLG-50 User manual

GE String-A-Long FPLG-50 User manual

50L PEARL LIGHTS
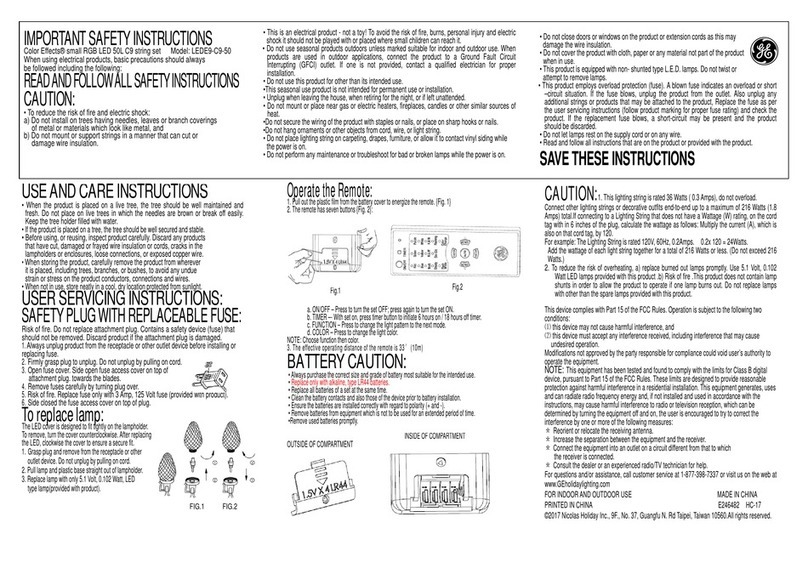
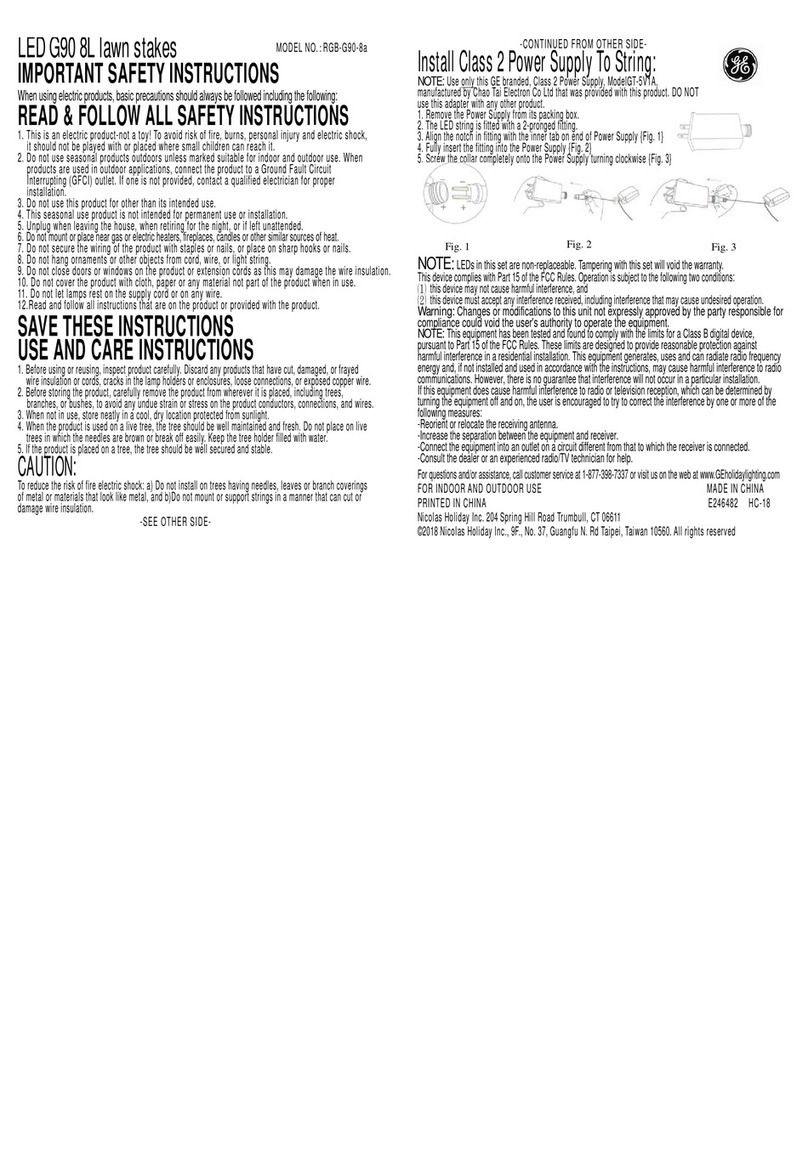
IMPORTANT SAFETY INSTRUCTIONS
When using electric products, basic precautions should always be followed including the following:
a)
READ AND FOLLOW ALL SAFETY INSTRUCTIONS
b)Do not use seasonal products outdoors unless marked suitable for indoor and outdoor use. When
products are used in outdoor applications, connect the product to a Ground Fault Circuit
Interrupting (GFCI) outlet. If one is not provided, contact a qualified electrician for proper installation.
c)This seasonal use product is not intended for permanent installation or use.
d) Do not mount or place near gas or electric heater, fireplaces, candles or other similar sources of heat.
e) Do not secure the wiring of the product with staples or nails, or place on sharp hooks or nails.
f) Do not let the lamps rest on the supply cord or on any wire.
g) Unplug the product when leaving the house, when retiring for the night, or if left unattended.
h) This is an electric product-not a toy! To avoid risk of fire, burns, personal injury and electric shock, it
should not be played with or placed where small children can reach it.
i) Do not use this product for other than its intended use .
j) Do not hang ornaments or other objects from cord, wire, or light string.
k) Do not place lighting string on carpeting, drapes, furniture, or allow it to contact vinyl siding while the power is on.
l) Do not perform any maintenance or troubleshoot for bad or broken lamps while the power is on.
m) Do not close doors or windows on the product or extension cords as this may damage the wire insulation.
n) Do not cover the product with cloth, paper, or any material not part of the product when in use.
o)This product is equipped with push-in type lamps. Do not twist lamps.
p)This product employs overload protection (fuse). A blown fuse indicates an overload or short -circuit
situation. If the fuse blows, unplug the product. Replace the fuse as per the user servicing
instructions(follow product marking for proper fuse rating) and check the product.
If the replacement fuse blows, a short-circuit may be present and the product should be discarded.
q) Read and follow all instructions that are on the product or provided with the product.
SAVE THESE INSTRUCTIONS
USE AND CARE INSTRUCTIONS
a) When the product is placed on a live tree, the tree should be well maintained and fresh. Do not place on
live trees in which the needles are brown or break off easily. Keep the tree holder filled with water.
b)If the product is placed on a tree, the tree should be well secured and stable.
c) Before using or reusing, inspect product carefully. Discard any products that have cut, damaged, or frayed wire
insulation or cords, cracks in the lamp holders or enclosures, loose connections, or exposed copper wire.
d)When storing the product, carefully remove the product from wherever it is placed, including trees, branches,
or bushes, to avoid any undue strain or stress on the product conductors, connections, and wires.
e)When not in use, store neatly in a cool, dry location protected from sunlight.
-SEE OTHER SIDE-
-CONTINUED FROM OTHER SIDE-
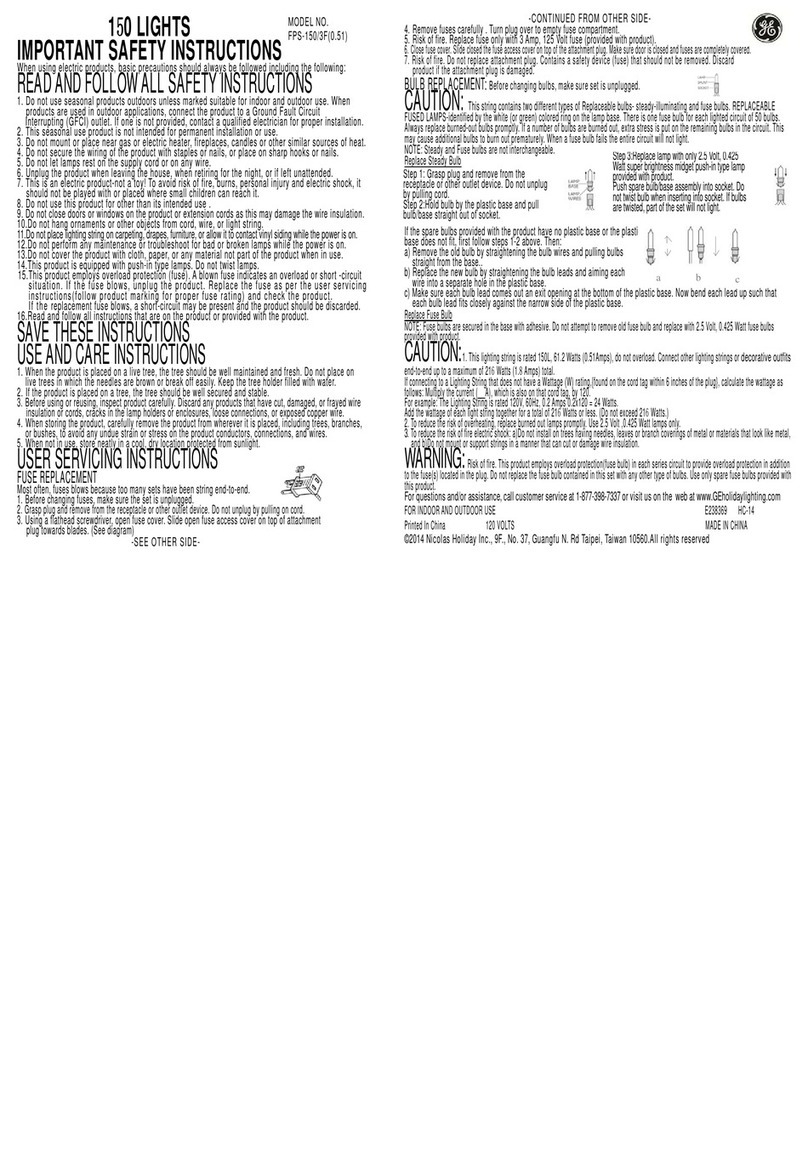
USER SERVICING INSTRUCTIONS
Fuse replacement:
Most often, fuses blow because too many sets have been strung end-to-end.
a)Before changing fuses, make sure the set is unplugged.
b)Grasp plug and remove from the receptacle or other outlet device. Do not unplug by pulling on cord.
c)Using a flathead screwdriver, open fuse cover. Slide open the fuse
access cover on top of attachment plug towards blades.
d)Remove fuses carefully .
e)Risk of fire. Replace fuse only with 3 Amp, 125 Volt fuse (provided with product).
f)Close fuse cover. Slide closed the fuse access cover on top of the attachment plug.
Make sure door is fully closed and fuses are completely covered.
g)Risk of fire. Do not replace attachment plug. Contains a safety device(fuse) that should not be removed. Discard product
if the attachment plug is damaged.
Bulb replacement: Before changing bulbs, make sure set is unplugged.
If the spare bulbs provided with the product have no plastic base or the plastic
base does not fit, first follow steps 1-2 above. Then:
a) Remove the old bulb by straightening the bulb wires and pulling bulbs
straight from the base..
b) Replace the new bulb by straightening the bulb leads and aiming each
wire into a separate hole in the plastic base.
c) Make sure each bulb lead comes out an exit opening at the bottom of the plastic base. Now bend each lead up such that
each bulb lead fits closely against the narrow side of the plastic base.
CAUTION:
1. This lighting string is rated 24 Watts ( 0.2 Amps), do not overload. Connect other lighting
strings or decorative outfits end-to-end up to a maximum of 216 Watts (1.8Amps) total.
If connecting to a Lighting String that does not have a Wattage (W) rating,
{
found on the cord tag within 6 inches of the
plug
}
, calculate the wattage as follows: Multiply the current ( A), which is on the flag-type tag by 120.
For example: Lighting String is rated 120V, 60Hz,0.2Amps. 0.2x 120 = 24 Watts.
Add the wattage of each light string together for a total of 216 Watts or less. (Do not exceed 216 Watts.)
2. To reduce the risk of overheating, replace burned out lamps promptly. Use 2.5 Volt ,0.5 Watt lamps only.
3. To reduce the risk of fire and electric shock: a)Do not install on trees having needles, leaves or branch coverings of metal
or materials that look like metal, and b)Do not mount or support strings in a manner that can cut or damage wire insulation.
For questions and/or assistance, call customer service at 1-877-398-7337 or visit us on the web at www.GEholidaylighting.com
FOR INDOOR AND OUTDOOR USEE238369 HC-18
PRINTED IN CHINA
120 VOLTS
MADE IN CHINA
©2018 Nicolas Holiday Inc., 9F., No. 37, Guangfu N. Rd Taipei, Taiwan 10560
.All rights reserved.
Step 3:Replace lamp with only 2.5 Volt, 0. 5 Watt
super brightness midget push-in type lamp
provided with product.
Push spare bulb/base assembly into socket. Do
not twist bulb when inserting into socket. If bulbs
are twisted, part of the set will not light.
Step 1: Grasp plug and remove from
the receptacle or other outlet device.
Do not unplug by pulling cord.
Step 2:Hold bulb by the plastic base
and pull bulb/base straight out of
socket.
MODEL NO.
:
FPLG-50(0.2)
50LUCESdelaPERLA
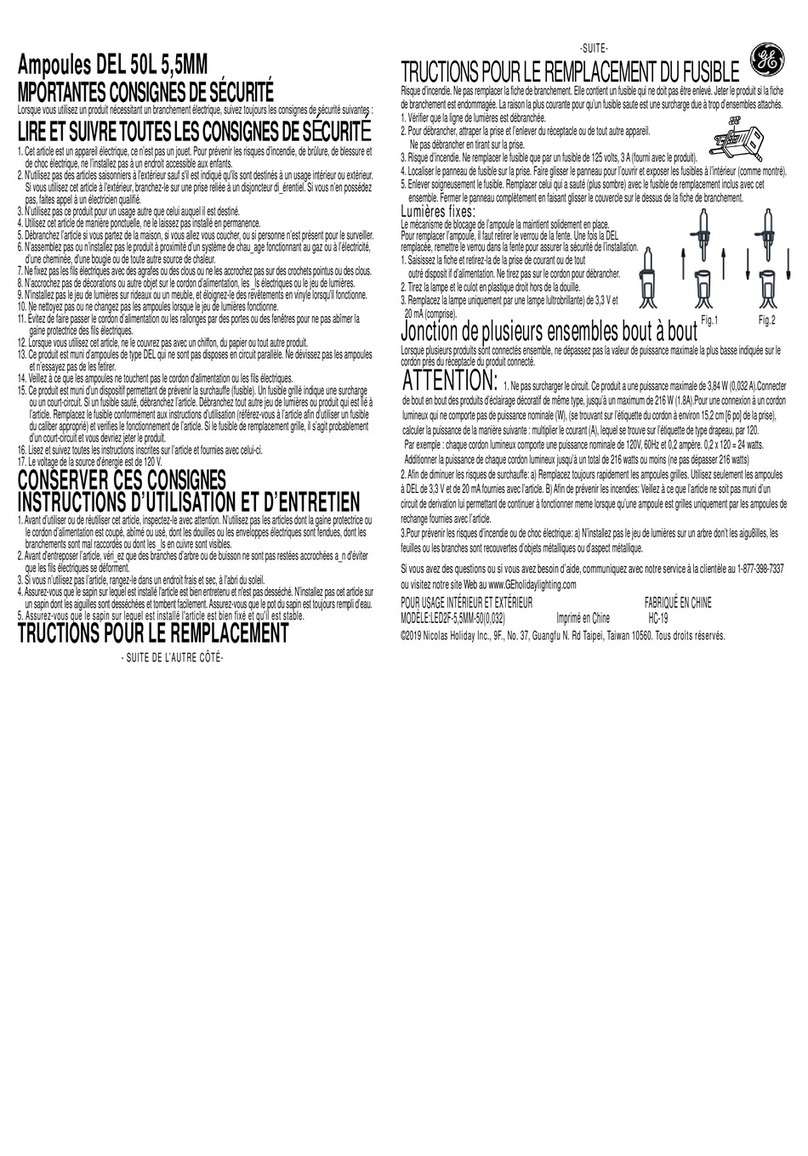
INSTRUCCIONESIMPORTANTESDESEGURIDAD
Cuando se utilizan aparatos eléctricos, siempre se debe tomar ciertas precauciones incluyendo las siguientes:
a)
LEAYSIGATODASLASINSTRUCCIONESSOBRESEGURIDAD
b)No use productos de temporada en exteriores a menos que sean adecuados para el uso en interiores y exteriores.Cuando los productos se
usen en aplicaciones en exteriores, conéctelos a un tomacorriente con interruptor de circuito de falla conectado a tierra (GFCI). De no
existir, comuníquese con un electricista calificado para su instalación adecuada.
c) Este producto de temporada no está concebido para la instalación ni el uso permanentes.
d) No lo instale ni coloque cerca de calentadores a gas o eléctricos,chimeneas,velas ni ninguna otra fuente de calor similar.
e) No fije los alambres del producto usando clavos ni grapas, ni lo coloque sobre clavos o ganchos afilados.
f) No permita que las bombillas descansen sobre el cable de la fuente ni sobre ningún otro alambre.
g) Desenchufe el producto al salir de la casa, cuando se retire a dormir o si lo deja desatendido.
h) ¡Este es un producto eléctrico –no un juguete! Para evitar riesgos de incendios, quemaduras, lesions personales y descargas eléctricas,
no se debe jugar con él ni colocar al alcance de los niños pequeños.
i) No use este producto para ningún otro propósito que no sea para el que está destinado.
j) No cuelgue adornos ni ningún otro objeto del cable, los alambres o la línea de luces.
k) No coloque la línea de luces sobre alfombras, cortinas o muebles, ni permita que haga contacto conel revestimiento de vinilo cuando el
producto estéencendido.
l) No realice ninguna labor de mantenimiento o detección de bombillas defectuosas o rotas cuando el producto esté encendido.
m) No cierre puertas ni ventanas sobre el producto o la extensión eléctrica pues esto podría dañar el aislamiento de losalambres.
n) No cubra el producto con paños, papeles ni ningún otro material que no sea parte del mismo cuando esté en uso.
o) Este producto está equipado con bombillas de presión. No enrosque las bombillas.
p) Este producto emplea protección contra sobrecargas (fusible). Un fusible quemado indicaunasituaciónde obrecarga o cortocircuito. Si el
fusible se quema, desenchufeel producto del tomacorriente. Desenchufe también cualquier línea adicional o producto conectado a este
producto. Reemplace el fusible según las instrucciones de servicio para el usuario (respete la calificación del fusible indicada en el mismo)
y revise el producto. Si el fusible de reemplazo se quema, puede haber haber un cortocircuito y el producto debe ser desechado.
q)Lea y siga todas lasinstrucciones queaparecen en el producto o quese incluyen conel mismo.
CONSERVE ESTAS INSTRUCCIONES
INSTRUCCIONES DE USOY CUIDADO
a) Cuando coloqueelproductoen unárbol vivo, el árbol debeestarbien conservadoyfresco. Nolocoloqueen árbolesvivoscuyasagujas tenganun
color marrón ose rompan fácilmente. Mantenga el recipiente del árbollleno deagua.
b) Si el producto se coloca sobre un árbol, dicho árbol debe estar bien fijo y estable.
c) Antes de usar o reusar, inspeccione el producto cuidadosamente. Deseche todo producto que tenga cables o alambres cortados,dañados o
con el aislamiento raído, grietas en los portalámparas o soportes, conexiones sueltas o alambres de cobre expuestos.
d) Cuando vaya a guardar el producto, retírelo con cuidado de donde se haya colocado, ya sean ramas de árboleso
arbustos, para evitar cualquier tensión excesiva en los conductores, conexiones y alambres del producto.
e) Cuando no esté en uso, guárdelo de manera organizada en un lugar seco, fresco y protegido de la luz solar.
-VEA DEL OTROLADO-
-CONTINUACION-
INSTRUCCIONESDESERVICIOPARAELUSUARIO
Reemplazo de fusibles:
Can frecuencia, los fusible se queman porque se han conectado
Demasiados juegos de punta a punta.
a)Antes de cambiar los fusible,asegúrese de desenchufar el juego.
b) Tome el enchufe y retírelo del tomacorriente o de la toma del otro aparato.
No hale el cable para desenchufarlo.
c)Usando un destornillador plano,abra la cubierta de los fusible.Abra la cubierta de acceso
alos fusible ubicada en la parte superior del enchufe deslizándola hacia las patas.
d) Retirelos fusibleconcuidado.
e) Riesgodeincendio. Reemplace el fusiblesolo conunfusible de 3amperios
y125voltios(se incluyeconelproduct)
f)Cierrala cubiertadelos fusible.Deslícelasobreelenchufeparacerrarla.Asegúrese
de que quede completamente cerrada y que los fusible estén completamente cubiertos.
g) Riesgo de incendio. Noreemplace el enchufe. Estecontiene un dispositivodeseguridad(fusible)que
nose deberetirar.Deseche elproductsi el enchufe está dañado.
Reemplazodelosbombillos:
Antes de cambiar las bombillas,asegúrese de deaenchufar el juego.
Paso1:Tomeelenchufeyretírelodeltomacorriente Paso3:Reemplacelasbombillasoloconlasbombillasde
odelatomadelotroaparato. presiónpequeñasdebrillosuper,2,5voltiosy
Nohaleelcableparadesenchufarlo.
0,5vatiosqueseincluyenconelproduct.
Paso2:Sostengalabombillaporlabase
Empujrlabase/bombilladerepuestoenportalámpara
Plásticayhalelabombilla/base
Nolaenrosquecuandolainserteenelmismo.Sienrosca
haciaafueradelportalámpara. Labombilla,partedeljurgonoencenderát.
Silas bombillos derequesto queseincluyenconel product notienenbásica
Plasticola baseno entre,siga primerolospasos 1-2anteriores.Luego,
a)Retirela bombillaviejaestirandolosalambresdelabombilla
yhalándolapara sacarlade la base.
b)Coloquela bombilla nueva estirandolosalambres de bombilla e
insertandocadaalambrepor unorificioseparadodela baseplastic.
c)Asegúresede quelosalambres delabombillasalganporlos orificiosalfondode labaseplastic.Dobleahoralos
alambreshacia arribademaneraquecadaalambrequede ajustadocontraelladoestrechodela baseplástica.
PRECAUCION:
1. Este juego de luces está calificado para 24 vatios (0,2amperios), no lo
sobrecargue.Conecte otros de luces o aparatos decorativos de punta a punta hasta un máximo de 216vatios
(1,8amperios) en total.Si se conecta a un juego de luces que no tengalacalificacióndevataje(seencuentra
en la etiqueta ubicada a unas 6 pulgadas del enchufe), calcule el vataje de la siguiente manera:
Multiplique la
corríente (___A) referida en la etiqueta por 120.
Por ejemplo: El juego de luces está calificado para 120 voltios, 60 Hz y 0,2 amperios. 0,2 x 120 = 24 vatios.
Sume el vataje de cada juego de luces hasta obtener un total de 216 vatios o menos. (No exceda los 216 vatios).
2
.Para reducir el riesgo de sobre calentamiento, reemplace de inmediato los bombillos quemados. Use
bombillos de 2,5voltios,0,5vatios únicamente.
3. Para disminuir el riesgo de incendio y descarga eléctrica: a) No instale este producto en los árboles con
agujas, hojas o ramas metálicas o de materials semejantes, y b) No instale ni sostenga cuerdas de manera
que puedan cortar o dañar el aislante del alambre.
Para cualquier pregunta y/o asistencia, llameal servicio alcliente al1-877-398-7337 ó visítenos por internet en
www.GEholidaylighting.com
PARAUSOENINTERIORESYEXTERIORES E238369 HC-18
ImpresoenChina 120Volts HechoenChina
© 2018 Nicolas Holiday Inc., 9F., No. 37, Guangfu N. Rd Taipei, Taiwan 10560. Todos los derechos reservados.
MODELO NO. :
FPLG-50(0,2)
This manual suits for next models

3

Other GE Home Lighting Accessories manuals

GE LED 200 7MM LIGHTS User manual

GE

GE LED 200 7MM LIGHTS User manual

GE FCB-XM-XS-PG0032-120V User manual

GE

GE FCB-XM-XS-PG0032-120V User manual

GE 2020168 User manual

GE

GE 2020168 User manual

GE LED2F-5.5MM-50 User manual

GE

GE LED2F-5.5MM-50 User manual

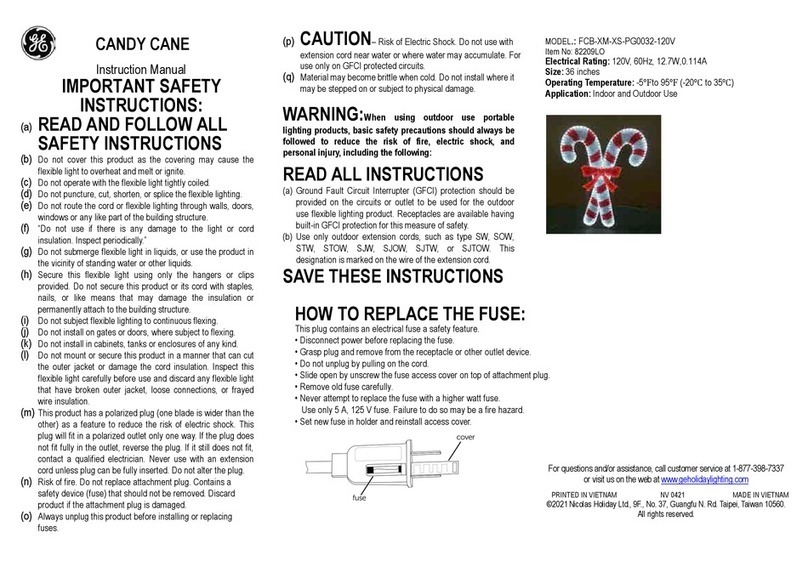
GE CANDY CANE User manual

GE

GE CANDY CANE User manual

GE Energy Smart 97732LO User manual

GE

GE Energy Smart 97732LO User manual

GE SNOWMAN FCB-XM-CH0083-24V-48"-B User manual

GE

GE SNOWMAN FCB-XM-CH0083-24V-48"-B User manual

GE 86501 User manual

GE

GE 86501 User manual

GE Color Effects 72144 User manual

GE

GE Color Effects 72144 User manual

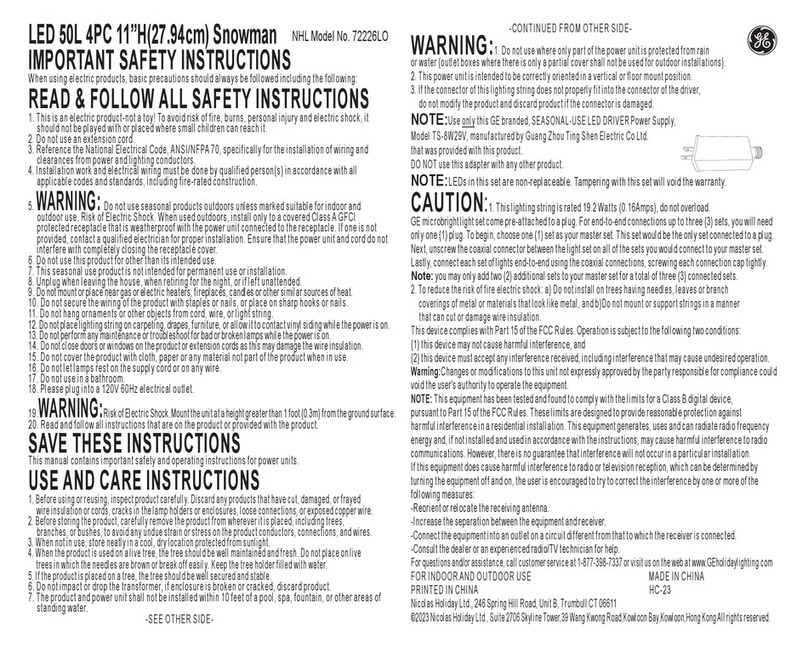
GE 72226LO User manual

GE

GE 72226LO User manual

GE StayBright TREE PATHWAY User manual

GE

GE StayBright TREE PATHWAY User manual

GE Energy Smart Color Choice 00167 User manual

GE

GE Energy Smart Color Choice 00167 User manual

GE C3LED(I)-5.5MMa-50(0.1) User manual
GE

GE C3LED(I)-5.5MMa-50(0.1) User manual

GE LED 400 7MM LIGHTS User manual

GE

GE LED 400 7MM LIGHTS User manual

GE LEDE5-G50-25(0.3) User manual

GE

GE LEDE5-G50-25(0.3) User manual

GE 88820LC User manual

GE

GE 88820LC User manual

GE Pro-Line 20FPL-150/3F User manual

GE

GE Pro-Line 20FPL-150/3F User manual

GE Color Choice 19005LO User manual

GE

GE Color Choice 19005LO User manual

GE 41617 User manual

GE

GE 41617 User manual

GE Holiday Classics GL-108B User manual

GE

GE Holiday Classics GL-108B User manual

GE FCB(J)-XM-CH0085-120V User manual

GE

GE FCB(J)-XM-CH0085-120V User manual

GE SANTA FCB-XM-CH0084-120V User manual

GE

GE SANTA FCB-XM-CH0084-120V User manual

GE Color Effects RGB-G90-8a User manual

GE

GE Color Effects RGB-G90-8a User manual

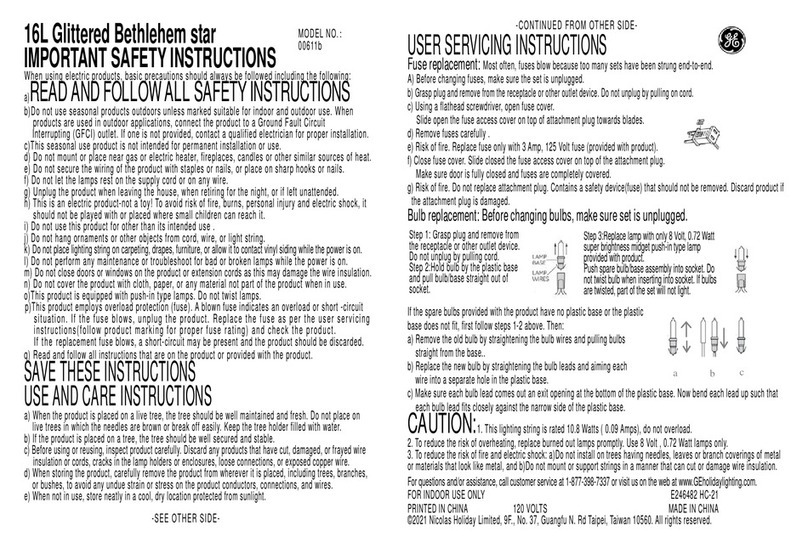
GE 00611b User manual

GE

GE 00611b User manual

Popular Home Lighting Accessories manuals by other brands

FLOS RF04322 quick start guide

FLOS

FLOS RF04322 quick start guide

Prilux RENO FIBRA manual

Prilux

Prilux RENO FIBRA manual

Kingfisher 3663602491392 manual

Kingfisher

Kingfisher 3663602491392 manual

LIVARNO home 1029-RG manual

LIVARNO home

LIVARNO home 1029-RG manual

Home Accents Holiday TY505-1714-1 Assembly instructions

Home Accents Holiday

Home Accents Holiday TY505-1714-1 Assembly instructions

Home Accents Holiday 1000862801 quick start guide

Home Accents Holiday

Home Accents Holiday 1000862801 quick start guide

IKEA Strala manual

IKEA

IKEA Strala manual

IKEA SVARTRA quick start guide

IKEA

IKEA SVARTRA quick start guide

Anslut 005862 operating instructions

Anslut

Anslut 005862 operating instructions

Home Accents Holiday 21RT0422124 Assembly instructions

Home Accents Holiday

Home Accents Holiday 21RT0422124 Assembly instructions

Home Accents Holiday 23RT12622111 Assembly instructions

Home Accents Holiday

Home Accents Holiday 23RT12622111 Assembly instructions

IKEA TOTTARP Assembly instructions

IKEA

IKEA TOTTARP Assembly instructions

Maxwell MW-0002 Manual instruction

Maxwell

Maxwell MW-0002 Manual instruction

AVILO G212340 quick guide

AVILO

AVILO G212340 quick guide

MELINERA HG00374A Operation and safety notes

MELINERA

MELINERA HG00374A Operation and safety notes

Westfalia 94 61 38 instruction manual

Westfalia

Westfalia 94 61 38 instruction manual

LIVARNO home 1031-S manual

LIVARNO home

LIVARNO home 1031-S manual

Home Accents Holiday TY448-1611 Use and care guide

Home Accents Holiday

Home Accents Holiday TY448-1611 Use and care guide

manuals.online logo
manuals.online logoBrands
  • About & Mission
  • Contact us
  • Privacy Policy
  • Terms and Conditions

Copyright 2025 Manuals.Online. All Rights Reserved.