manuals.online logo
Brands
  1. Home
  2. •
  3. Brands
  4. •
  5. GE
  6. •
  7. Microwave Oven
  8. •
  9. GE JKP60 Installation instructions

GE JKP60 Installation instructions

.
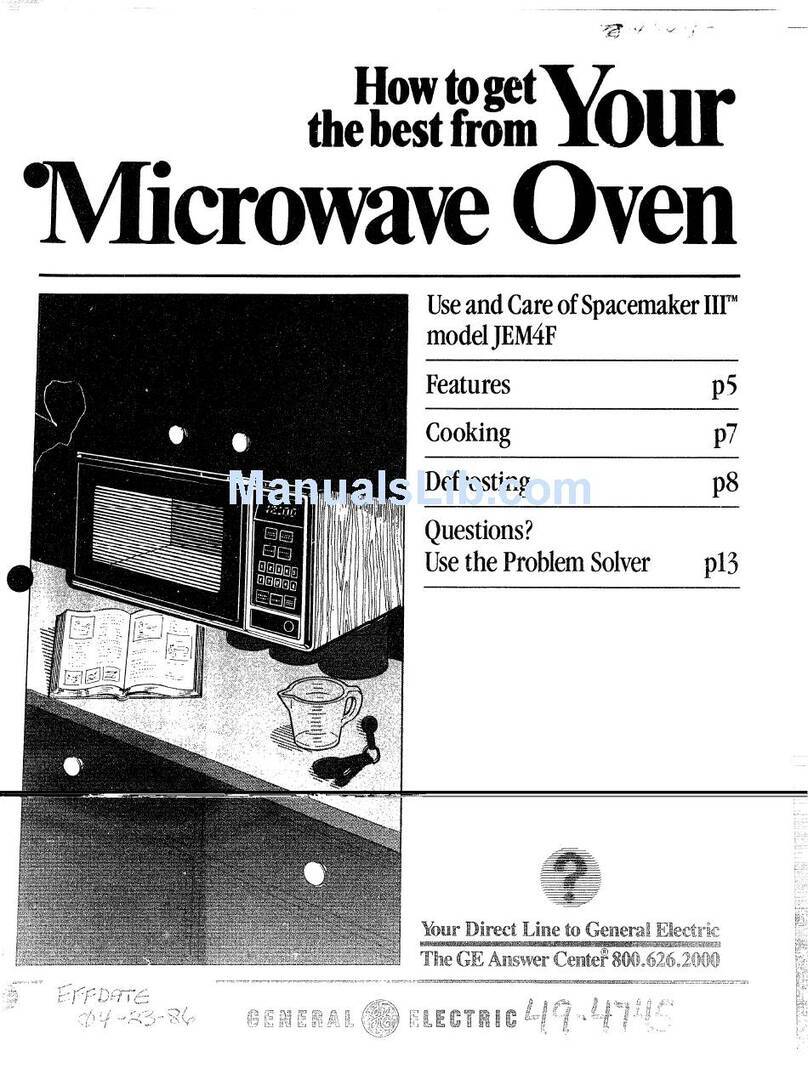
use careof
tips p5
of
Ip6
tow%the D12
toWw the
CODE’” LM!
HOWto the
oven
save
timeand
‘you
Use the p26
s=.====-
——
————
—..
-.—.. -
~. -:
...—.——--
—~.--——
———
--==—-=’
---------
.—..
.——. .
.—
Your Direct Line toGeneralEkxm’k
!aeacithis
It will help you operate and maint-
ain your new Cooking Center
properly.
Keep it handy for answersto your
questions.
if you don’t understand something
or need more help. . .
Call, toll free:
The GE Answer center’”
consumer information service
or write: (include your phone
number);
Consumer Affairs
General Electric Company
Appliance Park
Louisville, KY 40225
writefhwvnthe lmddl and
serial numbers.
You’llfind them on a label on the
front of the lower oven behind the
door.
These numbers are also on the
Consumer Product Ownership
Registration Card that came with
your Cooking Center. Before
sending in this card, pleasewrite
these numbers here:
ModelNo.
SerialNo,
Usethese numbers in any
correspondence or service calls
concerning your Cooking Center.
Be’sure oven is
It is important that we, the manu-
facturer, know the location of your
Cooking Center should a need
occur for adjustments.
Your supplier is responsible for
registering you asthe owner.
Pleasecheck with your supplier to
be sure he has done so; also send
in your Consumer Product Owner-
ship Registration Card. If you move,
or if you are not the original pur-
chaser pleasewrite to us,stating
model and serial numbers. This
appiiarwemustbe registered.
Pleasebecertainthatit is.
Write to:
General Electric Company
Range Product Service
Appliance Park
Louisville, KY 40225
If you received aCkmaged
OV~Ulm. .
immediately contact the dealer (or
builder) that sold you the Cooking
Center.
Save time and money.
Bdcm you requestserwice,check
the ProblemSOhw on page 26. It
lists minor causes of operating
problems that you can correct
yourself.
TO
(a) DONCJt to operate this
oven with the door open since open
door operation can result in harmful
exposure to microwave energy. It is
important not to defeat or tamper
with the safety inter60clcs.
(b) ifloNotPkce any object
between the oven front face and the
door or allow soil or cleaner residue
to accumulate on sealing surfaces.
(c) DoNd Operatethe oven if it is
damaged. His particularly important
that the oven door close properly
and that there is no damage to the:
(1) door (bent),
(2) hinges and latches (broken or
loosened),
(3) door sealsand sealing surfaces.
(d)?he OwenShoukilNot be
adjusted or repaired by anyone
except properly qualified service
personnel.
@Make sure all utensils used in
your microwave oven are labeled
“suitable for microwaving”, Check
your Cookbook for specific test
to determine “microwave-safe”
utensils.
@Papertowels, wax paper, and
plastic wrap can be usedto cover
dishes in order to retain moisture
and prevent spattering.
@Some microwaved foods require
stirring, rotating, or rearranging.
Check your Cookbook for specific
instructions. o
~Some foods suct7 as unshelled ‘
>gq&
eggsand hotdogsmustbe pierced ~=
.
to allow steam to escape during
cooking.
2
ivlkxcwaweown
safety Instructions ............3-5
Featuresof Youroven .........6-’/
Trne Cook ., . . . . . . . . . . . . , ... , . 8
13efrost., ... , . . . . . , . . . . . . . . . . . 9
Temperature Cook . . . .. . . .. . . . 10
i+ola/Tirner ................... 11
Auto Roast &Chat-t . . . . . . ““s12-13
Cook Co&TMcontroi. . . . .. ... 14-15
Conventional Oven
Safety instructions . . . . . . . . .. ..3-5
Features . . . . . . . . . . . . . . . . . . . . . . 6
OvenControis . . .. . . . .. . . .. . . . . 6
Oven Light . . .. . . .. . . . . . . .. . . . 17’
OvenSheives ... , , .. . . . . . .. . . . 17
Minute Timer, Ciock,
Automatic C)venTimer . . . . . . . 17
Baking . . . . . . . . . . . . . . . . . . . . . . . 17
Broiiing ...................... 18
Roasting .......,............. 18
Baking Chart ................. 22
Broiling Chart . . . .. . . . . . . .. . . . 23
Roasting Chart ............... 24
Careof Your Cookhq Center-
Seif-Clean Operation . . . . . .. . . . 19
Careof Your Cooking Center . . . 20
Oven Vent Duct. .............. 21
Lamp Replacement. ........... 21
Oven-rherrnostat
Adjustment ................. 21
RemovableOven Door. .,,..... 21
Cleaning Chart (Aii Parts) . .. . . . 25
General
Before Using Your
Cooking Center.. . . . . . . . . . . . . 2
Energy Saving Tips, ............ 5
Model t3Serialf’Jumber
Location .................... 6
The Probiem Soiver .........26-27
Corisumer Services, ........... 31
Warranty . . . . . .. . . . .. . Back Cover
.
.
,&.-—*> :-,.. .-
.—
.. .
.
. . .
When usirtg electrical appliances
basic safety precautionsshouid
be fotiowed, including the
following:
WARNING—To reducethefisk
of burns, e[ectric shock, fire,
injury to persons orexposure to
excessive microwave energy:
@LJsethis applianceonlyfor its
intended use as described in this
manual.
aBe sureyourappliance is
properfyinstalfed and grounded
by aquafified technician in
accordance with the provided
installation instructions.
eThis appliance must be con-
nectedto agrounded, metallic,
permanent wiring system, oran
equipment grounding conductor
shou!d be run with the circuit
conductors and connected to
the equipment grounding ter-
minalor lead ontheappliance.
eThis appliance should beser-
vicedonly by qualified service
personnel. Contact nearest
authorized service facility for
examination, repairer
adjustment.
eBefore performing any
service, DISCONNECTTt-iE
OVEN POWER SUPPL’?ATTI-IE
HOUSEHOLD DISTRIBUTION
PANEL BY REMOVING THE
FUSE OR SWITCHING OFF
THE CIRCUIT BREAKER.
eDo not cover or block any
openings on the appliance.
SYDo not use outdoors.
eDo not operate this appliance
if it is not working properly, or if
it has been damaged or dropped.
@As with any appliance, close
supervision is necessary when
used by children,
@!3(3not k2%NK3 akMw?—’—
children should not be left alone
or unattendeci in areawhere
appliance is in use,They should
nevw be allowed to sit or stand
on any part of the appliance,
3
@akM# to
Small CM’hang ‘cmthe door. They’
CX’WM the Wenm
*Do
OF -’i-cl
IIN
ABOVE AN ‘cm!‘THE -in
r’mms BE
@proper Loose
fitting or hanging garments
should never be worn while
using the appliance. Flammable
material could be ignited if
brought in contact with hot heat-
ing elements and may cause
severe burns.
@Llseonly dry pMMMde$%+-—
mo[st or damp potholders on
hot surfaces may result in burns
from steam. Do not let pot-
holders touch hot heating ele-
ments. Do not use atowel or
other bulky cloth.
@Never use your apphnce for
warmingor heatingthe room.
@JKMnot storefkmmakdemate-
rialsin thecwem
@Keephood and greasefilters
dean to maintain good venting
and to avoid grease fires.
@iDonot let cooking greaseor
otherflammablematerialsaccw-
Bmkm h’!the ovenor near if.
@Do not useVWakron grease
fires.Fkme in oven can be
smotheredby
dosing ckmrand tm.@Wtg
CLEAWCWF, —
@when CCmkhlgpork follow
our directions exactly and
always cook the meat to at least
170°. This assures that, in the
remote possibility that trichina
may be present in the meat, it
will be killed and meat will be
safe to eat,
(continuednext page)
sDO not!kxmh ele-
~~~~$ g-jf’ ~~@~~(J~~~rf~~fjof ~v~~”
These surfaces may be hot
enough to blurneventhough they
aredark in color. During and
afier use,do not touch, or let
c!oth!ng or other flammable
materials contact any interior
area of the oven; allow sufficient
time for cooling, first.
Other potentially hot surfaces
include the ovenvent openings
and surfaces nearthe open-
ings,crevicesaround the oven
door and the edges of the door
window.
Remember: The insidesurfaceof
the oven may be hot when the
door is opened.
~Read and follow the specific
‘PRECAUTIONS TO AVOID
POSSIBLE EXPOSURETO
EXCESSIVE MICROWAVE
ENERGY” found on page 2.
~To reduce the risk of fire in
the oven cavity:
—Do not overcook food. Care-
fully attend appliance if paper,
plastic, or other combustible
materials are placed inside the
ovento facilitate cooking.
—Remove wire twist-ties from
paper or plastic bags before
placing bag in oven.
—Do not use your microwave
oven to dry newspapers.
—Paper towels and napkins,
wax paper. Recycled paper
products can contain metal
fiecks which may cause arcing
or ignite. Paper products con-
taining nylon or nylon filaments
shouid be avoided, asthey may
aiso ignite.
—Do not pop popcorn in your
oven uniessin a
qxxiai microwave popcorn
WCe.SSQryor uniess you use
popcorn labeled for use in
microv~ave ovens.
—Do notqxwaw?the Owen while
towok! damage tothe
CW?UIwd h? da!’iger dfire. if by
accident the oven shouid run
empty aminute or two, no harm
is done. However, try to avoid
operating the oven empty at aii
times—it savesenergy and pro-
iongs iife of the oven.
—If materiais inside the oven
should ignite, keep oven door
ciosed, turn oven off, and dis-
connect the power cord, or shut
off power at the fuse or circuit
breaker panel.
~Some products such as
whoie eggs and seaiedcon-
tainers—for exampie, ciosed
giass jars—may expiode and
should not be heated in this
oven.
~Avoid heating baby food in
glass jars, even without their
iids; especially meatand egg
mixtures.
@Seedoor surface cieaning
instructions on page 20.
~Don’%defrost frozenbever-
ages in narrow necked botties;
especially carbonated ones.
Evenif the container is opened,
pressure can buiid up. This can
causethe container to burst,
resuiting in injury.
49 Use metal only asdirectediin
OxW.mok. Metai strips as used
on meat, roasts are heipfui when
used as shown in Cookbook.
TV dinners may be cooked in
metai trays but when using sheif
they must be repiaced in their
box. However, when using metai
in microwave oven, keep metal
(except for DOUBLE !DLJTYTM
shelf) a?least “1-inchaway from
sides of oven.
~Cooking utensils may
become hot becauseof heat
transferred from the heated
food. This is especially true if
piastic wrap has been covering
the top and hanc!iesof the
utensii. Potholders may be
needed to handie the utensii.
4
@the CJwi?nlmmr
(X3F%
ltwxmfe km Ihclttokind-i.
Be carefui touching the fioor
during and after cooking.
@Do not use any
in food you are microwaving
uniess that thermometer is
designed or recommended for
use in the microwave oven.
aRemovethe temperature
probe from the oven when not
using it to cook with. If you ieave
the probe insidethe ovenwithout
inserting it in food or iiquid, and
turn on microwave energy, it can
create electrical arcing in the
oven, and damage oven waiis.
~Eh3iihg eggs (in and out cd
she!!) is not uwxmwnended for
microwave cooking. Pressure
can buiid up inside egg yoik and
may cause it to burst, resuiting
in injury.
aFoods wi~hunbrokenouter
“skin”such as potatoes, hot
dogs or sausages,tomatoes,
appies, chicken iivers and other
gibiets, and eggs (seeabove)
shouid be pierced to aiiow
steam to escape during cooking.
~Plastic Utensik+Piastic
utensiis designed for microwave
cooking are very usefui, but
shouid be used carefuiiy. Even
microwave piastic may not be as
toierant of overcooking condi-
tions as are giass or ceramic
materiais and may soften or
char if subjected to short periods
of overcooking. in ionger expo-
sures to overcooking, the food
and utensiis couid ignite. For
these reasons: 1)Use micro-
wave piastics oniy “and use
them” in strict compliance with
the utensii manufacturer’s
recommendations. 2) Do not
subject empty utensiis to micro-
waving. 3) Do not permit chiidren
to use piastic utensiis without
compiete supervision.
=“Ekik3bh’2”
and Cdtxxd bags
sfiou\cjbe slit, pierced or vented
#s&==Lasdirected in C~~kb~~k. If they
aare not, ~la$tic couId bUR~du~-
ing or immediately after cooking,
pcssibiy resulting iri injury. Also,
plastic storage containers should
beat least partially uncovered
because they form atight seal.
When cooking with containers
tightly covered with plastic wrap,
removecovering carefully and
direct steam away from hands
and face.
@use of the DUTVM
shelfaccessory. (Seeyour Cook-
book for proper use.)
—Removethe shelf from oven
when not in use.
—Do not store or cook with
shelf on floor of oven. Product
damage may result.
—Usepotholders when handling
the shelf and utensils. They may
be hOt
—Do not use microwave
browning dish on shelf. The
shelf could overheat.
@Stand away from the oven
‘whenopening oven door. T-he
hoi air or steamwhich escapes
cm came bums to hands,face
and/cWeyes.
@imm’theat Wlcp?rled!food
Containersin h? oven. PressLure
txmk!build up and m? CCmkmwr
CWUMburstcausingan ihjury.
*Keep oven vent ducts
unobstructed.
~Keep oven free from grease
build up.
@Place oven rack in desired
position while oven is cool. If
racks must be handled when
hot, do not let potholder contact
heating units in the oven.
~Puliing out shelf to the shelf
stop is aconvenience in lifting
heavy foods. It is also aprecau-
$~~t~~nagainst ~urn~ fr*m ~o(jc~~ng
-- fi[)~~Ljrf~~~:;Of~h~~~or or oven
??J<?IIS.
@When using cooking or roast--
ing bags in oven,follow the
manufacturer’s directions.
@Do not useyour oven tO dv
newspapers. if overheated,they
can catch fire.
@Do notdean dcmr gasket
The door gasket is essentialfor
a good seal. Care should be
taken not to rub, damage, or
movethe gasket.
@Do no$use oven cleaners.
No commercial oven cleaner or
oven liner protective coating of
any kind should be used in or
around any part of the oven.
@Clean only parts listed in this
Use and Care Book.
@Before seif=cleaningthe oven,
remove broiler pan and other
utensils.
*Listen for fan—a fan noise
should be heard sometime dur-
ing the cleaning cycle. If not,
call for service before self-
cleaning again.
@Use proper power levelas
recommended and DO NOT
OVEF4CXX)K.
@Do not operate the oven while
empty. If’by accident the oven
should run empty aminute or two,
no harm is done. However,try to
avoid operating the oven empty at
all times—savesenergy and also
ensuresgood long term life of oven.
@preheat the oven only when
necessary.Most foods will cook
satisfactorily without preheating.
If you find preheating is necessary,
keepan eye on the indicator light,
and put food in the oven promptly
after the light goes out.
@Always turn Oven OFF before
removing food.
@Don’t open the oven door any
more often than necessaryduring
baking. If you do haveto open it,
close it assoon as possible.
@Be sure to wipe up excessspill-
age before self-cleaning operation.
@Cook complete oven meals
instead of just one food item.
Potatoes, other vegetables,and
somedesserts will cook together
with amain-dish casserole,meat
loaf, chicken or roast. Choose
foods that cook at the sametem-
perature in approximately the same
time.
@USeresidual heat in oven when-
ever possible to finish cooking cas-
seroles,oven meals,etc. Also add
rolls or precooked dessertsto warm
oven, using residual heat to warm
them.
5
of
1~
-.—.-——.——.-
——-—
——.—
/77”:-
.—-....-..—..————
.---..--.P--------- ---
@--..~-====---.===~ ——.
-—————-----—=
1. Door l+and!e. Pull to open door. Door
must be securely latched for oven to
operate.
2. Inside Door Latches”
3. with Metal Shieid. Allows
cooking to be viewed while keeping
microwaves confined in oven.
4. Wastic Antenna Cover. Protects the
antenna which distributes microwave
energy into the oven.
5. Oven Vent.
&Oven Light. Goes on when door is
opened or when oven is operating in
any function.
7. oven Floor.
8. Temperature
Probe. Use with Temperature Cook or
Auto Roast functions.
9. Receptacle for Temperature Probe.
10. DOLJBLE-DLJTYT”Shelf. Lets you mic-
rowave several foods at once. Do not
use shelf without plastic spacers in
place as shown. (See Safety Instructions
for special instructions.) When this shelf
is not in use, please remove from the
oven.
11. oven Set (Clean) Knob
12. oven “oh!” Light
13. Oven Termp(Clean) Knob
14. Oven Cycling Light
15. Automatic Oven ‘Tlfner,Clock, Minute
Tinwr
16. (Men Timer [Clean) Dial
17. Latch Release Button
18. Latch
19. Self-Cieaningj Oven Clean ‘Light
20. Lock Light
21. Model and Serial Numbers—located at
right side of lower oven frame.
22. shelf support
23. Oven Shelves
24. Oven Frame
25. Door Gaskefi
26. window
27. Door Liner
28. Broiler Pan and flack
29. Oven Light Swikh-t300r
——
6
.,- -
—
‘\
@
o
A—
1.
2.
3.
4.
5.
@
‘!
CLOCK. Touch this pad to enter time of day or
check time of day while microwaving. To set
clock, first touch CLOCK pad and then enter
time of day. For example, if time is 1:30, touch
number pads 1, 3, and Oand 1:30 will appear in
display. Retouch CLOCK pad. To reset or
change time, simply repeat above process.
TIME COOK. Microwave for apreset amount of
time using automatic Power Level 10 (or change
power level after entering cooking time. See
page 8.)
TEMP COOK. Use the temperature probe to
cook by using apreset temperature. Oven
shows temperature until preset temperature is
reached and then turns off. (See page 10.)
AUTO ROAST. Insert Probe, touch this pad,
and desired number pad for Code to tempera-
ture cook meat with automatic preset program.
(See page 12.j
LEVEL. Touch this pad before entering
another power level number if you want to
change from automatic Power Level 10 (HIGH)
f’or cooking or Power Level 3(LOW) for
defrosting.
6
0
0B
@
&START. After all selections are made, touch this
pad to start oven.
7. DISPLAY. Displays time of day, time or temper-
ature during cooking functions (or power level
when Power Level Pad is touched).
8. DEFROST, Gentle, generally uniform thawing at
automatic Power Level 3(or change power level
after entering defrosting time. See page 9.)
9. HOLD/TIMER. This feature uses no microwave
energy while it functions as both akitchen timer
or as aholding period between defrost and time
or temperature cooking. (See page 11.)
10. COOK CODE’” control. Usethis pad as ashort-
cut method for entering cooking time, and
power level. (See page 14,)
t1. NUMBER PADS. Touch these pads to enter
cooking/defrosting time, time of day, tempera-
ture, Power Level, Auto Roast Code or COOK
CODETMdigits.
12. CLEAF1/OFF. When touched, it shuts off the
oven and erases all settings (except time of day),
.-
CR$w— 1-
KiT-
E3!lwz
K--
e-
.-
7
The TiME COOK feature allGws
you to preset the cooking time.
The oven shuts off automatically.
power Level 10is automatically set
for time cooking, but you may
change this for more flexibility.
Seeyour Cookbook,
To become better acquainted with
TiME COOK function, make acup
of coffee by following the steps
below.
II
): ——.———
--:.
Step 1: Fill acup 2/3 full of water
and add 1teaspoon of freeze dried
coffee. Use acup that has no metal
decoration. Place cup in oven and
c!ose door.
Step 2: Touch TIME COOK. The
display shows :0. Signal light
above TIME COOK flashes. Power
Level 10 is automatically set in
oven, but does not appear in
display.
Step 3: Select your time. Touch
1, 2 and Ofor aminute and 20 sec-
onds. 1:20 and signal light above
TIME COOK appear on display. If
another Power Level is desired
touch POWER LEVEL and the
number, although Power Level 10
(HIGH) is preferred for this cup of
coffee.
\x
Step 4: Touch START. Time
counting down shows on display.
Step 5: When time is up, oven
sounds and oven, light, and fan
shut off.
NOTE: When lower oven is c!ean-
ing, microwave fan will remain on
until Lock Light goes out.
and
Q, Iset my oven for the time called
for in the recipe but at the end of
the time allowed, my dish wasn’t
done. What happened?
A. Since house power varies due
to time or location, many Time
~~ok recipes g~ve you atime ran9e
!Q prevent overcooking. Set the
~>Jen;Or minimum time, test the
food Ior doneness, and cook your
dish alittle longer, if necessary.
Q. 1want to cook my dish on a
Power Level other than HIGH, what
do Ineed to do?
A. To change the Power Level,
touch the POWER LEVEL pad after
entering desired cooking time.
Enter the desired number and then
touch START.
Q. Can Iinterrupt my Time Cook
function to check the food?
A. Yes. To resume cooking, simply
close the door and touch START.
NOTE: Microwave power will not
come on until you are ready. You
must touch START for cooking to
begin.
Q. Itouched the number pads and
selected my power level. When I
touched START, however, my oven
didn’t come on. Why not?
A. The TIME COOK pad must be
touched before setting the number
pads or else your oven will not be-
gin cooking.
Q. Itried to change Power Level
but the display changed back to
cooking time, Why?
$4.After touching Power Level pad
you only have 4seconds to enter
the number. Try setting controls
again,
.
The Defrost setting is designed for
even thawing necessary for large
amounts of food and is one of the
most important advantages of a
microwave oven.
Power Level 3is automatically
set for defrosting, but you may
change this for more flexibility.
See your Cookbook for the
complete defrosting chart.
become better acquainted with
your Defrost function, defrost fro-
zen pork chops by following the
steps below.
Step 1: Place package of frozen
chops in the oven and close door.
Step 2: Touch DEFROST. Display
reads :0. Power Level 3is automat-
ically set in oven but does not
appear on readout. Signal Light
above DEF. flashes.
Step 3: Touch 8, Cl,and Ofor 8min-
utes. 8:00 and signal light above
DEF. are displayed. If you wish to
change Power Level, touch Power
Level pad and then new number.
Step 4: l-ouch START. Time counts
down on display. When cycle is
completed, the oven signals and
automatically shuts off.
Step 5: Turn package over, close
door and repeat Steps 2, 3 and 4.
Step 6: When oven signals, remove
package and separate chops to
finish defrosting.
Tips
@Foods frozen in paper or
plastic can be defrosted in the
package.
@For even defrosting, many
foods need to be broken up or
separated part of the way through
the defrosting time. Z==—
@Homemade dinners can be
frozen in shallow foil trays and
heated for later use. (Do not heat
on metal shelf). Select foods
which microwave well.
@Pre-packaged frozen dinners
can be defrosted and microwave
cooked, but foil tray must be
returned to box before cooking
on metal shelf.
@Check your Cookbook for
other defrosting tips.
G!.When Ipress START, Ihear a
dull ~humping noise. What is it?
A. This sound is normal. It is letting
you know the oven is using a
Power Level iower than HIGH.
Q. Can iDefrost small iterns in a
hurry?
A. Yes, but they will need more
frequeniattention than usual. Raise
the Power Level after entering the
time by touching POWER LEVEL
and 7 or 10. Power Level 7cuts the
time about in 1/2; Power Level IO
cuts the time to approximately 1/3.
During either, rotate or stir food
frequenlly.
Q. Can Iopen the door during DE-
FROST to check on the progress
of my food?
A. Yes. You may open the door at
any time during microwaving. To
resume defrosting, close the door
and press START.
Q. Why don’t the defrosting times
in the Cookbook seem right for my
food?
A. Cookbook times are average.
Defrosting time can vary according
to the temperature in your freezer.
Set your oven for the time in-
dicated in your Cookbook. If your
food is still not completely thawed
at the end of that time, re-set your
oven and adjust the time ac-
cordingly.
Q. Can Iselect a-Power Level other
than automatic Power Level 3for
defrosting?
A. Yes. Some smaller foods may be
defrosted quicker on higher Power
Levels but for even, carefree de-
frosting, Power Level 3is sug-
gested. Check the chart in the
Cookbook for specific times and
Power Levels,
,-:.~—-:--...=-p,=,-p,=.—.-..
%,,,.
-..”.-.< .-. *-W ..-.<+ 1-..-.-= ..--.”,...-. e--=--.e-==a%:- —a~..— .e--.. r---
9
—
by
For many foods, internal temperature is the best ‘TTw2
test dC!CNM31V3SS. .
The temperature probe is afood thermometer that
Roasts or poultry are cooked to your preference gauges the internal temperature of your food; it
when temperature cooking. Heating or reheating must be used when using TEMP COOK or AUTO
foods accurately to aserving temperature you ROAST. Follow the directions for use and insertion
desire is simple and easy. on page 12.
TEMP COOK takes the guesswork out of cooking HANDLE
because the oven shuts ~ff automatically when the
food is done. /CABLE
END
6Ew- ~1’
SENSOR CLIP
Step 1: Insert temperature probe
as directed in Cookbook and at-
tach probe securely in oven wall.
Close the door.
step 2: Touch TEMP COOK. The
readout display shows Oand signal
light above TEMP COOK flashes.
Step 3: TOUCII1, 3, 0or 130°. 130
shows on display. Power Level 10
is automatically set in oven but
does not appear on readout.
Step 4: Touch POWER LEVEL pad.
Touch 5for MEDIUM power. P-5
shows on display and then display
reverts back to set finished
temperature.
Step 5: Touch START. Display
shows temperature of food count-
ing up.
Step &When 130° is reached, the
oven will signal. Remove probe and
food from the oven.
-rips
@Use alower power level setting;
it will heat more evenly even
though requiring more time.
@Be sure frozen food has been
completely defrosted before insert-
ing probe. Probe may break off if
used in frozen foods.
@Always insert probe into the
center of meaty areas; take care
not to touch the fat or the bone.
@Insert probe as horizontally as
possible into foods as directed in
the recipes. Make sure the handle
does not touch the food.
@Use the clip to keep the probe
in place while heating.
@Cover foods as directed in
Cookbook for moisture control and
quick, even heating.
Q, Are there any foods Ican’t
TEWIP COOK?
A. Yes. Delicate butter icings, ice
cream, frozen whipped toppings,
etc., soften rapi”diy a?warm tempe-
ratures. Batters and doughs as
weiIas frozen foods are also diffi-
CIJII to COOK precisely with the
probe. It is best to TIME COCJK
iI-!esefoods.
Q. After Ifollowed the steps and
touched START, asignal sounded
and oven did not start. What is
wrong ?
A. If you set the temperature either
below 80° or gredter than 199° the
oven will not start. To re-enter,
touch CLEAR/OFF pad and begin
steps again.
Q. Oven sounded and would not
start although Ientered the temp-
erature correctly. What is wrong?
A. If you have not securely seated
the end of th~ probe into the
re~eptacle in the oven wall, if YOU
touch TEI’vIPC(XJK and have for-
gotten to use the probe or if the
actual food temperature is higher
than set temperature, oven will
sound and not start.
Q. Can Ileave my probe in the
oven if it’s not inserted in the food?
A. No. If the probe is left inside the
oven, touching the oven wall, and
not inserted in food, you may c@n-
age the oven.
Q. t-low do Iknow what tempera-
ture to set?
A. Your Cookbook contains sec-
tions on all types of foods showing
the temperatures needed to cook
the foods to different degrees of
doneness. For reheating, refer to
Reheating Charts in the front
of the Cookbook for specific
temperatures.
._,—..— —7.-._:,,,. =~,~..- ..—....=~.~-~-
-.!-!37.— -.-—. —ffi—
10
—
Your HOLD~àTIMER, which oper-
ates without microwave energy,
has three timing functions.
It operates as aMinute Timer, it
can be set to delay cooking or may
be used as ahold setting after de-
frosting. Hoid~Timer can be set up
to 99 minutes.
Step 1: Touch l-iOLD/TIMER pad.
The display shows :0. Signal light
above HOLDTFIMER flashes.
Step 2: Select the amoun$ of time
you desire. Touch the appropriate
number pads. If, for example, you
are timing athree minute phone
call, touch 3, 0, and O.The display
shows 3:00. .
Step 3: Touch START. The readout
display shows the time as it counts
down.
Step 4: W-hentime is up, oven will
signal and display will show time
of day.
The HOLD/TIMER can also be
used to program “standing time”
between microwave cooking func-
tions. The time can range from one
second to 99 minutes and 99 sec-
onds. AHOLD, or “standing” time
may be found in some of your own
recipes or Cookbook.
To set the oven to delay cooking
up to 99 minutes follow Steps 1
and 2 to enter hold time, then set
Time Cook and time, or Temp
Cook and temperature desired
before pressing START. When
hold ing before temperature
cooking, be sure probe is in food
before pressing START.
To help you become acquainted with the HOLD/TIMER feature as used with Time Cook or TempCook follow
steps below to defrost afrozen casserole for 15minutes, then hold 10 minutes and then cook 25 minutes. If using
Temp Cook after Hold/Timer, be sure to insert probe correctly as shown on page 12.
Step 1: Remove casserole from the
freezer and place in oven. Touch
the DEFROST pad. The readout
panel shows :0 and signal light
above DEF. flashes.
Step 2: Touch 1, 5, 0 and Ofor
defrosting time. 15:00 appears on
display panel. (Defrosting is auto-
matically set on Power Level 3but
can be changed by touching
POWER LEVEL pad and the new
Power Level.)
Step 3: Set standing or hold time
by touching HOLD/TlfvlER. :0 ap-
pears on display. Signal light above
HOLD/TIMER flashes.
‘Step 4: Touch 1, 0, 0 and Oto hold
for ten minutes. 10:00 appears on
display.
Step 5: Touch the TIME COOK
pad. l-his display shows :0 and
signal light above TIME COOK
tlashes.
Step 6: Touch 2, 5, 0 and Ofor
twenty-five minutes of cooking
time. 25:00 appears on display.
Step 7’:Touch START. 15:00 count-
ing down shows on display, .%
each function is automatically per-
formed oven display shows entered
information and light above that
function comes on. While cooking,
you may touch appropriate pad to
recalItimes you set.
Q. What will happen if Iacciden-
taIIyreverse the instructions?
A. If you accidentally reverse the
sequence of programming instruc-
.&-% tions, your oven automatically
.-.
“-;:;; rearranges yfiu rprogram. Defrost-
ing a!ways comes first, then hold,
,Ind Ihen the cocking func1ion.
Q. Iprogrammed my oven for a
specific defrosting time but it de-
frosted Iongpr than necessary.
What happened?
A. When instructions conflict, the
oven carries out the last instruc-
tion. You may have set the oven to
Defrost for 4minutes, Hold/Time
for 2minutes, ~nd then Defrost for
6minutes. In this case, the oven
would Defrost for 6minutes and
Hold /Time for 2minutes.
Q. Can IDefrost-Hold only on my
oven?
A. Yes, for foods you don’t want
to cook, like frozen fruit, frozen
whipped topping, etc.—refer to
Cookbook.
NOTE: Allow foods to remain at
room temperature only as long as
safe. Times will vary.
R
Auto Roast uses the temperature probe to cook to Just as in conventional roasting, cmly tender roasts
the desired serving temperature. Unlike Temp should be Auto Roasted until specified internal tern-
Cook, which uses asingle power level, Auto Roast peratures are reached. Lesstender roasts should be
is designed to use up to 3power settings which microwaved by time, according to the Cookbook
automatically switch during roasting, for even and which comes with your oven. Complete information
tender cooking results without overcooking. on preparing roasts for microwaving is in your
Cookbook.
for
1
I
r
1
Placetender beef roasts on trivet in
microwave safe dish. Insert probe
horizontally into center meaty area
not touching bone or fat. Cover
with wax paper.
Poultry, pork or ham roasts need
no trivet. Add Mcup water to roast
dish, cover with plastic wrap. (For
cooking bag method, see cook-
book.) Insert probe into center
r---- —.
I‘T”–”_lUl
Place meat in oven with probe to
the right. insert cable end of probe
firmly into receptacle on oven wall.
1. Touch AUTO ROAST Pad. Cooking signal light
over Code flashes. Touch number pad 3. Touch
START.
2. Light over Code shows on display. Readout dis-
plays internal food temperature.
3. @Ien rnonit~r$ internal temperature, automati-
~aI~~ 5Witc hing tO Iower power as meat’s tem -
~~eraturerises. This helps prevent toughening or
Ove;”cooking,
4. After temperature is reached, oven signals.
-12
~Use containers and coverings as directed at left. Place probe correctly in roast before cooking.
@Recommended Codes are also shown inside oven on Auto Roast Chart.
sBeef tenderloin roast, because of its small size, should be turned over after 90° has been reached.
Beef
Tender Roast
Rare 2125° 12-14 5-10
Medium 314’0° 14-16 10-15
Well 4 170° 17”18 30
Meatloaf 4170° 30-40 5-1o
(loaf or round)
Pork
Loin Roast 4170° 18-20 20
Precooked Ham 1115° 17-19 5-1o
Poultry
Whole Chicken 5190° 13-15 20
(3 lb.)
Whole Turkey 5190° 13-15 20
(Up to 12 Ibs.)
~(Insert probe into meatiest area of inner thigh from below end and parallel to leg.)
Turkey Breast 4 170° 13-15 20
~(Insert probe horizontally into meatiest area.)
*Recommended slanding time before serving.
Q. Are there any particular trivets
that work better than others7
A, Yes,flat glass trivets such as lids
or dish covers generally give more
even cooking resuits than plastic
trivets. Aiso, ceramic ridge-
bottorned roasting dishes usuaiiy
work weil. Piastic trivets generaiiy
require meat to be turned over
more frequently because the grid
design and iegs aiiow the bottom
of the meat to stay cooler as it
cooks, than giass trivets do.
Q. Why was my roast not fuily Q. is it necessary to aiways cover
cooked even though the tempera- foods during Auto Roast?
ture on the readout was correct A. No, but aioose covering heips
and Auto Roast compieted? prevent spattering and hoid mois-
A. When cooking with Auto Roast, ture in food.
the temperature probe must be
inserted properly asf’dily described
in the Cookbook. Check to make
sure the probe hasn’t siipped or
changed position.
Cook .‘TM *
The Cook CodeTMcontrol provides ashort-cut
method for entering time and the Power Level 017
your microwave oven. Cooking Codes are only used
for recipes which need little or no attention, and
which require no change of power level during cook-
ing. Recipes which require additional ingredients,
attention or change in power ieve[ during micro-
waving should be cooked in the usual manner. Also,
recipes with cooking time of less than one minute or
more than 99 minutes can not use Cooking Codes.
To understand the Cook Code control, it is impor-
tant to know what the numbers mean and what the
sequence is. The first and second numbers, if set-
ting a 3 digit Cooking Code, indicate the amount of
time you desire; the last control entry number is
always the Power Level. For example, 125 means
12 minutes at Power Level 5. NOTE: Your oven can
only be programmed to 99 minutes when using the
Cook Code control and the highest Power Level is
10 which is represented by “O”. When setting a
2digit Cook Code control entry, the first is time, the
second is power level. For example, 50 means
5minutes at Power Level 10.
On the following page is shown many frequently
prepared foods and their codes. It’s easy, though,
to make Cooking Codes for many other recipes.
Just select one or two digits representing the length
of cooking time desired, and a final digit for the
Power Level required. The Cooking Codes given on
the chart are for the minimum time needed, to avoid
overcooking which can dry out food and make it
tasteless and tough. If you feel that more cooking is
needed, add additional time by changing the first
digit of the Code. You cannot add seconds to the
cycle time—Cooking Codes are for whole minutes
only. If your recipe calis for Power Level changes or
different amounts of time needed between addition
of ingredients, you may set one Cooking Code for
the first part of the recipe, then after completion, set
another Cooking Code for that period of time and
Power Level.
Remember that Cooking Codes are for micro-
waving by time only. If you are microwaving by
temperature, you must use the Temp Cook or Auto
Roast function.
R
50
Time in Power Level
Minutes High (10)
COOKING CODE
R
Time-in Power Level
Minutes Med (5)
to
Programming your oven for Cook CodeT”Control operation is easy. Follow the simple steps below.
~~~~ ~:Touch C(3OK CODE.
Signal light above Code flashes. ~~~~ ~: Enter the proper code
{nto Cook Code control. For exam-
ple, arecipe calling for 12 minutes
cooking time at Power Level 10
would be 120. 120 appears on the
display panel.
~~~~ ~: Touch START. Signal
light above TIME COOK shows as
well as time counting down on
display.
14
TI-)e Cook CodeTMcontrol feature gives you an easy
autcmatk way to accurately set microwave tin7e for
foods requiring only one power level and little
attention during cooking. The Chart below shows
frequently prepared foods and the suggested
Cooking Codes to use with each. For specific
information on stirring, turning or rotating, check
the Microwave Guide and Cookbook which comes
with vour microwave oven. Always use microwave-
Appetizers (Warming)
Dip (Cream Cheese)
‘/2cup 25
1cup 45
Dips (Sour Cream)
‘/2cup 23
1cup 43
Pastry Bites (Reheating)
2Servings 10
4Servincas 20
Breads and Desserts
Apples
(2) 40
Bran Muffins
(5-6) 37
Brownies (Mix) 60
Cakes (Mix)
(16 cup fluted mold) 110
Cheese Bread, Yeast
(1 loaf) 105
Chocolate Chip Bars 50
Pudding Mix (3oz. pkg.) 60
Eleverages
Coffee, Soup
(1 cup) 10
Milk Bases
(1 CUD) 28
Frozen Feds (Defrost)
Note: Times given below are for entire defrost
cycle. Usually food must be rotated, broken up or
turned over while defrosting. Check Cookbook for
specific information.
Cake, Whole iced 23
Chicken, Cut-Up
(2’/2-3’/’2[k..) 143
Dessert Topping, Whipped 23
Doughnuts or Pastries
(2-4) 13
Fish Fillets
(1 lb.) 83
Hamburgers
(2 Ills.) 123
p~~,Fruit Filling
(Whole) 83
Roast
(L&sjb~.) 283
$jI:eak~r chops
(2 \bs.) 103
——,-— —. .- .—— ..-.
“15
safe containers and microwave techniques as de-
scribed in the Cookbook.
To set Cookin~ codes for many other foods or
re;ipes refer to-page 14 in the Us& and Care E3mk.
Cook Code’” control codes given are for minimum
time. Check and add time if necessary to complete
cooking.
Bacon
2Slices
4Slices
Chicken
8-10 pieces
2pieces
4pieces
Chuck Roast
(3 Ibs.)
Eggs, Baked
2Eggs
Eggs, Scrambled
2Eggs
Entrees, Frozen
8OZ.
16 OZ.
2Ibso
Fish Fillets
(1 lb,)
Franks (in bun)
2
4
Meat Loaf
(1‘h Ibs.)
Sausage (Raw)
4Patties (% lb.)
4Links
Swiss Steak
(2 Ibso)
Frozen TV Dinner
(12 oz.)
28
48
200
50
100
665
27
20
50
120
200
30
10
30
170
40
20
705
70
Beans, Green
(1 lb.)
Broccoli
(1M-1% Ibs.)
Spears
cut
Cauliflower, Head
Corn on Cob
(4)
Potatoes
(4)
Squash
(1 lb.)
Zucchini
(1 lb,)
150
157
120
137
120
120
100
100
\
IOven
Your oven is designed to give you the best results in
baking, broiling, and roasting when used as recom-
mended. Before using your oven, look at the direc-
tions for setting and using all of the controls and
timer.
Light comes on automatically when door is opened
or use switch on window door to turn it on when
door is closed.
When the shelves are correctly placed on shelf sup-
ports they are designed with stop-locks to prevent
them from coming out of the oven or tilting when
food is placed on them. TO REMOVE, lift up rear of
shelf and pull forward with stop-locks along top of
shelf support. TO REPLACE, insert shelf with stop-
Iocks resting on shelf supports and push toward
rear of oven until it falls into correct position under
shelf support.
Oven Timer Controls are designed
to automatically start and stop cer-
tain oven functions (TIME BAKE
or CLEAN). Dials are timed by a
special Clock with index marks
(denoting numerals) and hands.
(For location see page 6.) TO SET
THIS CLOCK, push in the center
knob of Minute Timer andturn the
Clock hands to correct time, then
let knob out. TO SET MINUTE
TIMER, turn knob to desired min-
utes. (Knob must be out to set
Minute Timer.) Minute Timer will
buzz when time has finished and
must be turned off manually.
Use the Microwave Oven Clock for
easy reference to time of day.
(Also see Baking Chart, page 22.)
Step 1: Place shelf on embossed
she{f support “B” or as indicated
on Baking Chart, page 22.
Step 2. After making sure that the
eve-n door is closed, turn the Oven
MKnob to BAKE. -Oven ‘‘On
Light comes on and remains on as
long asOven Set Knob ison BAKE.
Step ~: Turn Oven Temp Knob to
the temperature called for in rec-
ipe. Oven cycling Light comes on
and remains on until preset oven
temperature is reached. It reap-
pears each time oven temperature
drops blow preset temperature.
S$2Vq; You may set your Minute
Timer to the desired cooking time as
indicated ]n your recipe. if your
CGDk;ng tirne is longer than sixty
minutes, i’itlinu?e Timer must be
~~~gw>;.
Most foods cook satisfactorily
without preheating. If preheating
is required, put your dish promptly
in the oven after Oven Cycling
Light goes out.
Step 5: Place food inside the oven.
Make sure at least 1“ of space is
left between the cooking container
and the oven wall for proper heat
circulation. Close the oven door.
NOTE: Avoid opening your oven
door frequently. This could cause
undesirable results in your baking.
Only check foods at the minimum
tii~e of the recipe. Then cook
longer if necessary.
Step &When the BAKE cycle is
complete, turn off heat. When
cooking food for the first time in
your oven, usethe tirae on your rec-
ipe as aguide. Be sure foods are
done before removing from oven.
HGAW%f3$h9tYour
farThreeBake
Your Automatic Oven Timer con-
trols your TIM E BAKE feature.
When you TIME BAKE, your oven
can be preset to start and stop
automatically if you are not home.
Step 1: Be sure the oven Ciock
shows correct time of day since
Clock controls the Oven Timers.
Start dial pointer must indicate
same time of day as on Clock. If
you want the oven to turn on at a
later time, set that time by pushing
in knob on Start dial and turn
pointer to time that you want oven
to start. (There’s no need to set
Start dial when starting time is the
present time of day.)
Step 2: To determine Stop time,
add the food’s cooking time to
time set on Start dial. Push in knob
on Stop dial and turn pointer to
time oven isto turn off.
Step 3:Turn Oven Set Knob to TIME
BAKE. Oven “On” Light comes on
immediately even if the Start time is
later.
Step 4: Turn Oven Temp Knob to
temperature setting. Oven Cycling
Light comes on even though heat
is not on in the oven if alater start
time is used. Your oven automat-
ically turns on and off at the times
you set.
Slep 5: Remove food and turn
Oven Set Knob to OFF.
——..—=..-p-r.+. . . . . ..—...--=.. ---.—-—-— ---- ———
-.
‘‘-.+- _“y.. ..-. . .
*% .= <-. ,. K
--
—
,- .
.. .- ggf?j- --
Your
iiii
—~
$%
.-
Ycur oven is designed to give you the best results in
baking, broiling, and roastingwhen used as recom-
mended. Before using your oven, look at the direc-
tions for setting and using all of the controls and
timer.
Light comes on automatically when door is opened
or use switch on window door to turn it on when
door is closed.
When the shelves are correctly placed on shelf sup-
ports they are designed with stop-locks to prevent
them from coming out of the oven or tilting when
food is placed on them. TO REMOVE, lift UPrear of
shelf and pull forward with stop-locks along top of
shelf support. TO REPLACE, insert shelf with stop-
Iocks resting on shelf supports and push toward
rear of oven until it falls into correct position under
shelf support.
Oven Timer Controls are designed
to automatically start and stop cer-
tain oven functions (TIME BAKE
or CLEAN). Dials are timed by a
special Clock with index marks
(denoting numerals) and hands.
(For location see page 6.) TO SET
THIS CLOCK, push in the center
knob of Minute Timer and turn the
Clock hands to correct time, then
let knob out. TO SET MINUTE
TIMER, turn knob to desired min-
utes. (Knob must be out to set
Minute Timer.) Minute Timer will
buzz when time has finished and
must be turned off manually.
Usethe Microwave Oven Clock for
easy reference to time of day.
(Aiso see Baking Chart, page 22.)
-- Step 1: Place shelf on embossed
shelf support “B” or as indicated
on Baking Chart, page 22.
Sep 2. After making sure that the
eve-ndoor is closed, turn the Oven
Set Knob to BAKE. -Oven “On”
Light comes on and remains on as
long asOven Set Knob is on BAKE.
Step 3: Turn Oven Temp Knob to
the temperature called for in rec-
ipe. Oven Cycling Light comes on
and remains on until preset oven
temperature is reached. It reap-
pears each time oven temperature
drops below preset temperature.
!3t9p 4: YoLi may set your Minute
Timer to the desired cooking time as
indicated in your recipe. If your
cooking time is longer than sixty
minutes, Minute Timer must be
reset.
Most foods cook satisfactorily
without preheating. If preheating
is required, put your dish promptly
in the oven after Oven Cycling
Light goes out.
Step 5: Place food inside the oven.
Make sure at least 1“ of space is
left between the cooking container
and the oven wall for proper heat
circulation. Close the oven door.
NOTE: Avoid opening your oven
door frequently. This could cause
undesirable results in your baking.
Only check foods at the minimum
time of the recipe, Then cook
longer if necessary.
Step &When the BAKE cycle is
complete, turn off heat. When
cooking food for the first time in
your oven, usethe time on your rec-
ipe as aguide. Be sure foods are
done before removing from oven.
Your Automatic Oven Timer con-
trols your TIME BAKE feature.
When you TIME BAKE, your oven
can be preset to start and stop
.
automatically if you are not home.
Step 1: Be sure the oven Clock
shows correct time of day since
Clock controls the Oven Timers.
Start dial pointer must indicate
same time of day as on Clock. If
you want the oven to turn on at a
later time, set that time by pushing
in knob on Start dial and turn
pointer to time that you want oven
to star?. (There’s no need to set
Start dial when starting time is the
present time of day.)
Step 2: To determine Stop time,
add the food’s cooking time to
time set on Start dial. Push in knob
on Stop dial and turn pointer to
time oven isto turn off.
Step3: Turn Oven Set Knob to TIME ‘-=
BAKE. Oven “OtI” Light comes on --
immediately even if the Start time is
later.
Step 4: Turn Oven Temp Knob to
temperature setting. Oven Cycling -.
Light comes on even though heat ---
is not on in the oven if alater start .--.._-.
time is used, Your oven automat- “=-: ---
ically turns on and off at the times “- ‘“-
you set. .-
Step 5: Remove food and turn =-~-:--
Oven Set Knob to OFF.
Step 3: Place the meat on the
broiler rack in the broiler pan. Al-
ways use the rack so fat drips into
the broiler pan.
Step 2: Position Oven Shelf as indi-
cated on Broiling Chart, page 23.
Step 3: Turn the Oven Set Knob
and Oven Ternp Knob to BROIL.
Both Oven Indicator Lights come on.
Step 4: Leave oven door ajar
about 3inches (except chicken,
see beiow). The door wiil stay open
itself yet the proper temperature
will be maintained in the oven. Dur-
ing cooking, turn the food only
once.
Step 5: Turn Oven Set Knob to
OFF and serve food immediately.
Leave the pan outside the oven to
cool during the meal for easy
cleaning.
@Foil may be used to line the
broiler pan and rack. However,
be sure to cut openings in the
foil to correspond with the slits
in the broiler rack so fat drips
into the pan below.
For all weights of chicken, broil
with door closed.
Placing food closer to the top
of the oven increases smoking,
spattering, exterior browning
on the meat and the possibility
of food fat catching on fire. Al-
ways keep rack 3-5 inches
from the broiling unit.
Step 1: Check the weight of the
meat and place, fat side up, on the
rack in the broiler pan that came
with your oven. This helps the
meat to baste itself.
Step 2: Use shelf position “A” or
“B”; or the one indicated on
Roasting Chart, page 24. Place
Oven Shelf on correct embossed
shelf support. For very tall roasts,
remove second oven shelf.
Oven “on’” Light comes on and
stays on until Oven Set Knob is
turned to OFF. Oven Cycling Light
comes on and remains cm until
temperature is reached.
Step 5: Placeyour meat inside the
oven, making sure the pan is not
touching the oven walls or door.
%s
~~
$fep S: Turn the Oven Ternp Knob
to &?5°. (The exception is small
podRry which is roasted at 375°.)
~fe~ 4SClose the oven door and
turn the Oven Set Knob to BAKE.
?I 6U
Sfep 6: Turn off the heat when the
roasting cycle is complete
18
Be sure meat is cooked to your
satisfaction. Most meats con-
tinue to cook slightly while
standing after being removed
from the oven. This should be
taken into ~consideration when
determining your cooking time.
Always use aroasting pan that
fits the size of your meat. A
roast placed in a pan too small
for its size will drip over the
edge.
You may cook frozen meat
roasts without thawing. How-
ever, you must allow more
cooking time, For large roasts,
add 10-25 minutes per pound.
For roasts under 5pounds, add
10 minutes per pound.
To slow down surface browning
on turkeys, you can use afoil
“tent”. The tent-shaped foil
should be laid loosely over the
poultry so the heat can circulate
under the foil.
Most frozen poultry should be
thawed before cooking to en-
sure it is done evenly, Some,
however, can be cooked suc-
cessfully without thawing.
Check the packer’s label for
specific directions.
Ifdone properly, it will take only afew moments to while you aFelbecornirlg acquainted with your self”
start the self-cleaning cycle on your range. After cleaning cwen,we ffeccmmend 2knowsfor the over-
setting your range to self-clean, ahigh heat tem- age cleaning function, but in some cases a hanger
perature removes the soil in the oven cavity. The cleaning time, up to 3hours may be necessary. in
dirt will then disappear by turning into an ash waste order to judge the degree of soil, look at the oven
or evaporating into an odorless and colorless vapor. floor and walls. Light spatter and thinner spills
When the cycle is complete, allow your range to would generally need only 2hours cleaning. Heavy
cool .greasy spills and spatter on the oven interior would
need up to 3hours.
—1: Remove ail cookware
and food as weHas heavysoil de-
posits from the oven. Clean spat-
ters or spills around the oven door,
rectangular flanges, and gasket.
~~~~ ~: Push and hold Latch
ReieaseButton while latching door.
Then dOSt?the door.
..——._-——
L--==”—----—--—-
STEP 2: Turn (Mm Set Knob
and Oven Temp Knob clockwise to
CLEAN. The control will snap into
final position when the CLEAN po-
sition is reached.
@
@
e
Push in knob on Stop (Clean)
Dial and turn to the time you
wish oven to stop cleaning. Add
the numberof hours neededfor
cleaning to the present time of
day.
Cleaning indicator Lights come
on when all steps are set
properly.
If you wish to clean at alater
time set Start Dial to that time.
INOTE: Fan in microwave oven
comesonwhen LockLight isglow-
ing during cleaning lower oven.
You may useyour microwave oven
during this time.
NOTE: Aslight odor may be de-
tected especially during the first
few cleanings. Do not be alarmed.
This is normal during the self-
cleaning cycle.
When cleaning temperature is
reached, Lock Lightcomes on and
door cannot be unlatched until
Lock Light goesoff.
STEP 5: When Lock Light goes
off, push and hold the Clean Lock
Button while sliding Latch to
OPEN. ●Turn Oven Set Knob to
OFF.
—-+ M-N \
STEP 6: TurnOvenSet Knobto
OFF.
Q. Why is there still some black
soil left after cleaning?
A. You did not time the oven to
clean long enough. This deposit
will be removed in later cleanings.
Q. The fan in the microwave oven
runs during self-c Jeaning lower
oven. !s this normal?
#.,‘(es, ~~efan ~~mes on when the
Lock Light glows. This fan heips
keep the components Coolc
Q. Why did the Lock Light come
on when Ifirst set the oven for
CLEAN?
A. Lock Light glowing indicates
that oven is too hot. Turn Oven Set
Knob to OFF and open Oven Door
to cool the internal cavity. After a
short period of time, reset controls
for cleaning.
~. My oven shelves have become
gray after several cleanings. Is this
normal?
A. Yes. After many cleanings, the
shelves may lose some luster and
discolor to a deep gray color.
Q. Why do Ihave ash left in my
oven after cieaning?
A. Some types of soil will leave a
deposit which is ash. It can be re-
moved with adamp sponge or cloth.
Q. What should Ido if excessive
smoking occurs during cleaning?
A. This is caused by excessive
grease and you should switch the
Oven Set Knob to OFF, Open win-
dows and doors to rid room of
smoke. Allow the oven to cool for
at kxNt one hour’ before opening
the door. Wipe up the excess
grease and reset the clean cycle,
19
—.-
pE+OpEWCX3W and cleaningare
importan?soyourCookingCenter
WNgiveyouefficientand satisfac-
toryservice.Followthesedirections
carefullyin caringfor itto help
assuresafeandpropermaintenance.
BE SURE EIECTRIC POWER$s
OFF BEFORECLEANING ANY
PARTOF YOURCXXIKING
CENTER.
control Panels
Don’t usesharp-edged utensils
around the control panels.They
might damage it.
Clean the panelswith alightly
dampened cloth. DO NOT USE
cleaning spraysor large amounts of
soap and water. These can cause
problems with the control
mechanisms.
-i’impemtwe Probe
The probe is sturdy, but care
should be taken in handiing it. Do
not twist it. Avoid dropping it. Ciean
assoon as possible after use.Wipe
it with asudsy cloth, then rub metal
parts with aplastic scouring pad if
necessary.Rinseand dry. DO NOT
wash the probe in an automatic
dishwasher.
Foil cm sl’whles—
why ywl Shcmh’a’tLJseit
DO NOT place asheet of aluminum
foil on any shelf in either your micro-
waveor conventional oven. If you
do, your foods may not cook prop-
erly. The oven finish may be dam-
aged. And there may be an increase
in heat on the outside surfaces of
the oven.
ownLamp
The oven lamp bulb is long-lasting.
Only aqualified servicetechnician
should replace it.
DUTYTM
shelf Axx?s$ory
Yourshelf accessory is designed for
use in amicrowave ovenonly; do
not use in aconventional oven. Do
not useabrowning dish with the
shelf. Arcing could occur.
Clean shelf with mild soap and
water or in the dishwasher. Do not
remove plastic spacersfrom the
shelf when cleaning. Do notclean
inself-ckaningoven.
lPrtxxNJtk3risfor Use of Metal
Usemetal only as directed in the
Cookbook. Metal trays no more
than 3/4” deep may be usedfor TV
dinners, and the metal temperature
probe is designed for microwave
oven use.Always keep rnetaiat
leastone inch away from sides
of oven.
Ckankg-CMside
Clean the outside of your microwave
oven with soap and water, then
rinse and dry. The outer pane of the
window is glass.Wipe it clean with
adamp towel. Chrome is best
wiped with adamp cloth and then
with adry towel.
Cieaning—hside
Keep itcleanandsweet-smelling.
Op&ing the oven door afew m[n-
utes after cooking helps air out the
inside. An occasional thorough wip-
ing with asolution of baking soda
and water keepsthe interior fresh.
Spi~~sand spatters are easyto re-
movefromwalls,floorandantenna
cover.That’s becausethere’s little
heat except in the food, or some-
times in the utensil. Some spatters
wipe up with apaper towel, some
may require adamp cloth. Remove
greasy spatters with asudsy cloth,
then rinse and dry.
NEWERUSE A
OVEN CLEANER 054ANY PART
OF YOUR OVEN.
Wipeupspatterson the glasson
theinsideof the doordaily.Wash
glass,when it’s soiled, with amin-
imum of sudsy, warm water. Rinse
thoroughly and dry.
Wipemeialand plasticpartsonthe
insideofthedoor frequently.Usea
damp cloth to remove ali soil. DO
NOT USEABRASIVES, such as
cleaning powders or steel and plas-
tic pads.They may mar the surface.
DoorSurface.When cleaning sur-
faces of door and oven that come
together on closing the door, use
only mild, non-abrasive soaps or
detergents appiied with asponge
or soft cloth.
Do not removethe plasticantenna
coveratthe top of the oven(see
page6.) Youwill damage the oven
if you do.
!.king aBrown‘N Sear Dish?Use
BarKeepersFriend@Ckanser.
High heat generated on the bottom
of the Brown ‘N Sear Dish can cause
scorched appearing stains to bake
onto the floor if grease is present.
These may be removed with Bar
Keepers Friend@Cleanser by
SerVaasi..aboratories, inc.
After using this cleaner, rinse and
dry thoroughly, following instruc-
tions on can. Do not use it on the
painted surfaces such asthe walls—
it may scratch the paint.
Bar KeepersFriend@Cleanser is
sold in many grocery, hardware and
department stores.
—
-
20

Other GE Microwave Oven manuals

GE Profile PEB1590DM Manual

GE

GE Profile PEB1590DM Manual

GE JE2810A Use and care manual

GE

GE JE2810A Use and care manual

GE JVM6175SFSS Operating manual

GE

GE JVM6175SFSS Operating manual

GE Spacemaker 164 D2092P021 User manual

GE

GE Spacemaker 164 D2092P021 User manual

GE JE320 User manual

GE

GE JE320 User manual

GE Appliances JVM1950 User manual

GE

GE Appliances JVM1950 User manual

GE JNM6171 User manual

GE

GE JNM6171 User manual

GE JES1289 User manual

GE

GE JES1289 User manual

GE JEB1055 User manual

GE

GE JEB1055 User manual

GE JES1142SFC User manual

GE

GE JES1142SFC User manual

GE PVM9005DJBB User manual

GE

GE PVM9005DJBB User manual

GE JES1136WK01 User manual

GE

GE JES1136WK01 User manual

GE RK961G Installation instructions

GE

GE RK961G Installation instructions

GE SpacemakerXL JVM1450AA User manual

GE

GE SpacemakerXL JVM1450AA User manual

GE Spacemaker II JEM20F User manual

GE

GE Spacemaker II JEM20F User manual

GE JES0736 User manual

GE

GE JES0736 User manual

GE JE1465K User manual

GE

GE JE1465K User manual

GE PSA2201RSS User manual

GE

GE PSA2201RSS User manual

GE VM141J User manual

GE

GE VM141J User manual

GE JNM6171DFBB User manual

GE

GE JNM6171DFBB User manual

GE SpacemakerXL JVM1640 User manual

GE

GE SpacemakerXL JVM1640 User manual

GE Spacemaker JVM1850DMBB User instructions

GE

GE Spacemaker JVM1850DMBB User instructions

GE JEB1095 User manual

GE

GE JEB1095 User manual

GE REM25SJ User manual

GE

GE REM25SJ User manual

Popular Microwave Oven manuals by other brands

Electrolux E30MH65GSS - Icon 1.6 cu. Ft. Convection Microwave... Specification sheet

Electrolux

Electrolux E30MH65GSS - Icon 1.6 cu. Ft. Convection Microwave... Specification sheet

Kenmore ELITE 790.488 Use and care guide

Kenmore

Kenmore ELITE 790.488 Use and care guide

Breville VMW207 user manual

Breville

Breville VMW207 user manual

Samsung ME731K Owner's instructions & cooking guide

Samsung

Samsung ME731K Owner's instructions & cooking guide

ILVE IVFSCM34X Owner's instruction manual

ILVE

ILVE IVFSCM34X Owner's instruction manual

Samsung MS28F303E series Owner's instructions & cooking guide

Samsung

Samsung MS28F303E series Owner's instructions & cooking guide

Electrolux ZKD 4050 B Instruction book

Electrolux

Electrolux ZKD 4050 B Instruction book

SEVERIN MW 7838 datasheet

SEVERIN

SEVERIN MW 7838 datasheet

Emerson MW1101W owner's manual

Emerson

Emerson MW1101W owner's manual

Bosch HMV3053C use and care manual

Bosch

Bosch HMV3053C use and care manual

AEG MCC 663 instruction manual

AEG

AEG MCC 663 instruction manual

SEVERIN MW 7873 Instructions for use

SEVERIN

SEVERIN MW 7873 Instructions for use

Danby DMW104W owner's manual

Danby

Danby DMW104W owner's manual

Electrolux EMDN20S3MLW instruction manual

Electrolux

Electrolux EMDN20S3MLW instruction manual

Defy DMO 345 owner's manual

Defy

Defy DMO 345 owner's manual

Sanyo EM-S8597V Service manual

Sanyo

Sanyo EM-S8597V Service manual

Samsung CM1029 Owner's instructions & cooking guide

Samsung

Samsung CM1029 Owner's instructions & cooking guide

Koenic KMO 4341 user manual

Koenic

Koenic KMO 4341 user manual

manuals.online logo
manuals.online logoBrands
  • About & Mission
  • Contact us
  • Privacy Policy
  • Terms and Conditions

Copyright 2025 Manuals.Online. All Rights Reserved.