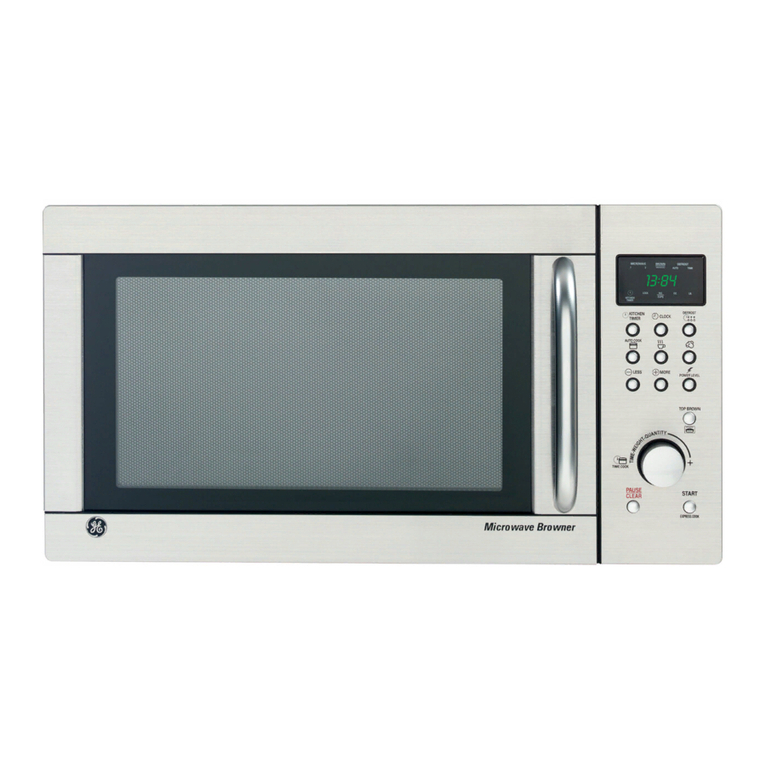
GE Monogram ZE2160 User manual

Owner's
Manual
Countertop
Microwave Oven
ZE2160
Monogram:
We bring good things to life,

Consumer Infbrmadon
Ceu_tertop M_crowave Ore,
ir_tr_)ductior_ Your m_ew M on ogram microwave ovem] makes an eloq uem_ t statemen t of style, convem_iem_ ce aN_d
kitchem_ plam_im_g flexibilitw Whether w>u chose it {or its imrity of design, practical cookh_g
features or assiduous attentiom_ to detail--or fbr all of d]ese reasons--_ou ]1 fim_d d_at your
M om_og_ m microwave ore N_s super] or b]e N_d of form a m_d fi_ m_ct] om_ will deligh t yol_ fbr
years to come.
The im_{brmatiom_ on the }b]lowim_g pages will help you operate amid maim_taim_wmr microwave
Corzterzts Adapter P]ugs ......................... 7
A]umimm_ Foil ................ 5, 6, 15, 22
App]ia_ce Registration .................. 3
Auto Featm'e ......................... ] 7
Auto Defl'ost ....................... 17
Care a_d C]ea_i_g .................... 23
Consm_ er Sep+ices .................. 3, 27
Cooki_g Co_m+oIs ..................... 10
Extensio_ Cords ....................... S
Featm'es of Yore" ()ve_ .................. 9
C,rom_di_g h*sm*ctio_s ................. 7
Microwave-Sa{e Cookware ............... 6
Mode] a_d Serial Nm_ber I,ocatio_ ....... 3
Other Features .................... 20, 21
Beeper Vo] um e ..................... 21
Child I,ock-Out ..................... 20
Clock ............................. 20
Cookh_g Complete Remi_der . ......... 20
Delay Start ......................... 2l
H e] p .............................. 20
Re m h_de r + ......................... 2 ]
Scroll Speed ........................ 20
Start/Pause ........................ 20
Ti m er 0 n /()_t ...................... 21
Power I,eveIs ......................... 1 1
Precautio_s to A_oid Possible Exposure to
Excessive Microwave Energy ............. 2
Problem Solver +...................... 24
Tim e Featm'es ..................... 12-1 I;
Add 30 Seco_ds ..................... 16
Express (ook ...................... 16
Time Cook ...................... 12, 13
Time Dei_'ost .................... 14, 15
Se_sor Featm'es ................... IS, 19
Beverage .......................... l S
Chicken,/Fish ....................... 19
Pc+pcor_ ........................... 18
Potato ............................ 19
Re h eat ............................ 19
Vegetable .......................... 19
Safew h_structio_s ................... 4-S
Warra_tv ..................... Back Cover
PRECAUTIONS TO AVOID POSSIBLE EXPOSURE TO
EXCESSIVE MICRO WAVE ENERG Y
(a) Do Not Attempt to operate this oven with the door
open since open-door operation c}ln result in
harmflfl exi)osure to microwave energy. It is
important not to defeat or tamper with the safety
interlocks.
(b) Do Not Place any object between the oven fl+ont lace
and the door or allow soil or cleaner residue to
accumtflate on sealing surfaces.
(c) Do Not Operate the oven if it is damaged. It is
i)articularly important that the oven door close
properly and that there is no damage to the:
(1) door (bent),
(2) hinges and latches (broken or loosened),
(3) door seals and sealing surfaces.
(d) The Oven Should Not be a(!justed or repaired bv
anvone except properly qualified service personnel.

B@)r
usir g
yOU_
Read this ma]mal carehd]v. It is im_teN_ded to
he] I} _o_0,operate amid n]aim_taim__om'• m_ew
Keep it ham_dy for am_swers to ,ore" qltestions.
Write
dowrz the
modal
See the Feamres of Yom" Ove]] section fi>r
m ode] am_d serial m_Im_bet 1oca t]oral
These mlmbers are also +7+/the ( o]/sHmer
Product ()wnership RegisHation Card ]m_ch*ded
]m_this mmmal.
Before sendh-lg in this card, please write these
numbers here:
Model Nm_ber
Serial Nm_ber
[Jse th ese m__tm bets iN_am_) correspon deN_ce or
service calls co]?ce]']?]m?g )ollr microwave ovem
i,iyou
r ceived a
damaged
OgJgTg
[mme(;[iatel'_ co]ltact the dealer (or bltilder)
that sold _ol0 the o','e]/.
Before vo++ req_test service_ check the Problem [t lists ca_tses of mimn" operati_g problems that
Solver ]_ the back ot this mamml. ,ol0 ca_ correct yore'serf.
service
To obta]_ service, see the (;o_sm_er Services
page ]_ the back of this mam*al.
_'e're proHd of our service a_d waist _'+>_to be
pleased. If {or some reason _o_ are _ot happy
wit]] the service vow*receive, here are the steps
to fi)]]ow fin" fm'ther help.
FIRST, contact the people who serviced vo_*r
applia_ce. Expla]_ why yo_ are _ot pleased.
h_ most cases, this will solve the problem.
NEXT, if"_o_ are still _lot pleased, write all the
details--i_ch_di_g )ore _ph+>_e mm_be_t+>:
]\.'la]_qoer C_st+>mer I).e]atio]_s
_pplim_ce Park
l,o_tis',ille, K} 40225

IMPORTANT SAFETY INSTRUCTIONS
SAFE TY PtLE CA UTIONS
Whem_ I_sh_g electrical appliames, bask sa{etv
precalgi(ms sh(mkl! be fk)Howed, im_c]m]im_gthe
ik WARNING-To redh_ce the
risk of bm'ns_ electric shock, fi re, i0j m T
to persons ()1"expos_lre to excessive
microwave e_?ergy:
o Read and follow the specific "Precalgio_s
to A_oid Possible Exposl_re to Excessive
Microwave El_exgy" om_page 2.
This appliance must be grounded, Co m_m_e ct
(m]y to properly grom_ded (mt]et. See
(;rom_dh_g h_strl_cti(ms sectiom_ om_page 7.
* Install or locate tNs appliance only in
accordance with the provided Installation
Instructions,
o Be certain to place the front surface of the
door three inches or more back from the
countertop edge to avoid accidentM tipping
of the appliance in norma! usage,
o Use this appliance only for its intended
use as described in tb_s manual. Do m)t i_se
corrosive chemicals or wqx)rs im_this
app]iam_ce. This microwase ove_ is specifically
designed to heat, dry or cook tim(t, am] is
m_ot ]m_temIed [i_r ]aborator_ or imh_stria] i_se.
*Do not cover or block any openhlgs on
the appliance,
oDo not store this appliance outdoors,
Do m_otI_se this pro(h_ct m_ear watexm
fkw example, i_ a wet basement, _ear
a swimmi_g pool _ear a siM< or i_ similar
]ocati o _?s.
riP,is microwave oven is not approved or
tested for marine use,
Do not mmmrse power cord or plug h_ water,
Keep power cord away frmn heated surfaces,
Do not mount the microwave oven over
or near any portion of a heatmg or cooking
appliance,
Do not mount this app_ance over a s_lk,
Do not store anytNng directly on top of the
microwave oven surface wben the microwave
oven is in operation,
Do not let power cord hang over edge of
table or counter,
Do not operate this appliance if it has a
damaged power cord or plug, if it is not
working properly or if it has been damaged
or dropped, If the power cord is damaged, it
must be replaced by General Electric Service
or an authorized service agent using a power
cord available from General Electric,
See door surface cleamng instructions i_ the
Care am] C]ea_i_g sect]o_ (s) of this mamm].
TNs appliance must only be serviced by
quafified service persmmeL Cow, tact _earest
a _gh ori zed servi ce {Sci]i ty for exa m i_a ti on,
repair or a(_i_stm ent.
As with any appliance, close supervision is
necessary when used by children,
To reduce the risk of fire in the oven cavity:
-Do not overcook food. Caref_]h attem]
app]ia_ce when paper; plastic or other
comb_stib]e materials are placed ]_side
the oven_ to fi_ci]itate cooki_g.
-Remove w_re twist-ties and metal handles
f_'om paper or plastic c(mtai_ers be{ore
plach_g them i_ the ovem
-Do not use the oven for storage purposes,
Do _mt leave paper pro(h_cts, cooki_g _te_siIs
or fk)od i_ the ovel_ when_ _ot i_ ilse.
-If materials inside the oven ignite, keep oven
door dosed, tin'l? ovel? oil a_ld disco_l_lect
power cord, or sh _t off power at the fl_se or
chmdt breaker pane]. If the door is ope_ed,
-Do not use the Sensor Features twice i_
s_ccesshm o_ the same _i)od portiom If [i)od
is m_dercooked after the first com_tdow_, _se
Tram Cook fi)r additiomd cooki_g time.

ARCING
If you see arcing, press the CLEAR/OFF pad
and correct the problem.
Arch_g is the microwave term fi)r sparks im_the
ovem Arch_g is c;msed b/:
o Metal or foil toucBing the side of the oven.
o Foil not molded to food (upturned edges act
like antennas).
o Metal, such as twist-ties, poultry pins or
gold-rimmed dishes in the microwave.
Recycled paper towels containing small metal
pieces being used in the microwave.
FOODS
Operating the microwave with no food inside
for more than a minute or two may cause
damage to the oven and could start a fire.
It im_creases the heat arolmd the mag_etro_
amI caN_ shorteN_ the ]ile of the oven.
* Hot foods and steam can cause burns.
Be carefa] whel_ upeMm_g any culmdm_ers uf
hot _bod, imhldh]g popcorn bags, cookiN]g
pomhes amI boxes. To prevent pussib]e
h_im N direct steam a_av f?om hamlds ;m d e_ce.
o Foods with unbroken outer "skin" sl_ch as
potatoes, smlsages, tomatoes, apples, chickel_
livers am_d other giblets am_d egg yo] ks sh old d
be pierced to a]]uw steam to escape dmim_g
cuokim_g.
* Do not overcook potatoes. Thev col_ld
dehydrate ;rod catch fire, c;msim_g damage
to volu" ovem?.
* Some products such as whole eggs and
sealed containers--tbr example, dosed jars--
are able to exp]ude am] shol_]d mat be heated
ira]this microwave ovem Slid] ilse of the
microwave oveN_ coldd resl_]t ]m_im_jm'y.
* Do not boil eggs in a microwave oven.
Pressm'e wi]] bld]d Ill:>im_side egg yolk ;rod wi]]
c;mse it to bm'st, possibly resl_]tim_g ]m_im_im"}.
* Avoid heating baby food i_ glass jars, eve_
with the aid off. Make sm'e a]] i_[imt tbod is
thorollgh]y cooked. Stir food to distribme
the heat evel_E. Be careflll to preve_t
sca]di_g whe_ warmi_g _brmlda. The
c{mtah/er may [be] cooler t]la_/ the }iirlml]a
really is. Always test the _i)rml_]a bdin'e
_eedi_g the babl.
* Do not defrost frozen beverages in narrow°
necked bottles (especially carbm_ated
beverages). Eve_ if the c(m tai_ er is ope_ed,
pressm'e ca_ bld]d i_p. This c;m c;mse the
co_tah_er to bm'st, pussib]y resl_]ti_g h_ i_J_') r.
SAI%T[_ FACT Superheated water.
IJqldds, sl*ch as watel; c(dtbe ur tea, are able
to be overheated bey{rod the boi]i_g poi_t
whholg appearh_g to be boi]i_g. Visible
bllbbli_g or boiIi_g whel_ the col_tai_er is
removed {_'om the microwave ove]/is _/ut
always prese_m THIS COl II,D RES[ ILT IN
VERY HOT I,IQ{ _[DS S[ _DDENI N BOII,ING
(WER WHEN THE CONTAINER IS
DISTURBED OR A SPOON OR OTHER
1 ITENS[I, IS INSERTED INTO THE I,IQ[ lID.
To redl_ce the lisk of i_im" } to pets{ms:
- Do _ot overheat the ]iqldd.
- Stir the ]i(p_kt both be%re am] ha]i\vav
throl_gh heath_g it.
- Do mIt I_se straight-sided c{mtah_ers with
_/_/1TOW _/ecks.
-After heati_g, allow the contai_er to sta_d
h_ the microwave {}_e]_ fiir ;t short time
beiiare removi_/g the co_/tah/er.
- llse extreme care when h?serti_?g a spoo_? ur
other I_te_s]] i_to the c{mtah_er.
Cook meat and poultry thorougtily--meat to
at ]east a_ INTERNAl, temperatm'e o{ 160%"
a_(] pol_Itry to at ]east a_l INTERNAl,
temperatm'e of 180°K Cooki_g to these
temperamres I_sl_a]ly protects agai_st
fi)odborn ei]] _ ess.
Do not pop popcorn in your microwave oven
m]]ess it is i_ a speda] microwave popcorl_
accessory ur im]ess v(m ilse pupcor_ labeled
f()r IIse i_/ microwave ove_/s.
IMPORTANT SAFETY INSTRUCTIONS
MICROWAVE.SAFE COOh%VARE
Make sHre all cookware Hsed im_ voHr
microwave overt is sHitab]e t()r microwavim_g
Most glass casseroles, cookh_g dishes,
measurim_g cl_ps, cl*stard clq)s, pottery or chim_
dim_er_are which does m_ot have metallic trim
or glaze with a metallic sheen_ cam_ be used.
Some cookware is hd)eIed "slfitab]e for
o If vol* are m_ot sure if a dish is m]crowave-salte,
I_se this test: Place im_the oven both the dish
v(m are testh_g am] a glass measur]m_g clq)
filled with (me el* I) of wate_mset the
measurim_g cl*p either im_or m_ext to the dish.
M]cro_ave ]mhmte at h]g]]. If the dish heats,
it sholfld m_ot be i_sed %r microwavim_g.
If the dish remaim/s cool amid oi/]v the water im]
the clq) heats, thei/ the dish is microwave-sa{i _.
* If v(m lase a meat thermometer **lille cookh/g,
make sHre it is sa{e t()r Hse h/ micro_a_e
OV e H S
* Do not use recycled paper products. Recycled
paper towels, _]apkb]s am] waxed paper ca_]
c(mtah_ metal flecks whic]] may cruise arci_g
or ignite. Paper prod_cts co_tai_i_g _)]o_ or
_w]on tl]ame_ts sho_a]d be avoided, as they
may also ignite.
Some stw'ofl)am trays (like those that meat
is packaged o_) have a thi_ strip of metal
eml)edded i_ the bottom. When microwa_ed,
the _'d/eta] ca _/bu_']/ the t] oo_" of the ove_/or
ignite a paper towel.
* Do not use the microwave oven to dry
newspapers.
* Paper towels, waxed paper and plastic wrap
ca_] be used to cover dishes in order to retain
moisture and prevent spattering. Be sure to
vent plastic wrap so ste_ can escape.
*Not all plastic _ap is suitable for use in
microwave ovens. Check the package for
proper use.
* Cookware may become hot because of
heat transferred from the heated food.
Pot holders may be _eeded to hamI]e
the cookware.
* "Bo]]ab]e" cooki_g p(mches am] tightly closed
plastic bags sho_fld be slit, pierced or yes, ted
as directed by package. If they are _ot, plastic
co_fld burst dmJ_g or immediately aiter
cooki_g, possibly res_flti_g i_ i_jury. Also,
plastic storage c(mtai_ers sh(m]d be ;it ]east
partially m_covered beca_se they form a tight
sea]. Whel_ cooki_g with col_tah_ers tightly
covered with plastic wrap, remove coveri_g
carehfi]v am] dh'ect steam a_av t_'om ham]s
a_ d titce.
* Use foil only as directed in tiffs mmmaL
di_ers may be m]crowaved i_ foil trays
less than 3/4" high; remove the top tiff] cover
a_(] retHrH the trav to the box_ _*_']]e_ //Si_g
ti)i] i_ the microwave ove]_, keep the {i)i] :It
]east ]i i_ch a_av fl'om the shies of the oven.
* Plastic cookware--P]astic cookware designed
fin" microwave cooki_g is very meflfl, bm
sh(m]d be _sed carefully. Eve_] microwa_e-sa{e
plastic may m)t be as to]era_t of overcooki_g
com]it]ol?s as are ghtss or celamic mateiJa]s
a _ d may s{ilten or ch a r if s ut)ject ed to sh oft
periods of overcook]_]g, h_ longer exposm'es
to overcooki_g, the tood am] cookware
c(m]d ignite.
Follow these guidelines:
1. llse microwave-sa[e plastics only am]!
_se them i_ strict compliance with the
COOkWa Fe maHillhctHFeF s
2. Do _ot microwave empty c(mtai_ers.
3. Do _ot permit children to _se plastic
cookware witho_t complete s_q:ier',is]om

GR 0UNDING INS TR UC TIONS
AWARN IN.se
of the grounding plug can result in a risk
of electric shock.
This appliance must be grotmded. In the
event of an electrical short circuit, grotmding
reduces the risk of electric shock by providing
an escape wire fl)r the electric current.
This appliance is equipped with a power cord
having a grounding wire with a grounding plug.
The plug must be plugged into an outlet that is
properly installed and grounded, (Fig. 1)
Fig, 1 PREFERREDMETHOD
Consult a qualified electrician or service
technician if the grotmding inst_ uctions are not
completely tmderstood, or if doubt exists as to
whether the appliance is properly grounded.
Where a standard two-prong wall receptacle is
encotmtered, it is yore" personal responsibility
and obligation to have it replaced with a
properly grotmded three-prong wall receptacle.
Do not under any circumstances cut or remove
the third (ground) prong from the power cord.
_'e do not recommend using an extension
cord with this appliance. If the power cord is
too short, have a qualified electrician or
service technician install an outlet near the
appliance. (See the Extension Cords section.)
For best operation, plug this appliance into its
own electrical outlet to prevent flickering of
lights, blowing of fuse or tripping of circuit
breaker,
USE OF ADAPTER PLUGS
Usage situations where appliance's power cord
will be discmmected infrequently.
Because of pote_tia] sa{ety hazards m_der
certah_ coadithms, we strongly recommend
against the use of an adapter ping. However;
if vol_ still elect to i_se am_adapte]; where local
codes permh, a TEMPORARY CONNECTION
may be made to a properly grom_ded two-
[:)rom_gwall receptacle bv the use of a Ill, listed
adapter (Fig. 2) which is available at most local
hardware stores.
Fig. 2 TEMPORARYMETHOD
(Adapter plugs not permitted in Canada)
Align large prongs/slot__
_f/" Ensure proper ground and
firm connection before use
The larger sh)t im_the adapter ml*st be aligned
with the larger slot im_the wall receptacle to
provide proper po]adty im_the co_m_ect]o_ of
the power cord.
CAUTION: Attachim_g the adapter groined
termJm_] to the wall receptacle cover screw
does m_otgroined the app]iam_ce m_]ess the
cove r s crew Js m eta], a n]d m?o t Jm?s id ated, a n?d
the wall receptacle is grom_ded throl_gh the
hol_se wirim_g. \'ol_ sholdd have the circlfit
checked by a qtm]ified e]ectrJciam_ to make
sm'e the receptacle is properly grom_ded.
Whe]_ disc{m_ecti_g the power cord t_'om the
adapte_; always hold the adapter with o_]e
ha_]d. If this is m_t dogie, the adapter groined
termi_a] is very likely to break with repeated
_*se. Sho_dd this happem DO NOT [ISE the
appIim_ce m_ti] a proper groined has agah_
bee_ established.
Usage situations where appliaa]ce's power cord
will be disconnected frequently.
Do not use an adapter plug i_ these situation,s
beca_se t}'eq_ent discon_ection of the power
cord places middle strai _ o]] th e adapter a_ d
]ea (Is to eve_ ma] t_]] m'e of the adapter grom_ d
termimd. \))_ sho_dd ha_e the two-prong wall
receptacle replaced with a three-pro_g
(grom_di_g) receptacle by a q_a]ified
e]ectrician_ be{ore _si_g the app]im_ce.
7

IMPORTANT SAFETY- INSTRUCTIONS
USE OF EXTENSION CORDS
A short power s_pply cord is provided to red_ce
the risks res_/]tJllg from becomh_g e_tm_gled i!_
or tripph_g over a loi/ger cord_
Exte_lsio_ cords ma\ be _sed if'v<m ate catef_fl
If' a_/ exte_sio_ cord is _sed i
1. The marked electrica! rati_g of the cord set
or exte/lsJoli cord sho_fld be at least as great
as the electrica! rati_g of the appli_mce.
2. The exte_sioll cord m_st be a gromlditlg-
type 3-_Gre cord a_d it m_st be pl_gged imo
a 3-slot omlet.
3. The kruger cord sho!_ld be arrmlged so that
it wi]] _ot drape over the comltertop or
tabletop where it ca_ be pulled otl by
chiklre_ or tripped over m3imemioim!!v.
If' v<m _se a_ exte_si<m cord, the imerior light
m:ly flicker a_d the blower som_d ma\ vary
whe*_ the microwave ove*_ is o*_. Cooki_g times
re:iv be lo_ger, too.
SA _THESE INS TR UC TIONS

Features of Your Oven
( ou_tertop Microwave Ove_
Throughout
this manual,
J_,atures a_zd
appearance
Itztly utll'J
,f)'Ol?_ )'0111"
model
1200 watts
m
1. Door Latches.
2. Window with Metal Shield. Screen allows
cooking to be viewed while keeping
inicrowaves conlined in the ()veil,
3. Convenience Guide.
4. Touch Control Pmml mad Display.
5. Door Latch Release. Press latch release
b/itton to open door.
6. Removable Turntable. Turntable and
support must be in place when using the
()veil. The turntable may be removed fl)r
cleaning.
7. Removable Turntable Support. The
turntable support must be in place when
using the ()veil.
NOTE: Rating plate, oven vent(s) and oven
light are located on the inside walls of the
ii/icYowave ()veil.
ODtional
Accessories A\ailable at extra cost from your (;E supplier.
Ch(iose the appropriate hlstallation I¢dt to
con'_ert this oxen to a built-in wall oxen.
tqw 27" ir_,stalla6o_,s:
Modd Kit
ZE2160SF Jx2127SH
t'br 30" ir_,_talbltior_,_:
Model Kit
ZE2160SF JX2130SH

Cooking ControE
<ol*t_terto/) Microwave Ove*_
Yolt (:(_ 17
time, _v_thHze
or with fhe aulo TIME
COOK
@
®
®
_)[ TIME
DEFROST
®
®®
®® AUTODEFROST
Check the Convenience Guide before yon begin.
1. Time Features
Press
TIME COOK
Press o]_ce or twice
TIME DEFROST
EXPRESS COOK
ADD 30 SEC
POWER LEVEL
2. Sensor Features
Press
POPCORN
BEVERAGE
REHEAT
CHICKEN/FISH
Press once (chicken pieces)
Press twice (fish f_llets)
POTATO
VEGETABLE
Press ot]ce (flesh vegetables)
Press r_ice (fkoze_l vegetables)
Press three times (craned vegetables)
3. Auto Feature
Press
AUTO DEFROST
Enter
Amom_t of cookh_g time
Amom_t of de{_'ostim_g time
Starts immediately!
Starts immediately!
Power ]eve] 1-10
Enter Options
Starts immediately! more/less time
Starts immediately!
Starts immediately!
Starts immediately! inure/less time
Starts immediately! more/less time
Enter
Food weigh t
10

Changing the Power i eve]
Coantertop M_crowa'_'_e Ove_
D riab[e
Pov er
LeveLs 1-10
How to Change Power Level
The power level may be eN_tered or c]]am_ged
immediately altter enterim_g tile }batm'e time ibr
Time Cook or Express Cook_ The power ]eve]
may also be cham_ged (]m'im_gtime com_t(]owlL
1. P_'ess TIME COOK.
2. Select cookim_gtime.
3. Press POWER I,EVEI,.
4. Select desired power level ]-] O.
5. Press START.
Variable power levels add {lexil)i]itv to v(mr
microwave cookh_g. The po*_er levels on yore
microwave oven cam_ 1)e compared to the
sm'fi_ce m_its on a rm_ge. Each power level
gives yol_ microwave em_ergy a certaim_ percent
of the time. Power level 7 is microwave energy
70% of die time. Power ]eve] 3 is energy 30%
of the time. Most cookim_g will be doN]e om_
High (po_er ]eve] ] O) _hich gives yol_
]00% power.
Po_er level l0 _]ll cook {_ster bm tbod may
m_eed more t_'eql_em_t stirrim_g, rotatim_g or
mrni_ig ove_: A lower setti_ig will cook more
erectly a_d _eed less stirri_g or rotati_g of
t]_e }hod.
Some }i)ods may have better }]avol; texture or
appearm_ce if one of the lower setti_gs is _sed.
l]se a lower power ]eve] whe_ cooki_g foods
that have a te_de]_cv to boil ove_; s_.ch as
Rest periods (when the microwave e_ergy
c_c]es off) give time fin" the food to "eq_a]ize"
or traaster heat to the i_side of the [i_od. An
example of this is shown with power ]eve] 3--
the defrost cvc]e. If m icrowave e_ ergy di d _ ot
cycle off, the omside of the {ood wo_ld cook
before the i_side was defrosted.
®
®
@
®®
®®
DISPLAYON/OFF
@
Here are some examples of i_ses }br variolls
P()V_R LEVEL BEST USES
High 10 Fish, bacon], vegetab]es,
boi]i_]g ]iquids.
Gemle cooki_]g of meat
a_]d ponltlTy; l)aki_]g
casseroles a[_d reheati[]g.
Medium 5 Slow cookit_g a_d te_derizi_g
such as stews a[]d less resider
cuts of meat.
Low 3 Defi'osting without cooki_g;
simmeri_g; de]icate sauces.
Wm'm ] Keepi_g food warm without
ovei'cooki_]g; softeni_]g buttei'.
11

Time Features
Cot_tertop M_crowave Ore,
Time Cook Time Cook I
AHows wm to microwave Itbr m_y time I*p to
99 mim*tes amid99 secom_ds.
Power level ]i0 (high) is amomaticaHv set,
bm yol* may cham_ge it tor more flexibility:
1, Press TIME COOK.
2. Enter cookim_g th_e.
3, Chm_ge po_er ]eve] if vol* dom_'t wm_t fl_]]
power. (Press POWER I,EVEI,. Select a
desired power ]eve] ]i-]i0.)
4, Press START.
Yol, may open the door durim_g Time Cook
to check the {ood. Close the door an_d press
START to resinate cookim_g.
Time Cook II
Lets vol* ch;mge power levels al*tomatica]ly
durim_g cookim_g. Here's how to do it:
1, Press TIME COOK.
,
3.
Enter the I? rst cook time.
Change the po_er ]eve] if vol, don't want fi*]]
power. (Press POWER I,EVEI,. Select a
desired power ]eve] ]i-]i0.)
4. Press TIME COOK agaim
5, Em_ter the secom_d cook time.
6, Chm_ge the po_ er level if vol_ don't wm_t fl*]]
power. (Press POWER I,EVEI,. Select a
desired power ]eve] l-HI.)
7. Press START.
At the end of Time Cook 1, Time Cook II
COIH_ tS dowlk
®
®
TIME
COOK
®®
®®
DISPLAYON/OFF
@
12

Cooking Guide for Time Cook
NOTE: [Jse power ]eve] 1(} (High) tm]ess otherwise m_ted.
Amount Time Comments
Vegetal'pie
Asparagus
(h'esb spears)
(h'oze_ spears)
Beaos
(h'esh green)
(h'oz_ _ green)
Beets
(hr sh, whole)
Broccoli
(fresh cut)
(h'esh spears)
(h'oz( _, chopped)
(h'oze_ spears)
Cabbage
({i'esh)
(wedges)
Carrots
(h'esh, sliced)
(h'oze_)
Cauliflower
(tlowerets)
(tkesh, whole)
(l_'oze_*)
Corn
(l_'ozen kernel)
Corn on the cob
(l_'esh)
(l?'ozei*)
Mixed vegetables
(l_'oze1*)
Peas
(tkesh, shelled)
(l?'oze_)
Potatoes
(['_esh, cul)ed,
white)
(t_'esh, whole,
sweet or white)
Spinach
(t_'esh)
([_'oze_, choptmd
md lea[)
Sqoash
(ll'esh, S{OOlOer
md ?,ellow)
(wiote_; _coro
or b[l{telo[It )
1 lb.
1O-oz. pat kage
1 Ub. cm h_ hd{"
10-oz. parkag<
10-oz. parkage
1 Inmcb
1 bunch (l _/_to I J/2lbs.)
1 Inmcl_ (! _* to l J/2lbs.)
10-oz. parkag<
10-oz. parkage
1 medimo head (about 2 lbs.
1 Ib.
1O-oz. parkage
1 medilno heul
1 medium beo!
]O-oz. package
1O-oz. p o kage
1 to _'_ears
1O-oz. package
2 Ibs. m_shelhd
1O-oz. p o kage
4 pot Noes
(6 to 8 oz. each)
1(6to8oz.)
10 to 16 oz.
10-oz. package
1 lb. sliced
1 to 2 squash
(d)om ] !b. e_eh)
5to 8 ofilL,
M(d-High (7)
4to 7 rain.
I0 to 14 mill
4 to 8 rain.
4 to 8 rain.
16 to 2! rain.
5 to 9 rain.
7to I(} rain.
4 to 7 rain.
4to 7 rain.
6 to 9 rain.
5to 9 rain.
4 tt) 8 rain.
3to 7 rain.
7 to ] 0 rain.
7 to ] 4 mill
3 to 7 mill
2 to 6 mill
2-1/4 to 4 ]*fin.
per ear
3 to 6 mill
2 to 3 min.
per ca1
2 to 6 mill
7 to 9 mim
2 to 6 mim
9 to ] ] rain.
2 to 4 o]i_L
[o ] _/_,-qt.oblong glass baking dish, place !/4 cup w _teit
Rotate dish a/kt: bait ot time.
h_ 1-qt. casserole.
[o ] ½-tit. cass< role, place ]/2 clq) w_t(r.
lo 1-tit. cass{ role, place 2t d)lespooos wat(*t
[o l-qt. (asseroh,, pha( 1/4 cup wate_;
[o 2-qt. casserole, plate l/2 cup water.
[o 2-qt. c _sserole, plare 1/2 cup water.
[o 2-qt. oblong glass baki_g dish, plare 1/4 cup water:
Rotate dish aJ_er hall of time.
In 1-qt. casserok.
la l-tit, tasserole, place 3 tahlespooas war(12
h! ! _/_,-or 2-qt. casserole, plare l/4 cup water.
[o 2- or 3-qt. <asserole, plate 1/4 cup war( r.
[o ] ½-tit. casserok, place !/4 ctq) water.
la l-(/t, tasserole, place 2 t fl)lesl}ooas war( it
In 2-qt. casserole, place 1/2 cup watec
[o 2-qt. casserole, pIo:e 1/2 cup water
In l-qt. casserole, plare 2 tahlespooos waten
lo I-qt. casserole, place 2mblespooos war( r.
[o 2-qt. obloog glass baking dish, plate corn. It' cor_
is in husl<, use _o w _te*; f{ torn h_s b(en husked,
add 1/4 (up w _ter. Re_rr rage d_er hall o! time.
Place in 2-qt. oblong gl_ss b _kiog dish.
(hae* with vented plastic wrqx Rearrang_ d'_e["
ha![ o{" time.
lo 1-tit. casserole, place 3 mblespooos war< [t
[1/ ]-qt. casserole, plare 1/4 cup water:
lo 1-tit. casse['ole, i)lace 2 tablespoons wat_*t
PeeI and cut into 1 inch cubes. Place in 2-qt.
c_sserok with ]/2 cup w _te_t Stir t[_e_ half o{'tio/e.
Pierce with cooking {}>rk. Pl_c_ i_ the chert, ! ioch
_part, io circuI u" _aogemem. I,et stmid 5 minutes.
[o 2-qt. casserole, plare washed spinar:h.
]o 1-qt. (asserole, place 3 mblespooos war( [:
h] !½-tit. cass{ rule, place !/4 cup w _te['.
Cut in hdf md remo_e fibrous membr rues. In 2-qt.
obkmg gl_ss 1)aki_g dish, place squast_ (;ut-side-diB*dL
'['[Ir!_ (;m-side-up _tte_ 4 miracles.
13

Time Features
Cot_terto k M_cro_vave Ove_
Allows you to defrost for a selected length of
time. See the Defrosth]g Guide for suggested
times. (Auto Defrost is explahmd in the Auto
Feature section.)
1, Press TIME DEFROST.
2, Enter deJh'osth_g time.
3. Press START.
Whem_ the ovem_ signals, tarm_fl)od over and
break apart or rearram?ge pieces {or more evem?
delh'ostim_g. Shield am_v warm areas with small
pieces of fi_il. The ovem_ will contim_e to deh'ost
if vol_ dom_'t opem_ the door am_d turn the _i_od.
Ipo_er ]eve] is almm_atica]]v set at 3, blot cam_ be
c]/a]/ge(;[. \2al cam/ de{}'ost small items qllick]y
bv raisim/g the power ]eve] after enterim/g the
time. Ipo_er level 7 cms the total detrostim_g
time h_ abtmt half; power ]eve] ]i0 clots the total
time to approximately 1/3. However; {i_od will
m?eed m ore f_'eq Ilem/t a item/ti oral th a m/ iisua].
A dull t]mmpim_g m)ise may be heard (h_ri_g
delti'osti_]g. This is m)rmal whe_] oven is m)t
operati_]g at High power.
Defrosting Tips
* Foods f_'ozen i_ paper or plastic ca_ be
deh'osted i_ the package, Closed packages
should be slit, pierced or vented AFTER
fi)od has partially def_'osted. Plastic storage
contai_e_s sh{m]d be partially m_covered.
* F2m_i]}-size, prepackaged }]'oze_ dimmers can_
be def_'osted am;l microwa_ed. If the {i_od is
i_ a{i)i] contai_e_; tr;msfiq" it to a microwa_e-
sati _ dish.
®
®
TIME
DEFROST
DISPLAYON/OFF
@
1®
®
@
* For m ore even_ dei_'osti _g of larger foods,
s_ch as roasts, _se Amo Defrost. Be sm'e
large meats are completely deh'osted beliu'e
* Foods that sp(}i] easily sho_Id m)t be allowed
to sit Ollt [kU"more thai] o_]e hOlU" a[ter
deJh'osti_g. Room tempex_m_re promotes
the growth of harmfl_] bacteria.
*When del_'osted, Iti)od sho_]d be coo] bm
sotten]ed i_] all areas. If still slightly it), retm'n
to the microwave very briefi), or let it staml
a fi_w mi _ iltes.
14

Defrosthlg Guide
Food Time Commeuts
Breads, Cakes
Bread, btms or roils (1 pie(_) ]/4 rain.
Sweet rolls (_pprox. 12 oz.) 2 to 4 mi_*. Rear_a*_g< _l_e_ h_/I o! time.
Fish and Seafood
_ilets, frozen (1 lb,) 6to 9 mh*.
Shellfish, small pieces (1 lb.) 3 to 7 mhL Place block h_ casserole.
'Ii_rn o_e_ md break up _{ker {lrst hal{" og time.
Fruit
Plastic pouch--/ or 2 ! to 5 mh_.
(10-oz. packag( )
_/[eat
BacorJ (! lb.)
Franks (! lb.)
Grotmd meat (1 Ib.)
Roast: beef, lamh_ veal, pork
Steaks, chops and e_ttlets
Poultry
Chicken, broile>fryer, cut up
(2_i to 3 Ibs.)
Chlckem whole (2½ to 3 lbs.)
Cornish hen
T_rk W breast (4 m 6lbs.)
4 to 6 mf*L
9 to 12 mi*_. per lb.
4 to 8 mi_. p<r lb.
!4 to !9 rain.
20 to 24 rain.
Place unopened package i*i oxen. Let s{md 5 mim_tes atier del)'osti_ig.
Plac( m_ope_ed p _ckage b_ own, Microw _xe,i_st m/ti[ [?:mfl<.s _an be
separ _ed. [,et stand 5 mim*tes, i{ imcess try, to complete (k [i'osting.
Tm'n me_ oxe_ a[_e_ [irst h_igo{ time.
Use power level W_rm (1).
Place m_wrapped me_ b_ cookb_g dish. Tm'n o_er al_er first haft
o{" dine md shi_ td w_m a_eas with }biL A/ie_ second half of dine,
separate pie(es with table k_itb. I,et stand to complete de['rosti_g.
Place wrapped chicken i_* dish. [ nwr_p md mrn o, er al_er [irs_
half o[ time. Aider se_ cmd half o{" tim_, sep _ate pieces and place in
cooking dish. Microwm e 2 to 4 mim*tes more, if necessar). I,et sired
[bw mimit_ s to [h_ish de[_'osting.
Place wr _pped ehicke_* in dish. Alder [irsl half of time, m_wr tp
a_d turn chieke_ o_er. Shield warm areas with [kA[. 'I1_ complete
de!_osting, *tin cool water i*_e _xitx mid[ giblets cm be remoxed.
Pl_ce m_wr _pped hen in o_en bre _st-side-_p. 'Ii_rn oxer _[ier fi_st hal{"
of th_e. Rm_ _.oo[ water in ca_dt m_ti[ giblets cm tx removed.
Plac( miwrapped breast in microwme-sati, dish breast-side-down.
A!_er first half of time, mm breas_-sid{-up md shi(td wu'm _re_s
with loll. Deh'ost {}>rseco_d half o1"time. [,_t stare{ I to 2 hours in
reh'iger m_r to complete d( [l:osting.
15

Time Features
( ou_ztertop Microwave Ove_
Express Cook This is aquick way to set cooking time for 1-6
minutes°
Press o]/e of the Express Cook pads ([_'om
I to 6) for 1 to 6 mimltes of cookim/g at power
level ]i0. For example, press the 2 pad fi)r 2
mi m/1lies of cook] m/g ti m e.
The power level cam/ be ch;mged as time is
com/tim/g dow,/. Press POWER I,EVEI, amid
em/ter 1-10.
Add 30
Seconds
You can use this feature two ways:
• It will add 30 seconds to the time counting
down each time the pad is touched.
• It can be used as a quick way to set
30 seconds of cooking time.
@
16

A/Ko Featllre
<ou_lerlop Mi_ro_vave Ove_
A uto
D@ost [lse _(ao Detrost h)r meal po(dtry amid fish.
[Jse Time Deirost for most other frozem_ foods.
AIlto Def_'ost almm/;aic;d]y sets die dei_'osdm/g
rimes amid power levels to give evem/ dei_'ostim/g
reslllts filr meats, p(ilfltry aN/d fish weighim/g iq)
to six pom/ds.
1. Press AilTO DEFROST.
2, [ ]sire/, the c(mvershm gldde below, e]/ter
food weight. For example, press pads l :rod
2 for 1.2 pom/ds (1 pore/d, 3 om/ces).
3. Press ST_R%
(Time De['rost is explah/ed h/ tl/e Time
Featm'es secti(m.)
There is a ham/dy gldde located (m the ira/side
fr(i]/t (if the (Be]/.
* Remove meat ['rom I)ackage_ :tm/(] place (m
dish.
*Wile]/ the ove]/ sigmds, mrl/ the food over_
Remove de_'(/sted meat or shield w_rm areas
wid/small pieces of ti)il.
* After deii'osti m/g, m ost m eats m/eed to st;m d
5 mim_tes to complete dei_'ostimlg, i,arge
roasts sholfld stam/d fi/r ab(mt 30 mimltes.
Conversion Guide
If tile weight (if food is stated in p(mnds and
()1111ces_ tile ()1111ces 1/1 ust be coilverted to
tenths (.1) (If a pouI]d.
Ounces Pom]ds
1-2 .1
3 .2
4-5 .3
6-7 .4
8 .5
9-10 .6
11 .7
12-13 .8
14-15 .9
®
®
AUTO
DEFROST
®®
®®
DISPLAY ON/OFF
@
Guide
17

Sensor Featllres
C,u_tertop Mitt, wave Ore,
Humidity
SeTISOr
The Sensor Features detect the increasing
lmmiditv released during cooking. The oven
automatically a(!justs the cooking time to
vaFious t,vl)es and _lUlOllnts of t()()(1,
Do not use the Sensor Features twice in
succession on the same tood portion--it may
result in severely overcooked or bm'nt tood.
If fi_od is undercooked atter the cotmtdown,
use TIME COOK tot additional cooking time.
• The proper containers and cove_ are
essential fi)r best sensor cooking.
• Ahvays use microwave-safe containers and
cover them with lids or vented plastic wrap,
Never use tight-sealing plastic covers--
they can prevent steam fl'om escaping and
catlse 1[_)o(1 to overcook.
•Be sure the outside of the cooking container
and the inside of the microwave oven are dry
before placing fbod in the oven. Beads of
moisture turning into steam can mislead the
sensoi i
Covered
Vented
Dry off dishes so they don't misleadthe sensor.
P@€orTl
NO_I_': Do not use
this fi_atu*e twice in
S'II(:€(_SSIO?I 011 t[l(_
same jbod
portion--it may
_vsult in seve_@'
ove_zooked or bur_tt
,/_,od.
To use the Popcorn feature:
1. Follow package instructions, using Time
Cook if the package is less than 1.75 otmces
or larger than 3.5 ounces. Place the package
of popcorn in the center of the microwave.
2. Press POPCORN. The oven starts
immediatelv.
If wm open the door while "POPCORN" is
displayed, "SENSOR ERROR" will appear.
Close the door and press START immediately.
If tood is undercooked after the cotmtdown,
use TIME COOK fi_r additional cooking time.
How to Adjust the Popcorn Program to
Provide a Shorter or Longer Cook Time
If you find that the brand of popcorn you use
tmderi)ops or overcooks consistentl> you can
add or subtract 20-30 seconds to the automatic
i)oi)ping time.
To subtract time:
After pressing POPCORN, press 1 immediately
atier the oven starts for 20 seconds less
cooking time. Press 1 again to reduce cooking
time another 10 seconds (total 30 seconds less
time).
To add time:
After pressing POPCORN, press 9 immediately
alter the oven starts Ira" an extra 20 seconds.
Press 9 again to add another 10 seconds (total
30 seconds additional time).
BgT) gr(l_7?
NO_I_': Do not use
this fi_atu*v twice in
S'd,g ( g_ssio_t Oil th(_
sameji,od
portion--it may
result in seven4y
overcooked or burnt
ji,od.
Press BEVEIL4_GE to heat an 8-10 oz. cup
of cotti_e or other beverage.
Drilflcs heated with the Beverage feature may
be very hot, Remove the container with care,
If fi_od is undercooked atter the cotmtdown,
use TIME COOK fiw additional cooking time.
18

twice M
the mme jbod
po,, fion--it ma)
resultMsevv_v/3
o'(:#I_OO/¢(:d ot
/:urnljbo(L
How to
Change the
Automatic
Settings
Chwhen/
NO_I_: Do not use
this jbatu*_ twice in
su(cession on the
same j_:od
portion--it may
result in seven4y
ove_moked or burnt
j_od.
The Reheat featm'e reheats 4-36 om/ces of
previol_s]y cooked fi)ods or aplate ok ]eRovers.
1, Place covered food im]the ovel/. Press
REHEAT. The ovel/ starts hm//ediateE.
2. The ove]/ sigmt]s where/ steam is seN/sed amI
the time remaim/im/g begh/s com/t]m/g dow_/.
Do m/or opeN/ the ovem/ door m/til dine is
com/th/g dowm If the (tl}OI" is ope]/ed, dose
it amI press START immediately.
After removing food from the oven, stir, if
possible, to even out the temperature. If the
food is not hot enough, use Tram Cook to
reheat for more time° Reheated foods may
have wide vmqations in temperature. Some
areas may be extremely hot°
Some Foods Not Recommended for Use
Whh Reheat
It is best to ilse Time Cook fill" these fbods:
* Bread produrts.
*Foods that mllst be reheated imcovered.
* Foods that m/eed to be sthTed or rotated.
* Foods callim/g tot a dry look ur crisp surfsce
You can at!just tile cooking time for
the Chicken/Fish, Potato and Vegetable
features t{i suit your personal taste.
To reduce time by 10%:
Press 1 aiter tile ti_ature pad.
To add 10% to cooking time:
Press 9 atier tile feature pad.
Lesstime More time
Use tile Chicken/Fish teature to cook 1-8
pieces of chicken or 4-16 ounces of fish.
1. Place covered chicken 11i"fish in the oven.
Press CHICKEN/FISH oure for chicken
pieces or twice tot fish. The oven starts
immediately.
2. Tile oven signals when steam is sensed and
the time remaining begins counting down.
Do not oi)en the oven dour until time is counting
down. If the door is opened, close it aml press
SZ_RT immediately. If ti}o(1 is not (hme enough,
11se WiIne Cook to cook tor inoi'e tiIne.
Potato
NOTE: I)o not
use this f!:atun:
twice in sm ( ession
on the samejood
portion--it may
result in seve_vly
ovezmoked or
burnt jood.
The Potato feature cooks 1/2-2 lbs. of potatoes.
1. Pierce skin with fork and place potatoes on
the turntable. If cooking three or more
potatoes, arrange in a star pattern.
2. Press POTATO. The oven starts immediately.
Tile oven signals when steam is sensed and
tile time remaining begins counting down.
D{} not open tile (wen dour until time is counting
down. If the door is opened, close it and press
START immediately. If ti)od is not (hme enough,
11seWiIne Cook to cook tor inoi'e tiIne.
Vegetabh?
NO_I_': I)(1 not
use this fi:atun:
twit e ill su( ¢essimt
on the samejood
portion--it may
result in seven4y
ove_moked or
burnt jbod.
Use tile Vegetable feature to cook 4-16 ounces
of fl'esh, fl'ozen or cmmed vegetables.
1. For fl'esh vegetables, add 2 tablespoons of
water per serving. For fl'ozen vegetables,
ti}ll{)w package instructions tor adding watei:
Cover with lid ur plastic wrap. Place vegetables
in tile oven.
2. Press VE(;ETABI,E once tor fl'esh vegetables,
twice tor fl'ozen vegetables or three times tor
cmmed vegetables. The uren starts
immediately The oven signals when steam is
sensed and time remaining is counting down.
Do not open the oven dour until time is counting
down. If the door is opened, close it and press
START immediately. If ti}od is not (hme enough,
use Time Cook to cook for more time.
NOTE: Automatic settings cammt be changed
fl}r caroled vegetables. 19

Other Features
Help The HEI,P pad displays {eatm'e imfformati{m
a_]d he]ptt]] him]ts. Press HEI,P, then select a
featm'e pad. HELP ]
Cooki tg
Compkte
RemMder
To remim]dvou thatvoll have _}od ira1the oven,
the oven wi]] (lisp];{) "FOOD IS READ'_ _' and
beep om?ce a mimlte m]t]] you either open? the
ovem_ door or press CI,EAR/OFF.
Child
Lock-O't t You ma_ lock the c{mtro] pam]e] to prevent the
microwave from beim, accideN_ta]h started or
used b_ children.
To lock or tm]ock the controls, press amid hold
CI,EAR/OFF %1" abollt three seconds. Whem_
the c]mtro] [:)am_e]is locked, am_"i," wi]] appear
im_the display.
To mm the dock dispIav om_of off, press a_d
hohI (} [i)r about 3 secom]ds. The Display
On/Off {i_amre cam]mint be used while a
cookim_g ti_amre is im_use.
Clock Press to enter the time of day o1" to check the
t]m e of dav whi] e mi crowavi m_g.
1, Press CI,OCK.
2, Enter ti m e of day.
3. Select AM or PM.
4, Press START or C1,OCK.
CLOCK
Scroll S peed The scroll speed of the display ca,_ be
cham_ged. Press a_(] hold the AM/PM pad
about three seconds to bri_]g up the display.
Select 1-5 fi]r slow to fhst scroll speed.
AN/PN
SCF_OLL_;PEED
J_]addit]{mtostarti_]Zmini}fimctio_]s,
ST%RT/P%_ JSE allows _ou to st{}[:)cooki_g
without (}[{e_J m,_.,the door ]n" c]em'i_g the
2O
Other manuals for Monogram ZE2160
2
Table of contents
Other GE Microwave Oven manuals

GE
GE JES1344 User manual

GE
GE JE66 Specification sheet

GE
GE JKP77G Installation instructions

GE
GE JES2051DN Manual

GE
GE PVM9195 User manual

GE
GE Profile Spacemaker PVM2170DR Manual

GE
GE Spacemaker 164 D2588P063 User manual

GE
GE Spacemaker JVM141J User manual

GE
GE Spacemaker XL JVM1850 User manual

GE
GE JES1657 User manual

GE
GE Spacemaker JVM2070BH01 User manual

GE
GE Appliances JVM1950 User manual

GE
GE JET213 Installation instructions

GE
GE JES0736SPSS User manual

GE
GE RK961G Installation instructions

GE
GE Spacemaker II JEM31G Installation instructions

GE
GE Microwave Oven User manual

GE
GE JEM25 User manual

GE
GE Appliances JES1456 User manual

GE
GE Spacemaker JVM140K04 User manual