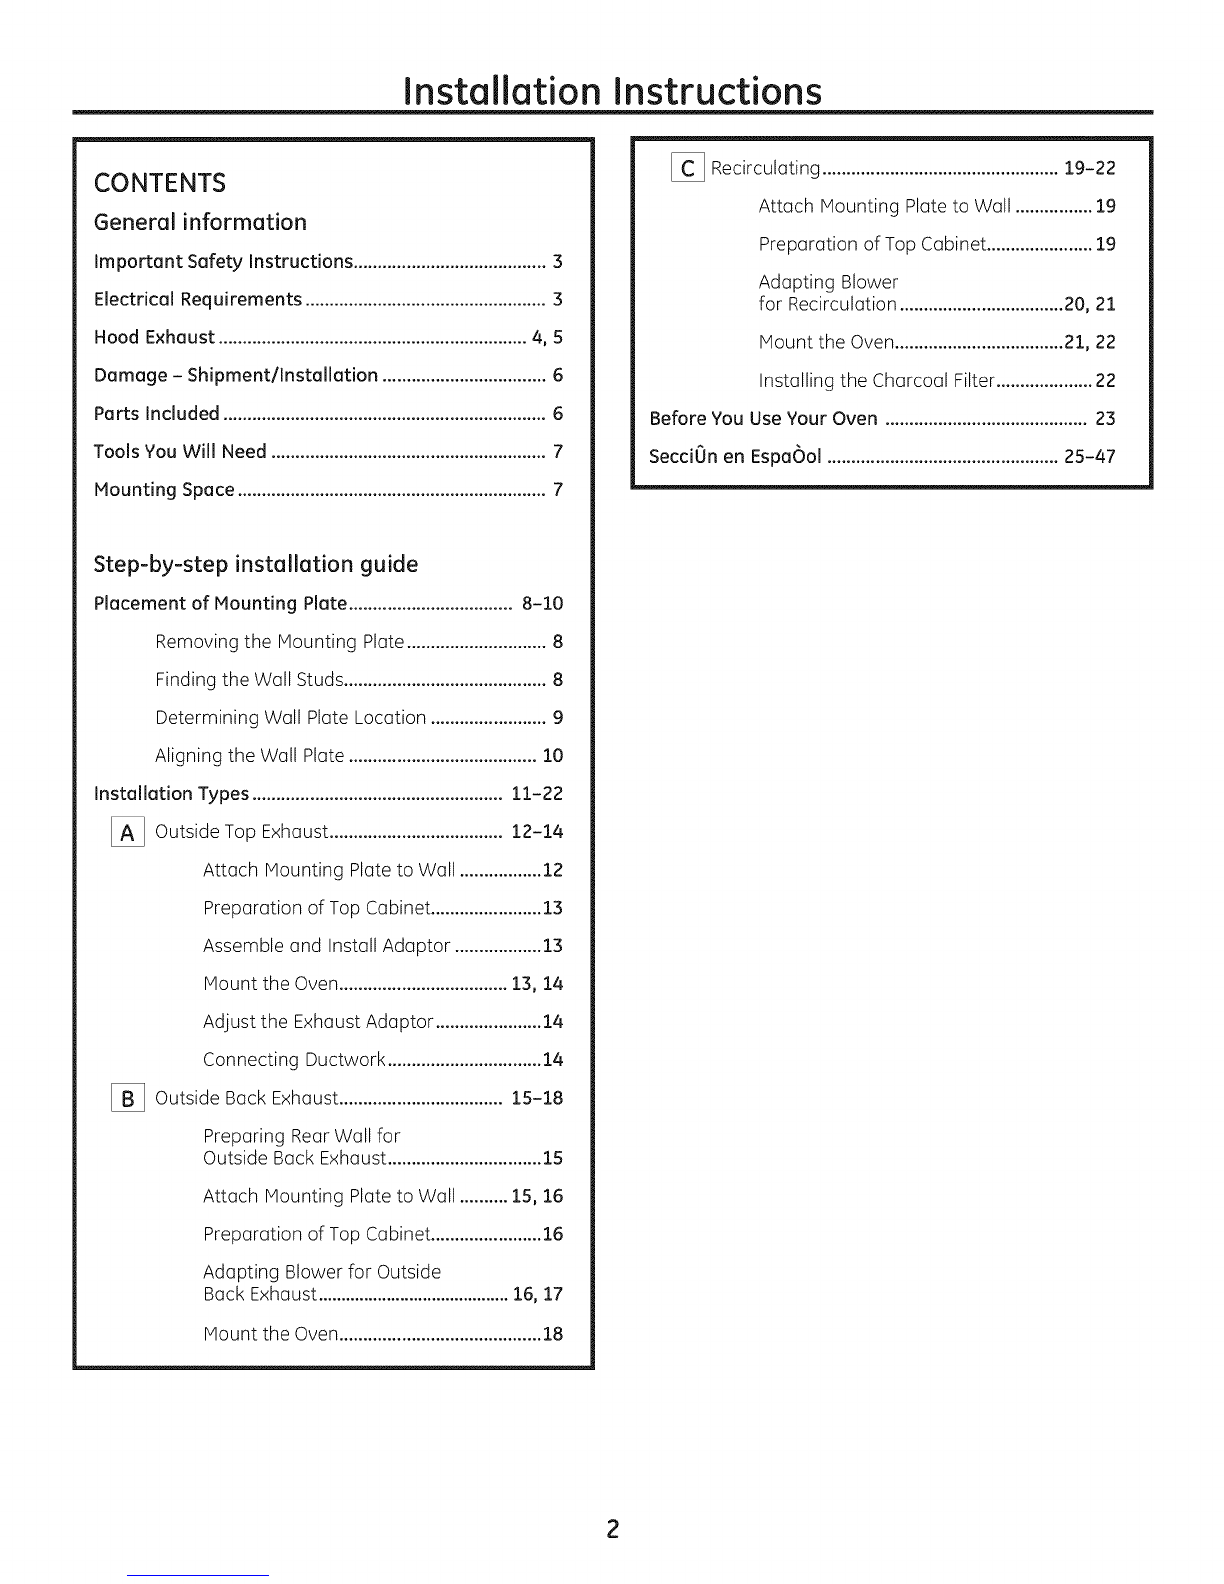
Installation Instructions
IMPORTANT SAFETY INSTRUCTIONS
A qualified electrician must perform a ground continuity
check on the wall receptacle before beginning the
installation to ensure that the outlet box is properly
grounded. If not properly grounded, or if the wall
receptacle does not meet electrical requirements noted
(under ELECTRICALREQUIREMENTS),a qualified electrician
should be employed to correct any deficiencies.
WARNING:
Riskof Electric Shock.
Can cause injury or death:
Remove house fuse or
open circuit breaker before
beginning installation to avoid
severe or fatal shock injury.
A, ,,,^ ,.,,,,,,,,,,,.-
J_Wt'_11,1_l I I_i !_.3:Riskof Electric Shock.
Can cause injury or death: THISAPPLIANCEMUSTBE
PROPERLYGROUNDEDto avoid severe or fatal shock.
120 V Models
ground% s
beforeuse
240 V Models
The power cord of this
appliance isequipped with
a three-prong (grounding)
plug which mates with
a standard three-prong
(grounding) wall receptacle
to minimize the possibility
of electric shock hazard
from this appliance.
NEMA!4-30R
WGIIReceptacle
Ensureproper
ground exists
beforeuse.
The wall outlet receptacle
recommended for this
application is NEMA #14-
30R and accepts the four-
prong grounded plug of
this appliance.
Where a standard two-prong wall receptacle is
encountered, it must be replaced with a properly
grounded three-prong wall receptacle, installed by a
qualified electrician.
AWARN ING:RiskofElectricShock.
Can cause injury or death: DONOT,under any
circumstances, cut, deform or remove any of the prongs
from the power cord. Do not usewith an extension cord.
Failure to comply may cause fire.
3
A,-.^..T._.
LL!_,_IJ|| _J|_l: For personal safety, the
mounting surface must be capable of supporting the
cabinet load, in addition to the added weight of this
63-85 pound product, plus additional oven loads of up
to 50 pounds or a total weight of 113-135 pounds.
,CAUTION: Forpersonalsafety,thisproduct
cannot be installed in cabinet arrangements such as an
island or a peninsula. It must be mounted to BOTHa top
cabinet AND a wall.
CAUTION: Toavoidtheriskofpersonal
injury (back injury or other injuries due to excessive
weight of the microwave oven) or property damage, you
will need two people to install this microwave oven.
ELECTRICAL REQUIREMENTS
120 V Models
This product requires a three-prong grounded outlet.
Product rating is 120 volts AC, 60 Hertz, 15 amps,
and 1.70 kilowatts. This product must be connected
to a supply circuit of the proper voltage and frequency.
Wire size must conform to the requirements of the
National Electrical Code or the prevailing local code
for this kilowatt rating. The power supply cord and
plug should be brought to a separate 15 to 20 ampere
branch circuit single grounded outlet. The outlet box
should be located in the cabinet above the oven and away
from any potential microwave oven ducting.The outlet
box and supply circuit should be installed by a qualified
electrician and conform to the National Electrical Code or
the prevailing local code.
240 V Models
This product requires a four-prong grounded outlet.
Product rating is 120/208 or 120/240 volts, 60 Hertz,
30 amps and 6.5 kilowatts. This product must be
connected to an individual properly grounded branch
circuit, protected by circuit breakers or time-delay fuses.
Wire size must conform to the requirements of the
National Electrical Code or the prevailing local code for
this kilowatt rating. The outlet box should be located in
the cabinet above the oven and away from any potential
microwave oven ducting. The outlet box and supply circuit
should be installed by a qualified electrician and conform
to the National Electrical Code or the prevailing local code.


M Service manual")