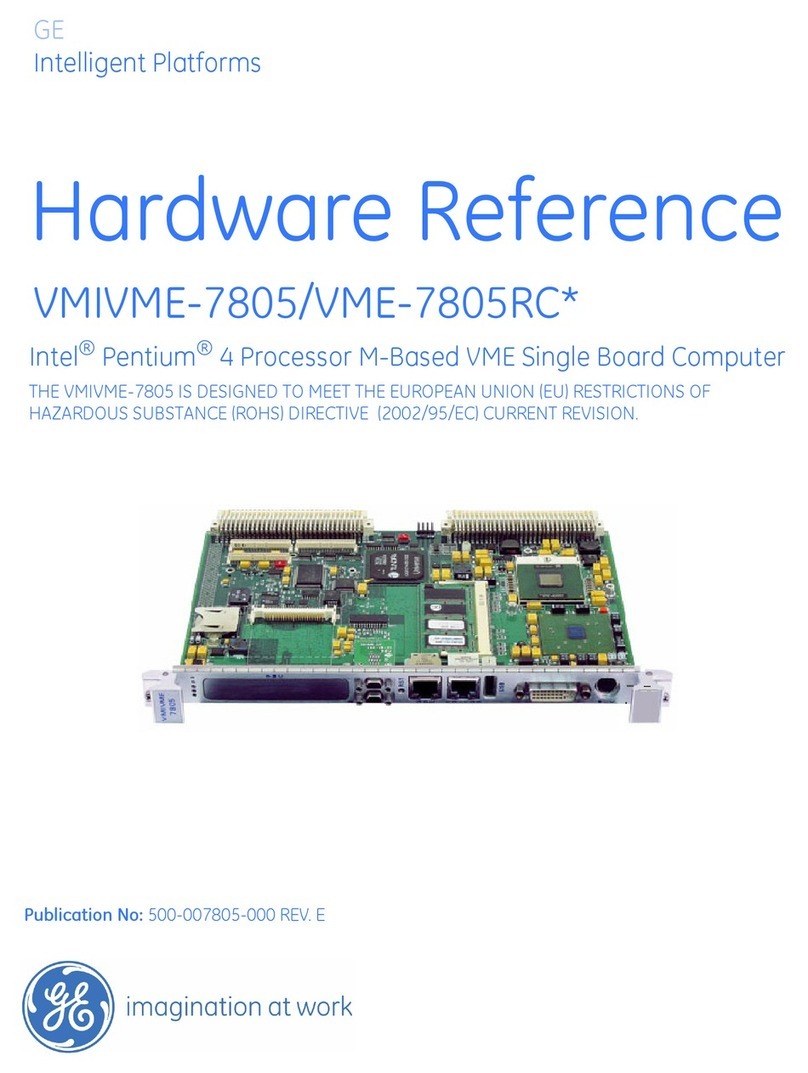
GE VR11 User manual

GE
Intelligent Platforms
Hardware Reference Manual
VR11, VP11
Intel® Core™2 Duo / Intel® Core™ Duo
6U VME SBC
Second Edition
Publication No. HRMVR112E

Document History
EditionDateByBoardArtworkRevision
Second01Apr2010HHSAll
HHSAdjustlayouttonewstyle
HHSChangesupportchapter;addsalesaddresses
Copyright©2010GEIntelligentPlatforms,Inc.
Allrightsreserved.
TheVR11,VP11HardwareReferenceManualappliestotheVR11,VP116U
VMESingleBoardComputerrevision1.0andabove,untilsuperseded.
GE Intelligent Platforms – VR11, VP11 Hardware Reference Manual, Second Edition Page 2

Legal Information
Legal Disclaimers
© 2010 GE Intelligent Platforms, Inc. All rights reserved.
The information in this manual is proprietary to and is the confidential
information of GE Intelligent Platforms, Inc. and may not be reproduced in
whole or in part, for any purpose, in any form or by any means, electronic,
mechanical, recording, or otherwise, without written consent of GE Intelligent
Platforms, Inc. Use, disclosure, and reproduction is permitted only under the
terms of a GE Intelligent Platforms license agreement or explicit written
permission of GE Intelligent Platforms. You are not authorized to use this
document or its contents until you have read and agreed to the applicable
license agreement. Receipt of this publication is considered acceptance of these
conditions.
All information contained in this document has been carefully checked and is
believed to be entirely reliable and consistent with the product that it describes.
However, no responsibility is assumed for inaccuracies. GE Intelligent
Platforms assumes no liability due to the application or use of any product or
circuit described herein; no liability is accepted concerning the use of GE
Intelligent Platforms products in life support systems. GE Intelligent Platforms
reserves the right to make changes to any product and product documentation
in an effort to improve performance, reliability, or design.
THIS DOCUMENT AND ITS CONTENTS ARE PROVIDED AS IS, WITH
NO WARRANTIES OF ANY KIND, WHETHER EXPRESS OR IMPLIED,
INCLUDING WARRANTIES OF DESIGN, MERCHANTABILITY, AND
FITNESS FOR A PARTICULAR PURPOSE, OR ARISING FROM ANY
COURSE OF DEALING, USAGE, OR TRADE PRACTICE.
Changes or modifications to this unit, not expressly approved by GE Intelligent
Platforms, could void the user’s authority to operate the equipment.
All computer code and software contained in this document is licensed to be
used only in connection with a GE Intelligent Platforms hardware product.
Even if this code or software is merged with any other code or software
program, it remains subject to the terms and conditions of this license. If you
copy, or merge, this code or software, you must reproduce and include all GE
Intelligent Platforms copyright notices and any other proprietary rights notices.
The content of this manual if furnished for informational use only and is subject
to change without notice. Reverse engineering of any GE Intelligent Platforms
product is strictly prohibited.
In no event will GE Intelligent Platforms be liable for any lost revenue or
profits or other special, indirect, incidental and consequential damage, even if
GE Intelligent Platforms has been advised of the possibility of such damages,
as a result of the usage of this document and the software that this document
describes. The entire liability of GE Intelligent Platforms shall be limited to the
amount paid by you for this document and its contents.
GE Intelligent Platforms – VR11, VP11 Hardware Reference Manual, Second Edition Page 3

GE Intelligent Platforms shall have no liability with respect to the infringement
of copyrights, trade secrets, or any patents by this document of any part thereof.
Please see the applicable software license agreement for full disclaimer or
warranties and limitations of liability.
This disclaimer of warranty extends to GE Intelligent Platforms’ licensees, to
licensees transfers, and to licensees customers or users and is in lieu of all
warranties expressed, implied, or statutory, included implied warranties of
scalability or fitness for a particular purpose.
GE Intelligent Platforms and the GE Intelligent Platforms logo are trademarks
of GE Intelligent Platforms, Inc. Other brand names and product names
contained herein may be claimed as the property of others.
GE Intelligent Platforms, Inc., 2500 Austin Drive, Charlottesville, VA 22911,
U.S.A.
Regulatory compliance
Products sold or transferred between companies or operated on company
premises (factory floor, laboratory) do not need CE, FCC or equivalent
certification. Boards or subsystems which cannot provide a useful function on
their own do not need certification.
Certification can only be granted to complete and operational systems. There
are authorized testing agencies, regulatory organizations and laboratories who
will issue certificates of compliance after system testing.
GE Intelligent Platforms designs and tests all their products for EMI/EMC
conformance. Where GE Intelligent Platforms supplies a complete/functional
system for use by end users a certificate will be cited in the manuals/documents
which are provided with the products.
Products manufactured by GE Intelligent Platforms should normally be suitable
for use in properly designed and produced customer equipment (system boxes
or operational systems) without any major redesign or additional filtering.
However, the systems might not conform to specific regulations once
assembled and used. The system integrator or installer must test for compliance
as required in his country or by the intended application and certify this to the
end user.
ESD/EMI issues
ESD (Electro-Static Discharge) and EMI (Electro-Magnetic Interference) issues
may show up in complete and operational systems. There are many ways to
avoid problems with these issues.
Any operational system with cables for I/O signals, connectivity or peripheral
devices provides an entry point for ESD and EMI. If GE Intelligent Platforms
does not manufacture the complete system, including enclosure and cables, it is
the responsibility of the system integrator and end user to protect their system
against potential problems. Filtering, optical isolation, ESD gaskets and other
measures might be required at the physical point of entry (enclosure wall of box
or rack). For example it is state-of-the-art that protection can not be done at the
GE Intelligent Platforms – VR11, VP11 Hardware Reference Manual, Second Edition Page 4

internal connector of an RTM if a cable is attached and routed outside the
enclosure. It has to be done at the physical entry point as specified above.
Products manufactured by GE Intelligent Platforms should normally be suitable
for use in properly designed and produced customer equipment (system boxes
or operational systems) without any major redesign. However, the systems
might be subject to problems and issues once assembled, cabled and used. The
end user, system integrator or installer must test for possible problems and in
some cases show compliance to local regulations as required in his country or
by the intended application.
Waste Disposal
The mark or symbol on any electrical or electronic product shows that this
product may not be disposed off in a trash bin. Such goods have to be returned
to the original vendor or to a properly authorized collection point.
Electric waste disposal symbol with black bar as explained below
The black bar underneath the waste bin symbol shows that the product was
placed on the market after 13 August 2005. Alternatively the date of ‘placed on
the market’ is shown in place of the bar symbol.
CE conformance declaration
CE certification is required in EU countries for equipment which is used or
operated by the end user. Products sold or transferred between companies or
operated on company premises (factory floor, laboratory) do not need CE
certification.
CE certification can only be granted to complete and operational systems.
Boards or subsystems which cannot provide a useful function on their own do
not need CE certification.
GE Intelligent Platforms designs and tests all their products for EMI/EMC
conformance. Products manufactured by GE Intelligent Platforms should
normally be suitable for use in properly designed and produced customer
equipment (system boxes or operational systems) without any major redesign
GE Intelligent Platforms – VR11, VP11 Hardware Reference Manual, Second Edition Page 5

GE Intelligent Platforms – VR11, VP11 Hardware Reference Manual, Second Edition Page 6
or additional filtering. The system integrator or installer must, in any case, test
for CE compliance and certify this to the end user.
Where GE Intelligent Platforms supplies a complete/functional system for use
by end users in EU countries a CE certificate will be cited in the
manuals/documents which are provided with the products. The CE (and year of
certification) symbol is shown on the equipment, typically on the type or S/N
label or close to the power cable entry.
GE Intelligent Platforms have tested their boards using their own card cages
(chassis). Test results of these tests are available upon request.
Corporate addresses Corporate headquarters
GE Intelligent Platforms Inc.
2500 Austin Drive
Charlottesville, VA 22911
U.S.A.
Phone: +1-800-322-3616
Web: www.ge-ip.com
Regional headquarters
US Germany
Americas & Pacific Rim (Japan,
Korea, China, Philippines, AUS, NZ)
Germany
GE Intelligent Platforms, Inc. GE Intelligent Platforms GmbH &
Co. KG
2500 Austin Drive Memminger Str. 14
Charlottesville, VA 22911 86159 Augsburg
U.S.A. Germany
Phone: +1-800-322-3616 Phone: +49-821-5034-0
Fax: +1- Fax: +49-821-5034-119
Web: www.ge-ip.com Email: sales.augsburg.ip@ge.com
GE Intelligent Platforms on the Web: http://www.ge-ip.com
For contact and other information (service, warranty, support etc.) see address
list in chapter: ‘Support, Service’.

Introduction Welcome
The VR11, VP11 VME Single Board Computer is a fully IBM-AT compatible
stand-alone PC equipped with numerous functions and add-on features on a
minimal board foot print. This technical manual is designed to provide
information regarding the general usage and application of the VR11, VP11
VME Single Board Computer. It also details the hardware and software
methodologies. Programming information is also provided.
Chapter 1 gives a brief overview over the functions, features and devices of the
VR11 and VP11.
Chapter 2 and 3 illustrate unpacking and installation procedures.
Chapter 4 contains important information for 'Getting started'
Chapter 5 describes all onboard and panel interfaces with pin assignments.
Chapter 6 contains notes on system resources.
Chapter 7 describes the functional blocks.
Chapter 8 details electrical and environmental specifications.
Appendix A describes the VME Transition Module VTM22.
Appendix B shows details of the PMC sockets.
Appendix C explains the Vx9 and Vx11 compatibility.
Appendix D describes support and warranty conditions and procedures.
Please observe all safety instructions when handling GE Intelligent Platforms
products as given in the unpacking and installation chapters.
The following document also covers items relevant to the VR11 and the VP11
VME Single Board Computer. It is also included under Technical Product
Information on our Product CD-ROM.
•User’s Manual for AMIBIOS8 Setup
•Board Specific Hardware Programmer’s Manual
•AMIBIOS8 Check Point and Beep Code List
•AMIBIOS8 Error Messages
•Thermal Report TR-HW-012
GE Intelligent Platforms – VR11, VP11 Hardware Reference Manual, Second Edition Page 7

Typographic Conventions
This manual uses the following notation conventions:
•Italics (sometimes additional in blue color) emphasize words in text or
documentation or chapter titles or web addresses if underlined.
•Hexadecimal values (base 16) are represented as digits followed by 'h', for
example: 0Ch.
•Hexadecimal values (base 16) are represented as digits preceded by 'H', for
example: H0C.
•Hexadecimal values (base 16) are represented as digits preceded by '$', for
example: $0C.
•Binary values (base 2) are represented as digits followed by 'b', for
example 01b
•The use of a '#' (hash) suffix to a signal name indicates an active low
signal. The signal is either true when it is at logic zero level (voltage close
to 0 V) or the signal initiates actions on a high-to-low transition.
•The use of a '\' (backslash) prefix to a signal name indicates an active low
signal. The signal is either true when it is at logic zero level (voltage close
to 0 V) or the signal initiates actions on a high-to-low transition.
•Text in Courier font indicates a command entry or output from a GE
Intelligent Platforms embedded PC product using the built-in character set.
•Notes, warning symbols and cautions call attention to essential
information.
Product Properties
Certification
The product or products described in this technical manual cannot be operated
by themselves. They are components for integration into operational systems or
add-ons to such systems. The products have been designed to meet relevant
regulatory standards like FCC and CE. As mandated by these standards
conformance to these standards can only be certified for complete operational
systems. This has to be done by the end-user or by the systems integrator in
their operational systems. GE Intelligent Platforms have tested some products
in their own systems. Upon request information is available which products
have been tested and about the specific environment under which GE
Intelligent Platforms has tested these components.
Altitude
Altitude, air pressure and ambient temperature influence the thermal operation
of the components described in this manual. They have been developed and
tested at about 500 m (1650 ft.) above sea level at a typical ambient
temperature of 20 °C (68 °F). Because of only marginal variations within a
limited range of altitudes these products operate as specified within altitudes
from sea level to 1000 m (3300 ft.). This is with reference to temperature
ranges of air-cooled versions. GE Intelligent Platforms can assist the user of
these components in planning operation outside this altitude range upon
request.
Options
This manual describes the basic product plus all options. Your product may not
have all options implemented. Please verify with your purchase contract which
GE Intelligent Platforms – VR11, VP11 Hardware Reference Manual, Second Edition Page 8

options are implemented. Descriptions of options which are not implemented
obviously do not apply to your product.
Support, Service and Warranty
The manufacturer grants the original purchaser of GE Intelligent Platforms
products a warranty of 24 months from the date of delivery. For details
regarding this warranty refer to Terms & Conditions of the initial sale.
Please see chapter 'Support, Service, and Warranty Information' for further
details on repairs and product support.
For support on the web and product information, visit our website at
http://www.ge-ip.com
GE Intelligent Platforms – VR11, VP11 Hardware Reference Manual, Second Edition Page 9

GE Intelligent Platforms – VR11, VP11 Hardware Reference Manual, Second Edition Page 10

Introduction Contents
Contents
Legal Information 3
Legal Disclaimers 3
Regulatory compliance 4
ESD/EMI issues 4
Waste Disposal 5
CE conformance declaration 5
Corporate addresses 6
INTRODUCTION WELCOME 7
Typographic Conventions 8
Product Properties 8
Certification 8
Altitude 8
Options 8
Support, Service and Warranty 9
INTRODUCTION CONTENTS 11
CHAPTER 1 INTRODUCTION 19
Board Design 20
Design Features 22
GE Intelligent Platforms – VR11, VP11 Hardware Reference Manual, Second Edition Page 11

CHAPTER 2 UNPACKING AND INSPECTION 27
Delivery Volume 27
Available Options 27
ESD 28
Warning 28
Initial Inspection 29
Unpacking 29
Handling 30
CHAPTER 3 INSTALLATION 33
Installation preparation 33
General advice 33
Advice on VMEbus products 34
Advice on Batteries 34
Required items 34
Backplane and Power Supply 34
Keyboard and Mouse 34
Video Monitor 35
Minimum System Requirements 35
THE POST TEST 35
Installation of a plug-in board 36
Installation of the Rear Transition Module (VTM22) 36
Initial Power-On Operation 36
Entering the BIOS SETUP 37
CHAPTER 4 GETTING STARTED 39
Power Supply 39
Status indicator, Postcode and Beeps 40
Booting 40
Setup 41
Unexpected Resets 41
CHAPTER 5 INTERFACES 43
GE Intelligent Platforms – VR11, VP11 Hardware Reference Manual, Second Edition Page 12

Front Panel Interfaces 44
VR11 Connectors 45
PMC options 45
VMEbus Connector P1 (P7301) 45
VMEbus Connector P2 (P7302) 46
VMEbus Connector P0 (P7300) with partial PMC-I/O 47
VMEbus Connector P0 (P7300) with full PMC-I/O 49
IDE Connector (P1800) 50
Ethernet Interface (U5600 and U5650) 53
Fast Ethernet Interface U5102 54
Serial Port COM1 (P2200) 54
RJ45 cable (optional) 55
VGA Interface (P4200) 56
USB Interfaces (P1680, P1681) 57
PMC1 Connectors (P6201, P6202, and P6203) 58
PMC2 Connectors (P7201, P7202) 59
PMC-I/O Connector (P6204 and P7204) 61
Transition Module 61
CHAPTER 6 RESOURCES 63
Memory Map 63
Register Set 63
Standard Register Set 64
Plug and Play Devices 64
Interrupts 65
APIC Controller 66
CHAPTER 7 FUNCTION BLOCKS 67
Processor 67
Memory Controller 67
Interrupt Controller 67
Timer 68
Real Time Clock 69
Keyboard and Mouse 69
GE Intelligent Platforms – VR11, VP11 Hardware Reference Manual, Second Edition Page 13

EIDE Interface 69
Serial Interface 69
Graphics Controller 70
Software Installation 70
PMC Interface 70
Ethernet Interface 70
Software Installation 70
Additional devices 71
SMBus devices 71
Temperature Sensor LM86 71
Serial EEPROM 71
Geographic Addressing 72
GPIO (0...7) 72
Watchdog, Powerfail Monitor 72
Programmable Timer 72
LED 72
Reset Button 73
Speaker 73
CHAPTER 8 SPECIFICATIONS 76
Power Consumption 76
Onboard Lithium Battery 78
Not powered by the system 78
Powered by the system 79
Battery removal and replacement 80
+5VSTDBY 80
Environment Conditions 81
Card edge temperatures for VR11 style 8 83
Electrical Characteristics 83
Supply voltage range 84
GPIO 0...7 84
Isolation 84
Board layout drawings 85
Placement Plan Component Side VR11 (V0) 86
GE Intelligent Platforms – VR11, VP11 Hardware Reference Manual, Second Edition Page 14

Placement Plan Bottom Side VR11 (V0) 87
Placement Plan Component Side VR11 (V1) 88
Placement Plan Bottom Side VR11 (V1) 89
APPENDIX A TRANSITION MODULE VTM22 91
VTM22 Interfaces 93
VGA Interface (P4001) 96
DVI-I connector (P4100) 97
USB connectors (P1600, P1601) 98
Miscellaneous connector (P2000) 99
PMC I/O connectors 100
VGA 2 connector 102
SATA connectors 102
Headphone Out connector 103
SPDIF connector 103
Audio connector 104
CD IN connector 104
Line IN connector 104
Placement Plan VTM22V0 105
APPENDIX B PCI MEZZANINE CARD (PMC) SLOT 107
Electrical characteristics 107
Mounting of PMC module 108
Secondary Thermal Interface 109
APPENDIX C VX11 AND VX9 COMPATIBILITY 111
Basic compatibility: 111
Front I/O: 111
Rear I/O 112
APPENDIX D SUPPORT, SERVICE AND WARRANTY 115
Error Report 116
GE Intelligent Platforms – VR11, VP11 Hardware Reference Manual, Second Edition Page 15

FIGURES
Figure 1: VR11 board................................................................................................................................................19
Figure 2: VR11 Block diagram .................................................................................................................................21
Figure 3: Board packaging ........................................................................................................................................30
Figure 4: Handling the 6U VME board.....................................................................................................................31
Figure 5: 6U board insertion into VMEbus system box............................................................................................36
Figure 6: VR11 board with PMC sockets .................................................................................................................44
Figure 7: Front panel on single slot board.................................................................................................................44
Figure 8: Front panel on dual slot board ...................................................................................................................45
Figure 9: IDE connector............................................................................................................................................51
Figure 10: Ethernet connectors .................................................................................................................................53
Figure 11: Ethernet connector pin assignment ..........................................................................................................53
Figure 12: Fast Ethernet connector layout.................................................................................................................54
Figure 13: COM1 location ........................................................................................................................................55
Figure 14: VGA interface..........................................................................................................................................56
Figure 15: USB .........................................................................................................................................................57
Figure 16: USB pin assignment ................................................................................................................................57
Figure 17: Battery current versus temperature ..........................................................................................................78
Figure 18: Battery current versus time ......................................................................................................................79
Figure 19: Battery removal .......................................................................................................................................80
Figure 20: Air temperature vs. air speed ...................................................................................................................82
Figure 21: Component side of VR11 (V0)................................................................................................................86
Figure 22: Bottom side of VR11 (V0).......................................................................................................................87
Figure 23: Component side of VR11 (V1)................................................................................................................88
Figure 24: Bottom side of VR11 (V0).......................................................................................................................89
Figure 25: VTM22 Transition Module......................................................................................................................92
Figure 26: Ethernet connector pin assignment ..........................................................................................................94
Figure 27: DVI-I connector layout............................................................................................................................97
Figure 28: Placement plan VTM22, V0 ..................................................................................................................105
Figure 29: Mounting of PMC module on VR11 .....................................................................................................108
Figure 30: Mounting of Secondary Thermal Interface on PMC module.................................................................109
GE Intelligent Platforms – VR11, VP11 Hardware Reference Manual, Second Edition Page 16

TABLES
Table 1: Styles available ...........................................................................................................................................25
Table 2: BIOS ID coding ..........................................................................................................................................37
Table 3: Boot sequence .............................................................................................................................................41
Table 4: VMEbus connector P1 ................................................................................................................................46
Table 5: VMEbus connector P2 ................................................................................................................................47
Table 6: VMEbus connector P0 with partial I/O and HD Interface ..........................................................................48
Table 7: VMEbus connector P0 with partial I/O, HD interface, SATA, Audio........................................................49
Table 8: VMEbus connector P0 with full I/O ...........................................................................................................50
Table 9: IDE connector .............................................................................................................................................52
Table 10: Ethernet 1/2 connectors.............................................................................................................................53
Table 11: LEDs on Ethernet connector .....................................................................................................................54
Table 12: COM1 pin assignments.............................................................................................................................55
Table 13: RJ45 converter cable pin assignments ......................................................................................................56
Table 14: VGA connector pin assignments...............................................................................................................57
Table 15: USB pin assignments ................................................................................................................................58
Table 16: PMC1 connector pin assignments.............................................................................................................59
Table 17: PMC2 connector pin assignments.............................................................................................................60
Table 18: Memory map.............................................................................................................................................63
Table 19: Standard register set ..................................................................................................................................64
Table 20: Interrupt assignments ................................................................................................................................65
Table 21: Interval timer functions.............................................................................................................................68
Table 22: Software interfaces....................................................................................................................................70
Table 23: Additional devices.....................................................................................................................................71
Table 24: BIOS power up status ...............................................................................................................................73
Table 25: Power consumption CPU dependent.........................................................................................................77
Table 26: Power consumption DRAM dependent.....................................................................................................77
Table 27: Environment conditions ............................................................................................................................81
Table 28: Shock & vibration parameters...................................................................................................................81
Table 29: Maximum height usage.............................................................................................................................82
Table 30: Card edge temperatures for style 8............................................................................................................83
Table 31: Supply voltages .........................................................................................................................................83
Table 32: Supply voltage range.................................................................................................................................84
Table 33: GPIO IN signal levels ...............................................................................................................................84
Table 34: GPIO OUT signal levels ...........................................................................................................................84
Table 35: VTM22 IDE connector .............................................................................................................................93
Table 36: VTM22 Ethernet connectors .....................................................................................................................94
Table 37: VTM22 LEDs ...........................................................................................................................................94
Table 38: VTM22 TMDS connector.........................................................................................................................95
Table 39: VTM22 COM1..........................................................................................................................................96
Table 40: VTM22 COM2..........................................................................................................................................96
Table 41: VTM22 VGA ............................................................................................................................................97
Table 42: VTM22 DVI-I connector digital pin assignments.....................................................................................98
Table 43: VTM22 DVI-I connector analog pin assignments ....................................................................................98
Table 44: VTM22 USB0...........................................................................................................................................99
Table 45: VTM22 USB1...........................................................................................................................................99
Table 46: VTM22 Miscellaneous Connector ............................................................................................................99
Table 47: PMC I/O connectors................................................................................................................................100
Table 48: PMC I/O header ......................................................................................................................................101
Table 49: VTM22 VGA 2 .......................................................................................................................................102
Table 50: VTM22 SATA 0 .....................................................................................................................................102
Table 51: VTM22 SATA 1 .....................................................................................................................................102
GE Intelligent Platforms – VR11, VP11 Hardware Reference Manual, Second Edition Page 17

GE Intelligent Platforms – VR11, VP11 Hardware Reference Manual, Second Edition Page 18
Table 52: VTM22 SATA HD direct........................................................................................................................103
Table 53: VTM22 Headphone Out..........................................................................................................................103
Table 54: VTM22 SPDIF........................................................................................................................................103
Table 55: VTM22 Audio.........................................................................................................................................104
Table 56: VTM22 CD IN........................................................................................................................................104
Table 57: VTM22 LINE IN ....................................................................................................................................104
Table 58: Electrical characteristics..........................................................................................................................107
Table 59: Rear I/O pin assignments for Vx9 & Vx11.............................................................................................112

CHAPTER 1 Introduction
Chapter Scope
This chapter describes features, capabilities and compatibilities of the VR11
and VP11 VME Single Board Computer. Both boards are based on the same
PCB. All further occurrences of the board’s names will be referred to as the
VR11. Any further specification in this document referring to VR11 can be
applied to VR11 and VP11 unless otherwise noted.
Figure 1: VR11 board
GE Intelligent Platforms – VR11, VP11 Hardware Reference Manual, Second Edition Page 19

Board Design The VR11 is a fully IBM-AT compatible stand-alone PC. It is equipped with
many functions a conventional Personal Computer can only offer after the
installation of several add-in cards. Extension boards can be connected via the
VME interface. The minimal board size and the large number of I/Os and
functions allow the VR11 to be used in many applications. See the following
block diagram for the boards design.
GE Intelligent Platforms – VR11, VP11 Hardware Reference Manual, Second Edition Page 20
This manual suits for next models
1
Table of contents
Other GE Motherboard manuals

GE
GE VMIVME-7805 Application guide

GE
GE AZ45E09DABW1 Configuration guide

GE
GE MicroVersaTrip User manual

GE
GE SBC330 3U VPX Quick user guide

GE
GE DS200LDCCH1A User manual

GE
GE V7865 Series Application guide

GE
GE C2K Application guide

GE
GE V7768 Application guide

GE
GE OpenVPX VPXcel6 SBC622 Application guide