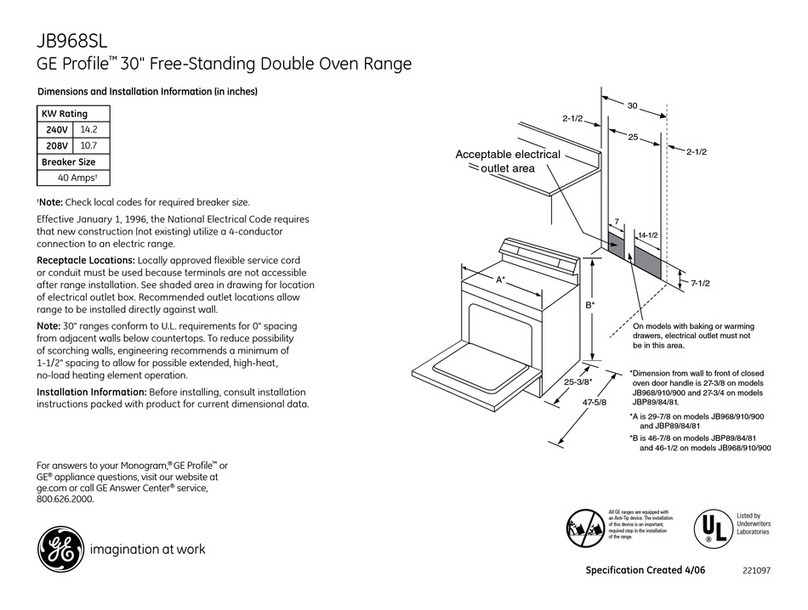
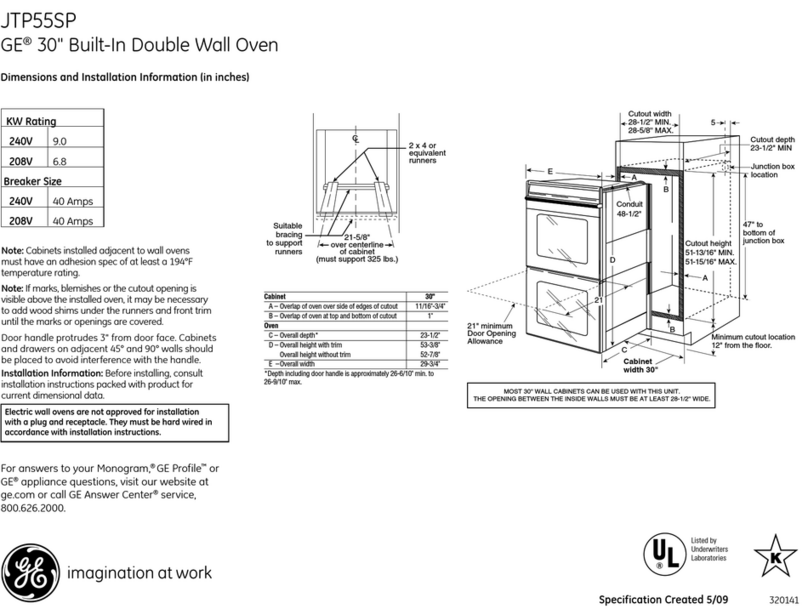
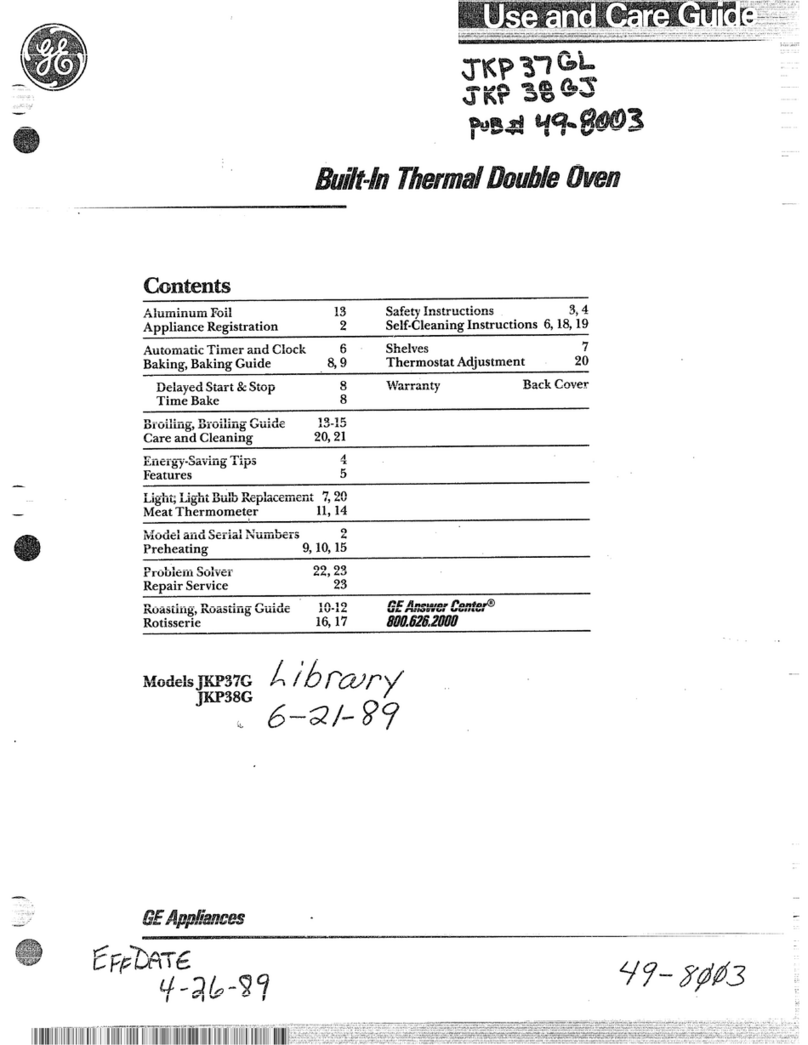
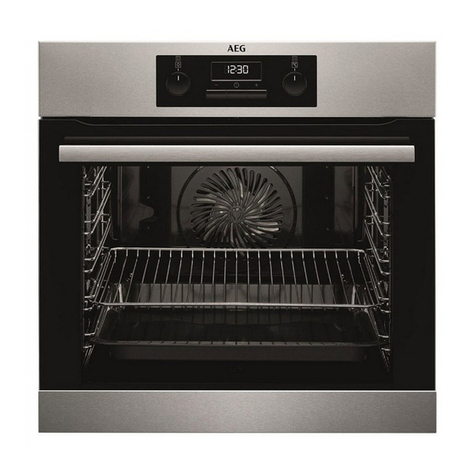
GE JKC06GJ Specification sheet

thebestf;nm1
—,
.----==
:-...—------..-. ———.—-_—_..—-.4
useandcareofJ
JKC06GJJmo6
Jmo6J~m26
Features
Energy-savingtips p5
ovenCooting p6
ovencare p14
Questions?
UsetheProblemSolver p18
I

ImportantSafetyInstmctions. ...3
FeaturesofYourOven .......4.5
Energy-SavingTips . . . . . . . . ...5
UsingYotirOven .............6
AutomaticOvenTimer,
MinuteTirnerand Clock .....7
Baking . . . . . . . . . . . . . . . . . . . ..$
BakingGuide ................9
Roasting . . . . . . . . . . . . . . . . . ..lO
RoastingGuide ..............li
Broiling ...................l2
J3roilingGuide . . . . . . . . . . . . ..l3
CareandCleaning .........14.15
Continuous-Cleaning
OvenCare . . . . . . . . . . . ..l5.l6
CleaningGuide. . . . . . . . . . . . ..l7
TheProblernSolver . . . . . . . ...18
IfYouNeedService . . . . . . . ...19
Warranty . . . . . . . . . ..BackCover
It isintendedto helpyouoperate
andmaintainyournewoven
properly.
Keepithandyforanswersto your
questions.
If youdon’tunderstandsomething
or needmore help,write (include
yourphonenumber):
ConsumerAffairs
GeneralElectric Company
AppliancePark
Louisville,KY40225
writedownthemodel
andserialnumbers.
Yourovenhas anameplateon
whichis stampedthe modeland
serialnumbers. (Seepage4.)
These modeland serial numbers
are also on the Consumer Product
Ownership RegistrationCard that
came with youroven. Before
sendingin this card, please write
these numbers here:
Model Number
Serial Number
IJse these numbersin any
correspondence or service calls
concerning your oven.
If youreceived
adam%ed oven...
Immediatelycontactthe dealer (or
builder)thatsoldyoutheoven.
save time and money.
Before you request
service.oe
ChecktheProblem Solveron
page 18.It listsminorcausesof
operatingproblemsthatyoucan
correctyourself.
It couldsaveyouanunnecessary
servicecall.
-—-
-\
--------—- - —---——--—-————-- -

:ReadaIlimtruetiombeforeusingthisappliance.
Jwen using electrical appliances,
basicsafetyprecautionsshould
befollowed,includingthe
following:
@usethis app~ianceonlyforifi
ktended use as describedin this
manual.
@Besure your applianceis
proprly titied md ~omded
byaqualifiedtechnicianin
accordancewith theprovided
kstallation Instructions.
@Don9tattempttorepak
or repIaceany partof your
oven Udess it isSpecflcal]y
reeomended in this book. All
otherservicingshouldbe referred
toaqualifiedtechnician.
efom&flo* my setice~
DIscomcT Tm omN
———_
POmR SUPPLY AT Tm
~Houmom~~mo~
—-—
.ENL BYWMOWNG THE
FUSE OR SWTCHING OFF
THE CRCUIT BREAKER.
@~~ not leaveChildren aloDe—
Children shouldnot be lefialone
or unattended in an area where
applianceis in use. They should
neverbe allowedto sit or stand
LIIIany part ofthe appliance.
~Don’t allow anyone to eIi113b9
Stand {jrhang on tile door.
Tileycould damage the oven.
~~p~~~lQN: Do Nm Smm
I-TEMS017ENTERMSTm
broughtin contactwithhot
heatingelementsandmaycause
severeburns.
~useonly dry pothQlders—
Moistor damppotholdersonhot
surfacesmayresultinburns
fromsteam.Do notletpotholders
touchhotheatingelements.Do
notuse atowelor otherbulky
cloth.
@Storage inor on appliance–-
Do notstoreflammablematerials
in the oven.
@Keep hood and greasefilters
clean to maintaingoodventing
andto avoidgrease fires.
QDo not let tootinggrease
orotherflamable materials
accmdate horn-r theoven.
~Do not use wateron grease
fires. Hame in ovencan be
smotheredby‘completely
closingdoorand turni~lg
OWN SETto Om.
eDo nottouchheathg‘elemen@
or iIIterior surface of oven.
These surfacesmay be hot
enoughto burn eventhoughthey
are dark in color. During and
after use, do not touch, or let
clothingor other flammable
materials contactany interior
area of the oven;allowsufficient
ti~nefor cooling, first.
Potentiallyhot surfaces include
the ovenvent openingsand
surfaces ~learthe openings,
crevices arotindthe ovendoor
a~~dthe edgesofthe door wtidow.
@when cookingperky follow
our directionserectly andalways
cookthemeattoat least 170°F.
Thisassuresthat, in theremote
possibilitythattrichinamaybe
presentin themeat, it willbe
Mled andthe meatwdl be safe
toeat.
@Stind away from ovenwhen
opening ovendoor. The hot air
or steam which escapescan
burnhan~, faceand/oreyes.
@Don9theat unopened food
Conmtiers hthe oven.Rwsme
Codd bdd up ad the Contier
could burnt, caushg aninjury.
@Keepovenventdue@
Uobstructede
@Keepovenfreefrom greme
buildup.
@Placeovenshelfin desired
positionwhile ovenis cool. If
shelvesmustbe handledwhen
hot, do notlet potholdercontact
heatingunits i~the oven.
@Wuhg out shelf to shelf stop
kaconveniencehMfttigheavy
foow. It is also aprwaution
agatit burns from touchg
hot surfaces of door or oven
waUs.
~m~~whgCOOWgOr
can catchfire. ;‘.
i‘-–””-1
!i::::”

.~
..
.FeaturesofYollroven
——— ——— ——
ModelJKC06GY*
with Conthuous-cieaning oven
@
q.%-)..——— ———-
.e~

I1OVENSET Knob I6IeI@I@I
2OVENTEMP Knob 6a e @
r3OvenCyclingLight 6e@a
4AutomaticOvenTimer, 7e e e
MinuteTimer and Clock I
I5OvenTimer Dials I7I@IeIeI
6OvenLiner** 14-16 e@@
7OvenShelves 6223
8ShelfSupports 6@e@
9OvenGasket 17 @ee
10 Window 6eee
11 Broiler Panand Rack 12 eee
RemovableOven Door** 14 eee
13 RemovableAluminumFoil
Oven BottomLiner
14 Interior Light 1: .~
15 Oven LiRhtSwitch I6I@I@I2
16 Model and Serial Number Plate 2eee
“’G”’in mode]number indicatesBlackGlass Door.
“’>Note:Special porous ceramic coatingon ovenliner and
door inner liner on Continuous-CleaningOven Model JKC06GJonly.
-
I,
.

1.Lookat the controls.Besure
youunderstandhowto setthem
properly.Readoverthe directions
fortheAutomaticOven Timerso
youunderstanditsuse withthe
controls.
2, Check oveninterior.Look at
theshelves.Takeapractice run
atremovingandreplacingthem
properly,to givesure, sturdy
support.
3.Readoverinformationandtips
thatfollow.
4. Keepthis bookhandy soyoucan
referto it, especiallyduringthe
firstweeksof gettingacquainted
withyour oven.
The controls for the ovenare
marked OVEN SET and OVEN
TEMP. OVEN SET has settingsfor
BAKE, TIME BAKE, BROIL and
OFF. When you turn the knobto
thedesired setting, the proper
heatingunits are then activated
forthat operation. OVEN TEMP
maintainsthe temperature YOU set
fromWARMto BROIL.
OvenCyciillgLight
Alightnear theOVENTEMP
controlglowsuntilovenreachesthe
selectedtemperature,thengoesoff
and on withtheovenunit(s)during
cooking.PREHEATINGtheoven,
evento hightemperaturesettings,
isspeedy—rarelymorethan 10
minutes.Preheattheovenonlywhen
necessary..Mostfoodswillcook
satisfactorilywithoutpreheating.If
youfindpreheatingnecessary,keep
an eyeonthe indicatorlight,and
putfoodin theovenpromptlyafter
thelightgoesout.
oven Light
The lightcomes on automatically
whenthedoorisopened.Useswitch
on thecontrolpanelto turn lighton
andoff when door isclosed.
The shelvesaredesignedwith stop-
locks, sowhenplacedcorrectly on
shelfsupports,they(a) stop before
comingcompletelyoutofoven,
and (b)do not tilt when removing
or placingfoodonthem.
~REMOVEshelffromthe oven,
when cool, lifi up rearof shelf,
pull forwardwith stop-locksalong
topof shelfsupports.
TOREPLACE shelfin oven,insert
with stop-locksrestingon shelf
supports.Push shelftowardrear of
oven;it willfallintoplace. When
shelfis in proper position, stop-
lockson shelfwillrun under shelf
supportwhenshelfispu~d forward.
The ovenhas four shelf supports—
A(bottom), B, Cand D(top).
Shelfpositions for cooking food
are suggestedon Baking, Roasting
and Broilingpages.
.. ..-—.. .
I
,
i
.. ... . .-—--—--———-....—.—-... ._____

TheAutomaticOvenTimer,
MinuteTimerand Clockonyour
ovenare helpfuldevicesthatserve
severalpurposes.
T’ settheMinutemmer
The MinuteTimer is thelargedial
towardtheleft sideofthe control
panel. It iscombinedwith the
OvenClock. Use itto time allyour
precisecookingoperations.You’ll
recognizethe MinuteTimer as the
uointerwhich is differentin color
shapefromthe Clock hands.
SET THE MINUTE TIMER,
—_ turn centerknob counterclockwise,
withou~pushingin, untilpointer
reaches number ofminutesyou
wish to time. (Theminutesare
marked, up to 60,in the center ring
on the Clock.) Atthe end ofthe set
time, abuzzer soundsto tellyou
the time is up. Turn the knob,
withoutpushing in, untilthe
pointer reaches OFF.
~us~zin lhe centerknob ofthe
Minute Timer and turn knob in
either direction to the correct time.
If the Minute Timer pointer should
also movewhile you’resettingthe
Clock, letthe knob out and turn the
Minute Timer pointer to OFF.
The automaticovencontrolsare
designedforthepersonwhocan’t
betieddowntobeingin thekitchen
or athomeat specifictimestoturn
anovenor applianceonor off.These
controlscan be presettostartand
stopyourovenforyou.Or, ifyou
preferto startthe foodyourself,
theywilltakeoverthejob of
turningthe ovenoff.
~SETTHE AU~MATIC OVEN
T~ER, usethetwodialsnexttothe
Clock, marked STARTand STOP.
Each dialis markedoffin J5-rninute
segmentsand numberedbythehour.
The pointerson thesedialscan be
movedonly when knob ispushed
in. (When thepointersare turned,
youcan hear a“ratchety” sound.)
If pointer can beturned, it means
knobhasbeenpushedinandpointer
has been set. Tobe certain knob is
in “out” position, turn knob so
pointer is at time showingon the
Clock. Knob willpop out and
cannotthen be turned. (Note:
Beforeyou setthese dials, be sure
the hands ofthe Oven Clock show
the correct time ofday.)
QuestiQIB2ndAmwers
Q. Must the clock be seton the
correcttimeofday when Itish
tousethe Automatic mmerfor
baking?
A. Yes,ifyouwishtosetthe Start
or Stopdialstoturn on andoffat
settimesduringtimedfunctions.
Q. CanIusethe Minute~mer
duringovencooking?
A. The MinuteTimercanbeused
duringanycookingfunction.The
AutomaticTimers(StartandStop
dials)areused withTIME BXE
finction only.
Q. Can 1change the Clock while
I’mmme Cootig inthe oven?
A. No.TheClockcannotbechanged
duringanyprogramthatusesthe
oventimer. Youmusteither stop
thosep~ogramsor waituntilthey
are finishedbeforechangingtime.
7

Whencookingafoodfo~the
firsttimein yournewoven,usethe
timegivenonrecipesas aguide.
Oventhermostatsmay “drift” from
thefactorysettingovertheyears,
and5to 10-minutedifferencesin
timingbetweenanoldandnewoven
arenotunusual. Youmightthink
yournewovenisnotperforming
satisfactorily;however,ithas been
setcorrectly atthefactoryand is
morelikelytobe accuratethan the
ovenit replaced.
HowhsetovenforBamg
1. Place foodin oven,being certain
toIeaveabout1inchofspacebetween
pansand wallsofovenfor good
circulationofheat. Closeovendoor.
During baking,avoidfrequentdoor
openingstopreventundesirableresdts.
2. Toset oven:Closeovendoor.
nrn OVENSETtoBAKEandOVEN
TEMP totemperatureon recipeor in
BakingGuide.
3. Check foodsfordoneness at
nlinimumtimeon recipe. Cook
longerif necessary.Switch offheat
and removefoods.
...
—-
on nowandofflater,automatically)
md DelayStartandStop(setoven
toturn on automaticallyatlater
time andturn OHautomaticdy at
presetstoptime).
How @set be@ak
Stit and Automatic Smp
Before begiting, make SWethe
ovenClwkshorn Comt tie of&y.
2. TosetStopTime,pushinknobon
Stopdialandturnpointertotimeyou
wantoventoturnoffiforemmp~e,
6:00.This meansyour recipecalled
for2% hours ofbakingtime.
N~E: Timeon Stopdialmustbe
laterthantime shownon ovenclock
and Startdial.
1. The Startdial shouldbe at the
same positionas thetime ofdayon
clock. Toset StopTime, push in
knob on Stopdial and turn pointer
to time youwantovento turn offi
for example,6:00. 3.Tum OVENSfiTknob to TIME
BAKE.TurnOVENTEMP knobto
recommendedtemperature.
2. Turn OVEN SETknobtoTIME
BAKE.TurnOVENTEMPknob
todesiredoventemperature;for
example,250°F.Ovenwillstart
heatingimmediately.
~q~~~~~~~~~~~~gy
S’hF”i:and Stoo
i
N~E: OVENINDICA~R
LIGHTSatT~E BAKEsetting
workditierentlythantheydoat
BM setting.DOnotbeconcerned 1~
ifnolightappears.CarefuUy “,
—
recheckthestepsgivenabove.Ifdl ~
operationsaredoneasexpltied,
ovenwilloperateasit shotid. ..
::
4. Placefoodin oven,closethe ~
door andthe ovenwill be turned on ~
and offautomaticallyat the times \r
youhaveset. When food is done, i
turn OVENSET toOFF md remove !
:
foodfromoven. #
[
i
(/--\
‘\ /
‘- . -,
..———.
.—
.——
-

-:;
1. Aluminumpansconductheat 2. Darkornon-shinyfinishes,glass whichcooklongerthan30to40
quictiy.Formostconventional andPyrocerarn@utensilsotin absorb --
minutes.Forfoodwithsholt
baking,light,shinyfinishesgive
bestresultsbecausetheyhelp
preventoverbrowninginthetime
ittakesforheattocookthecenter
areas.Dull(satin-finish)bottom
surfacesofpansarerecommended
forcakepansandpieplatestobe
surethoseareasbrowncompletely.
heat,“whichmayresultindry,crisp
crusts.Reduceovenheat25°F.if
lightercrustsaredesired.Preheat
castironforbakingsomefoodsfor
rapidbrowningwhenfoodisadded.
coobng times,preheatinggives
bestappearanceandcrispness.
4. Opentheovendoortocheck
foodaslittleaspossibletoprevent
unevenheatingandto saveenergy.
3. Preheatingtheovenisnotalways
necessary,especiallyforfoods
--
IOven
Tem~erature Time,
Minutes
Shelf
Wsitiona
Shelf
Positions Oven
Temperature
425°-4750
350°-4000
425°-4500
350°
400°-4250
375°
350°-3750
375°-4250
375°-4250
350°-3750
325°-375”
375°-4000
325°-3500
Time,
Minutes Food
iFood
Cookiesl
Brownies
Drop
Refrigerator
Rolledorsliced
1
Breadl
Biscuits(M-in.thick)
Coffeecake
Cornbread
Gingerbread
lMuffins
Popovers
Quickloafbread
)Yeastbread(2loaves)
Plainrolls
Sweetrolls
325°-3500
350°-4000
400°-4250
375°-4000
25-35
10-20
6-12
7-12
B,C
B,A
B
B.
A,B
B
B
A,B
A, B
B,A
B,C
B,C
B, C
B,C
10-20
20-30
25-40
30-45
20-30
45-60
45-60
45-60
10-25
20-30
Fruits,
OtherDesserts
Bakedapples
Custard
Puddings,rice
andcustard
350°-4000
300°-3500
325°
30-60
30-60
60-90
A, B, C
B
B
C9kes1
(withoutshortening)
A1lgelfood
Jelly roll
Sponge
Cakesl
Bundtcakes
,.
2
Fruitcakes
Layer
Layer,chocolate
Loaf
Piesz
Frozen
.Meringue3
Onecrust
Twocrust
Pastryshell
30-55
10-15
45-60
45-65
20-25
2-4hrs.
20-35
25-30
40-60
45-70
15-25
45-60
40-60
12-15
A
B
A
A, B
B
A, B
B
B
B
A
B,A
A, B
B
B
400°-4250
325°-3500
400°-4250
400°-4250
450°
325°-350”
350°-3750
275°-3000
350°-3750
350°-3750
350°
A,B, C325°-4000 60-90
A, B, C325°-3750 30-60
B300°-3500 30-75
Miscellaneous
Bakedpotatoes
Scallopeddishes
Souffles
1Forbestresults, useshiflyaluminumutensils,withdullfinishon bottom.ToRAISE YEASTDOUC-HS,coverlightlywithclothand placeinyourwell-insulated
{~ventokeepawayfromdrafts. Yetistdoughsraise bestat85°to I1O”F.soovenlampshouldbeoffduring rising. FRUITCAKES:place largeonesonlowershelf
position;placesltlallor loafpuntypeonshelfincentcrof oven.
‘For bestresultsuscsatin-finish(anodized)aluminumorglassutensils; placefrwzenpies, infoilplate, onbakingsheet.
~T()brownmeringueonly,usc400°F., 8to 10minutes;tocookmcringl~cthrough, usclowertemperaturesfortimes given,
NOTII:Whentwoshetfpositionsarc listed,the first onegiveswellbrownedandcookedfood,Ifyoudesireadifferent browning,usethe secondshelf positionthenext
timcyouc:ook.I:oodsIistcdwith threeshelt’positionscooksuccessfullyonanypositiorllisted,aloneor inanovenmeal.
I
I
I
(,

l?o~stingis cookingbydry heat.
Tendermeator poultry can be
ro~stcduncoveredinyouroven.
Roastingtemperatures,which
shouldbe lowand steady,keep
spatteringto aminimum. When
roasting,it isnot necessaryto
sear,baste, Covei or addwater
toyourmeat.
Roastingis reallyabaking
procedureformeats. Therefore,
OVENSET controlis setto BAKE
or TIME BAKE. (Youmayhear a
slightclickingsound, indicating
theovenis workingproperly.)
Roastingis easy;just followthese
steps:
I
Step 1:Check weightof meat, and
placeit, fat sideup, on roastingrack
inashallowpan. (Broiler pan with
rack isagood pan for this.)Line
broilerpan withaluminumfoilwhen
usingpan for marinating, cooking
withfruits, tooting heavily cured
meats, or for basting foodduring
cooking. Avoidspilling these
materiaison ovenliner or door. In
caseof aspill, see Cleaning Guide
on page 17.
Step2: Piacemeatinovenonshelf
i[~Aor Bpositiori.Nopreheating
isnecessary.Forlocationofshelf
positions,seepage6.
..
---
Step 3: TurnOVENSET toBAKE
or TIME BAKEandOVENTEMP
to 325”F.Smallpoultrymaybe
cookedat 375°F.forbestbrowning.
For TIME BAKEprocedure, see
page 8.
Note: The guideon theopposite
pagegivesapproximatetimesin
minutesper pound. These times
shouldonlybe usedas aguide.A
meatthermometer, insertedintothe
centerofthe thickestpart ofthe
meat, isthe only accuratetestfor
doneness.
Step 4: Most meatscontinueto
cook slightlywhile standing,afier
being removedfromthe oven.For
rare or medium internaldoneness,
ifmeat is to stand 10to 20 minutes
while making gravy,or foreasier
carving, you may wish to remove
meat from ovenwhen internal
temperature is 5° to 10°.F.beiow
temperature suggestedin guide.
If no standing isplanned, cook
meat to suggestedtemperature
in guide.
coofing time isrecommended.
Tempemturesare showninRoastin
Guideon oppositepage. For roast
over8pounds cookedat 300°F.
with reduced time, check with ..—. -:
.—
-.
thermometer at half-hourintervals ,_~,’ ~
afier halfthe time has passed. .
Q. why ismy roastcrumbling :-:.:
-
whenItry tocarveit?
A. Roasts areeasiertosliceif
allowedto cool10to20 minutes .
afterremovingfromoven.Besure
tocutacrossthegrainofthemeat.
Q. DoIneedtopreheatmy
oven eachtimeIcool{aroast
or poultry?
A. It is rarely necessary to preheat
your oven, and usually only for
very small roasts, which cook a
short length of time.
.

1. PositionovenshelfatBfor
small-sizeroasts(3to7pounds)
andatAfor largerroasts.
..
—. 2. Place meat fat-side-upor
poultrybreast-side-uponbroiler
panor other shallowpan with
trivet. Do notcover.Do notstuff
poultryuntiljust beforeroasting.
Usemeatthermometerformost
accuratedoneness.(Do notplace
thermometerin stuffing.)
N~E: Linebroilerpanwith
aluminumfoilwhenusingpanfor
marinating,cookingwithfruits,
cookingheavilycuredmeats,or
bastingfoodduringcooking.Avoid
spillingthesematerialsonoven
lineror door. Seecleaningnotein
guide,CareSection,page 17.
3. Removefatanddrippingsas
necessary.Basteas desired.
4. S@ndir~gtime recommended ~-
forroastsis 10to20minutesto
allowroasttofirm up andmakeit ~“---
easiertocarve.Internaltemperature ~-z.
willriseabout5°to 10°F.If desired, :-. - -
removeroastfromovenat5°to 10°F. .-
Iessthantemperaturein guide
to compensate for standing
temperaturerise.
ApproximateRoastingTimeIn Meat
Meat MinutesperPo~md ThermometerTemperature
BeeF ‘..
*
StandingRib 3-5 Ibs. 6-8 lbs?
Rare 24-30min. 18-22min. 130-140
Medium 30-35min. 22-26min. 150-160
Wel]Done 35-45min. 28-33min. 170-185
RolledRib Add5to 10minutesper poundto timesgivenforstandingrib roasts.
Pmb 3-5 lbs. 6-8 Ibs.
Leg 30-35min. 175-185
Shoulder 30-35min. 180-185
For bonedand rolled shoulder, add 10minutesper poundto timesgiven.
—
Pork, fresh 3-5 lbs. 6-8 lbs.
Loin 35-40min. 30-35min. 170-175
FreshHam, Shoulder 30-40min. 185-190
Wrk, cured
Ham, Precooked
Ham, Cook before
Eating
Shoulder,picnic
i%ultry
Chicken
Ready-to-CookWeight
Turkey
Ready-to-CookWeigh{
14-18minutesper lb.
Under 10lbs. 10-15Ibs.
20-30 min. 17-20min.
25-35 min.
3-5lbs. Over 5lbs.
35-40 min. 30-35min.
Under 10lbs. 10-15lbs. Over 15lbs.
~()-3()min. 20-25min. 15-20min.
130
155-160
170
InThigh In Stuffing
185-190 165
180-185 165
veal 3-5 lbs. 6-8 lbs.
Leg, Loin, Shoulder 30-40 min. 25-35min. 170-180
[For roastsover8~ol]nds,rf>astat 300°F.and rcducctime. Figure theestimatedtirnefromtheaboveguide. Afierhalfthattimehas passed,checkmeat thermometer
lbr intcrniil temp~r:tturcat half-hourintervals.
~Tcndcrcdbeef, foundin some markets, mayrequire lesscooking time than regular beef, When cookingtenderedbeef, estimatecookingtime using shortest time
givenillminutes per poundfor desireddoneness. Also, this type of beefis usually \ve!ldoneat 170°F.internal temperature.

~roilin~ is cookingfoodbyintense
radiantheat fromtheupper unitin
t!leoven.Most fishand tendercuts
ofmeatcan bebroiled. Follow
thesestepsto keepspatteringand
smokingto aminimum.
Step 1:If meat hasfatorgristlenear
edge,cut verticalslashesthrough
bothabout 2“apart. If desired, fat
maybe trimmed, leavinglayer
about 1/8”thick.
Step 2: Place meaton broiler rack
inbroilerpan. Alwaysuserack so
fatdrips into broilerpan; otherwise
juicesmaybecomehotenoughto
catchfire.
Step3:%sitionshelfonrecommended
shelfpositionassu~ested inBroiling
Guideon oppositepage. Most
broilingis done on Cposition, but
ifyouroven is connectedto208
volts, you may wishto use higher
position.
Step 4: Leavedoor ajar afewinches
(exceptwhen broiling chicken).
‘~llcdoor staysopen by itself, yet
theproper tempc~dtu~c is maintained
illrhcoven.
Step 6: Turnfoodonlyonceduring
cooking.Timefoodsfor firstside
per BroilingGuide.
Turn food,thenusetimesgivenfor
secondsideasaguidetopreferred
doneness.(Wheretwothicknesses
andtimesare giventogether,use
firsttimesgivenfor thinnestfood.)
Step %TurnOVENSET knob
toOFF. Servefoodimmediately,
andleavepan outsideoventocool
duringmealforeasiestcleaning.
use ofAluminum Foil
1. Ifdesired, broilerpanmaybe
linedwith foilandbroilerrackmay
becoveredwithfoilforbroiling.
ALWAYSBECERTAINTOMOLD
FOIL THOROUGHLYTO
BROILERRACK,AND SLIT
FOIL TOCONFORM WITH
SLITSIN RACK.Broilerracksare
designedtominimizesmokingand
spattering,andtokeepdrippings
cool during broiling. Stopping fat
and meatjuices from draining to
thebroiler panpreventsrackfrom
serving itspurpose, andjuices may
becomehotenoughtocatchfire.
2. DO NOT placeasheetof
aluminumfoilonshelf. Todoso
mayresultinimproperly cooked
foods,damagetoovenfinishand
increase inheatonoutsidesurfaces
ofthe~>ven.
Q. why shouldIleavethe door
closed whenbroiling chicken?
A. Chickenistheonlyfood
recommendedforclosed-door
broiling.This isbecausechickenis
relativelythickerthanotherfoods
youbroil. Closeddoor holdsmore
heatin oven,sochickenmaybe
broiledbutwell-doneinside.
Q. When broiling, isitnecessary
to alwaysuse arackin the pan? .-
A. Yes.Usingtherack suspends
the meatoverthe pan. Asthe meat .-
cooks,thejuices fallintothe pan,
thuskeepingmeatdrier. Juices
are protectedbythe rack and stay
cooler,thus preventingexcessive .-
spatterand smoking.
Q.ShouldIsaltthe meat before
broilinlg?
A. No. Saltdrawsout thejuices
and allowsthemto evapo;ate.
Alwayssaltafter cooking.Turn .”~
meat with tongs;piercing meat -—
—
with afork also allowsjuices to
escape. When broilingpoultry
or fish, brush each sideoften
with butter.
Q.Why are my meatsnotturning
out asbrown as theysIRould?
A. In some areas, the power
(voltage) to the oven maybe low.
In these cases, preheat the broil
unit for 10minutes before placing
broiler pan with food in oven.
Check to see if you are using the
recommended shelf position. Broil
for longest period of time indicated
in the Broiling Guide. Turn food
only once during broiling.
A. No. The broiler rack is designed
to reflect broiler heat, thMSkeeping.
the surface cool enough to preve~~t~
meatstickingtothesurface.However;
spraying the-broiler rack lightly with t
f“-”Y,
a\/egetab]e~oo](ing spray b~fo~c (’
8
cooking will make c}ea.~lupeasier.
‘.—-.
:
,
\
;-)
... ———-.——— I
—. —
.-.

.-$-~
., (. -
Y
1<3=,: -
-4. - ---- .
‘3?:>;:jg~ v!!iElgGuide
-?;*4<>3~ a%mj~-
..,:.=.
-‘Q:” BFQiIi~~(SeeUsing YourOven Toslash,cut crosswisethrough 6. Broilerdoesnotneedtobe
forpositioningshelves.)outerfatsurfacejust to theedgeof preheated.However,forverythin
themeat. Use tongstoturn meat
overtopreventpiercingmeatand
losingjuices.
foodsorto increasebrowning,
preheatifdesired.
~.Always use broilerpanandrack
thatcamewithyouroven.Itis
designedtominimizesmokingand
spatteringbytrappingjuices inthe
shieldedlowerpart ofthepan.
2. Ovendoor shouldbe ajar for
mostfoods;thereis aspecial
positionon doorivhicliholds
dooropen correctly.
3. For steaksand chops, slashfat
evenlyaroundoutsideedgesofmeat.
7. Frozen Steak can bebroi~ed
conventionallybypositioningoven
shelfat nextlowershelfposition
and increasingcookingtimegiven
inthisguide 1YZtimesper side.
4. If desired, marinatemeatsor
chickenbeforebroiling.Or, brush
withbarbecue saucelast5to 10
minutesonly.
5. Whenarrangingfoodonpan,
do notlet fattyedgeshangover
sides,which couldsoil ovenwith
drippingfat.
8. If yourrangeisconnectedto208
volts,rare steaksmaybe broiledby
preheatingbroilheater andmoving
ovenshelfonepositionhigher.
I
IIQuantity
andlor Shelf
Food Thickness Position FirstSide
Time,Minutes
4
SecondSide
Time, Minutes Comments
2-3 Arrangein singlelayer.
IBacon I!/’-lb.(about8Ic
thin slices)
Spaceevenly.
4-5 Up to 8pattiestakeaboutsametime.
IGroundbeef Il-lb. (4patties)
WellDone 1Ato %-in. thick Ic7
6-9
6-8
8-10
7-8
14-16
20-25
Steakslessthan l-inchcookthroughbefore
browning.Panfryingis recommended.
SeenoteinRoastingabouttenderedbeef.
Slashfat.
c
c
c
c
B
A
l-in, thick
(1to 1%-lbs.) 7
8
12
10
15
25
35
I%-in. thick
(2to2%-lbs.)
Reducetimesabout5to 10minutesper side
for cut-upchicken. Brusheachside with
meltedbutter. Broilwith skinsidedown
first and broil withdoor closed.
10-15
Chicken 1whole A
(2to2%-lbs.),
split lengthwise
Bakeryproducts
Bread(Totist)or 2-4 slices D
ToasterPastries 1package(2)
English Muffins 2–split D
‘/2 Spaceevenly.Place Englishmuffins
cut-side-upandbrush with butter, if
desired.
1%-2
3-4
Do not Cut throughbackof shell. Spread
turn open. Brushwith meltedbutter
over. beforeand after halftime.
4Handle andturn verycarefully.
Brush with lemonbutter beforeand
during cookingifdesired. Preheat
broiler toincreasebrowning.
4-5 Increase times5to 10minutesper side
for 11Ainch thickor homecured.
9-11
10 Slash fat.
12-14
13-16
I(6 to 8-uz. C;iCh) II
Il-lb. lill~ts Mto c
l/~-in.thick
I8
8
1-2slices, %-in< c
about 1lb.
1y~-in,Ifi-lbs. B12
10
17
Ieating
2(’/’-in.)c
2(l-in. thick) B
about l-lb.
t-–— —.—
4-7 Slash fat.
8
4-6
l~_~4
s
10
10
17
61-~ If desired, split suustigesin half
lengthwise into5to 6-inch pieces.
I
_.—. ——-—
!i)[:il~.’.’lll”st
.-..—.-.—---———
. . . . . . . . .
I.———
--——--—-- - -

Propercare andcleaning
proceduresareessentialfora
longandsatisfactorylifeforyour
oven(s).Includedin this sectionare
directionsand aClea?zii?gGuide
(seepage17)for cleaningallparts
oftheoven.Whencleaninganoven
manually,wearingofrubbergloves
isrecommendedtoprotectthehands.
RemovableoveEnDoor
TOREMOVEdoor,open to
BROILposition,where youfeel
hingecatch slightly.Grasp door at
sides;lift door upand awayfrom
hinges.~REPLACE, grasp door
at sides.Lineup door with hinges
and pushdoor firmly intoplace.
L
PorcelainEnamel Fi12ish
The porcelain enamel finish is
essentially glass fused on steel at
high temperature and is breakable
ifmisuscd. This finish is acid-
i“~;sistant.However, L/IZ}Jacid foods
spilled (such as lemon or other
~’itrusfruit-juices, or mixtures
containing tomato or vinegar)
should be wiped up immediately.
Scc guide for cleaning suggestions.
CAUTION:BEFORE
REPLACINGANY LAMP,
DISCONNECT ELECT~C
POWERTOOVENATTHE
MAIN FUSE OR CIRCUIT
BREAKER PANEL, LET LAMP
(ORBULB) AND LAMP COVER
COOLCOMPLETELY.
The ovenlamp (bulb)is covered
with aglass removablecover which
is held in place with abail-shaped
wire. Removeovendoor, if desired,
to reach covereasily.
1. TOREMOVE, hold hand
under cover so itdoesn’tfallwhen
released. With fingersof same
hand, firmly push backwire bail
until itclears cover.Lift off cover.
DO NOT REMOVE ANY
SCREWS TO REMOVE COVER.
2. Replace lamp with40-watt
home appliance bulb.
3. TO REPLACE cover,place it
intogroove of lamp receptacle. Pull
wire bail forward tocenter of cover
until it snaps intoplace. When in
place, wire holdscover firmly. Be
certain wire bail is in depression
in center of cover.
~. connect electric power to oven,

Usetime givenon recipewhen
cookingfor firsttime. Oven
thermostatsmay“drift” fromthe
factorysettingoverthe years,and
5to 10-minutedifferencesintiming
be~weenan old andanewovenare
notunusual.Yourovenhasbeen set
correctlyat the factoryand ismore
apttobe accuratethanthe oven
whichit replaced. However,ifyou
findthatyour foodsconsistently
browntoolittleor too much,you
maymakeasimpleadjustmentin
theOVENTEMP thermostatknob.
PULLKNOBOFF SHAFT.LOOK
ATBACKOF KNOB AND NOTE
CURRENT SETTING BEFORE
MAKINGANY ADJUSTMENT.
Toincreasetemperature,turn
towardHI; todecrease,turntoward
LO.Eachnotchchangestemperature
.
10”F.
I
-- .....
2. Movepotiter onenotchindesired =w
direction. Tightenscrews. m-. -. .–.
..,,-—_—
~
—---
3. Returnknobto oven,matching ------ .
=-
_-<–
E---::
flatarea of knobtoshaft. ma-
-W
=*
N~E: On double-ovenmodel, be --—
w-..
certain knobs are returned to shafis .,...__
from which theywereremoved. =W
-—
Recheclcovenperformancebefore =:
makingan additionaladjustment. lrr?m
e::. w
-—
when spatterhitsthepoi-ollsfinish,
itisdispersedandpartially
absorbed.Thisdispersalaction
increasestheexposureofoven
soiltoheatedair,whichresults
inoxidationofsoil.Thisfinish
alsoreducesthevisualeffect
ofresidualsoil.
Soilmay~~otdisappearcompletely,
and at sometime after extended
usage,stainsmayappear. See “To
Clean the Continuous-Cleaning
Oven” at right to minimizethis
effect.
The special coating IVork best on
small amounts of spatter. It does
not work well with larger spills,
especially sugarsor eggor dairy
mixtures. For this reason, the oven
isequipped with aremovable,
replaceable aluminum foilbottom
liner which protects the ?orous
finishon the bottomofthe oven
fr{~~}]s~jillOV~~~.
Spii!s 013iE2sicIeS:]:r::?ceof oven
[i{?O:.”Sili}=!{!135:?$’{}itiefl*
.—
The spwial coatingis notused
on ovenshelves. Shelvescan be
takento the sink for cleaning, and
can be cleaned with abrasive and
commercial ovencleaners oz4tside
the oventoavoid damage to the
special coating. These parts clean
easiestwhen soilisstillmoist, before
ithas carbonizedorburnedon.
Toremoveshelvesfromtheoven,
whencool,liftrearofshelfandpull
forwardwithstop-locksalongtop
ofshelfsupports.Toreplaceshelves
inoven,reversetheprocedure.
Toclean the
continuous-cleaning oven:
1. Letovenpartscoolbefore
handling.It is recommendedthat
rubberglovesbewornwhen
cleaningovenpartsmamlally.
2. Removeallcookingutensils,
includingthebroilerpanandrack.
3. Takeshelvesoutoftheovenand
cleanma]luallywitilscouringpads,
mildabrasivesor commercialOVe~~
~~eaner~.(Followp:li:b.gedirections
foreyeprotectionallcluse<Ifgloves
~1}~~~
usingoJencleaners,)
—... .-..——

4. Removeexcessspillsand
boiloversfromthealuminumfoil
ovenbottomlinerbeforetakingit
outoftheoven,soexcessliquids
.won’tspillontotheporousfinish.
Thenremovethealuminumfoil
liner.(Whencleaningor removing
thealuminumfoilliner,liftthe
bakeunitupoutoftheway.)
If the aluminum foilliner is soiled
beyondcleaning with adamp cloth,
rep~aceit. Using the old sheetas
apattern, cut anew liner from
regular heavy-weightaluminumfoil
and place it on the ovenbottom.
1
—
Do notinstallaluminumfoilon
or nearbakeelement.Improper
installationoffoilmayresultin
arisk ofelectricshockor fire.
5. Cleanovenwindowandinsideof
ovendoor.Usemild,non-scratching
cleanseranddampcloth.Avoid
spillingwateror cleaneronporous
surface.
6. Soilvisibilitymaybe reducedby
operatingthe ovenat400°F.Close
door; turn OVENSET knobto
BA~ and OVENTEMP knobtO
400”F.Timeforatleast4hours.
Repeatedcyclesmaybenecessary
beforeimprovementin appearanceis
apparent,particularlyonovendoor.
For moderateto heavysoilingof
ovendoor, use methoddescribedin
item(7)atrightbeforerunning400”F.
cycle.The oventimer canbe used
to controlthe cycleautomaticallyat
atimeconvenientfor you.Some
slightsmokingmayoccur, similar
to thatwhich mayoccur during
other TimeBakecooking.
~J~mER: ~URINGTHE
OPERATIONOFTHEOVEN,THE
DOOR,WINDOWANDOTHEROVEN
SURFACESWILLGETHOTENOUGH
~CAUSEBURNS.~0 N~ ~UCH.
LETTHEOVENCOOLBEFORE
REPLACINGALUMINUMFOILOVEN
BOT~M LINERAND,IFTHEYWERE
REMOVED,OVENSHELVES.
—
occurstintheporous.vu#ace,as
—
soon aspracticalafiertheovenhas
—
cooled,removeasmuchofthe soil .
—
aspossible,usingasmallamount
ofwaterand astiffbristle nylon
brush. When usingwater,useit -.
—.
.—..
.
sparinglyand changeit frequently,
keepingitas cleanaspossible,and
be sureto blot itup withpaper —
towels,clothsor s~onges~Do not
ruborscrub withpapertowels,
clothsor sponges,sincetheywill
leaveunsightlylinton the oven
finish. If waterleavesawhitering
on the finishas it dries, apply water
againand blotit with aclean
sponge,startingattheedgeofthe -- —
ring and workingtowardthe center.
Usecareinremovingandreplacing —
-.
thealuminumfoilovenbottom
linerandshelves,andinplacing —
—
andrelmovingutensils,toavoid
scratching,rubbingor otherwise
damagingtheporousfinish on
the ovenwallsand door. -.: -----
---
DOnotusesoap,detergent, .- —
.-
‘—–-
commercialovencleaner,sflicone
ovensprays,coarsesteelpadsor
coarsebrushesontheporous
su)face. Theseproductswillspot, ..
.
..
clogandmartheporous su~ace
andreduceitsabilitytowork. .
I
\
I
,
t,
,
-. .. —...— ..

@SoapandWater
*Soap-FilledScouringPad
0PlasticScouringPad
*CommercialOvenCleaner
*MildSoapandWater
Drainfat,coolpan andrackslightly.(Donotlet soiledpanandrackstandinoventocool.)
Sprinkleon detergent.Fillthe pan withwarmwaterandspreadclothorpapertowelover
therack.Letpanandracks~~ndforafewminutes.Wash;scourif necessary.Rinseanddry,
O~ION: The broilerpanandrack mayalsobecleanedinadishwasher.
Pull offknobs.Washgentlybut do notsoak. Dry andreturncontrolsto ovenmakingsure
tomatchflatareaon theknobandshaft.
BakeUnitand
BroilUnit Do notclean[hebakeunitor broil unit. Anysoil will bumoffwhentheunitisheated.
N~E: Thebakeunitis hingedandcanbeliftedgentlytocleantheovenfloor.If spillover,
residueor ashaccumulatesaroundthebakeunit, gentlywipearoundtheunitwithwarm
water.The broil unit ispermanentlyattached.
OutsideGlassFinish Washall glasswith clothdampenedinsoapywater.Rinseandpolishwith adry cloth. If
knobsareremoved,donotallowwatertorundowninsidethesurfaceofgiasswhilecleaning.
eSoapandWater
Metal IoSoapandWater IWash,rinse, and thenpolishwithadry cloth, DO N~ USEsteelwool, abrasives,
ammonia,acidsor commercialovencleanerswhichmaydamagethefinish.
PorcelainEnamel @PaperTowel Avoidcleaningpowdersor harshabrasiveswhichmayscratchthe enamel.If acidsshould
@Dry Cloth spillon the rangewhileit ishot, use adry paper towelorclothtowipeuprightaway.
*SoapandWater Whenthe sr.rfice hascooled, washandrinse. For otherspills, suchas fatsmatterings,etc.,
washwith soapand waterwhencooledandthen rinse. Polishwithdry cloth. Seenoteon
porcelainenamelintheCare Sectiononpage 14.
OvenGasket *SoapandWater Onedgeofovenframe. Clean offsoil with sudsywaterandrinsethoroughly.
SiliconeRubber
(HeatResistant)
SheIves* eSoapandWater Yourshelvescan be cleanedbyusinganyandall mentionedmaterials. Rinsethoroughly
)aSoap-FilledScouringPad to removeall materialsaftercleaning. N~E: Somecommercialovencleanerscause
0CommercialOvenCleaner darkeninganddiscoloration.When usingfor first time, testcleaner on smallpart ofshelf
andcheckfordiscolomtionbeforecompletelycleaning.
USE TIiE FOLLOWINGDIRE~IONS FOR STANDARDOVENONLY.ForContinuous-CleaningOven(ModelJKC06GJ):
Referto “Continuous-CleaningOvenCare” Section onpages 15and 16for directionson care ofspecialporousceramiccoating.
Toclean ovendoor,removebyopeningtoBROILpositionandgraspingdoorat sides. Lift
door upandawayfrom hinges.Clean with soapand water.Replacebygraspingdoorat
sidesand liningupdoor with hinges. Push door firmly intoplace.
Cool beforecleaning.
FOR LIGHT SOIL: Frequentwiping with mildsoap andwater(especiallyaftercooking
meat)will prolongthetime betweenmajor cleanings.Rinsethoroughly.NOTE:Soapleft
on liner causesadditionalstainswhen ovenis reheated.
FOR HEAVYSOIL: Chooseanon-abrasivecleaner and followlabel instructions,using
thin layerofcleaner. Useofrubber glovesis recommended.Wipeor rub lightlyon
stubborn spots. Rinse well. Wipe off a~]yovencleaner that getson thermostatbulb.
When rinsingovenafter cleoning,also wipethermostat bulb.
‘nsideOvenDoorM
I
*SoapandWater
Liner) sSoap-FilledScouringPad
~CommercialOvenCleaner
L
USC,light bulbscan *Co[;lmercialOvenCleaner
becomewarmenough
tobrctikif[ouchcd with
Inoislcloth or towel.
Whencie:ining,uvoid
tvilm) lampswith clcarring
cloths if Iiilnp coveris
rcrnovcd,Scc IJ:trnp
Rcplaccn]cnt,page 14.)
~When usingCol~]mcr~iidOven Cl~i][l~ron Broiler Rm andRack or ShcivcsofContinuous-CleaningOven (ModelJKC06GJ) besure toren~ovethemfrom tl~e
oven [Irsl, bccauscsuchclcancrs can (lillf}:i~~ the special ceramic coating inthis oven.
i}$;piila~:cof l]lilrirl;i(l~s, fruitjuices, iil)d bastirlgrnztcri:dscontaining flcidsmaycause discoloration. Spillovcrsshouldbe wiped up immediately,with care being
IilliCfl ])01 10 (C)UCIIilily hot porti(lrlOftlltoven. When the surface is cool, clcir[land rinse.
)venLiner** I*Soap andWater
CAUTION:When in @SoaP-FilledScouring Pad
‘.

I
PROBLEM
OVEN DOES NOT
“wow
AUTOMATICOVEN
TIMER DOES NOT
WOU PROPERLY
BANNG RESULTS
IUNSATISFA~ORY
L.
BROILING RESULTS
UNSATISFA~RY
POSSBLE cAusE Am mm~~
Difficultymaybeinthemaindistributionpanelofyourhousecausedbyablownoven
circuitfise, atrippedovencircuitbreaker,themainfuseorthemaincircuitbreaker,
dependingonnatureoftie powersupply.If acircuitbreakerisinvolved,resetit.Ifthe
controlboxusesfuses,theovenfuse(acartridge-type)shouldbechangedBUTONLY
BYSOMEONEFAMILIARWITHELE~NCAL CIRCUITS,If, afterperformingone
oftheseprocedures,thefise blowsorcircuitbreakertripsagain,callforservice.
N~E: Apartmenttenantsorcondominiumownersshouldrequesttheirbuilding
managementtoperformthischeckbeforeca~ingforservice.
Oven controlsare notproperly set.
Checkto be certain step-by-stepdirectionswere followedcorrectly.Reviewpagesonuse
of timer.
Check material and sizeofbakingutensil;placementof shelfand foodin oven.If the
ovenwasused for broiling,just beforeit ispreheated for baking, turn theoven
completelyoffand open thedoor widesoit can cool(5 to 10minutes). Then closethe
ovendoor and preheat asdirected on Bakingpage.
BesureOVENTEMPandOVENSETaresetatBROIL.Iftherewasexcessivesmoking ~
(
andspattering:Wereshelfandbroilerpanatpositionsuggestedonbroilingchart?If
aluminumfoilwasusedonbroilrack,wasithandledaccordingtodirections?
If you need nlore help...Call,tollfree:
The GE Answer Center”
800.626.2000
consumer informationservice

A>*
“+.:_--=
-Toobtainservice,seeyourwarranty
ontheback pageofthisbook.
We’reproud ofour serviceand
wantyouto bepleased. If forsome
reasonyouare nothappywiththe
serviceyoureceive,here arethree
stepstofollowforfurther help.
FIRST,contactthepeoplewho
servicedyourappliance.Explain
whyyouare notpleased. In most
cases,this will solvethe problem.
NEXT, ifyou are stillnotpleased,
write allthe details-including
yourphone number—to:
Manager, ConsumerRelations
General Electric
AppliancePark
Louisville,Kentucky40225
FINALLY,if yourproblem isstill
notresolved, write:
Major Appliance
Consumer ActionPanel
20 North WackerDrive
—Chicago,Illinois60606
—
-.
->
...“’
.:

WHATIS COVEBED FULL ONE-YEAR wARRANn Thiswarrantyisextendedtothe
Foroneyearfromdateoforiginai originalpurchaserandanysucceed-
purchase,we will provide,freeof ingownerfor productspurchased
charge,partsandservicelaborin forordinaryhomeuseinthe48
your hometorepairorreplaceany mainlandstates,Hawaiiand
Parloftherangethatfailsbecause hVashington,D.C.InAlaskathe
ofamanufacturingdefect. warrantyisthe sameexceptthatit
isLIMITED becauseyoumustpay
toshipthe productto the service
shoporforthe servicetechnician’s
travelcoststoyourhome.
Allwarrantyservicewillbeprovided
byour FactoryServiceCentersor l!-~%
byourauthorizedCustomerCare@ ~.:-
~..
servicersduringnormalworking II-E:
*%.
hours. p;-k‘-
lls~
LookintheWhiteorYellowPages IiC=Y’
~~~w:
ofyourtelephonedirectoryfor ,,.=–
)!y-:.;,=
GENERAL ELECTRICCOMPANY, 1,r----
GENERAL ELECTRICFACTORY l!~.a:..
SERVICE, GENERAL ELECTRIC- 
Forno Bravo
Forno Bravo Toscana80 Installation and operation manual

White and Brown
White and Brown FP 563.1 Parma II user manual

Hotpoint
Hotpoint RGJ534GEP use and care manual

AEG
AEG B9872-5 user manual

NEFF
NEFF B15E42 0 Series instruction manual

NEFF
NEFF C29MY7M.0 o.Tw.Pad User manual and installation instructions