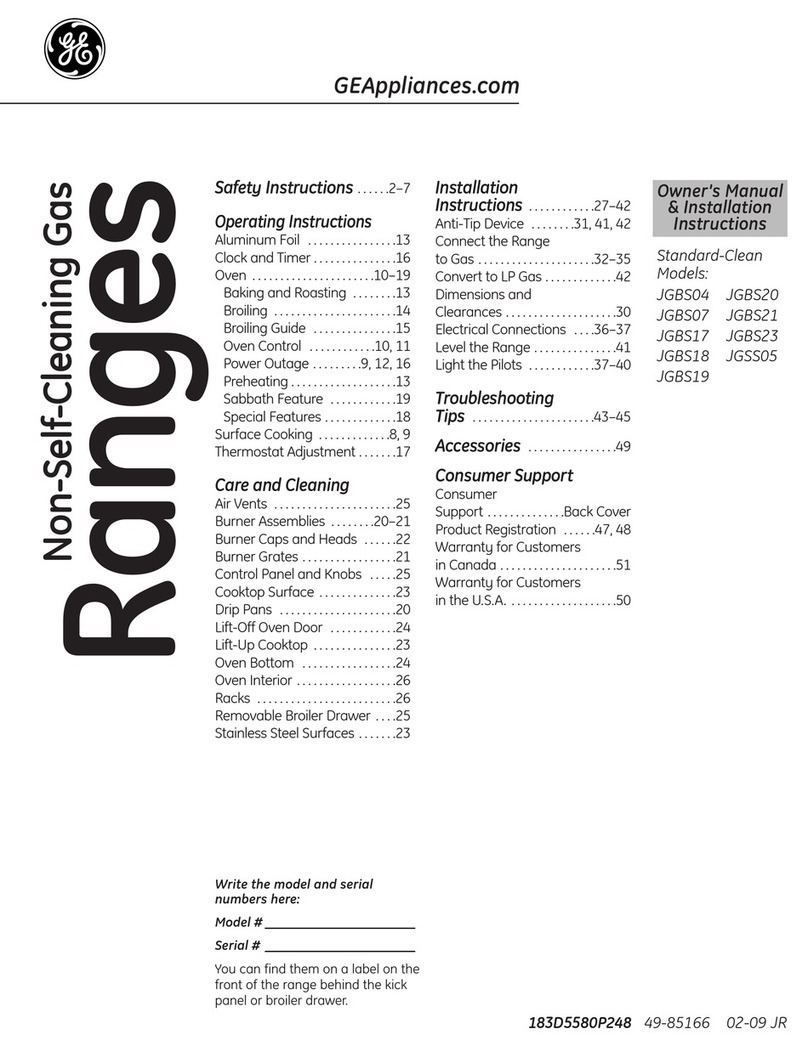
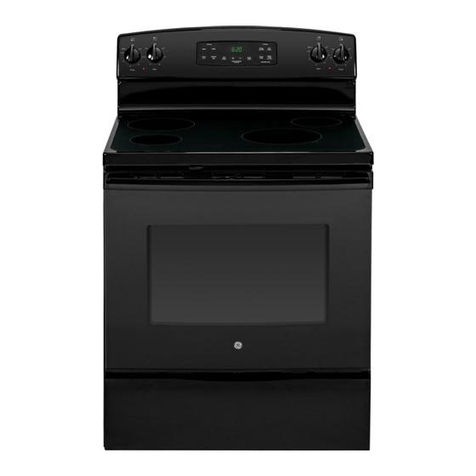
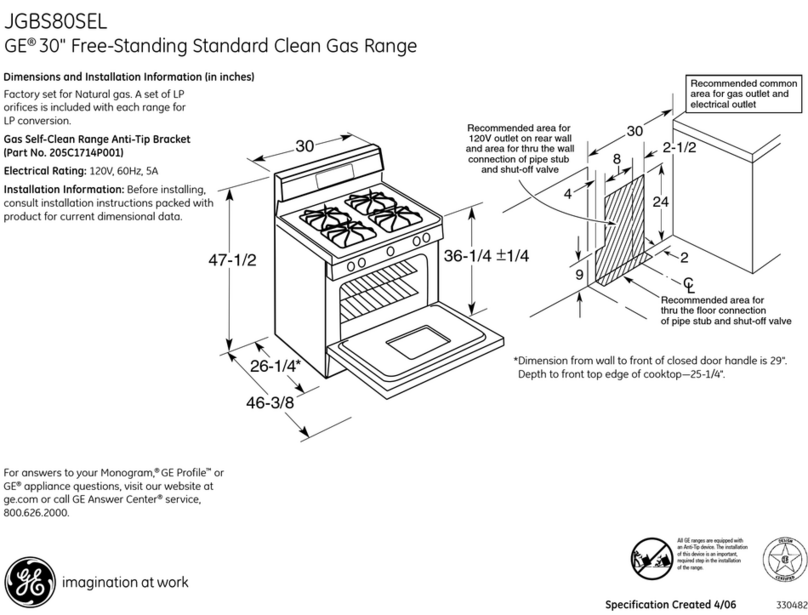
GE Appliances JGBS04 Original instructions

GEAppliances.com
.
Lo
oi
0
Z
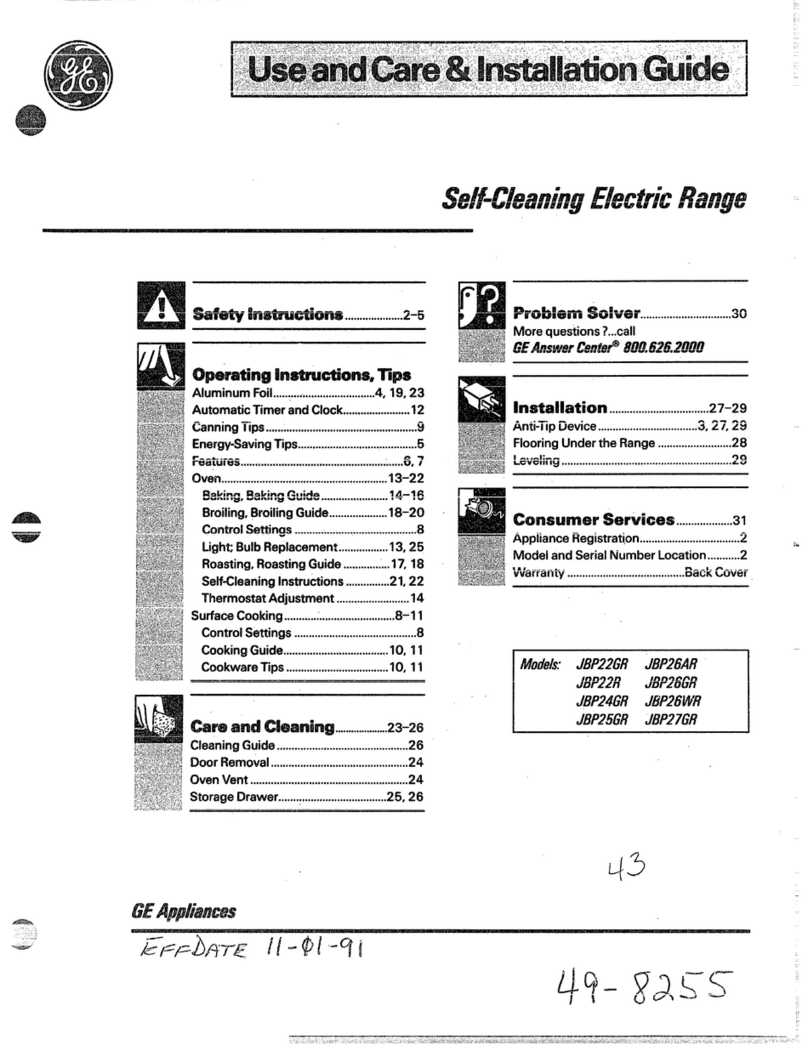
Safety Instructions., ..... 2-7
OperatingInstructions
Aluminum Foil .13
Clock and Timer ............... 16
Oven. ................... _.10-19
Baking and Roasting ........ 13
Broiling ...................... 14
Broiling Guide ............... 15
Oven Control .... ........ 10, 11
Power Outage ......... 9, 12, 16
Preheating ................... 13
Sabbath Feature .... _.:..... 19
Special Features..- ......... J.18
Surface Cooking ............. 8,9
Thermostat Adjustment ....... 17
Careand Cleaning
Air Vents ..... :................ 25
Burner Assemblies ........ 20-21
Burner:Caps and Heads ...... 22
Burner Grates....: ............ 21
Control Panel and Knobs ..... 25
...Cooktop Surface,. ............. 23
Drip Pans ..: ................... 20
Lift-Off Oven Door ............ 2/4
Lift-UpCooktop ............... 23
Oven Bottom ................. 24
Oven Interior ................. :26
Racks ......................... 26
Removable Broiler Drawer .... 25
Stainless SteelSurfaces ...._..23
• . _
Write the model and serial:
numbershere:
Model#
Serial #
Youcan find them on a label on the
front of the range behind the kick
panel or broiterdrawer.
Installation
Instructions ............ 27-42
Anti-Tip Device......... _.31,41, 42
Connect the Range
togas ..................... 32-35
Convert to LPGas. ............ 42
Dimensions and
Clearances .................... 30
Electrical Connections .... 36-37
Levelthe Range ............... 41
Light the Pilots ............ 37-40
Troubleshooting
Tips ...................... 43-45
Accessories ................ 49
Consumer Support
Consumer
Support .............. Back Cover
Product Registration ...... 47,/48
Warranty for Customers
in Canada ..................... 51
Warranty for Customers
in the U.S.A.................... 50
.... -: _ ,.,
,:, ,, :,.. _::L_: • : :•'•
-183D5580P248
Models:
JGBS04 JGBS20
JGBS07 JGBS21
JGBS17 JGB523
JGBS18 JGSS05
JGBS19
49-85156 02-09 JR

IMPORTANT SAFETYINFORMATION.
READALL INSTRUCTIONS BEFOREUSING.
III II i iiiiii i II illlllllllll i
_AWARNING! ::
For your safety, the information in this manual must be fOiiowedto minimize the risk of fire or explosion, electricshock,
or to prevent property damage, personal injury, or loss of life.
®
••°
ANTI-TIP DEVICE
-All ranges can tip.
• BURNS or other SERIOUS
INJURIES can result.
•INSTALL and CHECK the
ANTI-TIP bracket following
the instructions supplied
with the bracket.
,_ WARNING: Ifthe information
in this manual is not followed exactlg,
a fire or explosion mag result causing
propertg damage, personalinjurg
or death.
-- Do not store or use gasoline or other
flammable vapors and liquids in the
vicinitg of this ,or ang other appliance.
-WHAT TODO IFYOU
SHELL GAS :_
@Do not trg to light ang appliance:
Do not touch ang electrical:switch;
do not use ang phone in gour
building.
Immediatelg call gour gas supplier
from a neighbor's phone._Follow the
gas supplier's instructionS.
If gou cannot reach gour gas supplier,
call the fire department.
-- Installation and service must be
performed bg a qualified installer,
service agencg or the gas supplier.
Toreduce the risk of tipping the.range, the range must
be secured by a properly installed anti-tip bracket. See
installation instructions shipped with the bracket for complete
details before attempting to install.
To check if the bracket is installed and engaged properly,
carefully tip the range forward. The bracket should stop the
range within 4inches, tf it does not, the bracket must be
reinstalled. Ifthe range is pulled from the watt for ang reason,
always repeat this procedure to verify the range is properlg
secured by the anti-tip bracket.
For free-standing or slide-in ranges, never completelg remove
the leveling legs or the range will nat be secured to the anti-tip
device properlg.
If goudid not receive an anti-tip bracket with your purchase,
call $.80.0.626.8774to receive one at no cost(in Canada, call
£800.56£3344). For installation instructions of the bracket,
visit GEApplic]nces.com (in Canada, GEAppliances.ca).

ii iii iiiii ijllllllllllll ILIIIIIIIIIIIIII,IIIHill III I I 'GEAppliances:com
AWARNING!
.;IMPORTANTSAFETYNOTICE • ' .... '
_afeDrinking Water and ToxicEnforcement Act requiresthe Gcvernor of California to
• : _pubfisha list of substances known to the state to cause birth defects or other reproductive harm, and
:_' ' . requires businesses to warn customers of potentia! exposure to such substances..
: _:Gas appliances can cause minor exposure to four of thesesubstances, namefg benzene, carbon
.. -. ..... _:_monoxide, formaldehgde and soot, caused primarilg bg the incomplete Combustion of natural gas
or LPfuels.Properlg adjusted burners, indicated bg a bluish rather than a geltow flame, will minimize
incomplete combustion. Exposure to these substances can be minimized bg venting with an open
window or using a ventilation fan or hood.
"SAFETYPRECAUTIONS
Have the installer show gou the location of the range gas shut-offvafve and how to shut it off if
necessarg.
.. :_ Have gout range installed and propertg
•grounded bg a qualified installer, n
accordance with the installation instructions.
Ang adjustment and service should be
performed onlg bg qualified gas range
installers or service technicians.
@Donot attempt to repair or replace ang
part of gour range unless it isspecificallg
recommended in this manual. All other service
should be referred to a qualified technician.
_ Plug gour range into a 120_volt grounded
outlet onlg. Do not removethe round
grounding prong from the plug. Ifin doubt
about the grounding of the home electrical
sgstem, it is gour personal responsibilitg and
obligation to have an ungrounded outlet
replaced with a properlg grounded,
three-prong outlet in accordance with
the National Electrical Code. Do not use
an extension cord withthis appliance.
WARNING: NEVERusethis
appliance as a space heater to heat or
warm the room. Doing so mag result
in carbon monoxide poisoning and
overheating of the oven.

IMPORTANT SAFETYINFORMATION.
READ ALL INSTRUCTIONS BEFOREUSING.
i, ii i iiil, ln ..... n :, Jl ,11,,,
4
SAFETYPRECAUTIONS
Locate the range out of kitchen trafficpath _Never wear loose fitting or hanging ga_6ts ::
and out of draftg locations to prevent pilot: ,:,:: .while using the appliance. Be careful when::.:
,: :., outage (on standing pilot models} and poor ....... reaching for items stored incabinets Over:the'
,. i .:..: - air circulation. • .... .range. Flammable material could be ignited :
Besure all packaging materials are :, ........if brought in contact with flame or hot oven
removed from the range before operating ....... surfaces and mag cause severeburns.
i it to prevent fire or smoke damage shou d ::: _ Do not store flammable mater a s in an oven,
,.. _. the packaging material ignite. _ . " .arangebroiler or neara cooktop.
_ Be sure sour range iscorrectlg adjusted bg : _ Do not store oruse combustible materials
a qualified service technician or installer for gasoline or other flammable vapors and
the tgpe of gas {naturalor LP)that isto be
used. Your range can be converted for use
with either tgpe of gas. See the Installation
of the range section.
WARNING: These adjustments
must be made bg a qualified service technician
in accordance with the manufacturer's
instructions and all codes and requirements
ofthe authoritg having jurisdiction. Failure to
follow these instructions could result in serious
injurg or propertg damage. The qualified
agencg performing this work assumes
responsibility for the conversion.
Be careful when you clean the cooktop
because the area over the pilot (on standing
pilot models) will be hot.
After prolonged use of a range, high floor
tern peratures may result and many floor
coverings will not withstand this kind of use.
Never install the range over vingl tile or
linoleum that cannot withstand such tgpe
of use. Never install it directlg over interior
kitchen carpeting.
Do not leave children alone or unattended
where a range ishot or in Operation. Theg
could be seriouslg burned.
_ Do not allow anyone to climb, stand or hang
on the oven door, broiler drawer or cooktop.
Theg could damage the range and even tip
it over. causing severe personal injury.
,A CAUTION:Itemsofinterestto
children should not be stored in cabinets
above a range or on the backsplash of a
range-children climbing on the range to
reach items could be seriouslg injured.
liquids in the vicinitg of this or ang other
apptiance.
Do not iet cooking grease or other flammable
materials accumulate in or near the range/ "
Do not use water on grease fires. Never
pick up a flaming pan. Turn the controls off.
Smother a flaming pan on a surface burner
bg covering thepan completelg with a
well-fitting lid,cookie sheet or flat trag.
Use a multi-purpose drg chemical or
foam-tgpe fire extinguisher.
Flaming grease outside a pan can be put out
bg covering it with baking soda or, ifavailable,
bg using a multi-purpose drg chemical or
foam-tgpefire extinguisher.
Flame in the oven can be smothered
completelg bg closing the oven door and
turning the control to off or bg using a
multi-purpose drg chemical or foam-tgpe
fire extinguisher.
Letthe burner grates and other surfaces cool
before touching them or leaving them where
children can reach them.
Never block the vents (air openings] of the
range. Theg provide the air inlet and outlet
that are necessarg for the range to ooerate
properlg with correct combustion. Air openings
are located at the rear of the cooktop, at the
top and bottom of the oven door, and atthe
bottom of the range under the broiler drawer.
•_] Large scratches or impacts to glass doors
can lead to broken or shattered glass.
@Cleanonlg parts listed inthis Owner's HanuaL
GEAppliances.com
COOKMEAT AND POULTRYTHOROUGHLY...
Cook meat and poultry thoroughly meat to at least an,INTERNALtemperature of l 60°F and poultry to
at least an INTERNALtemperature of 180_ Cooking to these temperatures usually protects against
foodbome illness.
OVEN
Stand away from the range when opening the door of a hot oven. The hot air and steam that escape
can cause bums to hands, face and eyes.
Do not usethe oven for a storage area.
tems stored in the oven can ignite. @Do not use gour oven todrg newspapers.
If overheated, theg can catch fire.
Keep the oven free from grease buildup.
@Placethe oven racks in the desired position
while the oven iscool.
Pulling out the rack to the stop-lock is a
convenience in lifting heavg foods. It isalso
a precaution against burns from touching hot
surfaces of the door or oven walls. The lowest
position isnot designed to slide.
@Do not heat unc pened food containers.
Pressure could build up and the container
Could burst, causing an injurg.
Never use aluminum foil to line the oven
bottom. Improper use of foil could start
a fire and.result in high carbon monoxide,
WARNING: NEVERcover
ang slots, holes or passages in the oven
bottom or cover an entire rack with
materials such as aluminum foil. Doing
so blocks air flow through the oven and
mag cause carbon monoxide poisoning.
Aluminum foil linings mag also trap
heat, causing afire hazard.
use onlg glass cookware that isrecommended
for use in gas ovens.
_Alwags remove ang broiler pan from range
assoon as gou finish broiling. Grease left in
the pan can catch fire if oven is used without
removing the grease from the broiler pan.
_ When broiling, if meat istoo close to the flame,
the fat mag ignite: Trim excess fat to prevent
excessive flare-ups.
Make sure ang broiler pan isin place correctlg
to reduce the possibilitg of grease fires.
If gou should have a grease fire in a
broiler pan,turn offthe oven control, and keep
the broiler drawer and oven door closed to
contain fire until it burns out.
Forsafetg and proper cooking performance,
alwags bake and broil with the oven door
closed.
When using cooking or roasting bags in the
oven, follow the manufacturer's directions.
For continuous clean models, do not use oven
cleaners on ang of the continuous cleaning
surfaces. Continuous cleaning Surfaces can
be identified bg their rough surface finish.
v
,iI_1
i,_1. i
5

o
£
v
IMPORTANTSAFETYINFORMATION.
READALL INSTRUCTIONS BEFOREUSING.
,, :,, .... ilul i i illljll ,lU ....
tl WARNING! ..........
SURFACEBURNERS -
Use proper pan size avoid pans that are unstable or easily tipped. Select cookware having fiat
bottoms large enough to cover bumer grates. Toavoid spiftovers,make sure cookware is large enough
to contain the food properly. Thiswill both save cleaning time and prevent hazardous accumulations of
food, since heavy spattering or spiftoversleft on range can ignite. Usepans with handles that can be
easily grasped and remain cool.
Always use the LEE position Ion electric
ignition models) or the Ht position (onstanding
pilot models) when igniting the top burners
and make sure the burners have ignited.
Never leave the surface burners unattended at
. high flame settings. Boilovers cause smoking
and greasy spillovers that may catch on fire.
@Adjust the top burner flame size so it
does not extend beyond the edge of the
cookware. Excessiveflame is hazardous.
Use only dry pot holders moist or damp pot
holders on hot surfaces may result in burns
• from steam. Do not let pot holders come near
open flames when lifting cookware. Do not use
a towel or other bulky cloth in place of a pot
holder.
_ When using glass cookware, make sure it
is designed for top-of-range cooking.
To minimize the possibility of burns, ignition
of flammable materials and spillage, turn
cookware handles toward the side or back
of the range without extending over adjacent
burners.
Carefully watch foods being fried at a high
flame setting.
Alwags heat fat slowly, and watch as it heats.
Do not leave any items on the cooktop. The
hot air from the vent may ignite flammable
items and will increase pressure in closed
containers, which may cause them to burst.-
_ Ifa combination of oils or fats wilt be used in
frying, stir together before heating or as fats
melt slowly.
_ Use a deep fat thermometer whenever
possible to prevent overheating fat beyond
the smoking point.
Usethe least possible amount of fat for
effective shallow or deep-fat frying. Fillingthe
pan too full of fat can cause spillovers when
food isadded.
_Do notflame foods on the Cooktop.lfgou do
flame foods under the hood.turn the fan on.
@Do not use a wok onthe cooking surface
ifthe wok has _ round meto ring that is
placed over the burner grate to support
the wok. This ring acts as aheat trap, which
may damage the burner grate and burner
head. Also, it may cause the burner to work
improperly. This may cause a carbon
monoxide levelabove that allowed bg current
standards, resulting in a health hazard.
@Foodsfor frying should be as dry as possible.
Froston frozen foods or moisture on fresh
foods can cause hot fat to bubble up and
over the sides of the pan.
£_!Never trg to move a pan of hot fat, especially
a deep fat frger. Wait untit the fat iscool.
i® Do not leave plastic items on the cooktop-
theg mag melt if left too close to the vent.
Keep all plastics awag from the surface
burners;
_To avoid the possibilitg of a burn, alwags be
certain thatthe controls for all burners are at
the OFF position and all grates are cool before
attempting to remove them.
If range is located near a window, do not hang
long curtains that could blow over the surface
burners and create a fire hazard.
If gou smell gas, turn off the gas to the range
and call o qualified service technician. Never
usean open flame to locate a leak.

GEAppliances.corn
SURFACEBURNERS(cont.)
Alwags turn the surface burner controls off
before removing cookware.
Donot lift the cool_op on sealed burner
...... models. Lifting the cooktop can lead to
damage and imp[oper operation of the range.
When a pilot goes out {on standing pilot
models), gou will detect a faint odor of gas
as gour signal to relight the pilot. When
relighting the pilot, make sure burner controIs
are in the Off positiOn_and follow instructions
in this book to religitt.
If gou smell gas, and gou have atreadg made
sure pilots are lit (on standing pilot models),
'turn offthe gas to the range and call a
qualified service technician. Never use
anopen flame to locate a leak.
Do not place or store items that can meIt
or catch fire on the grates, even when the
cooktop is not being used.
@ Keep range clean and free of accumulatioris
of grease or spillovers, which mag ignite.
READAND FOLLOWTHISSAFETYINFORMATION
CAREFULLY.
SAVETHESEINSTRUCTIONS
• • L L •.
o!
I I
I I
I t

!
!
:I
I
!
0
0
I
Using thergaS surface burners.
iiiiiiiiiiiiiiiiiiiiii ii L
ThroUghout this manual, features and appearance may vary from your model.
iii i
Before Lighting aGas Burner ._After Lighting a Gas Burner .........." "
............................... _ Ifdrip pans aidesuppliedwith your rangei _ Donot operatethe burne_:foran extended ::
..... _ : : : theg shouldbe usedat all times. :' : periodof time without Cookwareonthe
: : :: " .... ' grate.Thefinishon thegrate may chip :
:_ Hake sureal .burnersarein place.
'-:: :.......... , .... without cookwareto absorbthe heat.
..... .... :: _ Hakesureal!grateson the range are _ Besurethe burnersand gratesarecool
: _: -:, properly placed:beforeusingany burner.i : beforeyou placegout hand,a pot holder,
..... .. : cleaning.clothsor othermaterialsonthem.
-[ ....
::_ How toLight a Gas Surface Burner ...... , :: ..... :
_ntheir respectivepositions. Pushcontrol knob in andturn itto HIposition.
f._.7_iElectricIgnition t4odels: Theburnershouldlightwithin afew seconds.
Pushthe control knobin andturn it Turnthe knobto adjust theflame size.
,:_.::,:_4:i_:::'_:.i_.:_,,:_._:::<:::.,:;._:_#:_:_:,totheLITE position- .... , : . ::..... :- " : - .
ii_ii_i:i_ii_:i;_i_ii!:!;_!i'_!iii_ii!_i:__;:_!::i_;77!_ii_!_i.... : _ _: ' , .: ........ :_. Flame willbe almost honzontaland will,,, :
_:}_}-;ii!!!ii_:ili:i_!i i::i_ii!:ii!:i;_iiii:_i:i_ii_!i!i::; Youwill heara littleclicking noise- ift s!ghtJgaway from the burnerwhen :
PUShthecontr01kngbinandturn.......... thesound ofthe e!ectricspark igniting................the bumeris firstturned on._ blowing:: :
it totheLtTEposition[onelectric theburner. ........... or:hissingsound.magbe heardfor . :
ignitionmodels)or//l(on standing ', :: ; :_" '...... "
pilotmodels}. Turnthe knobto adjustthe"flameSize,...... _3(3-60seconds:Thisnormalsound isdue::-:!:
Ifthe knobstagsat LITE,itwill continue
to click.
Whenone burner isturned to LITE,
all theburnersspark.Donotattempt to
disassembleor cleanaround any burner
whileanother burner ison.An electricshock
may result,which couldcauseyouto knock
overhot cookware.
to improvedinjectionof gasand air into
the burner.Puta panon the burnerbefore
lightingit, or adjustthe flame to match pan
sizeassoonasit lights,and the blowingor
hissingsoundwill be much lessnoticeable.
Onsomemodels.
i-!ii_::_:iiii!!:• • _i)!_}_i!iii!i.!i;ii
Onsomemodels,the burnersareall
the samesizeandpowe_
On Ranges with Sealed Gas Burners
Thesmallest burnerin the rightrear position
isthe simmerburner.Thisburner canbe
turned downto a very lowsimmersetting.
It providesprecisecooking performancefor
delicatefoods suchassaucesor foodsthat
requirelow heatfor a long cookingtime.
Themedium (leftrearand left front}
and the large (rightfront)burnersarethe
primary burnersfor mostcooking.These
general-purposeburnerscanbe turneddown
from HIto LOto suit awide rangeof cooking
needs.
NOTE:Onsomemodels,the bumersareall
thesamesizeand power.
8

ii
-r
GEAppliances.com
n
How to Select Flame Size
Forsafe handling of cookware, never let the
flames extend up the sides of the cookware.
Watchthe flame,notthe knob,as youreduce
heat.Whenfastheating isdesired,theflame
sizeon a gasburnershouldmatch the
cookwareyou areusing.
Flames larger than the bottom of the
cookware willnot result infaster heating
ofthe cookware and could be hazardous.
Top-of-Range Cookware
Aluminum: Medium-weight cookwareis
recommendedbecauseit heatsquickly
andevenly.Mostfoods brown evenlyin an
aluminumskillet.Usesaucepanswith tight:
fitting lidswhen cookingwith minimum
amounts ofwater.
Cast-Iron: Ifheated slowly, most skillets wil
give satisfactory results.
Enamelware: Undersome conditions,the
enamet ofsome cookweremay melt.Follow
.................. cookwaremanufacturer's recommendations
forCookingmethods:
Glass:Therearetwo types of g_ass
cookware--thosefor ovenuseonly andthose
for top-of-[ange cookng {saucepans,coffee
andteapots).Glassconducts heatvery
slowly,
HeatproofGlassCeramic: Canbe usedfor
eithersurfaceor oven cooking.Itconducts
heatvery slowly and coolsvery slowly.Check
cookwaremanufacturer's directionsto be
sureit canbe usedon gasranges.
StainlessSteel: Thismetal alonehaspoor
heatingpropertiesand is usuallycombined
with copper,aluminum or othermetalsfor
improvedheat distribution.Combination
metalskilletsusuallywork satisfactorilgif
thegare usedwith medium heat asthe
manufacturer recommends.
Sf:ovetop Grills (onmodelswith sealed Oumersl
Donot usestovetopgrillson your sealedgas Thiscanbehazardoustoyour health.
burners.If you usethe stovetopgrill onthe
sealedgas burner,itwill causeincomplete .
combustionand can resultinexposureto
carbonmonoxidelevelsaboveallowable
standards.
Useaflat-bottomedwok.
Wok This Wag [onmodelswith sealedburners)
Werecommendthatgou usea 14"orsmalter Do.not useaflat-bOttomedwok on a support
flat-bottomedwok.Makesurethe wok bottom ring.Placingthe ring overthe burneror grate
sitsflot on thegrate.Thegareavaitableat may causethe burnerto work improperly,
yourlocalretailstore, resultingin carbonmonoxide levelsabove
Onlyaflat-bottomed wok shouldbe used. allowablestandards.Thiscouldbedangerous
to your health;
In Case of Power Failure (electricignition models)
Incaseof a powerfailure,gou can light
the gassurfaceburnerson your rangewith
a match. Holda lit matchto the burner,then
pushinand turn the control knobto the LEE
position.Useextremecaution when lighting
burnersthiswag.
Surfaceburnersin usewhen an electrical
powerfailureoccurswillcontinueto operate
normally.
9
÷ _,_
¢b
1:1
I:1
OI
0
0,)
t::
t_
0

I..I
.£
I=
n
wu
t,_1. _,
__ i
.-- L
O:
w._
•
:£
E
8
Using the oven controls.
JllllIJL
Throughout this manual, features and appearance may vary from your model.
Oo',0
Temp Recall
Ji• • Clear
Brod
4
¸
L Ligh_
Tillne Cont s
•/
_imeDL_L' CD
On/Off
Oven Control,Clockand Timer Features and Settings lonso e odets
0Bake/Tamp RecallPad
Touchthis pad to selectthe bakefunction.
Bake Light
Flasheswhileineditmode-gou canchangethe
oventemperatureatthispoint.Glows:whenthe
ovenisinbakemode.
OStartiOnPad
Mustbe touched to start ang cooking function.
iO Display
Showsthetime ofday, oventemperature,
whether the ovenisinthe bakeOrbroil mode
and the timessetfor the timer.Thedisplaywill
show PREwhilepreheating.Whenthe oven
reachestheselectedternperoture,the oven
control wilt beepandthe displagwill show the
oventemperature.
If"F-" and a numberorletterflashin thedisp!ayand
theovencontrolsignals,this indicatesa function error
code.
Thetime of day willflash in the display when there has
been a power outage. Reset the clock.
Touch the Ctear/Off pad. Allow the oven to cool
for one hour. Put the oven back into operation. Ifthe
function errorcode repeats, disconnect the power
to the range and calfforservice.
Oitchen TimerOn/OffPad
Touch this pad to select the timer feature. Then
press the + and - pads to adjust the timer,
Kitchen Timer Light
Flashes whilein editmode-gou can change the
set time at this point. Glowswhen the timer has
been activated. Flashes again when the time has
-runout untilthe control is reset.
0ClockPad .... : .
Tosetthe dock pressth spadtwce andthen
pressthe + and - pads.Thetime:of dogwill
flash inthe displagwhen theoven isfirst
turnedon.
OvenLight Pad Ion some models)
Touchthis padtoturn theovenlightonor off.
-Pad
Shorttaps tothis pad will decreasethetime or
temperatureby small amounts.Touchand hold
the pad to decreasethe time or temperature bg
largeramounts.
+Pad
Shorttaps to this padwilt increasethe timeor
temperaturebgsmall amounts.Touchand hold
the pad to increasethe time or t6mi_eraturebg
largeramounts.
10

i|11 ii i i i i i ii iii i GEAppliances.com
OvenControlClockandTimerFeaturesandSettingS_onsomemo_e_s_
OleariOffPad
Touchthis pad to cancelALL ovenoperations
excepttheclockand timer.
OBroil Hi/Lo Pad
Touchthis pad to selectthe broilfunction.
Broil Light
Flasheswhile in edit mode-you can switch from
Hi to Lo Broil at this point, Glows when the oven
isin broitmode.
Indicator Lights fan some pads)
EditmodelasLsseveralsecondsafterthelast
padpress.
Oven Control Knob fonsomemodels)
!i;!ii!iii:i:!i:ii::iiiii_ii!:iii_i;i!iiiiii!!i!_:i:ii::ii:_:_:_a!i_Turn the OVEN CONTROL knob to the setting gou want.
Appearancemayvary.
11
!.n
t_
O"
_L : ,:
I:1
w A
u
in •
_T
v
*_,,4 ' iPl't,
0
w
0

O
IL.....
J,tJ-J,_-
.£
: 111;
• w
w
.-. L
_L
£
O•
8
m
Usingthe oven.
I IIIIIIII iiii ii iii iiii J J II IIII II Jll
Toavoid pOssibiebums, ptaceth e racks in the desired position before gou turn the oven on. ...... ........................
Theracks havestop-locks,sothat when ...........
placedcorrectlgon the racksupports
(Athrough E),theg wiilstop before
:comingcompletelgout, and willnot tilt: : ..
'whenp!acing land removingcookware,
pull therack outto the bumpon the
rack support. .....
To removea racklpull it toward you,till the
front end up and pullit out.
:To.replace, ptacethe endof.the rack
!stop:t0¢ks)on theSupporL:tittup the
front and pushthe rack in.
NOTE:Therack isnot designedtosfideoutat
thespedaltow rackfR)position.
Theovenhas5rackpositions.
Itatsohasaspecial{owrackposition(R)
forextra largeitems,suchasalarge
turkey,
Oven Control
Youroveniscontrolledbga singleOVEN
CONTROLknob.
It willnormallgtake 30-90 secondsbefore
the flame comeson.After the ovenreaches
the selectedtemperature,the ovenburner
cgcles-off completelu,then on with a
fullflame-to maintain the selected
temperature.
Plastic items on the caoktop may melt
if left too close to the vent
Vent appearance and location vary.
Oven Vent
Yourovenisvented through ductsat the rear
ofthe range.Donot blockthese ductswhen
cookinginthe oven-it isimportant that the
flow of hotair from the ovenand freshair
to the ovenburner be uninterrupted.
Avoidtouching the vent openingsor
nearbg surfacesduringovenor broiler
operotion-theg mag becomehot.
_! Handlesofpotsand panson thecooktop
may becomehotiffelt too closeto thevent.
Donot leaveplasticor flammableitemson
thecooktop-theg magmelt or igniteifleft
toocloseto thevent.
Donotleavecbsed containerson the
cooktop.Thepressurein closedcontainers
may _ncrease,whichmay causethem to
burst.
@Metalitemswillbecomevery hatiftheg are
lefton thecooktop,and couldcausebums.
Power Outage {electricignition models)
^,.,CAUTION: notmakeany
attempt to operatetheelectricignitionoven
duringan electricalpower failure.
Theovenor broilercannot be lit during
a powerfailure.Gaswillnot flowunless
theglow bar ishot.
If the ovenisin usewhena powerfailure
occurs,the ovenburner shutsoff and cannot
be re-tituntil powerisrestored.Thisis
becausethe flow of gasisautomaticallg
stoppedand will not resumewhen power
isrestoreduntiltheglow bar hasreached
operatingtemperature.
12
Oven Light (on some models)
Usethe switch on the lower control panelto
turn thelight on or off.

GEAppliances.com
The,oven has a speciaXlow Fack(R)
position iust above th_ oven bottom. Use
it when extra cookingspace is needed,
for example, when cooking a large
turkey. The rack is not designed to slide
out at this position.
How to Set the Oven for Baking or Roasting "'_
Your oven is not designed for open-door Tgpe of Food Rock Position
cooking. Frozenpies(oncookiesheet) Bor C
NOTE:On models with an OVENCONTROL : Angelfood cake. B
knob, turn it to the desired temperature.
[Z] TouchtheBakepad.
[] Touchthe + or- padsuntilthedesired
temperatureisdisplayed.
I-_ Touchthe Start/On pad.
bundtorpoundcakes
Biscuits.muffins,brownies, C
coekies,,cupcakes,
layer cokes, Dies
Casseroles BorE
Roasting RorA
Theovenwill start automaticaUg.Thedisptag
will showPREwhilepreheating.Whenthe
oven reachestheselectedtemperature,the
ovencontrolwill oeepseveraltimes andthe
displaywill show theoventemperature.
Tochange the oven temperature during Bake
cgde, touch the Bake pad and then the+ or-
pads to get the new temperature.
r_ Checkfood for donenessat minimum
time on recipe.Cooklongerif necessary.
r_ Touchthe Clear/Off padwhen bakingis.
finishedand then removethe food from
the oven. " " : :-
Preheating and Pan Placement
Preheatthe ovenifthe recipecallsfor it.
Topreheat,setthe ovenat the correct
temperature. Preheatingisnecessaryfor
good resultswhen bakingcakes,cookies,
pastry and breads.
Forovenswithoutapreheatindicatorlightor
tone,preheat10minutes.
Bakingresultswill be betterif bakingpans
are centeredinthe ovenasmuch as possible.
Pansshouldnottouch eachother orthe walls
ofthe oven.If you needto usetwo racks,
staggerthe panssoone isnot directlyabove
the other,andleaveapproximately 1Y2"
betweenpans,from thefront, back and
sidesofthe wall.
Aluminum Foil
Donot usealuminum foilon thebottomof
the oven.
Neverentirelgcover o rack with aluminum
foil.Thiswilldisturb the heatcirculationand
resultin poor baking.
Asmallersheetof foilmay be usedto catch a
spilloverby placingit on a lowerracksevera!
inchesbelowthe food.
Oven Hoisture
Asyour ovenheatsup,the temperature
changeofthe air in the ovenmay cause
water dropletsto form onthe door glass,
Thesedropletsare harmlessand will
evaporateasthe ovencontinuesto
heat up. 13
9
O"
1:1
_'4'I
5
w A
w
O
O

• U
U_
.£
I&l
:'0
w A
v_ f_
.-- L
0
w
w.. t._
£
-E-
9
kll
eo
E
0
{J
Usingthe oven.
i
Broiling
Broilingiscooking food bg directheatfrom
abovethe food. Mostfishand tendercutsof
meat canbe broiled.Followthesedirections
tokeep spattering andsmokingto a
minimum.
Yourrange hasa compartment belowthe
ovenfor broiling.
Boththeovenand broilercompartment
doorsmust beCLOSEDduringbroiling.
Turnmost foods onceduringcooking (the
exceptionisthin filletsoffish:oil one side,
placethat sidedown on broilergrid and cook
without turning untildone].Timefoods for
aboutone-halfthe total cookingtime,turn
food,then continue to cookto preferred
doneness.
g]
Youcan change:thedistanceof thefood
from the heat sourcebg positioninga
broilerpan and gridon oneof threerack
positionsin the broilercompartment-
A(bottom of broilercompartment).B
(middle]and C(top).
Preheatingthe broileror ovenisnot
necessargand can producepoor results,
Ifmeat hasfat or gdstlearoundthe edge,
cut vertical slashesthroughboth about
2" apart. If desired,the fat may be
trimmedl leavinga lagerabout :i/8" thick.
_-] Arrangethe food onthe grid and position
the broilerpan on the appropriaterack
inthe oven or broilingcompartment.
Placingfoodcloserto theflame "
increasesexterior browningofthe
food, but alsoincreasesspattering
and the possibilitgOffatsand meat
juices igniting.
[_] Closethe ovenand broilercompartment
door.
NOTE:Onmodelswith an OVEN
CONTROLknob,tum.:itto Broil.
Touchthe Broil Hi/Lo padoncefor
HiBroil.
%
Tochange to LoBroil, touch the
BroilNi/Lo pad again.
UseLo Broil to cookfoods suchas
poultrg or thickcuts ofmeat thoroughlg
withoutover-browning them.
Touchthe Start/On pad.
When broilingisfinished,touch the
Clear/Off pad.
Removethe broiler panfrom the
broi!ercompartment and servethe food
immediately Leavethe panoutsidethe
rangeto cool.
!4

[hesize,weight,thickness,starting
temperatureandyourpreferenceof
donenesswill affectbroilingtimes.This
guideisbasedonmeatsatrefrigerator
temperature.
tThe U.S. Department of Agriculture
says "Rare beef is popular, but you
should knew that cooking it to only
140°Fmeans some food poisoning
organisms may survive, "[Source:.
Safe Food Book, YourKitchen Guide,
USDA Rev.June ?gB_l
Theovenhas5rackpositions.
" " GFAnnlioncp=.rnm
iiiiii,ii iiu
Broiling Guide
The oven and broiler compartment doors
must be closed during broiling.
Atwagsusea broilerpun and grid.It is
designedto minimizesmokingand
spatteringbg trappingjuices inthe
shielded.10werpartofthe pen.
•_.For steaksend chops,slashfat evenl#
aroundthe outsideedgesofthe meat.To
slash,cut crosswisethrough the outerfat
surfacejust to theedge ofthe meat. Use
tongs to turn the meat overto prevent
piercingthe meat and losingjuices,
Ifdesired,marinate meatsor chicken
beforebroiling.Or brushwith barbecue
saucelast 5to 10minutesonlg.
@Whenarrangingthe food on thepan,do
not letfattg edgeshang overthe sides
becausedrippingfat CoUldsoilthe oven.
ThebroiIercompartment doesnot needto
bepreheated.However,for vergthin foods,
or to increasebrowning, preheatifdesired.
Frozensteakscan be broiledbg positioning
the rackat the next lowestrack position
and increasingthe cookingtime givenin
this guide1Vztimes perside.
Foe ouontitg end/ '
dor Thickness
Bacon (about 8 thin slices)
Ground Beef 1 lb. (4 patties)
Well Dane 1/2" to 3/4" thick
Beef Steaks
Rock*:: First Side SecondSide
Position Time (min.) Time (min.)
C. 4
C i0
Comments
Arrange in singte lager.
Spaceevenlg, Up to
8 patties take about
the same time.
Raret ....... 1"thick
Medium I to 1VzIbs.
Well Done
•Raret :1V_"thick
Medium 2 to 2VzIbs_
Well Dane
Chicken 7'
•Lobster TaBs
Fish Fillets
Ham Slices
tprecooked)
Pork ChoPS ,,
Well Done.....
Wieners
SimilarPrecooked
Sausages,
Bratwurst
....C.... 9 ' ' 7 '
C :. 12 ' : 5-6
B 13 8-9
.... .C ' i0
C 12-15
B 25
!whole " = ,i B :.t - :30-35 ..
2to 2VzIbs.,
split lengthwise . ,
4 bone-in breasts B
2-4 A
6to 8 oz. each "
6-7
i0-]2
16-18
," 15
25-30 10-15
13-16 Donat
turn
over.
1lb. fillets C S 5
1/4" to 112"thick . :
I • " i ...... I :-
1" thick B 8
l!2"thick B i : " 6
2(Z/2"thick) :, , : B 10
2 (1"thick) about 1 lb, B " 13
8
6
4-5
9-]2
,1.Ib, I_kg,(10) ' C 1-2
Steaks lessthan I" thick
cookthrough before
browning. Panfrging is
recommended.
Slash fat.
•Brush each side with
melted butter. Broil
skin-side-down first,
Cutthrough b_cl{' of
shell. Spread open. Brush
with meited butter before
broiling and after half
of broiling time,
Handie and turn very "
carefullg, Brush with
lemon butter before
and during cooking, if
desired, Preheat broiler
to increase browning.
r
Slash fat.
If desired, split sausages
in half lengthwise; cut
into 5- to 6qnch pieces.
*Seeillustration for description of rack positions.
15
t'l
O"
Cl
S"
w _
_ u
•
O•

6"}
la
! _2:•
w
_1.) •
v_
_i, f_
o
_.. I.n
w
8
Usingthe clockand timer.
||1 ,
Not all features ore on all models.
To Set the Clock
i!i!_!_i!ii!:iii:::!iiii!i_iI!!'' C_!;ock'_!!!:!ii::iii!ii!:_i!ii!i!) _ Touc_theClock padtwice
iiii!ii!iii!!i_ __!i_! '" Touc the.or pads '" "
;ii_:iiii!iii!!! i!_ii!i_i If the+or-pads are nottouched within one
_:%!-i_:_:_? :_!::_: _;i:i{!!!i:'!minute after gou touchthe Clockpad,the
:_;i_:!:/_!/t_:i!_ii:;!,:i_::;:;!::_:Si'!!_;i_,i_::),;:,_:_;_:!ii!!_:.;!i_;i-idisplagrevertsto the originalsetting.Ifthis
(_!ii_i!;:!_:;!:!:!_!ii!i_ :!i!_!ii_!(! happenstouch theClockpad twice and
;;i_i_i_!_!i_i:i:![_' J!:i!i;i!!ii!!!i_i_iii!i!reenterthe time ofdog.
Makesuretheclockissetto thecorrect
time ofday.
TouchtheStart/On pad until thetime of
daMshowsinthe disptag.Thisentersthe
timeand starts theclock.
Tocheckthetimeofdog whenthedisptagis
showingotherinformation,simpl_ttouch the
Clockpad.Thetime of dogshowsuntil
"anotherpad is touched.
To Turn Off the Clock Oisplag
tf gou havesevera!clocksin gour kitchen,
goumeg.wish toturn off the time ofdag
clockdisplagon gout range.
[Z] TouchtheClockpad onceto turn off the
time ofday:display.Althoughgou will
not be ableto seeit, the clockmaintains
the correcttime ofdag.
Touchthe Clockpad twiceto recall
the clockdisplag.
iiii)!;ii_!i;!_!i:i_!:!::_-itch,qi'_i!i:ili!i_iii_i!iii_
Thetimeris aminutetimer onty.
The Clear/Offped does not affect
the timer.
To Set the Timer
Thetimer does not control oven operations.
The maximum setting on the timer is 9 hours
and 59 minutes.
Touchthe Kitchen TimerOn/Off pad.
Touchthe +or - padsuntilthe amount [_]
oftime gou want showsinthe displag.
Themaximum time that can beentered
in minutesis59.Timesmorethan
59 minutesshouldbechangedto
hours andminutes.
ff gou makea mistake,touchtheKitchen
TimerOn/Offpod and beginagain.
TouchtheStart/On pad.Thetime wilI
star_countingdown, atthoughthe
displagdoesnotchangeuntil one
minute haspassed.
Whenthe timer reaches:00,the Control
will beep3timesfo!towed bgone beep
every 6 secondsuntilthe Kitchen Timer
On/Off pad istouched.
To Reset the Timer
If thedisplagisstillshowing thetime
remaining,youmag changeit bgtouching
the KitchenTimerOn/Off pad,then touch the
+or- padsuntilthetime gouwant appears
inthe disp]ag.
Ifthe remainingtime isnot in the displag
(clockisinthe display),recallthe remaining
time bg touchingtheKitchen TimerOn/Off
padand then touchingthe +or - padsto
enterthenewtime you want.
To Cancel the Timer
Touchthe Kitchen TimerOn/Off padtwice.
16
/:
Power Outage
Ifaflashingtime isin thedisptag,you have
experiencedapowerfailure.Resetthe clock. Toresettheclock,touch the Clock pad.Enter
the correcttime ofdag bg touching the +or -
pads.TouchtheStort/On pad.

Adjust the oven thermostat-Do it yourself! GEApp,io.cos.oom
t J i .111 i i i ii
Youmayfind that your new oven cooks differently than the Oneit replaced. Usegour new ovenfor a few weeks to
become more familiar with it. If you still think your new ovenis toohot or too cold. gou con adjust the thermostat
yourself. .........
i i!:i !i !! ;ii i!iT-st}aq!ii i!ii!!i2:!i!i
Do not use thermometers, such as those found in grocery stores, to check the temperature setting of gour oven.
Thesethermometers mag varg 20-40 degrees.
NOTE:This adjustment will not affect the broiling temperatures.
-v-:_:_;_;_:_,_:%!:_;:i_._ii_i;i:_!;_i!;i_:_To Adjust the Thermostat fanmodels with touch pads)
Touch the Bake and Broil Hi/Lo pads
atthe some time for 2 Seconds until the
displag shows SF.
Touch the Bake pad. A two-digit number
shows in the displag. ,: ' "
The oven temperature can be adjusted
up to (+)35°F hotter or 1-)35°F cooler.
,Touch the + pad to increase the
temperature in I degree increments.
When gouhavemodethe adjustment,
..: - ,touchthe Start/On pad to go backto
thetime ofdag displag.Usegout oven
asgou would normaltg.
NOTE:Thisadjustment wilt not affect broiling
temperatures. It will be retained in memory
after a powerfailure.
Touch the -pad to decrease the
temperature in i degree increments.
(Appearancemayvan/)
To Adjust the Thermostat [on models with an Oven Control Knob)
Pullthe OVENCONTROLknoboff
the rangeand lookatthe back side.
Tomakean adjustment,loosen
(approximatelgoneturnj, but do not
completelgremove,thetwo screws
on the back ofthe knob.
Eachclickwillchangetheoventemperature
approximatelg10°E(Rangeis_+60°Efrom
thearrow,)Wesuggestthat goumakethe
adjustmentone clickfrom the originalsetting
and checkovenperformancebeforemaking
ang additionaladjustments.
With the back ofthe knobfacing gou,
hold theouter edgeofthe knobwith one
hand and turn thefront ofthe knobwith
theother hand.
Toraisethe oventemperature, movethe
top screwtoward the right. You'llheara
clickfor eachnotch goumovethe knob.
[-_ Afterthe adjustmentismode,retighten
screwssothee aresnug,but becareful
notto overtighten.
[_] Reinstallknobon range andcheck
performance.
Tolowerthetemperature,movethe top
screwtoward the left.
Thetype of margarine will affect baking performance!
i i i ii ii i
Most recipes for baking have been developed using high-fat products such as butter or margarine (80% fat).Ifgou
decrease the fat, the recipe mug not give the some results as with a higher fat product.
Recipe failure can result if cakes, pies, pastries, cookies or candies are made with tow-fat spreads. The lower the fat
content of o spread product, the more noticeable these differences become.
Federal standards require products labeled "margarine" to contain at least 80% fat bg weight. Low-fat spreads, on the
other hand, contain less fat and more water. The high moisture content ofthese spreads affects the texture and flavor
of bakedgoods.Forbestresultswith gour aidfavorite recipes,usemargarine, butteror stickspreadscontainingat least
70%vegetableoil. 17
:%:22LL1 i
;:r;-..
_n
r,t,z
0
¢b
w
w
0

2.
"o
v ¸ A
W
I,Wi f_
t_
Specialfeatures ofyour oven control . .
] i i i .i L|ill t II
Your new touch pad COntrolJ_asadditional features that you may choose to use. Thefollowing are the features and
how you mag activate them.
Thespedal feature modes can only be activated while the display is showing the time of day. The#remain in the
control's memory until the steps are repeated,
When the display shows your choice, touch the Start/On pad. The special features will remain in memory after
a power failure.
NOTE: The Sabbath feature and the Thermostat Adjustment feature are also special Features, but they are addressed
separatelg in their own sections.
12 Hour Shut-Off
With this feature, should gou forget and leave
the oven on, the control Willautomaticaltg turn
off the oven after 12 hours during baking
functions or:after 3 hours during a broit
fdnctionl "
Ifgou wish toturn OFFthis feature,follow
the stepsbelow.
r_] Touchthe Bakeand Broil Hi/Lo pads
at the sametime for 3secondsuntil
the displagshowsSF.
Touchthe Clockpad.Thedisplegwill
show On(t2 hour shut-off).Touchthe
Clockpad repeatedlguntilthedisplag
shows0ff(no shut-off).
TouchtheStart/On pad to activatethe
noshut-off andleavethe controlset in
this specialfeaturesmode.
°. •
18

"-: -u ,ngthe Sabbath Feature. conomemode sJ
(Designedfor useonthe Jewish Sabbath and Holidags) GEAppliances.com
J i J lluH
TheSabbath feature can beused for baking/roasting only. It cannot be used for broiling.
NOTE:Theoven light comes on automatically (on some models) when the door is opened and goes off when the
door isclosed. Thebulb mad be removed. On models with a light switch on the control panel, the oven light mad be
turned on and left on.
ii!ii ii ¸ii!
i_ Bake !_iii:_i!i_i_!!ii!i_;(--Broiiiil
When the dis_tay shows _ the ove_ is
set in Sabbath. When [he display shows
cthe oven is baking/roasting•
How to Set for Regular Baking/Roasting
NOTE:Tounderstandhow theovencontrol
works,practiceusingregularbaking(non-
Sabbath)beforeenteringSabbathmode._
NakesuretheclockshowstheCorrecttime
of dadand theovenisoff.
[_ TOuchand hold boththe Bakeand
Broil Hi/Lo pads,at the same time,
untilthe displagshowsSF.
17tTapthe Clock pad untilS_bappears
in thedisplag.
F_ TouchtheStart/On padand _ will
appear in the displag.
Touchthe Bake pad.Nosignalwill
be given.
[-_ Touch the Start/Onpad.
After a random deled period of
epproximatelg 30seconds to,1 minute,
c will appear in the displag indicating
that the oven is baking!roasting.If_
doesn't appear in the disptag, star1 again
at Step/4.
Toadjustthe oventemperature,touchthe
Bakepad and topthe + or -padsto increase
or decreasethe temperaturein 25°
increments.TouchtheStart/On pod.
NOTE:TheClear/Offpad isactiveduring
theSabbathfeature.
Thepresetstarting temperaturewill
automaticallg beset to 350°.Tap.the+
or- padsto increaseor decreasethe
temperature in 25°increments.The
temperature can beset between 170°
end 550°.Nosignalor temperaturewill
begiven.
i:_8ake ::::i:!;14;:i!_::_,iii!_Broil__.
i_!i:iiiiii,:;i::ii!iiiii_Clock i!!ii;:_iiiiii!i_:I
How to Exit the Sabbath Feature
Touchthe Clear/Off pad.
tfthe oveniscooking,wait for a
randomdela_ periodof approximatelg
30secondsto i minute,untilonig
isinthe displabj.
Touchand hold boththe Bakeand
BroilHi/Lo pads,at the same time,
untilthe displagshowsSF.
@Tapthe Clock paduntilOnor Off
appearsinthe displa_j.Onindicates
that the ovenwillautomaticallgturn
off after 12hours.Offindicatesthat
the ovenwillnot automaticollgturn off.
SeetheSpecialFeaturessectionfor an
explanationofthe 12HourShut-Off
feature,
TouchtheStart/On pad.
NOTE:lfapower outageoccurredwhile
the ovenwas inSabbath,theavenwill
automaticallgtum off andstag off even
when thepower returns.Theovencontrol
must be reset.
19
O"
r_
v
u
0 1
01

£o
o u
P
v •
i
8
Care and cleaning of the range.
im m m
Be sure electrical power is off and all surfaces are coot before cleaning ang part of the range.
Ifgour range is removed for cleaning, servicing or ang reason, be sure the anti-tip
device is reengaged properfg when the range is replaced. Failure to take this precaution
could result in tipping of the range and cause injury.
..... Standard Twin Burner Assemblies fansomemodels)
CAUTION:
Be not operate the ceektop without all
burnerparts,drip pans(ifsoequipped)
andgratesin place,
Forcleaning information on sealed
burners, see next section. Sealed burner
cooktops do not lift up. Ij Toremoveburned-onfood, soakthe surface
burner ina solution of mildliquiddetergent
and hotwater.Soakthe surfaceburnerfor
20-30 minutes.
:--:_: On models with standard twin burners, the '
Turn all controlsOFF beforeremoving burner
partsand drippans(ifsoequipped).
Theburner gratesand drip pans(ifso
equipped) can belifted off,makingthem
easg tOclean.
Theholesinthe surface burnersof gour
rangemust be kept cleanatall timesfor
properignitionand an even,unhampered
flame.
Youshouldcleanthesurface burners
routinelg,especiallgafter bad spillovers,
which couldclogthese holes.
Wipeoff surfaceburners.If heavgspilIover
occurs,removethe surfaceburnersfrom the
range.Burnerslift out fordeaning. Lift upthe
cooktopand then liftout the surfaceburners.
Clean these holes thoroughly on each
burner•
•Drip Pans/ifso equipped)
Removethe grates and liftout the drip pans.
Drippanscan be cleanedin a dishwasheror
:?i:":_:L_•_:,:.:.:.:.:?:::_•_:::,-:..-_::._....::_"•_ bg hand.
Whenreplacingthe drip pans,make sure
theg arein thecorrect position.
For more stubborn stains, use a cleanser like
Soft Scrub®brand or Ban AmP brand. Rinse
.well to remove ang traces of the cleanser
that might clog the surface burner openings.
Do not use steel wool because itwillclog
the surface burner openings and scratch the
surface burners. Ifthe holes become clogged,
clean them with a sewing needle or twist4ie.
Beforeputtingthe surfaceburner back,shake
out excesswater and then drg itthoroughlg
bgsettingit in a warm ovenfor 30minutes.
Thenplaceit backin the range,makingsure
it ispropedgseatedand level.
Checkthe flame pattern of each burner.If
theflamesare '_iumpg"inotsteadg),cleanthe
holesagain with a sewingneedleortwist-tie.
Togetrid of burned-on food,placethem
ina coveredcontainer (orplasticbag)
with _/4 cupammonia to loosenthesoil.
Thenscrubwith a soap-filledscouring
padif necessarg.
CAUTION: nonotclean
thedrippansin a self-cleaningoven.
2O
Other manuals for Appliances JGBS04
3
This manual suits for next models
9
Table of contents
Other GE Range manuals
Popular Range manuals by other brands

Crosley
Crosley CRP3160GWWD installation instructions

Indesit
Indesit K6C32/G operating instructions

Forno
Forno FFSGS6239-30 installation guide

Kenmore
Kenmore 9991 - Elite 30 in. Induction Range Use and care guide

Jenn-Air
Jenn-Air ELECTRIC DOWNDRAFT SLIDE-IN RANGE user guide

Frigidaire
Frigidaire FPEF4085KFD installation instructions