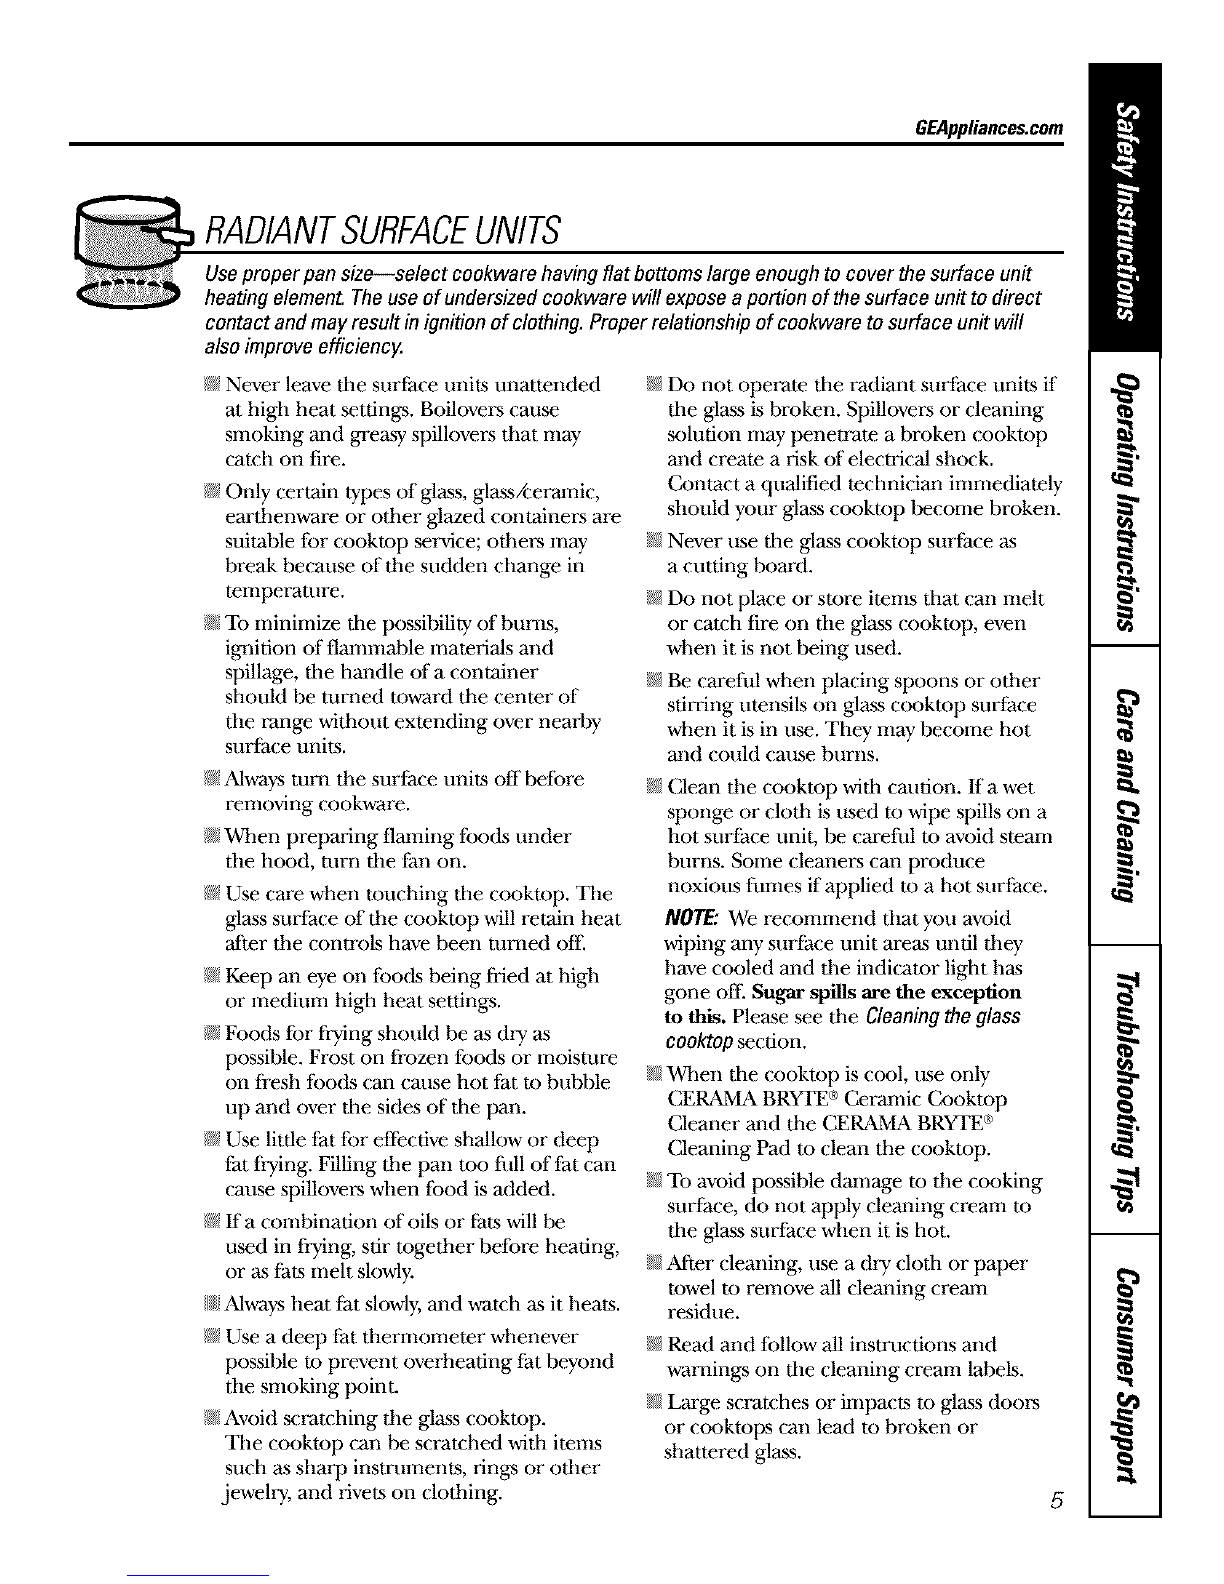
GE JBP82 User manual

GEAppliances.com
Safety Instructions ....... 2-6
Operating Instructions
Clock and Timer ........... 16
Oven ................. 11-21
Sabbath Feature ........ 18, 19
Self-Cleaning .......... 20, 21
Special Features ........ 12, 13
Thermostat .............. 19
Timed Baking & Roasting . . .17
Surface Units ........... 7-10
Care and Cleaning
Broiler Pan &Grid ......... 24
Control IZmobs ............ 22
Gl_s Cooktop .......... 25, 26
Lift-Off Oven Door ......... 23
Light .................... 24
Shelves .................. 24
Troubleshooting Tips ... 27-30
Consumer Support
Consumer Support.. Back Cover
Warranty ................. '31
Write the model and serial
numbers here:
Model #
Serial #
You can find them on a label
behind the storage drawer on
the front of the range fi'ame.
164D4290P076-1
JBP82
49-80118-2 OI-02JR

IMPORTANTSAFETYINFORMATION.
READALLINSTRUCTIONSBEFOREUSING.
WARNING!
For your safe_ the information in this manual must be followed to minimize the risk of fire,
electric shock, or to prevent property damage, personal injury, or loss of fife.
WARNINGANTI-TIPDEVICE
All ranges can tip and injury could result
Toprevent accidental tipping of the range, attach it to the wall and floor by installing the Anti- 77p
device supplied.
Tocheck if the device is installed and engaged properly, remove the kick panel or storage drawer
and inspect the rear leveling leg. Make sure it fits securely into the slot.
If you pull the range out from tile wall tbr any reason, make sure tile device is properly
engaged when you push the range back against the wall. If it is not, there is a possible risk of
the range tipping over and causing itoury if you or a child stand, sit or lean on an open door.
Please relier to the Anti-Tip device information in this manual. Failure to take this precaution
could result in tipping of the range and itouiy.
2

GEAppliances.com
IMPORTANTSAFETYNOTICE
TheCallfomia Safe Drinking Water and Toxic Enforcement Act requires the Govemor of Callfomia to
publish a list of substances known to the state to cause cancer, birth defects or other reproductive
harm, and requires businesses to warn customers of potential exposure to such substances.
Thefiberglass insulation in self-clean ovens gives off a very small amount of carbon monoxide during
the cleaning cycle. Exposure can be minimized by venting with an open window or using a ventilation
fan or hood.
SAFETYPRECAUTIONS
When using electrical appliances, basic safety precautions should be followed, including the following:
N Use this appliance only Ibr its intended
pt_e as de_ribed in tilts ()m_er's
Mara_l.
Be sure your appliance is properly
installed and grounded by a qualified
installer in accorv.tance with tile provided
installation instructions,
N Have file installer show you file location
of tile circuit breaker or l:use. Mark it Ibr
e_y reference.
N Do not attempt m repair or replace aW
part of your range unless it is spedfically
recommended in this manual. All otiler
se*_idng should be referred m a qualified
technician.
@ Before perIbrming any se*_ice, disconnect
file range power supply at tim household
distribution panel by removing the i:use or
swimhing off tile circuit breaker.
@ Do not leave children alone---children
should not be left alone or unattended in
an area where an appliance is in use. They
should nexer be allowed to sit or stand on
any part of tlle appliance.
@ Do not allow anyone m climb, stand or
hang on tile door; storage drawer or
cooktop. They could danmge tile range
and eNen tip it over, cansing severe
pe_sonal ir_ul y.
3

IMPORTANTSAFETYINFORMATION.
READALLINSTRUCTIONSBEFOREUSING.
WARNING!
SAFETYPRECAUTIONS
Do not operate the oven or cooktop controls if the glass is broken. Food splatter or cleaning solution
may penetrate a broken control panel and create a risk of electrical shock. Contact a qualified
technician immediately should your glass control panel become broken.
N
N
N
Do [lot store flammable materials in
arl oven or [lear file cooktop.
CAUTION:[teins of interest to
children should not be stored in cabinets
ahove a range or oil the backsplash of a
range--children climbing on the range
m reach items could be seriously injured.
Never wear loose-fitting or hanging
garments while using file appliance.
Be carefifl when reaching t:or items stored
over the range. Flammable material could
be ignited if"brought in contact with hot
surface uniLs or heating eleinents and may
cause severe burns,
N
N
Use only dry pot holders_moist or damp
pot holde*:s oil hot surl:aces may result in
burns from steam. Do not let pot holders
much hot surface units or heating
elements. Do not use a towel or other
bulky cloth in place of pot holders.
Do not use >rater oil grease fires. Never
pick up a flaming pan. Turn the controls
otI: Smother a flaming pan oil a surface
unit by covering the pan completely with
a well41tting lid, cookie sheet or fiat tray.
Use a multi-purpose dry cheinical or
t:oaln-type tire extinguisher.
Flaining grease outside a pan can be put
out by covering it with baking soda or;
if available, by using a inulti-pmt)ose dry
cheinical or t:oaln-type fire extinguishen
Flalne in the oven can be smothered
completely by closing tim oven door and
mining the oven off or by using a multi-
purpose dry cheinical or fc_aln-type fire
extingmisher.
@ For your s_ety; never use your appliance
for wamfing or heating the room.
@ Do not let cooking grease or other
flammable materials accuinulate in or
near the range.
Do not touch the surface units, file
heating elements or file interior surfare
of tile. oven. These surfares may be [lot
enough to burn even fllough they are
dark in color During and _ter use, do not
touch, or let cloflfing or other flmnmable
materials contact the surface uniks, areas
nearby tile surface units or any interior
area of the oven; allow sufficient time lbr
cooling first.
Potentially [lOt surt:aces include file
cookmp, areas t:acing tim c_ktop, oven
vent opening, surfaces near tile opening,
crevices around the oven door.
REMEMBER: Tile inside surface of tim oven
nlay" be hot when the door is opened.
Do not store or use combustible materials,
gasoline or other flalnmable vapors and
liquids in the vicinity of this or any other
appliance.
@ Keep the hood and grease film_:s clean
m maintain good venting and m avoid
gwease fires.
@ Teach children not m play"with tim
controls or any other part of the range.
N Always keep dish towels, dish cloflls, pot
holde*:s and other linens a s_e distance
from your range.
NAlways keep wooden and plastic: umnsils
and canned f_d a s_e distance from
your range,
N Always keep combttsfible wall covering,
curtains or drapes a s_e distance from
your range.
4
COOKMEATANDPOULTRYTHOROUGHLY...
Cookmeatandpoultry thoroughly--meat to at leastan INTERNALtemperatureof 160°Eandpoultry toat least
an INTERNALtemperatureof 180°ECookingto thesetemperaturesusuallyprotects againstfoodborneillness.

GEAppliances.com
RADIANTSURFACEUNITS
Use proper pan size--select cookware having flat bottoms large enough to cover the surface unit
heating element. Theuse of undersized cookware will expose a portion of the surface unit to direct
contact and may result in ignition of clothing. Proper relationship of cookware to surface unit will
also improve efficiency.
_;_Never leave the surface units unattended
at high heat settings. Believers cause
snloking and gweasT spillovers that nlay
camh on fire.
N Only certain types of glass, glass/cerainic,
eardmnware or other glazed containers are
suitable for cookmp service; odmrs inay
break because of the sudden change in
teinperamre.
N To minimize die possibility" of brims,
ignition of flalnnlable materials and
spillage, the handle of a container
should be turned toward the center of
tile range widlout extending over neafl)y
surt:ace units.
N Always turn the surl:ace units off befbre
removing cookware.
N _vghen preparing flauling foods under
file h_d, turn die lSn oil.
N Use care when touching die c_ktop. Tile
glass surt:ace of the cookmp will retain heat
_ter the controls have been mined eli:
N Keep an eye oil foods being flied at high
or mediunl high heat settings.
@ Foods fbr l:iTing should be as dry as
possible. Frost on frozen foods or moisture
on fresh foods carl cruise hot fat m bubble
up and over tile sides of tile vail.
N Use litde fat for effective shallow or deep
fat Iiying. Filling die pall me fill of fat can
cause spillovers when fbod is added.
@ If a combination of oils or fats will be
used in Iiying, stir together befbre heating,
or as lhts melt slowly.
{{{{1_Always heat lat slowly, and watch as it heats.
_;aUse a deep fat fllermonleter whenever
possible m prexent overheating lat beyond
tlle snloking point.
N Avoid scratching the glass cookmp.
Tile cooktop Call be scratched with imms
such as sharp instruinents, rin_ or trier
jewelry, and rivets on clothing.
@ Do not operate file radiant surface units if
die glass is broken. Spillovers or cleaning
solution may penetrate a broken cooktop
and create a risk of electrical shock.
Contact a qualified technician inmlediately
should your glass cooktop become broken.
N Nexer rise die glass cooktop surface as
a cutting board.
_;_Do not place or store items dlat can melt
or catch fire oil die glass cookmp, even
when it is flat being used.
N Be carefid when placing spoons or other
stirring umnsils on glass cookmp surt:ace
when it is in use. They may become hot
and could cause burns.
@ (;lean dm cookmp widl cmltion, ga wet
sponge or cloth is used m wipe spills on a
hot surface unit, be carefid to avoid steanl
burns. Some cleaners can produce
noxious fumes if applied m a hot surface.
NOTE: We reconunend that you avoid
wiping aW surl:ace unit areas until dmy
have cooled and the indicator light has
gone off. Sugar spills are the exception
to tl_. Please see dm Cleaning the glass
cooktop section.
N When die cooktop is cool, rise only
CERAIVIA BRYI'E ®Ceralnic Cookmp
Cleaner and the CERAMA BRYTE ®
Cleaning Pad m clean the cookmp.
N To avoid possible dam_e m the cooking
surface, do flat apply cleaning crealn m
tlle glass surface when it is hot.
N After cleaning, rise a dry" clofll or paper
towel m renlove all cleaning creanl
residue.
@ Read and fbllow all instructions and
warnings oil die cleaning crealn labels.
N Large scratches or impacts m glass doors
or c_ktops can lead m broken or
shattered glass.
5

IMPORTANTSAFETYINFORMATION.
READALLINSTRUCTIONSBEFOREUSING.
WARNING!
OVEN
Stand away from the range when opening the oven door. Hot air or steam which escapes can cause
bums to hands, face and/or eyes.
_a Do not heat unopened food containers.
Pressure could build up and die container
could blmst, causing an i_tuy.
S;_Keep tile oven vent unot)stmcted.
_} Keep tile oven free from grease buildup.
_a Place tile oven shelf in tile desired position
while tile oven is cool. ffshelves must be
handled when hot, do [lot let pot holder
contact tile heating eleinent_s.
_a"When using cooking or r_asting lyags in
tile oven, lbllow tile manufacturer's
directions.
Do [lot use tile oven to dry newspapers.
If overheated, they can catch on fire.
Do [lot use tile oven for a storage area.
Items stored in an oven carl ignite.
Do [lot leave paper products, eooking
umnsils or food in tile oven when [lot
in use,
Do [lot use ahmlinuin Ibil to line oven
bottoms, except as suggested in this
manual. Inlproper installation of
ahuninunl t:oil may result in a risk of
electric shock or fire.
_ Pulling out die shelf m die stop-lock is a
convenience in lifting heavy i:oods. It is also
a precaution agmnst bums fronl touching
hot surfaces of file door or oven urals.
SELF-CLEANINGOVEN
Do not use oven cleaners. No commercial oven cleaner or oven liner protective coating of any kind
should be used in or around any part of the oven. Residue from oven cleaners will damage the inside
of the oven when the self-clean cycle is used.
_ Do not clean tile door gasket. Tile door
gasket is essential for a g_d seal. (_e
should be taken not m rob, danlage or
nlove tile gasket.
N g die sell:cleaning mode malfimctions,
turn tim oven off and disconnect the
power supply. Have it serviced by a
qualified technician.
N Before sellk:leaning tim oven, remove tile
broiler pan, grid and otimr cookware. @ Clean only parts listed in this Owner's
Manual.
N Be sure to wipe up exee_ spillage belbre
starting tile selgcleaning operation.
READANDFOLLOWTHISSAFETYINFORMATIONCAREFULLY.
SAVETHESEINSTRUCTIONS
6

Usingthesurfaceunits, eEA .linncos.com
Throughout this manual, features and appearance may vary from your model.
Besure you turn the control knob to
OFFwhen you finish cooking,
WARMER GUIDE
How to Set
Push the knob in and turn in either
direction to the setting you ,a_ant.
At both OFFand HI the control clicks
into position. You may hear slight
clicking sounds during cooking,
indicating the control is keeping the
power level you set.
AHOTCOOKTOPindicator light will glow
when any radiant element is turned on,
and will remain on until the surface is
cooled to approximately 150°E
Indicatorlightwill;
I;_comeonwhentheunitis turnedonorhotto
thetouch.
stayonevenaftertheunitisturnedoff
I;;_glowuntiltheunitiscooledtoapproximately
150°£
Dual Surface Unit Control Knob
Therightfrontsurfaceunithas2 cookingsizesto
selectfromsoyoucanmatchthesizeof theunit
tothesizeofthecookwareyouareusing.
To use the small (6 inch) surface unit,
turn dm control knob to dm SMALL
BURNERsettings.
To use the large (9 inch) suriZace unit,
turn dm control lamb to dm lARGE
BURNERsettings.
SETTING FOOD
(Low) Bread/Pastries
(Medium) Chocolate/Butter
(Medium) Sauces,Stews,
CreamSoups
(Medium) Vegetables
(High) Soups(liquid)
(High) TeaorCoffee
TheWarmer Guideis forreference
only andthe SETTINGthat you
needwill dependonthe amount
and type offood,the starting
temperature ofthe food,and the
length ofthe holdingtime,
Using the Warming Zone
The WARMING ZONE, located in the back
center of the glass surface, will keep hot,
cooked food at serving temperature.
zMways stm't with hot Jibed. Do not use
to heat cold food. Placing uncooked or
cold food on the WARMING ZONEcould
result in food-borne illness.
Push and turn the control knob to any
desired setting.
For best rmul_s, all foods on the
WARMINGZONEshould Ix" covered with
a lid or aluminum foil. When warming
pasnies or breads, the cover should be
vented to allow moisture to escape.
zMwaysuse potholders or oven mitts when
removing food from the WARMINGZONE,
as cook,a_are and plates will be hot.
CAUTION: Do not warm food on the
WARMINGZONEfor more than two hours.
NOTE:Thesurface warmer will not glow redlike
the cookingelements.
AHOTsurface indicator light will glow
when the glass surface is hot and will
remain on until the surface is cool
enough to touch. Lower settings may not
heat the glass surface enough to cause dm
HOTsurface indicator light to come on.
AWARMINGZONEindicator light will
glowwhen the unit is on.
_Donotuseplasticwraptocoverfood.Plastic
maymeltontothesurfaceandbeverydifficult
toclean.
_Useonlycookwarerecommendedfor
top-of-rangecooking.
7

Usingthesurface units.
Throughout this manual, features and appearance may vary from your model.
Using the Bridge Burner
use the bridge burner, turn the
control knob to the BRIDGEBURNER
settings.
For fi]ll bridge burner operation, turn
on the rear burne_:
'lb use only the front burnel, turn the
control knob to the FRONTBURNER
settings.
Temperature Limiter
Every radiant surihce unit has a
temperature limiter.
_12qetemperature limiter promcts the
glass cooktop from getting too hot.
_12qetemperature limimr may cycle
the units offfbr a time if."
{{1_Thepanboilsdry.
{{1_Thepanbottomisnotflat
{{{I;Thepanisoffcenter
I;_;Thereisnopanontheunit.
Home Canning 7_ps
Be sure the canner is centered over the
surtZace unit.
Make sure the calmer is fiat on the
bottom.
To prevent burns from steam or heat,
use cautioll when canning.
Use recipes and procedures from
reputable sources. These are available
from manufacturers such as Ball®and
Kerr _ and the Department of Agriculture
Extension Service.
Flat-bottomed canners are
recommended. Use of water bath
canners with rippled bottoms may
extend the time required to bring
the water to a boil.
WokCooking
Werecommendthatyouuseonlya flat-bottomed
wok.Theyareavailableatyourlocalretailstore.
Do llOt use woks that have support rillgs.
Do ilot use round bottom woks.
You could be seriously burned if the
wok tipped over.
Use only flat-bottomed wok&
8

Usingthesurfaceunits. OEApp,,,oo=co=
Thefollowing information will help you choose cookwara which will give good performance on glass cooktops.
Never cook directly onthe glas&
Always use cookware.
Always place thepan in the center of
thesurface unit you are cooking on.
About the radiant surface units...
The radiant cooktop features heating
units beneath a smooth glass suriCace.
NOTE:A slightodorisnormalwhena new
cooktopisusedforthefirsttime.Itiscausedby
theheatingofnewpartsandinsulat#Tgmaterials
andwilldisappearina shorttime.
NOTE:Onmodelswithlightcoloredglass
cooktops,it isnormalforthecookingzonesto
changecolorwhenhotorcoolingdown.Thisis
temporaryandwilldisappearastheglasscools
toroomtemperature.
The surface unit will cycle on and off to
maintain your selected control setting.
It is safe to place hot cookware on the
glass surface even when tim cooktop
is cool.
Even after the surface units are torned
off, the glass cooktop retains enough
heat to continue cooking. "ib avoid over-
cooking, remove pans from the surt:ace
units when tim food is cooked. Avoid
placing anything on the surface unit
until it has cooled completely:
Do not slide cookwara across the
cooktop because it can scratch the
glass--the glass is scratch resistant,
not scratch proof.
I;s_Waterstains(mineraldeposits)areremovable
usingthecleaningcreamor fullstrengthwhite
vinegar.
I;S_Useofwindowcleanermayleavean
iridescentfilmonthecooktop.Thecleaning
creamwillremovethisdiscoloration.
I;S_Don'tstoreheavyitemsabovethecooktop.
ff theydropontothecooktop,theycancause
damage.
I;S_Donotusethesurfaceasa cuttingboard
9

Selecting typesofcookware.
Check pans for flat bottoms by
using astraight edge.
Pans with rounded, curved, ridged
or warped bottoms are not
recommended,
Stainless Steel:
recommended
Aluminum:
heavyweightrecommended
Good conductivity. Muminum residues
sometimes appear as scratches on the
cooktop, but can be removed if cleaned
immediately. Because of its low melting
point, thin weight aluminum should not
be used.
Copper Bottom:
recommended
Copper may leave residues which can
appear as scratches. "ilm residues can be
removed, as long as the cooktop is
cleaned immediamly: However; do not let
these pots boil dW.Overheated metal can
bond to glass cookmps, zM1overheated
copper bottom pot will leave a residue
that will permanently" stain the cooktop
if not removed immediately.
Porcelain EnamelCoveredCastIron:
recommended
_Mlong as the cookware is covered
complemly with porcelain enamel, this
cookware is recommended. Caution is
recommended fbr cast iron cookware
that is not complemly covered with
smoofll porcelain enamel, as it may
scratch the glass ceramic cooktop.
Glass-ceramic:
usable,butnotrecommended
Poor performance. May scratch tim
suriZace.
Stoneware:
usable,butnotrecommended
Poor performance. May scratch tim
surt;ace.
10

Usingtheovencontrols. GEAppliances.com
Throughout this manual, features and appearance may vary from your model.
[
OvenControl,Clockand timer FeaturesandSettings
BAKEPad
Press this pad to select the bake fimction. KITCHEN TIMER ON/OFFPad
Press this pad to select tim timer feature.
BROILHI/LO Pad O
Pr_ tiffspad to select the broil function.
Display
Sbow_ the time of day and tbe time set for O
the timer.
If "F--anda numberorletter"flashin thedisplay
andtheovencontrolsignals,thisindicatesa
functionerrorcode.
If yourovenwassetfora timedovenoperation
anda poweroutageoccurred,theclockandall
programmedfunctionsmustbereset
Thetimeofdaywillflashin thedisplaywhen
therehasbeenapoweroutage.
COOKINGTIMEPad
Press this pad and then press the _'
INCREASEor DECREASEpads to set the
amount of time you want your food to
cook. The oven will shut offwhen the
cooking time has nm out.
0STARTTIME Pad
Press tiffs pad and the INCREASEor
DECREASEpads to delay the starting of"
your oven up to 9 hours and 59 minutes.
STARTPad
Must be pressed to start any cooking or
cleaning function.
DECREASEPad
Short taps to tiffs pad will decrease the
time or mmperamre by small amounts.
Press and hold the pad to decrease tim
time or mmperamre by larger amounts.
INCREASEPad
Short taps to this pad will increase the time
or temperature by"small amounts. Press
and hold the pad to increase tim time or
temperature by larger amounts.
CLEAR/OFFPad
Press this pad to cancel ALL oven
operations except the clock and timer.
SELFCLEAN Pad
Pres,s tiffs pad to select tim self-cleaning
fimction. See the Usingtheself-cleaning
oven section.
CLOCKPad
Press tiffs pad before setting tbe clock.
11

Specialfeaturesofyourovencontrol
Yournew touch pad control has additional features that you may choose to use. Thefollowing are the features and
how you may activate them.
Thespecial feature modes can only be activated while the display is showing the time of day. They remain in the
control's memory until the steps are repeated.
When the display shows your choice, press the STARTpad. The special features will remain in memory after a
power failure.
i,i! iii!il, .ourShut-O.
Withthisfeature,shouldyouforgetandleavethe []
ovenon,thecontrolwillautomaticallyturnoff the
ovenafter12hoursduringbakingfunctionsor
after3hoursduringabroilfunction.
If you wish to turn OFFthis feature, fbllow
the steps belo,a_
[] Press the BAKEand BROILHI/LO []
pads at the same time for 3 seconds
until the display shows SE
Press the STARTTIMEpad. _12qe
display will show 12shdn(12 hour
shut-oiI). Press the STARTTIME
pad again and the display will show
noshdn01oshut-oil).
Press the START pad to activate the
no shut-off and leave the control set
in this special features mode.
¸7¸¸7¸¸7¸¸7¸¸7¸¸7¸¸7¸¸7¸¸7¸¸7¸¸7¸¸7¸¸7¸¸7¸¸7¸¸7¸¸7¸¸7¸¸7¸
Fahrenheit or Celsius Temperature Selection
YourovencontrolissettousetheFahrenheit
temperatureselectionsbutyoumaychangethis
tousetheCelsiusselections.
[] Press the BAKE and BROILHI/LO
pads at the same time fbr 3 seconds
until the display" shows SE
[] Press the BROIL HI/LO mad COOKING
TIMEpads at the same time again.
_12qedisplay" will show C(Celsius).
[] Press the START pad.
[] Press the BROIL HI/LO and COOKING
TIMEpads at the same time. _[2qe
display" will show F(Fahrenheit).
Control Lockout
Yourcontrolwillallowyoutolockoutthetouch
padssotheycannotbeactivatedwhenpressed.
[] Press the BAKE and BROILHI/LO
pads at the same time fbr 3 seconds
until the display" shows SE
[] Press the SELFCLEAN pad. The
display" will show LOC OFF.
Press the SELFCLEAN pad again.
The display will show LOC ON.
[] Press the STARTpad to activate the
control lockout feature and leave
the control .set in this special
features mode.
When this feature is on and the touch
pads are pressed the control will beep
and the display will show LOC.
NOTE:Thecontrollockoutmodewillnot
affecttheCLOCKandKITCHENTIMERON/OFF
touchpads.
12

GEAppliances.com
Tonesat the End of a timed Cycle
At theendofa timedcycle,3 shortbeepswill
soundfollowedbyonebeepevery6secondsuntil
theCLEAR/OFFpadispressed.Thiscontinual
6secondbeepmaybecanceled.
To cancel the 6 second beep:
[] Press the BAKE and BROIL Nil'tO
pads at the same time fbr 3 seconds
until the display" shows SE
[] Press the KITCHENTIMERON/OFF
pad. _12qedisplay"shows CONBEEP
(continual beep). Press the KITCHEN
TIMERON/OFFpad again. '[lm
display"shows BEER.(This cancels the
one beep every 6 seconds.)
[] Press the START pad.
12Hour,24 Hour or Clock Black-Out
Yourcontrolissettousea 12hourclock.
If you would prefer m have a 24 hour
military dme clock or black-out the clock
display; follow the steps below.
[] Press the BAKE and BROILH!/LO
pads at the same time J[br 3 seconds
until the display" shows SE
[] Press the CLOCKpad once. The
display will show 12hr. If this is
the choice you want, press the
START pad.
Press the CLOCKpad again to change to
the 24 hour military time clock. The
display will show24hr, ffthis is the choice
you want, press the STARTpad.
Press the CLOCKpad again to black-out
the clock display. The display will show
OFF.ffthis is the choice you ,a_ant,press
the STARTpad.
NOTE:Iftheclockisin theblackreutmodeyou
willnotbeabletousetheDelayStartfunction.
Cook and Hold
Yournewcontrolhasacookandholdfeaturethat
keepscookedfoodswarmforupto3 hoursafter
thecookingfunctionisfinished.
'lb activate this feature, follow the steps
bclow.
[] Press the BAKEand BROILHI/LO
pads at the same time _r 3 seconds
until the display"shows SE
[] Press the COOKINGTIMEpad.
_12qedisplay will show HidOFF.
[]
Press the COOKINGTIMEpad again
to activate the J[bature. The display"
will show HIdON.
Press the STARTpad to activate
the cook and hold J[eature and
leave the control set in this special
features mode.
Changing the Speed of the Increase or Decrease Pads
AsyouusetheINCREASEorDECREASEpads
whensettinga timeor temperature,youmay
noticethedisplaychangesslowly.Thisspecial
featureallowsyoutochangethespeed.
To set the speed you prefer; follow the
steps below.
[] Press the BAKE and BROILH!/LO
pads at the same time J[br 3 seconds
until the display" shows SE
[] Press the INCREASEpad to increase
the speed up to the immber 5.
Press the DECREASEpad to decrease
the speed down to the number 1.
[] Press START to activate the setting
and leave the coim'ol set in this
special features mode.
[] Press the INCREASEpad. _12qedisplay
will show you a set speed between
1and 5. 13

Usingtheoven.
Toavoid possible burns, place the shelves in the desired position before you turn the oven on.
The oven has 6 sheff pesitiens.
Before you begin...
_12qeshelves have stops, so that when
placed correctly on the supports, they will
stop before coming completely out, and
will not tilt.
When placing and removing cookware,
pull the shelf out until it stops.
TOremove a shelf, pull it toward you,
tilt the front end up and pull it out.
TOreplace,place the end of the shelf
(stop-locks) on the support, tilt up the
front and push the shelf in.
CAUTION:Whenyouareusingtheshelfin the
lowestposition{,4),youwillneedtousecaution
whenpullingtheshelfout.Werecommendthat
youpulltheshelfoutseveralinchesandthen,
usingtwopotholders,pulltheshelfoutby
holdingthesidesofit. Theshelfislowandyou
couldbeburnedif youplaceyourhandinthe
middleof theshelfandpullall thewayout.Be
verycarefulnottoburnyourhandon thedoor
whenusingtheshelfinthelowestposition(A).
How to Set the Oven for Baking or Roasting
[] Press the BAKEpad.
[] Press the INCREASEorDECREASE
pads until the desired temperature
is displayed.
[] Press the STARTpad.
[] Check food fbr doneness at
minimum time on recipe. Cook
longer ifneck.
Type of Food Shelf Position
Frozeepies(oecookiesheet) D
Angelfoodcake A
Buedtorpouedcakes Cor D
Biscuits,muffles,brownies, Cor D
cookies,cupcakes,
layercakes,pies
Casseroles Cor D
Turkey A
[] Press the CLEAR/OFFpad when
cooking is complete.
¢1111 II\\\xi
Center baking pans in the even.
Preheating and Pan Placement
Preheat the oven if the recipe calls for it.
Preheating is necessary for good results
when baking cakes, cookies, pasnT and
breads.
Topreheat,settheovenat thecorrecttemperature.
Thecontrolwillbeepwhentheovenispreheated
andthedisplaywillshowyoursettemperature.
Thiswilltakeapproximately6-10 minutes.
Baking results will be better if baking
pans are centered in the oven as much as
possible. If baking with more than one
pan, place the pans so each has at least
1 to 1V2"of air space around it. Kbaking
four cake layers at the .same time, place
two layers on rack B and two layers on
rack D. Stagger pans on the rack so one
is not directly above the othm:
Cut slits in the fogjust like the grid.
14
Aluminum Foil
You can use aluminum foil to line the
broiler pan and broiler grid. Howevel;
you must mold the foil tightly to the grid
and cut slits in itjust like the grid.
Without the slits, the foil will prevent J[at
and meat juices from draining into the
broiler pan. The juices could become
hot enough to catch on fire. If you
do not cut the slits, you are essentially
fiTing, not broiling.
Donotusealuminumfoilonthebottomof
theoven.
Never entirely cover a shelf with
aluminum J[bil._12qiswill disn]rb the heat
circulation and result in poor baking.
A smaller sheet of fbil may be used to
catch a spillover by placing it on a lower
shelf several inches below the food.

GEAppliances.com
Leave the door open tothe broil
stop position, The door stays open
by itself, yet the proper temperature
is maintained #7the oven,
How to Set the Oven for Broiling
[] Place tbe meat or fish on tbe broiler
grid in tim broiler pan.
[] Follow suggesmd shelf positions in
the Broiling Guide.
ff yourrangeisconnectedto208volts,raresteaks
maybebroiledbypreheatingthebroilerand
positioningtheovenshelfonepositionhigher
Use LOBroil to cook foods such as
poult_T or thick cuts of meat thoroughly
without over-brow_ling flmm.
[] Press the BROILHI/LOpad alice fbr
HI Broil.
To change to LO Broil, press the
BROILHI/LOpad again.
[] Press the STARTpad.
[] When broiling is finished, press the
CLEAR/OFFpad.
The size, weight, thickness,
starting temperature,
and your preference
of doneness will affect
broiling times. This guide
is based on meats at
refi'igerator mmperature.
?TD*'{LX 1)epa*¢mgntof
Ag'fiodhm, _ays "Rare beef is
popula*, but you shlmM know that
L_&ing it to only 140_F. means
s_ne_ poi_onir*g o_gani_s_
Book. Your Kit_t_et_ Guide. US1)A
Rta,. Ju n_ 1985. )
Broiling Guide
Food
GroundBeef
Beef Steaks
Raret
Medium
WeNDone
Raret
Medium
WeNDone
Chicken
Bakery Product
Bread (toast)
English Muffin
LobsterTaBs
FishFillets
Salmon
Steaks
Figets
HamSlices
srecooked)
Pork Chops
WeNDone
LambChops
Medium
Well Done
Medium
WeNDone
Quantityand/
orThickness
1Ib (4patties}
72to3/4"thick
4Ibs (12patties)
3/4to1" thick
1te 1 72Ibs
1/Z' thick
2to 2 72Ibs
1whole cut up
2to 2 ½1bs.,
split lengthwise
Breast
2to 4slices
2{split)
2--4
11b(74tO 72*'thick)
2(1"thick)
2{Yz"to 3/4"thick)
72" thick
1" thick
2{yZ'thick)
2(l"thick)aboutllb.
2(l"thick)aboutlO
to 12oz
2{172"thick}aboutllb
Shelf
Position
F
E
E
D
D
E
C
C
E
F
E
E
D
D
D
D
E
E
E
E
FirstSide
Time(mind
13
15
6
8
10
10
15
20
25
25
3
3-4
18-20
10
10
6
8
10
15
7
10
9
14
SecondSide
Time (mind
11
4
6
8
8
10-12
20
25
15
1
Do not
turn
ovec
6
8
10
15
4
9
6
10
Comments
Spaceevenly
Steakslessthana/4-
thick aredifficult
to cookrare
Slashfat.
Brusheachsidewith
meltedbutter
Broilskin-side-dawn
first.
Spaceevenly Place
Englishmuffinscut-
side-upandbrush
with butterif desired
Cutthroughbackof
shell.Spreadopen.
Brushwith melted
butterbeforebroiling
andafter half of
broilingtime
Handleandturn very
carefully Brushwith
lemanbutterbefore
andduringcooking,
if desired
Turncarefully Donot
turn skin sidedown.
Slashfat.
Slashfat.
15

Usingtheclock and timer.
Make sure the clock is set to the
correct time of dag
To Set the Clock
_12qeclock must be set m the correct time
of day for the mltomatic oven timing
fimctions to work properly. _12qetime of
day cannot be changed during a timed
baking or self-cleaning cycle.
[] Press the CLOCKpad.
[] Press the INCREASEand
DECREASEpads.
[] Press the STARTpad.
The timer is a minute timer only.
The timer does not control oven
operations. The maximum setting on
the timer is 9 hours and 59minutes,
To Set the Timer
[]
[]
Press the KITCHENTIMERON/OFF
pad.
Press the INCREASE and DECREASE
pads until the amount of time you
want shows in the display: Maximum
time that can be entered in minutes
is 59. Cooking times more than
59 mimltes should be changed to
hours and minutes. For example,
enter 90 minutes as 1 horn;
30 minutes.
If you make a mistake press the
KITCHENTIMERON/OFFpad and
begin again.
[] Press the STARTpad.
[] When the timer reaches :00, the
control will beep 3 times fbllowed
by one heep every 6 seconds until
the KITCHEN T/MER 0N/0FF pad
is pressed.
The6secondtonecanbecanceledbyfollowing
thestepsintheSpecialfeaturesofyouroven
controlsectionunderTonesattheEndera
TimedCycle.
To Reset the Timer
If the display is still showing the time
remaining, you may change it by pressing
the KITCHENTIMERON/OFFpad, then
press the INCREASEand DECREASE
pads until the time you want appears
in the display:
ffthe remaining time is not in the display"
(clock, delay start or cooking time are in
the display), recall the remaining time by
pressing the KITCHEN TIMER ON/OFF pad
and then pressing dm INCREASEand
DECREASE pads until dm time you want
appears in the display:
To Cancel the Timer
Press the KITCHENTIMERON/OFF
pad twice.
16

Usingthetimedbaking andmastingfeatures. GEA ,,,cos.oom
NOTE:Foods that spoil easily-such as milk, eggs, fish, stuffings, poultry and pork-should not be allowed to sit for
more than I hour before or after cooking. Room temperature promotes the growth of harmful bacteria. Be sure that
the oven light is off because heat from the bulb will speed harmful bacteria growth.
How to Set an Immediate Start and Automatic Stop
Theovenwill turnonimmediatelyandcookfora
selectedlengthoftime.At theendofthecooking
timetheovenwill turnoffautomatically
[] Press the BAKEpad.
[] Using the INCREASEand DECREASE
pads, enter the desired temperature.
[] Press the COOKINGTIMEpad.
NOTE:Ifyourreciperequirespreheating,you
mayneedtoaddadditionaltimetothelengthof
thecookingtime.
[] Using the INCREASEand DECREASE
pads, enter the desired baking time.
Maximum time that can be enmred
in minutes is 59. Cooking times
more than 59 minutes should be
changed to hours and minutes.
For example, enter 90 minutes
as 1 ham; 30 minutes. The oven
wmperatore and the cooking time
that you entered will be displayed.
[] Press the STARTpad.
_12qedisplay"shov_ the oven temperature
that you set mid the cooking time
countdown. The display starts changing
when the temperature reaches 100° E
_12qeoven will continue to cook fbr the
programmed amount of time, then shut
off automatically.
Press the CLEAR/OFFpad to clear the
display:
How to Set a Delayed Start and Automatic Stop
Youcansettheovencontroltodelay-startthe
oven,cookfora specificlengthoftimeandthen
turnoff automatically
Make sure the clock shows the correct
time of day.
[] Press the BAKEpad.
[] Using the INCREASEand DECREASE
pads, enter the desired temperature.
[] Using the INCREASEand DECREASE
pads, enter the time of day you want
the oven to turn on and start
cooking.
[] Press the START pad.
NOTE:Anattentiontonewillsoundif youare
usingtimedbakinganddonotpresstheSTART
padafterenteringthebakingtemperature.
[] Press the COOKINGTIMEpad.
NOTE:Ifyourreciperequirespreheating,you
mayneedtoaddadditionaltimetothelengthof
thecookingtime.
[] Using the INCREASEand DECREASE
pads, enter the desired baking time.
Maximum time that can be entered
in minutes is 59. Cooking times
more than 59 minutes should be
changed to hours and minutes.
For example, enter 90 minutes as
1 ham; 30 minutes. _Ilm oven
temperatore and the cooking time
that you entered will be displayed.
[] Press the STARTTIMEpad.
If you would like to check the times you
have set, press STARTTIMEpad to check
the start time you have set or press the
COOKINGTIMEpad to check the length
of cooking time you have set.
When the oven turns on at the time of
day you have set, the display will show the
changing temperatore (starting at 100°
F) and dm cooking time countdown.
At the end of timed baking, the oven
will turn off. '[ile end of cycle tone
will sound.
Press the CLEAR/OFFpad to clear the
display: 17

Usingthe SabbathFeature.(Designed for use on the Jewish Sabbath and Holidays.)
TheSabbath feature can be used for baking/reasting only. It cannot be used for broiling, self-cleaning,
or Delay Start cooking.
NOTE."The oven light comes on automatically when the door is opened and goes off when the door is closed.
Thebulb maybe removed. See the Oven Light Replacement section. On models with a light switch on the
control panel, the oven light may be tumed on and left on.
When the displayshows Dthe
even is set in Sabbath, When the
display shows D c the oven is
baking/roasting.
How to Set for Regular Baking/Roasting
NOTE:Tounderstandhowtheovencontrolworks,
practiceusingregularbakklg(non-Sabbathlbefore
entedngSabbathmode.
Makesuretheclockshowsthecorrecttimeofday
andtheovenisell
[] Press and hold both the BAKE and BROIL
HII_O pads, at the same time, uritil the
display shows SE
[] 'Ihp the STAffrTIME pad until
SAb bAtHappears in tile display.
[] Press flae STAg9" pad arid D will appear
in the display.
[] Press the BAKE pad. No signal will
be given.
The preset starting temperature will
] automatically be set to 3_KI°. 'Ihp
the INCREASE or DECREASEpads to
increase or decrease die mmperature in
5 ° increments. Tile temperature can be
set beP, veen 170 ° arid 550 °. No signal or
temperature will Ix, given.
[] Press the START pad.
] After a random delay period of
approximately 30 seconds to i minute,
D a win appear in tile display
indicating that file oven is
baking/roasting. IfD a does not
appear in the display, stm__again
at step 4.
'Ib adjust tile oven temperature, press
the BAKEpad and tap tile INCRF-ASEor
OECREASE pads m increase or decrease file
temperature in 5 ° incrernenLs. Press the
START pad.
NOTE:The CLEAR/OFFand COOKING TIME pads
are active during the Sabhath fbature.
When the display shows Dthe
oven is set in Sabbath, When the
display shows D c the oven is
baking/roasting.
How to Set for timed Baking/Roasting-Immediate Start and Automatic Stop
NOTE:Tounderstandhowtheovencontrolworks,
practiceusingregular(non-Sabbath)ImmediateStart
andAutomaticStopbeforeenteringtheSabbathmode.
Makesuretheclockshowsthecorrecttimeofday
andtheovenisoff.
[] Press and hold bothtile BAKEand BROIL
H!/LOpads, at thesame time,until flae
display shows SE
[] Tap the STARTTiMg pad until SAbbAtH
appeal_ in flae display.
[] Press tile STARTpad and D win appear
in tile display,
[] Press tile COOKINGTIME pad.
[]
[]
[]
Press tile INCREASE or DECREASEpads
to set tile desired length of cooking time
tx, tween 1 nliiltllt, and 9 hours and 59
minutes. The cooking time that you
entered will be displayed.
Press tile START pad.
Press tile BAKEpad. No signal will
Ix' given.
[]
[]
'l]le preset starting temperature will
automatically Ix., set to 350% 'Ihp the
INCREASEor DECRERSE pad.s u) increase
or decrease the temperature in 5 °
increments. Tile temperature can be set
tx.tween 170 ° and 550 °. No signal or
temperature will be given.
Ptz'ss tile START pad.
[] After a random delay period of
approximately 30 seconds to i minute,
D a will aplx.ar in the display
indicating that the oven is
baking/roasting.
lid a does not appear in tile display,
stall again at step 7.
'lb adjmt the oven temperature, press the
BAKEpad arid tap tile INCR_SEor DECREASE
pads to incre&se or decrease the tcrt_perature
in 5 ° increrllents. Press die STARTpad.
When cooking is finished, the display will
change from D a m D and 0:00will appem;
indicating that the oven has mined 0EFbut is
still set in Sabbath. Remove the cooked frx)d.
18

GEAppliances.com
How to Exit the Sabbath Feature
[] Press the CLEAR/OFFpad.
[] If the oven is cooking, wait for
a random delay period of
approximamly 30 seconds m
1 minum, until only"m is in the
display.
[] Press and hold both the BAKEand
BROILHI/LOpads, atthesametime,
until the display shows SE
[] Tap the STARTTIMEpad until
12shdnor noshdnappears in the
display. 12shdnindicates that the
oven will automatically turn off after
12 hours, no shdn indicates that the
oven will not automatically turn of[i
[] Press tim START pad.
NOTE:If a power outage occurred while
the oven was in Sabbath mode, the oven
will automatically turn off and the oven
control must be reset.
Adjust the oventhermostat--Do it yourself!
Youmay find that your new oven cooks differently than the one it replaced. Use your new oven for a few
weeks to become more familiar with it. If you still think your new oven is too hot or too cold, you can adjust
the thermostat yourself.
Do not use thermometers, such as those found in grocery stores, to check the temperature setting of your oven.
These thermometers may vary 20-40 degrees.
NOTE."This adjustment will not affect the broiling or the self-cleaning temperatures. Theadjustment will be
retained in memory after a power failure.
To Adjust the Thermostat
[] Press the BAKE and BROIL HI/LO
pads at the same time for 3 seconds
until tim display shows SF,
[] Press the BAKEpad. A m,o digit
number shows in the display.
[] _12qeoven temperature can be
adjusted up as much as 35°E or
dowql as much as 35°E
Press the/NCREASEpad to
increase the temperature by"
1 degree increments.
Press the DECREASEpad to
decrease the temperature by
1 degree increments.
[] When you have made the
adjustment, press the STARTpad
to go back to the time of day display:
Use your oven asyou would
normally:
Thetypeofmargarine will affect bakingperformance!
Most recipes for baking have been developed using high fat products such as butter or margarine (80% fat). If you
decrease the fat, the recipe may not give the same results as with a higher fat product.
Recipe failure can result if cakes, pies, pastries, cookies or candies are made with low fat spreads. The lower the fat
content of a spread product, the more noticeable these differences become.
Federal standards require products labeled "margarine" to contain at [east 80% fat by weight. Low fiatspreads,
on the oflmr hand, con 'tain less fht and more water. _12qehigh moisture conmnt of these spreads affects the
texture and flavor of baked goods. For best results with your old iCavoriterecipes, use margarine, butter or
stick spreads containing at [east 70% vegetable oil. 19

Usingtheself-cleaning oven.
Wipeupheavysoil ontheoven
bottom,
Before a Clean Cycle
We recommend venting your kitchen
with an open window or using a
ventilation fhn or hood during the
first self-clean cycle.
Remove the shelves, broiler pro1, broiler
grid, all cookware and any aluminum foil
from the oven.
The oven shelves can be self<leaned,
but they" will darken, lose their luster
and become hard to slide.
Soil on the front frame of the range and
outside the gasket on the door will need
to be cleaned by"hand. Clean these areas
with hot water; soap-filled steel-wool pads
or cleansers such as Soft Scrub"2 Rinse
well with clean water and dl T.
Do not clean the gasket. The fibe@ass
material of the oven door gasket cannot
withstand abrasion. It is essential for the
gasket to remain intact, lfyou notice it
becoming worn or frayed, replace it.
Wipe up any heavy spillovers on the oven
bottom.
Make sure the oven light bulb cover is in
place and the oven light is off
IMPORTANT: The health of rome birds is
extremely sensitive to the fumes given off
during the self-cleaning cycle of any
range. Move birds to another well
ventilated room.
How to Set the Oven for Cleaning
[] Touch the SELFCLEAN pad.
[] Using the INCREASEor DECREASE
pads, enter the desired clean time, if
a time other than 4 hours is needed.
Clean cycle time is normally" 4 hours.
You can change the clean time to any
time between 3 hours and 5 hours,
depending on how dirty your oven is.
[] Touch the START pad.
The door locks automatically. _l_ne display"
will show the cleml time remaining. It will
not be possible to open the oven door
until the temperature drops below the
lock temperature and the LOCKEDdoor
light goes ore
When the LOCKEDdoor light is off, open
the doon
The oven shuts off automatically when
the clean cycle is complete.
_The words LOCKEDor LOCKDOOR will
flash and the oven control will signal if
you set the clean cycle and fbrget to
close the oven door.
_ "Ib stop a clean cycle, touch the
CLEAR/OFFpad. When the LOCKED
door ligilt goes offindicating the
oven has cooled below the locking
temperature, open the door.
2O
Table of contents
Other GE Range manuals