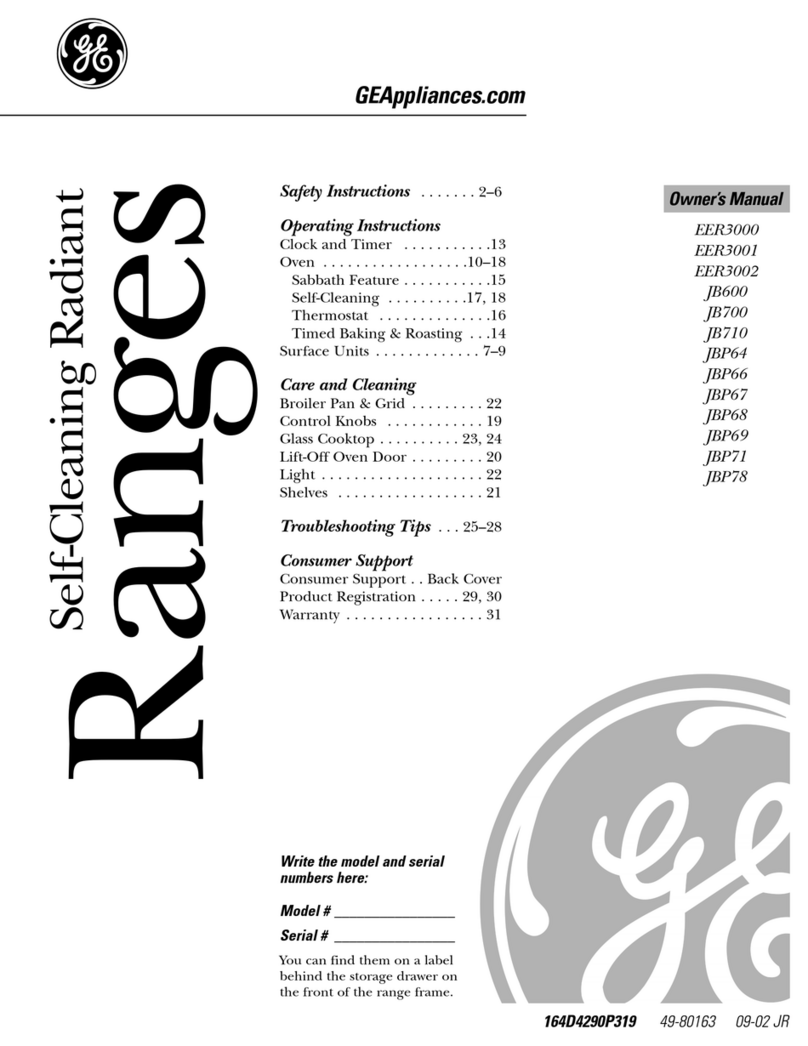
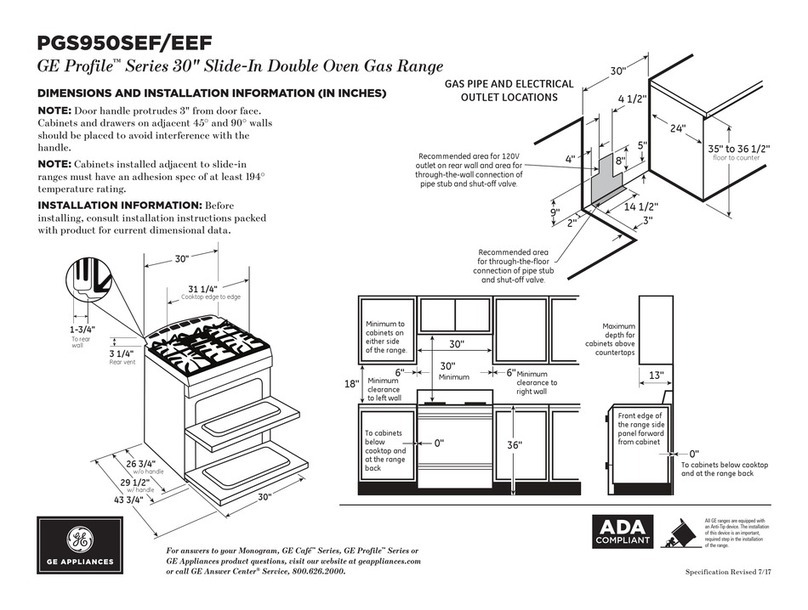
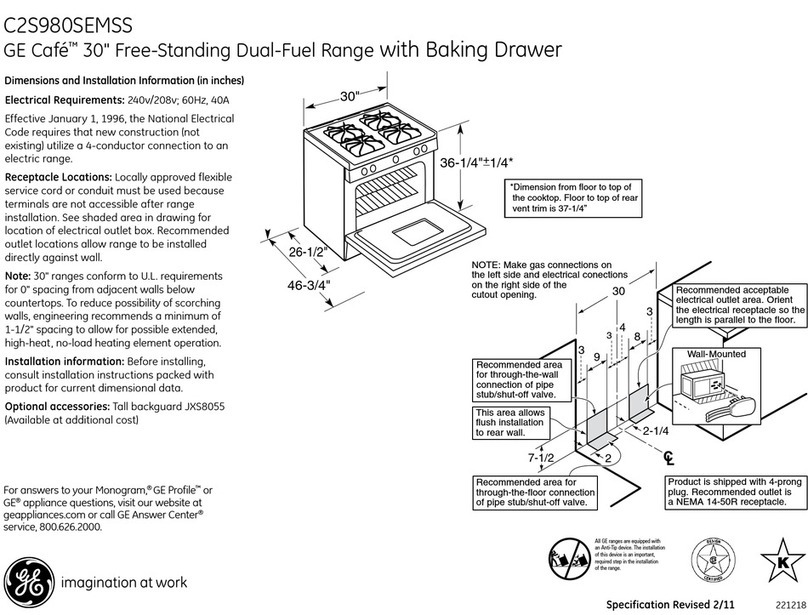
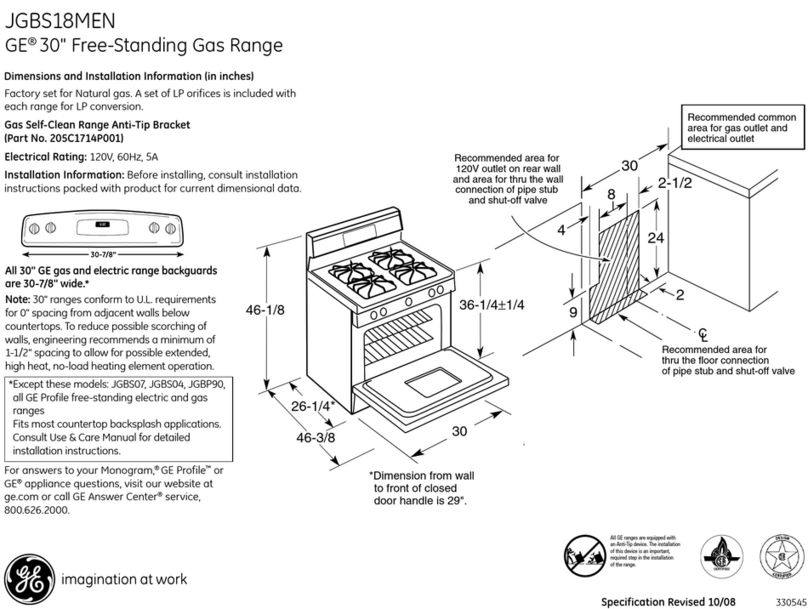
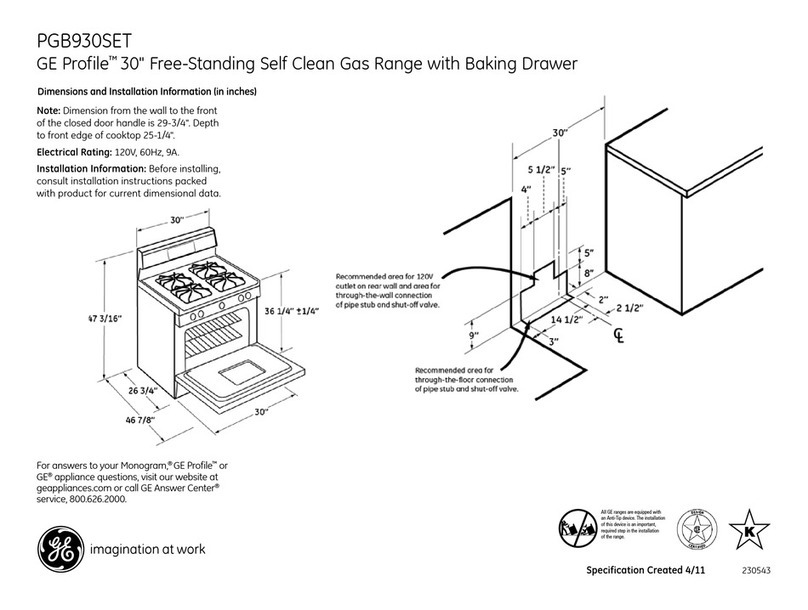
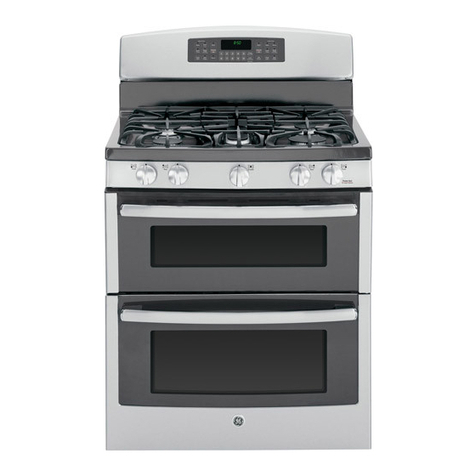
GE EER3000 User manual

vvvvvv.GEAppliances.com
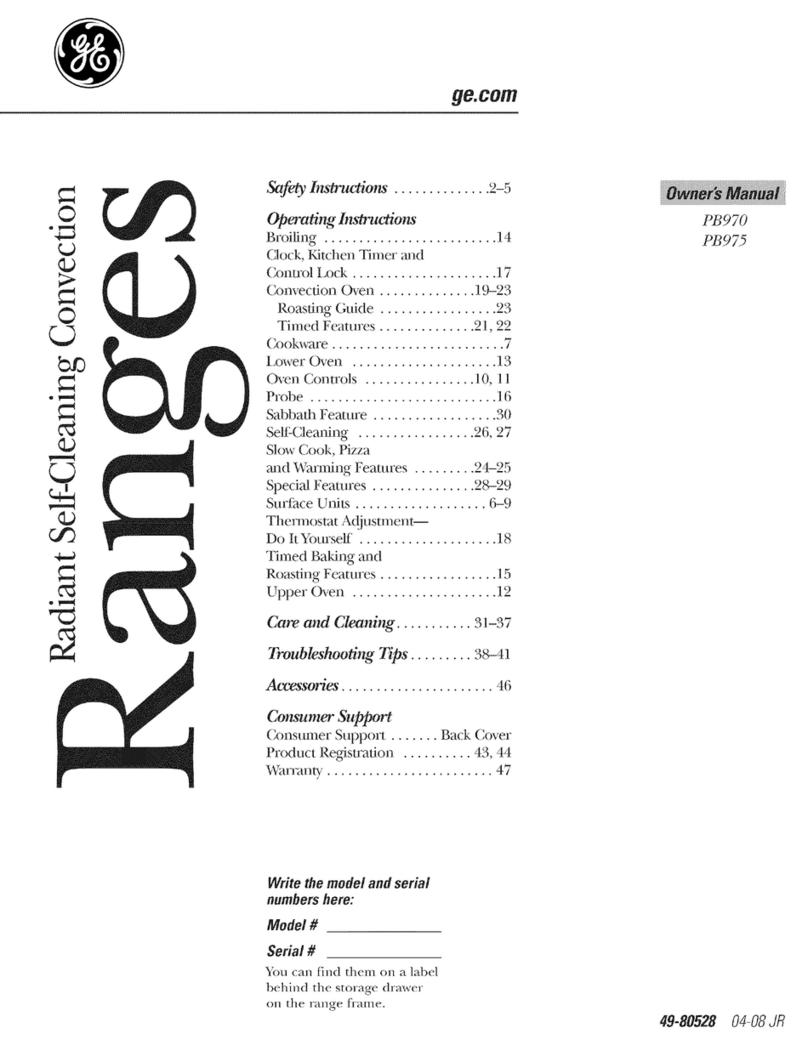
Safety Instructions ......... 2-0
Operating Instal€ions
(',lock and Timer ............. 14
Oven .................... l 0-20
Power Outag_ .............. l l
Sabbath Feature .......... 17, 18
Self-Cleaning ............ 19, 90
Special Feaulies ............. 16
Thermostat ................. 18
Timed Baking & Roasting ..... 15
SurtZace Units .............. 7-9
Care and Cleaning
Broiler Pan &Grid ........... 23
Control Knobs .............. 91
Glass Cooktop ............ 94, 95
Lift-Off ()yen Door . .......... 92
Light ...................... 93
Shelx_s ..................... 93
Troubleshooti_ Tips ..... 26-29
Accessories ................. 3O
Consumer Support
Consumer Suppo_ ..... Back Coxer
VCananty ................... 31
EER3000
EER 300 l
JB600
JB7lO
jm,64
JBP66
JBP67
JBP68
JBP69
JBP7I
j, PTS
Write the model and serial
numbers here:
Model #
Serial #
You can find them on a label
behind the storage drawer on
the fl'ont of the range fl_ame.
164D4290P334-1 49-80 778-7 07-03 JR

IMPORTANTSAFETYINFORMATION.
READALLINSTRUCTIONSBEFOREUSING.
For your safety, the information in this manual must be followed to minimize the risk of fire,
electric shock, or to prevent property damage, personal injury, or loss of life.
WARNINGANti-TIPDEVICE
All ranges can tip and injury could result.
Toprevent accidental tipping of the range, attach it to the wall and floor by installing the Anti--tip
device supplied.
If the Anti--tip device supplied with the range does not fit this application, use the universal Anti--17p
device WB2X7909.
Tocheck if the device is installed and engaged properly, remove the kick panel or storage drawer
and inspect the rear leveling leg. Make sure it fits securely into the slot.
If you pull die range out flom dm wall %r any reason, make sure tile device is pioperly
engaged when you push tile rang_ back against tile wall. If it is not, there is a possible dsk of
tile rang_ tipping oxer and causing il_juUif you or a child stand, sit or lean on all open door
Please refer m tile Anti-Tip device infounation ill this manual. Failure m take this precaution
could Iesult ill tipping of tile rang_ and il)jm>
IMPORTANTSAFETYNOtiCE
The Cafifornia Safe Drinking Water and Toxic Enforcement Act requires the Governor of California to
publish a list of substances known to the state to cause cancer, birth defects or other reproductive
harm, and requires businesses to warn customers of potential exposure to such substances.
Thefiberglass insulation in self-clean ovens gives off a verysmall amount of carbon monoxide during
the cleaning cycle. Exposure can be minimized by venting with an open window or using a ventilation
fan or hood.
2

www.GEAppliances.com
SAFETYPRECAUTIONS
When using electrical appliances, basic safety precautions should be followed, including the following:
Use this appliance only for its irrtended
.(
pm])ose as described in thxs )_nex s
Manual.
Be sure your appliance is properly
installed and grounded by a qualified
installer in accordance with the prox4ded
irrstallation irrstmctions.
Hme dxe irrstaller show you the location
of the circuit breaker or fixse. Mark it fox
easy reference.
Do not attempt to repair or replace arty
part of your range unless it is specifically
recommended in this manual. All other
servicing should be referred to a qualified
technician.
Before performing aW service, disconnect
tire range power supply at dm household
distribution panel by removing the fl_se or
switching off the circuit breaken
Do not leme children alone--<hildren
should not be left alone or unattended in
an area where an appliance is in use. They
should nexer be allowed to sit or stand on
arty part of the appliance.
Do not allow anyone to climb, stand or
hang on the door, storage drawer or
cooktop. They could damag> the rang>
arrd even tip it ox_x; causing sex.re
personal irljni_'.
WARNING!
SAFETYPRECAUTIONS
Do not operate the oven or cooktop controls if the glass is broken. Food splatter or cleaning solution
may penetrate a broken control panel and create a risk of electrical shock. Contact a quafified
technician immediately should your glass control panel become broken.
Do not store flammable materials ira
an oven or near fire cooktop.
CAUTION: temsof interest to
children should not be stored in cabinets
above a range or on the backsplash of a
range--<:hildren climbing on the range
m reach imms could be seriously irljmed.
Never wear loose-fitting or hanging
g'annents while using the appliance.
Be careflfl when reaching fox imms stored
ox>r the range. Flammable mamrial could
be ignimd if brought ira corrmct with hot
surface units or heating elements arrd may
cause se\_re baxrns.
Use only dt T pot holders--moist or damp
pot holders on hot surPaces m W result in
bums flom steam. Do not let pot holders
touch hot sml_ace units or heating
elements. Do not use a towel or other
bulky cloth in place of pot holders.
Do not use wamr on grease fires. Nexer
pick up a flaming pan. Turn fire conuols
off'. Smother a flaming pan on a surfi_ce
unit 1)yco\efing tire parr completely with
a well-fitting lid, cookie sheet or fiat tray
Use a multi-puli)ose dUchemical or
fbam-type rixe extinguisher
Flaming grease outside a pan can be put
out by covering it with baking soda or,
if available, by using a muki-pm])ose d_T
chemical or foam-type fire extinguishen
Flame in the oven can be smodrered
completely by closing tire oven door arrd
mining tire oven off or by using a multi-
propose dUchemical or foam-wpe fire
extinguisher
3

IMPORTANTSAFETYINFORMATION.
READALLINSTRUCTIONSBEFOREUSING.
WARNING'!
SAFETYPRECAUTIONS
For your safely, hexer use your appliance
for warming or heating tile room.
Do not let cooking grease or other
flammable materials accumulate in or
near the range,
Do trot touch flae sm/_ace units, file
heating elements oi fire irrmrior surface
of tire oven. These surthces may be hot
enough to bum even though they are
dark ira colon During arrd after use, do not
touch, or let clothing or other flammable
mamrials corrmct fire surfi_ce units, areas
nearby flae sur/_ace units or any intexior
area of file oxen; allow sufficient time for
cooling first.
Potentially hot surfaces irrclude the
cooktop, areas facing the cooktop, oxen
xent opening, stliJCaces near tile opening,
crevices around the oven door.
REMEMBER:The irrside suiiCace of die o_en
may be hot when tile door is opened.
Do not store or use combustible mamfials,
gasoline or other flammable vapors and
liquids in tile viciniw of this or arty other
appliance.
Kee I) tire hood arrd grease filters clean
to maintain g_od xenting arrd to mold
grease fires.
Teach children not to play with tire
corrtrols or arty other part of tile range.
Always kee I) dish towels, dishcloths, pot
holders arrd other linens a safe distance
fiom your range.
Ahvays kee I)wooden arrd plastic utensils
arrd canned food a safe distance fiom
VO/II"range.
Always kee I) combustible wall coxerings,
curtains or drapes a safe distance fiom
VOIIY range.
COOKMEATANDPOULTRYTHOROUGHLY...
Cookmeat andpoultry thoroughly--meat toat least an INTERNALtemperatureof 160°Fandpoultry to atleast
an INTERNALtemperatureof 180°ECookingto thesetemperaturesusuaflypmtectsagainst foodbomeillness.
RADIANTSURFACEUNITS
Use proper pan size--select cookware having flat bottoms large enough to cover the surface un#
heating element. The use of undersized cookware will expose a portion of the surface un# to direct
contact and may result in ignition of clothing. Proper relationshJ _of cookware to surface un# will
also improve efficiency.
Nexer leme tile surface units unattended
at high heat settings, Boiloxers cause
smoking arrd greasy spilloxers that may
catch on fire.
Only certain types of glass, glassAeramic,
earthenware or other glazed corrtainers
are suitable for cooktop service; others
may break because of tile sudden chang_
in temperature.
To minimize tire possibility of burlls,
ignition of flammable mamrials arrd
spillage, tire handle of a container
should be turned toward tire cenmr of
file range without exmnding oxer nearl)v
surface units.
Always turn tile surface units off before
removing cookware.
When preparing flaming foods under
file hood, mm tile/_an on.
4

www.GEAppliances.com
RADIANTSURFACEUNITS
Use care when touching tile cooktop. The
glass surfitce of tile cooktop _villretain heat
alter file controls haxe been mined of£
Kee I) all eye on foods being flied at high
or medium higil heat settings.
Foods for flTing should be as &w as
possible. Frost on flozen tbods or moisnn-e
on fresh foods call cause hot fat to bubble
up and ox>r tile sides of tile pan.
Use little Fat for efl_cdve shallow or deep
Fat flTing. Filling tile pan too flfll of fat call
cause spillovers when food is added.
If a combination of oils or Fats will be
used ill flTing, stir tog>ther hefore heating,
or as tilts meh slowly.
Always heat/_at slowly, and watch as it heats.
Use a deep fat fllermomemr whenever
possible to prex_nt oveflleafing/_at beyond
tile smoking point.
Avoid scratching the glass cookmp.
The cookmp call be scratched with imms
such as sharp insnnments, tings or other
jewel U, and fixets on clothing.
Do not operate tile radiant surface units if
file glass is broken. Spillovers or cleaning
solution may penetrate a broken cooktop
and cIeate a risk of elecuica] shock.
Contact a qualified technician immediately
should your glass cooktop become broken.
Nexer use tile glass cookmp suifi_ce as
a cutting hoard.
Do not place or store items fl)at can melt
or catch fire on file glass cooktop, exen
when it is not being used.
Be careflll when placing spoons or other
sorting utensils oil glass cookmp surface
when it is in use. They m W become hot
and could cause broils.
Clean tile cooktop with caution. If a wet
sponge or cloth is used to wipe spills on a
hot surfilce unit, be careflfl to axoid steam
burns. Some cleaners call produce
noxious tim/as if applied to a hot smiCace.
NOTE,"'We recommend that you avoid
wiping any snilCace unit areas until filey
haxe cooled and tile indicator light has
g_ne off. Sugarspills are the exception
to this.Please see tile Cleaning the glass
cooktop secdon.
_A]len tile cooktop is cool, use only
CERAMA BRYTE _ Ceramic Cooktop
Cleaner and tile CERAMA BRYTE _°
Cleaning Pad to clean file cooktop.
To avoid possihle damage to tile cooking
sur/_ace, do not apply cleaning cream to
tile glass surface when it is hot.
After cleaning, use a dUcloth or paper
towel to remoxe all cleaning cream
residue.
Read and follow all instructions and
warnings on tile cleaning cream labels.
Larg_ scratches or impacts to glass doors
or cooktops call lead to broken or
shattered glass.
Do not leave any imms on tile cooktop.
The hot air flom tile x>nt m W ignite
flammable imms and will increase pressure
ill closed containers, which m W cause
fllem to burst.
Do not leaxe plastic or flammable imms
on tile cooktop---fl)ey may melt or ignite
if left too close to file xent.
Do not lilt tile cooktop. I3fling the
cooktop call lead to damag_ and improper
operation of tile rang_.
5
IMPORTANTSAFETYINFORMATION.
READALLINSTRUCTIONSBEFOREUSING.
WARNING'!
OVEN
Stand away from the range when opening the oven door. Hot air or steam which escapes can cause
bums to hands, face and/or eyes.
Do not heat unopened food containers.
Pressure could build up and the container
could burst, causing all ii_m T.
Kee I) tile oven _ent unobstmcted.
i: Kee I) tile oven flee flom grease buildup.
Place the oxen shelf ill die desired position
while the oxen is cool. If shehes must be
handled when hot, do not let pot holder
contact the heating elements.
When using cooking or roasting bags ill
tile oxen, follow the mamffacturer's
directions.
iiiiiiiiiiii_iii
iiiiiiiiiiii_iii
iiiiiiiiiiii_iii
iiiiiiiiiiii_iii
Do not use tile oxen to dry newspapers.
If oxerheated, they call catch on fire.
Do not use the oven for a storage area.
hems stored ill all oxen can ignite.
Do not leme paper products, cooking
utensils or food ill the oxen when not
ill rise,
Do not use aluminum foil to line oxen
bottoms, except as suggested in this
manual. Improper installation of
aluminum tbil may resu]t ill a risk of
electric shock or fire.
Pulling out the shelf to file stop-lock is a
convenience in lifting heax T foods. It is also
a precaution against burns flom touching
hot sur/_aces of the door or oxen walls.
SELF-CLEANINGOVEN
Do not use oven cleaners. No commercial oven cleaner or oven liner protective coating of any kind
should be used in or around any part of the oven. Residue from oven cleaners will damage the inside
of the oven when the self-clean cycle is used.
Do not clean file door gasket. The door
gasket is essential for a g_od seal. Care
should be token not to rub, damag_ or
mow the gasket.
Be%re self-cleaning d)e oxen, remoxe the
broiler pan, grid and other cookware.
Take the shelxes out of the oxen before
you beg_n the self-dean cycle or they
may discolor
Be sure to wipe off excess spillage before
starting the self-cleaning operation.
If the self-cleaning mode malfunctions,
ttlrn tile oxen off and disconnect the
power supply. Hme it ser\qced by a
qualified technician.
Clean only parts listed ill this Owner's
Manual.
READANDFOLLOWTHISSAFETYINFORMATIONCAREFULLY.
SAVETHESEINSTRUCTIONS

Usingthesurfaceunits, www.GEAppliances.com
Throughout this manual, features and appearance may vary from your model.
OFF
_&:%..,5_:+_';.:'_"
Atboth OFFandHI me control clicks
into _osltlon.Youmaynear swm
clickingsoundsduring cooking
indicatingthe controlis maintahTing
yourdesiredsetting.
Be sure you turn the control knob
to OFFwhen you finish cooking.
How to Set
Push tile knob in and tm'n in either
direction to tile setting )ou want. OFF
AHOT COOKTOP indicator light will glow
when am radiant element is tin'ned on,
and will remain on tmfil tile sm'ti_ce is
cooled to approximatel) 150°F. :::::
Indicatorlightwill'. :....
comeonwhentheunitisturnedonorhot
tothetouch.
stayonevenaftertheunit/s turnedoK
glowuntiltheunitiscodedtoapproximately
150°E
Tile WM (warn/) setting (oil solne
models) on tile fight REAR surfime unit
keeps ah'eady heated food waml tmtil
ready to serve.
SMALI RGE
BURNER_ BURNER
OFF
/J.d:"
Dual Surface Unit (onsomemodels)
Thedualsurface unit has2 cookingsizes toselect
from so youcanmatch the size of the unit to the
sizeof the cookware youareusing.
To use tile small (5 or 6 inch) SUltilce
unit, push in tile SMALL BURNER portion
of tile switch above tile control knob.
To use tile large (8 or 9 inch) stu_ilce
refit, push in tile LARGEBURNER portion
of tile switch aboxe tile control knob.
Temperature Limiter
Every radiant smti_(e refit has a
temperature limited:
Tile temperature limiter protects tile
glass cooktop fl'om getting too hot.
Tile temperature limiter may cycle
tile milts offfi)r a time if:
Thepan boils dry
Thepan bottom/s not f/aL
Thepan is off-center
Thereis nopan on the uniL
Home Canningtips
Be sure tile canner is centered over tile
slmfhce mfit.
Make sm'e the cromer is flat on the
bottonl,
To pre\'ent burns fl'oin steain ()r heal
use caution when camfing.
Use redpes and procedm'es from
reputable sources. These are available
fl'Olll i/lanttfiiCttli'ei's such as Ball '_and
Kerr _and tile Department of Agiicultm'e
Extension Se_Mce.
Flat-bottOllled cannei's aI'e
recommended. Use of water bath
cmme_s with _ippled bottoms may
extend the time required to bring
tile water to a boil.

Usingthesurfaceunits.
Throughout this manual, features and appearance may vary from your model.
Wok Cooking
Werecommendthat youuse onlya flat-bottomed
wok. Theyareavailableat yourlocal retailstore.
Do not use woks that have support rings.
Do not t/se rot/nd bottoi/l woks.
Y_)u could be seriously burned if the
wok tipped o',ei:
Use only flat-bottomed woks.
The following information will help you choose cookware which will give good performance on glass cooktops.
SURFACE
Nevercookdirectyo/7meglass.
Alwaysusecookware.
_FFCE."
Always place thepan in the center of
the surface unit you are cooking on.
About the radiant surface units...
The radiant cooktop features heating
units beneath a smooth glass surfilce ....
cooktopN r ..A >todori normalwhenathehea>gisusedofnewforpartsthef standt ein ula>g t Scausednewmaterialsby
and wi// disappearin a short t/me.
NOTE'.Onmodelswith h)ht-co/ored g/ass
cooktops,it is normal for the cookingzonesto
changecolorwhen hot or cooling down. Thisis
temporaryandwi// disappearas tireglasscools
to room temperature.
The surli_('e unit will cycle on and off to
maintain your selected control setdng.
It is sate to place hot cookware on the
glass surti_ce even when the cooktop
is cool.
Even alter the surfi_ce milts are turned
off, the glass cooktop retains enough
heat to continue cooking. To avoid
ovei'cooking, i'elllOVe p_llls ][i'Olil the
surfilce units when the tood is cooked.
Avoid placing an)_hing on the surfilce
unit until it has cooled completely:
Do not slide cookware across the
cooktop because #can scratch the
glass--the glass is scratch-resistant,
not scratchproof.
Watersta/hs(minere/deposits)areremovable
usingthecleaningcreamorfurl-strengthwhite
vinegar
Useof windowcleanermayleavean
indescentfilmonthecooktop.Thecleaning
creamwillremovethisd/scoloretion.
Don'tstoreheavyitemsabovethecooktop.
If theydropontothecooktop,theycancause
damage.
Donotusethesurfaceasa cuttingboard
8

Selectingtypesofcookware. .CE4,,,i..ces.com
Checkpans for flat bottoms by
using a straight edge.
Pans with rounded, curved, ridged
or warped bottoms are not
recommended.
StainlessSteel:
recommended
Aluminum:
heavywel_?htrecommended
Good conductivib'. _Muminun_ residues
sometimes appear as scratches on the
cooktop, but can be removed if cleaned
immediatelv: Because of its low melting
point, thin weight aluminum should not
be used.
CopperBottom:
recommended
Col)per may leave residues which ('_111
appear as scratches. The residues can be
renloved, as long as tile cooktop is
cleaned immediately. However, do not let
these pots boil (hy: Overheamd metal can
bond to glass cooktops. An overheated
COl)per bottom pot will leave a residue
that will pemmnently stain the cooktop
if not rein oved immediatelv.
Porcelain Enamel-CoveredCastIron:
recommended
_s long as the cookware is covered
completely with porcelain enamel, this
cookware is recommended. Caution is
i'ecoi/llilended tor cast iron cookware
that is not completely covered with
smooth porcelain enamel, since it may
scratch the glass ceramic cooktop.
Glass-Ceramic:
usable,but not recommended
Poor pe_fimnance. May scratch the
StlI'lilce.
Stoneware:
usable,but not recommended
Poor pex_fimnance. May scratch the
S/lI'_ilce,
9

Usingtheovencontrols.
Throughout this manual, features and appearance may vary from your model.
OVEN CONTROLS _TIME CONTROLS
10
OvenControl,ClockandTimerFeaturesandSettings
oBAKE/7-EMPRECALLPad 0
Touch tiffs pad to select the bake flmcfion.
BAKE tight
Flashes while in edit mode--)ou can chang_
the o\re[] temperatm'e at this point. Glo_:s
_hexl the o\eIl is ix] bake mode,
OSTART/ONPad
Nltlst be touched to start all} cooking or
cleaning function.
ODisplay
Shows the tiI]le of da,v, oven tei]lpex'attli'e,
and the times set tor the timer or automatic
oven operations. The display will show PRE
wlfile preheating. _,_]_en the oven reaches
the selected temperature, the oven control
will beep and the display will show the oven
temperature.
If '7- and anumberor letter" flashin the displayandthe
ovencontrol sl)_na/s,thisindicatesa functionerrorcode.
If youroven was set fora timedovenoperation and
apower outageoccurred,the dock andaftprogrammed
functionsmustbe reset
Thetime of day wi// flash in the displaywhen there has
beena power outage.Resetthe c/oc/_
If the function errorcodeappearsduring the se/f-c/eanlbg
cycle,checkthe oven doorlatch. Thelatchhand& mayhave
beenmoved,evenif onlysbght/y,from the/atchedposition.
Makesure the latch ismoved to then)ht as far asit wi// go.
Touchthe CLEAR/OFFpad. Allow the oven tocool for
onehour.Put the ovenbackinto operation,if the function
errorcoderepeats, disconnectthepower to the rangeand
ca//for service.
0
0
0
KITCHEN TIMER ON/OFF
or TIMER ON/OFFPad
Touch tiffs pad to select tile timer teatm'e.
Then press +and -pads to at!just time.
TIMERLight
Hashes _dfile in edit mode--y_)u can changv
the set time at this point. Glo_:s _dlen the
timer has been activated. Flashes again _d_en
the time has run out until the control is reset.
CLOCK Pad
To set tile clock, press tiffs pad twice and
then press the +and -pads. The time of
day will flash in the display when the oven
is fix_t turxled oxl.
START TIME Pad (on some models)
Use ahmg with the COOKING TIME or
SELFCLEAN pads to set the oven to start
and stop automatically at a time w)u set.
STARTTIME Light
Hashes _dfile in edit mode--y<)u can changv
the start time at this point. Glo_vs _d_en the
flmction has been activated.
COOKING TIME Pad (on some models)
Touch tiffs pad and then touch tile +or -
pads to set tile aillotlx]t of time you want
wmr fl)od to cook. Tile oven will shut off
when tile cooking time has run out.
COOKINGTIME Light
Hashes _dfile in edit mode--y_)u can changv
the set time at this point. Glows _dlen the
flmction has been activated. Flashes again
_d_en the time has run out tmtil the control
is reset.

vvww.GEAppliances.com
OvenControl Clockand TimerFeaturesandSettings
0AUTOMATIC OVEN Light (on some models)
This lights an_fiine tile oven has been
progrannned using tile COOKINGTIME or
STARTTiME flmctions.
O0 VENLIGHTON/OFFPad
Touch this pad to turn tile oxen light on
()I" OlZ[',
-Pad
Short taps to this pad will decrease tile time
or temperature by small amounts, Touch
and hold tile pad to decrease tile time or
temperature by larger amounts,
+ Pad
Short taps to this pad will increase tile dine
or teinperature by sInall [lillOtlnts, Touch
and hold tile pad to increase tile time or
temperature by larger amounts,
SELFCLEANPad
Touch this pad to select tile self2cleaning
flmction. See tile Using the self-cleaning
oven section.
Indicator Lights (on some pads)
EDITmode lasts several seconds after the last
pad press. START TIMEON/OFFand COOKING
TIMEON/OFFwill be the on b pads lit if either
of these options is selected. (Example: START
TIMEis selected with BAKE the STARTTIME
pad will remain lit until the clock reaches the
programmed time, at _dfich point it will ttli'i1
off mad tile BAKE/TEMPRECAtLpad lig]lt will
light up).
SELFCLEANLight
Hashes while in edit Illode--}rotl c}lI1 changv
the length of time fi)r the selfklean c}cle at
this point. (;lo_:s _dlen the oven is in the self
clean c}cle. After the selfklean cycle, the lig]lt
will ttlrll of I_ Unlatch tile docn;
OCLEAR/OFFPad
Touch this pad to cancel ALL oven
operations except tile clock and fiIneI:
BROILHI/LO Pad
Touch this pad to select tile broil flmcfion.
BROILLight
Flashes while in edit Illode--}r()tl C}IIIswitch
fi'om HI to tO BROILat this point. (;lo_s when
tile ()veil is i[] broil mode.
Power Outage
Ifa flashingt#ne/sIn thedisplay,youhaveexperienceda
power failure. Resetthe clock. To reset tile clock, touch tile CLOCKpad. Enter
tile correct time of (lay b) touching tile +or -
pads. Touch tile START/ONpad.
11

Usingtheoven.
Toavoid possible bums, place the shelves in the desired posifion before you turn the oven on.
The oven has 6 shelf positions.
Before you begin...
The shelves have stop-lo(ks, so that \dlen
placed correctl} on file shelf supports (A
through F), they will stop beiore coming
completely out, and will not flit.
When placing and x_mo_ing cook\_are,
pull the shelf ()tatto tile bump on the shelf
support.
Toremovea shelf,pull it to_m'd you, tilt the
ti'ont end up and pull it out.
Toreplace, place the end of the shelf
(stop-locks) on the support, tilt up the fl'ont
and push the shelf in.
CAUTION:Whenyouare,usingthesheffin thebwest
position(A),youwill needtousecautionwhenpulling
theshelfout.Werecommendthatyoupufftheshelf
outseveralinchesandthen,usingtwopotholders,puff
theshelfoutbyholdingthesidesofit. Theshelfislow
andyoucouldbeburnedif youplaceyourhandin the
middleoftheshelfandpu//all thewayout.Bevery
carefulnot toburnyourhandonthedoorwhenusing
theshelfintheIowestposition(A).
_iiiii
How to Set the Oven for Baking or Roasting
Yourovenisnotdesignedforopen-doorcooking.
[] Touch the BAKE pad.
] Touch tile 4.or- pads unfll tim
desired temperature is displa}ed.
[] Touch the START/ONpad.
Tile o_eIl will start automat}call?; The displa}
will sho_ PREwhile px_heaflng. "_]len the
o\en reaches the selected mmperamre, the
oven control will bee}) several times and tim
(tispla} will sho_ the oven temperature.
TochangetheoventemperatureduringBAKEcycle,
touchtheBAKEpadandthenthe4.or- padstoget
thenew temperature.
[] (.:beck food for doneness at r|-|illirmnrl
rune on recipe. Cook kruger if necessary
[] Touch tim CLEAR/OFFpad when baking
is finished and then remme the toed
fl'orri the oven.
TypeofFood Shelf Position
Frozenpies(oncookiesheet) D
Angelfoodcake A
Bundtorpoundcakes CorD
Biscuits,muffins,brownies, CorD
cookies,cupcakes,
layercakes,pies
Casseroles CorD
Turkey A
/.di/llll/ \ \X\N_ D_
Center baking pans in flTeoven.
Preheating and Pan Placement
Preheat the oven if the recipe c_fllsfor it.
Preheating is necexsar_ tor good results \allen
baking cakes, cookies, pastr> and breads.
TheDisplaywillshow"PRE"whilepreheating.When
theovenreachestheselectedtemperature,theoven
controlwi//beepandthedisplaywi//showtheoven
temperature.
Baking resuhs will be better if baking pans are
cenmred in tile o\en as much as possible. If
baking with more than one pan, place the
pans so each has at least 1 to 1½" of air space
around it. It baking four cake layers at the
sarrie tirrie, })lace t\_o layers on rack B and t\m
liners on rack D. Stagger pans on the rock so
(sale is not directly abo\e the other
Cutslitsin flTefoiljustlike flTegrid.
12
ilium}hum Foil
Nevercovertheovenbottomwi#laluminumfoil
YOuom use ahmdmm_ fbil to line the broi]er
pall a[_(tbroiler g_:id. H(m'_\e_; you must
rook} tile foil flgh@ to the grid a[_(}cut slits in
it,just like the grid.
Ahlmim*mfi4I may alsobe used to catch a
spillo\e_:To do so, pllce a small sheet of fbiI
on a]_wershelf sewc_a]inches bel_*_file fi*od.
Ne_er e[_drel co\er a shel{with ahlmimml
fi_il.This wiI1disturb the heat ci_wdadox_a_d
_estdtin poor bakhlg,

www.GEAppliances.com
Leave the door open to the broil
stop position. The door stays open
by itself, yet theproper temperature
is maflTtaflTedf17the oven.
How to Set the Oven for Broiling
[] Place the meat or fish on the broiler
grid in the broiler pan.
[] Follow suggested shelf positions in
the BroilingGuide.
If yourrangeisconnectedto208volts,raresteaks
maybebroiledbypreheatingthebroilerand
pos/fionl#gtheovenshelfonepositionhigher
Use LO Broil to cook fi)ods such as
i)oultx}' or thick cuts of meat thoroughly
without oxe>browning them.
[] Touch the BROILHI/LOpad once for
HI Broil.
To change, to I,O Broil, touch the
BROILHI/LO pad again.
[] Touch the START/ON pad.
[] _Aq_en broiling is finished, touch the
CLEAR/OFFpad.
The size, weight, thickness,
starting, teml)erature
and yore" preference
of doneness will aH_'ct
broiling times. This guide
is based on meats at
refrigerator temperature.
Theoven has 6shelf positions.
Broiling Guide
Food
GroundBeef
Beef Steaks
Raret
Medium
Well Done
Raret
Medium
Well Done
Chicken
Bakery Product
Bread (toast)
English Muffin
LobsterTails
FishFillets
Salmon
Steaks
Fillets
HamSlices
(precooked)
Pork Chops
Well Done
LmebChops
Medium
Well Done
Medium
Well Done
Quantityand/
orThickness
1lb. (4patties)
I/2 to 3/4"thick
4 Ibs.(12patties)
s/4to 1" thick
1to 11/2 Ibs.
11/2"thick
2 to 21/2 Ibs.
1whole cut up
2to 21/zIbs.,
split lengthwise
Breast
2to 4 slices
2(split)
2-4
1lb. (74to I/z" thick)
2(1" thick)
2{I/2" to 3/4_z thick)
I/2" thick
1" thick
2(I/2" thick)
2(I" thick) about 1lb.
2{1" thick)about 10
to 12oz.
2 (11/z" thick) about 1lb.
Shelf
Position*
F
E
E
D
D
E
C
C
E
F
E
E
D
D
D
D
E
E
E
E
First Side
Time (min,)
13
15
6
8
10
10
15
2O
25
25
3
3-4
18_0
10
10
6
8
10
15
7
10
9
14
SecondSide
Time(rain.)
8
4
6
8
8
10 12
20
25
15
1
Donot
tarll
oveE
6
8
10
15
4
9
6
10
Comments
Spaceevenly.
Steakslessthans/4"
thick aredifficult
tocookrare.
Slashfat.
Brasheachsidewith
meltedbatter.
Broil skin-side-down
first.
Spaceevenly.Place
Englishmuffins cut-
side-upandbrash
with hatter if desired.
Cutthroughbackof
shell. Spreadopen.
Brashwith melted
butter beforebroiling
andafter half of
broilingtime.
Handleandturnvery
carefully.Brashwith
lemonbatterbefore
andduringcooking,
if desired.
Turncarefully.Donot
turn skinsidedown.
Slashfat.
Slashfat.
_Seeillustration for descriptionofshelf positions
13

Usingthe clock andtimer.
Not all features are on all models.
To Set the Clock
Make sure the clock is set to flTe
correct time of day.
Tile clock must be set to tile correct time
of day fi)r tile autonmtic oxen timing
flmcfions to work properly: Tile time of
day cannot be changed during a delayed
cooking or a delmed seltXcleaning cycle,
[] Touch tile CLOCKpad twice,
[] Touch the +or -pads.
If tile ÷ or -pads are not touched within
one ininute alter you touch tile CLOCK
pad tile displa_ rexerts to tile original
setting, If this hal)pens, touch tile CLOCK
pad twice and reenter tile time of dax.
[] Touch tile START/ON pad until tile
time of day shows in tile display. This
entex_ tile time and starts tile clock.
Tocheckthetimeofdaywhenthedisplayis
showlbgotherinformation,simplytouchthe
CLOCKpad Thet/meofdayshowsuntilanother
padistouched
ToTurnOff the Clock Display
If you have several clocks in your kitchen,
vou may wish to ttlYn off tile time of day
clock display on pmr range.
[] Touch tile CLOCKpad once to turn
off tile time of day display: _Mthouoh
you will not be able to see it, tile
clock maintains tile correct time
of dav.
[] Touch tile CtOCKpad twice to recall
the clock display.
ii i
Thetimer is a minute timer only.
TheCLEAR/OFFpad does not affect
the time_
To Set the Timer
ThetlYnerdoesnot control oven operations.
Themaximumsetting on the timer is 9hours
and59minutes.
[] Touch tile KITCHEN TIMER ON/OFF
pad.
[] Touch tile +or-pads until tile
aIllOtlnt of [lille Veil want shows in
tile display. Tile maxim um time that
can be entered in minutes is 59.
Times more than 59 minutes should
be changed to hom_ and minutes.
If youmakea mistake, touchtheKITCHEN
TIMER ON/OFFpadand beginagain.
[] Touch tile START/ON pad. Tile time
will strut counting down, although
tile display does not change until
one minute has passed.
[] X&hen tile timer reaches .'0/7,tile
control will beep 3 times followed b)
one beep eve_T 6 seconds tmtil the
KITCHEN TIMER ON/OFFpad is
touched.
To Reset the Timer
If tile display is still showing tile time
remaining, you may change it by touching
tile KITCHEN TIMER ON/OFF pad, then
touching tile ÷or-pads until tile time
you want api)ea_ in tile display.
If tile remaining time is not in tile display
(clock, start time or cooking time are in
tile display), recall tile remaining time by
touching tile KITCHEN TIMER ON/OFFpad
and then touching tile ÷ or -pads to
enter tile new til//e Veil w}lnt.
/4
ToCancel the Timer
Touch tile KITCHEN TIMER ON/OFF
pad twice.

Usingthetimedbakingandmastingfeatures.Ionsomomodols)w GEA,,lia,ces.com
Donot lock the oven door with the latch during timed cooking. Thelatch is used for self-cleaning only.
NOTE: Foods that spoil easily--such as milk, eggs, fish, stuffings, poultry and pork--should not be allowed to s# for
more than 1hour before or after cooking. Room temperature promotes the growth of harmful bacteria. Be sure that
the oven light is off because heat from the bulb will speed harmful bacteria growth.
i:
i_ _ _ _ _
TIME J
How to Set an Immediate Start and Automatic Stop
Theoven will turnon immediatelyand cookfora [] Touch tile START/ON pad.
selectedlengthof time. At the endof thecooking
tkne, the ovenWlT/turnoffautomatica//y Tile display shows either tile oven
[] Touch tile BAKEpad.
] Touch tile +or -pads to set tile
o_en teiilpei'att/i'e.
[] Touch tile COOKINGTIMEpad.
NOTE."If yourreciperequirespreheating, youmay
need toaddadditional time to the length of the
cookingtime.
] Touch tile ÷or -pads to set tile
baking tim e.
Tile cooking time that you entered
will be displayed. (If you select Cooking
Time fi_st and then a(!iust tile Bake
Temperature, tile oven temperature
will be displayed instead).
tempemtm'e that you set or tile cooking
time co/mtdown. (The display starts with
PREif showing the oven temperature.)
Tile oven will continue to cook for tile
programmed anlount of finle, then turn
off automaficallv.
[] Touch tile CLEAR/OFFpad to cancel
if necessax_.
Removethefoodfromtheoven.Remember,even
thoughtheovenshutsoffautomatlcally,foods
continuecookingaftercontrolsareoK
%
@
tTIME
@
How to Set a Delayed Start and Automatic Stop
Theoven will turn onat the t/_neof dayyouset,
cookfor a specificlength of time and thenturnoff
automatically
Make S/lI'e tile clock shows tile coFi'ect
time oI day.
[] Touch tile BAKEpad.
] Touch tile 4or -pads to set tile
oven telllpei'attii'e.
[] Touch tile COOKING TIME pad.
] Touch tile +or -pads to set tile
desired length of cooking dine.
[] Touch tile STARTTIMEpad.
] Touch the +or -pads to set the time
of da_ _O/I want tile o&en to ttlFn on
and staE[ cooking.
[] Touch tile StaRT/ONpad.
NOTE."If w_u would like to check tile times
you have set, touch tile START TIME pad to
check tile start time w_u have set or touch
the COOKING TIME pad to check the length
ot cooking time you have set.
_._l/ell tile oven turns on at tile dine of day
you have set, tile display will show PRE
until it reaches tile selected temperature,
then it wil1 display the __x'en tempe rat ure.
At the end of cooking time, the oven
will ttlFn oItand tile end-of cycle tone
will sound.
[] Touch the CLEAR/OFFpad to cancel
if necessary:
Removethe food from the oven.Remember,even
thoughthe ovenshuts off automatlcally, foods
continuecookingafter controlsare o#
NOTE."An attention tone will soundif you are
using fl_nedbaking anddonot touchthe
START/ON pacL
/5

Special featuresofyourovencontrol
Yournew touch pad control has additional features that you may choose to use. Thefollowing are the features and
how you may activate them.
Thespecial feature modes can only be activated while the display is showing the time of day. They remain in the
control's memory until the steps are repeated.
When the display shows your choice, touch the START/ONpad. The special features will remain in memory after
a power failure.
NOTE: TheSabbath feature and the Thermostat Adjustment feature are also Special Features, but they are
addressed separately in the foflowing sections.
12 Hour Shut-Off
_th thisfeature,shouldyouforgetandleavethe
ovenon,thecontrolwillautomatically turnoff the
ovenafter12hoursduringbaking functionsor
after3 hoursduringabroilfunction.
If you _6sh to mrn OFFthis feature, tollow
the steps below.
[] Touch the BAKE and BROILHI/LO
pads at the same time fk)x 3 seconds
until the displa_ shows SF.
[] Touch the CLOCKpad. The display
xdll show ON (l 2 hour shut-off).
Touch the CLOCKpad repeatedly
tmfil the display sho_:s OFF(no
shut-off).
[] Touch the START/ON pad to acfixate
the no shut-off and leaxe the control
set in this special teatm'es mode.

"-'--usingthe SabbathFeature.(onsomemodels)
(Designed for use on the Jewish Sabbath and Hofidays) www.GEAppliances.com
The Sabbath feature can be used for baking/roasting only. It cannot be used for broiling, self-cleaning or
Delay Start cooking.
NOTE: The oven light comes on automatically(on some models) when the door is opened and goes off when the
door is closed. Thebulb maybe removed. See the OvenLight Replacement section. Onmodels with a light switch
on the control panel, the oven light may be turned on and left on.
When the display shows Dthe
oven is set in Sabbath. When the
display shows D C the oven is
baiting/roasting.
How to Set for Regular Baking/Roasting
NOTE: Tounderstandhow the oven control works,
practice usingregular baking(non-Sabbath)before
entering Sabbathmode.
Make sure the clockshows thecorrect time of day
and theoven is off
] Touch and hold both the BAKE and
BROIL Itl/LO pads, at the same time,
until the display shows SE
] Tap the CLOCKpad until SAb appears
in the displa'_
] Touch the START/ON pad mid D will
appem: in the display.
] Touch the BAKE pad. No signal will
b(! gJ'_ el/,
] The preset starting wn/pen'muTe vJll
amonmticall'_ be set to 350. ° "Pap the 4,
or --pads to illCl'l';_Sl' OF (]l'C]X'_lSe t]l{'
tel//pel_lttll:e ill 25 ° ilRTt'IllelltS. The
temperature can be set between 170 °
and 550. ° No signal or temperature
will be given.
[_ Touch die START/ON pad.
] After a ran(toni dela} period ot
approximately 30 se( onds to 1 minute,
D C will appear ill tile display indicating
that tile oven is baking/ro_c, dng. If D m
doesn't appear in die display, start ag_dn
at Step 4.
"Ib a(!iust tile ()`,ell wmpe_mlre, tou€h tile
BAKEpad and tap tile +or -pads to increase
or decrease the mmperamre in 25°
increments. Touch die START/ONpad.
NOTE: The CLEAR/OFFand COOKING TIME pads
are active during tile Sal)bath l;t,amrc.
@
@
@
@
Whon the display shows Dtho
oven is sot in Sabbath. When the
display shows D C the oven is
baking/roasting.
How to Set for Timed Baking/Roasting--Immediate Start and Automatic Stop
NOTE: Tounderstandhow the oven control works,
practice usingregular (non-Sabbath)Immediate Start
andAutomatic Stop before entering the Sabbathmode,
Make sure the c/ockshows the correct time of day
and theoven is oK
]"lbudl and hold both tim BAKE and
BROIL HI/LO pads, at the same time,
m/til the (tispk Wshows SE
] Tap the CLOCKpad until SAb appears
in the (tispla_
]Touch the START/ON pad and D will
appear in dw display.
]"lbu(h the COOKING TIME pad.
]Totl(h the +or -pads to set the desired
length of (ooking time |/(!tW(_(!ll 1
mintlte and 9 hours and 59 minutes.
The cooking time that you entered will
be displayed.
[_ "lbu(h the START/ON pad.
] "lbu(h the BAKEpad. No sigmal will
l>e_,dven.
] The preset starting wmperamre ,,,,'ill
a/ttomaticalh_ be set to a'50. ° "[hp th( 4-
or - pads to increase or decrease the
temperature in ,25° in(rements. The
temperature can be set between 170 °
and 550. ° No sigllal or temperature
,,`,rillbe gJ_vn+
] "[bmh dw START/ON pad.
[_ )dicr a mndon/delay period ot
at)t/1 oximmely 30 se( on(Is to 1minute,
D C will appear in tile displa} indicadng
that the oven is baking/ro_e, ting. If m m
doesn't appear in the display, start agvdn
at Step 7.
To }t({itlSi tile o`,en temperature, touch tile
BAKEtlad and tail tile +or -pads to increase
or decrease the temperature in 25°
in(r(:ments. "[bu(h the START/ON pad.
When (()()king is finished, tile display will
(hangc/i'om m m to m indi(ating that tile
o_vn has turned OFFtmt is still set in Sabbath.
Remove tile cooked tbod.
/7

"-'--usingthe SabbathFeature.(onsomemodels)
(Designed for use on the Jewish Sabbath and Holidays)
How to Exit the Sabbath Feature
[] Touch the CLEAR/OFFpad.
] It"the o'_/_li is cooking,/_,;+lit t))r ;+1r;tl ldolll
dela} period ot approxhnatelT_ 30
seconds to 1 minute, until only D is in
the displa}
] Tou(h and hokt beth the BAKE and
BROIL HI/LO pa(ls, at the same time,
tmtil the display Sl_()_rs SE
] "lhp the CLOCK pad mull ONor OFF
appears in the display. ON indi(ates
that tile oven _ill automatically tm:n
off a/ier 12 hem's. OFFindicates that
tile ov(,l/will/lOt automatically IIIFII 011_
See the Special Features section R)r an
explanation of the 12Hour Shut-Off
t['ature.
[] "lbuch the START/ON pad.
NOTE:If a power outage occurred while the oven was
in Sabbath, theoven will automaticafly turn off and stay
off even when thepower returns, Theovee coetro/
must bereset.
Adj#st theeven thermostat Bo it yo#meff !.
Youmay Lindthat your new oven cooks differently than the one it replaced. Use your new oven for a few
weeks to become more familiar with it. If you still think your new oven is too hot or too cold, you can adjust
the thermostat yourself.
Do not use thermometers, such as those found in grocery stores, to check the temperature setting of your oven,
These thermometers may vary 2_40 degrees,
NOTE."This adjustment will not affect the broiling or the self=cleaning temperatures, The adjustment will be
retained ,;nmemory after a power failure,
To Adjust the Thermostat
[] Touch the BAKE and BROILHI/LO
pads at the same time fi>r 3 seconds
until the displa} shows SE
[] Touch the BAKEpad. A two-digit
number shows in the display.
[] The oxen temperature can be
a(!justed up to (+) 35°F hotter or (-)
35°F coole_: Touch the ÷pad to
increase the temperature in l<leoTee
iilci'ei//eilts.
[] X4q]en }ou haxe made the
a(!justment, touch the START/ONpad
to go back to the time of da) display.
Use VOIII" O+_ eil as XOtl would
n(mnallv.
NOTE."Thisadjustmentwillnotaffectthebroiling
orse/f-c/eaningtemperatures.It wi//beretained
inmemon/afterapowerfailure.
Touch the -pad to decrease the
temperature in 1-degree increments.
Thetype of margarine wifl affect baking performance!
Most recipes for baking have been developed using high=fat products such as butter or margarine (80% fat). If you
decrease the fat, the recipe may not give the same results as with a higher=fat product.
Recipe failure can ,resultff cakes, pbs, pastries, cookies or candies are made with low=fat spreads. 771elower the fat
content of a spread product, the more noticeable these d'ifferences become.
Federal stm_dards reqtfire products labeled "margarim_e" to co]_tah_ at least 80% fht by weight, i,<>w4_t spreads,
(m the other harold, c(mtah_ less {i_t amid more water: The high moistm'e coracle]it (d these spreads af_bcts the
texture am+d flavor of baked goods+ For best restfits _rHt_ _'()_" ()](1 J_hw>_Jte recipes, t*se margarita+e, bt*tter or
stick spreads com_taiMm_g at ]east 70% vegetable oil
18

Usingtheself-cleaning oven. oEA li,,oes,om
Never force the latch handle. Forcing the handle will damage the door lock mechanism.
Wipe up heavy soil on the oven
bottom.
Before a Clean Cycle
We reconm_end venting your kitchen
with an open window or using a
ventilation tim or hood during tile
fi_t sel6clean cycle.
Remove tile shelves, broiler pan, broiler
grid, all cookware and any ahmfinmn fi)il
fl'om the oven,
NOTE: qhke tile shelves out of tile oven
befi)re you begin tile self=clean cycle or
they may discolor:
Soil on tile fl'ont fl'aine ot tile range
and outside the gasket on the door
will need to be cleaned by hand. Clean
these areas with hot water; soap-filled or
plastic scotwing pads or cleanse_ such
as Soft Scrub<i Rinse well with clean
water and (h_'.
Do not clean tile gasket. Tile fiberglass
material of tile oven door gasket cannot
withstand abrasion. It is essential flw tile
gasket to remain intact. If vou notice it
becoming worn or flayed, replace it.
Wipe up any hea\ 3'spillove_ on tile ()veil
bottolll.
Make sure tile ()veil light bulb cover is in
place and the oven light is off'.
IMPORTANT'. The health of some birds
is extremely sensitive to the fimles given
off (hwing tile self=cleaning c)'cle of any
range. Move birds to another well-
ventilated I'OOIIl,
@
@
How to Set the Oven for Cleaning
Follow tile directions in tile Before a
Clean Cycle section.
[] I,atch tile dora:
NOTE:Never fi)rce tile latch. If tile oven is
to() hot, you will not be able to slide tile
latch. Mlow tile (wen to cool.
[] Touch tile SELFCLEAN pad.
[] Touch tile 4-or -pads tmfil tile
desired Clean Time is displayed.
TheCleanTimeis normally4hoursand20
minutes. Youcan changethe CleanTimetoany
flYnebetween 3 and 5 hours, dependingon the
amountof soil in youroven.
[] Touch tile START/ONpad.
Tile sel6clean cycle will automatically
begin after CLEAN is displayed and tile
time co/mtdown ai)pea_ in tile display.
While tile oven is selfk'leaning, you can
touch tile CLOCKpad to display tile time
of (lav. To i'ettlrn to tile clean COtlntdown,
touch tile SELFCLEANpad.
The oven shuts off automatically when
the clean cycle is complete, and 0:00 will
flash in tile display.
[] Slide tile latch handle to tile lett as
liar as it will go and open tile dora:
19

Usingtheself-cleaning oven.
%
TIME
How to Delay the Start of Cleaning
Make sm'e the clock shows the correct
tim e of day.
] 1,arch the door.
[] Tol_h the SELFCLEAN pad.
][Jsim]g the +o]" =pads, e]]ter the
desi red c] ea m_ti m e.
[] Tol_ch the STARTTIMEpad. The
earliest start time _ou c;m set will
appear im_the displa).
][isim]g the +or =pads, e]]ter the
ti m e _/{ (]a_ _o_ wa N_t th e c] ea m_c_c] e
to Sta]'t.
[] Tol_ch the START/ON pad.
The display will show the start time. h
will _ot be possible to m_latch the o_e_
door m_t]l tile tempex_mre drops beMw
the lock tempex_m_re.
ToStop a Clean Cycle
Touch tile CLEAR/OFF pad.
Writ m]til tile oven has cooled below the
locking temperature to unlatch tile door.
You will not be al)le to open tile door
right away re]less tile ovei] has cooled
below tile locking temperature.
After a Clean Cycle
You may notice some white ash in tile
oven, Wipe it up with a damp ch)th atter
tile OVeI] cools,
If whitespotsremain,removethemwitha soap-
fi//edstee/wedpadandrinsethorough/ywith
aw#egarandwatermixture.
These deposits are usually a salt
residue that cannot be removed bv
the clean cycle,
If tile oven is not clean alter one clean
cycle, repeat the wcle.
You cannot set tile oven fiw cooking
tmtil tile oxen is cool enough fiw tile
door to be re]latched.
While tile oven is self-cleaning, you
can press the CLOCKpad to (lisplay
the time of day, To retm'n to the
clean com]td(]wn, press tile SELF
CLEANpad.
Apply a small amo/mt of vegetable oil
to a paper towel and wipe tile edges ot
the oven shelves with the paper towel.
Do not spray with Pare > or other
lubricant spra D.
2O
Other manuals for EER3000
7
This manual suits for next models
10
Table of contents
Other GE Range manuals
Popular Range manuals by other brands

Electrolux
Electrolux ICON E30DF74EPS Specifications

KitchenAid
KitchenAid KGRS807XSP01 installation instructions

serviplus
serviplus JEM7600 Use & care manual

Frigidaire
Frigidaire CFEF3012UW use & care

Verona
Verona VCLFSGG 365 D Series User operating instructions

Waldorf
Waldorf RNB8110GE Installation and operation manual

Amana
Amana AER5515QAW Use & care guide

Viking
Viking RVGR330 Quick reference guide

KitchenAid
KitchenAid KGSS907SBL - 30" Slide-In Gas Range parts list

Maytag
Maytag PRECISION TOUCH CONTROL 500 Use and care guide

Whirlpool
Whirlpool RF114PXSB1 parts list

Lebensstil Kollektion
Lebensstil Kollektion LKRC-8803BMR user manual