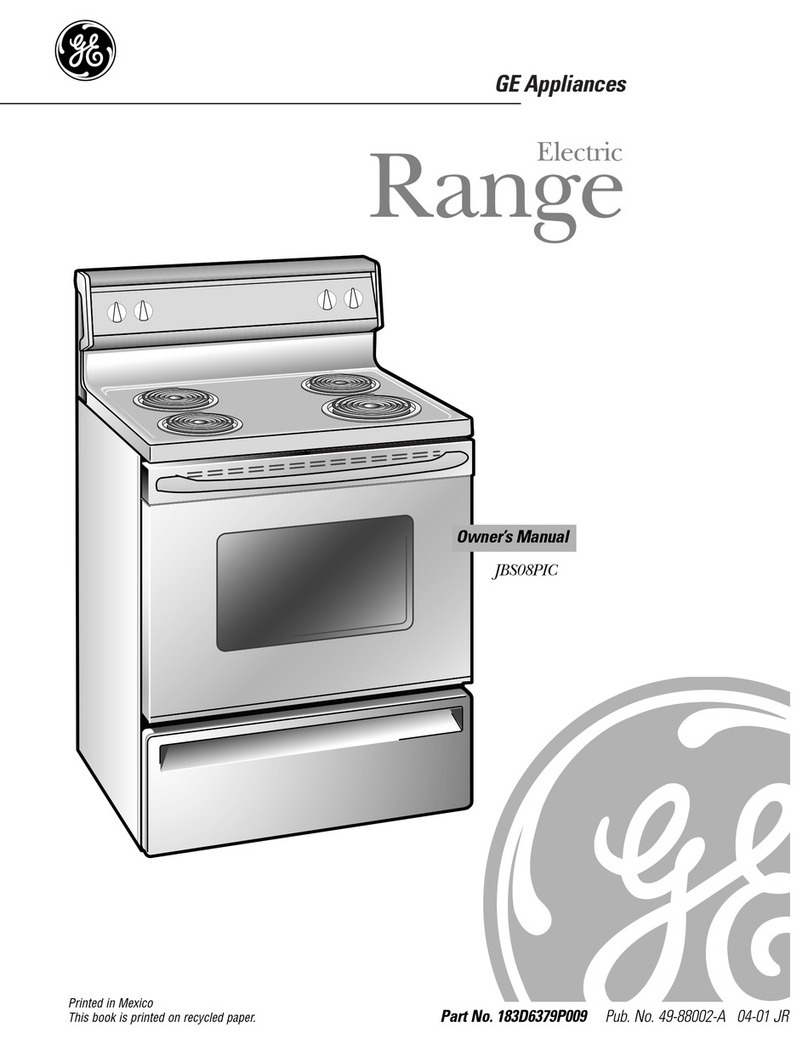
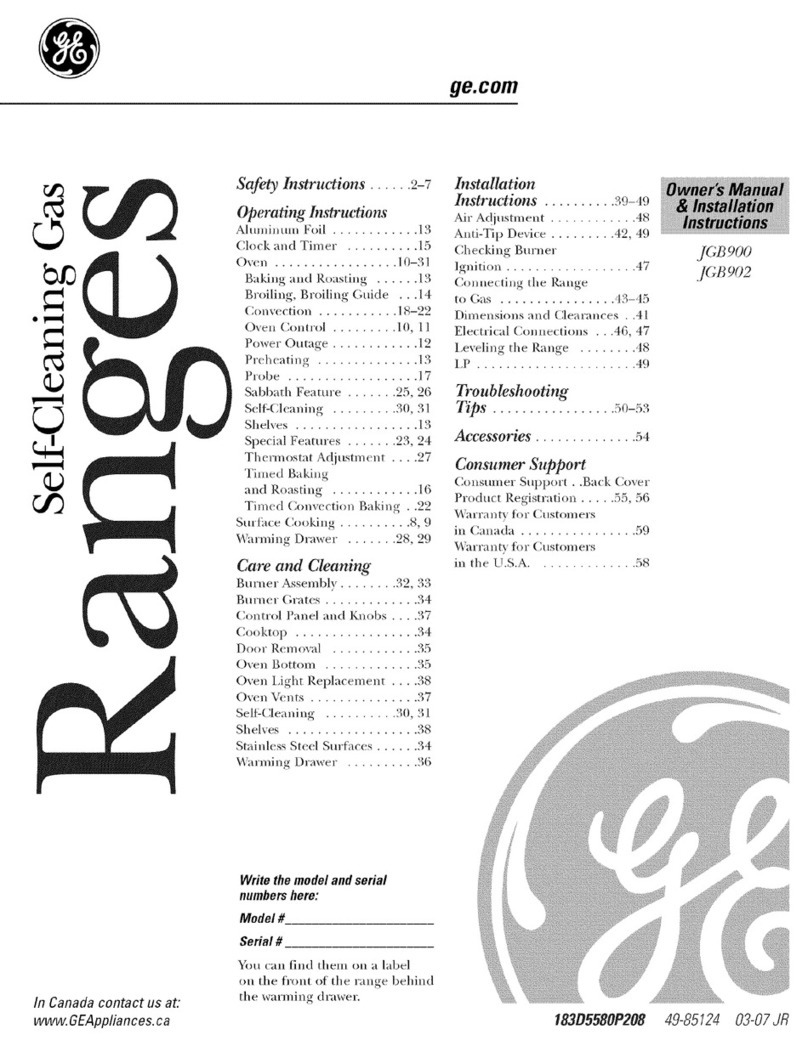
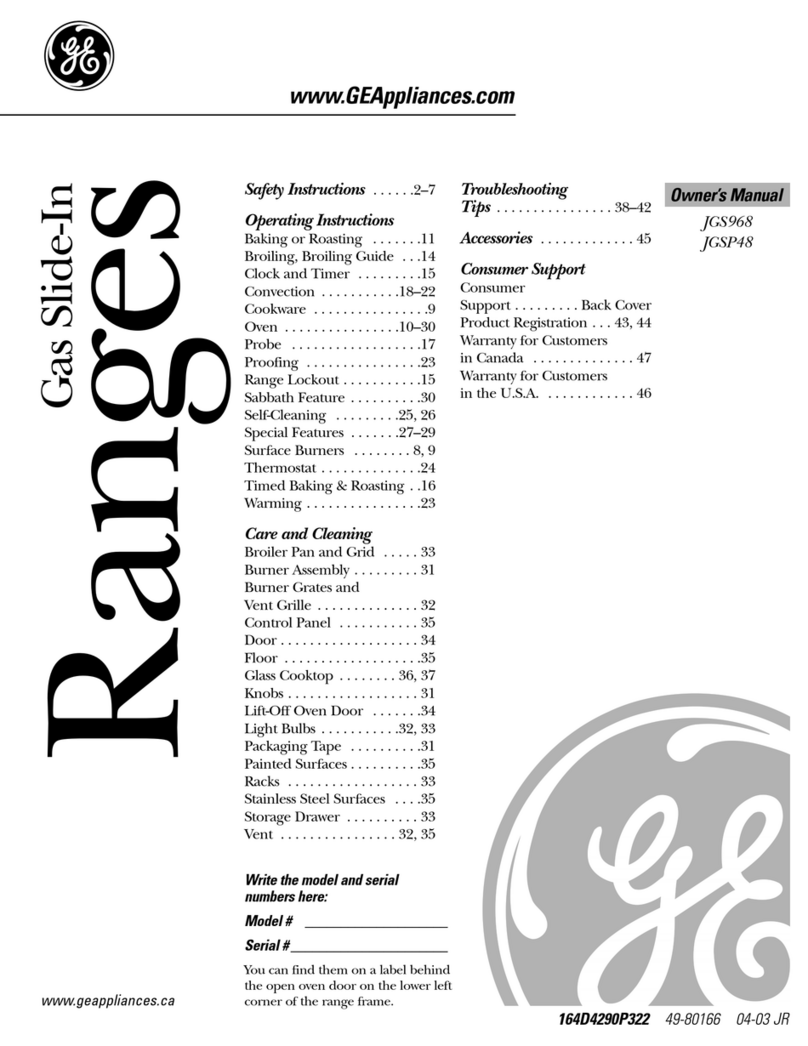
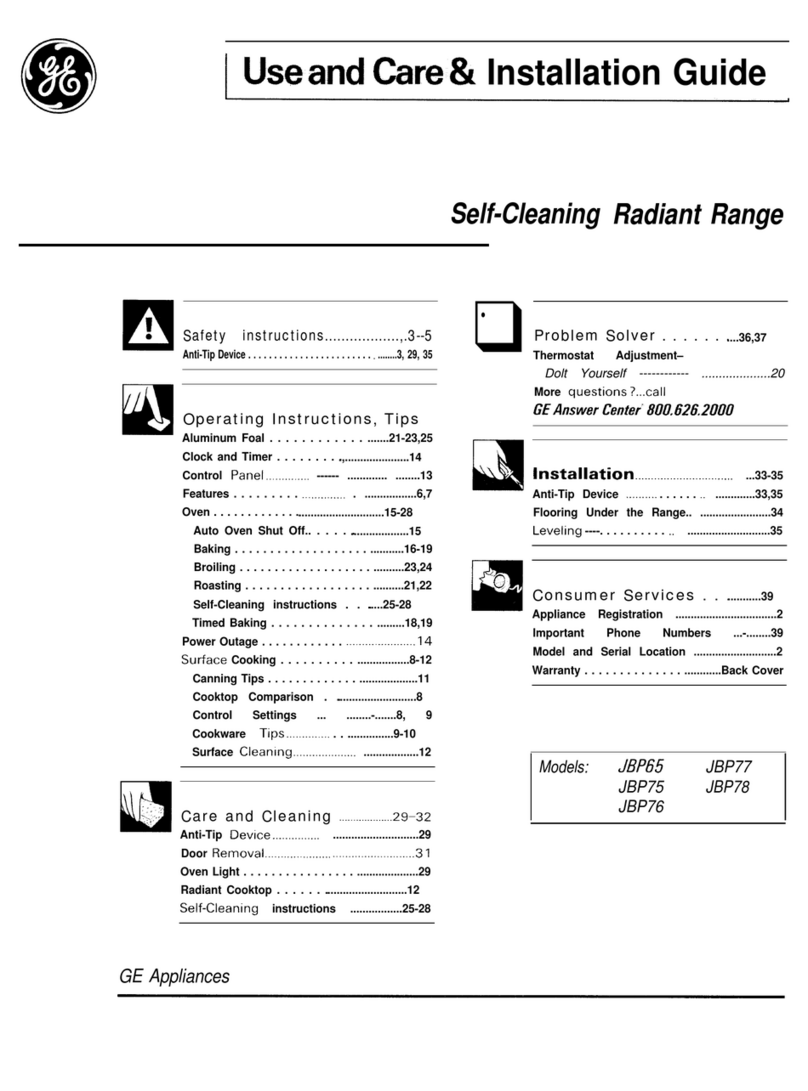
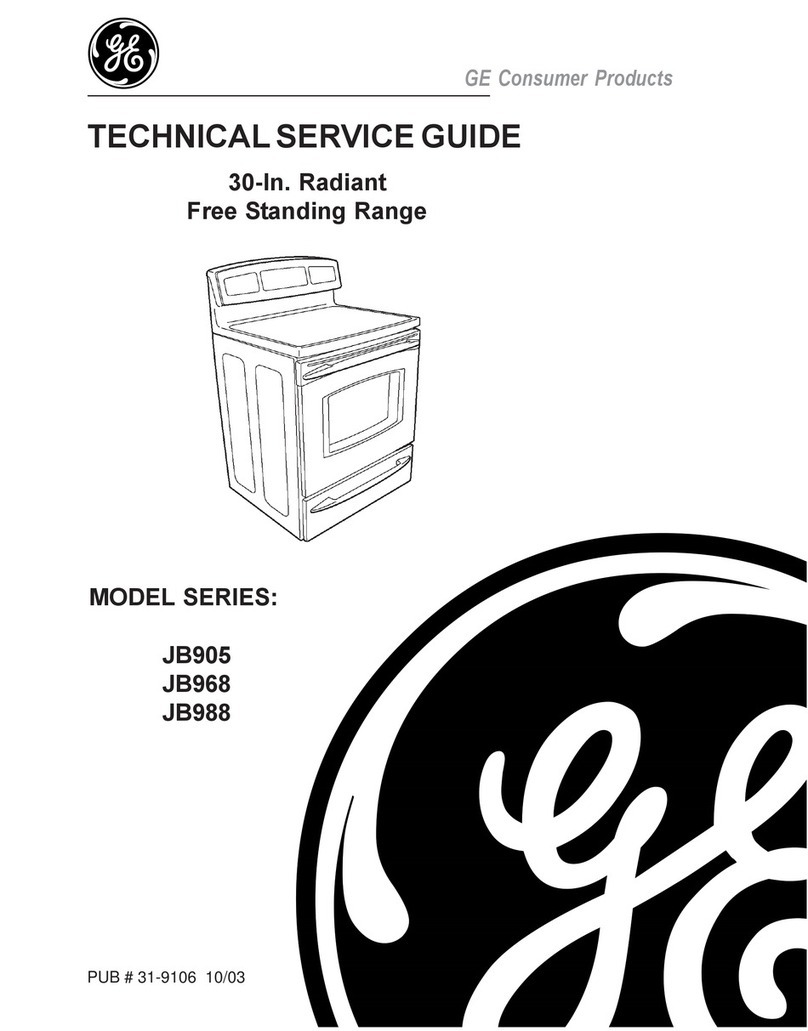
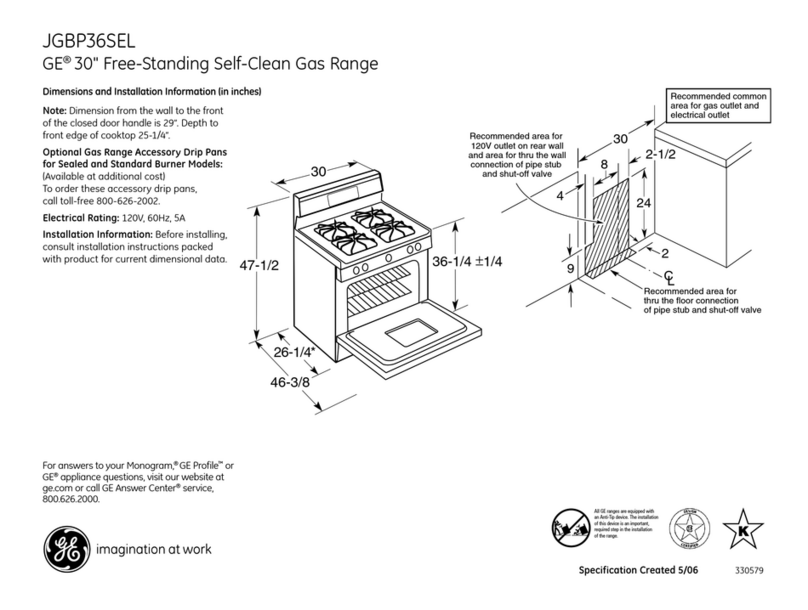
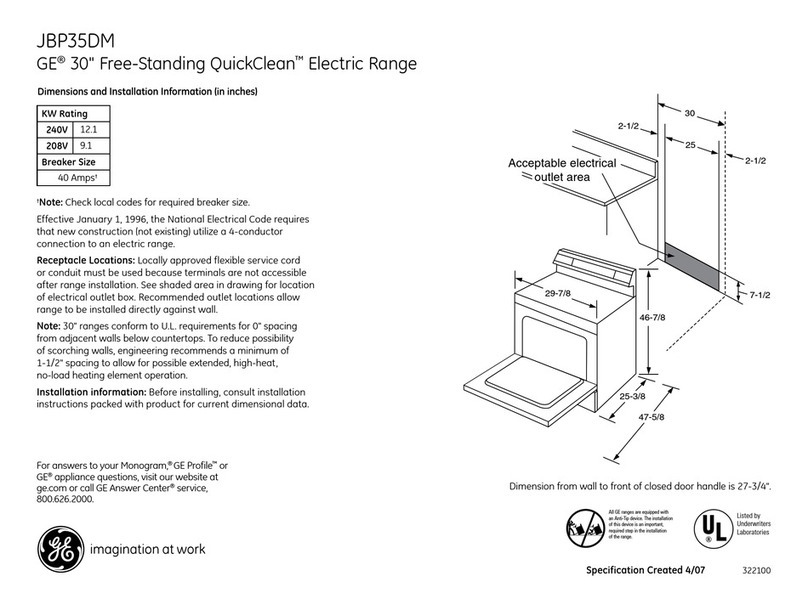
GE JGB910 and User manual

GEAppliances
S_rfety Instructions .... 2, 4-8
Anti-tipdevice ........ 4, 43, 51
Operatinglnstructions, Tips
Aluminum foil ............. 17
Clock and timer ............ 19
Electric warming drawer..28-29
Oven .................. 16-27
Baking ............... 17, 20
Broiling, Broiling guide .... 18
Convection cooking .... 22-23
Door latch ............ 30, 31
Electric ignition ....... 16, 49
Light bulb replacement .... 39
Oven control ............. 12
Preheating ............... 17
Probe ................... 21
Roasting, Roasting
guide .......... 17, 20, 24-25
Self-cleaning
instructions ........... 30-31
Shelves .................. 16
Special features of your
oven control .......... 123-15
Timed baking ......... 20, 26
Type of margarine ........ 27
Surface cooking .......... 9-11
Control settings ............ 9
Electric glass top
warming zone ............ 11
Care and Cleaning
Broiler pan and grid ........ 36
Burner assembly ......... 32, 33
Burner grates .............. 34
Control panel .............. 38
Cooktop ............... 34-35
Glass .................... 35
Porcelain ................ 34
Door removal .............. 36
Oven bottom ............... 36
Oven vents ................. 38
Self-cleaning
instructions ............. 30-31
Shelves .................... 39
Stainless steel .............. 34
Top light .................. 39
Warming drawer ............ 37
Before You Call For
Service
Thermostat adjustment-
do it yourself ............... 27
Troubleshooting tips ..... 52-55
Preparation
Air adjustment ............. 50
Flame size ................. 49
Flooring under the range .... 43
Installation instructions . .40-51
Leveling ................... 50
LP ........................ 51
ConsumerServices
Important phone
numbers ........... Back Cover
Model and serial number
location .................... 3
Product registration ...3, 57, 58
Warranty for customers
in Canada ................. 63
Warranty for customers
in the U.S.A ................ 62
JGB 910
JGB920
wvvw.oeapp/iances.com 183D5580P084 49-80037 7-OOJB 350A_P216

IMPORTANTSAFETYINFORMATION.
READALLINSTRUCTIONSBEFOREUSING.
AWARNING!
ANTI-TIPDEVICE
•ALL RANGES CAN TIP
•INJURYTOPERSONS
COULDRESULT
•INSTALLANTI-TIP
DEVICESPACKEDWITH
RANGE
•SEEINSTALLATION
INSTRUCTIONS
WARNING:iftheinformation
in this manual is not followed exactly,
a fire or explosion may result causing
property damage, personal injury
or death.
-- Do not store or use gasoline or other
flammable vapors and liquids in the
vicinity of this or any other appliance.
-WHATTODOIF YOU
SMELLGAS
•Do not try to light any appliance.
•Do not touch any electrical switch;
do not use any phone in your building.
•Immediately car your gas supplier
from aneighbor's phone. Follow the
gas suppfier's instructions.
•If you cannot reach your gas supplier,
car the fire department.
-- Installation and service must be
performed by aqualified installer,
service agency or the gas supplier.
2

GE& You,A ServicePartnership.
IMPORTANT!
Fill out the Consumer Product Registration Card.
Twoeasy ways to register yourappliance!
• Through the internet at www.geappliances.com
• Complete and mail the enclosed Product Registration Card
YOURRECORDS
Write the model and serial numbers here:
#
#
You can find them on a label on the front of the range behind the warming drawer.
Staple sales slip or cancelled check hare.
Proof of the original purchase date is needed to obtain service under the warranty.
READTHISMANUAL
Inside you will find many helpful hints on how to use and maintain your range properly.
Just a little preventive care on your part can save you a great deal of lime and money over the life
of your range.
IFYOUNEEDSERVICE
You'll find many answers to common problems in the Before You CalIForService section.
If you x_wiew our chart of Troubleshooting "tipslust, you may not need to call for service at all.
If you do need service, you can relax knowing help is only a phone call away. A list of toU-free
customer service numbers is induded in the back section of this manual.
OR
Visit our Website at: t_tw.papl.Pliencea.com.
3

IMPORTANTSAFETYINFORMATION.
READALLINSTRUCTIONSBEFOREUSING.
4
AWARNING!
Foryoursafety,the informationinthis manualmustbefollowedtominimizethe riskoffireorexplosion,
electn'cshock,orto preventpropertydamage,personalinjury,orlossoflife.
AWARNINGANTI-TIPDEVICE
All rangescana'pand injurycouldresult
Topreventaccidentaltippingoftherange,attachittothewaftbyinstollingtheAnti-tipdevicesupplied.
Tocheckifthe deviceis installedandengagedproperly,carefullytipthe rangeforward.TheAnti-77p
deviceshouldengageandpreventthe rangefromtippingover.
If you pull the range out from the wall for any reason, make sure the device is properly engaged
when you push the range back against the wall. If it is not, there is a possible risk of the range
tipping over and causing injury if you or a child stand, sit or lean on an open door.
Please refer to the Anti-Tip device information in this manual. Failure to take this precaution
could result in tipping of the range and injury.
IMPORTANTSAFETYNOTICE
TheCaliforniaSafe DrinkingWater and ToxicEnforcementAct requiresthe GovernorofCaliforniato
publisha listofsubstancesknownto thestateto causebirthdefectsor otherreproductiveharm,and
requiresbusinessestowarn customersofpotentialexposuretosuchsubstances.
Gasappliancescancauseminorexposureto fourofthese substances,namelybenzene,carbon
monoxide,formaldehyde andsoot causedprimarilybythe incompletecombustionofnaturalgasor
LPfuels.Properlyadjustedburners,indicatedbya bluishratherthan a yellowflame,Willminimize
incompletecombustion.Exposureto thesesubstancescanbeminimizedbyventingwithan open
windowor usinga ventilationfanor hood.
Fluorescentlightbulbsandsafetyvalvesonstandingpilotrangescontainmercu_ If your modelhas
these features,they mustbe recycledaccordingto local,state andfederalcodes.
SAFETYPRECAUTIONS
Havetheinstaller showyouthe location ofthe range gasshut-offvalve andhow toshutit offif
necessa_
• Have your range installed and properly
grounded by a qualified installer, in
accordance with the Installation Instructions.
Any adjustment and service should be
performed only by qualified gas range
installers or service technicians.
•Do not attempt to repair or replace any part
of your range unless it is specifically
recommended in this manual. All other
service should be referred to aqualified
technician.
•Plug your range into a 120-volt grounded
outlet only. Do not remove the round
grounding prong from the plug. If in doubt
about the grounding of the home electrical
system, it is your personal responsibility and
obligation to have an ungrounded outlet
replaced with a properly grounded, three-
prong outlet in accordance with the National
Electrical Code. Do not use an extension
cord with this appliance.

SAFETYPRECAUTIONS
• Locate the range out of kitchen traffic path
and out of drafty locations to prevent pilot
outage (on standing pilot models) and poor
air circulation.
• Be sure all packaging materials are removed
from the range before operating it to prevent
fire or smoke damage should the packaging
material ignite.
• Be sure your range is correctly adjusted by a
qualified service technician or installer for
the type of gas (natural or LP) that is to be
used. Your range can be converted for use
with either type of gas. See the Installation of
the range section.
WARNING: eseadjustments must
be made by a qualified service technician in
accordance with the manufacturer's
instructions and all codes and requirements
of the authority having jurisdiction. Failure
to follow these instructions could result in
serious injury or property damage. The
qualified agency performing this work
assumes responsibility for the conversion.
• After prolonged use of arange, high floor
temperatures may result and many floor
coverings will not withstand this kind of use.
Never install the range over vinyl tile or
linoleum that cannot withstand such type of
use. Never instali it directly over interior
kitchen carpeting.
• Do not leave children alone or unattended
where a range is hot or in operation. They
could be seriously burned.
•Do not allow anyone to climb, stand or hang
on the oven door, storage drawer, warming
drawer or cooktop. They could damage the
range and even tip it over, causing severe
personal injury.
•CA_TIOI_I: Items of interest to
children should not be stored in cabinets
above a range or on the backsplash of a
range-children climbing on the range to
reach items could be seriously injured.
• For your safety, never use your appfiance
for warming or heating the room.
•Never wear loose fitting or hanging garments
while using the appliance. Be careful when
reaching for items stored in cabinets over the
range. Flammable material could be ignited
if brought in contact with flame or hot oven
surfaces and may cause severe bums.
•Do not store flammable materials in an oven,
arange storage drawer, a warming drawer or
near a cooktop.
• Do not store or use combustible materials,
gasoline or other flammable vapors and
liquids in the vicinity of this or any other
appliance.
• Do not let cooking grease or other
flammable materials accum_ate in or near
the range.
nDo not use water on grease fires. Never pick
up a flaming pan. Turn the controls off.
Smother a flaming pan on a surface burner
by covering the pan completely with a well-
fitting lid, cookie sheet or flat tray. Use a
multi-purpose dry chemical or foam-type fire
extinguisher.
Flaming grease outside a pan can be put out
by covering it with baking soda or, if
available, by using a multi-purpose dry
chemical or foam-type fire extinguisher.
Flame in the oven or warming drawer can be
smothered completely by closing the oven
door or drawer and mining the control to off
or by using a multi-purpose dry chemical or
foam-type fire extinguisher.
• Let the burner grates and other surfaces cool
before touching them or leaving them where
children can reach them.
• Never block the vents (air openings) of the
range. They provide the air inlet and outlet
that are necessary for the range to operate
properly with correct combustion. Air
openings are located at the rear of the
cooktop, at the top and bottom of the oven
door, and at the bottom of the range under
the wanning drawer, storage drawer or kick
panel.
5
IMPORTANTSAFETYINFORMATION.
READALLINSTRUCTIONSBEFOREUSING.
AWARNING!
SURFACEBURNERS
Useproperpan sizHvoid pans thatare unstableor easilytipped. Selectcookvvarehavingflatbottoms
largeenoughto coverburnergrates.Toavoidspi/Iovers,makesurecookware islargeenoughtocontain
the foodproperig.Thiswillbothsave cleaningtime andpreventhazardousaccumulationsoffood,since
heavyspatteringor spi/Ioversleftonrange canignite.Usepans withhandlesthat canbe easilygrasped
andremain cool.
m Alwaysuse the/J/'E position (on electric
ignition models) or the HI position (on
standing pilot models) when igniting the top
burners and make sure the burners have ignited.
• Never leave the surface burners unattended
at high flame settings. Boilovers cause smoking
and greasy spillovers that may catch on fire.
• Adjust the top burner flame size so it does
not extend beyond the edge of the cookware.
Excessive flame is hazardous.
• Use only dry pot holders- moist or damp pot
holders on hot surfaces may result in burns
from steam. Do not let pot holders come
near open flames when lifting cookware. Do
not use a towel or other bulky doth in place
of a pot holder.
• When using glass cookware, make sure it
is designed for top-of-range cooking.
• To minimize the possibility of bums, ignition
of flammable materials and spillage, turn
cookware handles toward the side or back
of the range without extending over adjacent
burners.
• Carefully watch foods being fried at a high
flame setting.
• Always heat fat slowly, and watch as it heats.
• Do not leave any items on the cooktop. The
hot air from the vent may ignite flammable
items and will increase pressure in closed
containers, which may cause them to burst.
•If a combination of oils or fats will be used in
flying, stir together before heating or as fats
melt slowly.
• Use a deep fat thermometer whenever
possible to prevent overheating fat beyond
the smoking point.
mUse the least possible amount of fat for
effective shallow or deep-fat frying. Filling the
pan too full of fat can cause spillovers when
food is added.
• When flaming foods are under the hood,
turn the fan off. The fan, ifoperating, may
spread the flames.
• Do not use a wok on the cooking surface if
the wok has a round metal ring that is placed
over the burner grate to support the wok. This
ring acts as a heat trap, which may damage
the burner grate and burner head. Also, it
may cause the burner to work improperly.
This may cause a carbon monoxide level
above that allowed by current standards,
resulting in a health hazard.
• Foods for frying should be as dry as possible.
Frost on fi'ozen foods or moisture on fresh
foods can cause hot fat to bubble up and
over the sides of the pan.
• Never try to move a pan of hot fat, especially
a deep fat fryer. Walt until the fat is cool.
• Do not leave plastic items on the cooktop--
they may melt ifleft too dose to the vent.
• Keep all plastics away from the surface
burners.
• To avoid the possibility of a bum, always be
certain that the controls for all burners are
at the OFFposition and all grates are cool
before attempting to remove them.
•If range is located near a window, do not
hang long curtains that could blow over the
surface burners and create a fire hazard.
•Ifyou smell gas, turn offthe gas to the range
and call aqualified service technician. Never
use an open flame to locate a leak.
•Always turn the surface burner controls off
before removing cookware.
6

AEWARNING!
GLASSCOOl(TOPSURFACE(onsomemodels)Usecare whentouching theglasseooktopsurface.Theglasssurfaceofthe cooktopwillretainheat after
the controlshavebeen turned off.
• Avoid scratching the glass cooktop surface.
The glass surface can be scratched with items
such as sharp instruments, rings or other
jewelry and rivets on clothing.
•Do not operate the cooktop if the glass is
broken. Spillovers or cleaning solution may
penetrate a broken cooktop and create a risk
of electrical shock. Contact a qualified
technician immediately should your glass
cooktop surface become broken.
•Never use the glass cooktop surface as a
cutting board.
•Do not place or store items that can melt or
catch fire on the glass cooktop surface, even
when itis not being used.
•Be careful when placing spoons or other
stirring utensils on glass cooktop surface
when itis in use. They may become hot and
could cause bums.
•Clean the cooktop surface with caution. Ifa
wet sponge or cloth is used to wipe spills on a
hot surface, be careful to avoid steam burns.
Some cleaners can produce noxious fumes if
applied to a hot surface.
NOTE."We recommend that you avoid wiping
any surface areas tmdl they have cooled and
the indicator light has gone off. Sugar spills
are the exception to this. Please see Cleaning
the glasscoolrtopsurfacesection.
• When the cooktop surface is cool, use only
the recommended cleaning cream to clean
the cooktop.
•To avoid possible damage to the cooking
surface, do not apply deaning cream to the
glass surface when it is hot.
•After cleaning, use a dry cloth or paper towel
to remove all cleaning cream residue.
• Read and follow allinstrucdons and warnings
on the cleaning cream labels.
ELECTRICWARMINGDRAWER
• The purpose of the warming drawer
is to hold hot cooked foods at serving
temperature. Always start with hot food;
cold food cannot be heated or cooked in
the warming drawer.
• Do not use the warming drawer to dry
newspapers. If overheated, they can catch
on fire.
•Do not leave paper products, cooking
utensils or food in the warming drawer
when not in use.
[] Never leave jars or cans of fat drippings in
or near your warming drawer.
[] Always keep wooden and plastic utensils and
canned food a safe distance away from your
warming drawer.
[] Do not warm food in the warming drawer
for more than two hours.
[]Do not touchthe heating element or the
interior surface of the warming drawer.
These surfaces may be hot enough to
burn.
REMEMBER:The inside surface of the
warming drawer may be hot when the
drawer is opened.
• Use care when opening the drawer. Open
the drawer a crack and let hot air or steam
escape before removing or replacing food.
Hot air or steam which escapes can cause
burns to hands, face and/or eyes.
• Do not use aluminum foil to line the
drawer. Foil is an excellent heat insulator
and will trap heat beneath it. This will upset
the performance of the drawer and it could
damage the interior finish.

IMPORTANTSAFETYINFORMATION.
READALLINSTRUCTIONSBEFOREUSING.
COOKMEATANDPOULTRYTHOROUGHLY...
Cookmeatandpoultrythoroughlff--meattoatleastanINTERNALtemperatureof 160°1=..andpoultrytoat leastan
INTERNALtemperatureof 180°,£.Cookingto thesetemperaturesusualiypro_ctsagainstfoodbomeillness.
OVEN
Standaway fromthe range whenopeningthe doorofa hotoven.Thehot air andsteamthat escapecan
cause burnstohands,face andeyes.
• Do not use the oven for a storage area. Items
stored in the oven can ignite.
• Keep the oven free from grease buildup.
• Place the oven shelves in the desired position
while the oven is cool.
• Pulling out the shell to the stop-lock is a
convenience in lifting heavy foods. Itis also
a precaution against bums from touching
hot surfaces of the door or oven walls. The
lowest position "R" is not designed to slide.
• Do not heat unopened food containers.
Pressure could build up and the container
could burst, causing an injury.
• Never use aluminum foil to line the oven
bottom. Improper use of foil could start a fire.
• Do not use aluminum foil anywhere in the
oven except as described in this manual.
Misuse could result in a fire hazard or
damage to the range.
• When using cooking or roasting bags in the
oven, follow the manufacturer's directions.
• Do not use your oven to dry newspapers.
Ifoverheated, they can catch fire.
•Use only glass cookware that is
recommended for use in gas ovens.
•Always remove the broiler pan from range as
soon as you finish broiling. Grease left in the
pan can catch fire if oven is used without
removing the grease from the broiler pan.
• When broiling, if meat is too close to the
flame, the fat may ignite. Trim excess fat to
prevent excessive flare-ups.
•Make sure the broiler pan is in place correctly
to reduce the possibility of grease fires.
• If you should have a grease fire in the broiler
pan, press the C_/:Fpad, and keep
the oven door dosed to contain fire until
it burns ouL
SELF-CLEANINGOVEN
•Be sure to wipe up excess spillage before
self-deaning operation.
• Before se_deaning the oven, remove
the shelves, broiler pan, grid and
other cookware.
• Do not dean the door gasket. The door
gasket is essential for a good seal. Care
should be taken not to rub, damage or
move the gasket.
[] Clean only parts listed in this Owner's Manual.
• If the self-cleaning mode malfunctions, turn
the oven off and disconnect the power supply.
Have it serviced by aqualified technician.
•Do not use oven cleaners. No commercial
oven cleaner or oven liner of any kind should
be used in or around any part of the oven.
Residue from oven cleaners will damage
the inside of the oven when the self-dean
cycle is used.
READANDFOLLOWTHISSAFETYINFORMATIONCAREFULLY.
SAVETHESEINSTRUCTIONS
8

Usingthegas surfaceburners.
Throughoutthis manual,features and appearance may varyfromyour model.
Pushthe controlknobinandturnit
to theLITEposition.
How to Light a Gas Surface Burner
Push the control knob in and turn itto the
//_ position.
You will hear alittle clicking noise-the
sound of the electric sparkigniring the
burner.
Turn the knob m adjustthe flame size.
Ifthe knob staysat//_ itwillcontinue
to click.
When one burner is turned to//_ all
the burners spark. Do not attempt to
disassemble or clean around any burner
while another burner is on. An electric
shock may result, which could cause you
to knock over hot cookware.
Sealed Gas Burners
The smaller burner (right rear position) will
give the best simmer results. Itoffers precise
cooking performance fordelicate foods,
such assauces or foods which need to cook
over lowheat for along time. Itcan be
tttmed down to averylowsimmer setting.
The largest burners are higher powered
than the others and will bring liquids toa
boil quicker.
How to Select Flame Size
Forsafehandlingofcookware,never/et_neflames
extendup_nesidesof_necookware.
Watchthe flame, not the knob, asyou
reduce heat. The flame size on a gas burner
should match the eookware you are using.
Any flame largerthan the bottom of the
cookware iswasted and onlyserves to heat
the handle.
In Case ofPower Failure
In case of a power failure, you can light the
gassmface burners on your range with a
match. Hold alit match to the burner, then
push in and turn the control knob tothe
//lSposidon. Use extreme caution when
lighting burners this way.
Surface burners in use when an electrical
power failureoccurs will continue to
operate normally.
Before Lighting a Gas Burner
•If drip pans am supplied with your range,
they should be used at all times.
•Make sure all grates on the range are in
place before using any burner.
After Lighting a Gas Burner
• Do not operate the burner for an
extended period of time without
cookware on the grate. The finish on
the grate may chip without cookwace
to absorb the heat.
•Be sure the burners and grates arecool
before you place your hand, apot holder,
cleaning doths or other materials on
them.
9

Usingthegas surfaceburners.
Top-of-Range Cookware
A/umimmr Medinnvaeight cookwareis
recommended because itheats quickly
and evenly.Most foods brown evenly in an
aluminum skillet. Use saucepans with tight-
fitting lidswhen cooking with minimum
amounts ofwater.
_st-lma: If heated slowly,most skillets
give satisfactoryresults.
Emmmlmtra:Under some conditions,
the enamel of some cookware maymelt.
Follow cookware manufacturer's
recommendations for cooking methods.
Glass:There are twotypes ofglass
cookware--those foroven use only and
those for top-of-rangecooking (saucepans,
coffee and teapots). Glass conducts heat
very slowly.
HeatpmofGlassCeramic:Can be used for
either surface or oven cooking. Itconducts
heat very slowlyand cools veryslowly.Check
cookware manufacturer'sdirections to be
sure it can be nsed on gasumges.
StainlessSteel:Thismetal alone has poor
heating properties and is usuaUycombined
with copper, aluminum or other metals for
improved heat distribution. Combination
metal skillets usually work satisfactorily if
they areused with medium heat as the
manufacturer recommends.
Stove TopGrills
Do not use stove topgrillson your sealed
gas burners, ffyou use the stove top grill
on the sealed gasburner, it will cause
incomplete combustion and can result
in exposure to carbon monoxide levels
above allowable current standards.
Thiscanbehazard.stoyourhealS.
Usea flat*bottomedwok.
Wok This Way
Werecommendthatpauuseaflat-bottomedvvolc
Theyareavailableatyourlocalretailstore.
Only a flat_oottomed wok should be used.
Do not use a flat-bottomed wok with a
wok holder.
Do not use a flat4_ottomed wok on a
support ring. Placingthe ring over the
burner or grate may cause the burner
to workimproperly, resulting in carbon
monoxide levels above allowable ctm_nt
standards. This could be dangerous to
your health.
10

Usingthe electric glasstop warmingzone (onsomemodels).
The WARMINGZONE,located in the back
centerofthegla surface,wi.keephot,
cooked food at serving temperature.
Alwaysstart with hot food. Do not use
to heat cold food.
Push and turn the control knob to any
desired setting.
For best results, allfoods on the
WARMINGZONEshould be covered with
alid oraluminum foil. When warming
pastries or breads, the cover should be
vented to allowmoisture to escape.
Alwaysuse potholders or oven mitts when
removing food hum the WARMINGZONE,
ascookware and plates willbe hot.
AHOTsurfaceindicator light will glow
when the glasssurface is hot and will
remain on until the surface is cool
enough to touch,
AWARMINGZONEindicatorlight will
glow when the unit is on.
NOTE"TheWARMINGZONEcannotbeused
duringaserf-cleancycle.
FoodType ControlBetting
Broads/Pastries LO
Casseroles LO
DinnerPlateswith Food LO
Eggs LO
Gravies LO
Meats Medium
Sauces Medium
Soups(cream) Medium
Stews Medium
Vegetables Medium
FriedFoods HI
HotBeverages HI
Soups(liquid) HI
Thechartaboveshowsinitialsuggested
settingsonig.Thetemperature,tYpeand
amountof food,andthetimeheldwill
affectthe qualityof thefood.
CAUTION: Donotwarmfoodonthe
WARMINGZONEformorethantwohours.
•DonotuseplasticwraptocoverfoodPlastic
maymaltontothesurfaceandbeverydifficult
toclean.
•Useonlyceakwararecommendedforoven
ortop-of-rangecooking.
Never cookdirectlyon theglass.
Alwaysusecookware.
Alwaysplacethe paninthecenterof
the warmingzone.
About the glass surface (on some models)...
The WARMINGZONEfeatures heating
units beneath asmooth glasssurface.
The WARMING ZONEunit will cycle on
and off to maintain your selected control
setting.
Itis safe to place hot cookware on the
glasssurface even when the cooktop
is cool.
• Waterstains(mineraldeposits)areremovable
usingthecleaningcreamor full strengthwhite
vinega_
• Useofwindowcleanermayleavean
iridescentfilmontheceaktop.Thecleaning
creamwillremovethisdiscoloration,
•Don'tstoreheaWitemsabovetheconktop.
ff theydropontotheceaktop,_cancause
damage.
•Do not use the surfaceasa cuttingbea_
NOTE:Aslightodorisnormalwhena new
cnoktopisusndforthefitsttime.ltiscausndby
theheatingofnewpartsandinsulatingmaterials
andwilldisappearinashorttime.
NOTE"Onsomamodelswithawhiteglass
coo/ctop,itisnormalforthesurfacetoappear
discoloredwhenitisheLThisistemporaryand
willdisappearastheglasscea/s.
Donots/idecookwareacrossthe
cooktopbecauseit canscratchthe
glass---_e glassisscratchresistant
notscratchproof,
11

Usingthe ovencontrols.
Throughout this manual, features and appearance may varyfrom your model.
OvenControl,Clockandtimer FeaturesandSettings
SELFCLEANPad
Touch this pad to select the self-cleaning
function. See the Usingtheserf-cleaning
ovensection.
0PROBEPad (on some models)
Touch this pad when using the probe to
cook food to the desired internal
temperature.
oBAKEPad
Touch this pad to select the bake function.
oBROILHI/LOPad
Touch thispad to select the broil function,
oCONVECTIONROASTPad
Touch this pad to select roasting with the
convection function.
0Display
Shows the time of day, oven temperature,
0
0
COOKINGTIMEPad
Touch thispad and theft touch the number
pads to set the amount of time you want
your food to cook. The oven willshut off
when the cooking time has run OUL
DELAYSTARTPad
Use along with COOKINGTIMEor SELF
CLEANpads to set the oven to start and stop
automatically at a time you seL
oTOPLIGHTPad
Touch this pad to turn the surface light on
oroff.
oOVENLIGHTPad
Touch this pad to turn the oven light on
or off.
oSTARTPad
Must be touched to start any cooking or
whether the oven isin the bake, broil,
convection, or self-cleaning mode and
the times set for the timer orautomatic
oven operations.
if'F- andanumberorletter"flashinthedisplayandthe
ovencontrolsignals,thisindicatesa functionerrorcode.
If)ourovenwassetforatimedovenoperationand
apoweroutageoccurred,theclockandallprogrammed
functionsmustbereset.
Thetimeofdaywill flashin thedisplaywhentherehas
beenapoweroutage.
If"Err"appearsththedbplagyouhavetriedtosetatime
ortemperatureoutsideofthecontTol'slimits.Press
CLEAR/OFFandenteranewsetting.
oCLOCKPad
Touch this pad before setting the clock.
cleaning function.
KITCHENTIMERON/OFFPad
Touch this pad to select the timer feature.
NumberPads
Use to set any function requiring numbers
such as the time of day on the dock, the
timer, the oven temperature, the internal
food temperature, the start time and
length of operation fortimed baking
and self-cleaning.
CONVECTIONBAKEPad
Tour_hthis pad to select baking with the
convection function.
CLEAR/OFFPad
Touch this pad to cancel ALLoven
operations except the dock and timer.
12

Specialfeaturesofyourovencontrol
Yournew touch pad control has add_'onalfeaturesthat youmay chooseto use.Thefollowingare thefeatures
and how youmay activatethem.
Thespecialfeaturemodescanonlybeactivatedwhilethe displayisshowingthe timeofday.Theyremainin the
control'smemoryuntilthe stepsare repeated.
Whenthe displayshowsyourchoice,touchtheSTARTpad.Thespecial featureswillremaininmemoryafter
a powerfei/ure.
12Hour Shut-Off
Withthisfeature,shouldyouforgetandleavethe
ovenon,thecontrolwillautomaticallyternoffthe
ovenafter12hoursduringbakingfunctionsor
after3hoursduringa broilfunction.
If you wish to uml OFFthis feature, follow
the steps below.
[] Touch the BA/_ and BROILHI/gO
pads at the same time for 3seconds
until the display shows SF.
[] Touch the DELAYSTARTpad. The
display will show 12_dn (12hour
shut-off). Touch the DELAYSTART
pad again and the display will show
noshdn (no shut-off).
[] Touch the STARTpad to activate the
no shut-offand leave the control
set in this special features mode.
Fahrenheit or Celsius Temperature Selection
YourovencontroliscottousetheFahrenheit
temperaturecolectlbnsbutyoumaychangethis
tousetheCelsiusselections.
[] Touch the BAKEand BROILH!/LO
pads at the same time for 3seconds
until the display shows SF.
[] Touch the BROILHI/LOpad. The
display will show F(Fahrenheit).
[] Touch the BROILBI/LOpad again.
The displaywill show C(Celsius).
[] Touch the STARTpad.
Tonesat the Endof a TimedCycle
At theendofa timedcycle,3shortbeepswill
soundfollowedbyonebeepevery6secondsuntil
theCLEAP/OFFpadistouched.Thiscontinual6
secondbeepmaybecancelecL
To cancel the 6 second beep:
[] Touch the BAKEand BROILHI/tO
pads at the same time for 3seconds
undl the displayshows $F.
[] Touch the K/TCBEN//MER0N/0FF
pad. The display shows CONBEEP
(continual beep). Touch the
K/TCHENT/MERON/OFFpad
again. The displayshows BEEP.
(This cancels the one beep
every 6seconds.)
[] Touch the STARTpad.
13

SpecialfeaturesofyourovencontroL
Control Lockout (on some models)
Yourcontrolwillallowyoutolockoutthetouch
padsso#_ycannotbeactIVatadwhentouched
orcleaningtheglasspanel.
To lock the controls:
[] Touch the 9and 0touch pads at the
same time for3 seconds until the
control beeps twice.The displaywill
show LOCconfinuously and the time
of dayif not blacked out.
NOTE."Aflcookingandtimingfunctionswillbe
cancelledwhenIocla_goutthecontrol
[] To unlock the control, touch the
9and 0touch pads at the same time
for 3seconds until the control beeps
twice, and LOCwill be removed from
the display.
12Hour,24 Houror Clock Black-Out
Yourcontrolissettousea 12hourclock.
If you would prefer to have a 24 hour
military time dock or black-out the clock
display, follow the steps below,
[] Touch the BAKE and BROILIilltO
pads at the same time for 3 seconds
until the display shows SF.
[] Touchthe CL0ggpadonce.The
displaywiUshow 12hr..If this is
the choice you want, touch the
STARTpad.
Touch the CLOCKpad again to change
to the 24 hour military time dock. The
display will show 24 hr. If this is the choice
you want, touch the START pad.
Touch the CLOCKpad again to black-out
the clock display.The displaywinshow
OFF.If this is the choice you want, touch
the STARTpad.
NOTE:ff theclockisintheblack-outmodeyou
willnotbeabletousetheDelayStartfunction.
CookandHold
Yournewcontrolhasacookandholdfeaturethat
keepscookedfoodswarmfurupto3hoursafter
thecookingfunctionisfinished
This feature can only be used when timed
cooking.
To activate this feature, follow the steps
below.
[] Touch the BA/_ and BROILHI/tO
pads at the same time for 3 seconds
until the display shows $F.
[_ Touch the COOKINGTiME pad. The
display will show Hid OFF..
Touch the COOKINGTIME pad again
to activate the feature, The display
will show Hid ON.
[_] Touch the STARTpadto activate
the cook and hold feature and
leavethe control set in this special
features mode.
14

Notes.
15

Usingthe oven.
Toavoidpossiblebums,place the shelvesin the desiredpositionbeforeyouturnthe ovenon.
Before you begin...
The shelves have stop-locks, so that when
placed correctly on the supports, they will
stop before coming completely out, and will
not tilt.
When placing and removing cookware,
pull the shelf out to the bump on the shelf
support.
Toremora ashelf,,pull it toward you, tiltthe
front end up and pull it out.
Toreplace, place the end of the shelf (stop
locks) on the support, tilt up the front and
push the shelf in.
NOTE:Theshelfisnotdesignedtoslideoutatthe
speciallowshelf(R)position.
Theovenhas5shaftpositions.
It alsohasaspeciallowsheff
position(RIfor extralargeitems,
suchaselargetufl_ey.
PlaMJcitemson thecooktopmay
meit ff foftfoo closeto the ven_
Ventappearanceandlocationvarg
Oven Vent
Your oven is vented through ducts at the
rear of the range. Do not block these ducts
when cooking in the oven-it is important
that the flow of hot air fi'om the oven and
fresh air to the oven burner be
uninterrupted. Avoid touching the vent
openings or nearby surfaces during oven or
broiler operation--they may become hot.
•Handlesofpots andpansonthe cooktepmay
becomehot ffleft toocloseto_vent
• Donetleaveplasticitemsonthecaolctop--they
maymaltff lefttooclosetothevent
• Donetleaveanyitemsonthecooktop.Thehot
airfromtheventmayigniteflammableitemsand
willincreasepressureinclosedcontainers,which
maycausethemtoburst
lMetalitemswillbecomeveryhotiftheyareleft
ontheconktep,andcouldcausebums.
Power Outage
CAUTION:Donot makeanyattempttooperatethe
electricignitionovenduringanelectricalpower
failure.
The oven or broiler cannot be litduring a
power failure. Gas will not flow unless the
glow bar is hot-
If the oven is in use when a power failure
occurs, the oven burner shuts offend
cannot be re-lituntil power is restored. This
isbecause the flowof gas is automatically
stopped and willnot resume when power is
restored undl the glow barhas reached
operating temperature.
Oven Light
Touch the OVENLIGHTpad on the upper
control panel to turnthe light on or off.
16

TheovenhasaspecialIow shelf(RI
positionjust abovethe ovenbottom.
Usait whenextra cookingspaceis
needed,forexample,whencooking
a largetorkeg Theshelfisnot
designedto slideoutat this position,
How to Set the Oven for Baking or Roasting
[] Touch the RAKEpad.
[] Touch the number pads to set the
desired temperature.
[] Touch the STARTpad.
The word ONand 100"willbe displayed.
As the oven heats up, the display will show
the changing temperature. When the oven
reaches the temperature you set, a tone will
sound.
TochangetheoventomgemtureduringBAKEcycle,
presstheBAKEpadandthenthenumberpadsto
getthenewtemperature.
Typeof Food Shelf Position
F_en pies(oncookiesheet) BorC
Angelfo_ cake. A
bondtorpoundcakes
Biscuits,muffins,brownies, C
cookies,cupcakes,
layercakes,pies
Casseroles BorC
8casting RorA
[] Check food for doneness at minimum
time on redpe. Cook longer if
necessary.
[] Touch the C_FFpadwhen
cooking is complete.
Preheating and Pan Placement
Preheat the oven if the recipe ca]Isfor it.
To preheat, set the oven at the correct
temperature. Preheating is necessary
when convection bakingand forgood
resultswhen baking cakes, cookies, pastry
and breads.
Forovenswithoutapreheatindicatorlightortone,
preheat10minutes.
Baking resultswillbe better ifbaking pans
are centered in the oven as much as
possible. Pansshould not touch each other
or the walis of the oven. If you need to use
two shelves, stagger the pans so one isnot
directlyabove the other, and leave
approximately 1½"between pans, from
the front, backand sides of the wall.
Cutslitsinthe foiljustlike thegrid.
AluminumFoil
Never cover the oven bottom with
aluminum foil.
You can use aluminum foil to line the
broiler pan and broiler grid. However, you
must mold the foil tightly to the grid and cut
slits in it just like the grid.
Aluminumfoilmayalsobeusedtocatchaspillover.
Never entirely cover a shelf with aluminum
foil. This will disturb the heat circulation
and result in poor baking.
A smaller sheet of foil may be used to catch
a spillover by placing it on a lower shelf
several inches below the food.
Oven Moisture
As your oven heats up, the temperature
change of the air in the oven may cause
water droplets to form on the door glass.
These droplets are harmless and will
evaporate as the oven continues to heat up.
17

Usingtheoven.
Alwaysusethe broilerpanandgrid
that camewithyouroven.Iris
designedto minimizesmokingand
spatteringbytrappingjuicesinthe
shieldedlowerpart of thepan.
How to Set the Ovenfor Broiling
[] Place the meat or fish on the broiler
grid in the broiler pan.
[] Follow suggested shelf positions in the
BroilingGuide.
[] The oven door mUMbe closed during
broiling.
[] Touch the BROILHgLOpad once for
HIBroil.
To change to LOBroil,touch the BROIL
HJ/LOpad again.
[] Touch the START pad.
[] When broiling is finished, touch the
C_BFpad.
Serve the food immediately, and leave the
pan outside the oven to cool during the
meal for easiest cleaning.
Use LOBroilto cook foods such as pouhly
or thick cuts of meat thoroughly without
over-browning them.
Broiling Guido
The size, weight, thickness,
starting temperature, and Food
your preference of Bacon
doneness will affect broiling
times. This guide is based GroundBeef
on meats at refrigerator WellDone
temperature. BeefSteaks
t7_e U.S.DepartmentofAgriculture Rarer
Medium
says "Rarebeefispopular,butyou WellDone
shouldknowthatcookingit tooniy
140°F.meanssomefoodpoisoning Raret
organismsmaysurvive."(Source: Medium
WellDone
SafeFoodBook.YourKitchen Chicken
USDARev.June 1985.)
LabstsrTails
FishFillets
HamSlices
(precooked)
PorkChops
Well Done
LambCho_
Medium
Well Done
Medium
Well Done
n,,antlfyand/
orTkicknm
I/2 lb.
(about8thinslices)
1lb.(4patties)
1/2to 3/4"thick
Wthick
1to 1_ Ibs.
1½"thick
2to 2_ Ibs.
1whole
2to2½Ibs.,
splitlengthwise
4bone-inbreasts
2-4
6to 8oz.each
1/4to 1/2_thick
1_thick
1/2"thick
2(1/2_thick)
2(1"thick)about1Ib,
2(1"thick)about10
to 12oz.
2(1_ thick)aboutIlb.
Shelf
Position
C
C
C
c
c
c
B
O
O
D
D
D
D
D
RrstSide
Time(rain.)
9
12
13
10
12-15
25
30_35
25-3O
13-16
6
10
15
8
10
10
17
Second Side
Time (rain.)
3
7
5-6
8-9
6-7
10-12
16-18
15-20
10-15
Donot
turn
over.
6
8
8
4-7
10
4-6
12-14
Comments
Arrangeinsinglelayer,
Spaceevenly.Upto8
)attiestakeaboutthe
sametime,
SteakslessthanI"thickcook
throughbeforebrowning,
PanfTyingisrecommended.
Slashfat.
Brusheachsidewithmelted
I_tter,Broilskin-side-down
first.
Cutthroughbeckofshell.
Spreadopen.Brushwith
meltedbut_erbeforebroiling
andafterhalfofbroiling
time.
HandleandturnveW
care_lly.Brushwithlemon
butterbeforeandduring
cooking,if desired.Preheat
broilerto increasebrowning,
Slashfat.
Slashfat.
18

Usingthe clock and timer.
Not all features are on all models.
To Set the Clock
Make suretheclockissetto the
correcttimeof day.
The clock must be set to the correct time of
day for the automatic oven timing funcdous
to work properly. The time of day cannot be
changed during a timed baking or self-
cleaning cycle.
[] Touch the CLOCKpad.
[] Touch the number pads.
Touch the ntanber pads the same wayyou
read them. Forexample, to set 12:34, touch
the number pads 1,2,3 and 4in that order.
Ifnumber pads are not touched within one
minute after you touch the CLOCKpad, the
displayrevertsto the original setting. If this
happens, touch the CLOCKpad and reenter
the time ofday.
[] Touch the STMITpad until the time of
day showsin the display.This enters
the time and starts the dock.
Tocheckthetimeofdaywhenthedisplayis
showingofferinformation,simplytouchtheCLOCK
pad.Thetimeofdayshowsuntilesotherpadis
touchocL
To Set the timer
Thetimerdoesnotcontrolovenopomtions.
Themaximumsettingonthetimeris9hours
and59minutes.
Thetimerisaminutetimeronlg
TheCLEAR/OR:paddoesnotaffect I/I
thetimer. []
Touch the KITCHENTIMERON/OFF
pad.
Touch the number pads until the
amount of time you want shows in the
display. The maximum number of
minutes that can be entered is 60. To
set additional time, you will need to set
it by hours and minutes. For example,
to enter i hour and 30 minutes, touch
/, 3 and 0 in that order.
ffyoumakeamistake,presstheKITCHENtiMER
ON/OFFpodandbeginagain.
[] Touch the STARTpad,After pressing
the STARTpad,SLe/'disappears;this
tells you the time iscounting down,
although the displaydoes not change
until one minute has passed.
[] When the timer reaches :00,the
control willbeep 3times followed by
one beep every6seconds until the
KITCHENTIMEROIgtOFFpadis touched.
The6secondtonecanbecanceledbyfollowing
ff_ stepsintheSpecialfeaturesofyouroven
controlsectionunderTonesattheEndofa timed
@tie.
ToReset the timer
Ifthe displayis stillshowing the time
remaining, you may change it bytouching
the KITCHENTIMERON/OFFpad, then touch
the number pads until the time you want
appears in the display.
Ifthe remaining time isnot in the display
(clock, delaystart or cooking time arein the
display), recall the remaining time by
touching the KITCHENTIMERON/OFFpad
and then touching the number pads to
enter the new time you want.
To Cancel the timer
Touch the KITCHENTIMERON/OFF
pad _ice.
Power Outage
ffa flashingtimeisinthedisplay,youhave
e_onriemedapowerfailure.Resettheclock.
To reset the clock, touch the CLOCKpad.
Enter the correct time of day by touching
the appropriate number pads. Touch the
STARTpad. 19

Usingthetimedbakingandmastingfeatures.
NOTE: Foodsthat spoileasily-suchas milk,eggs,fish,stuffings,poultryandpork-shouldnotbe allowedtositfor
morethan I hourbeforeor aftercooking.Roomtemperaturepromotesthe growthofharmfulbacteria.Besurethat
the ovenlightisoffbecauseheatfromthe bulbwillspeedharmfu/bacteriagrowth.
How to Set an Immediate Start and Automatic Stop
Theovenwillternonimmediatelyandcookfora
selectedlengthoftime.Attheendofthecooking
timetheovenwillternoffautometicalig
[] Touch the BA/_pad.
[] Using the number pads, enter the
desired temperature.
[] Touch the COOKINGTIMEpad.
NOTE."ffyourreciperequirespreheating,you
mayneedtoaddadditionaltimetothelengthof
thecaokingtime.
[] Using the number pads, enter the
desired baking time. The oven
temperature and the cooking time
that you entered will be displayed.
The word ON and I00#will be displayed.
The cook time will begin to count down.
As the oven heats up, the display will show
the changing temperature. When the
oven reaches the temperature you set,
3beeps will sound.
At the end of timed baking, the oven will
turn off. The end of cycle tone will sound.
Touch the CLEAR/0FFpad to clear the
display.
[] Touch the STARTpad.
How to Set e Delayed Start and Automatic Stop
Youcansetthe ovencontroltodolapstert the
oven,cookfora specificlengthoftimeandthen
tomoff automatica//j_
Make sure the clock shows the correct
time of day.
[] Touch the GAKEpad.
[] Using the number pads, enter the
desired temperature.
[] Touch the COOKINGTiMEpad.
NOTE:Ifyourreciperequirespreheating,you
mayneedto addadditieaa/timetothe/eagthof
the cookingtime.
[] Using the number pads, enter the
desired baking time.
[] Touch the OBAYSTARTpad.
[] Using the number pads, enter the
time of day you want the oven to turn
on and start cooking.
If you would like to check the times you
have set, touch the DBAYSTART pad to
check the start time you have set or touch
the COOKINGTIME pad to check the
length of cooking time you have set.
The oven will turn on automatically. The
word ON and I00° will be displayed. The
cook time will begin to count down.
As the oven heats up, the display will show
the changing temperature. The oven will
cook for the programmed cooking time
and shut off automatically.
At the end of timed baking, the oven will
turn off. The end of cycle tone willsound.
Touch the C/.EAP,v'OFFpad toclear the
display.
[] Touch the STA_rpad.
NOTE"Anattentiontonewi/Isoundff youare
usingtimedbakinganddonottouchtheSTART
padafterenteringthebakingtemperature.
20
Other manuals for JGB910 and
3
This manual suits for next models
3
Table of contents
Other GE Range manuals

GE
GE JBS03 Operating instructions

GE
GE Profile PGB965YPFS User manual

GE
GE CAFE CGY366 User manual

GE
GE JGBS10FSA User manual

GE
GE Appliances Quickset III User manual

GE
GE Profile JGB900CEFCC User manual

GE
GE JGSP28CEK Manual

GE
GE JGB910 and Operating instructions

GE
GE PS968SPSS User manual

GE
GE CleanDesign JBP62BMWH Manual
Popular Range manuals by other brands

Bakers Pride
Bakers Pride XOB-212-SU Specifications

Whirlpool
Whirlpool RF3120XP Use & care guide

Frigidaire
Frigidaire ES340 Use & care guide

Whirlpool
Whirlpool WEE750H0H installation instructions

Thermador
Thermador Professional Pro Harmony PRL486GDH Use and care guide

Crosley
Crosley 316902601 (1001) Use & care manual