GE Ranges Self-Cleaning Gas Dual Fuel User manual

49-85217-1 08-14 GE
GEAppliances.com
Safety Information ..............2
Warranty..........................8
Assistance / Accessories........9
Using The Cooktop
Surface Burners.....................10
Griddle..............................12
Using The Oven
OvenControls.......................13
OvenAirVents......................14
SpecialFeatures....................14
Oven Racks .........................16
Cooking Modes .....................17
Aluminum Foil and Oven Liners ......18
Cookware...........................18
Using the Lower Oven Drawer .......19
Adjust the Lower Oven Thermostat . .19
Cooking Guide ......................20
Care and Cleaning
CleaningtheOven..................21
CleaningTheCooktop...............23
Cleaning The Door and Drawer ......26
Maintenance........................27
Troubleshooting Tips ...........29
Ranges
Self-Cleaning Gas Dual Fuel
Write the model and serial
numbers here:
Model # __________________
Serial #___________________
You can find the rating label under
the control panel above the top of
the oven door.
In Canada contact us at:
www.GEAppliances.ca
For a Spanish version of this
manual, visit our Website at
GEAppliances.com.
Para consultar una version
en español de este manual
de instrucciones, visite
nuestro sitio de internet
GEAppliances.com.
Owner’s Manual

249-85217-1
- Do not store or use gasoline or other flammable vapors and liquids in the vicinity of this or any other
appliance.
- WHAT TO DO IF YOU SMELL GAS
ŶDo not try to light any appliance.
ŶDo not touch any electrical switch; do not use any phone in your building.
ŶImmediately call your gas supplier from a neighbor’s phone. Follow the gas supplier’s instructions.
ŶIf you cannot reach your gas supplier, call the fire department.
- Installation and service must be performed by a qualified installer, service agency or the gas supplier.
WARNING If the information in this manual is not followed exactly, a fire or
explosion may result, causing property damage, personal injury or death.
To reduce the risk of tipping the
range, the range must be secured by
a properly installed anti-tip bracket.
See installation instructions shipped
with the bracket for complete details
before attempting to install.
For Freestanding and Slide-In
Ranges
To check if the bracket is installed
and engaged properly, look
underneath the range to see that
the rear leveling leg is engaged in the bracket. On some models, the
storage drawer or kick panel can be removed for easy inspection. If
visual inspection is not possible, slide the range forward, confirm the
anti-tip bracket is securely attached to the floor or wall, and slide the
range back so the rear leveling leg is under the anti-tip bracket.
If the range is pulled from the wall for any reason, always repeat
this procedure to verify the range is properly secured by the anti-tip
bracket.
Never completely remove the leveling legs or the range will not be
secured to the anti-tip device properly.
Freestanding and Slide-In Ranges
Anti-Tip
Bracket
Leveling Leg
A child or adult can tip the range and be killed.
Verify the anti-tip bracket has been properly installed
and engaged.
Ensure the anti-tip bracket is re-engaged when the range
is moved.
Do not operate the range without the anti-tip bracket in
place and engaged.
Failure to follow these instructions can result in death or
serious burns to children or adults.
Tip-Over Hazard
WARNING
SAVE THESE INSTRUCTIONS
IMPORTANT SAFETY INFORMATION.
READ ALL INSTRUCTIONS BEFORE USING.
ANTI-TIP DEVICE.
SAFETY INFORMATION

49-85217-1 3
GENERAL SAFETY INSTRUCTIONS
WARNING
STATE OF CALIFORNIA PROPOSITION 65 WARNING
The California Safe Drinking Water and Toxic Enforcement Act requires the Governor of California to
publish a list of substances known to the state to cause cancer, birth defects or other reproductive harm,
and requires businesses to warn customers of potential exposure to such substances.
WARNING This product contains one or more chemical known to the State of California to
cause cancer, birth defects or other reproductive harm.
Self-clean ovens can cause low-level exposure to some of these substances, including carbon monoxide,
during the cleaning cycle. Exposure can be minimized by venting with an open window or using a
ventilation fan or hood.
SAFETY INFORMATION
SAVE THESE INSTRUCTIONS
WARNING NEVER use this
appliance as a space heater to heat or warm
the room. Doing so may result in carbon
monoxide poisoning and overheating
of the oven.
Ŷ 8VHWKLVDSSOLDQFHIRULWVLQWHQGHGSXUSRVHDV
described in this owner’s manual.
Ŷ +DYH\RXUUDQJHLQVWDOOHGDQGSURSHUO\
grounded by a qualified installer in accordance
with the provided installation instructions. Any
adjustment and service should be performed
only by a qualified gas range installers or service
technicians. Do not attempt to repair or replace
any part of your range unless it is specifically
recommended in this manual.
Ŷ <RXUUDQJHLVVKLSSHGIURPWKHIDFWRU\VHWIRU
use with natural gas. It can be converted for use
with LP gas. If required, these adjustments must
be made by a qualified technician in accordance
with the installation instructions and local codes.
The agency performing this work assumes
responsibility for the conversion.
Ŷ +DYHWKHLQVWDOOHUVKRZ\RXWKHORFDWLRQRIWKH
range gas shut-off valve and how to turn it off if
necessary.
Ŷ 3OXJ\RXUUDQJHLQWRDYROWJURXQGHGRXWOHW
only. Do not remove the round grounding
prong from the plug. If in doubt about the
grounding of the home electrical system, it is
your responsibility and obligation to have an
ungrounded outlet replaced with a properly
grounded, three prong outlet in accordance with
the National Electrical Code. Do not use on
extension cord with this appliance.
Ŷ %HIRUHSHUIRUPLQJDQ\VHUYLFHXQSOXJWKHUDQJH
or disconnect the power supply at the household
distribution panel by removing the fuse or
switching off the circuit breaker.
Ŷ %HVXUHDOOSDFNLQJPDWHULDOVDUHUHPRYHGIURP
the range before operating to prevent ignition of
these materials
Ŷ $YRLGVFUDWFKLQJRULPSDFWLQJJODVVGRRUV
cooktops or control panels. Doing so may lead to
glass breakage. Do not cook on a product with
broken glass. Shock, fire or cuts may occur.
Ŷ 'RQRWOHDYHFKLOGUHQDORQH²FKLOGUHQVKRXOG
not be left alone or unattended in an area where
an appliance is in use. They should never be
allowed to climb, sit or stand on any part of the
appliance.
Ŷ CAUTION Do not store items of
interest to children in cabinets above an oven
- children climbing on the oven to reach items
could be seriously injured.
Ŷ 'RQRWDOORZDQ\RQHWRFOLPEVWDQGRUKDQJRQ
the oven door, drawer or cooktop. They could
damage the range or tip it over causing severe
injury or death.

449-85217-1
Ŷ 'RQRWVWRUHRUXVHIODPPDEOHPDWHULDOVLQ
an oven or near the cooktop, including paper,
plastic, pot holders, linens, wall coverings,
curtains, drapes and gasoline or other
flammable vapors and liquids.
Ŷ 1HYHUZHDUORRVHILWWLQJRUKDQJLQJJDUPHQWV
while using the appliance. Avoid storing
commonly used items in cabinets above the
range and be careful when reaching over the
range. Clothing in close proximity to burners or
hot surfaces may ignite causing severe burns.
Ŷ 'RQRWOHWFRRNLQJJUHDVHRURWKHUIODPPDEOH
materials accumulate in or near the range.
Grease in the oven or on the cooktop may ignite.
Ŷ &OHDQYHQWLODWLQJKRRGVIUHTXHQWO\*UHDVH
should not be allowed to accumulate on the
hood or filter.
IMPORTANT SAFETY INFORMATION.
READ ALL INSTRUCTIONS BEFORE USING.
SAFETY INFORMATION
SAVE THESE INSTRUCTIONS
GENERAL SAFETY INSTRUCTIONS (CONT.)
WARNING
Ŷ 1HYHUEORFNWKHYHQWVDLURSHQLQJVRIWKH
range. They provide the air inlets and outlets
that are necessary for the range to operate
properly with correct combustion. Air openings
are located at the rear of the cooktop, at the top
and bottom of the oven door, and at the bottom
of the range under the warming drawer, lower
oven drawer or kick panel.
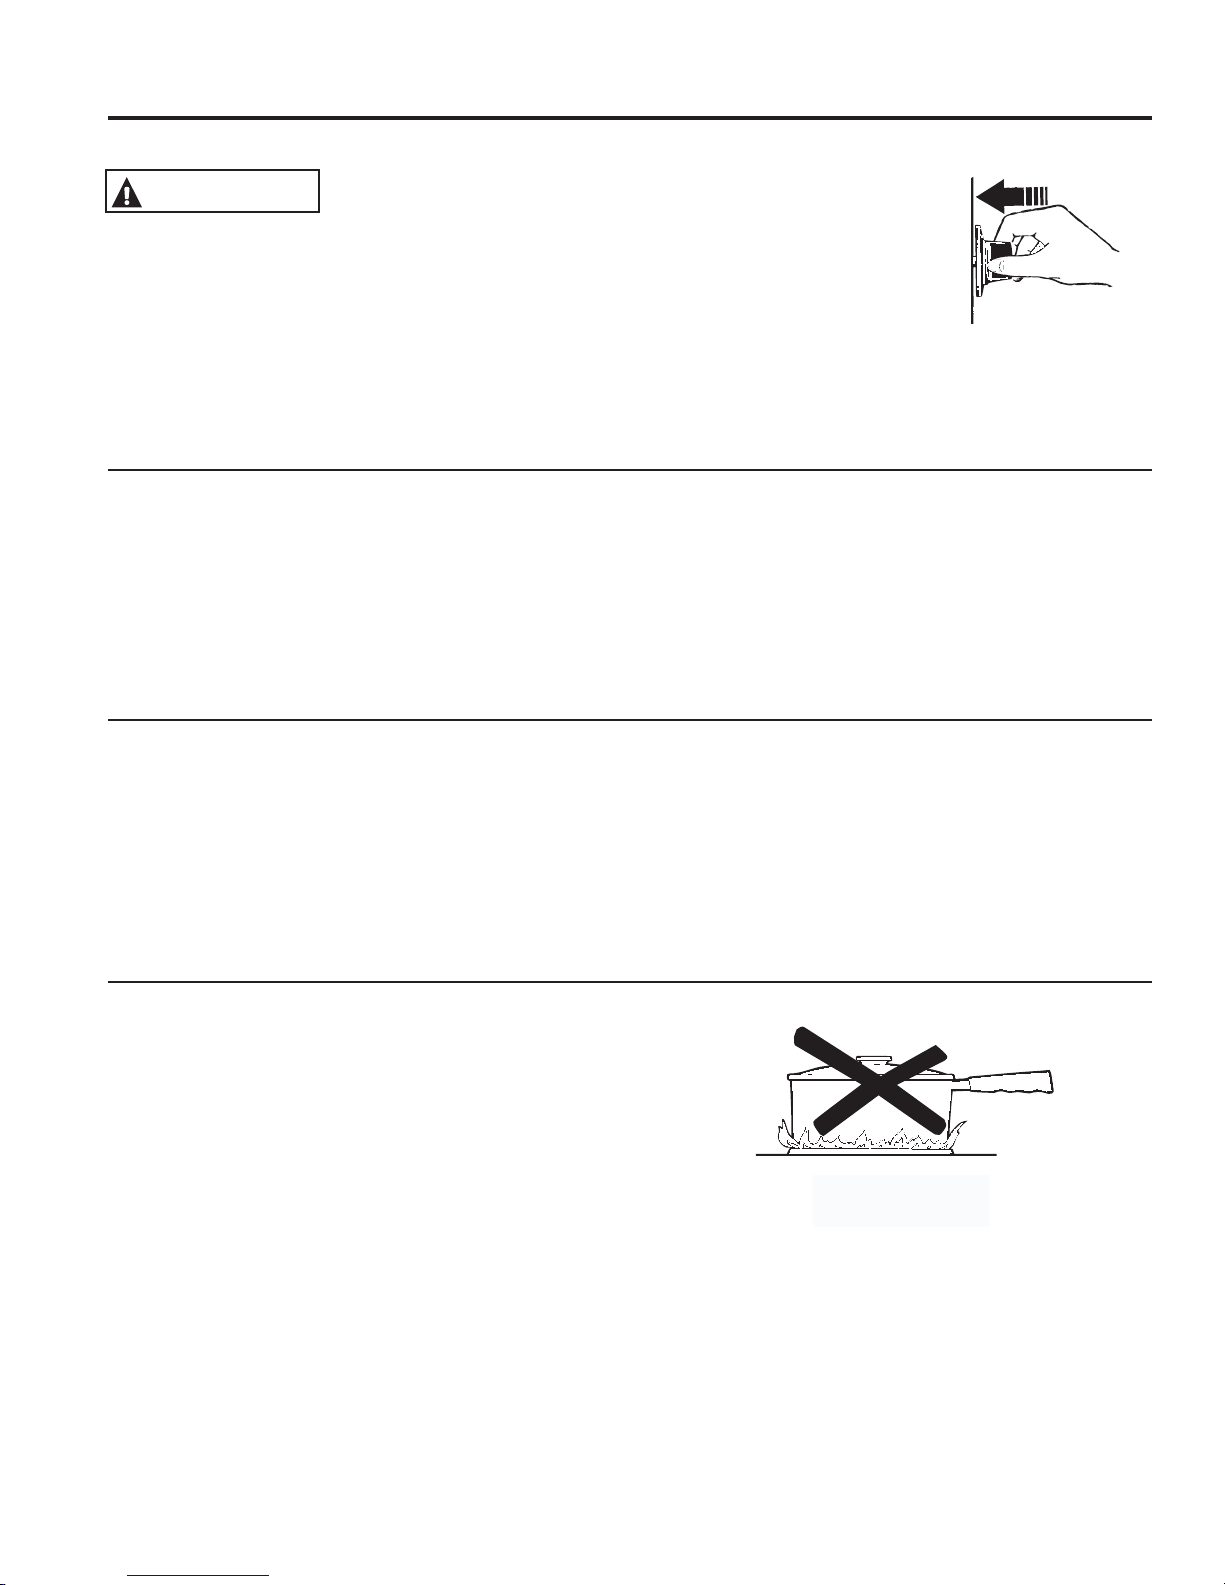
Ŷ 8VHRQO\GU\SRWKROGHUV²PRLVWRUGDPSSRW
holders on hot surfaces may result in burns
from steam. Do not let pot holders touch surface
burners, burner grate, or oven heating element.
Do not use a towel or other bulky cloth in place
of pot holders.
Ŷ 'RQRWWRXFKWKHKHDWLQJHOHPHQWVRUWKH
interior surface of the oven. These surfaces
may be hot enough to burn even though they
are dark in color. During and after use, do
not touch, or let clothing or other flammable
materials contact any interior area of the oven;
allow sufficient time for cooling first. Other
surfaces of the appliance may become hot
enough to cause burns. Potentially hot surfaces
include the burners, grates, oven vent opening,
surfaces near the opening and crevices around
the oven door.
Ŷ 'RQRWKHDWXQRSHQHGIRRGFRQWDLQHUV
Pressure could build up and the container could
burst, causing an injury.
Ŷ &RRNPHDWDQGSRXOWU\WKRURXJKO\²PHDWWR
DWOHDVWDQLQWHUQDOWHPSHUDWXUHRI)DQG
poultry to at least an internal temperature of
)&RRNLQJWRWKHVHWHPSHUDWXUHVXVXDOO\
protects against foodborne illness.
Ŷ 'RQRWXVHDQ\W\SHRIIRLORUOLQHUWRFRYHU
the oven bottom, drip pans or anywhere in the
oven, except as described in this manual. Oven
liners can trap heat or melt, resulting in damage
to the product and risk of shock, smoke or fire.
KEEP FLAMMABLE MATERIALS AWAY FROM THE OVEN
Failure to do so may result in fire or personal injury.
WARNING

49-85217-1 5
SAFETY INFORMATION
SAVE THESE INSTRUCTIONS
Ŷ 'RQRWXVHZDWHURQJUHDVHILUHV1HYHUSLFNXS
a flaming pan. Turn the controls off. Smother a
flaming pan on a surface burner by covering the
pan completely with a well-fitting lid, cookie sheet
or flat tray. If necessary, use a multi-purpose dry
chemical or foam-type fire extinguisher.
Ŷ ,IWKHUHLVDILUHLQWKHRYHQGXULQJEDNLQJWXUQ
the oven off and keep the door closed until the
fire goes out. If necessary, use a multi-purpose
dry chemical or foam type fire extinguisher.
Ŷ ,IWKHUHLVDILUHLQWKHRYHQGXULQJVHOIFOHDQWXUQ
the oven off and wait for the fire to go out. Do
not force the door open. Introduction of fresh air
at self-clean temperatures may lead to a burst
of flame from the oven. Failure to follow this
instruction may result in severe burns.
Ŷ 1HYHUOHDYHWKHVXUIDFHEXUQHUVXQDWWHQGHGDW
medium or high heat settings. Foods, especially
oily foods, may ignite resulting in fire that could
spread to surrounding cabinets.
Ŷ 1HYHUOHDYHRLOXQDWWHQGHGZKLOHIU\LQJ,IDOORZHG
to heat beyond its smoking point, oil may ignite
resulting in fire that may spread to surrounding
FDELQHWV8VHDGHHSIDWWKHUPRPHWHUZKHQHYHU
possible to monitor oil temperature.
Ŷ 7RDYRLGRLOVSLOORYHUDQGILUHXVHDPLQLPXP
amount of oil when shallow pan-frying and avoid
cooking frozen foods with excessive amounts of
ice.
Ŷ 8VHSURSHUSDQVL]HDQGDYRLGSDQVWKDWDUH
unstable or easily tipped. Select cookware that is
PDWFKHGWRWKHVL]HRIWKHEXUQHU%XUQHUIODPHV
should be adjusted so that they do not extend
beyond the bottom of the pan. Excessive flame
may be hazardous.
Ŷ $OZD\VXVHWKH/,7(SRVLWLRQZKHQLJQLWLQJWKH
top burners and make sure the burners have
ignited.
Ŷ :KHQXVLQJJODVVFHUDPLFFRRNZDUHPDNHVXUH
it is suitable for cooktop service; others may
break because of sudden change in temperature.
Ŷ 7RPLQLPL]HWKHSRVVLELOLW\RIEXUQVLJQLWLRQRI
flammable materials and spillage, the handle of a
container should be turned toward the center of
the range without extending over nearby burners.
Ŷ :KHQSUHSDULQJIODPLQJIRRGVXQGHUDKRRGWXUQ
the fan on.
Ŷ 'RQRWXVHDZRNZLWKDURXQGPHWDOVXSSRUW
ring. The ring may trap heat and block air to the
burner resulting in a carbon monoxide hazard.
Ŷ 'RQRWDWWHPSWWROLIWWKHFRRNWRS'RLQJVRPD\
damage the gas tubing to the surface burners
resulting in a gas leak and risk of fire.
Ŷ :KHQGLVDEOLQJ/RFN&RQWURORQVRPHPRGHOV
make sure the surface controls are set to the
OFF position. This will prevent unintended gas
flow from the burners.
Ŷ 'RQRWXVHDOXPLQXPIRLOWRFRYHUWKHJUDWHVRU
line any part of the cooktop. Doing so may result
in carbon monoxide poisoning, overheating of the
cooktop surfaces, or a potential fire hazard.
IN THE EVENT OF A FIRE, TAKE THE FOLLOWING
STEPS TO PREVENT INJURY AND FIRE SPREADING
COOKTOP SAFETY INSTRUCTIONS
WARNING
WARNING

649-85217-1
IMPORTANT SAFETY INFORMATION.
READ ALL INSTRUCTIONS BEFORE USING.
SAFETY INFORMATION
SAVE THESE INSTRUCTIONS
OVEN SAFETY INSTRUCTIONS
SELF-CLEANING OVEN SAFETY INSTRUCTIONS
WARNING
WARNING
WARNING NEVER cover any slots,
holes, or passages in the oven bottom or
cover an entire rack with materials such as
aluminum foil or oven liners. Doing so blocks
air flow through the oven and may cause
carbon monoxide poisoning. Never place foil
or oven liners on the oven bottom. They can
trap heat causing risk of smoke or fire.
Ŷ 8VHWKLVDSSOLDQFHIRULWVLQWHQGHGSXUSRVHDV
described in this owner’s manual.
Ŷ 6WDQGDZD\IURPWKHUDQJHZKHQRSHQLQJWKH
RYHQGRRU+RWDLURUVWHDPZKLFKHVFDSHVFDQ
FDXVHEXUQVWRKDQGVIDFHDQGRUH\HV
Ŷ .HHSWKHRYHQIUHHIURPJUHDVHEXLOGXS*UHDVH
in the oven may ignite.
Ŷ 3ODFHRYHQUDFNVLQGHVLUHGORFDWLRQZKLOHRYHQ
is cool. If rack must be moved while oven is hot,
be careful to avoid touching hot surfaces.
Ŷ 3XOOWKHRYHQUDFNWRWKHVWRSORFNSRVLWLRQZKHQ
loading and unloading food from the oven. This
helps prevent burns from touching hot surfaces
of the door and oven walls.
Ŷ 'RQRWOHDYHLWHPVVXFKDVSDSHUFRRNLQJ
utensils or food in the oven when not in use.
Items stored in an oven can ignite.
Ŷ 'RQRWOHDYHLWHPVRQWKHFRRNWRSQHDUWKHRYHQ
vent which is in the center of the backguard.
Items may overheat resulting in a risk of fire or
burns.
Ŷ :KHQXVLQJFRRNLQJRUURDVWLQJEDJVLQWKH
oven, follow the manufacturer’s directions.
Ŷ 1HYHUEURLOZLWKGRRURSHQ2SHQGRRUEURLOLQJ
is not permitted due to overheating of control
knobs.
The self-cleaning feature operates the oven at
temperatures high enough to burn away food soils
in the oven. Follow these instructions for safe
operation.
Ŷ 'RQRWWRXFKRYHQVXUIDFHVGXULQJVHOIFOHDQ
RSHUDWLRQ.HHSFKLOGUHQDZD\IURPWKHRYHQ
during self-cleaning. Failure to follow these
instructions may cause burns.
Ŷ %HIRUHRSHUDWLQJWKHVHOIFOHDQF\FOHUHPRYH
pans, shiny metal oven racks and other utensils
from the oven. Only porcelain-coated oven racks
may be left in the oven. Do not use self-clean to
clean other parts, such as grates.
Ŷ %HIRUHRSHUDWLQJWKHVHOIFOHDQF\FOHZLSH
grease and food soils from the oven. Excessive
amount of grease may ignite leading to smoke
damage to your home.
Ŷ ,IWKHVHOIFOHDQLQJPRGHPDOIXQFWLRQVWXUQWKH
RYHQRIIDQGGLVFRQQHFWWKHSRZHUVXSSO\+DYH
it serviced by a qualified technician.
Ŷ 'RQRWXVHRYHQFOHDQHUV1RFRPPHUFLDORYHQ
cleaner or oven liner protective coating of any
kind should be used in or around any part of the
oven.

49-85217-1 7
SAFETY INFORMATION
SAVE THESE INSTRUCTIONS
BAKING DRAWER SAFETY INSTRUCTIONS
WARNING
Ŷ 'RQRWOHDYHSDSHUSURGXFWVSODVWLFVFDQQHG
food or combustible materials in the drawer. They
may ignite.
Ŷ 'RQRWWRXFKWKHKHDWLQJHOHPHQWRUWKHLQWHULRU
surface of the drawer. These surfaces may be
hot enough to cause burns.
Ŷ 8VHFDUHZKHQRSHQLQJWKHGUDZHU2SHQWKH
drawer a crack and let hot air or steam escape
EHIRUHUHPRYLQJRUUHSODFLQJIRRG+RWDLURU
steam that escapes can cause burns to hands,
IDFHDQGRUH\HV

849-85217-1
Thank You! ... for your purchase of a GE Brand appliance.
WARRANTY
GE Gas Range Warranty
GEAppliances.com
All warranty service is provided by our Factory Service Centers, or an authorized Customer Care®technician.
7RVFKHGXOHVHUYLFHRQOLQHYLVLWXVDWZZZJHDSSOLDQFHVFRPVHUYLFHBDQGBVXSSRUWRUFDOO*(&$5(6
3OHDVHKDYHVHULDOQXPEHUDQGPRGHOQXPEHUDYDLODEOHZKHQFDOOLQJIRUVHUYLFH
Servicing your appliance may require the use of the onboard data port for diagnostics. This gives a GE factory
service technician the ability to quickly diagnose any issues with your appliance and helps GE improve its products
by providing GE with information on your appliance. If you do not want your appliance data to be sent to GE, please
advise your technician not to submit the data to GE at the time of service.
For the period of one year from the date of the original purchase. GE will provide any part of the range which fails due
to a defect in materials or workmanship. During this limited one-year warranty, GE will also provide, free of charge, all
labor and in-home service to replace the defective part.
What GE will not cover:
ŶService trips to your home to teach you how to use
the product.
ŶImproper installation, delivery or maintenance.
ŶFailure of the product if it is abused, misused,
modified or used for other than the intended purpose
or used commercially.
Ŷ 5HSODFHPHQWRIKRXVHIXVHVRUUHVHWWLQJRIFLUFXLW
breakers.
ŶDamage to the product caused by accident, fire,
floods or acts of God.
ŶIncidental or consequential damage caused by
possible defects with this appliance.
ŶDamage caused after delivery.
ŶProduct not accessible to provide required service.
Ŷ 6HUYLFHWRUHSDLURUUHSODFHOLJKWEXOEVH[FHSWIRU/('
lamps.
EXCLUSION OF IMPLIED WARRANTIES
<RXUVROHDQGH[FOXVLYHUHPHG\LVSURGXFWUHSDLUDVSURYLGHGLQWKLV/LPLWHG:DUUDQW\$Q\LPSOLHGZDUUDQWLHV
including the implied warranties of merchantability or fitness for a particular purpose, are limited to one year or the
shortest period allowed by law.
This warranty is extended to the original purchaser and any succeeding owner for products purchased for home use
ZLWKLQWKH86$,IWKHSURGXFWLVORFDWHGLQDQDUHDZKHUHVHUYLFHE\D*($XWKRUL]HG6HUYLFHULVQRWDYDLODEOH\RX
may be responsible for a trip charge or you may be required to bring the product to an Authorized GE Service location
for service. In Alaska, the warranty excludes the cost of shipping or service calls to your home.
Some states do not allow the exclusion or limitation of incidental or consequential damages. This warranty gives you
specific legal rights, and you may also have other rights which vary from state to state. To know what your legal rights
are, consult your local or state consumer affairs office or your state’sAttorney General.
Warrantor: General Electric Company. Louisville, KY 40225
Extended Warranties: Purchase a GE extended warranty and learn about special discounts that are available while
\RXUZDUUDQW\LVVWLOOLQHIIHFW<RXFDQSXUFKDVHLWRQOLQHDQ\WLPH
ZZZJHDSSOLDQFHVFRPVHUYLFHBDQGBVXSSRUWVKRSIRUH[WHQGHGVHUYLFHSODQVKWP
RUFDOOGXULQJQRUPDOEXVLQHVVKRXUV*(&RQVXPHU+RPH6HUYLFHVZLOOVWLOOEHWKHUHDIWHU\RXU
warranty expires.
Register Your Appliance: 5HJLVWHU\RXUQHZDSSOLDQFHRQOLQHDW\RXUFRQYHQLHQFH
ZZZJHDSSOLDQFHVFRPVHUYLFHBDQGBVXSSRUWUHJLVWHU
Timely product registration will allow for enhanced communication and prompt service under the terms of your warranty,
VKRXOGWKHQHHGDULVH<RXPD\DOVRPDLOLQWKHSUHSULQWHGUHJLVWUDWLRQFDUGLQFOXGHGLQWKHSDFNLQJPDWHULDO
Staple your receipt here. Proof of the original purchase
date is needed to obtain service under the warranty.

49-85217-1 9
Schedule Service: Expert GE repair service is only one
step away from your door. Get on-line and schedule
\RXUVHUYLFHDWZZZJHDSSOLDQFHVFRPVHUYLFHBDQGB
VXSSRUW2UFDOO*(&$5(6GXULQJ
normal business hours.
Parts and Accessories: Individuals qualified to service
their own appliances can have parts or accessories sent
GLUHFWO\WRWKHLUKRPHV9,6$0DVWHU&DUGDQG'LVFRYHU
FDUGVDUHDFFHSWHG2UGHURQOLQHWRGD\KRXUV
HYHU\GD\RUE\SKRQHDWGXULQJQRUPDO
business hours.
Instructions contained in this manual cover procedures
to be performed by any user. Other servicing generally
should be referred to qualified service personnel.
Caution must be exercised, since improper servicing
may cause unsafe operation.
Real Life Design Studio: *(VXSSRUWVWKH8QLYHUVDO
Design concept of products, services and environments
that can be used by people of all ages, sizes and
capabilities. We recognize the need to design for a wide
range of physical and mental abilities and impairments.
)RUGHWDLOVRI*(¶V8QLYHUVDO'HVLJQDSSOLFDWLRQV
including kitchen design ideas for people with disabilities,
check out our Website today. For the hearing impaired,
SOHDVHFDOO7''*($&
Contact Us: If you are not satisfied with the service you
receive from GE, contact us on our Website with all the
details including your phone number, or write to:
General Manager, Customer Relations
GE Appliances, Appliance Park Louisville, KY 40225
ASSISTANCE / ACCESSORIES
7U\WKH*($SSOLDQFHV:HEVLWHwww.geappliances.com/service_and_support/KRXUVDGD\DQ\GD\RIWKH
\HDU)RUJUHDWHUFRQYHQLHQFHDQGIDVWHUVHUYLFH\RXFDQQRZGRZQORDG2ZQHU¶V0DQXDOVRUGHUSDUWVRUHYHQ
schedule service on-line.
Have a question or need assistance with your appliance?
Accessories
Looking For Something More?
GE offers a variety of accessories to improve your cooking and maintenance experiences!
To place an order visit us online at:
www.GEApplianceParts.com86RUwww.GEAppliances.ca&DQDGD
or call 800.626.200286800.661.1616&DQDGD
The following products and more are available:
How to Remove Protective Shipping Film and Packaging Tape
Carefully grasp a corner of the protective shipping film
with your fingers and slowly peel it from the appliance
surface. Do not use any sharp items to remove the film.
5HPRYHDOORIWKHILOPEHIRUHXVLQJWKHDSSOLDQFHIRUWKH
first time.
To assure no damage is done to the finish of the
product, the safest way to remove the adhesive from
packaging tape on new appliances is an application of
a household liquid dishwashing detergent. Apply with a
soft cloth and allow to soak.
NOTE: The adhesive must be removed from all parts. It
cannot be removed if it is baked on.
Accessories
6PDOO%URLOHU3DQô´[ó´[ò³ :%;86'*&DQDGD
/DUJH%URLOHU3DQô´[ó´[ò³ :%;86'*&DQDGD
;/%URLOHU3DQ´[ó´[³ :%;861RWDYDLODEOHLQ&DQDGD
Parts
Oven racks Part numbers vary by model
Oven burners Part numbers vary by model
Light bulbs Part numbers vary by model
Cleaning Supplies
&LWUX6KLQH6WDLQOHVV6WHHO:LSHV :;;
&HUDPD%U\WH6WDLQOHVV6WHHO$SSOLDQFH&OHDQHU 30;

10 49-85217-1
These flames are too
large for the pot
Surface Burners
USING THE COOKTOP: Surface Burners
After Lighting a Burner
Ŷ 'RQRWRSHUDWHWKHEXUQHUIRUDQH[WHQGHGSHULRGRI
time without cookware on the grate. The finish on the
grate may discolor or chip without cookware to absorb
the heat.
Ŷ 'RQRWDWWHPSWWRGLVDVVHPEOHDQ\EXUQHUZKLOH
another burner is on. An electric shock may result,
which could cause you to knock over hot cookware.
Ŷ %HVXUHWKHEXUQHUVDQGJUDWHVDUHFRROEHIRUH\RX
place your hand, a pot holder or cleaning materials on
them.
How to Light a Surface Burner
WARNING Burners should be operated
only when covered by cookware. Burner flames
not covered by cookware present a risk of fire or
clothing ignition. Never let flames extend beyond the
sides of the cookware. Failure to comply may result
in serious injury.
0DNHVXUHDOOEXUQHUVDUHLQWKHLUFRUUHFWORFDWLRQVDQG
fully assembled before attempting to operate any burner.
Select a burner and find its control knob. Push the knob
in and turn it to the LITE position.
<RXZLOOKHDUDFOLFNLQJQRLVH²
the sound of the electric spark
igniting the burner. When one
burner is turned to LITE, all
burners will spark. Sparking will
continue as long as the knob
remains at LITE. Once gas is
ignited, turn the knob to adjust
the flame size.
Use of the Surface Burners
<RXUJDVUDQJHWRSKDVVHDOHGJDVEXUQHUV7KH\RIIHU
convenience, cleanability and flexibility for a wide range
of cooking applications.
The smallest burner is the simmer burner. On some
models, the center burner of the triple flame burner
provides an additional simmer burner. A simmer burner
turned down to LO provides precise cooking performance
for foods such as delicate sauces that require low heat
for a long cooking time.
The extra-large burner
is designed to quickly bring large
amounts of liquid to a boil. Some models have a POWER
BOIL™ setting especially designed for use with cookware
ZLWKDGLDPHWHURILQFKHVRUODUJHU
How to Select Flame Size
Watch the flame, not the knob, as you adjust heat. When
rapid heating is desired, the flame size on a burner
should match the size of the cookware you are using.
Flames larger than the bottom of the cookware will not
heat faster and may be hazardous.
Push the control knob in and
turn it to the LITE position.

49-85217-1 11
Do not use stove top grills
Surface Burners (Cont.)
USING THE COOKTOP: Surface Burners
Top-of-Range Cookware
Aluminum:0HGLXPZHLJKWFRRNZDUHLVUHFRPPHQGHG
EHFDXVHLWKHDWVTXLFNO\DQGHYHQO\0RVWIRRGVEURZQ
HYHQO\LQDQDOXPLQXPVNLOOHW8VHVDXFHSDQVZLWKWLJKW
fitting lids when cooking with minimum amounts of water.
Stainless Steel: This metal alone has poor heating
properties and is usually combined with copper,
aluminum or other metals for improved heat distribution.
Combination metal skillets usually work satisfactorily if
they are used with medium heat as the manufacturer
recommends.
Cast-Iron: If heated slowly, most skillets will give
satisfactory results.
Enamelware:8QGHUVRPHFRQGLWLRQVWKHHQDPHORIVRPH
cookware may melt. Follow cookware manufacturer’s
recommendations for cooking methods.
Glass:7KHUHDUHWZRW\SHVRIJODVVFRRNZDUH²WKRVH
for oven use only and those for top-of-range cooking
VDXFHSDQVFRIIHHDQGWHDSRWV*ODVVFRQGXFWVKHDW
very slowly.
Heatproof Glass Ceramic: Can be used for either surface
or oven cooking. It conducts heat very slowly and cools very
slowly. Check cookware manufacturer’s directions to be
sure it can be used on gas ranges.
Stove Top Grills
Do not use an after-market stove top grill on your gas
surface burners. A stove top grill will cause incomplete
combustion resulting in carbon monoxide levels above
allowable standards. This could be hazardous to your
health.
Using a Wok
8VHRQO\DIODWERWWRPHGZRNZLWKDGLDPHWHURILQFKHV
RUOHVV0DNHVXUHWKHZRNERWWRPVLWVIODWRQWKHJUDWH
Do not use a wok support ring. Placing the ring over the
burner or grate may cause the burner to work improperly,
resulting in carbon monoxide levels above allowable
standards. This could be hazardous to your health.
In Case of a Power Failure
In case of a power failure, you can light the surface
EXUQHUVRQ\RXUUDQJHZLWKDPDWFK+ROGDOLWPDWFK
to the burner ports, then slowly turn the control knob to
the LITESRVLWLRQ8VHH[WUHPHFDXWLRQZKHQOLJKWLQJ
burners this way.
Surface burners in use when an electrical power failure
occurs will continue to operate normally.
Use a flat-bottomed wok.

12 49-85217-1
Type of Food Cook Setting
Warming Tortillas 0HG/R
Pancakes 0HG/R
+DPEXUJHUV 0HG
Fried Eggs
0HG/R
%UHDNIDVW6DXVDJH/LQNV 0HG
+RW6DQGZLFKHV
VXFKDV*ULOOHG&KHHVH
0HG/R
Griddle(on some models)
USING THE COOKTOP: Griddle
Using the Griddle (on some models)
WARNING Fire Hazard
ŶUse care when cooking greasy foods. Spilled grease may result in fire.
ŶNever place any items on the griddle when it is not in use. Heat from surrounding burners can heat the
griddle and may result in fire.
Ŷ Place and remove the griddle only when griddle is cool and all surface burners are turned OFF.
<RXUJULGGOHSURYLGHVDQH[WUDODUJHFRRNLQJVXUIDFHIRUPHDWVSDQFDNHVDQGRWKHUIRRGVXVXDOO\SUHSDUHGLQDVNLOOHW
%HIRUHILUVWXVHULQVHZLWKKRWZDWHUDQGGU\WKRURXJKO\3UHSDUHWKHVXUIDFHZLWKFRRNLQJVSUD\RUYHJHWDEOHRLO
NOTE: Do not place the griddle in a microwave oven.
NOTE: Do not clean the griddle in the self-cleaning oven. Doing so will remove the seasoned finish. For instructions
on how to clean the griddle, see Care and Cleaning section.
Placement of the Nonstick Griddle on the Cooktop
These griddles can only be used over the oval burner in the center of the rangetop. To position the griddle, remove
the center grate and replace it with the griddle. Do not turn on the oval burner until you are certain the griddle has
been positioned correctly.
Preheating the griddle3UHKHDWIRUPLQXWHVEHIRUHSODFLQJIRRGRQJULGGOHDQGWKHQWXUQKHDWGRZQWRFRRNVHWWLQJ
Do not overheat the griddle. Leaving the griddle
EXUQHURQDW+,IRUDQH[WHQGHGDPRXQWRIWLPH
without food can damage the nonstick coating.
Avoid using metal utensils with sharp points or rough
sharp edges which might damage the griddle surface.
Nonstick Griddle
Replace the center grate with the Nonstick Griddle

49-85217-1 13
Oven Controls
USING THE OVEN: Oven Controls
1. Convection Cooking Modes: Convection cooking
modes use increased air circulation to improve
performance. The type of benefit depends on the
PRGH<RXURYHQKDVWKHIROORZLQJFRQYHFWLRQ
FRRNLQJPRGHV%DNHDQG5RDVW6HHWKH&RRNLQJ
0RGHVVHFWLRQIRUPRUHLQIRUPDWLRQ
2. Traditional Cooking Modes: <RXURYHQKDVWKH
IROORZLQJWUDGLWLRQDOFRRNLQJPRGHV%DNH%URLO+L
DQG%URLO/R6HHWKH&RRNLQJ0RGHVVHFWLRQIRU
more information.
3. Clean: <RXURYHQKDVD6HOI&OHDQPRGH6HHWKH
Cleaning the Oven section for important information
about using this mode.
4. Start: 0XVWEHSUHVVHGWRVWDUWDQ\FRRNLQJ
cleaning, or timed function.
5. Clear/Off: Cancels ALL oven operations except the
clock and timer.
6. Cooking Time: Counts down cooking time and
turns off the oven when the cooking time is
complete. Press the Cook Time pad, use the
number pads to program a cooking time in hours
and minutes, then press Start. This can only be
XVHGZLWK7UDGLWLRQDO%DNH&RQYHFWLRQ%DNHDQG
&RQYHFWLRQ5RDVW
7. Clock: Sets the oven clock time. Press Clock
SDGRQVRPHPRGHOV8VHWKHQXPEHUSDGVWR
program the clock. Press Start to save the time.
8. Kitchen Timer: Works as a countdown timer. Press
the Kitchen Timer pad and the number pads to
program the time in hours and minutes. Press the
Start pad. The oven will continue to operate when
the timer countdown is complete. To turn the timer
off press the Kitchen Timer pad.
9. Delay Start: 'HOD\VZKHQWKHRYHQZLOOWXUQRQ8VH
this to set a time when you want the oven to start.
Press the Delay Start pad and use the number
pads to program the time of day for the oven to
turn on. Press the desired cooking mode and
temperature then press Start. A cook time may also
be programmed if desired. This can only be used
ZLWK7UDGLWLRQDO%DNH&RQYHFWLRQ%DNH&RQYHFWLRQ
5RDVWDQG6HOI&OHDQ
NOTE: When using the delay time feature, foods
WKDWVSRLOHDVLO\²VXFKDVPLONHJJVILVKVWXIILQJV
SRXOWU\DQGSRUN²VKRXOGQRWEHDOORZHGWRVLWIRU
PRUHWKDQKRXUEHIRUHRUDIWHUFRRNLQJ5RRP
temperature promotes the growth of harmful bacteria.
%HVXUHWKDWWKHRYHQOLJKWLVRIIEHFDXVHKHDWIURP
the bulb will speed harmful bacteria growth.
10. Probe: 0RQLWRUVLQWHUQDOIRRGWHPSHUDWXUHDQGWXUQV
the oven off when the food reaches the programmed
temperature. Insert the probe, program the cooking
mode and program the probe temperature. See the
&RRNLQJ0RGHVVHFWLRQIRUPRUHLQIRUPDWLRQ7KH
SUREHFDQRQO\EHXVHGZLWK7UDGLWLRQDO%DNHDQG
&RQYHFWLRQ5RDVW
11. Oven Light(s): 7XUQVWKHRYHQOLJKWVRQRURII
12. Gas/Control Lockout: Locks out the control so that
pressing the pads does not activate the controls.
Press and hold the Gas/Control Lockout pad for
three seconds to lock or unlock the control. Clear/Off
is always active, even when the control is locked.
1 96
23 58 7
12 1110
4

14 49-85217-1
Vent appearance and location vary.
1HYHUEORFNWKHYHQWVDLURSHQLQJVRIWKHUDQJH7KH\
provide the air inlet and outlet that are necessary for the
range to keep cool and operate properly with correct
combustion.
Air openings are located at the rear of the cooktop, at
the top and bottom of the oven door, and at the bottom
of the range.
There are several different special features on your oven. To change the settings of these special features, press the Bake
and BroilSDGVDWWKHVDPHWLPHDQGKROGIRUWKUHHVHFRQGV6)ZLOODSSHDULQWKHGLVSOD\6HOHFWWKHIHDWXUH\RXZDQWWR
change. When the change has been made, press the Start key to save the change and return to the time of day.
Adjust the Oven Temperature
This feature allows the oven baking temperature to be
DGMXVWHGXSWR)KRWWHURUGRZQWR)FRROHU8VH
this feature if you believe your oven temperature is too
hot or too cold and wish to change it.
Press the Bake pad to enter the temperature adjustment
PRGH$QXPEHUEHWZHHQDQGZLOOGLVSOD\
8VHWKHQXPEHUSDGVWRVHWWKHGHVLUHGWHPSHUDWXUH
adjustment and use the Bake pad to change between
negative and positive.
Press the Start pad to save the temperature adjustment.
End of Timer Signals
This is the tone that signals the end of a timer. The tone
FDQEHFRQWLQXRXV&RQE((SRURQHUHSHDWLQJEHHS
E((S$FRQWLQXRXVVHWWLQJZLOOFRQWLQXHWRVRXQGDWRQH
until a button on the control is pressed. Press the Kitchen
Timer pad to view the current setting and then to change
the setting.
Fahrenheit or Celsius Temperature
Display
7KHRYHQFRQWUROLVVHWWRXVH)DKUHQKHLWWHPSHUDWXUHV)
EXW\RXFDQFKDQJHLWWRXVH&HOVLXVWHPSHUDWXUHV&
Press the Broil and Cook Time pads at the same time to
view the current setting, press again to change the setting.
Clock Display
This feature specifies how the time of day will be
GLVSOD\HGRULIQRWLPHRIGD\ZLOOEHGLVSOD\HG<RXFDQ
VHOHFWDVWDQGDUGKRXUFORFNKUKRXUPLOLWDU\
WLPHGLVSOD\KURUQRFORFNGLVSOD\HG2))3UHVV
the Clock pad to view the current setting, press again to
change the setting.
Sound Volume
This feature allows the oven tone volume to be adjusted
EHWZHHQKLJKE((3PHGLXPE((3DQGORZ
E((33UHVVWKHCook Time pad to view the current
setting or to change the setting. The control will sound
the oven tone at the new volume level each time the
sound level is changed.
Cook and Hold
7KLVIHDWXUHNHHSVFRRNHGIRRGVZDUPIRUXSWR
hours after the cooking function is finished. Press the
Cooking TimeSDG7KHGLVSOD\ZLOOVKRZ+G3UHVV
the Cooking Time pad again to activate the feature. The
GLVSOD\ZLOOVKRZ+G
Autorecipe Conversion
7KLVIHDWXUH212))DXWRPDWLFDOO\UHGXFHVWKH
SURJUDPPHGUHFLSHWHPSHUDWXUHLQ&RQYHFWLRQ%DNH
PRGHE\)7KHGHIDXOWVHWWLQJIRUWKLVIHDWXUHLVRII
Note: This option does not convert baking time, only
temperatures. This option does not adjust temperatures for
&RQYHFWLRQ5RDVWPRGH3UHVVHLWKHUBake or Roast to
view the current setting. Press again to change the setting.
Using the Sabbath Feature
(Designed for use on the
Jewish Sabbath and Holidays)
The Sabbath feature can be used
IRUEDNLQJURDVWLQJLQWKHXSSHUDQG
ORZHURYHQRUEDNLQJGUDZHURQ
VRPHPRGHOV,WFDQQRWEHXVHGIRUFRQYHFWLRQEURLOLQJ
self-cleaning or Delay Start cooking.
NOTE:7KHRYHQOLJKWFRPHVRQDXWRPDWLFDOO\RQVRPH
PRGHOVZKHQWKHGRRULVRSHQHGDQGJRHVRIIZKHQWKH
door is closed. The bulb may be removed. See the Oven
/LJKW5HSODFHPHQWVHFWLRQ2QPRGHOVZLWKDOLJKWVZLWFK
on the control panel, the oven light may be turned on
and left on.
How to Set for Regular Baking/Roasting:
0DNHVXUHWKHFORFNVKRZVWKHFRUUHFWWLPHRIGD\DQG
the oven is off.
3UHVVDQGKROGERWKWKHBake and Broil Hi/Lo pads,
at the same timeXQWLOWKHGLVSOD\VKRZV6)
7DSWKHDelay StartSDGXQWLO6$EE$W+DSSHDUVLQ
the display.
7RXFKWKHStartSDGDQGwill appear in the
display.
7RXFKWKHBake pad. No signal will be given.
Oven Air Vents
Special Features
USING THE OVEN: Oven Air Vents / Special Features
K
CERTIFIED
SABBATH
MODE

49-85217-1 15
Special Features (Cont.)
USING THE OVEN: Special Features
8VLQJWKHQXPEHUSDGVHQWHUWKHGHVLUHG
WHPSHUDWXUHEHWZHHQDQG1RVLJQDORU
temperature will be given.
7RXFKWKHStart pad.
$IWHUDUDQGRPGHOD\SHULRGRIDSSUR[LPDWHO\
VHFRQGVWRPLQXWHZLOODSSHDULQWKHGLVSOD\
LQGLFDWLQJWKDWWKHRYHQLVEDNLQJURDVWLQJ,I
GRHVQ¶WDSSHDULQWKHGLVSOD\VWDUWDJDLQDW6WHS
To adjust the oven temperature, touch the Bake pad,
enter the new temperature using the number pads and
touch the Start pad.
NOTE: The Clear/Off and Cooking Time pads are
active during the Sabbath feature.
How to Set for Timed Baking/Roasting–Immediate
Start and Automatic Stop:
0DNHVXUHWKHFORFNVKRZVWKHFRUUHFWWLPHRIGD\DQG
the oven is off.
3UHVVDQGKROGERWKWKHBake and Broil Hi/Lo pads,
at the same timeXQWLOWKHGLVSOD\VKRZV6)
7DSWKHDelay StartSDGXQWLO6$EE$W+DSSHDUVLQ
the display.
7RXFKWKHStartSDGDQGZLOODSSHDULQWKH
display.
7RXFKWKHCooking Time pad.
7RXFKWKHQXPEHUSDGVWRVHWWKHGHVLUHGOHQJWKRI
FRRNLQJWLPHEHWZHHQPLQXWHDQGKRXUVDQG
minutes. The cooking time that you entered will be
displayed.
7RXFKWKHStart pad.
7RXFKWKHBake pad. No signal will be given.
8VLQJWKHQXPEHUSDGVHQWHUWKHGHVLUHG
temperature. No signal or temperature will be given.
7RXFKWKHStart pad.
$IWHUDUDQGRPGHOD\SHULRGRIDSSUR[LPDWHO\
VHFRQGVWRPLQXWHZLOODSSHDULQWKHGLVSOD\
LQGLFDWLQJWKDWWKHRYHQLVEDNLQJURDVWLQJ,I
GRHVQ¶WDSSHDULQWKHGLVSOD\VWDUWDJDLQDW6WHS
To adjust the oven temperature, touch the Bake pad,
enter the new temperature using the number pads and
touch the Start pad.
When cooking is finished, the display will change from
WRDQGZLOODSSHDULQGLFDWLQJWKDWWKH
RYHQKDVWXUQHG2))EXWLVVWLOOVHWLQ6DEEDWK5HPRYH
the cooked food.
How to Exit the Sabbath Feature:
7RXFKWKHClear/Off pad.
,IWKHRYHQLVFRRNLQJZDLWIRUDUDQGRPGHOD\SHULRG
RIDSSUR[LPDWHO\VHFRQGVWRPLQXWHXQWLORQO\
LVLQWKHGLVSOD\
3UHVVDQGKROGERWKWKHBake and Broil Hi/Lo pads,
DWWKHVDPHWLPHXQWLOWKHGLVSOD\VKRZV6)
7DSWKHDelay StartSDGXQWLOVKGQRUQRVKGQ
DSSHDUVLQWKHGLVSOD\VKGQLQGLFDWHVWKDWWKH
RYHQZLOODXWRPDWLFDOO\WXUQRIIDIWHUKRXUVQR
VKGQLQGLFDWHVWKDWWKHRYHQZLOOQRWDXWRPDWLFDOO\
turn off.
7RXFKWKHStart pad.
NOTE: If a power outage occurred while the oven was in
Sabbath, the oven will automatically turn off and stay off
even when the power returns. The oven control must be
reset.
+
When the display shows ()the
oven is set in Sabbath. When the
display shows ()the oven is
baking/roasting.
+
When the display shows ()the
oven is set in Sabbath. When the
display shows ()the oven is
baking/roasting.
+

16 49-85217-1
Oven Racks
<RXURYHQKDVVL[UDFNSRVLWLRQV5HFRPPHQGHGUDFN
positions for various types of foods are provided in the
Cooking Guide. Adjusting rack position is one way to
impact cooking results. For example, if you would prefer
darker tops on cakes, muffins, or cookies, try moving
food one rack position higher. If you find foods are too
brown on top try moving them down next time.
When baking with multiple pans and on multiple racks,
ensure there is sufficient space between pans to allow
air to flow.
Flat Racks
When placing and removing cookware, pull the rack out
WRWKHEXPSVWRSSRVLWLRQRQWKHUDFNVXSSRUW
To remove a rack, pull it toward you, tilt the front end up
and pull it out.
7RUHSODFHSODFHWKHFXUYHGHQGRIWKHUDFNVWRSORFNV
onto the oven supports, tilt up the front of the rack and
push the rack in.
5DFNVPD\EHFRPHGLIILFXOWWRVOLGHHVSHFLDOO\DIWHU
a self-clean. Put some vegetable oil on a soft cloth or
paper towel and rub onto the left and right edges.
USING THE OVEN: Oven Racks

49-85217-1 17
<RXUQHZRYHQKDVDYDULHW\RIFRRNLQJPRGHVWRKHOS\RXJHWWKHEHVWUHVXOWV7KHVHPRGHVDUHGHVFULEHGEHORZ
5HIHUWRWKH&RRNLQJ*XLGHVHFWLRQIRUUHFRPPHQGDWLRQVIRUVSHFLILFIRRGV5HPHPEHU\RXUQHZRYHQPD\SHUIRUP
differently than the oven it is replacing.
Bake
The bake mode is for baking and roasting. This mode
uses heat primarily from the lower element but also from
the upper element to cook food. When preparing baked
goods such as cakes, cookies, and pastries always
preheat the oven first. Follow recipe recommendations
for food placement. If no guidelines are provided center
IRRGLQWKHRYHQ7RXVHWKLVPRGHSUHVVWKH%DNHSDG
enter a temperature, and then press Start.
Broiling Modes
$OZD\VEURLOZLWKWKHGRRUFORVHG0RQLWRUIRRGFORVHO\
ZKLOHEURLOLQJ8VHFDXWLRQZKHQEURLOLQJRQXSSHUUDFN
positions as placing food closer to the broil burner
increases smoking, spattering, and the possibility
of fats igniting. Broiling on rack position 5 is not
recommended.
Try broiling foods that you would normally grill. Adjust
rack positions to adjust the intensity of the heat to the
food. Place foods closer to the broil burner when a
seared surface and rare interior is desired. Thicker foods
and foods that need to be cooked through should be
broiled on a rack position farther from the burner or by
XVLQJ%URLO/R
Broil Hi
7KH%URLO+LPRGHXVHVLQWHQVHKHDWIURPWKHXSSHU
HOHPHQWWRVHDUIRRGV8VH%URLO+LIRUWKLQQHUFXWVRI
PHDWDQGRUIRRGV\RXSUHIHUOHVVGRQHRQWKHLQWHULRU
To use this mode press the Broil pad once and then
press Start. It is not necessary to preheat when using
this mode.
Broil Lo
7KH%URLO/RPRGHXVHVOHVVLQWHQVHKHDWIURPWKHXSSHU
element to cook food thoroughly while also browning
WKHVXUIDFH8VH%URLO/RIRUWKLFNHUFXWVRIPHDWDQG
or foods that you would like cooked all the way through.
To use this mode press the Broil pad twice and then
press Start. It is not necessary to preheat when using
this mode.
Convection Bake Multi Rack
7KH&RQYHFWLRQ%DNH0XOWL5DFNPRGHLVLQWHQGHGIRU
baking on multiple racks at the same time. This mode
may use heat from the upper and lower elements, along
with air movement from the convection fan to enhance
FRRNLQJHYHQQHVV<RXURYHQLVHTXLSSHGZLWK$XWR
5HFLSH&RQYHUVLRQVRLWLVQRWQHFHVVDU\WRFRQYHUW
the temperature when using this mode. To use this
mode press the Bake pad under Convection, enter a
temperature, and then press Start. Always preheat when
using this mode.
Convection Roast
7KH&RQYHFWLRQ5RDVWPRGHLVLQWHQGHGIRUURDVWLQJ
whole cuts of meat on a single rack. This mode may
use heat from the upper and lower elements along with
air movement to improve browning and reduce cooking
time. It is not necessary to convert temperature. Check
food earlier than the recipe suggested time when using
WKLVPRGHRUXVHWKHSUREHRQVRPHPRGHOV7RXVH
this mode press the Roast pad under Convection, enter
a temperature, and then press Start. It is not necessary
to preheat when using this mode.
Probe
Internal food temperature is frequently used as an
indicator of doneness, especially for roasts and poultry.
The Probe mode monitors the internal food temperature
and turns the oven off when the internal food
temperature reaches the programmed temperature.
0LQLPXPWHPSHUDWXUHVIRUIRRGVDIHW\FDQEHIRXQGDW
ZZZ,V,W'RQH<HWJRY7KHWHPSHUDWXUHSUREHFDQRQO\
EHXVHGZLWK7UDGLWLRQDO%DNH&RQYHFWLRQ%DNHDQG
&RQYHFWLRQ5RDVWPRGHV
To use the probe with preheating:
3UHVVWKHGHVLUHGFRRNPRGH(Traditional Bake,
Convection Bake, or Convection Roast) pad and
enter the desired cooking temperature.
,QVHUWWKHSUREHLQWRWKHIRRGVHH3URSHU3UREH
3ODFHPHQW*XLGHOLQHVLQWKLVVHFWLRQ
2QFHWKHRYHQLVSUHKHDWHGSODFHWKHIRRGLQWKH
oven and connect the probe to the probe outlet,
PDNLQJVXUHLWLVIXOO\LQVHUWHG8VHFDXWLRQWKHRYHQ
walls and probe outlet are hot.
3URJUDPWKHSUREHWHPSHUDWXUHE\SUHVVLQJWKH
Probe pad and entering the desired food temperature.
The maximum internal food temperature that you can
VHWLV)
Cooking Modes
USING THE OVEN: Cooking Modes

18 49-85217-1
Cookware
Cookware Guidelines
The material, finish, and size of cookware affect baking
performance.
Dark, coated and dull pans absorb heat more readily
than light, shiny pans. Pans that absorb heat more
readily can result in a browner, crisper, and thicker crust.
If using dark and coated cookware check food earlier
than minimum cook time. If undesirable results are
obtained with this type of cookware consider reducing
RYHQWHPSHUDWXUHE\)QH[WWLPH
Shiny pans can produce more evenly cooked baked
goods such as cakes and cookies.
Glass and ceramic pans heat slowly but retain heat well.
These types of pans work well for dishes such as pies
and custards.
Air insulated pans heat slowly and can reduce bottom
browning.
.HHSFRRNZDUHFOHDQWRSURPRWHHYHQKHDWLQJ
Cooking Modes (Cont.)
USING THE OVEN: Cooking Modes / Aluminum Foil and Oven Liners / Cookware
To use the probe without preheating:
,QVHUWWKHSUREHLQWRWKHIRRGVHH3URSHU3UREH
3ODFHPHQW*XLGHOLQHVLQWKLVVHFWLRQ
3ODFHWKHIRRGLQWKHRYHQDQGFRQQHFWWKHSUREHLQWR
the probe outlet in the oven.
3URJUDPWKHGHVLUHGSUREHDQGFRRNLQJPRGHVHWWLQJV
by pressing the Probe pad and entering the desired
food temperature, then pressing the cook mode pad
Traditional Bake, Convection Bake, or Convection
RoastDQGHQWHULQJWKHGHVLUHGFRRNLQJWHPSHUDWXUH
Proper Probe Placement Guidelines
After preparing the meat and placing it on the cooking
pan follow these guidelines for proper probe placement.
Ŷ ,QVHUWWKHSUREHFRPSOHWHO\LQWRWKHPHDWXSWRWKH
handle, such that the point of the probe will rest in the
center of the thickest part of the meat.
Ŷ 7KHSUREHVKRXOGQRWWRXFKERQHIDWRUJULVWOH
Ŷ )RUZKROHSRXOWU\LQVHUWWKHSUREHLQWRWKHWKLFNHVW
part of the breast.
Ŷ )RUERQHOHVVURDVWVLQVHUWWKHSUREHLQWRWKHFHQWHU
of the roast.
Ŷ )RUERQHLQKDPRUODPELQVHUWWKHSUREHLQWRWKH
center of the lowest large muscle or joint.
Ŷ )RUFDVVHUROHVRUGLVKHVVXFKDVPHDWORDILQVHUWWKH
probe into the center of the dish.
Ŷ )RUILVKLQVHUWWKHSUREHIURPMXVWDERYHWKHJLOOLQWR
the meatiest area, parallel to the backbone.
Check the temperature at other locations in the food
with a food thermometer once the probe temperature
is reached to ensure that all portions of the food have
reached desired temperatures.
Probe Care Guidelines
NOTE: some double oven models have a probe in the
upper oven only.
Ŷ 8VHRISUREHVRWKHUWKDQWKHRQHSURYLGHGZLWKWKLV
product may result in damage to the probe.
Ŷ 8VHWKHKDQGOHVRIWKHSUREHDQGSOXJZKHQLQVHUWLQJ
and removing them from the meat and outlet
Ŷ 7RDYRLGGDPDJLQJ\RXUSUREHGRQRWXVHWRQJVWR
pull on the cable when removing it.
Ŷ 7RDYRLGEUHDNLQJWKHSUREHPDNHVXUHIRRGLV
completely defrosted before inserting the probe.
Ŷ 7RSUHYHQWSRVVLEOHEXUQVGRQRWXQSOXJWKHSUREH
from the outlet until the oven has cooled.
Ŷ 1HYHUOHDYHWKHSUREHLQVLGHWKHRYHQGXULQJDVHOIRU
steam clean cycle.
Ŷ 'RQRWVWRUHWKHSUREHLQWKHRYHQ
CAUTION: Do not use any type of foil or oven liner to cover the oven bottom. These items can
block airflow or melt, resulting in damage to the product and risk of carbon monoxide poisoning, smoke or
fire. Damage from improper use of these items is not covered by the product warranty.
Foil may be used to catch spills by placing a sheet on a lower rack, several inches below the food. Do not use more
IRLOWKDQQHFHVVDU\DQGQHYHUHQWLUHO\FRYHUDQRYHQUDFNZLWKDOXPLQXPIRLO.HHSIRLODWOHDVW´IURPRYHQZDOOV
to prevent poor heat circulation.
Aluminum Foil and Oven Liners

49-85217-1 19
Adjust the Lower Oven Thermostat - Do it yourself!
When Using the Lower Oven Drawer Warm Setting
7KH:$50VHWWLQJRIWKHORZHURYHQGUDZHUZLOONHHS
hot cooked foods at serving temperatures. Always start
with hot food.
'RQRWXVHWKH:$50VHWWLQJWRKHDWFROGIRRGRWKHU
than crisping crackers, chips or dry cereal.
3XVKLQDQGWXUQWKHFRQWURONQREWRWKH:$50VHWWLQJ
NOTE: The beginning temperature of the food, the
amount of food, the type of food, the container and the
amount of time the food is in the drawer will affect the
quality and ending temperatures of the food.
3XOOWKHOven Control knob off the range and look
at the back side. To make an adjustment, loosen
DSSUR[LPDWHO\RQHWXUQEXWGRQRWFRPSOHWHO\
remove, the two screws on the back of the knob.
:LWKWKHEDFNRIWKHNQREIDFLQJ\RXKROGWKHRXWHU
edge of the knob with one hand and turn the front of
the knob with the other hand.
To raise the oven temperature, move the top screw
WRZDUGWKHULJKW<RX¶OOKHDUDFOLFNIRUHDFKQRWFK\RX
move the knob.
To lower the temperature, move the top screw toward
the left.
Each click will change the oven temperature
DSSUR[LPDWHO\)5DQJHLV)IURPWKH
DUURZ:HVXJJHVWWKDW
you make the adjustment
one click from the original
setting and check oven
performance before making
any additional adjustments.
$IWHUWKHDGMXVWPHQWLV
made, retighten screws so
they are snug, but be careful
not to overtighten.
Using the Lower Oven Drawer(on some models)
USING THE OVEN: Using the Lower Oven Drawer / Adjust the Lower Oven Thermostat
The lower oven drawer may be used to bake foods
using the same times and temperatures as a standard
oven. Foods ideal for baking in the lower oven drawer
include pizza, frozen foods, casseroles, biscuits, rolls
and many desserts.
To Use the Lower Oven Drawer
3XVKLQDQGWXUQWKHORZHURYHQGUDZHUNQREWRDQ\
desired setting.
$OORZWKHORZHURYHQGUDZHUWRSUHKHDW
Ŷ 7KH21VLJQDOOLJKWLVORFDWHGRQWKHXSSHUULJKW
side of the knob and glows when the knob is in the
ON position. It remains ON until the knob is moved
to the OFF position.
Ŷ 7KH³+HDWLQJ´VLJQDOOLJKWLVORFDWHGEHORZWKH21
signal light and glows when the heating elements
DUHDFWLYH3UHKHDWLVFRPSOHWHDIWHUWKH³+HDWLQJ´
signal has turned off for the first time each use.
NOTES:
Ŷ $OZD\VXVHWKHLQFOXGHGGUDZHUUDFNZKHQXVLQJWKH
lower oven drawer.
Ŷ 7KHORZHURYHQGUDZHUFDQQRWEHXVHGGXULQJD
self-clean cycle of the upper oven.
Ŷ 'RQRWSXWIRRGIRLORUFRRNZDUHGLUHFWO\RQWKH
bottom of the lower oven drawer. Always use the
included drawer rack.
Ŷ ,IIRRGVUHTXLUHDFRYHUXVHRQO\IRLORUOLGVDEOHWR
withstand baking temperatures. Do not use plastic.
Ŷ 0D[LPXPKHLJKWRIIRRGVWKDWFDQEHSODFHGLQWKH
ORZHURYHQGUDZHULV´
Ŷ 'RQRWSXWOLTXLGRUZDWHULQWKHORZHURYHQGUDZHU
Ŷ 1HYHUSODFHSODVWLFVSDSHUFDQQHGIRRGVRU
combustible material in the lower oven drawer.
Push in and turn the lower oven
drawer knob to any desired setting.
The lower oven drawer uses less energy than the upper oven.
Allow the following approximate times for preheating:
Desired Lower Preheat
Oven Temperature Time
WARM 10 minutes
350°F 20 minutes
425°F 30 minutes
Back of Lower Oven Knob
(Appearance may vary.)
T
O
M
A
K
E
O
V
E
N
C
O
O
L
E
R
T
U
R
N
D
I
S
K
A
P
P
R
O
X
.
1
0
˚
F
P
E
R
N
O
T
C
H
T
O
M
A
K
E
O
V
E
N
H
O
T
T
E
R
T
U
R
N
D
I
S
K
T
O
A
D
J
U
S
T
O
V
E
N
T
E
M
P
E
R
A
T
U
R
E
L
O
O
S
E
N
S
C
R
E
W
S
A
N
D
R
O
T
A
T
E

20 49-85217-1
Cooking Guide
USING THE OVEN: Cooking Guide
FOOD TYPE RECOMMENDED
MODE(S) RECOMMENDED
RACK POSITION(S) ADDITIONAL SUGGESTIONS
Baked Goods
Layer cakes, sheet cakes,
bundt cakes, muffins, quick
breads, biscuits, scones on
D6LQJOH5DFN
%DNH RU 8VHVKLQ\FRRNZDUH
/D\HUFDNHVRQ0XOWLSOH
5DFNV
%DNH
&RQYHFWLRQ0XOWL%DNH DQG
Ensure adequate airflow
VHHLOOXVWUDWLRQEHORZ
8VHH[WHQVLRQUDFNLQSRVLWLRQV
&KLIIRQFDNHVDQJHOIRRG %DNH 8VHVKLQ\FRRNZDUH
Cookies, biscuits, scones on
D6LQJOH5DFN %DNH RU 8VHVKLQ\FRRNZDUH
Cookies, biscuits, scones on
0XOWLSOH5DFNV
&RQYHFWLRQ0XOWL%DNH
%DNH
5DFNVDQG
5DFNVDQG
Ensure adequate airflow. Switch food location
partially through cooking for more even cooking
UHVXOWV8VHH[WHQVLRQUDFNLQORZHUSRVLWLRQ
Beef & Pork
+DPEXUJHUV %URLO+L
8VHIODWUDFN8VHDEURLOSDQPRYHIRRGGRZQ
IRUPRUHGRQHQHVVOHVVVHDULQJ:DWFKIRRG
closely when broiling. Center food under broiler.
Steaks & Chops %URLO+L
8VHIODWUDFN8VHDEURLOSDQPRYHIRRGGRZQ
IRUPRUHGRQHQHVVOHVVVHDULQJ:DWFKIRRG
closely when broiling. Center food under broiler.
5RDVWV &RQYHFWLRQ5RDVW
%DNH RU Leave uncovered, use a low sided pan such
as a broil pan. Preheating is not necessary.
Poultry
Whole chicken &RQYHFWLRQ5RDVW
%DNH RU Leave uncovered, use a low sided pan
such as a broil pan.
%RQHLQFKLFNHQEUHDVWV
legs, thighs %URLO/R
%DNH RU
,IEUHDGHGRUFRDWHGLQVDXFHDYRLG%URLO
+LPRGHV%URLOVNLQVLGHGRZQILUVW
Watch food closely when broiling.
%RQHOHVVFKLFNHQEUHDVWV %URLO/R
%DNH RU
0RYHIRRGGRZQIRUPRUHGRQHQHVVOHVV
VHDULQJDQGXSIRUJUHDWHUVHDULQJEURZQLQJ
when broiling.
Whole turkey &RQYHFWLRQ5RDVW
%DNH 5RU Leave uncovered, use a low sided pan
such as a broil pan.
7XUNH\%UHDVW %DNH RU Leave uncovered, use a low sided pan
such as a broil pan.
Fish %URLO/R LQFKWKLFNRUOHVV
!LQFK
:DWFKIRRGFORVHO\ZKHQEURLOLQJ8VHIODWUDFNLI
XVLQJSRVLWLRQ
Casseroles %DNH RU
Frozen Convenience Foods
Pizza, french fries, tator tots,
chicken nuggets, appetizers
RQD6LQJOH5DFN
%DNH 8VHVKLQ\FRRNZDUH
Pizza, french fries, tator tots,
chicken nuggets, appetizers
RQ0XOWLSOH5DFNV
%DNH
&RQYHFWLRQ0XOWL%DNH
DQG
DQG
8VHVKLQ\FRRNZDUH
Switch food location partially through
FRRNLQJIRUPRUHHYHQFRRNLQJUHVXOWV8VH
extension rack in lower position.
*When baking four cake layers at a time, stagger the
pans as shown so that one pan is not directly above
another.
Cook food thoroughly to help protect against food
ERUQHLOOQHVV0LQLPXPVDIHIRRGWHPSHUDWXUH
recommendations for food safety can be found at
www.IsItDoneYet.gov0DNHVXUHWRXVHDIRRG
thermometer to take food temperatures.
Rear Placement (dual fuel models)
Front Placement
(dual fuel models)
Other manuals for Ranges Self-Cleaning Gas Dual Fuel
1
Table of contents
Languages:
Other GE Range manuals

GE
GE RGBS330 User manual

GE
GE Profile JGB908SELSS User instructions

GE
GE JB705DT User manual

GE
GE JBS27SMSS Manual

GE
GE Profile JD968 Manual

GE
GE JGBP24 Training manual

GE
GE JSP57 User manual

GE
GE JBS02 User manual

GE
GE PGS908SEPSS - Profile 30" Slide-In Gas Range Manual

GE
GE Monogram ZGP484NGRSS User manual