manuals.online logo
Brands
  1. Home
  2. •
  3. Brands
  4. •
  5. GE
  6. •
  7. Refrigerator
  8. •
  9. GE MBR12 Operating instructions

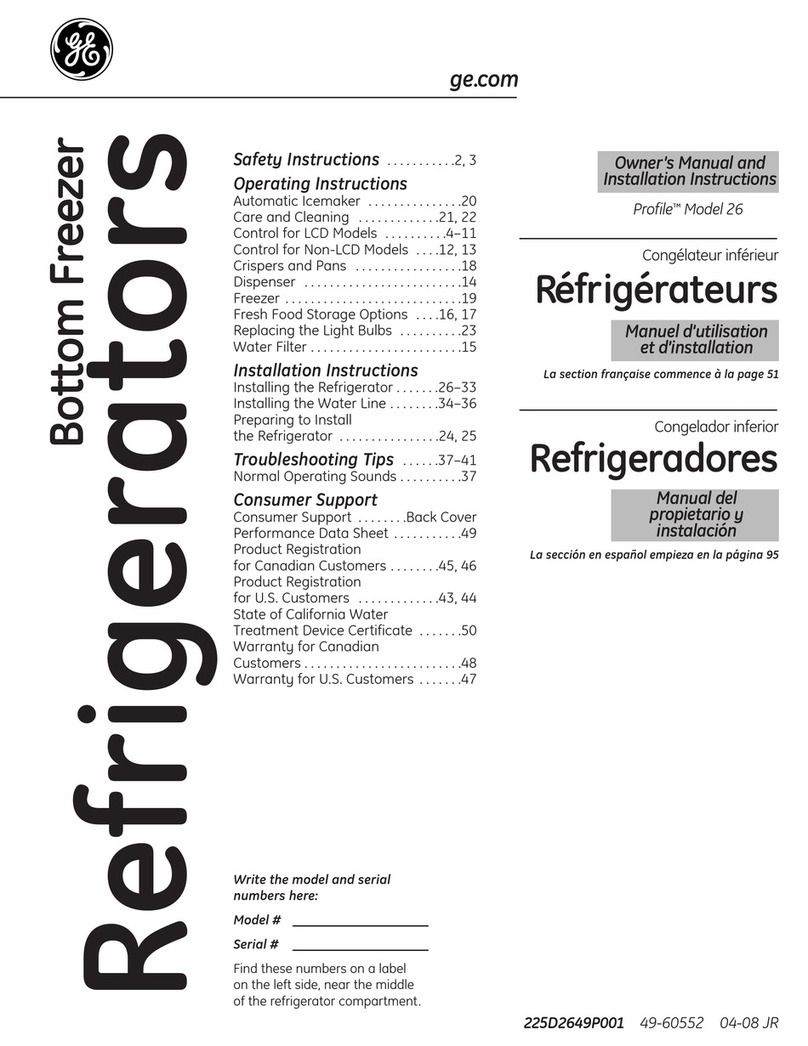
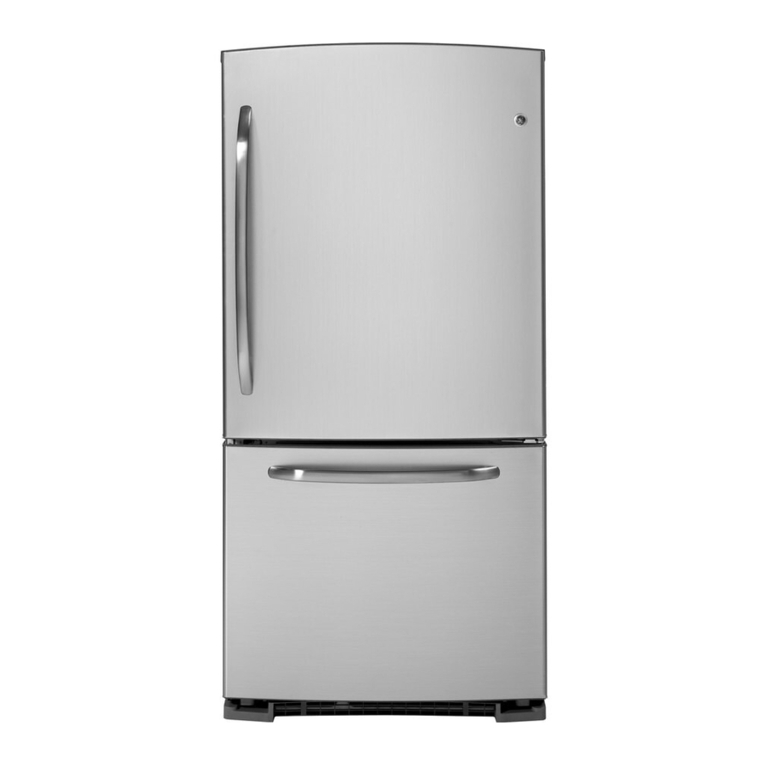
GE MBR12 Operating instructions

L...
m
~
u.
I
E
0
~
0
m c
QJ
Cl
geappliances.ca
Safety Instructions
.........
2,
3
Operating Instructions
Care and Cleaning
of
the refrigerator
................
6,
7
Control Settings
...............
.4,
5
Installation Instructions
Preparing
to
Install
the Refrigerator
..................
8
Reversing the Door Swing
.....
9-11
Troubleshooting Tips ... 12-14
Normal Operating Sounds
......
12
ConsumerSupport
Consumer Support
..............
18
Product Registration
........
15, 16
Warranty
......................
17
Write the model
and
serial
numbers here:
Model
______
_
Serial
______
_
You
can
find
them
on a label inside
the refrigerator
on
the
upper
left
sidewall.
Owner's Manual and
Installation Instructions
Mode/MBR12
La
section
fran~aise
commence ala page
19.
29-5943
c:
Cl)
0
c:
·-
0
....,,
·-
0....,,
-u
-s2
~....,,
Cl) Cl)
c: c:
--
IMPORTANT
SAFETY
INFORMATION.
READ
ALL
INSTRUCTIONS
BEFORE
USING.
2
A
WARNING!
Use
this
appliance
only
for
its
intended
purpose
as
described
in
this
Owner's
Manual.
SAFETY
PRECAUTIONS
When
using
electrical
appliances,
basic
safety
precautions
should
be
followed,
including
the
following:
•
This
refrigerator
must
be
properly
installed
and
located
in
accordance
with
the
Installation
Instructions
before
it
is
used.
•
Do
not
allow
children
to
climb,
stand
or
hang
on
the
shelves
in
the
refrigerator.
They
could
damage
the
refrigerator
and
seriously
injure
themselves.
•
Do
not
touch
the
cold
surfaces
in
the
freezer
compartment, particularly
when
hands
are
damp
or
wet.
Skin
may
stick
to
these
extremely
cold
surfaces.
•
Do
not
store
or
use
gasoline
or
other flammable
vapors
and
liquids
in
the
vicinity
of
this
or
any
other
appliance.
•
In
refrigerators
with automatic
icemakers,
avoid
contact with
the
moving
parts
of
the
ejector
mechanism,
or
with
the
heating
element
that
releases
the
cubes.
Do
not
place
fingers
or
hands
on
the
automatic
icemaking
mechanism
while
the
refrigerator
is
plugged
in.
•
Keep
fingers
out
of
the
"pinch
point''
areas;
clearances
between
the
doors
and
between
the
doors
and
cabinet
are
necessarily
small.
Be
careful
closing
doors
when
children
are
in
the
area.
•
Unplug
the
refrigerator
before
cleaning
and
making
repairs.
NOTE:
We
strongly
recommend
that
any
servicing
be
performed
by
a
qualified
individual.
•
Turning
the
control
to
the
OFF
position
does
not
remove
power
to
the
light
circuit.
•
Do
not
refreeze
frozen
foods
which
have
thawed
completely.
•
Before
replacing
a
burned-out
light
bulb,
the
refrigerator
should
be
unplugged
in
order
to
avoid
contact with a
live
wire
filament.
(A
burned-out
light
bulb
may
break
when
being
replaced.)
A
DANGER!
RISK
OF
CHILD
ENTRAPMENT
PROPER
DISPOSAL
OF
THE
REFRIGERATOR
Child
entrapment
and
suffocation
are
not
problems
of
the
past.
Junked
or
abandoned
refrigerators
are
still
dangerous
...
even
ifthey
will
sit
for 'justafew
days.''
If
you
are
getting
rid
of your
old
refrigerator.
please
follow
the
instructions
below
to
help
prevent
accidents.
Before
You
Throw
Away
Your
Old
Refrigerator
or
Freezer:
•
Take
off
the
doors.
•
Leave
the
shelves
in
place
so
that
children
may
not
easily
climb
inside.
USE
OF
EXTENSION
CORDS
Refrigerants
All
refrigeration
products
contain
refrigerants,
which
must
be
removed
prior
to product
disposal.
If
you
are
getting
rid
of
an
old
refrigeration
product,
check
with
the
company
handling
the
disposal
about whatto
do.
Because
of
potential
safety
hazards
under
certain
conditions,
we
strongly
recommend
against
the
use
of
an
extension
cord.
However;
if
you
must
use
an
extension
cord,
it
is
absolutely
necessary
that it
be
a
UL-listed
(in
the
United
States)
or
a
CSA-listed
(in
Canada),
3-wire
grounding
type
appliance
extension
cord
having
a
grounding
type
plug
and
outlet
and
that
the
electrical
rating
of
the
cord
be
15
amperes
(minimum)
and
120
volts.
geappliances.ca
A
WARNING!
HOW
TO
CONNECT
ELECTRICITY
Do
not,
under
any
circumstances,
cut
or
remove
the
third
(ground)
prong
from
the
power
cord.
For
personal
safety,
this
appliance
must
be
properly
grounded.
The
power
cord
of
this
appliance
is
equipped
with
a
3-prong
(grounding)
plug
which
mates
with
a
standard
3-prong
(grounding)
wall
outlet
to
minimize
the
possibility
of
electric
shock
hazard
from
this
appliance.
Have
the
wall
outlet
and
circuit
checked
by
a
qualified
electrician
to
make
sure
the
outlet
is
properly
grounded.
Where
a
standard
2-prong
wall
outlet
is
encountered,
it
is
your
personal
responsibility
and
obligation
to
have
it
replaced
with
a
properly
grounded
3-prong
wall
outlet.
The
refrigerator
should
always
be
plugged
into
its
own
individual
electrical
outlet
which
has
a
voltage
rating
that
matches
the
rating
plate.
This
provides
the
best
performance
and
also
prevents
overloading
house
wiring
circuits
which
could
cause
a
fire
hazard
from
overheated
wires.
Never
unplug
your
refrigerator
by
pulling
on
the
power
cord.
Always
grip
plug
firmly
and
pull
straight
out
from
the
outlet.
Repair
or
replace
immediately
all
power
cords
that
have
become
frayed
or
otherwise
damaged.
Do
not
use
a
cord
that
shows
cracks
or
abrasion
damage
along
its
length
or
at
either
end.
When
moving
the
refrigerator
away
from
the
wall,
be
careful
not
to
roll
over
or
damage
the
power
cord.
~
USE
OF
ADAPTER
PLUGS
~
Adapter
plugs
are
not
permitted
in
Canada.
~\\9.,p
'
n.~
READ
AND
FOLLOW
THIS
SAFETY
INFORMATION
CAREFULLY.
'cY
~
SAVE
THESE
INSTRUCTIONS
3
--
::s ::s
en en
g-~
c:
9..
ncr
Ct.~
0
-·
::s
0
en
::s
~
0
c:
~
::r
0
0
ct
::s·
CQ
:::t
"tf
en
-14 -24
6-12
If you wish to drop the temperature inside the
freezer compartment quickly,
ALARM
c:
Cl)
0
c:
·-
0
......
_
J2
tj
"6
2
...,
.....
Cl) Cl)
c: c:
--
Care
and
cleaning
of
the
refrigerator.
6
Cleaning
the
Outside
Keep
the
outside
clean.
Wipe
with a
clean
cloth
lightly
dampened
with
mild
liquid
dish
detergent.
Dry
with a
clean,
soft
cloth.
Do
not
wipe
the
refrigerator
with a
soiled
dish
cloth
or
wet
towel.
These
may
leave
a
residue
that
can
erode
the
paint.
Do
not
use
scouring
pads,
powdered
cleaners,
bleach
or
cleaners
containing
bleach
because
these
products
can
scratch
and
weaken
the
paint
finish.
Cleaning
the
Inside
To
help
prevent
odors,
leave
an
open
box
of
baking
soda
in
the
fresh
food
and
freezer
compartments.
Unplug
the
refrigerator
before
cleaning.
If
this
is
not
practical,
wring
excess
moisture
out of
sponge
or
cloth
when
cleaning
around
switches,
lights
or
controls.
Use
warm water
and
baking
soda
solution-about a
tablespoon
(15
mll
of
baking
soda
to a quart
(1
literl of
water.
This
both
cleans
and
neutralizes
odors.
Rinse
and
wipe
dry.
Other
parts
of
the
refrigerator-including door
gaskets,
fruit
and
vegetable
drawers,
and
all
plastic
parts-can
be
cleaned
the
same
way.
After
cleaning
the
door
gaskets,
apply a
thin
layer of
petroleum
jelly to
the
door
gaskets
at
the
hinge
side.
This
helps
keep
the
gaskets
from
sticking
and
bending
out
of
shape.
Do
not
use
cleansing
powders
or
other
abrasive
cleaners.
Behind
the
Refrigerator
Once
a
year,
move
the
refrigerator out
and
vacuum
Be
careful
when
moving
the
refrigerator away from
the
wall.
All
types
offloor coverings
can
be
damaged,
particularly
cushioned
covering
and
those with
embossed
surfaces.
geappliances.ca
Protect
the
paint
finish.
The
finish
on
the
outside
of
the
refrigerator
is
a
high
quality,
baked-on
paint
finish.
With
proper
care,
it
will
stay
new-looking
and
rust
free
for
years.
Apply
a coat of kitchen/appliance
wax
when
the
refrigerator
is
new,
and
then
at
least
twice a
year.
Defrost
water
pan.
The
non-removable
pan
is
located
under
the
compressor
at
the
rear
of
the
refrigerator.
It
should
be
cleaned
at
least
once
a
year.
Move
the
refrigerator out
from
the
wall
as
far
as
necessary,
and
unplug
the
power
cord
from
the
woll
outlet.
Let
the
compressor
cool
before
cleaning
the
pan.
Use
a
clean
cloth
or
sponge
dampened
in
warm
water
and
baking
soda
solution-one
tablespoon
(15
mil
of
baking
soda
to a quart
(1
liter)
of
water.
Do
not
use
cleansing
powders,
abrasive
cleaners,
bleach
or
cleaners
containing
chlorides.
Do
not
wash
any
plastic
refrigerator
parts
in
the
dishwasher.
Pull
the
refrigerator straight
out
and
return
it to
position
by
pushing
itstraight
in.
Moving
the
refrigerator
in
a
side
direction
may
result
in
damage
to
the
floor
covering
or
refrigerator.
When
pushing
the
refrigerator
back,
make
sure
you
don't
roll
over
the
power
cord.
Preparing
for
Vacation
For
long
vocations
or
absences,
remove
food
and
unplug
the
refrigerator.
Clean
the
interior with a
baking
soda
solution
of
one
tablespoon
(15
mil
of
baking
soda
to
one
quart
(1
liter)
of
water.
Leave
the
doors
open.
Preparing
to
Move
Secure
all
loose
items
such
as
shelves
and
drawers
by
taping
them
securely
in
place
to prevent
damage.
geappliances.ca
Be
sure
the
refrigerator
stays
in
an
upright
position
during
moving.
7
--
:::::s
::J
(I) (I)
c:t
.....
c:
9..
ncr
C!'.
!"to
0
-·
:::::s
0
(I)
:::::s
FP
racks getting
damaged)
Installation Instructions
REVERSING
THE
DOOR
SWING
ICONT.I
W
REMOVE
THE
FREEZER
DOOR
[A]
Tope
the
door
shut
with
masking
tope.
[j]
Remove
the
center
hinge
ond
shimlsJ
by
removing
the
scre.o.is.
Be
sure
to
keep
the
shim(s).
cg
Remove
the
tcpe
ond
lift
the
door
off
the
bottom
hinge
pin.
[QJ
Set
the
door
on
a
non-scratching
surface.
A
CAUTION:
Donotletdoordrop
to
the
floor.
[4J
INSTALLING
THE
DOOR
STOPS
[A]
With
the
doors
laying
on
a
non-scratching
surface.
remove
the
door
stop
from
the
bottom
of
each
door
using
o
Phillips
screw
driver.
[j]
Retrieve
new
door
stops
from
the
accessory
bag.
[CJ
Install
ne.v
door
stop
on
the
opposite
side
of
each
door
by
fully
inserting
the
pin
into
the
hole
in
the
door.
You
moy
hove
to
clear
the
hole
of
insulation
foam
using
o
scre..v
driver.
Secure
each
door
stop
in
place
with
the
scre..v
provided.
10
[SJ
TRANSFER
BOTTOM
HINGE
TO
THE
LEFT
[A]
Remove
the
bottom
hinge
bolts
with o
5/16"
socket
driver.
Discard
the
hinge
to
the
accessory
bag,
saving
the
shimls).
[j]
Using
o
flat
blade
screw
driver.
remove
the
bottom
hinge
hole
covers
from
the
left
side
and
transfer
to
the
right
side.
cg
Retrieve
o
new
bottom
hinge
from
the
occessol"ld
bog
and
install
the
new
hinge
and
shim(s)
on
the
left
side.
Do
not
tighten
the
bolts
comp~tely.
[§]REHANG
THE
FREEZER
DOOR
[A]
Place
the
freezer
door
on
the
bottom
hinge,
close
the
door,
MAJ<E
SURE
IT
IS
ALIGNED
PROPERL
V,
end
tape
it
in
place
with
masking
tape.
[j]
Tighten
the
t::ottom
hinge
bolts
completely,
ensuring
thot
the
door
is
level
and
aligned
properly.
Installation
Instructions
[1J
INSTALL
CENTER
HINGE
ON
THE
LEFT
[A]
Remove
the
two
plug
buttons
on
the
left
side
and
install
them
on
the
right.
Remove
the
mullion
screw
and
screw
cover
on
the
left
side
with
a
Phillips
scrE!IAldriver
and
install
on
the
right.
.~
CP~
[[]
Rotate
the
center
hinge
and
shimlsl
180
degrees
and
install
on
the
left
side
as
shOYJn.
Make
sure
that
the
hinge
pin
inserts
into
the
hole
in
the
top
of
the
freezer
door
.
[t]
Tighten
the
screws
and
remove
the
tape
holding
the
door
shut.
A
CAUTION:
When
assembled
correctly,
the
hinge
is
tight
against
the
cabinet.
ATTENTION:
lhe
screws
must
be
properly
tightened.
Turn
the
screws
until
snug.
Then
tighten
the
SCfe'NS a
minimum
of
112
turn
using
both
hands.
[!]
REHANG
THE
FRESH
FOOD
DOOR
[A]
Screw
out
The
upper
hinge
axis,
turn
the
upper
hinge
over
and
fix
axis
on
it.
Then
place
itat
side
far
use.
Exchange
wires
both
in
the
left
and
right
slots
ofrefrigerator
body.
11
[j]
Move
the
upper
door
to
appropriate
position,
adjust
partQ)
and
upper
door,
Move
the
connecting
wire®
in
the
slot of
upper
door from
right
to
left,
and
then
fix
partCDand
wire®
by
screws@.
(Please
hold
upper
door
by
hand
when
installing)
~~----.
ctJ
Connect
electrical connector(})
in
accordance
with
step
2A
and
then
install part®lwhich
is
in
the
plastic
bag).
[Q]
Reverse
part(!)
by
180°and
lnston
it
onto
the
right
corner
of
upper
door,
then
mount
part@.
(both
of~Tijlif
~tfi
I
[[]
Take
the
reed
switch
out
of
the
coping
block(part@
in
step
2Aland
mount
it
on
another
block
for
use
!which
is
v.nth
mark
"R"
in
the
plastic
bag).
Put
the
Ccop
ing
block
just
removed
back
to
the
plastic
bag.
,~.
'-
,~
Note:
Be
sure
character
side
of
reed
switch
frts
well
with
coping
block
[E]
Install
part
Q)
.
connector@.
and
then
install
part@,
~~
[!]
INSTALL
TOP
COVER
[A]
Re-install
the
top
cover,
sliding
it
into
place
and
securing
v.Ath
the
5
original
screws.
c:
Cl)
0
c:
·-
0
....,,
·-
0....,,
-u
-s2
~....,,
Cl) Cl)
c: c:
--
Normal
operating
sounds.
(?')
Newer
refrigerators
sound
different
from
older refrigerators.
Modern
refrigerators
'""\
have
mare
features
and
use
newer
technalagy.
Do
you
hear what I
hear?
These
sounds
are normal.
HUMMM
..
.
~HOOSH
..
.
•
The
new high efficiency compressor
may
run faster
and longer than your old refrigerator and you may
hear a high-pitched hum or pulsating sound while
it
is
operating.
•
You
may hear a whooshing sound when the doors
close.
•
•
•
•
12
This
is
due to pressure equalizing within the refrigerator.
CLICKS,
POPS,
CRACKS
and
CHIRPS
You
may hear cracking or popping sounds when the
refrigerator
is
first plugged
in.
This
happens
as
the
refrigerator cools to the correct temperature.
The
compressor
may
cause a clicking or chirping
sound when attempting
to
restart (this could take
up
to
5 minutes).
Expansion and contraction
of
cooling coils during and
after defrost can cause a cracking or popping sound.
On
models with an icemaker, after an icemaking cycle,
you may hear the ice cubes dropping into the ice
bucket.
WHIR!
R
-)
I
~
•
You
may
hear the fans spinning
at
high speeds.
This
happens when the refrigerator
is
first plugged
in,
when the doors are opened frequently or when a large
amount
of
food
is
added
to
the refrigerator or freezer
compartments.
The
fans are helping to maintain the
correct temperatures.
WATER
SOUNDS
•
The
flow
of
refrigerant through the freezer cooling coils
may make a gurgling noise like boiling water.
• Water dropping on the defrost heater can cause a
sizzling, popping or buzzing sound during the defrost
cycle.
• A
water
dripping noise
may
occur during the defrost
cycle
as
ice melts from the evaporator and flows into
the drain pan.
• Closing the door
may
cause a gurgling sound due to
pressure equalization.
Before
you call for
service
...
geappliances.ca
Troubleshooting
Tips
Save
time
and
money!
Review
the
charts
on
the
following
pages
first
and
you
may
not
need
to
call
for
service
.
What
To
Do
-
Possible
Causes
....___
________
_
Refrigerator
does
not Refrigeratorin defrostcycle.
operate
Control
IS
TURNED
OFF.
Vibration orrattling
(slight vibration
is
normal}
Motor
operates
for
long
periods
or
cycles
on and
off
frequently.
(Modem
refrigerators with
more
storage
space
and alarger
freezer
require
more
operating
time.
They
startand stop often
to maintain
even
temperaturesJ
Fresh
food
or
freezer
compartment too warm
Frost
or
ice
crystals
on
frozen
food
tfrost within
package
is
normal}
Ice
cubes
have
odor/taste
Slow
ice
cube
freezing
Refrigeratoris unplugged.
The fuse is blown/circuit
breakeris tripped.
Frontleveling legs need
adjusting.
Normal when refrigerator
is first plugged in.
Often occurs when large
amounts
of
food are
placed in refrigerator.
Doorleftopen.
Hotweather
or
frequent
door
openings.
Temperature control
set
at
the
coldestsetting.
Temperature control
not
setcold enough.
Warm weather
or
frequent
door
openings.
Doorleftopen.
Doorleftopen.
Too frequent
or
too
long
door
openings.
Food
transmitting odor/taste
to
ice cubes.
Interior
of
refrigerator
needs cleaning.
Doorleftopen.
Temperature control
not
setcold enough.
• Wait about
30
minutes
for
defrost
cycle
to
end.
•
Press
ON/OFF
button
and
check
for
operation
to
begin.
•
Push
the
plug
completely
into
the
outlet.
•
Replace
fuse
or
reset
the
breaker.
•
See
Leveling
Legs.
• Wait
24
hours
for
the
refrigerator to
completely
cool
down.
•
This
is
normal.
•
Check
to
see
if
package
is
holding
door
open.
•
This
is
normal.
•
See
About
the
control.
•
See
About
the
control.
•
Set
the
temperature
control
one
step
colder.
See
About
the
control.
•
Check
to
see
if
package
is
holding
door
open.
•
Check
to
see
if
package
is
holding
door
open.
•
Wrap
foods
well.
•
See
Care
and
cleaning.
•
Check
to
see
if
package
is
holding
door
open.
•
See
About
the
control.
13
--
::s ::s
en en
g-~
c:
9..
ncr
Ct.~
0
-·
::s
0
en
::s
c Cl)
oC
·-
0
.....,
·-
.S!
~
"'6
2
~.....,
Cl) Cl)
Cc
--
Before
you call forservice
...
~
Troubleshooting
Tips
lllllllllllllll~P_o_s_s1_'b_le_c_a_u_s_e_s~~~~~-IN~h_at~To~D_o~~~~~~~~~~~~~~
Refrigerator
has
odor
Foods
transmitting odor •
Foods
with
strong
odors
should
be
tightly
wrapped.
Moisture
forms
on
outside
of
refrigerator
Moisture
collects
inside
(in
humid
weather,
air
carries moisture into
refrigerator
when
doors
are
opened}
Interiorlight
does
notwork
14
to refrigerator. •
Keep
an
open
box
of
baking
soda
in
the
refrigerator;
Interior
needs
cleaning.
Defrost
water
pan
needs
cleaning.
Not
unusual
during
periods
of
high
humidity.
Too
frequent ortoo
long
door
openings.
No
power
at
outlet.
Light
bulb
burned
out.
replace
every
three
months.
•
See
Care
and
cleaning.
•
See
Care
and
cleaning.
•
Wipe
surface
dry.
•
Replace
fuse
or
reset
the
breaker.
•
Call
for
seNice.
Please
place
in
envelope
and
mail
to:
Veuillez
mettre
dans
une
enveloppe
et
envoyez
a:
OWNERSHIP
REGISTRATION
P.O.
BOX
1780
MISSISSAUGA,
ONTARIO
L4Y
4G1
(FOR
CANADIAN
CONSUMERS
ONLY·
POUR
RESIDENTS
CANADIENS
SEULEMENT)
15
1_.I
1+1
""'
"'
GiNil
....
=:
,
.,ti
:
~
.
1....,-
MC Commercial
succeeding owner of products purchased
Consumer
Support.
rg "
GE
Appliances
Website
geappliances.ca
Have
a
question
or
need
assistance
with
your
appliance?
Try
the
GE
Appliances
Website
24
hours
a
day,
=
any
day
of
the
year!
For
greater
convenience
and
faster
service,
you
can
now
download
Owner's
Manuals,
----~
order
parts
or
even
schedule
service
on-line.
Schedule
SeNice
Expert
GE
repair
service
is
only
one
step
away
from
your
door.
Call
1.800.561.3344
during
normal
business
hours.
Real
Life
Design
Studio
1.800.561.3344
geappliances.ca
GE
supports
the
Universal
Design
concept-products,
services
and
environments
that
can
be
used
by
people
of
all
ages,
sizes
and
capabilities.
We
recognize
the
need
to
design
for a
wide
range
of
physical
and
mental
abilities
and
impairments.
For
details
of
GE's
Universal
Design
applications,
including
kitchen
design
ideas
for
people
with
disabilities,
check
out
our
Website
today.
Extended
Warranties
Consult
your
local
listings
for
an
extended
warranty
provider.
Parts
and
Accessories
1.800.661.1616
or
geappliances.ca
Consult
your
local
listings
for
an
authorized
GE
service
parts
provider
or
call
1.800.661.1616
during
normal
business
hours.
Instructions
contained
in
this
manual
cover
procedures
to
be
performed
by
any
user.
Other
servicing
generally
should
be
referred
to
qualified
service
personnel.
Caution
must
be
exercised,
since
improper
servicing
may
cause
unsafe
operation.
Contact
Us
geappliances.ca
If
you
are
not
satisfied
with
the
service
you
receive
from
GE,
contact
us
on
our
Website
with
all
the
details
including
your
phone
number,
or
write
to:
Director.
Consumer
Relations
MC
Commercial
Inc.
Suite
310,
1
Factory
Lane
Moncton,
NB,
ElC
9M3
g"
Register
Your
Appliance
geappliances.ca
Register
your
new
appliance
on-line-at
your
convenience!
Timely
product
registration
will
allow
for
=
enhanced
communication
and
prompt
service
under
the
terms
of
your
warranty,
should
the
need
arise.
""----,)
You
may
also
mail
in
the
pre-printed
registration
card
included
in
the
packing
material.
18
Printed
in
China

Other GE Refrigerator manuals

GE GTN18BBCWW Manual

GE

GE GTN18BBCWW Manual

GE Profile ENERGY STAR PFCS1NJW Manual

GE

GE Profile ENERGY STAR PFCS1NJW Manual

GE Monogram ZIFI240 User manual

GE

GE Monogram ZIFI240 User manual

GE Profile PSCS3VGX User manual

GE

GE Profile PSCS3VGX User manual

GE Energy Star GDS18SBR User manual

GE

GE Energy Star GDS18SBR User manual

GE Side by Side 22 Dispenser User manual

GE

GE Side by Side 22 Dispenser User manual

GE 49-60423-2 User manual

GE

GE 49-60423-2 User manual

GE GTH18JBR User manual

GE

GE GTH18JBR User manual

GE ZIC360NXDLH User manual

GE

GE ZIC360NXDLH User manual

GE Monogram ZICS360NX User manual

GE

GE Monogram ZICS360NX User manual

GE GTH22KBR User manual

GE

GE GTH22KBR User manual

GE GSHF5MGXWW Manual

GE

GE GSHF5MGXWW Manual

GE Profile PFSS6PKXSS Manual

GE

GE Profile PFSS6PKXSS Manual

GE GFSS6KKXSS Manual

GE

GE GFSS6KKXSS Manual

GE ENERGY STAR GSHS9NGYSS User manual

GE

GE ENERGY STAR GSHS9NGYSS User manual

GE GTE15CTH Manual

GE

GE GTE15CTH Manual

GE Monogram ZFSB23D SS User manual

GE

GE Monogram ZFSB23D SS User manual

GE GSH22JSXSS - Appliances 22.0 cu. ft.... Manual

GE

GE GSH22JSXSS - Appliances 22.0 cu. ft.... Manual

GE TOP-FREEZER 16 Operating instructions

GE

GE TOP-FREEZER 16 Operating instructions

GE Monogram ZFSB27DASS User manual

GE

GE Monogram ZFSB27DASS User manual

GE TOP-FREEZER 16 Original instructions

GE

GE TOP-FREEZER 16 Original instructions

GE Monogram ZISS420NRSS User manual

GE

GE Monogram ZISS420NRSS User manual

GE GSHF6PHXBB Manual

GE

GE GSHF6PHXBB Manual

GE TFX27R User manual

GE

GE TFX27R User manual

Popular Refrigerator manuals by other brands

New Air Prismatic Series owner's manual

New Air

New Air Prismatic Series owner's manual

German pool REF-365 user manual

German pool

German pool REF-365 user manual

Scandomestic SKF 562 W user manual

Scandomestic

Scandomestic SKF 562 W user manual

New Air NOF160SS00 owner's manual

New Air

New Air NOF160SS00 owner's manual

V-ZUG Cooltronic operating instructions

V-ZUG

V-ZUG Cooltronic operating instructions

Scandomestic BIF 292 user manual

Scandomestic

Scandomestic BIF 292 user manual

Avantco 178A19RHC user manual

Avantco

Avantco 178A19RHC user manual

New Air NWC046SS01 owner's manual

New Air

New Air NWC046SS01 owner's manual

Isotherm CR165 instruction manual

Isotherm

Isotherm CR165 instruction manual

MICROMATIC Pro-Line MDD58W-E-E User manual & setup guide

MICROMATIC

MICROMATIC Pro-Line MDD58W-E-E User manual & setup guide

Avantco SCL1 user manual

Avantco

Avantco SCL1 user manual

Magic Chef HMBR350WE instruction manual

Magic Chef

Magic Chef HMBR350WE instruction manual

H.Koenig FGX880 instruction manual

H.Koenig

H.Koenig FGX880 instruction manual

Concept2 LA7383ss manual

Concept2

Concept2 LA7383ss manual

New Air NRF031BK00 owner's manual

New Air

New Air NRF031BK00 owner's manual

Universal Blue UBF2223-21 user manual

Universal Blue

Universal Blue UBF2223-21 user manual

Schaub Lorenz SLUS335S2 user manual

Schaub Lorenz

Schaub Lorenz SLUS335S2 user manual

New Air NBC224SS00 owner's manual

New Air

New Air NBC224SS00 owner's manual

manuals.online logo
manuals.online logoBrands
  • About & Mission
  • Contact us
  • Privacy Policy
  • Terms and Conditions

Copyright 2025 Manuals.Online. All Rights Reserved.