Aboutthe ice and water dispenserandautomaticicemaker.
A newly installed refrigerator may take 12to 24 hours to begin making ice.
AcgessDo0r _
IceStorageBin j/t /f
Mechanism
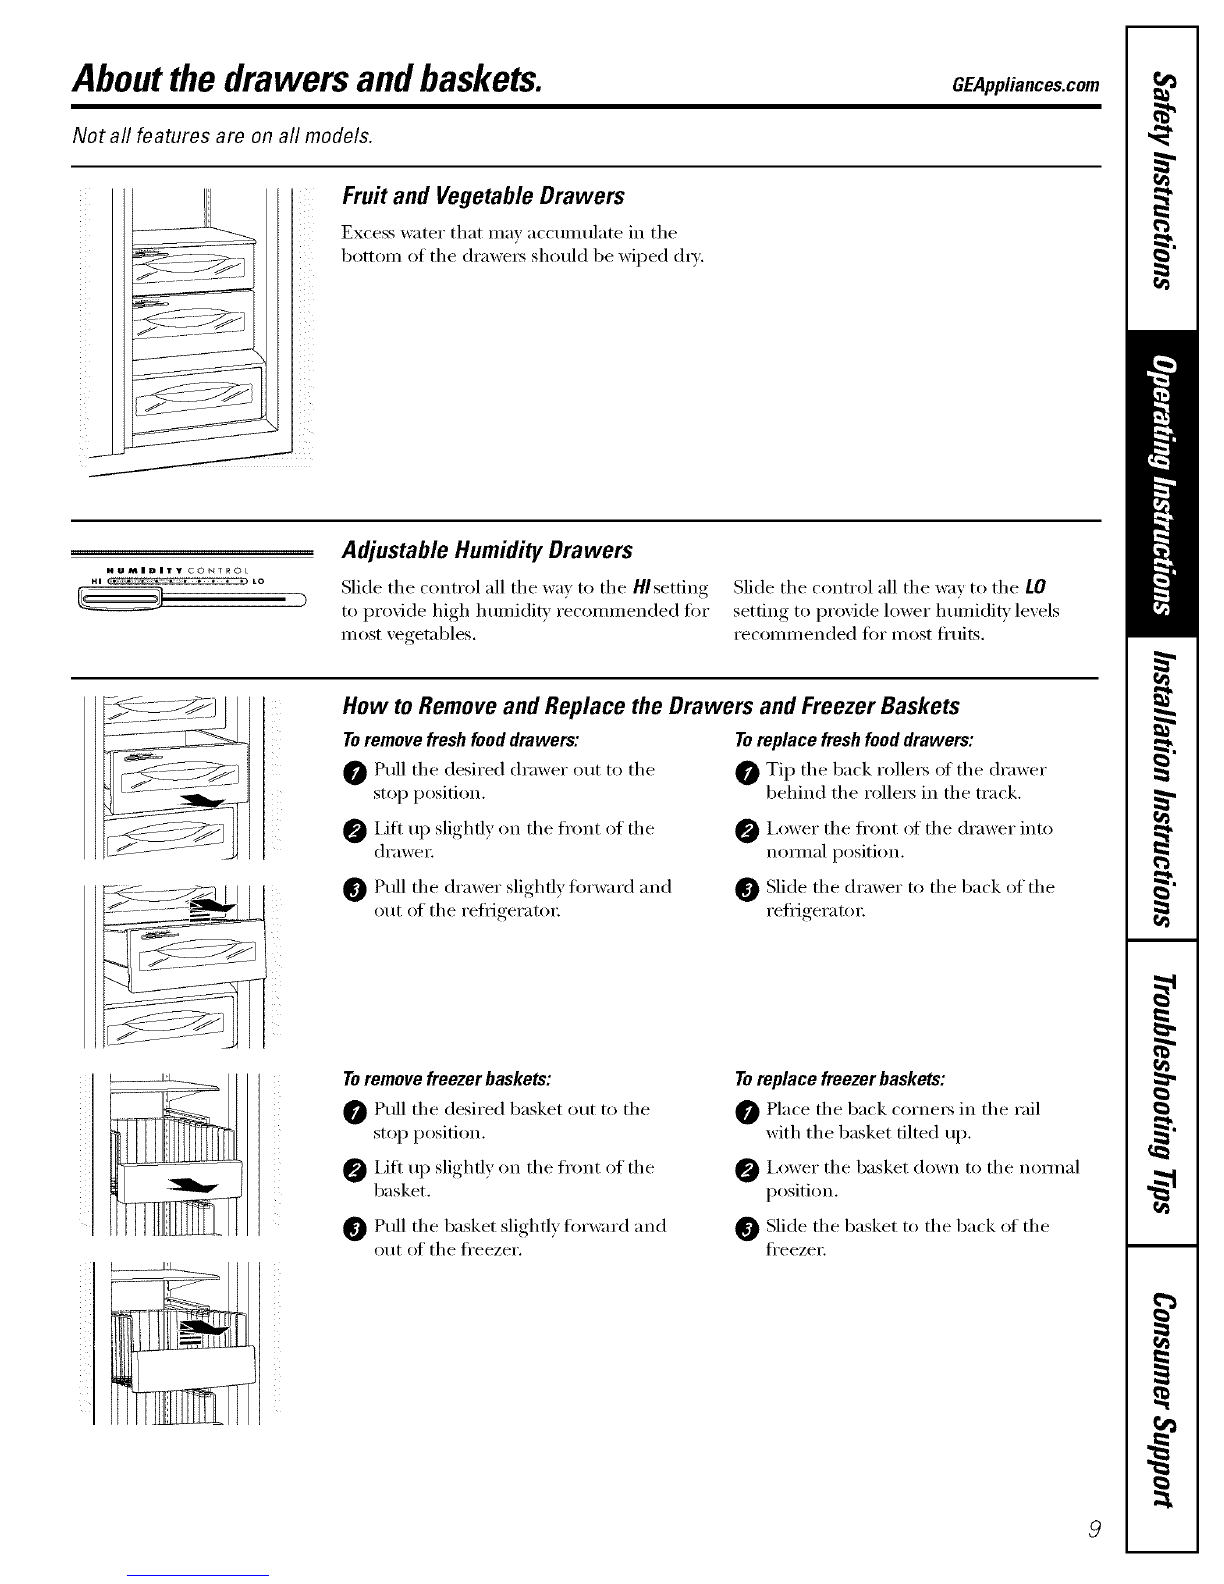
Ice Storage Bin
To remove:
I,ift u I) the access door to reach the
icelnaker. Set the icelnaker power switch
to the 0 (off) position. _,_ith the access
door closed, sui)port the storage bin at
the bottom while slightly lifting. Pull bin
straight out.
Toreplace:
Slide the bin back tmtil the tab on
the bin locks into the slot on the shelf.
If the bin does not go all the way back,
relnove it and rotate the dlive n_echai_ism
l/4 turn. Then push the bin back again.
Important facts about your
ice and water dispenser
Do not add ice fi'om trays or 1)ags to the
storage bin. It inay not crush or dispense
well.
Avoid ovedilling glass with ice and use of
narrow or extramdl glasses. Backed-up ice
canjaln the chute or cause the door in
the chute to fl'eeze shut. If ice is blocking
the chute, poke it through with a wooden
spoon.
Beverages and fi)ods should not be
quick-chilled in the ice storage bin.
Cans, bottles or food packages in the
storage bin inav cause the icelnaker
oi" auger to jam.
To kee I) dispensed ice fl'om nfissing
the glass, put the glass close to, but not
touching, the dispenser oi)ening.
Solne crushed ice inay be dispensed
even though you selected CUBED. This
hai)i)ens occasionally when a ti_w cubes
accidentally get directed to the crushei:
_M*eI"crushed ice is dispensed, some
water inay dri I) fl'Oln the chute.
The first glass of water dispensed may
be wanner than the tollowing ones.
This is nomml.
10
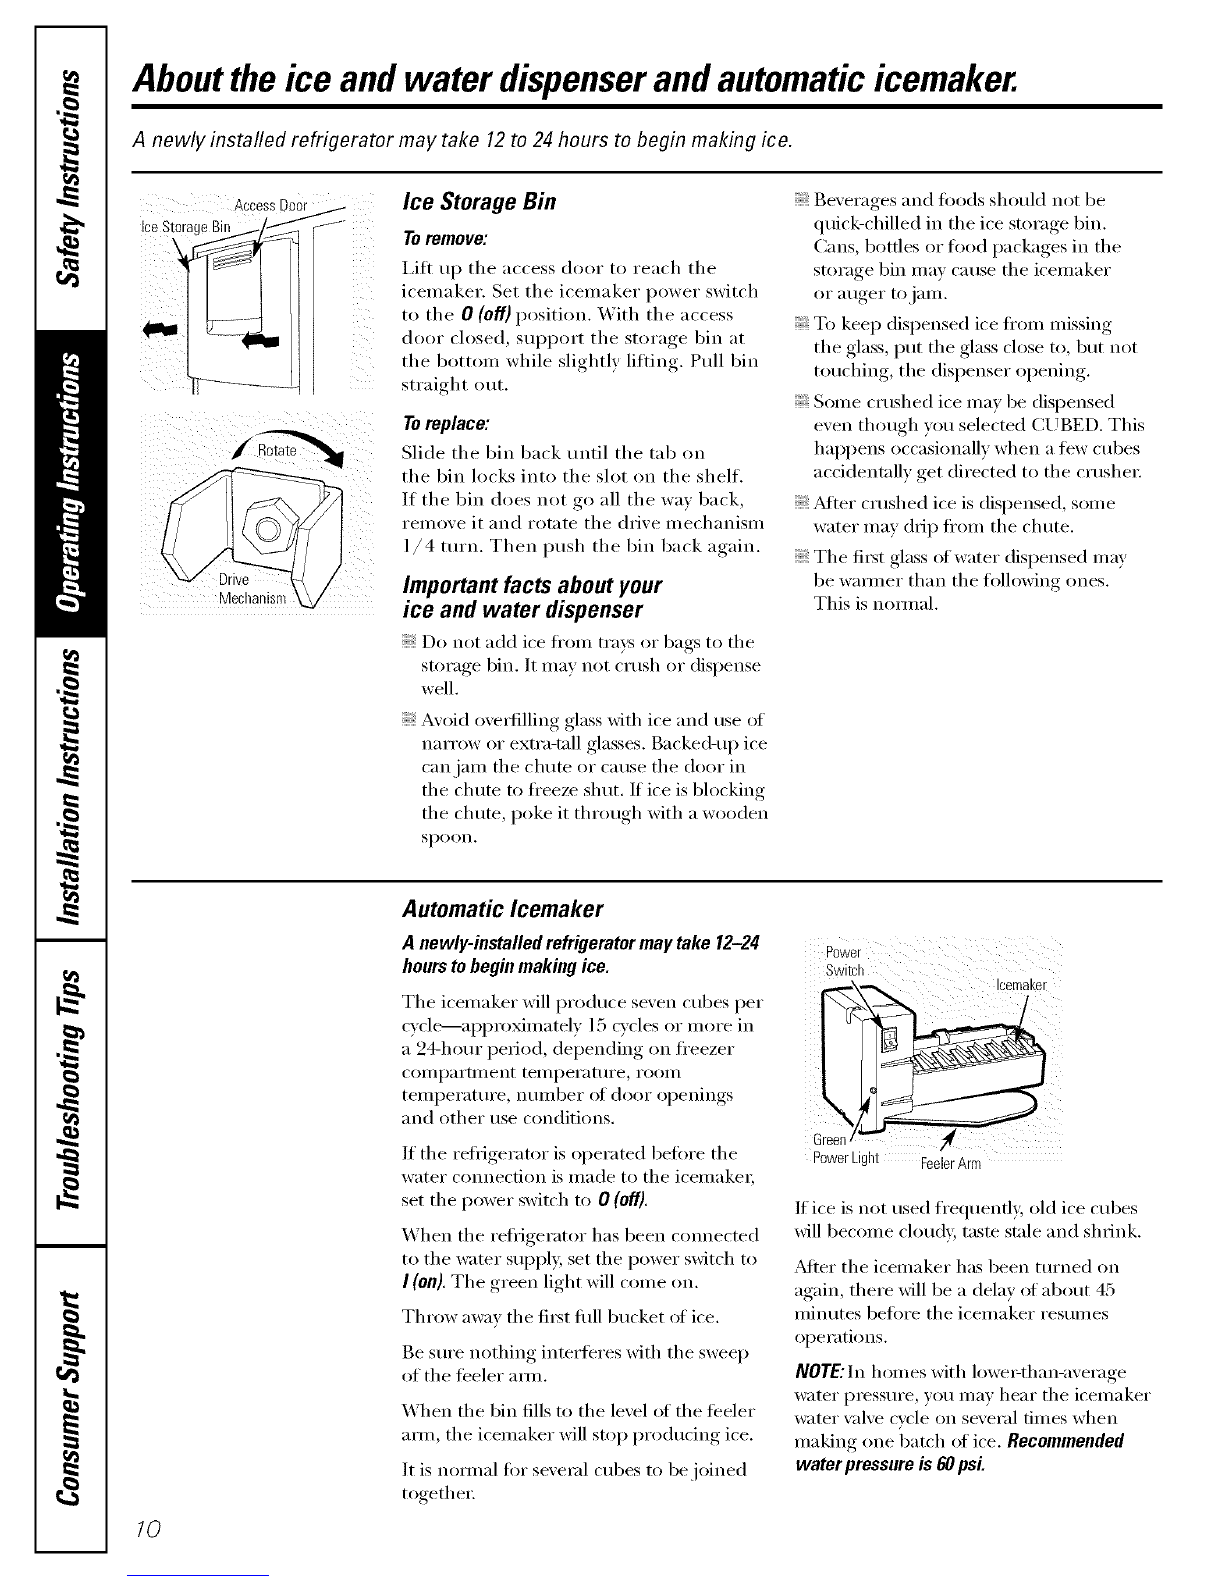
Automatic Icemaker
A newly-installedrefrigeratormaytake 12-24 Power
hourstobeginmakingice. Switch
The icelnaker will produce seven cubes per
c)'cle---aI)I)roMmately 15 cycles or inore in
a 24-hour peliod, dei)ei_ding on fi'eezei"
COI]/l)_lI'[lIlent [eii/l)ei'il[lli'e _ i'ooii/
teml)erature, imlnber (ff door oi)enings
and other use conditions.
If the retiigerator is operated befiwe the
water cotmectiot_ is inade to the icelnaket;
set the power switch to 0 (off}.
When the reli-igerator has been cotmected
to the water suppl); set the power switch to
I(on}. The green light will come on.
Throw away the fii_t flfll bucket of ice.
Be sure i_othing interteres with the sweep
of the feeler aim.
When the bin fills to the level ot the teeler
aim, the icelnaker will stop I)rodudng ice.
It is nolmal fi)I" several cubes to be joined
togethei;
Icemake[
Green
PowerLight FeelerArm
If ice is not used fl'equenfly, old ice cubes
will becolne cloudy, taste st;de and shrii_k.
_Mtei" the icelnaker has been turned on
again, there will be a delay of about 45
inilmtes bet0re the icelnaker resulnes
ol)erations.
NOtE:Inhomes with lowe>than-average
water pressure, you Inay hear the icenlaker
water \;dve cycle on several tilnes when
inakii_g one batch of ice. Recommended
water pressure is 60 psi.