manuals.online logo
Brands
  1. Home
  2. •
  3. Brands
  4. •
  5. GE
  6. •
  7. Refrigerator
  8. •
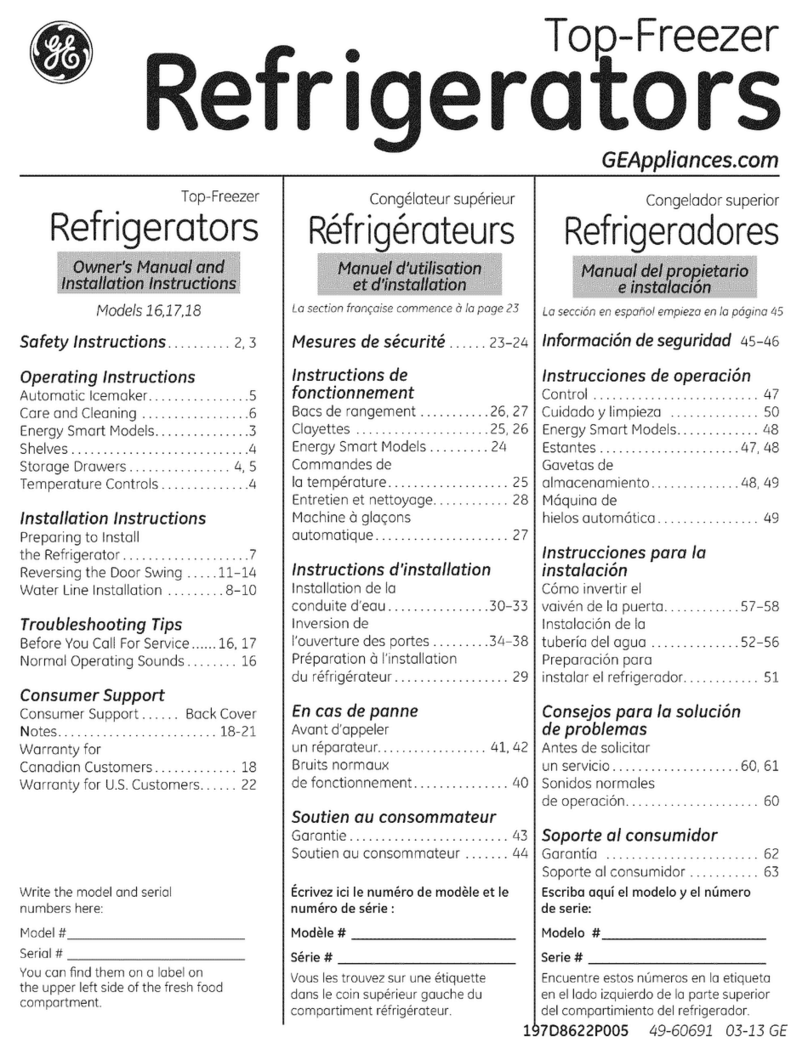
  9. GE Monogram ZIC36N LH Instruction Manual

GE Monogram ZIC36N LH Instruction Manual

Other manuals for Monogram ZIC36N LH

1

This manual suits for next models

1

Other GE Refrigerator manuals

GE ETS22XBPCRCC Original instructions

GE

GE ETS22XBPCRCC Original instructions

GE GTS18ABDBB Manual

GE

GE GTS18ABDBB Manual

GE GTH20JBBBB Manual

GE

GE GTH20JBBBB Manual

GE ENERGY STAR GTH21SCXSS User manual

GE

GE ENERGY STAR GTH21SCXSS User manual

GE Profile PFS22MIW Manual

GE

GE Profile PFS22MIW Manual

GE TBX25M User manual

GE

GE TBX25M User manual

GE GTH18CCCRCC Manual

GE

GE GTH18CCCRCC Manual

GE PSE26KSESS User manual

GE

GE PSE26KSESS User manual

GE GDSL3KCX Manual

GE

GE GDSL3KCX Manual

GE PSE26KGEGEWW Safety guide

GE

GE PSE26KGEGEWW Safety guide

GE GTL22JBPBS Original instructions

GE

GE GTL22JBPBS Original instructions

GE Spacemaker GMR02BAN User guide

GE

GE Spacemaker GMR02BAN User guide

GE Profile Series User manual

GE

GE Profile Series User manual

GE GTK21GBEBS Assembly instructions

GE

GE GTK21GBEBS Assembly instructions

GE Monogram ZDOD240 User manual

GE

GE Monogram ZDOD240 User manual

GE MONOGRAM ZISB360DM Service manual

GE

GE MONOGRAM ZISB360DM Service manual

GE PDS22xxP series How to use

GE

GE PDS22xxP series How to use

GE TCX22 User manual

GE

GE TCX22 User manual

GE G6S28TSLSS User manual

GE

GE G6S28TSLSS User manual

GE 18, 19 Original instructions

GE

GE 18, 19 Original instructions

GE CustomStyle GCL22QGT Manual

GE

GE CustomStyle GCL22QGT Manual

GE PSC23NHPABB and Safety guide

GE

GE PSC23NHPABB and Safety guide

GE PSE25KGHBHBB User manual

GE

GE PSE25KGHBHBB User manual

GE PGD Series Original instructions

GE

GE PGD Series Original instructions

Popular Refrigerator manuals by other brands

Frigidaire FRS26TS7DW2 Use & care manual

Frigidaire

Frigidaire FRS26TS7DW2 Use & care manual

Fisher Scientific 10ECEEFSA manual

Fisher Scientific

Fisher Scientific 10ECEEFSA manual

Summit FF22BDRSS user manual

Summit

Summit FF22BDRSS user manual

Frigidaire FFRU17B2QWE use & care

Frigidaire

Frigidaire FFRU17B2QWE use & care

Hotpoint ENBGH 19xxx FW operating instructions

Hotpoint

Hotpoint ENBGH 19xxx FW operating instructions

Hitachi R-SG28KPH instruction manual

Hitachi

Hitachi R-SG28KPH instruction manual

Dometic RMH 7390 L operating instructions

Dometic

Dometic RMH 7390 L operating instructions

AEG S71700TSW0 user manual

AEG

AEG S71700TSW0 user manual

Electrolux ENB3669 Instruction book

Electrolux

Electrolux ENB3669 Instruction book

Electrolux ERN 2930 Instruction book

Electrolux

Electrolux ERN 2930 Instruction book

Beko GNE 60520 X user manual

Beko

Beko GNE 60520 X user manual

Jenn-Air JUR248LBES00 Use & care guide

Jenn-Air

Jenn-Air JUR248LBES00 Use & care guide

Dometic RGE 4000 Installation and operating manual

Dometic

Dometic RGE 4000 Installation and operating manual

Dometic L-0191B Brochure & specs

Dometic

Dometic L-0191B Brochure & specs

LG LRBP1031W - 10 Cu. Ft. Cabinet Depth Bottom Freezer... owner's guide

LG

LG LRBP1031W - 10 Cu. Ft. Cabinet Depth Bottom Freezer... owner's guide

Daewoo RN-33 Series user manual

Daewoo

Daewoo RN-33 Series user manual

Haier RF-8888-174 Service manual

Haier

Haier RF-8888-174 Service manual

Blaupunkt 5CK2 Series user manual

Blaupunkt

Blaupunkt 5CK2 Series user manual

manuals.online logo
manuals.online logoBrands
  • About & Mission
  • Contact us
  • Privacy Policy
  • Terms and Conditions

Copyright 2025 Manuals.Online. All Rights Reserved.

GE Monogram _
36" Bottom Mount
Refrigerators
Custom
Options Guide
and
Installation
Instructions
With Custom Panel Dimensions
and Trim Kit Installation Instructions
These Monogram refrigerators are
designed to be customized with decorator
door and grille panels. Field installed
panels are required.
Factory installed trim will accommodate
1/4" thick custom panels or optional
Lexan c_and stainless steel panel kits.
Optional trim kits allow an even broader
range of custom appearance options.
Read this booklet carefully to accomplish the
desired appearance and to instwe atrouble free
installation.
This booklet contains information and
illustrations to demonstrate custom
possibilities. Custom door and grille panel
sizes vary to accommodate the kit being
used. Dimensions for each application are
included and can be faxed or sent to the
cabinet manufacturer so that the panels can
be constructed accurately.
Models:
ZIC36N RH
ZIC36N LH
Monogram
36" Bottom Mount Refrigerator
Before you begin -Read these instructions completely and carefully.
IMPORTANT - Save these instructions for local inspector's use.
IMPORTANT - OBSERVE ALL GOVERNING CODES AND ORDINANCES.
Note to Installer - Be sure to leave these instructions with the Consumer.
Note to Consumer - Keep these instructions with your Use and Care Book for future reference,
This appliance must be properly grounded. See "Grounding the Refrigerator," page 12.
If you have a question concerning the installation of this
product, call the GE Answer Center _>Consumer
Information Service at 800.626.2000, 24 hours a day,
7 days a week.
If you received a damaged refrigerator, you should
immediately contact your dealer or builder.
Proper installation is the responsibility of the installer.
Product failure due to improper installation is not
covered under the GE Appliance Warranty. See the
Use & Care Guide for warranty information.
WARNINGS:
•Use this appliance only for its intended purpose.
• Immediately repair or replace electric service cords
that become frayed or damaged.
• Unplug the refrigerator before cleaning or making
repairs,
• Repairs should be made by a qualified service
technician.
For Monogramlocal service in yourarea,
1-800-444-1845.
For Monogramservice in Canada
1-888-880-3030
ForMonogramParts andAccessories, call
1-800-626-2002.
Contents Design Information
Flush or Semi-Flush Enclosure Installations ............................................................................................................................... 3
Enclosure Cutout and Product Dimensions ................................................................................................................................. 3
Installation Examples, Between Base & Wall Cabinets ........................................................................................................... 4
Installation at End-of-Run ............................................................................................................................................................... 4
Frameless Cabinets .......................................................................................................................................................................... 4
Accessory Panel Kits ....................................................................................................................................................................... 4
Models Available .............................................................................................................................................................................. 5
Advance Planning Exterior Appearance Options ....................................................................................................................... 5
Trim Kit Descriptions ........................................................................................................................................................................ 6
CustomPanel Dimensions
Product andCutout Information....................................................................................................................................................7
1/4"Thick Custom Panelsor PanelsSecured to 1/4"thick backing ........................................................................................8
3/4"Thick Panelswith Supplied Handle, ZKTC36Lor ZKTC36R...............................................................................................9
3/4"Thick Panelswith CustomHandle .......................................................................................................................................10
Side Panelor Filler Options ..........................................................................................................................................................11
Installation Instructions...........................................................................................................................................................12-17
Trim Kits
ZGC2 Trim Kit, Grille Panel Frame Adjustment .......................................................................................................................... 18
ZKHC1 Trim Kit (for 1/4" Panels), Support for Custom Handles ......................................................................................... 19-21
ZKTC36L/ZKTC36R Trim Kit, 3/4" Custom Panels .................................................................................................................. 22-27
ZKHTC1 Trim Kit (for 3/4" Panels), Support for Custom Handles ...................................................................................... 28-31
ZKHCSS1 Trim Kit (for 1/4" Panels), Tubular Stainless Steel Handles ............................................................................. 32-35
ZKHTCSS1 Trim Kit (for 3/4" Panels), Tubular Stainless Steel Handles ........................................................................... 36-38
ZFC1 Trim Kit, for side to side installation .................................................................................................................................. 39
Flush or
Semi-Flush
Enclosure
Installations
Advance Planning
Design Information
36" Bottom Mollnt Refrigerators
f
True Flush Installation
In a flush installation,
the refrigerator doors
will align evenly with the
front face of adjacent cabinet
doors. The refrigerator blends
into the surrounding cabinetry.
Monogram built-in refrigerators can be installed flush
with typical 24-3/4" deep cabinetry.
When installed semi-flush, the case trim will conceal
slight gaps around the enclosure. The refrigerator will
project forward approximately 3/4" beyond the front
face of surrounding cabinetry.
In any installation situation, a wide range of appear-
ance options can be accomplished through the use of
one or more trim kits. See trim kit descriptions and
appearance options on page 6.
Semi-Flush Installation
These refrigerators
can also be installed
semi-flush into an enclosure
using the minimum cutout
width. The case trim creates a
frame around the opening.
Side Panels Requirements:
•Side panels are not required whenever the
refrigerator is installed into an enclosure or between
pantry and oven cabinets.
• Side panels are required whenever the sides of the
refrigerator are exposed.
• Side panel sizes vary depending on the type of
installation being made.
To accomplish an attractive installation, you must:
1. Determine the need for side panels.
2. Determine side panel thickness.
3. Order matching side panels from the cabinet
manufacturer. Be sure to provide the exact dimen-
sions.
Enclosure
Cutout and
Product
Dimensions
• To achieve a flush fit the finished cutout width must
be at least 36" wide.
• A semi-flush installation requires 35-1/2" min. finished
cutout width.
• The electrical and water locations must be located as
shown for either type of installation.
24-3/4'_36,,
83q/2" Min
84q/2" Max
841/2"max
831/2"rain
Finished
Opening
L3 1/2"
",. *FinishedWidth
/ Electrical
"7 Area
"_/_5"
-24 3/4" Total
Depth
*36" Min. for a flush installation
Wall View
74" FromFloor
to Bottom
of Electrical
35-1/2" Min. for a semi-flush installation
Note: Additional cutout width may be required when
side panels are used. Add side panel thickness to the
finished cutout to calculate rough-in width. See
installation examples on the following page.
Design Information
36" Bottom Mount Refrigerators
Installation Examples
Side panels are required whenever the sides of the refrigera-
tor will be exposed.
1/2"to 3/4"side panels are normally set into place and
fastened to adjacent cabinetry or to the back wall before
rolling the refrigerator into the opening.
Therefore, the rough-in dimensions must allow for side panel
thickness. In both aflush and semi-flush installation, the
finished dimension, (the width ofthe opening after side panels
are installed), must accommodate the full width of the
refrigerator.
See page 11for side panel sizes.
Installa tion
Between
Base &
Wall Cabinets
Installa tion
A t End-of-Run
Flushand Semi-Flush
Installations
[_ 1/4" Thick
__SidePanels ! I
FinishedDim.I._ 35q,/2_]
RoughedqnDirn,_36" I
Note: 1/4"thick side panels can be
inserted into the case trim, making the
rough-in the same as the outside trim
width, 36".
I
_Refrigerator_
Cabinet _
) Refrigeratordoor \
/"--k.2j/
Cabinet
1/4" Side Panels.Insert end of
side panel into trim
Flushand Semi-Flush
Installations
II1/2"Th °kII I
Finished Dim, k_36'_
Roughedqn Dim._37"
Cad
Refrigerator_4_
Cabinet _
)Refrigeratordoor \
Note: 1/2"thick side panels shown. Side panels can
be any thickness. Add side panel thickness to outside
trim width (36") to calculate the rough-in dimension.
The leading (front) edge must be finished to match
surrounding cabinetry.
1/2" To 3/4" SidePanels.Leading
EdgeFlushWith Cabinet
Frameless
Cabinets
Accessory
Panel Kits
Side panels, 1/2"minimum thickness are required when
using frameless cabinets. The side panel acts as a
spacer between the cabinet and the case trim and
prevents interference with cabinet door swing. The
leading (front) edge must be finished to match
surrounding cabinetry.
1/2" To3/4" SidePanels.Leading
EdgeFlushWith Cabinet
Cabinet
/
These refrigerators require field installed door and grille
panels.The factory installed trim will accept accessory
panel kits. White or black Lexan ':_and stainless steel
kits are available. Panels are cut to size and ready to
install. These panel kits must be ordered separately.
ZWBC36, Black Lexan _) Panels
ZWWC36, White Lexan CR)Panels
ZWSC36, Stainless Steel Panels
A wide range of custom appearance options can be
created with optional trim kits. See page 6 for examples
and trim kit descriptions.
Design Information
36 " Bottom Mount Refrigerator
Models
available
ZIC36N RH
36" wide model with handle on the left side, the door
swings left to right.
ZIC36N LH
36" wide model with handle on the right side, the door
swings right to left.
Advance
planning
exterior
appearance
options
These refrigerators are designed to be customized with
decorator door and grille panels. Field installed custom
door and grille panels are required for these models.
Factory installed trim will accommodate 1/4" thick
custom panels, Lexan ® or stainless steel panel kits.
Door and grille panel sizes vary to accommodate the kit
being used. Sizes are provided in this booklet.
Caution: Maximum panel weight for fresh food door is
50 pounds and 30 pounds for freezer drawer panel.
Side panels must be used whenever the sides of the
refrigerator will be exposed. Side panel sizes vary
depending on the installation.
3/4" thick custom panels-Without trim kits
A raised panel design, screwed or glued to a 1/4" thick
backing can be used. See page 8 for panel sizes and
clearances.
Youshould:
1.Select the appearance option.
2.Order the trim kit for that option.
3.Order the custom door andgrille panels from the
cabinet manufacturer. The exact dimension for each
trim kit application is provided in this booklet, Find
and pull out the page for your application and fax or
send it to the cabinet manufacturer. The cabinet
manufacturer must havethis information to con-
struct the panels accurately.
4.Determine the final installation situation and order
matching side panels.
Design Information
36 " Bottom Mount Refrigerator
Trim kit
descriptions
ZGC2 - Provides 1/4" grille panel frame side pieces for
83-1/2" and 84-1/2" installation heights. The supplied
grille panel frame is factory set for 84".
ZKHC1 - Provides the necessary framework to install
custom handles, ofyour choice, onto 1/4" thick panels.
(Handles not included.)
ZKHCSSI - Tubular stainless steel handles for 1/4" thick
panel installations.
ZKHTC1 - Provides the necessary framework to install
custom handles, ofyour choice, onto 3/4" thick panels.
(Handles not included.) This kit must be used in
combination with ZKTC36L or ZKTC36R
ZKHTCSS1 - Tubular stainless steel handles for 3/4"
thick panel installations. This kit must be used in
combination with ZKTC36L or ZKTC36R
ZKTC36L (left opening models),
ZKTC36R (right opening models) - Provides for the
installation of 3/4" thick custom door and grille panels.
This kit provides a standard handle to fit 3/4" thick
panels.
ZFC1 Trim Kit - For side to side installation of 2
refrigerators. This kit provides a trim strip to cover the
side case trim for a finished appearance.
1/4"Panels with standard
handles. No kits required. 1/4" Custom panels with
custom handles. Trim Kit
ZKHC1.
1/4"Custom panels with
Tubular Stainless Steel
handles, Trim Kit
ZKHCSS1.
3/4"Custompanels with
supplied handle. Trim Kit
ZKTC36L(or ZKTC36R)
3/4"Custom panels with
custom handles. Trim kits
ZKTC36L (or ZKTC36R)
and ZKHTC1.
3/4" Custom panels with
Tubular Stainless Steel
handles, Trim Kits
ZKTC36L (or ZKTC36R)
and ZKHTCSSI
Custom Panel Dimensions
36 " Bottom Mount Refrigerators
SideView
-- 243/4"--
--263/4"
FrontView 103/4"Max
--35"Case 10"Min
• 36"Overall'_
26"
841/2"Max
84 1/2" max
83 1t2" min
Finished
Opening
*Finished Width_
"7
Locate Grounded
Electrical outlet
Within Solid
Area Above
Locate Water
Supply Within
the Shaded
-- 3 112"
Wall View
(not to Scale)
74" From
Floor to
Bottom of
Electrical Area
-3 1/2"
* 36" Min. for a flush installation into an enclosure.
35-1/2" Min. for a semi-flush installation into an enclosure.
Note: Additional cutout width may be required when side panels are
used. Add side panel thickness to the finished cutout width to
calculate rough-in width. See installation examples on page 4.
ZIC36N Bottom Mount Refrigerator
Design Information
Designed to be installed flush or semi-flush with
surrounding cabinetry. Cutout dimensions, clearances
and side panel sizes are determined by the many
installation options available. Side panels must be used
whenever the sides of the refrigerator will be exposed.
Side panels are not required when refrigerator is
installed into an enclosure or between pantry and oven
cabinets. IMPORTANT - Side panels, 1/2" minimum
thickness are required when using FRAMELESS
CABINETS.
• Field installed custom panels, Lexan _ or stainless
steel panels are required. The door panels and grille
panel sizes vary to accommodate the kit being used.
• The supplied toekick is vented and must remain
unobstructed for proper air circulation.
Optional Panel Kits:
• ZWBC36:Black LexanCR_Panel Kit
• ZWWC36:White Lexan_ Panel Kit
• ZWSC36:Stainless Steel Panel Kit
Optional Custom Trim Kits:
• ZKHCI: Forinstallation of a custom handle of your
choice onto 1/4"Panels.
• ZKTC36Lor ZKTC36R:For installation of 3/4"thick
custom panels.
• ZKHTCI: For installation of a custom handle of your
choice onto 3/4"thick panels. (This kit must be used in
combination with ZKTC36Lor ZKTC36R.
• ZKHCSSI: Tubular Stainless Steel handles for 1/4"
thick panels.
• ZKHTCSSI:Tubular Stainless Steel handles for 3/4"
thick panels.
• ZGC2:1/4"grille panel frame side pieces for 83-1/2
and 84-1/2"installation heights. Factory set height is
84".
Additional Specifications
• A 115volt 60Hz.,15or 20amp power supply is
required. An individual properly grounded branch
circuit or circuit breaker is recommended. Install a
properly grounded 3-prong electrical receptacle
recessed into the back wall. Electrical must be
located on rear wall as shown.
• Water line can enter opening through the floor or
back wall. Thewater line should be 1/4"O.D.copper
tubing between the cold water line and water
connection location, long enough to extend to the
front of the refrigerator. Installation of an easily
accessible shut off valve in the water line is
recommended.
Clearances:
• If the refrigerator is to be installed in a corner:
A 4" clearance is required on the hinge side for a 90 °
door opening and access to fresh food drawers. A 10"
clearance is required on the hinge side for removal of
pans.
Custom Panel Dimensions
36" Bottom Mount Refrigerators
Custom Door Panel Dimensions Using Standard Trim
1/4"thick panels
or
Panels secured to 1/4"thick backing
"1" 35-1t16'_
Fresh Food Panel 45 1/2"
Freezer Panel
.I 35 118"
21 11/16"
Raised Panel on 1/4" Thick Backing
Using Standard Handles
7 LAppeorance
Backing I I Panel
LLJ
5116" Clearance
Fresh Food Panel
_ 5/16" Clearance
• /
ZIC36N Bottom Mount Refrigerator
• 1/4"Panels: Cutpanels to size.
• Custom handles with 1/4"door panels require Trim kits
ZKHC1or ZKHCSS1for tubular stainless steel
handles).
Standard Trim with Panels secured
to I/4" thick backing
• Applying a raised panel design to a 1/4" thick backing
(screws or glued): Cut 1/4" thick panels to size. On the
fresh food door, fabricate the raised panel to permit at
least 2" fingertip clearance of the standard handle. 1-
1/4" clearance from the hinge side to avoid striking
adjacent cabinetry and 5/16" from the top and bottom
edges to allow for the trim flange. For the freezer
drawer, allow 2" clearance at the top handle end and
5/16" clearance on both sides and the bottom edge to
allow for trim flange.
Note: ZKHTC1 custom handle kit cannot be used in
this configuration.
Custom Grille Panel
35 1t8"
1/4" Thick Panel
The grille panel frame is factory assembled for 84"
installation height. If installation height varies, order
ZGC2 trim kit that provides optional side trim pieces.
Cut grille panel to sizes shown below.
Installation Height Panel Height
83-1/2" 7-1/2"
84-1/2" 8-1/2"
1-1/4"
Clearance
hinge side
2" Clearance
Handle End
Freezer Panel
5/16" Clearance
Custom Panel Dimensions
36 " Bottom Mount Refrigerator
Custom Door Panel Dimensions
Using Trim Kits ZKTC36Lor ZKTC36R
314"thick panel with kit supplied handle
75 -1t16" _1" [
45-9tl 6"
Fresh Food Panel
ZIS36N Bottom Mount Refrigerator
• The ZKTC36L (or ZKTC36R) trim kit provides for the
installation of 3/4" thick custom door and grille panels,
using the supplied handle. Cut panels to size and
install.
Freezer Panel
Custom Grille Panel
35 1/4"
A 3/4" Thick Panel
Grille Panel height can vary to fill installation
height.
Installation Height Dimension A
83-112" 7-314"
84" 8-I/4"
84-I/2" 8-3/4"
Important: Maintain 1-1/2" min. gap between
top of door and bottom of grille panel.
Custom Panel Dimensions
36 " Bottom Mount Re_'igerators
Custom Door Panel Dimensions Using Standard Trim
Using Trim KitZKTC36Lor ZKTC36R
3/4"thick panel
with custom handle
"[- 35 114"
4
Fresh Food Panel 45 9/16"
Freezer Panel 21 13/16"
35 114 "
ZIC36N Bottom Mount Refrigerator
•The ZKTC36L (or ZKTC36R) trim kit installed together
with a ZKHTC1 custom handle kit provides for the
installation of 3/4" thick custom door and grille panels
with a custom handle of your choice. Order
ZKHTCSS1 for tubular stainless steel handles. Cut
panels to size, rout the handle side of the panels as
shown below and install.
t
1/4"
FFlax
Rout paneHsto specification bellow on
the handHe side of each paneH
_1/4" max
1 13116" 1
'<" _\ Freezer
Fresh Food Door Face Door
Face
Custom GriHHePanel
35 1t4"
_r
A 3/4" Thick Panel
A=
Grille Panel height can vary to fill installation
height.
Installation Height Dimension A
83-I12" 7-3/4"
84" 8-1/4"
84-1/2" 8-3/4"
Important: Maintain 1-1/2" min. gap between
top of door and bottom of grille panel.
10