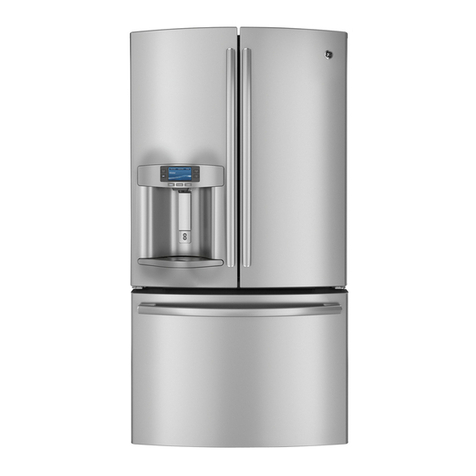
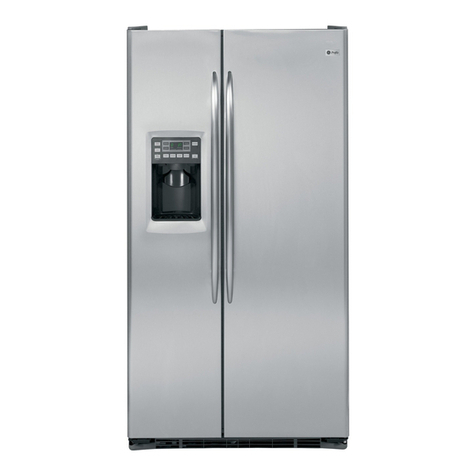
GE PFSS6SMXESS and Operating instructions

0GEAppliances.com
Q;
N
Q;
0
Safety Instructions ........... 2,3
Operating Instructions
Automatic Icemaker ............... 20
Care and Cleaning ............. 21, 22
Control for LCD Models .......... 4-11
Control for Non-LCD Models .... 12, 13
Crispers and Pans ................. 18
Dispenser ......................... 14
Freezer ............................ 19
Fresh Food Storage Options .... 16, 17
Replacing the Light Bulbs .......... 23
Water Filter ........................ 15
Installation Instructions
Installing the Refrigerator ....... 26-34
Installing the Water Line ........ 35-37
Preparing to Install
the Refrigerator ................ 24, 25
Troubleshooting Tips ...... 38-42
Normal Operating Sounds .......... 38
Consumer Support
Consumer Support ........ Back Cover
Owner's Registration
for Canadian Customers ........ 43, 44
Performance Data Sheet ........... 47
State of California Water
Treatment Device Certificate ....... 48
Warranty for Canadian
Customers ......................... 46
Warranty for U.S. Customers ....... 45
Profile'" Models 26, 29
Cong_lateur inf_rieur
R frig rateurs
La section franqaise commence 6 la page 49
CongelGdor inferior
Refrigeradores
La secci6n en espa_ol empieza en la p6gina 95
0
Write the model and serial
numbers here:
Model #
Serial #
Find these numbers on a label
on the left side, near the middle
of the refrigerator compartment.
225D2649PO02 49-60598-2 05-09 JR

IMPORTANT SAFETY INFORMATION.
READ ALL INSTRUCTIONS BEFORE USING.
WARNING!
Use this appliance only for its intended purpose as described in this Owner's Manual.
SAFETY PRECAUTIONS
When using electrical appliances, basic safety precautions should be followed, including the following:
;_Thisrefrigerator must be properly installed
and located in accordance with the Installation
Instructions before it is used.
Donot allow children to climb,stand or hang
on the shelvesin the refrigerator.They could
damage the refrigerator and seriouslyinjure
themselves.
Donot touch the cold surfaces in the freezer
compartment when hands are damp or wet.
Skinmay stickto these extremely cold surfaces.
Donot store or usegasolineor other flammable
vapors and liquidsin the vicinity of this or any
other appliance.
: Keepfingers out of the "pinch point" areas;
clearancesbetween the doorsand between
the doors and cabinet are necessarily small.
Becareful closing doorswhen children are
inthe area.
Inrefrigerators with automatic icemakers,
avoidcontact with the moving parts of the
ejector mechanism, or with the heating element
that releasesthe cubes. Donot place fingersor
handson the automatic icemaking mechanism
while the refrigerator isplugged in.
Unplugthe refrigerator before cleaning and making
repairs.
NOTE:Westrongly recommend that any servicing
beperformed bg o qualifiedindividual.
Donot refreezefrozen foods which havethawed
completely.
DANGER! RISK OF CHILD ENTRAPMENT
PROPERDISPOSAL OF THEREFRIGERATOR
Childentrapment and suffocation are not problems
of the past. Junked or abandoned refrigerators are
still dangerous...evenifthey will sit for 'just a few
days."If you are getting rid of your old refrigerator,
pleasefollow the instructions below to help prevent
accidents.
Before You Throw Away Your Old
Refrigerator or Freezer:
_,Take offthe doors.
Leavethe shelvesin place sothat children may not
easily climb inside.
Refrigerants
All refrigeration products contain refrigerants,
which under federal law must be removed prior
to product disposal. If you are getting rid of an old
refrigeration product, check with the company
handling the disposal about what to do.
2
USE OF EXTENSION CORDS
Because of potential safety hazards under certain conditions, we strongly recommend against the use
of an extension cord.
However,if you must usean extension cord, it isabsolutely necessarythat it be a UL-listed(inthe United States)
or a CSAcertified (inCanada),3-wire grounding type appliance extension cord having a grounding type plug
and outlet and that the electrical rating of the cord be 15 amperes (minimum) and 120volts.
GEAppliances.com
WARNING!
HOW TOCONNECT ELECTRICITY
Do not, under any circumstonces, cut or remove the third (ground) prong from the power cord.
For personol sofetg, this opplionce must be properly grounded.
Thepower cord ofthis appliance isequipped
with a 3-prong (grounding)plug which mates
with a standard 3-prong (grounding)wall outlet
to minimizethe possibility of electric shock hazard
from this appliance.
Have the wall outlet and circuit checked by
a qualified electrician to make sure the outlet
isproperly grounded.
Where a standard 2-prong wall outlet isencountered,
it is your personal responsibility and obligation to
have it replaced with a properly grounded 3-prong
wall outlet.
Therefrigerator should always be plugged into its
own individual electricaloutlet which hasa voltage
rating that matches the rating plate.
Thisprovides the best performance and alsoprevents
overloading house wiring circuits which could cause
a fire hazard from overheated wires.
Never unplug your refrigerator by pulling
on the power cord. Always grip plug firmly
and pull straight out from the outlet.
Repairor replace immediately all power cords that
have become frayed or otherwise damaged. Do not
usea cord that shows cracks or abrasion damage
along its length or at either end.
When moving the refrigerator away from the wall,
be careful not to roll overor damage the power cord.
READAND FOLLOWTHISSAFETYINFORMATIONCAREFULLY.
SAVETHESEINSTRUCTIONS

About the 7"controlpanel for LCDmodels.
NOTE:Therefrigerator isshipped with protective film covering the temperature controls. If this film was
not removed during installation, remove it now.
Thetemperature controls are presetin the factory at38°F for therefrigerator compartment and -2°F
for the freezercompartment. Allow 24 hours for the temperature to stabilizeto the presetrecommended
settings.
Thetemperature controls can display both theSETtemperature as well asthe actual temperature
in the refrigerator end freezer.Theactual temperature may very slightly from the SETtemperature based
on usageand operating environment.
ResettheLCDscreenat ang time bg inserting a paper clip into thesmall holenext to theSDcardslot under
the front edgeof the dispenseropening.
The Home Screen
The HOMEscreenisthe default displ% on the refrigerator. Fromthis screenyou con change the fresh food and freezer
temperatures, selectthe desirediceand water dispenser setting and access other functions as listed below.Toreturn
to this screenat 0% time, pressthe HOMEbutton inthe lower right hand corner of the screen.
FreezerButton:Displaysactual
aswellas settemperatures
compartment.WhenTurboFreezeis
active,itwill bedisplayed.
FeatureLock:Holdfor3
topreventaccidentaluseof
thedispenser.Thetockwill change
fromopentoclosedtoindicate
thedispenserandcontrolshave
beenlocked.
FreshFoodButton:Displaysactualaswell asset
temperaturesinfreshfoodcompartment.When
TurboCootisactive,it will bedisplayed. I
StatusBar:Showsstatusofwaterfilter.
J
WATER FILTER: GOOD
ConversionsTool:Accesses
theconversionsfunction.
Nutrition Facts:Findbasinnutrition
informationforcommonfooditems,
includingfruits,vegetables,meats
andcheeses.
Photos:Uploadphotographs
toyourrefrigerator.Organize
andarrangephotosinto
ascreensaverorstideshow.
SubstitutionsFeature:Acatalogof
substitutionsforcommoningredients
whicharenotreadilyavailable.
DispenserTab:Selectwater,crushediceorcubed
ice.Alsoaccessthedispenserlight. SettingsMenu:Accessrefrigeratorfunctions
suchasTurboCool,EnergySaverandDoorAlarm.
Changebrightnessofthedisplayandreplace
thewaterfilter.
4

Screen functions. GEAppliances.com
wA FREEZERButton 0 UpandDownArrows
toset temperature
IWATER FILTER: GOOD
Home Screen
FREEZERTemperature:
To change the freezer compartment temperature, pressthe FREEZER
button and usethe UPor DOWN arrow kegs until the desiredtemperature
appears on the screen.PressSAVEto confirm the selection.Thecontrol
will displag both the actual and set temperature until the set temperature
is reached.Theactual temperature mag vorg slightlg from the SET
temperature, based on usage and operating environment.
Eachtime gou adjust the controls, allow 24 hours for the refrigerator
to reach the settemperature.
SAVEButton
UpandDownArrows
to set temperature _ FRESHFOODButton
WATER FILTER: GOOD
FRESHFOODCompartment Temperature:
To change the fresh food compartment temperature, pressthe FRESH
FOOD button and use the UPor DOWN arrow kegs until the desired
temperature appears on the screen. Press SAVE to confirm the selection.
The control will displag both the actual and set temperature until the set
temperature is reached. The actual temperature mag varg slightlg from
the SETtemperature, based on usage and operating environment.
Each time gou adjust the controls, allow 24 hours for the refrigerator
to reach the set temperature.
0 SAVEButton
12:00 PM ] WATER FILTER: GOOD
DISPENSERButton Dispenser
WATER0xionchosen LIGHTButton
12:00 PM I WATERFILTER:GOOD
DISPENSER:
The refrigerator can dispensewater, crushed iceor cubed icethrough
the dispenser.To make a selection, pressthe DISPENSERbutton and
choose WATER,CRUSHEDICEor CUBEDICE.After the selection has
been made, pressa glassagainst the dispenser paddle.
NOTE:TheDISPENSERbutton isavailablefrom almost evergfeature
screen.
Dispenser LIGHT:
The dispenser light default setting is OFF.When the dispenser paddle
is pushed,the light automaticallg comeson (off after 5 secondswhen
pad isreleased).Toturn the light on manuallg, pressthe LIGHTbutton.
The dispenser lightwill stag on until the LIGHTbutton ispressed again.
LOCK:
To prevent accidental useof the control or dispenser,the control is
equipped with a lockfeature. When locked,the dispenser and LCD
functions are not available. Pressand hold the LOCI(button for
3 secondsto lock or unlock the dispenser.
LOCK
(_ _ LOCKButton
PressandHoldfor
3secondstoLock
Locked Unlocked orUnlock

Screenfunctions.
12:00 PM [
0 Chooseingredientorletter
WATER FILTER: GOOD CONVERSIONS
Pressthe CONVERSIONSbutton on the HOMEscreen to convert from one
unit and/or valueto another. Usethe UPand DOWN arrow keusto choose
the amount and/or units needed.
Conversions
Button
Chooseportion
Chooseunit
NutritionFactsButton
WATER FILTER:
NUTRITION FACTS
Pressthe NUTRITIONFACTSbutton on the HOMEscreento seenutrition
information. Sixoptions along with an alphabet displau are shown on
the screen.Selectone of these ingredients or scroll by page or alphabet
character to proceed.The LEFTand RIGHTarrow keys on the display
allow Uouto scroll left or right on the top or bottom displau.Togo back
to the HOMEscreen,pressthe HOMEbutton.
CTS
Number
ScrollPage
orAlphabet
NUTRITION FACTS
Apple
Serving Size 13gg
Calories 72
Calories from Fat 0
Amount Per Serving %DV*
Total Fat 0g 0%
Sat Fat Og 0%
Tl_ns Fat Og 0%
Cholesterol Og 0%
Sodium lmg 0%
Total Carbs !gg 6%
Dieterg Fiber 3g !2%
Sugars 14g
Protein 0g
Vitamin A 75
Vitamin C 63
Calcium 8
Iron 0.17
* Percent Dailg Values (DV) are
based on a 2,000 calorie diet.
ScrollRight
6 ScrollLeft

GEAppliances.com
12:00PM [ WATER FILTER: GOOD PHOTOS
Use the PHOTOS button to upload and display favorite photos that can
be used as a ZS-minute slide show or as a screen saver. The screen saver
shows on the LCD screen after 2 minutes of inactivity. After 15 minutes,
the backlight will go out. If the slide show is selected instead of the screen
saver, the photos will scroll through in a slide show for 15 minutes before
the backlight goes out.
Select the PHOTOS button on the HOME screen to see default photos and
to begin the process of uploading photos.
Speaker Reset 0 Insert
SDCard
Photos
storedin
0 Select internal
photos memory
40TO UPLOAD 1
Photos
Button
MemoryMeter:
Totalnumberof
photosavailable
for upload(Max.30)
AVAILABLE: 7PHOTOS
SELECT VIEW
ALLButton NONEButton O_uP_LOonADO_IEtCT
toSelectAll toDesetect
Photoson AllPhotos
SDCard onSDCard
Selectedphoto Numberofpagesavailable
OTOS
ALLButton NONEButton SLIDESHOWDELETEViewphotos
toSelect toDesetect Button Button asthumbnails
AllPhotos AllPhotos
_PHOTOS
UPLOADINGPHOTOS
To upload photos,insert an SDcard into the slot belowthe displag.
Upto 100 photos (6 per page)from the SDcard are displaued as
thumbnails in chronological order.Upto 30 photos can be uploaded.
Photos can be selectedone at a time on the screen or by usingthe
ALL button if all photos (30max) from the SDcard are to be uploaded.
To deselectall photos, selectthe NONEbutton. When photos have
been selected, pressthe UPLOADbutton. Uploading 30 photos will
take between 3 and 16 minutes. TheCANCELbutton can be pressed
at ang time to stop the uploading process.When the upload iscomplete,
the display will show UPLOADCOMPLETE.Selectthe EJECTbutton to eject
the SDcard and wait to be prompted to remove the card. If the card
is removed without pressingthe EJECTbutton, there isthe possibility
of damaging the files on the SDcard. When the SDcard isremoved,
the display returns to the PHOTOSscreen.
NOTE:Thedispenserwill not work during photo upload.
Arrow
Key
View
photos
full screen
Number
of photos
available
SELECTINGPHOTOS
The PHOTOSscreenwill display 6 thumbnail photos or you can
choose the full screen option. Navigate between screensusing
the LEFTand RIGHTarrow kegson the sidesof the display.
On the thumbnail screen,select photos one at a time by
touching that photo, select all ofthe photos by selecting
the ALL button or deselectall by selectingthe NONEbutton.
SLIDESHOW
SelectSLIDESHOW on the PHOTOSscreento view uploaded
photos in a slide show from newest to oldest. (Thisdoes NOTset
the slide show as the screen saver. That is done in the SYSTEMS
section.)
DELETINGPHOTOS
With photos selectedthat you want to delete,selectthe DELETE
button from either the thumbnail screen or the full screen.
TheALL button can be usedwith the DELETEfeature.You
will be given an opportunity to CANCELthe action before
the photos are deleted.
DELETE
Button 7

Screenfunctions.
12:00 PM
0 Select an
ingredient
WATER FILTER: GOOD
SUBSTITUTIONS
Button
SUBSTITUTIONS
Selectthe SUBSTITUTIONSbutton on the HOMEscreen.Thescreen
displuged givestips for using substitutions in recipes.Continue on to
the next screenwhere 6 ingredients per page are displaged in the upper
section. Selectan ingredient or usethe LEFTand RIGHTarrow kegs
to move from page to page.The lower sectionisfor navigating
alphabetically. Selecta letter or usethe LEFTand RIGHTarrow keys
to move from page to page.
Oncean ingredient has been selected,a listof ingredients and proportions
are listedthat can be used asa substitute.
lO
12:00 PM WATER FILTER: GOOD SETTINGS
TheSETTINGSfeature will give you accessto:
TurboCool'" settings
TurboFreeze'"settings
instructions for changing the water filter
,,access to systems such asdoor alarm
Metric/Englishdisplay
0 SE_INGS
Button
REFRIGERATOR
Button
REFRIGERATOR
Pressthe REFRIGERATORbutton to accessthe TurboCoolsetting
for the fresh food compartment and the TurboFreezesetting for
the freezer.TurboCool rapidly cools the fresh food compartment and
TurboFreezerapidly cools the freezer compartment in order to more
quickly cool foods. Usethese features when adding a large amount of
food to either compartment, putting away foods after they have been
sitting out at room temperature or when putting away warm leftovers.
It can also be usedifthe refrigerator has been without power for an
extended period.The compressor and fresh food or freezerfan will run
immediately for up to 3 1/2 hours (freshfood)or 2 1/2 hours (freezer)
and then return to the original setting value.
8

0 TURBOCOOL
Button
GEAppliances.com
SETTINGS (cont.)
When gou press TurboCool or TurboFreeze, a check mark shows
in the box next to the button showing thot it is turned on. It willalso be
listed on the HOMEscreen.
12:00 PM WATERFILTER:GOOD
TURBOCOOLSelected
WATERFILTERButton
WATERFILTER
Select WATERFILTERfrom the SETTINGSscreen.TheWATERFILTER
screen displogswhether the filter isGOOD,it istime to ORDERo filter,
or it is time to REPLACEthe filter.Follow on-screen instructions os shown
in the exomple to order or replocethe woter filter.Thestotus ofthe woter
filter con olso befound on the HOMEscreen in the upper right hond
corner when the door isopen.
WATER FILTER

Screenfunctions.
'SETTINGS .............
DOOR SYSTEM
ALARM Button
Button
ENERGYSAVER
Button
COOLING
SYSTEM 0 SETTIME
Button Button
0 Set_me
SETTINGS (cont.)
SYSTEM
Selectthe SYSTEMbutton to have accessto:
DOORALARM
BUTTONTONES
ENERGYSAVER
COOLINGSYSTEM
TIME
UNITS(ENGLISHor HETRIC)
DOORALARM
There isa check mark besidethe button if the DOORALARMis ON
(default).Toturn it OFF,selectthe DOORALARMbutton (checkwill
be gone).TheDOORALARMwill sound if the refrigerator door isopen
longer than 3 minutes.TheDOOROPENalarm screenwill be displaged
and a beeper will soundin i-minute intervalsuntil the door isclosed
or the SILENCEbutton is selected.
BUTTONTONES
Pressthe BUTTONTONESbutton to control the sound of the LCDbuttons.
When button sound isON(default),the beeper sounds a tone each time
a button is pressedper audio specifications.Toturn itoff, select
the BUTTONTONESbutton (checkwill be gone).Thisalso activates
or deactivates the RefreshmentCentertone.
ENERGYSAVER
This refrigerotor isshipped with the ENERGYSAVERfeoture ON(check).
Overtime, moisture can form on the front surface of the refrigerator
cabinet. If moisture doesappear on the front surface of the refrigerator
cabinet, turn OFFthe ENERGYSAVERbg pressing the button (check
will be gone).
COOLINGSYSTEM
This feature turns off the cooling sgstem in the fresh food and freezer
compartments without shutting off the electricitg to the refrigerator.
On the SYSTEMscreen,selectthe COOLINGSYSTEMbutton.
Toturn COOLINGSYSTEMONor OFF,selectCOOLINGSYSTEM
from the SYSTEMscreen.
SETTIME
To setthe clock,select the SETTIMEbutton from the SYSTEMscreen.
To change the hours and minutes, usethe UPand DOWN arrow kegs
above and below the numbers.To change from AM to PM,selectthe
corresponding pad.SelectSAVEor CANCEL.Youcan change the time
to a 24-hour clock bg selecting the 24 HR button. Changethe hours
and minutes usingthe UPand DOWNarrow kegs above and below
the numbers. SelectSAVEor CANCEL.
10 @ SAVEorCANCEL

SYSTEM
12:00 PM
_SCREEN
Bu_on
GEApplionces.com
METRIC
Button
ICEMAKER
Button
WATER FILTER: GOOD
SETTINGS (cont.)
UNITS
To chonge the temperoture reodingsfrom Englishunits to Metric units,
pressthe METRICbutton. Unitsshown on the HOMEscreenwill now reod
in Celsiusinsteod of Fohrenheit.
ICEMAKER
The unit comes with on icemoker instolled.Theicemoker rote of 9 cubes
per cucle will depend on freezercomportment temperoture, room
temperoture, number of door openings ond other useconditions. Ifthe
refrigerotor isoperoted before the woter connection is mode to the
icemoker,pressond releosethe ICEMAKERbutton on the SYSTEMscreen
to disengoge the icemoker.When the refrigerotor hos been connected to
the woter supplu, press ond releosethe ICEMAKERbutton on the SYSTEM
screento engoge the icemoker.A newly instolled refrigerotor moy toke
12 to 24 hours to begin moking ice cubes ond the ICEMAKERdefoult is
ON(check).
Youwill heor o buzzing sound eochtime the icemoker fillswith woter.
Throw owoy the first few botches of iceto ollow the woter line to cleor.
It isnormol for severolcubes to bejoined together. If iceisnot used
frequentlu, old ice cubes will become cloudu, toste stole ond shrink.
NOTE:In homes with Iower-thon-overoge woter pressure,you moy
heor the icemoker cycle multiple times when moking one botch of ice.
NOTE:TurnOFFthe icemoker ifthe woter supply isshut off.
SCREEN
SCREEN
Selectthe SCREENbutton from the SETTINGSscreen to odjust
the BRIGHTNESSof the disploUond to chooseo SCREENSAVER.
ForBRIGHTNESS,usethe LEFTond RIGHTorrow keysto dim ond
brighten the screen.
ForSCREENSAVER,usethe UP ond DOWN orrow keysto choose
DEFAULT,SLIDESHOW,BACKGROUNDor OFF.
DEFAULTgives o slideshow of foctory pre-looded pictures ot lO-second
intervols.Thesepictures ore not viewoble in the PHOTOSscreen ond
remoin even when oil photos ore deleted.
SLIDESHOW tokesthe most recently selectedphoto omong
user-uplooded picturesond disploys this one first, then the remoining
rondom photos ot lO-second intervols for 15 minutes.
BACKGROUNDtokes the most recently selected photo omong
user-uplooded picturesond disploys this os o stotic imoge.
After 15 minutes of disploying this screen with no octivity,
the bocklight will go OFF.
OFFsets no BACKGROUND,SCREENSAVERor SLIDESHOW.
0 SetScreenSaverand/or 0 SetBrightness
Background ofScreen
11

Aboutthecontrolwith temperaturesettingsfor non-LeDmodels.
Model 26
f
TURBO FREEZE TURBO COOL
(Hold 3sec (Hold 3sec
for Turbo Fre_e) for Turbo Cool(
(Hold 3 sec (Hold 3 sec
to Reset Filter} to Lock Control)
Model 29
Energy
Saver
Adjust
Freezer
(Ho}d 3seconds
for Turbo Freeze}
Ice &
Woter
IHo}d 3 sec
to Reset Filted
A(orml
Turbo Freeze Turbo Cool Light
Light ON/OFF
{Hold 3 seconds}
Adjust
Reffigerotor
(Hold 3 seconds
for Turbo Cool)
(ce Off/
Lock
Reset Filter Cubed Crushed Water
(Notd 3sec
toLockcontrok}
NOTE:Therefrigerator isshipped with protective film covering the temperature controls. If this film was
not removed during installation, remove it now.
Thetemperature controlsare presetin thefoctorg at38°Ffor therefrigerator compartment and -2°F for
the freezercompartment. Allow 24 hoursfor the temperature to stabilizeto the presetrecommendedsettings.
Thetemperature controlscan displagboth theSETtemperature as well asthe actual temperature in the
refrigerator and freezer.Theactual temperature mog vorgslightlg from theSETtemperature basedon usage
and operating environment.
ADJUST
REFRIGERATOR
{Hold 3 sec
for Turbo Cool)
ADJUST
FREEZER
{Hold 3 sec
for Turbo Freeze)
Changing the Temperature
Tochange the temperature, pressand
releasethe ADJUSTFREEZERor ADJUST
REFRIGERATORpod.Thedisplog will
show the actual temperature. Tochange
the temperature, top either the ADJUST
FREEZERor ADJUSTREFRIGERATORpod
untilthe desiredtemperature isdisplayed.
Oncethe desiredtemperature hasbeen
set, the temperature displog will return
to the actual refrigerator and freezer
temperatures offer 10 seconds.Several
adjustments mog be required.
Eachtime gou adjust controls, allow
24 hoursfor the refrigerator to reach
the temperature gou hoveset.
12

About TurboCoolTM and TurboFreeze.'"(Non-LCDmodelsOnly) GEAppliances.com
ADJUST
,REFRIGERATOR
{Hold 3 sec
for Turbo Cool}
How it Works
TurboCool rapidly cools the refrigerator
compartment in order to more quickly
cool foods. UseTurboCool when adding
a large amount of food to the refrigerator
compartment, putting away foods after they
have been sitting out at room temperature
or when putting away warm leftovers.
It can also be usedifthe refrigerator has
been without power for an extended period.
The compressor and fresh food fan will run
immediately for up to 2_/2hours and then
return to the original setting value.
How to Use
Pressand hold the ADJUSTREFRIGERATOR
pad for 3 seconds until you hear the sound
and the -_ displays.
After TurboCool iscomplete, the refrigerator
compartment will return to the original
setting.
NOTES:
_The refrigerator temperature cannot be
changed during TurboCool.
_The freezertemperature isnot affected
during TurboCool.
ADJUST
FREEZER
{Hold 3 sec
for Turbo Freeze}
How it Works
TurboFreezerapidly cools the freezer
compartment in order to more quickly
cool foods. UseTurboFreezewhen adding
a large amount offood to the freezer
compartment, putting away foods after
they havebeen sitting out at room
temperature or when putting away
warm leftovers.It can also be used
ifthe refrigerator hasbeen without
power for an extended period.
The compressor and freezerfan will
run immediately and keeprunning for
two-and-a-half hours.
How to Use
Pressand hold the ADJUSTFREEZERpad
for 3 seconds until you hear the sound
and the _ displays.
After TurboFreezeis complete, the freezer
compartment will return to the original
setting.
NOTES:
_The freezer temperature cannot
be changed during TurboFreeze.
_The refrigerator temperature is
not affected during TurboFreeze.
_When opening the freezer door during
TurboFreeze,the fans will continue
to run ifthey have cycled on.
13

About the dispenser. (Non-LCDmodelsOnlyJ
SpillShelf
iCE&
WATER
To Use the Dispenser
SelectCUBED_J, CRUSHED_£Jor WATER
_J by pressingthe ICE& WATERpad.
Pressthe glass gentlg against the top
of the dispenser cradle.
Thespill shelf isnot self-draining.Toreduce
water spotting, the shelf should be cleaned
regularlg.
If no water is dispensedwhen therefrigerator
isfirst installed,theremag be air in thewater
linesystem. Pressthe dispenserarm for at
leasttwo minutes to remove trapped air from
thewater line and to fill the water %ustem.
Toflush out impuritiesin thewater line,throw
awag thefirst six fullglassesofwater.
CAUTION:Neverputfingers
or ang other objectsinto theicecrusher
dischargeopening.
LOcKJCEOFF/
(Hold 3sec
to LockControl}
To Lock and Unlock the Dispenser
To lock, press and hold the ICE OFF/LOCK
pad for 3 seconds. Repeat this step to unlock
the dispenser.
Important Facts About Vour Dispenser
Donot add icefrom trags or bagsto the storage drawer.
It mag not crush or dispensewell.
_Avoid overfilling glass with iceand useof narrow glasses.
Backed-up icecanjam the chute or cause the door
in the chute to freeze shut. If iceisblocking the chute,
poke itthrough with a wooden spoon.
Beveragesand foods should not be quick-chilled in
the ice storage drawer. Cans,bottles or food packages
in the storage drawer mag cause the icemaker or auger
tojam.
_To keepdispensed icefrom missingthe glass,put the glass
close to, but not touching, the dispenser opening.
_Some crushed icemag be dispensed eventhough gou
selectedCUBEDICE.This happens occasionallg when
a few cubes accidentallg get directed to the crusher.
_After crushed ice isdispensed,some water mag drip from
the chute.
_Sometimes a small moundof snow willform on the door
in the icechute.Thiscondition isnormal and usuallgoccurs
when gou havedispensedcrushedice repeatedlg.Thesnow
willeventuallg evaporate.
ALARM/
LIGHT
Liqht ON/OFF
{Hold 3 seconds}
About Door Alarm
Thedoor alarm will sound ifany door
isopen for more than 3 minutes.Thebeeping
stopswhen you closethe door.
About Dispenser Light
Pressand hold the ALARM/LIGHTpad for
3 secondsto turn on the dispenser light.
Toturn off, press and hold the pad again
for 3 seconds.
ENERGY ]
SAVER !
About Energy Saver
Thisproduct isequipped with an Energg
Saverfeature. Therefrigerator isshipped
with the EnergySaverfeature on.
Overtime, moisture can form on the front
surface of the refrigerator cabinet and cause
rust. If moisture does appear on the front
surface of the refrigerator cabinet, turn off
the EnerggSaverfeature by pressing
and releasingthe ENERGVSAVERpad
on the control panel.
14

About the water filter. GEAppliances.com
Cartridge
Holder
I
FilterZ
Bypass _ _
Plug
iCE & 1
WATER !
(Hold3sec
toResetFiJter}
Water Filter Cartridge
Thewater filter cartridge islocated
in the back upper right corner of
the refrigerator compartment.
When to Replace the Filter
Thefilter cartridge should be replacedwhen
indicated on the control panel.Thewater
filter indicator light showsthe following:
Green- Good
Orange - Changesoon
Red- Changeimmediatelg
Follow the screen instructions shown in
WATER FILTERin the About the 7" LCD Control
Pond for LCDModels section.
Installing the Filter Cartridge
0 If gou are replacingthe cartridge,first
remove the old one bg slowlg turning
it counterclockwise. A small amount
of water mag drip down.
CAUTION:Ifoirhosbeen
trapped in the sgstem, the filter cartridge mo_j
be ejected as it is removed. Use caution when
removing.
Removethe protective foil from the end
of the cartridge.
Liningup the arrow on the cartridge
and the cartridge holder,placethe top
of the new cartridge up insidethe holder.
Donot pushit up into the holder.Slowlg
rotate the cartridge clockwise until it
stops.As gou turn the cartridge, it will
automaticallg raiseitself into position.
Cartridge will rotate about 1/4 turn.
Do not overtighten.
Pressand hold the ICE& WATERpad for
3secondsto resetthe filter.
0Runwater from the dispenserfor
5minutes (about 1V2gallons)to clear
the sgstem and prevent sputtering.
SeeToUsethe Dispensersection.
NOTE:A newlg installed water filter
cartridge mag cause water to spurt
from the dispenser.
Filter Bypass Plug
Youmust usethe filter bgpass plug when
a replacement filter cartridge isnot available.
The icemaker will not operate without
the filter or filter bgpass plug.
Replacement Filters:
To order additional filter cartridges
in the United States, visit our Website,
ge.com or cull GE Parts and Accessories,
800.626.2002.
Filter ModelMWF
Customersin Canadashould consult
the gellow pagesfor the nearest Mabe
ServiceCenter.
15

About the fresh food storage options.
Rearranging the Shelves
Shelvesinthe refrigerator comportment ore adjustable.
Toremove:
0 Removeall itemsfrom the shelf.
Tilt the shelf up at the front.
0 Liftthe shelf up at the back and
bring the shelf out.
Toreplace:
While tilting the shelf up, insert the top
hook at the back of the shelf in a slot
on the track.
Lowerthe front ofthe shelf until
the bottom of the shelf locksinto place.
Spillproof Shelves
Spillproofshelveshovespecial edgesto
help prevent spillsfrom dripping to lower
shelves.
Quick Space Shelf
Thisshelf splitsin half and slides under itself
for storage of toll items on the shelf below.
Thisshelf con be removed and replaced
or relocated (just likespillproof shelves).
NOTE:The location of the upper QuickSpace
Shelfisnot adjustable.
o)
Slide-Out Spillproof Shelves
Theseshelvescon be slidout to provide
easg accessto items near the back of
the refrigerator and to provideeasg cleaning.
16

GEAppliances.com
Non-Adjustable Dairy Bin
Toremove: Liftthe dairy bin straight up,
then pull out. Toreplace: Engagethe bin in the molded
door supports and push down. Thebin will
lock in place.
}
Refreshment
CenterDoor
(on some
models)
1
Adjustable Bins on the Door
Adjustable binscan easilgbe carried from
refrigerator to work area.
Toremove: Liftbin straight up,then pull out.
To replace or relocate: Slidein the binjust
above the molded door supports,and push
down. Thebin will lock in place.
Non-Adjustable Bins on the Door
Toremove: Lift the bin straight up,then
pull out.
Toreplace: Engagethe bin in the molded
supports on the door and pushdown.
It will lock in place.
17

About the crispers and pans.
Fruit and Vegetable Crisper
Keepfruits and vegetables organized in
separate compartments for easgaccess.
Excesswater that mag accumulate
in the bottom of the drawers or under
the drawers should be wiped drg.
Lower - ,, ,, ,- Higher )
Adjustable Deli/Produce Drawer
TheAdjustable Dell/Produce Drawer
isa full-width drawer with adjustable
temperature control, Thisdrawer can
be used for large miscellaneous items.
Thereis a temperature control which can
adjust the amount of cold air allowed into
the drawer.
Produce
Drower
Deli Drower
CITRUS
PRODUCE
DELl
IIFMP I
I CONTROL I
26Model 29Model
Controls Controls
(locatedon (locatedon
rightside rightside
ofdrawer) ofdrawer)
Control for 26-cu.-ft. models
When Produce Drawer is selected,
the temperature of the drawer can be kept
around 38°F (3.2°C).
When Dell Drawer is selected,
the temperature of the drawer can be kept
around 34°F (1°C).
NOTE:Fruits and vegetables may be damaged
using the Dell Drawer setting. Do not store
lettuce or other leafy produce in this drawer.
CAUTION:oonotstoregUss
bottles in this drawer. Iftheg ore frozen,
they con break and cause personal injury.
Control for 29-cu.-ft. models
When the CITRUSbutton is selected,
the temperature ofthe drawer can be kept
around 41°F (5°C).
When the PRODUCE button is selected, the
temperature of the drawer can be kept
around 37°F (3°C).
When the DELl button is selected, the
temperature of the drawer can be kept
around 34°F (1°C).
NOTE:Fruitsand vegetables mug be damaged
using the DELlsetting. Do not store lettuce or
other leaf_jproduce at the DELlsetting.
CAUTION:oonotstoregUss
bottles at this setting for a long period of time,
Iftheg ore frozen, theg con break and cause
personal injurg.
fj
Toremove:
0 Pullthe drawer out to the stop position.
Liftthe front of the drawer up and out.
How to Remove and Replace the Adjustable Deli/Produce Drawer
Toreplace:
Liftthe cover up.
Engagethe pantrg rollersinto
the side rails.
Pushthe drawer inward (untilit is
in place).
How to Remove and Replace Drawer Divider
Toremove:
Pullthe drawer out to the stop position.
Raisethe front sideof the divider
to unhook itfrom the rear wall of
the drawer.
To replace:
Hook the back of the divider over the rear
wall of the drawer.
Pushthe divider down.
18

About the freezer. GEAppliances.com
IlttJllllolllltllll ,
Freezer Basket and Drawer
0 Basket.
0 Drawer.
Basket Removal
Toremove:
Remove Freezer Bin, (Seebelow.)
Pullbasketout to the stop position.
Tilt up the rear of the bin.
Lift it out to remove.
Basket Divider Removal
Toremove:
_1 Pullbasketout to the stop position.
Tilt up the rear of the bin.
Lift it out to remove.
To replace:
Place the basket into the rail assemblg.
To replace:
Hook the top corners of the divider over
the hole of the basket.
Drawer Removal
To remove: Pullthe drawer forward and up to
remove itfrom the rails.
Toreplace: Placethe drawer wheels onto the
railsand push back asgou lower the drawer.
Non-AdJustable Bin in the Freezer
Toremove: Pullthe brackets upward until
gou hear a clickingsound and remove
the bin.
Toreplace: Hookthe endsof the bin into
both brackets and push down untilthe bin
locksinto place.
19

About the automatic icemaker.
A newly installed refrigerator may take J2 to 24 hours to begin making ice.
Automatic Icemaker
ICEOFF/
LOCK
(Hold 3sec
to LockControl)
The unit comes with an icemaker installed.
The icemaker rate of 9 cubes per cgcle will
depend on the freezer compartment
temperature, room temperature, number
of door openings and other useconditions.
For Non-LCDModels: If the refrigerator
isoperated beforethe water connection
ismade to the icemaker,pressand release
the ICEOFF/LOCKpad on the control panel
to disengagethe icemaker.
When the refrigerator has been connected
to the water supplg, pressand release
the ICEOFF/LOCKpad on the control
panel to engage the icemaker.
For LCDModels: Ifthe refrigerator is
operated beforethe water connection is
made to the icemaker,seeICEIAKERunder
the ScreenFunctionsof LCDOperotions
sectionand follow the screen commands
to turn the icemaker OFR
A newlg installed refrigerator mag take
12 to 24 hoursto begin making icecubes.
Youwill hear a buzzing sound eachtime
the icemaker fillswith water.
Throw away the first few batches of iceto
allow the water line to clear.
Besure nothing interfereswith the sweep
of the feeler arm.
When the bin fills to the levelof the feeler
arm, the icemakerwill stop producing ice.
It isnormal for severalcubes to bejoined
together.
If ice isnot used frequentlg,old ice cubes will
become cloudg,toste stole ond shrink,
NOTE:Inhomes with lower-than-overage
water pressure,gou mog hear theicemoker
cgde multiple timeswhen making one botch
of ice.
NOTE:If the water supply isshut off,
pressand releasethe ICEOFF/LOCKpod
on the control pond of the non-LCDmodel.
Forthe LCDmodel, seeICEMAKERunder
theScreenFunctionsof LCDOperations
sectionand follow the screencommands
to turn the icemokerOFF.
NOTE:It isnormal to hear icefoiling into the
icecomportment. It will make o marble-like
sound.
20
This manual suits for next models
19
Table of contents
Languages:
Other GE Refrigerator manuals

GE
GE Profile Series User manual

GE
GE GE Enegy Star GFSS2HCY Manual

GE
GE GSS22JET Manual

GE
GE Monogram ZIF360NHXH User manual

GE
GE MONOGRAM ZISB360DM Service manual

GE
GE Refrigerator Service manual

GE
GE GTS17DBEBB Manual

GE
GE Profile PSF26NGW User manual

GE
GE Monogram ZIBI240 User manual

GE
GE Profile Arctica PTS22LCPWW User instructions