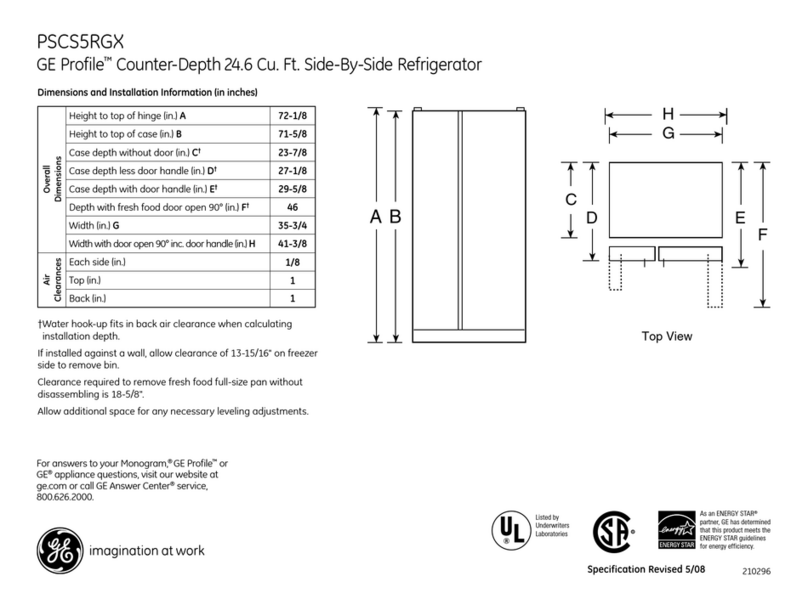
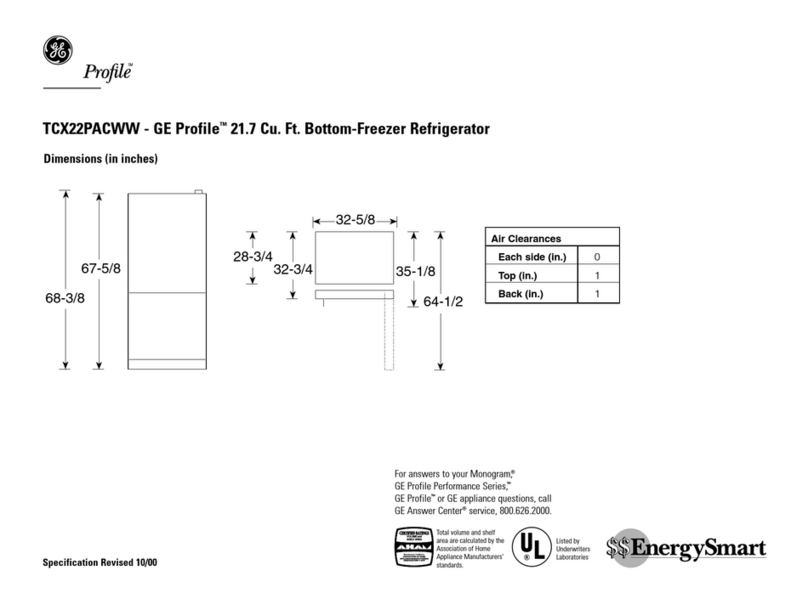
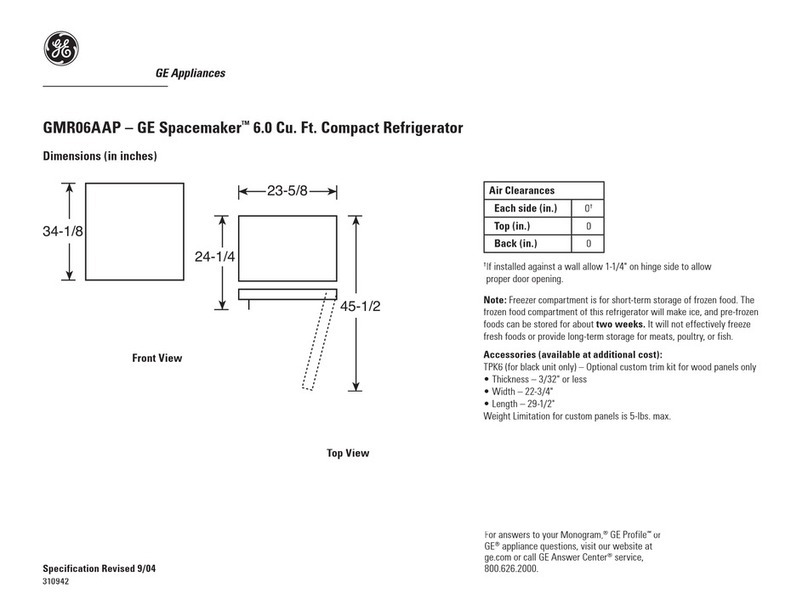
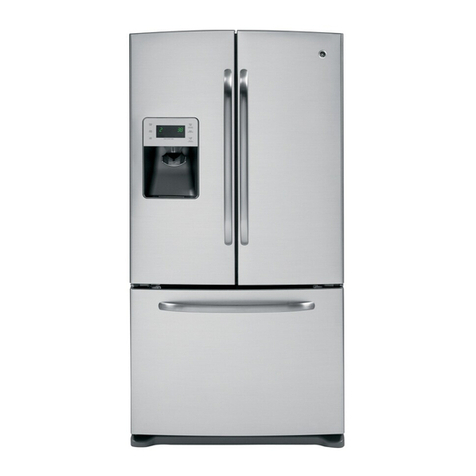
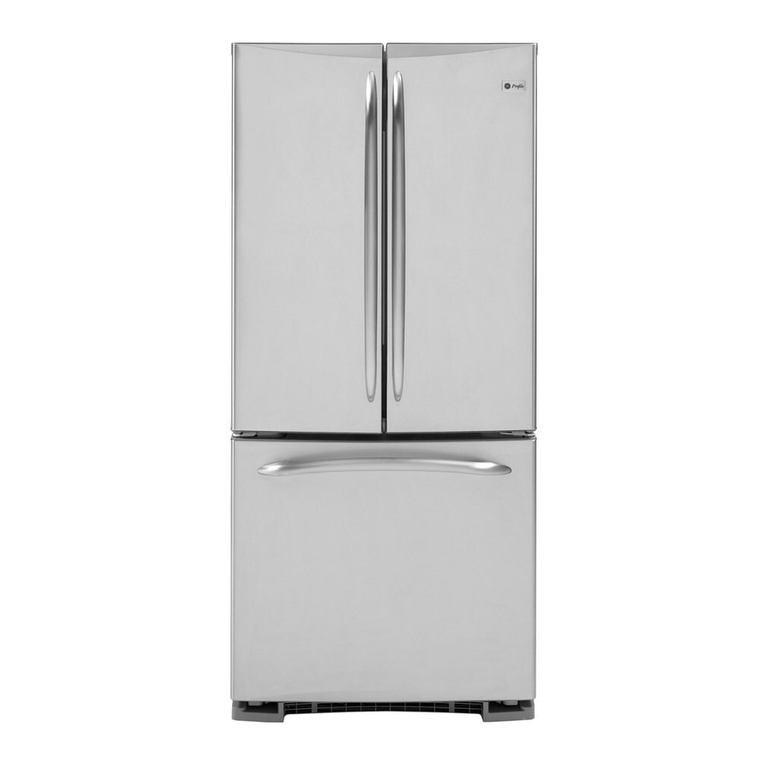
GE GNE26GGDABB User manual

GEAppliances.com
"0
Safety Instructions ............ 2,3
Operating Instructions
Features ....................... ...4, 5
Controls .......................... 6-9
Dispenser* ......................... 10
Autofill* .......... :................. Zl
Water Filter ........................ 12
Fresh Food Storage Options ..... 13,14
Climate Zone & TemperGture
Controlled Drawer ............... 15,16
Freezer ............................ 17
Automatic Ice maker ............... 18
CGreand Cleaning ................ 19
Replacing the Lights ................ 20
Installation Instructions
Preparing to Install the
Refrigerator .................... 21, 22
Installing the Refrigerator ....... 23-33
Installing the Water Line ........ 34-36
GE and GE Profile TM models
Modelsthat start with PFE,GFE,DFE,
and GNEare StandardDepthModels(SD)
Modelsthat startwith PYEand PWE
are CounterDepthModels(CD)
R frig roteurs
Mod@les GE et GE ProfileTM
Troubleshooting Tips ...... 38 39
Normal Operating Conditions ....... 37
Truth or Hyth .................. 40, 41
Consumer Support
Warranty for US Customers ........ 42
RPWFWater Filter Cartridge Limited
Warranty ......................... 43
Performance Data Sheet ........... 44
State of California Water Treatment
Device Certificate ................. 45
Consumer Support ................. 46
*Select Models Only
Write the model and serial
numbershere:
Hodel #
Lesnum@rosdemodulecommencantpar PFE,GFE,
DFE,etGNEsont desmod@les
deprofondeurnormale(PN).
Les num@rosde mod@lecommencant par PYE
et PWE sont des mod@lesde profondeur
de comptoir (PC).
Refrigerodores
GEy GE ProfileTM modelos
Losmodelosque comienzancon lasletras
PFE,GFE,DFE,y GNEsonNodeloscon
ProfundidadEst6ndar(SD)
Losmodelosque comienzancon lasletras
PYEy PWEsonHodelosconProfundidadde
Mesada(CD)
0
t-
O
,u
(1)
t-
O
,u
>
(1)
LL
a
Q.
0
t-
Serial # "_
Findthese numbers on o label
on the left side, near the middle
of the refrigerator comportment, o
£
239D4106PO09 49-60683-2 01-14 GE U_
E3
Q.

IMPORTANT SAFETYINFORMATION.
READALL INSTRUCTIONS BEFOREUSING.
_ _i_ _iiiiiiiiiii ii iiiiiii_ xtiiiiiiiiii _ iiiii_iiiiiiiiil iiiiiiiiiii_i_i_lii_ _¸ _ii_ _ iiiili_iii' _ii_.ii_iiiiiiii_ _ _i_ii _ii_ii_¸ _ i _ :_i i__iiii i_liii _i i_li_ii_i
IIMPORTANT SAFETY INFORMATION READ ALL INSTRUCTIONS BEFORE USING I
i
_Formore information on)lout refrigerator's operation, visit
............ www.GEAppliances.com
REFRIGERATOR SAFETY INFORMATION
This is the safety alert symbol. This symbol alerts you to potential hazards that can kill or hurt you and others. All safety
messages will follow the safety alert symbol and the word "DANGER","WARNING",or "CAUTION". These words are defined as:
Indicates a hazardous situation which, if not avoided, will result in death or serious injury.
Indicates a hazardous situation which, if not avoided, could result in death or serious injury.
Indicates a hazardous situation which, if not avoided, could result in minor or moderate injury.
IMPORTANT SAFETY INSTRUCTIONS
To reduce the risk of fire, explosion, electric shock, or injury when using your
refrigerator follow these basic safety precautions:
Thisrefrigerator must be properlyinstalled andlocated in
accordancewith the Installation Instructionsbeforeit isused.
_' Unplugthe refrigerator beforecleaningand making repairs.
NOTE:Repairsmustbe performed byaqualified Service
Professional.
@Replaceall partsand panelsbeforeoperating.
Becauseof potential safety hazards undercertain conditions,we
strongly
recommend againstthe useOfan extensioncord.However,ifyou
mustusean extensioncord,it isabsolutelynecessarythat it be a
UL-listed(inthe UnitedStates)or aCSAcertified (inCanada),:]-wire
groundingtype appliance extensioncord havinga groundingtype
plugand outlet and that the electricalrating of the cord be 15
amperes(minimum)and 120 volts.
_::To preventsuffocation and entrapment hazardsto children,
Removethe fresh foodand freezerdoorsfrom any refrigerator
beforedisposingof it or discontinuing itsuse.
Donot store or usegasolineor other flammable vaporsand
liquidsin the vicinity of this or any other appliance.
Powerto the refrigerator cannot be disconnected by any
setting on the control panel, refrigerator must be unplugged to
remove power.
Do not allow children to climb,standor hang onthe door handles
or the shelvesin the refrigerator.Theycouldseriouslyinjure
themselves.
:_In refrigeratorswith automatic ice makers,avoidcontact with
the moving pa_ of the ejector mechanism,or with the heating
elementthat releasesthe cubes.Do not placefingersor hands
onthe automatic ice making mechanismwhile the refrigerator is
pluggedin.
_' Do not cleanglassshelvesor coverswith warm water when
they arecold.Glassshelvesand coversmay breakif exposed
to suddentemperature changes or impact,suchas bumping or
dropping. Tempered glassisdesigned toshatter into many small
piecesifit breaks.
_::Keepfingersout ofthe "pinch point" areas;clearancesbetween
the doorsand between the doors and cabinet arenecessarily
small.Becareful closingdoors when childrenare in the area.
Do nottouch the coldsurfaces in the freezercompartment when
handsare damp or wet, skinmay stick totheseextremelycold
surfaces.
Do not refreezefrozen foods which havethawed completely.
Useasturdy glasswhen dispensingice(onmodelswith ice
dispenser)
INSTALLATION
_l_Explosion Hazard.
Keep flammable materials and vapors, such as gasoline, away from refrigerator. Failure to do so can
result in fire, explosion, or death.

GEAppliances.com
:@ _ _:_:_,_ , ....... _ _® _ :,_ ,_@_............
_/_ Tip Over Hazard.
Built-in style models (modelPYE,CYE,and PWE)aretop heavy, especiallywith any doors open. These
models must be secured with the anti-tip floor bracket to prevent tipping forward, which could result
in death or serious injury. Readand follow the entire installation instructions for installing the anti-tip
f oar bracket packed with your refrigerator. •
CONNECTING ELECTRICITY
Electrical• Shock Hazard.
Plug into a grounded :3-prong outlet
Do not remove the ground prong
Do not use an adapter
Faiure to fo ow these instructions can result in death, fire, or electrical shock.
Do not, under any circumstances, cut or remove the third (ground) prong from the power cord.
Forpersonal safety, this appliance must be properly grounded.
Thepower cordof this appliance isequippedwith a3-prong
(grounding)plug which mateswith astandard :]-prong
(grounding)wall outletto minimizethe possibilityof electric
shock hazardfrom thisappliance.
Havethe wall outlet and circuit checkedby a qualified
electricianto makesurethe outletis properlygrounded.
Wherea standard 2-prongwall outlet isencountered,it is
your personalresponsibilityand obligation to haveit replaced
with a properlygrounded:3-prongwall outlet Do not usean
adapter.
Therefrigerator should alwaysbe plugged intoits own
individualelectricaloutlet which hasavoltage rating that
matches the rating plate.
A 115VoltAC,60 Hz,1S-or 20-amp fused,groundedelectrical
supplyisrequired.Thisprovidesthe best performance and
alsopreventsoverloadinghousewiring circuits whichcould
causea fire hazardfrom overheatedwires.
Neverunplug your refrigeratorby pullingon the power cord.
Alwaysgrip plug firmly and pull straightout from the outlet.
Repairor replaceimmediatelyall power cordsthat have
becomefrayed or otherwisedamaged. Donot usea cord that
showscracksor abrasiondamage along itslength or ateither
end.
When movingthe refrigerator awayfrom the wall, be careful
not to rolloveror damage the powercord.
PROPER DISPOSAL OF YOUR OLD REFRIGERATOR
Suffocation and child entrapment hazard.
Remove fresh-food and freezer doors from the refrigerator, prior to disposal. Failure to do so can
result in child entrapmentwhich can lead to death or brain damage.
IMPORTANT: Childentrapment and suffocation are not problemsof the past
Junkedor abandoned refrigeratorsare stilldangerous even if
they will sitfor ':justa few days."Ifyou are getting ridof your old
refrigerator, please followthe instructions below to help prevent
accidents.
BeforeYouThrowAwayYourOldRefrigeratoror
Freezer:,
Refrigerants
Allrefrigerationproductscontainrefrigerants,which under
federallawmustbe removedpriorto productdisposal.Ifyou
aregettingrid ofanold refrigerationproduct,checkwith the
companyhandlingthe disposalaboutwhat to do.
Takeoff the freshfood andfreezerdoors.
@Leavethe shelvesinplaceso that children may not easilyclimb
inside.
READAND FOLLOWTHISSAFETYINFORMATIONCAREFULLY.
SAVETHESEINSTRUCTIONS

About the features. *
0 0
0
0
0
@
0
Space-saving ice maker*
Ice maker and bin are located on the door creating more usable
storage space.
Showcase LED lighting
LEDlighting ispositioned throughout the interior to spotlight areas
in the refrigerator. LEDsare located under the fresh food door to
light the freezer when opened.
Drop-down tray*
Allows for extra door storage when you need it and tucks away
when you don't.
Full-width temperature controlled drawer
(on some models)
Adjustable temperature control bin that can accommodate
larger items.
Dairy bin
Separatecompartmentforyouritems.
Dual icemakerlutility bin(onsomemodels)
Anice maker in both compartments gives you
more ice whenever you need it or o utility bin designed
for flexible storage.
0 QuickSpace'r"shelf
Functions as a normal full-sized shelf when needed and easily slides
back to store tall items below.
Spillproof shelves
Designedto capture your spills for easier clean up.
Removablecondiment bin
Separate bin designed for easy removal and storage.
0
0
0
0
Removabledoor bin
Can be removed for those with a wall limiting the door opening.
Climate zone bin
Separate binsfor produce storage.
In-the-door filter*
Located in the door for more available space in the fresh-food section
and easy replacement.
Water filter*
Filters water & Ice
*Select Models Only 4

About the features. *
Door ice bin*
1.Openleft fresh food door.
2.Pull down latch to release bin door.
3.Usinghandhold lift ice bucket up and
out to clear Iocators in bottom of bin.
4.To replace the ice bucket, set it on the
guide brackets and push until the ice
bucket seats properly.
5.If bucket cannot be replaced, rotate
the Ice Bucket Fork 1/4 turn clockwise.
O Drop down dairy bin*
1.Open right fresh food
2. Depressboth buttons on lower sides
and binwill drop down.
3. Reverseto reinstall.
Icebucket
Door ice/water filter
ARemove filter/bypass plug
Pushthe indent on the cover and open
filter door.Pullup on filter/bypass plug
and pull straight out to remove.
Installing the filter cartridge
Pushthe indent at the bottom of the
cover and open. Lift door and align tabs
on filter to filter/holder and push filter into
place.
Filter cover isdesigned to be
reinstalled ifaccidently removed
GEAppliances.com
Drop down tray
(trayopen)
Do not twist
'Pull
Water& IceFilter(indooror case)
*Select ModelsOnly

Aboutthe controlswith temperaturesettings.
PFE29,PVE23P Control Style A, LCD External Control
PFE27, PVE23K Control Style B,LCDExternal Control
,o££......oo
\ • • /
GFE29,GFE27,DFE29ControlStyleC,ExternalControl
I b_-ll -ooo OOoll--_-tl
I _1_1_ I
Replace Water Filter
_ ( Water Crushed Cubed ) _
I \ __] I_ /I
5
c
o
U
c-
€-
u)
o
U
N
uJ
a.
N
UJ
z
(.9
f
IRefrigerator
Hold 3 Sec for °F/°C
Recommended:37 °F
Actual Set
_._EnergySmart
Recommended:O°F
i Freezer
Energy Smart Override
Hold 3 Seconds J
IDoor Alarm
I Ice Maker
ILockControls
Hold 3 Seconds
I Reset Filter
Hold 3 Seconds
NOTE:The refrigerator is shipped with protective film covering the temperature controls.
If this film was not removed during installation, remove it now.
Thetemperature controls ore preset in the factory at 37°F for the refrigerator comportment and O°Ffor the freezer
compartment. Allow 24 hours for the temperature to stabilize to the preset recommended settings.
Thetemperature controls con display both the SETtemperature as well asthe actual temperature in the refrigerator and
freezer.The actual temperature may vary slightly from the SETtemperature based on usageand operating environment.
6

About the controls with temperature settings. GEApp,iances.com
Changing the Temperature for Control Style A
ToChange the Refrigerator Temperature:
Access By:TemperatureButton
Activate By: Belowthe word "Refrigerator", usethe
arrows to select the desiredtemperature. Press
DONEwhen finished to return to HOMEscreen.
ToChangethe Freezer Temperature:
Access By:Temperature Button
Activate By:Belowthe word "Freezer",usethe arrows to
selectthe desired temperature.
PressDONEwhen finished to return to HOMEscreen.
Toturn OFFcooling system, accessSETTINGSfrom the
HOMEscreen.Pageover and top COOLINGSYSTEMON.
PressDONEto return to HOMEscreen.
Toturn ONcooling system, access SETTINGSfrom the HOME
screen. Pageover end top COOLINGSYSTEMOFF.Press
DONEto returnto HOMEscreen.
Turning the cooling system off stops the cooling to
refrigerator, but it does not shut off the electrical power.
Changing the Temperature for Control Style B
Tochangethe temperature, press and releasethe _-]
pad.TheACTUALTEMPlight will come on and the dlsp_
will show the actual temperature. Tochange the
temperature, tap either the _] pad until the desired
temperature isdisplayed.
Changing the Temperature for Control Style C
Tochange thetemperature, press and releasethe
pod.TheACTUALTEHPlight will come on and the display
will show the actual temperature. Tochange the
either the _ pad until the desired
temperature, tap
temperature is displayed.
Toturn OFFcooling system, press end hold the Freezer_
pads simultaneously for 3 seconds. When the cooling
system isOFFthe display should read 0 IF.
Toturn ONcooling system, press either _] pod.The
display will show ONand then the actual temperature for the
refrigerator and the freezer.Turning the cooling system OFF
stops the cooling to the refrigerator, but it does not shut OFF
the electrical power.
Toturn OFFcooling system, press and hold the Freezer []_
pads simultaneously for 3 seconds. When the cooling
system isOFFthe display should read OFF.
Toturn ONcooling system, presseither _ pad.The
display will show the preset temperature sett_hngsof 37°F for
refrigerator and O°Ffor freezer.Turning the cooling system
off stops the cooling to refrigerator, but it does notshut off
the electrical power.
Changing Temp. for Control Style D
Temperature Displayis located on insideof left-hand
refrigerator door. Tochangethe temperature, pressand
releasethe REFRIGERATORor FREEZERpad.TheACTUAL
TEI"fPlight will come on and the display will showthe actual
temperature. Tochange the temperature, tap either the
REFRIGERATORor FREEZERpad until the desired
temperature isdisplayed.
Toturn OFFcooling system, press and hold the
REFRIGERATORand FREEZERpads simultaneously for 3
seconds. When the cooling system is OFFthe displc]yshould
read OFF.
Toturn ONcooling system, press either REFRIGERATORor
FREEZERpad.The display will show the preset temperature
settings of 37°Ffor refrigerator and O°Ffor freezer.Turning
the cooling system off stops the cooling to refrigerator, but it
does not shut offthe electrical power.
NOTE:Foroptimal temperature performance, we recommend to avoid placing food items directly at the air flow vents of the
fresh food air tower end thus blocking the air flow.
About the controls -features•
Qoe e
t I II
Freezer Refrigerator
i"-Ii-i _
-88.° Cii3
Actual Tamp Set Temp
I I
Replace Water Filter
O Hands-free Autofill*
Hands-free Autofill uses sensors to monitor
container height to automatically dispense filtered
water without having to activate the paddle.
PreciseFill setting*
Preciselydispenses filtered water in accurate measurements
in ounces, cups, quarts, or liters using paddle.
Refrigerator temp control
Adjust freezer compartment temperature.
Fresh food temp control
Adjustfreshfoodcompartmenttemperature.
O TurboFreezeTMsetting
Activate TurboFreeze to quickly restore freezer
temperatures after frequent door openings.
ID TurboCooITM setting
Activate TurboCool to quickly restore fresh food
temperature after frequent door openings.
Lock controls
Pressand hold 3seconds to lock outice and water dispenser
and all feature and temperature buttons.
LED dispenser light
LEDlightingthat canbeturnedon/offto lightyourdispenser.
0
e
Door Alarm
Soundsto alertwhenthefreezeror freshfooddoors
havebeenleftopen.
Reset filter
Pressand holdfor 3secondsafterreplacingthe filter.
Photo upload*
Insert USBmemory stick to upload personai //_ _-"/Ih
photos to the refrigerator LCDscreen. //'_//_-///
,cow,,provideonscreenpromptstoI__ //7-////
and view slideshow.
Hake sure the photos are in the
root directory in your USB. USBCover
Additional settings:
• Photo upload and delete
• S[ideshow
• Connected Home ready
• Resetwater filter
• Ice maker on/off
• Door alarm
• Sound control
• Cooling system On/Off
• Metric/English units
• Auto fill videoturorial
Additional Hades
•SabbathNode
Pressand hold lock & light (door alarm &ice maker buttons for non-
dispense modem simultaneously for 3seconds to enter/exit Sabbath
mode.
Activate Sabbath Node to turn off interior lights, temperature control
and advanced features. Compressor will run on a timed defrost when
in Sabbath mode.
*Select Models Only

About the controls- features.* G,:Apptio;ces.com
0
0Door Alarm
Sounds to alert when the freezer or fresh food
doors hove been left open.
Reset Filter
Hold for 3seconds after replacing filter.
_ Lock Controls
Pressand hold 3seconds to lock out ice
and water dispenser end all
feature and temperature buttons.
A LED dispenser light
LEDlighting that can beturned on/off to light
your dispenser.
AFreezertamp control
Adjust freezer compartment temperature
A Refrigerator temp control
"VB Adjust fresh food compartment temperature
Dual ice maker control*
vTurn your ice makers on/off.
_ TurboCool TM setting
Activate TurboCool to quickly restore refrigerator
temperature after frequent door openings.
Ice maker setting
O Turn your ice makers on/off.
*Select Models Only
9

About the dispenser.*
Water &Ice Dispenser
(See About the controls
with temperature settings &
About the control features)
Dispensertrey
Laceration Hazard
Never put fingers or any other object into ice crusher
discharge opening. Doing so con result in contacting the ice
crushing blades and lead to serious injury or amputation
:i Use o sturdy gloss when dispensing ice. A delicate gloss may
break and result in personal injury.
If nowater isdispensedwhenthe refrigerator isfirstinstalled,
there may beair in thewater linesystem.Pressthe dispenser
paddlefor at leastfive minutesto removetrapped air from the
water lineand to fillthe water system.Toflush out impuritiesin
the water line,throw away the firstsixfull glossesofwater.
Toremove DispenserTray
PullDispenserTroyout untilitstops.
Locatetab in the centeron the bottom and pushup.
PullDispenserTroyassemblyout.
__Liftmetal DispenserTroyoutat center notchto cleon.
Toreinstall DispenserTray
:_Placethe DispenserTraycover ontop ofcatch troy and
positionunder thetwo plasticretainerson eitherside.
CenterDispensertroy,and align with center guides.
Pushin untilit firmlyin place.
Important Facts About Your Dispenser
:_Donot odd icefrom traysor bagsto the door icemaker
bucket.It may notcrush or dispense.
_--"Avoidoverfillingglosswith iceand useof narrow glasses. _
Backed-upiceconjam the chute or causethe door inthe
chuteto freezeshut.If iceisblockingthe chute removethe ice
bucket,pokeitthrough with o woodenspoon.
_ Beveragesand foodsshouldnot be quick-chilledinthe
door icemaker bin.Cans,bottlesorfood packagesinthe
storage drawer may causethe icemaker or augerto jam.
Tokeepdispensedicefrom missingthe glass,put theglass
closeto, but nottouching,the dispenseropening.
Somecrushedicemay be dispensedeventhough you
selectedCUBEDICE.Thishappensoccasionallywhena few
cubesoccidentallyget directedto the crusher.
After crushediceisdispensed,some water may drip from the
chute.
Sometimeso smallmoundofsnowwillform on thedoor inthe
icechute.Thisconditionisnormaland usuallyoccurswhenyou
hovedispensedcrushedicerepeatedly.Thesnow willeventuolly
evaporate.
To Use the Internal Water Dispenser*
Thewater dispenser isIocoted on the
left wall insidethe refrigerator compart-
ment.
To dispense water:
OHoldthe gloss against the recess.
Pushthe water dispenser button.
Holdthe glass underneath the
dispenser for 2-3 seconds after
releasingthe dispenser button. Water
may continue to dispense after the
button isreleased.
*Select Models Only 10
If no water isdispensed when the refrigerator isfirst installed,
there may be air inthe water line system. Pressthe dispenser
button for at least 5 minutes to remove trapped air from the
water line and to fill the water system. During this process,
the dispenser noise may be loudas the air is purged from the
water line system. Toflush out impurities in the water line,
throw away the first 6 glassfuls of water.
NOTE:Toavoid water deposits, the dispenser should be
cleaned periodically by wiping with acleoncloth or sponge.

About autofill. *GEApp,onces.com
To Use HANDS FREEAUTO FILL:
• Center container on Recess Dispenser Trey (not touching
bottomsensors)and removehandfrom container
•PressAUTOFILL
To Stop AUTO FILL
•PressCANCEL,to resumefillingpressAUTOFILL.
Important Facts about AUTO FILL
•Foroptimum results, usea uniform container between 4-8"
toll and 2-6"wide.Containershouldbe astoll asthe bottom
sensors.
• Container shape,filllevelandfunctionality may varyon
containerstallerthan 8".
• Containervolumesmayvary, iferrormessage"Container
NotFound"isgiven,tryadifferentcontainer.
•AUTOFILLwill time out.
•Handlesand garnishesonthe rim ofthe container my cause
overfillingorvariationinfillvolumes.
•Splashingmay occur dependingon the locationofthe
container,water flowrote,containershape,and icecubes.
•Keepsensorscleanwith acleandampcloth,and do not
sprayliquidor cleanersdirectlyonsensors
•AUTOFILLworksbestwith householdwater pressureof60
to 100psi.
S
Sensors
*Select ModelsOnly
11

About the GE® RPWFwaterfilter cartridge.
Water Filter Cartridge
Thewater filter cartridge is located in one of the following places:
Bottom-freezer (BF)refrigerators:
- Inthe water filter compartment on the right sidewall of the
left-hand fresh food door.
- Inthe fresh food interior on the left side wall, near the top.
When to replace the filter cartridge
The filter cartridge should be replaced every six months or earlier
if the flow of water to the dispenser or icemaker decreases.
Touch Screen Models: Afilter status message will appear en the
screen when the water filter needs to be replaced. The filter status
message must be reset manually.
The "Water Filter: Replace" status message can be reset by
entering the Settings menu from the home screen. Then, select
the Water Filtermenu and press the RESETbutton. This will reset
the filter status.
Non-touch Screen Models: A filter indicator light (or message)
will illuminate on the screen when the water filter needs to be
replaced. This light must be reset by pressing and holding the
Reset Filter button for three seconds.
The filter cartridge has a maximum life of six months and
should be replaced when indicated by the filter indicator on the
refrigerator, or sooner if a significant reduction in flow occurs.
Removing the filter cartridge
Toreplace the filter, first remove the old cartridge by opening
the filter door and pulling on the bottom of the cartridge to allow
it te swing outward. When the cartridge can no longer swing,
gently pull to unseat it from the cartridge holder. DO NOTTWIST
CARTIDGE.Asmall amount of water may drip out.
Installing the Filter Cartridge
1.Align top offilter with cartridge holder and push until cartridge
is fully seated.
2.While continuing to ensure cartridge
is fully seated in the holder,gently
swing the filter inward until it isin a
vertical position. Iffilter will not swing
easily, check to ensure filter isproperly
aligned and fully seated within the
cartridge holder.
3.Run 2gallons of water through the cold
water dispenser (about 5 minutes) to
remove air from the system. A newlY_
installed filter cartridge will cause
water to spurt from the dispenser. Use
a large pitcher or sports bottle to catch Swing
the water spray. DO NOTuse the hot
water dispenser or hands-free auto-fill
(some models) until ell air isremoved
from the system.
4. Reset Filter Status message
Touch Screen Hodels: Access RESETbutton through the Water
Filtermenu.
Non-touch Screen Models: Pressand hold the Reset Filter button
for three seconds.
_ ARNING Usingthe hot water dispenser prior to purging air
fromthe system may result in spurting of her water and lead
to hot water scolding. Follow the instructions above to purge all air
from the system through the cold water dispenser prior to using the
hot water dispenser.
Note: It isnormal for water to appear discolored during the initial
system flush. Water colorwill return to normal after first few minutes
of dispensing.
P_ush/Pull
Filter Bypass Plug
To reduce the risk of property damage due to water leakage, you
IvlUSTuse the filter bypass plug when a replacement filter cartridge
is not available. The dispenser and icemaker will not operate without
either the filter or bypass plug installed. The bypass plug is installed
in the same way as afilter cartridge.
/_k WARNING
To reduce the risk associated with choking, do not allow children under 3 years of age to have access to
small parts during the installation of this product. The disposable filter cartridge should be replaced every
6 months at the rated capacity, or sooner if a noticeable reduction in flow rate occurs.
For the maximum benefit efyour filtration system, GErecommends the use of GE-branded filters only. Using GE-branded filters in GE
and Hotpoint ®refrigerators provides optimal performance and reliability. GE filters meet rigorous industry NSFstandards for safety
and quality that are important for products that are filtering your water. GEhas not qualified non-GE-branded filters for use in GEand
Hotpoint refrigerators and there is no assurance that non-GE-branded filters meet GE'sstandards for quality, performance and reliability.
Ifyou have questions, or to order additional filter cartridges, visit our website at www.geapplianceparts.com or call
GE Parts and Accessorie s, 800.626.2002.
Customers inCanada should consult the yellow pages for the nearest Camco Service Center.
8 GE
Appliances
Appliance Perk
Louisville, KY40225
geapplianceparts.com
12
RPWF
© 203.2 General Electric Company PC71879
Refer to 239D4126P002 Pub No.31-45497

About the fresh food storage options.
Rearranging the Shelves
Shelvesinthe refrigerator compartment are adjustable.
To remove:
0 Removeallitemsfrom the shelf.
Tilttheshelf up ot thefront.
Liftthe shelf upat the backend bringthe
shelfout.
Toreploce:
Whiletilting the shelf up,insertthe top hook
atthe back ofthe shelfin o sloton the
track.
Lowerthe front ofthe shelf untilthe bottom
of the shelflocksinto ploce.
Spillproof Shelves
Spillproofshelveshovespecialedgesto help
preventspillsfrom dripping to lowershelves.
Quick Space Shelf
Thisshelf splitsin half and slidesunderitselffor
storage oftell itemson the shelf below.
Thisshelfcan be removed and replacedor
relocated(justlikespillproofshelves).
NOTE:Thelocationof the upper QuickSpace
Shelfisnot adjustable.
13

About thefresh food storage options.
Non-Adjustable Dairy Bin
Toremove:Liftthe dairybinstraight up,
then pullout. Toreplace:Engagethe bin in the moldeddoor
supportsand pushdown. Thebin willlock in
place.Seepage33.
Adjustable Bins on the Door
Adjustablebinscaneasilybecarriedfrom
refrigerator to work area.
Toremove: Lift binstraight up,then pull out.
Toreplace or relocate:Slidein the binjust
abovethe moldeddoor supports,and push
down.Thebin willlock in place.Seepage 33.
Drop down trey *
(troy open)
1.Open right fresh food
door
2.Depressboth buttons
on lower sides of bin
and bin will drop down.
3.Reverseto reinstall.
Non-Dispense Models
(Left Hend Door)
Non-Adjustable Bins on the Door
To remove:Liftthe binstraight up,then pullout.
To replace: Engagethe bininthe molded
supportson the door end pushdown. Itwill lock
in place.
Theicemaker door binsare not
interchangeable,notethe locution upon
removal and replacethe bin in its proper
location.
14 *Select IVlodelsOnly

About the climate zone and
temperaturecontrolled drawer. GEAppliances.com
/ i
if
J
ClimateZone
Keep fruits and vegetables organized in separate
compartments for easy access.
Excesswater that may accumulate in the bottom
of the drawers or under the drawers should be
wiped dry.
Temperature Controlled Drawer*
The Temperature Controlled Drawer is a
full-width drawer with adjustable temperature
control. This drawer can be used for large
miscellaneous items.
Tochange setting, press select button.
Cold
_L__J
Colder
OR HEAT BEVERAGE PRODUCE CHEESE CITRUS
r- -- --
I
I
I
I
I
32 °,
I
I
I
I
L
34 °36 °38 °40 °
7I
Laceration Hazard
Do not store glass bottles at this setting. If I
tthey are frozen, they can break and cause i
_ersonal injury. J
NOTE: when fresh food temperature is set
to 40 ° or higher, the temperature controlled
drawer can only be set to citrus.
*Select ModelsOnly
15

About the climate zone and temperature controlleddrawer.
How to Remove and Replace the AdJustable Deli/Produce Drawer
Toremove:
0 Pullthe dr(]wer out to the stop position.
0 Liftthe front ofthe drawer up (]ndout.
Toreplace:
Pullleft (]nd rightslidesuntilfully
extended.
Pk]cedrawer bQckinfirst ond rotate
dr(]wer front downto seat on slide.
Pushthe drawer into closedposition.
How to Remove and Replace Drawer Divider
Toremove: Toreplace:
Pullthe drawer outto thestop position. _ Hookthe back ofthe divideroverthe
reorwall of the drawer.
Roisethe front sideof the divider
to unhookitfrom the reorw(]ll of _ Pushthe dividerdown.
the drc]wer.
16

About the freezer. GEAppliances.com
_ __ "._ FreezeroBasket.Basket and Drawer
_ _ 0 Drawer
Utility Bin /Ice Bucket
Non-Adjustable Bin in the Freezer
Toremove:pushin plastictab oneitherleft
or rightside
Toreplace: slidebininto location until it
locksintoplace.
Basket Removal
Toremove,Standard Depth models only:
Openfreezerdoorto the stop position.
Remove freezer door bin by pushing
plastic tab on either left or right side
to release bin hinge pin.
Q Removefreezer basket by lifting up
the rear of the basket and moving
basket rearward until the front of the
basket con be rotated upward and
out.
Liftitout to remove.
To remove, PVEand PWE models only:
Open fresh food doors.
Open freezer door to the stop position.
Remove freezer basket by lifting up
the rear of the basket and rotate it
upward.
Lift it out to remove.
Toreplace:
Reversestep 1thru 4 to replace.
17

About the automatic ice maker.
A newly installed refrigerator may take 12 to 24 hours to begin making ice.
Automatic Ice Maker*
aker
FeelerArm
Theicemaker willproducesevencubes
per cycleapproximately100-130cubes
in a 24-hour period,dependingon freezer
compartment temperature,roomtemperature,
number ofdoor openingsand otheruse
conditions.
The ice maker will fill with water when it cools to
15°F (-Z0°C).A newly installed refrigerator may
take 12 to 24 hours to begin making ice cubes.
Ifthe refrigerator is operated before the water
line connection is made to the unit or if the
water supply to an operating refrigerator is
turned off, make sure that the ice maker is
turned off. Once the water has been cQnnected
to the refrigerator, the ice maker may be turned
on. See the table below for details.
Youmay heara buzzingsoundeachtime
the icemakerfillswith water.
Throwaway thefirstfew batchesof iceto allow
thewater lineto clear.
Besurenothinginterfereswith the sweep
ofthe feelerarm.
Whenthe binfillsto the levelofthefeelerarm,
the icemakerwill stopproducingice.It isnormal
for severalcubesto bejoined together.
If iceisnotusedfrequently,old icecubeswill
becomecloudy,taste staleand shrink.
NOTE:Inhomeswith lower-than-averagewater
pressure,you may hearthe icemakercycle
multipletimeswhen makingonebatch of ice.
To minimize the risk of personal injury, avoid Contact with the moving parts of the ejector
mechanism, or with the heating element that releases the cubes. Do not place fingers or
hands on the automatic ice making mechanism while the refrigerator is plugged in.
How to Turn the Ice Maker On/Off
Control Style A
Control Style B
Control Style C
Control Style D
PFE29, PYE23P Use the settings menu on the touchscreen
PFE27, PYE23K Hold "CRUSHED" and "CUBED" together for 3 seconds
GFE29/27, DFE29 Use the "ICE MAKER" button on the control
GNE26, PWE23 Use the "ICE MAKER" button On the control
and pull
III
Ice Bucket and Dispenser*
• Open the ice box door on insideof the left
door.
• Pull up and out on on the ice bucket in
the left hand door to remove it from the
compartment.
• To replace the ice bucket, set it on the
guide brackets and push until the ice
bucket seats properly.
• If bucket cannot be replaced, rotate the ice
bucket fork 1/4 turn clockwise.
!
Extra Ice Storage*
Thereisadditional ice storage inthe freezer compartment drawer.
• Openthe freezer drawer.
• The ice bucket islocated on the left side below the mullion.
• Pullthe ice bucketforward.
18 *Select Models Only

Care and cleaning of the refrigerator.
Cleaning the Outside
GEApp/iances.com
The stainless steel panels,door handlesand trim.
Do not use appliance wax, polish, bleach, or other products
containing chlorine on stainless steel.
Stainlesssteel (on some models}can be cleaned with a
commercially available stainless steel cleaner. A spray-on
stainless steel cleaner works best.
Silver-accentedplasticparts.
Wash parts with soup or other mild detergents. Wipe cleon
with a sponge, dump cloth or paper towel.
Do not usescouring pads, powdered cleaners, bleach or
cleaners containing bleach because these products can
scratch and weaken the paint finish.
Should spill troy need cleaninguse lime remover.
Cleaning the Inside •
To help prevent odors,leavean open box of baking soda in
the refrigerator and freezer comportments.
Unplug the refrigerator before cleaning.
Ifthis is not practical, wring excessmoisture out of sponge or
cloth when cleaning around switches, lights or controls.
Useon appliance wax polish on the inside surface between
•the doors.
Useworm water and bokingsodo solution-about a
tablespoon (15 ml)of baking soda to a quart (1 liter)of water.
This both cleans and neutralizesodors.
Rinseand wipe dry.
Do not clean glass shelves or covers
with warm water when they are cold. Glassshelves and
covers may break if exposed to sudden temperature
changes or impact such as bumping or dropping.
Tempered glass is designed to shatter into many small
pieces if it breaks.
Behind the Refrigerator
Becarefulwhen movingthe refrigeratoraway from the wall.All
types offloor coveringscon bedamaged, particularlycushioned
coveringsand those with embossedsurfaces.
Raisethe levelinglegslocatedat the bottom front ofthe
refrigerator.
Pullthe refrigerator straight out and return it to position by
pushing it straight in. Moving the refrigerator in o side direction
may result in damage to the floor covering or refrigerator.
Lowerthe levelinglegsuntilthey touch the floor.
When pushing the refrigerator back, make sure you don't
roll over the power cordor water supply/ine.
Preparing for Vacation
Forlongvocations or absences,removefoodand unplugthe
refrigerator.Cleonthe interiorwith a bakingsodasolutionof
onetablespoon (15ml)of bakingsodato onequart 11liter}of
water. Leavethe doorsopen.
LCDModels:turn refrigeratoroff at control (pg7}.
Ifthe temperature con drop belowfreezing,havea qualified
servicetechnician drainthe water supply systemto prevent
seriousproperty damage dueto flooding.
1)Turnrefrigeratoroff (pg.7)or unplug the refrigerator.
2)Emptyicebucket
3)Turnwater supplyoff
If you cutthe water supply off,turn offthe ice maker(pg.18}.
Uponreturningfrom vacation:
1)Replacethe water filter.
2)Run2 gallonsofwater throughthe coldwater dispenser
(about5 minutes)to flushthe system.
Preparing to Move
Secureall looseitemssuch usshelvesand drawers bytaping
them securelyin placeto preventdamage.
When usinga hand truck to movethe refrigerator,do not rest
the front or backof the refrigeratoragainstthe handtruck. This
coulddamagethe refrigerator.
Handleonlyfrom the sidesofthe refrigerator.
Besure the refrigerator stays in an upright position during
moving.
19

Replacingthe lights.
Refrigerator Lights (LEDs)
ThereisLEDlightinginfresh food
compartment and on the bottom of
thefresh fooddoorsto light the freezer
compartment*
An authorized technician will need to
replace the LEDlight.
Ifthis assembly needs to be replaced, call
GEService at 1.800.432.2737
in the United States or 1.800.561.3344
in Canada.
*Select Models Only
20
Other manuals for GNE26GGDABB
1
Table of contents
Languages:
Other GE Refrigerator manuals

GE
GE GDSC0KBXARBB and Operating instructions

GE
GE Profile PSB42LSRBV How to use

GE
GE GBSL0HCXLLS Manual

GE
GE ENERGY STAR GTH21SCXSS Manual

GE
GE GSS20IBP User instructions

GE
GE GTS18TCSABB and Operating instructions

GE
GE Cafe CSHS5UGXSS Manual

GE
GE GE Profile Arctica PSS27SGN User instructions

GE
GE GBS22**P How to use

GE
GE GTZ18GCESS User manual

GE
GE GTH17BBZLWW Manual

GE
GE Monogram ZISS480NXSS User manual

GE
GE GTU358BAMR User manual

GE
GE ZIS360NXD User manual

GE
GE GSH22JFTDWW User manual

GE
GE 36? Built-In Bottom-FreezerRefrigerators User manual

GE
GE Monogram ZIFI240 User manual

GE
GE Profile CustomStyle PSH25MGS Manual

GE
GE GTS22ISSR User manual

GE
GE PFMS5RK User manual