210226
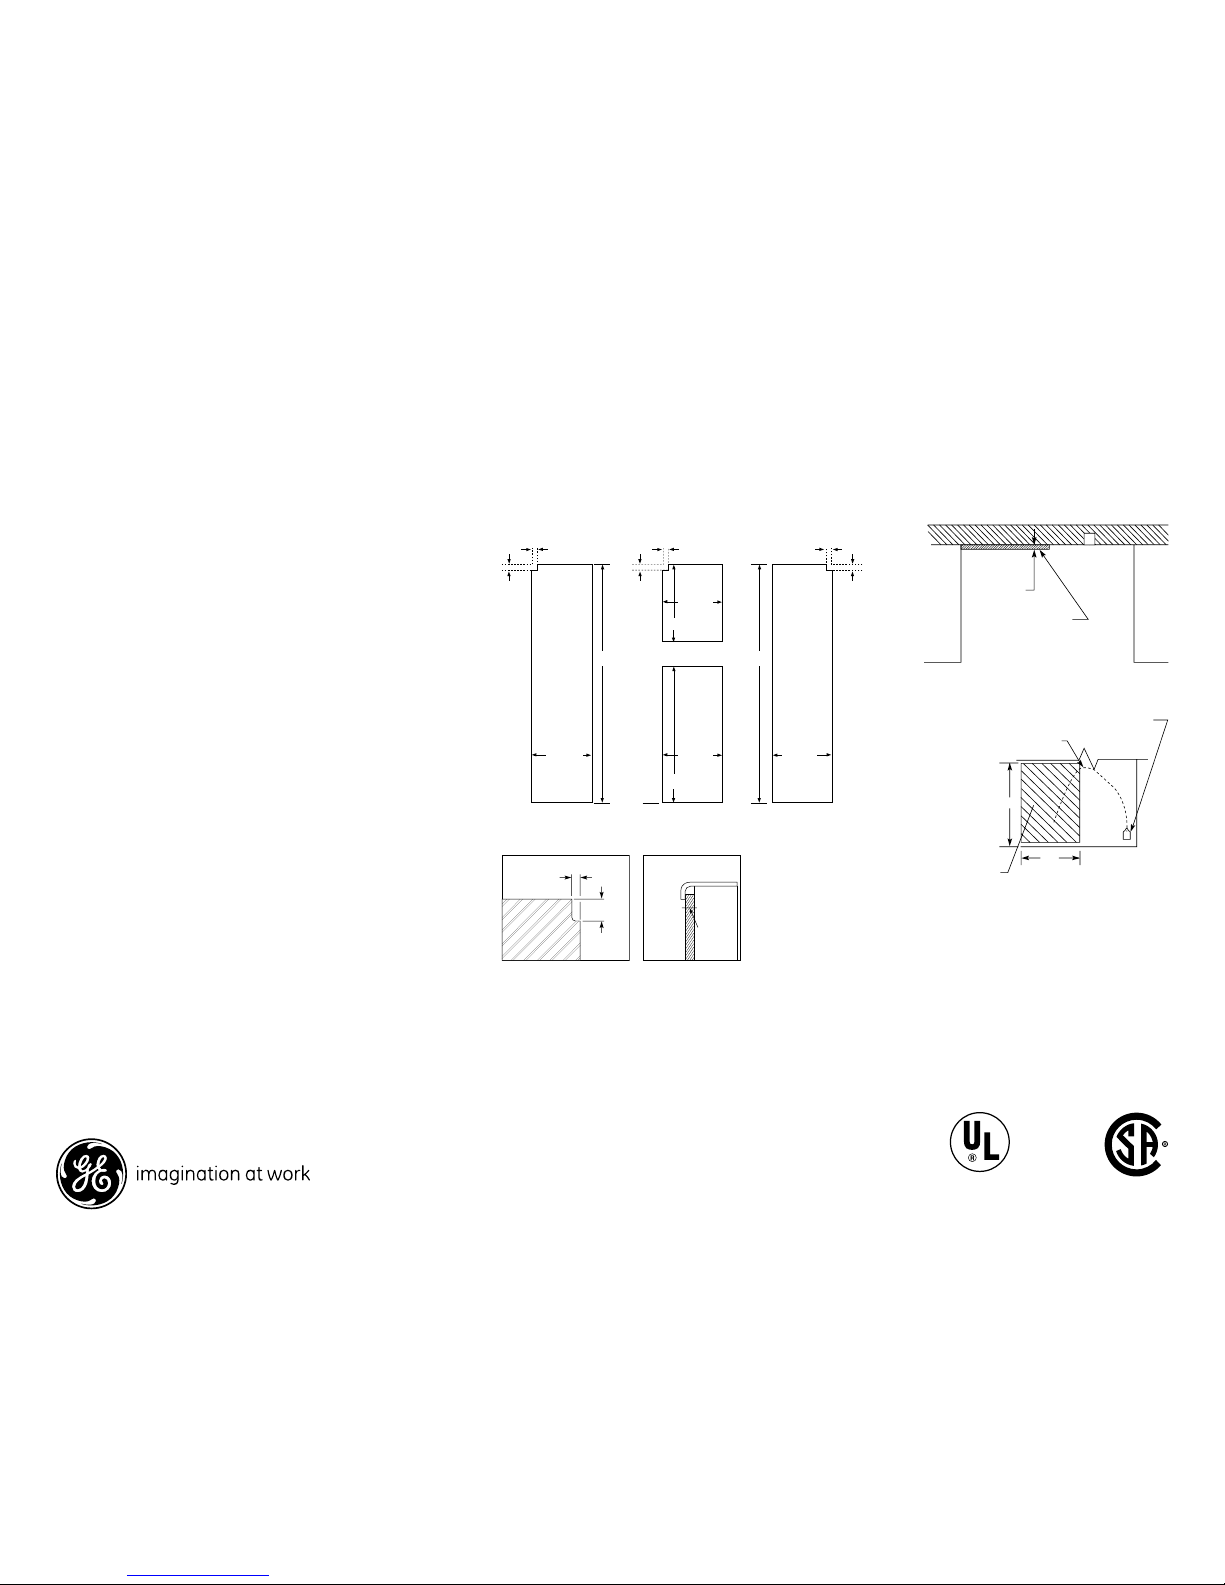
Collar Trim Installation
An enclosure is required to match up to the
trim, see Typical Installation. To obtain the
most integrated look, the cabinet or soffit
above the refrigerator should extend out
to the same depth as the side panels. The
refrigerator opening must have minimum
dimensions of 72-1/2" high x 36-1/8" wide
x 24-1/2" deep as shown at right. If there is
an overhead cabinet, allow 1" for cabinet
door clearance with the top trim piece so
the cabinet doors can be opened without
hitting the top trim. If 1/2" side panels are
used, then side trim and panel will be even.
If 3/4" side panels are used, then some of
the side panel will extend beyond the trim
and must be finished.
IMPORTANT: Before finalizing specifications
for your GE Profile Counter-Depth
Refrigerator, please NOTE:
• A minimum of 36-1/8" is required for
refrigerator installation with collar
• Be sure to allow for 1/2" or 3/4" side
panels in addition to the 36-1/8"
minimum.
Typical Installation
Shaded areas represent front surfaces of side panels and
overhead cabinet or soffit that contacts trim.
72-1/2"*
36-1/8"
24-1/2"*
1/2" minimum
*The rough-in dimension of 72-1/2" is minimum and is measured from the
finished floor to top of opening (or the underside of the overhead cabinets).
For Models with Trim Kit: If frameless style cabinets are planned for above the
refrigerator, you may need to consider adding a maximum of 1/4" (72-3/4") to
height of opening to allow additional clearance between cabinet doors and
top of refrigerator trim when cabinet doors are in open position.
Specification Revised 5/08
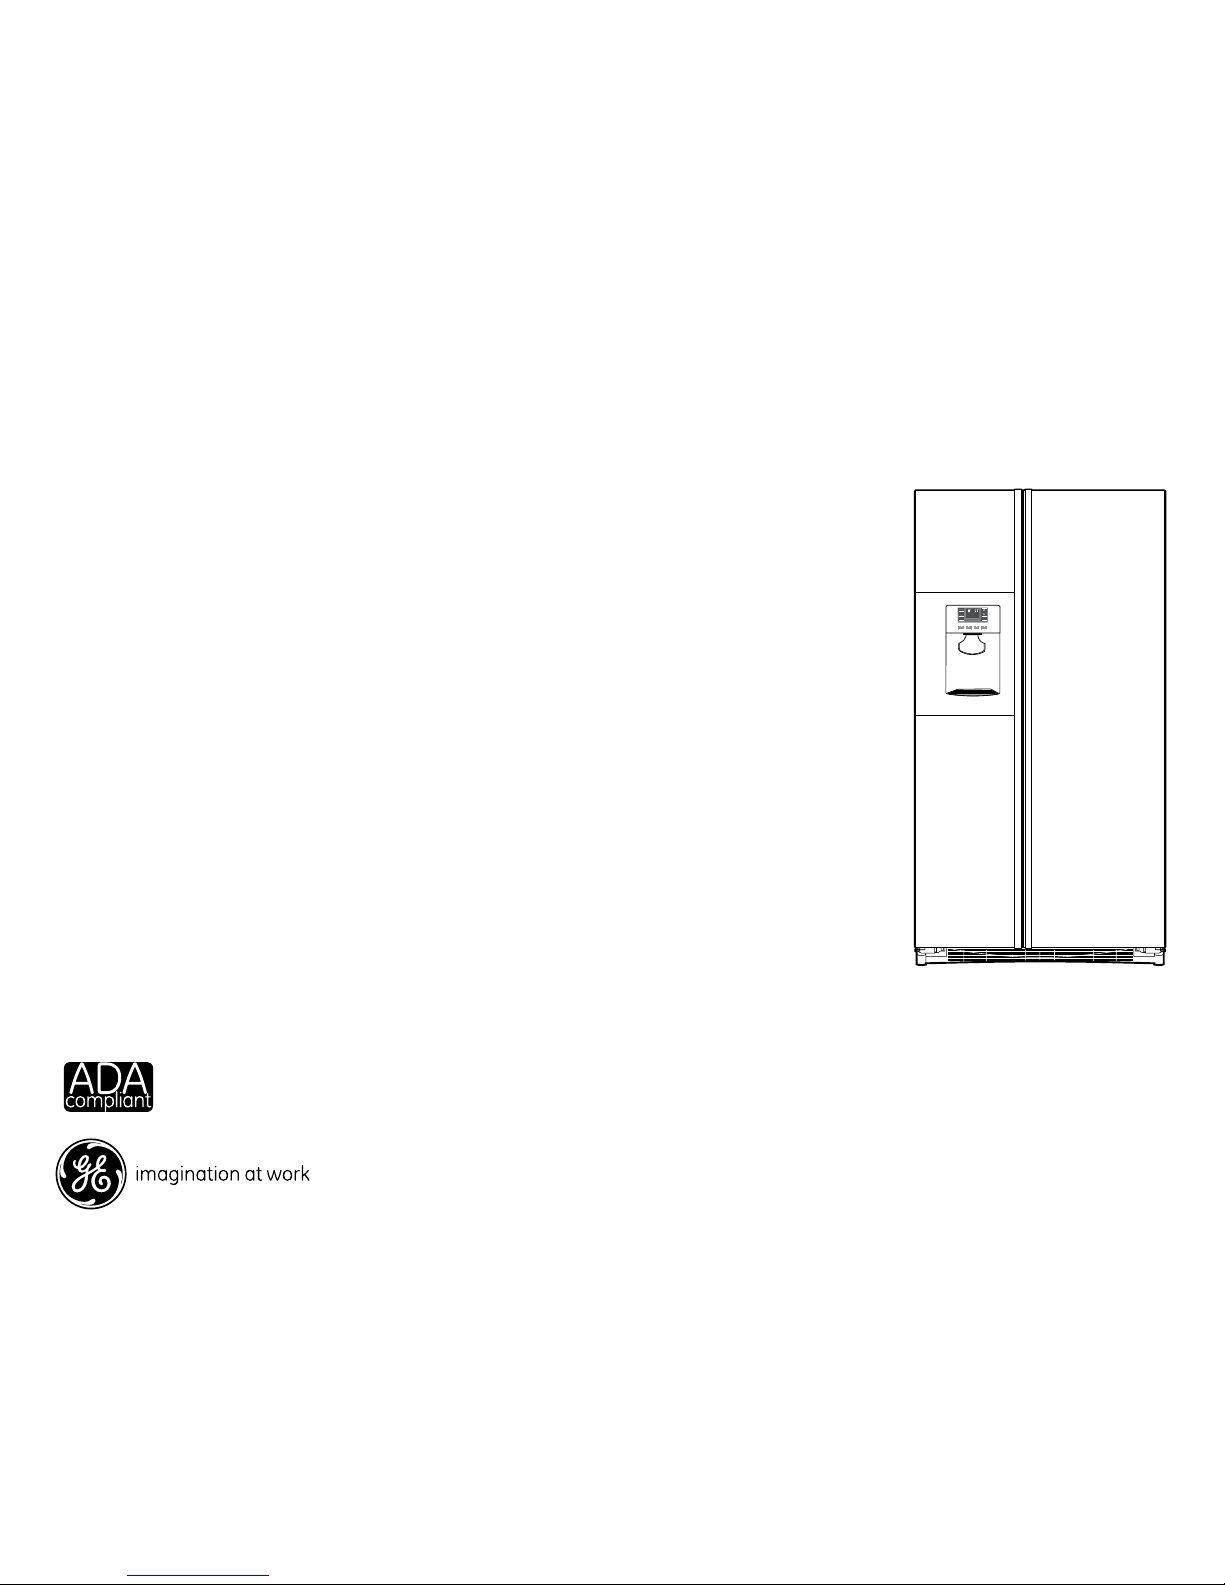
PSIC5RGX
GE Profile™Counter-Depth 24.6 Cu. Ft. Side-By-Side Refrigerator
For answers to your Monogram,® GE Profile™or
GE®appliance questions, visit our website at
ge.com or call GE Answer Center®service,
800.626.2000.
Listed by
Underwriters
Laboratories