manuals.online logo
Brands
  1. Home
  2. •
  3. Brands
  4. •
  5. GE
  6. •
  7. Refrigerator
  8. •
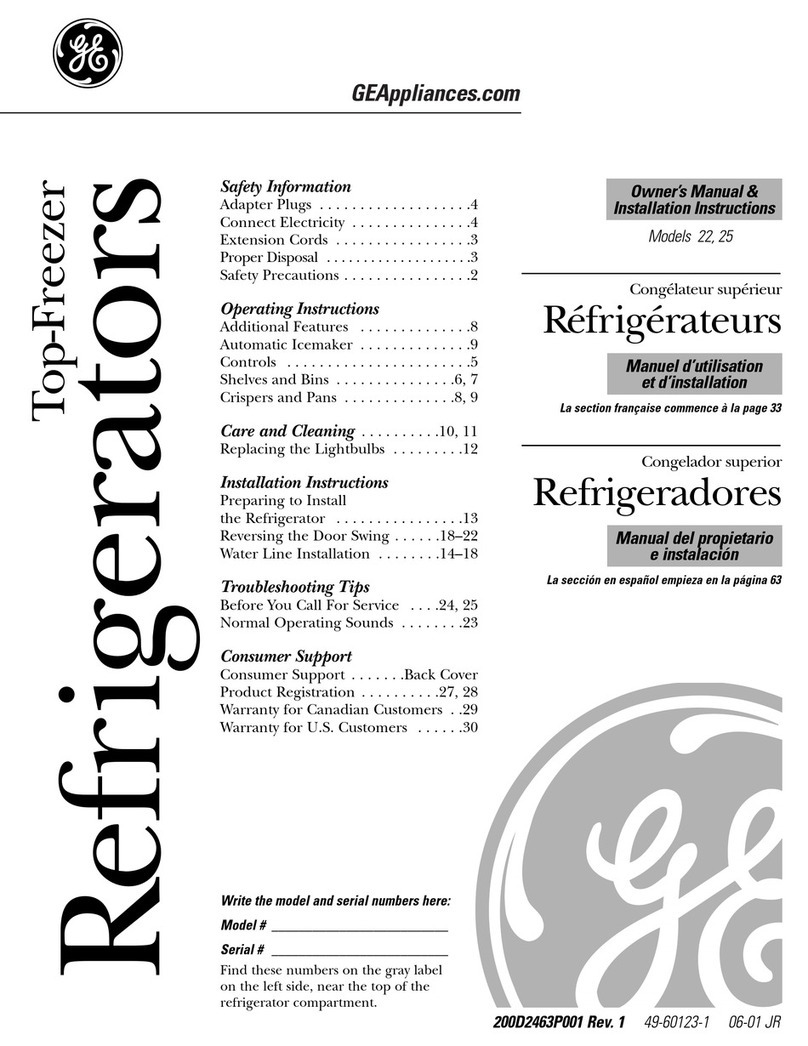
  9. GE SFR03BAV Operating instructions

GE SFR03BAV Operating instructions

This manual suits for next models

1

Other GE Refrigerator manuals

GE 22 Original instructions

GE

GE 22 Original instructions

GE GDS20SBSSS Manual

GE

GE GDS20SBSSS Manual

GE Hotpoint CTF14C Owner's manual

GE

GE Hotpoint CTF14C Owner's manual

GE Monogram ZFGP21HYSS User manual

GE

GE Monogram ZFGP21HYSS User manual

GE GSH25JSRISS and Operating instructions

GE

GE GSH25JSRISS and Operating instructions

GE PSC23MGS Manual

GE

GE PSC23MGS Manual

GE ESHF5MGXGEWW Safety guide

GE

GE ESHF5MGXGEWW Safety guide

GE GFE29HMEES Manual

GE

GE GFE29HMEES Manual

GE GTJ18CBDSA Manual

GE

GE GTJ18CBDSA Manual

GE Cafe CSCP5UGXSS Manual

GE

GE Cafe CSCP5UGXSS Manual

GE GE Profile Arctica CustomStyle PSI23SGN User instructions

GE

GE GE Profile Arctica CustomStyle PSI23SGN User instructions

GE Profile PSHW6YGZSS Assembly instructions

GE

GE Profile PSHW6YGZSS Assembly instructions

GE GTH22SBSSS User manual

GE

GE GTH22SBSSS User manual

GE GTH18KBXBRCC and Operating instructions

GE

GE GTH18KBXBRCC and Operating instructions

GE Monogram ZICS360NMBRH User manual

GE

GE Monogram ZICS360NMBRH User manual

GE SIDE-BY-SIDE REFRIGERATOR 26 Operating instructions

GE

GE SIDE-BY-SIDE REFRIGERATOR 26 Operating instructions

GE GSHL6PHXLS Manual

GE

GE GSHL6PHXLS Manual

GE PSE26KSESS User manual

GE

GE PSE26KSESS User manual

GE GTL12HBXRBS Assembly instructions

GE

GE GTL12HBXRBS Assembly instructions

GE GTS12BBPLCC Operating instructions

GE

GE GTS12BBPLCC Operating instructions

GE Monogram ZISS420DXSS User manual

GE

GE Monogram ZISS420DXSS User manual

GE PSC25NGSBBB and Safety guide

GE

GE PSC25NGSBBB and Safety guide

GE GTE21 Operating instructions

GE

GE GTE21 Operating instructions

GE ZIB240P How to use

GE

GE ZIB240P How to use

Popular Refrigerator manuals by other brands

Frigidaire FRS26TS7DW2 Use & care manual

Frigidaire

Frigidaire FRS26TS7DW2 Use & care manual

Fisher Scientific 10ECEEFSA manual

Fisher Scientific

Fisher Scientific 10ECEEFSA manual

Summit FF22BDRSS user manual

Summit

Summit FF22BDRSS user manual

Frigidaire FFRU17B2QWE use & care

Frigidaire

Frigidaire FFRU17B2QWE use & care

Hotpoint ENBGH 19xxx FW operating instructions

Hotpoint

Hotpoint ENBGH 19xxx FW operating instructions

Hitachi R-SG28KPH instruction manual

Hitachi

Hitachi R-SG28KPH instruction manual

Dometic RMH 7390 L operating instructions

Dometic

Dometic RMH 7390 L operating instructions

AEG S71700TSW0 user manual

AEG

AEG S71700TSW0 user manual

Electrolux ENB3669 Instruction book

Electrolux

Electrolux ENB3669 Instruction book

Electrolux ERN 2930 Instruction book

Electrolux

Electrolux ERN 2930 Instruction book

Beko GNE 60520 X user manual

Beko

Beko GNE 60520 X user manual

Jenn-Air JUR248LBES00 Use & care guide

Jenn-Air

Jenn-Air JUR248LBES00 Use & care guide

Dometic RGE 4000 Installation and operating manual

Dometic

Dometic RGE 4000 Installation and operating manual

Dometic L-0191B Brochure & specs

Dometic

Dometic L-0191B Brochure & specs

LG LRBP1031W - 10 Cu. Ft. Cabinet Depth Bottom Freezer... owner's guide

LG

LG LRBP1031W - 10 Cu. Ft. Cabinet Depth Bottom Freezer... owner's guide

Daewoo RN-33 Series user manual

Daewoo

Daewoo RN-33 Series user manual

Haier RF-8888-174 Service manual

Haier

Haier RF-8888-174 Service manual

Blaupunkt 5CK2 Series user manual

Blaupunkt

Blaupunkt 5CK2 Series user manual

manuals.online logo
manuals.online logoBrands
  • About & Mission
  • Contact us
  • Privacy Policy
  • Terms and Conditions

Copyright 2025 Manuals.Online. All Rights Reserved.

197D5616P006 49-60566 05-08 JR
ge.com
Write the model and serial numbers here:
Model # __________________________
erial # __________________________
Find these numbers on a label inside
the refrigerator on the side wall.
Refrigerators
SMR03BAV
SFR03BAV
Owner’s Manual
& Installation
Instructions
afety Information . . . . . . . . . . .2, 3
Operating Instructions
Care and Cleaning . . . . . . . . . . . . . .6, 7
Control Settings . . . . . . . . . . . . . . . . . . .4
Refrigerator Features . . . . . . . . . . . . . .5
Installation Instructions . . . .8 10
Troubleshooting Tips . . . . . .13, 14
Consumer upport
Consumer Support . . . . . .Back Cover
Warranty . . . . . . . . . . . . . . . . . . . . . . . .15
ATTENTION:
Defrosting—Do not use sharp,
pointed objects to remove frost or
ice from surfaces of the refrigerator
and/or freezer compartment. Doing
so could puncture the cooling coil,
causing the unit to lose its ability
to maintain cold temperatures
and voiding the warranty.
See the Care and Cleaning
section for instructions on
defrosting the refrigerator
and/or freezer compartment.
2
IMPORTANT AFETY INFORMATION.
READ ALL IN TRUCTION BEFORE U ING.
afety Instructions
Operating Instructions
Troubleshooting Tips
Consumer upport
Installation Instructions
DANGER! RI K OF CHILD ENTRAPMENT
Use this appliance only fo its intended pu pose as desc ibed
in this Owne ’s Manual.
WARNING!
■This refrigerator must be
properly installed and located in
accordance with the Installation
Instructions before it is used.
■Do not allow children to climb,
stand or hang on the shelves
in the refrigerator. They could
damage the refrigerator and
seriously injure themselves.
■Do not store or use gasoline
or other flammable vapors
and liquids in the vicinity
of this or any other appliance.
■Keep fingers out of the “pinch
point” areas; clearances between
the doors and cabinet are
necessarily small. Be careful
closing doors when children
are in the area.
■Unplug the refrigerator before
cleaning and making repairs.
■GE does not support any
servicing of the refrigerator.
■Turning the temperature control
dial to the OFF position stops
cooling but does not shut off
power to the refrigerator.
When using elect ical appliances, basic safety p ecautions
should be followed, including the following:
SAFETY PRECAUTIONS
Child entrapment and suffocation
are not problems of the past.
Junked or abandoned refrigerators
are still dangerous… even if
they will sit for “just a few days.”
If you are getting rid of your
old refrigerator, please follow
the instructions below to help
prevent accidents.
Before You Throw Away Your
Old Refrigerator or Freezer:
■Take off the doors.
■Leave the shelves in place so
that children may not easily
climb inside.
Refrigerants
All refrigeration products contain
refrigerants, which under federal
law must be removed prior to
product disposal. If you are getting
rid of an old refrigeration product,
check with the company handling
the disposal about what to do.
PROPER DISPOSAL OF THE REFRIGERATOR
ge.com
3
afety Instructions
Operating Instructions
Troubleshooting Tips Consumer upport
Installation Instructions
USE OF EXTENSION CORDS
Because of potential safety haza ds unde ce tain conditions,
we st ongly ecommend against the use of an extension co d.
However, if you must use an extension cord, it is absolutely necessary
that it be a UL-listed, 3-wire grounding type appliance extension cord
having a grounding type plug and outlet and that the electrical rating
of the cord be 15 amperes (minimum) and 120 volts.
HOW TO CONNECT ELECTRICITY
Do not, unde any ci cumstances, cut o emove the thi d
(g ound) p ong f om the powe co d. Fo pe sonal safety,
this appliance must be p ope ly g ounded.
The power cord of this appliance
is equipped with a 3-prong
(grounding) plug which mates
with a standard 3-prong
(grounding) wall outlet to minimize
the possibility of electric shock
hazard from this appliance.
Have the wall outlet and circuit
checked by a qualified electrician
to make sure the outlet is properly
grounded.
If you have only a standard
2-prong wall outlet, it is your
personal responsibility and
obligation to have it replaced
with a properly grounded
3-prong wall outlet.
The refrigerator should always
be plugged into its own individual
electrical outlet which has
a voltage rating that matches
the rating plate.
This provides the best
performance and also prevents
overloading house wiring circuits
which could cause a fire hazard
from overheated wires.
Never unplug your refrigerator by
pulling on the power cord. Always
grip plug firmly and pull straight
out from the outlet.
Repair or replace immediately
all power cords that have become
frayed or otherwise damaged.
Do not use a cord that shows
cracks or abrasion damage
along its length or at either end.
When moving the refrigerator
away from the wall, be careful
not to roll over or damage
the power cord.
About the control on the refrigerator.
4
Cont ol Settings
The temperature control maintains the temperature in the refrigerator.
COOL is the warmest setting; and COLDE T is the coldest setting.
The typical setting is COLD.
Allow 24 hours for the refrigerator to reach the desired temperature.
If you want a colder or warmer temperature, move the dial one setting
at a time. Moving the control to OFF stops the cooling but does not turn
off the power to the refrigerator. Setting the control too high may cause
freezing in the refrigerator, depending on the room temperature.
How To Test Temperatures
Use the milk test. Place a container of milk on a shelf and check it
a day later. If the milk is too warm or too cold, adjust the temperature
control.
Afte changing the cont ol, allow 24 hou s fo the ef ige ato to each
the tempe atu e you have set.
The control will look like one of the above.
afety Instructions
Operating Instructions
Troubleshooting Tips
Consumer upport
Installation Instructions
5
afety Instructions
Operating Instructions
Troubleshooting Tips Consumer upport
Installation Instructions
helves
To remove a shelf, lift up the back slightly and pull forward.
Some models have multi-position shelves that can be moved
to different levels.
Ice Tray Compartment (on some models)
This compartment is designed for production of ice cubes
and short-term storage (a few days at most) of some
commercially-frozen foods when in contact with
the evaporator (cold surface in compartment.)
Door helves
Shelves on the door provide convenient storage for frequently
used items. Some models have doors that are deep enough to
store large bottles.
About the refrigerator features. ge.com
Key-Ejecting Lock (on some models)
The key for the spring-loaded lock is automatically ejected—
key will not remain in lock in either the open or closed position.
Keep the key out of each of child en and away f om the ef ige ato .
If a replacement key is needed, it can be ordered by visiting our
Website www.GEAppliances.com, or calling GE Parts and Accessories,
800.626.2002.
Refrigerator torage Zones
(all- ef ige ato models)
For best results follow
the recommended
storage zones:
■The top and (front)
middle shelf are best
for storing fruits and
vegetables.
■The (rear) middle
shelf and bottom shelf
are best for storing
beverages, deli meats
and cheeses.
Case
Back Door
(Front)
BEST FOR BEVERAGES, DELI
MEATS, AND CHEESES
Bottom
Shelf
Middle Shelf
Top Shelf
DELI
ZONE
FRUIT
ZONE
REFRIGERATOR STORAGE ZONES
BEST FOR FRUITS, VEGETABLES
Side View of Refrigerator
6
afety Instructions
Operating Instructions
Troubleshooting Tips
Consumer upport
Installation Instructions
Cleaning the Outside
Keep the outside clean. Wipe with a clean cloth lightly
dampened with kitchen appliance wax or mild liquid dish detergent.
Dry and polish with a clean, soft cloth.
Do not wipe the ef ige ato with a soiled dish cloth o wet towel.
These may leave a esidue that can e ode the paint. Do not use
scou ing pads, powde ed cleane s, bleach o cleane s containing
bleach because these p oducts can sc atch and weaken the paint
finish.
Protect the paint finish. The finish on the outside of the refrigerator
is a high quality, baked-on paint finish. With proper care, it will
stay new-looking and rust-free for years. Apply a coat of kitchen/
appliance wax when the refrigerator is new, and then at least
twice a year.
Cleaning the Inside
To help prevent odors, leave an open box of baking soda
in the refrigerator.
Unplug the refrigerator before cleaning. If this is not practical,
wring excess moisture out of sponge or cloth when cleaning
around the control.
Use warm water and baking soda solution about a tablespoon
(15 ml) of baking soda to a quart (1 liter) of water. This both
cleans and neutralizes odors. Rinse and wipe dry.
Other parts of the refrigerator including door gaskets, fruit
and vegetable drawers, and all plastic parts can be cleaned
the same way.
Do not wash any plastic ef ige ato pa ts in the dishwashe .
Care and cleaning of the refrigerator.
Preparing for Vacation
For long vacations or absences, remove food and unplug the
refrigerator. Move the control to the OFF position, and clean the
interior with a baking soda solution of one tablespoon (15 ml) of
baking soda to one quart (1 liter) of water. Leave the door open.
Preparing to Move
Secure all loose items such as shelves and ice trays by taping them
securely in place to prevent damage.
Be su e the ef ige ato stays in an up ight position du ing moving.
afety Instructions
Operating Instructions
Troubleshooting Tips Consumer upport
Installation Instructions
ge.com
Defrosting (models with f eeze a ea)
Def ost wheneve f ost on the wall of the ice t ay compa tment
becomes 1/4″thick. Never use a sharp or metallic instrument
to remove frost as it may damage the cooling coils. (A punctu ed
cooling coil will cause se ious p oblems and void the wa anty.)
We ecommend using a plastic sc ape . Do not use any elect ical
device in def osting you ef ige ato .
To defrost:
■Remove foods and ice trays from the ice tray compartment.
■Set the temperature control dial at OFF position.
■On models without a drip tray, place a pan beneath the ice tray
compartment to collect water.
Defrosting usually takes a few hours. To defrost faster, keep the door
open. Also, pouring warm (not hot) water on the frosted part may
speed defrosting. Do not use boiling water—it may damage
plastic parts.
After defrosting:
■Empty water from the drip tray or from the pan placed beneath
the ice tray compartment. Wash the tray or pan with warm water.
■Wipe the ice tray compartment with a damp cloth.
■Turn the temperature control to the desired setting and return food
and ice trays to the refrigerator.
NOTE: If ice buildup is ve y thick, it may keep the ice t ay compa tment
doo f om opening o closing completely. Don’t t y to fo ce it open;
afte def osting, the doo will open and close easily.
Def ost wheneve f ost on the inside su faces of the sto age a ea
becomes 1/8 ″(3 mm) thick. Never use a heater of any kind, scraper
or sharp metallic instrument to remove frost as it may damage
the refrigerator or cooling coils. ( A punctured cooling coil will
cause serious problems and void the warranty.)
To defrost, unplug the refrigerator or turn the temperature control
dial to the OFF position. Remove the contents and wipe inside
surfaces and shelves with a clean towel. If frost does not come
off easily, allow the frost to melt somewhat and wipe off.
After defrosting, make sure inside surfaces are dry; then return
the contents to the refrigerator, plug unit back in and set
the temperature control to the desired setting.
Defrosting (all- ef ige ato models)
7
8
afety Instructions
Operating Instructions
Troubleshooting Tips
Consumer upport
Installation Instructions
Preparing to install the refrigerator.
Read these instructions completely and carefully.
Turn counterclockwise to raise,
clockwise to lower.
Ref ige ato Location
■Do not install the refrigerator where the temperature will go below
55°F (13°C) or above 110°F (43°C) because it will not be able to
maintain proper temperatures.
■Install it on a floor strong enough to support it fully loaded.
■Do not install it closer than 5″(13 cm) next to a range.
■Do not install it in a recessed area.
■Do not build in the refrigerator.
Clea ances
Allow the following clearances for ease of installation and proper
air circulation.
ides 1/2″ (13 mm)
Top 2″(51 mm)
Back 2″(51 mm)*
*From the rear cabinet surface to the wall
Leveling Legs
Adjustable legs at the front corners of the refrigerator
should be set so the refrigerator is firmly positioned on
the floor and the front is raised just enough that the door
closes easily when opened about halfway.
To adjust the leveling legs, turn the legs
counterclockwise to raise the refrigerator, clockwise
to lower it.
9
afety Instructions
Operating Instructions
Troubleshooting Tips Consumer upport
Installation Instructions
ge.com
Door Reversal
. Remove the two plug buttons on the top left of the cabinet.
2. Remove the plastic hinge cover by gently pressing forward
and lifting by the back edge.
3. Remove the two screws from the top hinge.
4. Lift the top hinge up and off of the refrigerator.
5. Lift the door up and off of the bottom hinge.
6. Remove the hinge pin grommet from the bottom of the door
on the right side and insert into the left side.
7. Tilt the refrigerator cabinet backward.
8. Remove the hinge pin. Keep the two spacers for reinstallation.
9. Remove the three screws to remove the bottom hinge
on the right side.
0. Remove the case screw from the left side.
. Flip the bottom hinge plate to install on the left side
of the refrigerator.
2. Screw the three bottom hinge screws into place.
3. Put a spacer between the hinge pin and the bottom hinge
and screw the hinge pin into place.
4. Place the second spacer between the hinge pin and the door.
Position the door on the bottom hinge.
5. While the magnetic gasket holds the door in place, secure
the top hinge with two screws.
6. Replace the hinge cover on the top hinge.
7. Place the two plug buttons in the holes on the right side
of the refrigerator cabinet.
Preparing to install the refrigerator. (cont.)
Bottom
hinge
Spacer
Hinge cover
Plug buttons Hinge
Spacer
Screws
10
Hinge pin
grommet
Bottom
hinge pin
afety Instructions
Operating Instructions
Troubleshooting Tips
Consumer upport
Installation Instructions