GE TURBOCOOL 23 Safety guide

www,GEAppliances.com
°e..q
U3
°e..q
U3
Safety Instructions ............... 2-4
Operating Instructions
Automatic Icemaker ............... 14
Care and Cleaning .............. 16, 17
Crispers and Pans ................. 13
CustomCool _'_.................... 7, 8
Ice and VVater Dispenser ............ 15
Refrigerator Doors ................ 12
Replacing the i_igh t Bulbs ........... 18
Shelves and Bins ............... 10, 11
Temperature Controls ............... 5
TurboCool r'* . ...................... 6
_'ater Filter . ...................... 9
Installation Instructions
Installing the Refrigerator . ....... 28-31
Moving the Refligeramr . ........ 24-27
Preparing to Install
the Reflig_ramr . .................. 23
Trim Kits and Panels ............ 19-22
Water Line Installation .......... 32-34
Troubleshooting Tips ........... 36-38
Normal Operating Sounds .......... 35
Consumer Support
Consumer Support ......... Back Cover
Performance Data Sheet ............ 41
Product Registration (U.S.) ....... 43, 44
Product Registration (Canadian) . . .45, 46
State of California V%ter
Treatment Device Certificate ......... 42
V%rranty (Canadian) ............... 39
VVarranty (U.S.) ................... 40
Models23,25,26,27and29
Profile C6te fi C6te
R frig&ateurs
La sectionfran_aise commenceala page 48
Profile Lado a Lado
Refrigeradores
Laseccion en espaOolempieza en lapagina 90
Write the model and serial numbers here:
Model #
Serial #
Find these numbers on a label inside
the refrigerator compartment at the
top on the right side. 200D2600POZ/6 49-60371 05-05Jfl

IMPORTANTSAFETYINFORMATION.
READALLINSTRUCTIONSBEFOREUSING.
WARNING!
Use this appliance only for its intended purpose as described in this Owner's Manual.
SAFETYPRECAUTIONS
When using electrical appliances, basic safety precautions should be followed, including the following:
This refi-igerator must be properly installed
and located in accordance with the Installation
Instructions before it is used.
Do not allow children to climb, st;rod or hang
on the shelves in the reli-igerato_: They could
damage the reti_igerator and seriously iqj ure
themselves.
Do not touch the cold sm_fi_ces in the fl'eezer
compartment when hands are damp or wet. Skin
may stick to these extremely cokl stmfaces.
Do not store or use gasoline or other flammable
\:q)ms and liquids in the vicinity ot this or any
other appliance.
In refl_igerato_ with automatic icemake_,
avoid coma ct with the moving parts of the
ejector mechanism, or with the heating element
locamd on the bottom _ff the icemake_: Do not
place finge_ or hands on the automatic
icemaking mechanism while the refiigerator
is plugged in.
Keep finge_ out ot the "pinch point" areas;
clearances between the doo_5 and between
the (loo_ and cabinet are necessarily small.
Be caretul closing doms when children are
in the area.
Unplug the reflJgerator before cleaning and
making repai_.
NOTE"We stronglyrecommendthat anyservicingbe
performedby a qualified individual.
Setting either or both controls to 0(Off)does not
remove power to the light circuit.
Do not reii'eeze ti'ozen foods which have
thawed completely.
_ ?dwax:s clean the CustomCooF_Tray after thawing
fi_od.

GEAppliances.com
DANGER!RISKOFCHILDENTRAPMENT
PROPERDISPOSALOFTHEREFRIGERATOR
Child entrai)ment and suffocation are not i)rol)lems
of the past, Junked or abandoned refl_igeratm_ are
still dangerotls.. ,even if they will sit for "just a few
days." If you are getting rid of your old refrigerator;
please fi_llow the instructions below to hel I) prevent
accidents.
Before YouThrowAway YourOldRefrigerator
or Freezer:
Take off the clom_.
I,eave the shelxes in place so that children ma)
not easilx climb inside.
Refrigerants
M1 refl_igeration products contain refi'igerants,
which trader federal law must be removed prior
to product disposal. If wm are getting rid of an
old refrigeration product, check with the
company handling the disposal about what
to do.
USEOFEXTENSIONCORDS
Because of potential safety hazards under certain conditions, we strongly recommend against the use
of an extension cord.
However; ifxou must use an extension cord, it is absolutely necessary that it be a Ui,-listed (in the United
States) or a (;SA-listed (in Canada), 3-wire gromMing type appliance extension cord haxing a grotmding
type plug and outlet and that the electrical rating of the cord be 15 amperes (minimmn) and 12(1xolts.
3

IMPORTANTSAFETYINFORMATION.
READALLINSTRUCTIONSBEFOREUSING.
WARNING!
HOWTOCONNECTELECTRICITY
Do not, under any circumstances, cut or remove the third (ground) prong from the power cord. For
personal safety this appfiance must be properly grounded.
The power cord of this appliance is equipped
with a 3-prong (gromMing) plug which mates
with a standard 3-prong (gromMing) wall outlet
to minimize the possibili_' of electric shock hazard
fl'om this appliance.
Have the wall outlet and circuit checked by a
qualified electridan to make sure the outlet is
properly gromMed.
If the outlet is a standard 2-prong outlet, it is your
personal responsibility and obligation to have it
replaced with a propedy grotmded %prong wall
outlet.
Tile refl-igerator, should always, be I_lugged,, into its
own indixidual electrical outlet which has a xoltnge
rating that matches the rating plate.
This provides tile best pe_timnance and also
I_rexents oxerloading, house wiring circuits which
could cause a fire hazard fl'om oxerheated wires.
NeverItm )lug,,vour refl'igerator, bx, i)ulling, on tile
I)°wer cord. Mwavs,, II,gli ) )lug firefly, and pull straight
out fl'om the outlet.
Repair or replace immediately all power cords that
have become fl'ayed or otherwise damaged. Do not
use a cord that sho_:s cracks or abrasion damage
along its length or at either end.
\,_]/en moving tile refligerator away from tile
wall, be carefld not to roll over or damage tile
power cord.
USEOFADAPTERPLUGS(Ad_pterplug_notpermittedinco_odo)
Because ofpotential safety hazards under certain conditions, we strongly recommend against
the use of an adapter plug.
However; if' you, must use an adapter; where local
codes pemfit, a temporary connection may be made
to a proi)erly gromMed 2-prong wall outlet by use
of a UI Aisted adapter a\:lilable at most local
l/J1 I'(1w[lI'e stores.
Tile linger slot in tile adapter must be aligned with
the larger slot in the wall outlet to provide proper
polarity in tile com_ection of tile power cord.
When disconnecting the power cord ti'om the
adapte_; always hold tile adal)ter in place with one
hand while pulling the power cord i)lug with the
other hand. If this is not done, tile adapter gromM
temfinal is very likely to break with repeated use.
If the adapter grotmd temfinal breaLs, DO NOT
USEthe refrigerator tmtil a proper grotmd has
been established.
Attaching the adapter ground terminal to a wall outlet
cover screw does not ground the appliance unless the
cover screw is metal, and not ihsu/ated, and the waft
outlet is grounded through the house wiring. Youshould
have the circuit checkedby a qualified electrician to make
sure the outlet is properly grounded
READANDFOLLOWTHISSAFETYINFORMATIONCAREFULLY.
SAVETHESEINSTRUCTIONS
4

Aboutthe temperaturecontrols. GEAppliances.com
J
%..........---
The temperature controls are preset in the factory at 37°F for the
refrigerator compartment and O°Ffor the freezer compartment. Allow
24 hours for the temperature to stabilize to the preset recommended
settings.
The temperature controls can display both the SET temperature
as well as the actual temperature in the refrigerator and freezer.
The actual temperature may vary slightly from the SET temperature
based on usage and operating environment.
Setting either or both controls to OFFstops cooling in both the freezer
and refrigerator compartments, but does not shut off electrical power
to the refrigerator.
NOTE: The refrigerator is shipped with protective film covering the
temperature controls. If this film was not removed during installation,
remove it now.
To change the temperature, press and release the
WARMER or COLDER pad. Tile SETlight will come
on and tile display will show tile set teml)eramre.
To change the temi)eratm'e, trip either the
WARMER or COLDER pad tmdl the desired
temperatm'e is displayed. ]?.ef'rigerator temperatm'es
can be ac!justed between 34°F and 44°F and the
fl'eezer teInl)eratures can be ac!iusted between
-6°F and +6°E
Once the desired temperattu'e has been set,
the temperature display will return to the actual
reflJgerator and fl'eezer teml)eratm'es afier 5
seconds. Several a(!itlsunents ma)' be reqtfired.
Each time you a(!iust controls, allow 24 horn's fin" the
refl-igerator to reach tile teml)eratm'e you have set.
Toturn the cooling system off, tnp the WARMER i;ad
fin" either tile reli-igerator or tile fl'eezer tmtil tile
display shows OFF.Toturnthe unit back on,press the
COLDERpad fin" either the refligerator or fl'eezer
The SETlight will illuminate on the side you
selected. Then press the COLDERpad again (on the
side where the SETlight is ilhmfinated) and it will
go to the preset points of O°Ftbr the fl'eezer and
37°Fior the refiigeratox: Setting either or both
controls to OFFsmps cooling in both the fi'eezer
and refiigerator compartments, but does not shut
off electrical power to the refl'igerat(n:
PerformanceAir FlowSystem
The Perfimmmce _d_=glow System is designed to
maximize temperatm'e control in the refligerator
and fl'eezer compartments. This tmique special
teature consists of the :Mr Tower along the back
wall of the refligerator and the :Mr Tmmel on the
bottom portion of tile fl'eezer rear wall. Placing fi)od
in fi'ont of the louvers on these components will not
affect I)erl(mnance. Although the :Mr Tower and
the ?dr Tunnel can be removed, doing so will affect
temperature pedimnance. (For remox_fl
instructions, on-line, 24 horns a day, contnct us at
GEAl)pliances.com or call 800.GE.CARES. In
Canada, contnct us at geappliances.ca or call
1.800.361.3400.)

About TurboCoM7
TurboCool
i iii iii iii iii iii iii iii iii iii ii
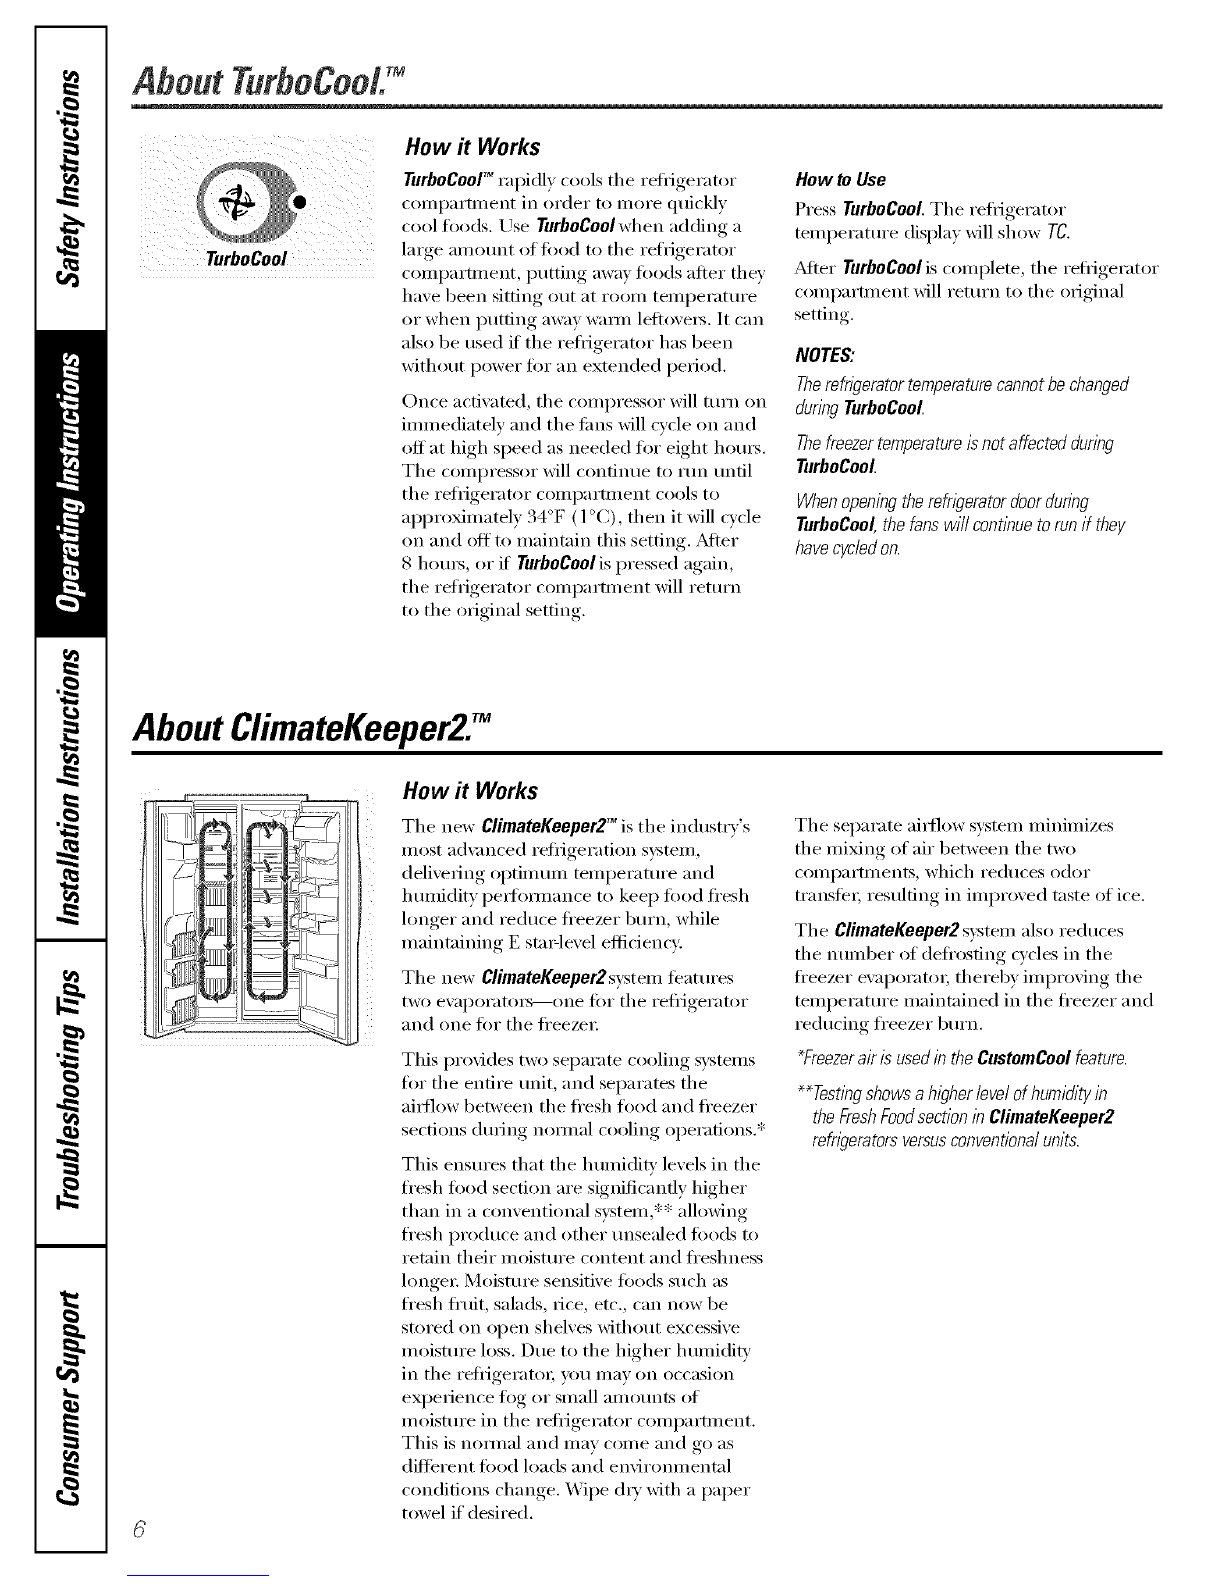
How it Works
TurboCoof_rapidly cools the refl_igerator
coml)artn_ent in order to more quickly
cool fi)o(ls. Use TurboCoolwhen adding a
large amount of fi)od to the refrigerator
compartment, putting away fi)ods after they
have been sitting out at room temperattu'e
or when putting away warn/leflovei_. It can
also be used if the refl{gerator has been
without power for an extended period.
Once actiw_ted, the compressor will tm'n on
immediately and the tiros will cycle on and
off at high speed as needed fi)r eight hems.
The colnl)ressor will continue to run tmtil
the reflJgerator COllll)artlllent cools to
approximately 34°F (1°C), then it will cycle
on and off to maintain this setting. _Mter
8 houi_, or if TurboCoolis pressed again,
the refrigerator con_l)artment will rettu'n
to the origilml setting.
How to Use
Press TurboCooLThe reti_igerator
temperature display will show TO.
_MteI"TurboCoolis coml)lete ,the reliJgerator
colnl)artment will return to the original
setting.
NOTES:
Therefngeratortemperaturecannotbechanged
duringTurboCool.
Thefreezertemperatureisnotaffectedduring
TurboCool.
Whenopeningtherefrigeratordoorduring
TurboCool,thefarowillcontinuetorunif they
havecycledon.
AboutClimateKeeper2J
How it Works
The new ClimateKeeper2 TM is the industrv's
nlost a(l\mlced reliJgeration system,
delivering oi)timtm_ teml)erattn'e and
hunfidity l)ei_iwmance to kee I) food fl'esh
longer and reduce ti'eezer burlL while
nmii_tailfing E Stalqevel efficiency.
The new ClimateKeeper2system featuI'es
two ewq)oratoi_--one fin" the refligerator
and one tot the fl'eezei:
This pro\ides two separate cooling svstelns
tor the entire trait, and separates the
aiI_lOW between the fl'esh food and fl'eezer
sections durii_g nomml cooling operati(ms.*
This ensures that the humidiD' levels in the
fresh tood section are significantly higher
than in a conventional system,** allowing
fresh produce and other tmsealed foods to
retain their Inoismre coI_tent and ti'eslmess
longei: Moisture sensitive toods such as
fresh ti'uit, salads, rice, etc., can now be
stored on oi)en shelves without excessive
moisture loss. Due to the higher hunfidit},
in the reli_igeratoi; you Inay on occasion
experiei_ce tog or small mnotmts of
moisttn'e in the reliJgerator coml)artn_ei_t.
This is nomml and may come and go as
ditti_i'ent toed loads and ei_virolm_ental
conditions change. _]i)e (liT with a paper
towel if desired.
The separate aii_low systeln milfinfizes
the nfixing of air between the two
colnl)artlnents , which reduces odor
transteI; i'estfltii_g in in_i)roved taste of ice.
The ClimateKeeper2systeln alsoreduces
the number of defi'osting cycles in the
fl'eezer ex_q)oratoi; thereby inq)roving the
temi)erature n_aii_tained in the ti'eezer and
redtlcing freezer btu'n.
_Freezerair is used in the CustomCool feature.
**Testingshowsa higher/eve/ofhumidityin
theFreshFoodsectioninClimateKeeper2
refweratorsversusconventionaiunits.

AboutCustomCoolY C Applia,ces.com
How it Works
The CustomCoolTM feature is a s_steIn of
dampe_, a tim, a temperature thermistor
and a heater. Depending on the flmction
selected, acombination at these will be
used to quickly chill items, thaw items or
hold the pan at a specific teillperattlre.
The pan is tightly sealed to prevent the pen's
temperature fl'onl causing temperature
fluctuations in the rest of the retiigeratm:
Some CustomCoolmodels teature abeverage
centei: It is designed to store beverages at
cokler wmperamres. Select the Beverage
Center pad if you like to kee I) extra-chilled
refl'eshments on hand.
The controls fin" this pan are located at the
top of the refi_gerator with the temperature
controls.
ExpressThawTM
ExpressChfllTM
How to Use
O Erupt} the pan. Place the Chill/Thaw
tra} in the pan. Place the items on the
tra} and close the pan completely.
0Select the ExpressThaw: _ExpressChilY_
or SelectTempTM pad. The display and
SkTlight will con/e on. Tap the pad
until tile light appeai_ next to the
desired setting. Lrse the chart to
detemfine the best setting to use.
To stop a feature before it is
finished, trip that teature's pad
until no options are selected and
the display is off.
During ExpressThaw and
ExpressChill,tile displa_ on the
controls will count down the time
in the cycle.
_Mier the ExpressThawcycle is
conq)lete, the pan will reset to the
MEATsetting (32°F) to help preserve
thawed items until they are used.
The displayed actual wmperamre _ff
the CustomCoolpan may vmy slightly
ti'om the SETtemperature based oil
usage and operating environment.
NOTE."Forfoodsafety reasons,it is recommended
thatfoodsbe wrappedinplastic wrap when using
ExpressThaHz Thiswill help containmeatjuices
andimprovethawingperformance.
How to Remove and Replace the Drawer
Toremove: _I,ock all fi)ur swing locks by rotating
O Pull the drawer out to the stop position, thenl to the lock position.
0 Rotate all fi)ur swing locks to the mdock
position.
O i,ifi the fl'ont of the drawer up and ()tit.
Toreplace:
O Make sure all four swing locks are in the
unlock position.
Place the sides of the drawer into the
drawer supports, making sure the swing
locks fit on the drawer slots.

About CustomCooU
CustomCooI 'MChart
NOTE: Results may vary depending on packagfl_g, starting temperature and other food traits.
0.5 Lb. (4 hours)
Hamburger Patties (0.5 lb)
h_dividually _,Vrapped
Filet Mignon (0.5 113)
1.0 Lb. (6 hours)
Chicken Breasts (1.0 113)
Ground Beef' (1.0 113)
Steak (] .0 113)
2.0 Lbs. (10 hours)
ChickeI_ Breasts (2.0 lbs)
Ground Beef (2.0 lbs)
Steak (2.0 lbs)
3.0 Lbs. (12 hours)
Chicken Breasts (3.0 lbs)
Ground Bed (3.0 lbs)
Steak (3.0 lbs)
15 Minutes
1 Beverage Can (12 oz)
2 Small Juice Boxes (6-8 oz each)
30 Minutes
2 to 6 Beverage Cans (l 2 oz each)
2 Plastic 20 oz Bottles of Beverage
4 to 6 Small Juice Boxes
(6-8 oz each)
3 Foil Juice Packets
Wine (750 ml bottle)
45 Minutes
:: 2IJter of Beverage
1/2 Galhm (if,Juice
Gelatin-1 package
Citrus Setting (43°F)
Oranges, i,emons, IJmes,
Pineapple, (:antaloupe
; Beans, (]tlCtli//bers, Tomatoes,
PeppeI_, Eggplant, Squash
Produce Setting (35°F)
Strawberlies, I_.aspberries, Kiwifl'uit,
PeaI_, Cherries, Blackberries,
Grapes, PlulnS, Nectarines, Apples
_&sparagus, Broccoli, ()brn,
Mushroon_s, Spilmch, (_aulflloweI;
Kale, Green Onion, Beets, Onions
Meat Setting (32°F)
Raw Meat, Fish and Poultr_
ii i _ i i
How to Use
Select the Beverage Centerpad. The set
light will come on and the feature will
operate as required.
_To turn off the fe'ature, press Beverage
Centerpad and set light will turn off.
NOTE:Unlessturnedoffasabove,featurewi//
remalbactiveforsixmonths.PresstheBeverage
Centerpadtorestart
DairyBin How to Remove and Replace the Beverage Center
Toremove: _Replace dairy bin.
O I_.emove dairy bin fiI_t. Holding the
botton/of the daily bill lift the fl'ont
straight up, then lift up and out.
0 Holding left and right side of beverage
center; lift straight up and out.
Oi.eave adapter in place.
Toreplace:
Engage bacLside of beverage center in
molded supports on adapte_: Then
push down on the sides of the beverage
centeI: The beverage cenmr will lock
into place.
Adapter
z
i ii
i ii
i i
i i

About the water filter, (onsomemodels) CEApptiances.com
Water Filter Cartridge
The water filter cartridge is located in the back upper right
corner of the refl_gerator compartment.
When toReplace the Filteron Models With a
ReplacementIndicator Light
There is a replacement indicator light for the water tilter
cartridge on the dispense_; This light will turn orange to tell
w)u that you need to replace the filter soon.
The filter cartridge should be replaced when the
replacement indicator light turns red or if the flow of water
to the dispenser or icemaker decreases.
When toReplace the Filteron Models Withouta
ReplacementIndicator Light
The filter cartridge should be replaced every six months
or earlier if the flow of water to the water dispenser or
icemaker decreases.
Removingthe Filter Cartridge
If you are replacing the cam_(lge, fi_t remove the old one
by slowly turning it to the left. Do not pull down on the
cam_dge. A small amount of water may (h_ I) down.
Installing the Filter Cartridge
O There is an adapter attached to the top of the new filter
cartridge
If you are replacing a SmartWater cam_dge, the adapter
nlust be removed before installing the cam_(lge. To
remove the adapte_; turn it to the left about 1/4 turn.
If you are replacing a Water by Culligan cartridge,
leave the adapter in place. This adapter will stay in the
reii_igerator when )'ou replace flmn'e cartridges.
With adapter Withoutadapter
(appearance may vary)
On models xfithout a replacement indicator light,
appl) the month and year sticker to the new cam_dge
to remind you to replace the filter in six months.
gt([_i)ll i1111)e: _l) )1! ;Ij(;;l[e] ie I_]to.( "_ lf'tl.l('J)11_ tl 1_;i t(ll; s;:;;tl lesl; iJ!_iI_ i, :lel(;i;:t: _le; v
after installation.
@ i,ine u I) the arrow on the cartridge and the camJdge
holder: Place the top of the new camJdge u I) inside the
holder: Donot push it u I) into the holder:
O Slowly turn it to the right until the filter cartridge stops.
DO NOTOVERTIGHTEN. As you turn the cartxidge, it will
automatically raise itself into position, The cam-idge will
mo',e about l/2 turn.
O Run x_ater from the dispenser fi)r 3 minutes (about l-1/2
gallons) to clear the s_stem and prexent sputtering.
0Press and hold the RESETWATERFILTERpad ((m some
models) on the dispenser fi)r 3 seconds.
NOTE:Anewlvqnstnlled water filter cartxJdge may cause
water to spurt fl'om the dispenser,
FilterBypassPlug
You must use the filter b)'pass l)lug when a replacement
filter cartridge is not a\:filable. The dispenser and the
icemaker will not operate without the filter or filter
byl)ass I)lug.
.... _4 _
Filter Filter-"_
Bypass
SmartWater WaterbyCul@an
1_o use the filter bypass/)lug on Water by Culligan models,
VOtl lnt/st filet l'elHove the filter ada/)ter from the C;ll'tridge
holder b_ turnin_ it to the left.
/f v()u have q uestions--visit our X4'ebsite
;it ge.c( )111_
or call 1.800.(;E.(_ARES (1.800.432.2737).
Replacement fillers:
To order additional filter cartridges in the United States,
visit our Website at go.corn, or call GE Parts and Accessories,
800.626.2002.
MWF
Suggested Retail $38.95-47.95
(;ustome_ in Canada shotfld constflt the yellow pages fi)r
the nearest Camco Ser\ice Centei:

Abouttheshelvesandbins.
Not all features are on all models.
Refrigerator Door Bins and Freezer Door Tilt-Out Bins
Refrigerator bin
Freezer tilt-out bin
Large Bins
The larger refl-igerator door bins and
freezer tilt-out door bins are ac!justable.
Toremove: Lift the front of the bin straight
up, then lift up and out.
To replace er relecate: Engage the back side
of the bin in the molded supports on the
dam: Then push down on the fl'ont of the
bin. Bin will lock in place,
Small Bins
Toremove: Lift the h'ont of the bin straight
up then out.
Tile snuggerhelps prment tipping, sl)illino
or sliding of small items stored on the door
shelf', Place a finoer on either side of the
snugger near the rear and moxe it back
and forth to fit yam" needs.
Donotblock CAUTION:
Becarefulwhen
placingitemsin the
topbin.Makesure
thatitemsdonot
blockor failinto
theicechute.
Toreplace: Position the bin above the
rectangular molded supports on the dam: ......
Then slide the bin down onto the supp()rt
to lock it in place.
Topfreezerbin
Donotblock
CAUTION:
Partmust be in
placeforproperasshownice
dispensing. Food
cannotbe stored
/b thislocation.
Top freezer bin (on some models)
i
Presstab andpullshelfforward
toremove
Slide-Out Spillproof Shelf
The slide-out spillproot shelf allows you
to reach items stored behind othe_s. The
special edges are designed to help prexent
spills fl'om dripping to lower shelxes.
Toremove:
Slide the shelf out until it reaches the stop,
then press down on the tab and slide the
shelf straight out.
Toreplace or relocate:
Line the shelf up with the supports and
slide it into place. The shelf can be
reposifioned when the door is at 90 ° or
more. To reposition the shelf, slide the shelf
past the stops and angle downward. Slide
shelf' down to the desired position, line up
with the supports and slide into place.
Make sure you push the shelves a// the way back
in before you close the doo_
10
OuickSpace TM Sheff
This shelf splits in half and slides trader
itself fin" storage at tall items on the shelf
below.
This shelf can be removed and replaced
or relocatedj ust like Slide-Out Spillproof
Shelves.
On some models, this shelf cannot be used
in the lowest position,

GEAppliances.com
Not all features are on all models.
Freezer Baskets
Toremove, push the basket all the way to the
back of tile fl'eezei: iJfi up until tile back
pins are disengaged, i,ifl tile entire basket
up and pull out.
Makesureyoupushthebasketsall thewayback
in beforeyouclosethedoo_
i¸I i; ¸ (;) Slide-Out Freezer Shelves
To remove, slk]e out to the stop positiomL
]ift the fixmt past the stop i)ositiom_ m_d
slide ola.
Makesureyoupushtheshelvesall thewayback
in beforeyouclosethedoo_
Fixed Freezer Shelves
There are two b])es of fixed
fl'eezer shelxes.
Toremovethis typeofshelf"
OI,ifl tile shelf up at tile left side.
r S "(
Ogiin_ tile, hell )tit.
To remove this type of shelf"
O i,ifl up tile left side of tile shelf and
slide it left into tile center of tile shelf
supports.
Rotnte the right side el the shel) up
and out ()i the shell supports.
NOTEFORDISPENSERMODELS:Inordertotake
fulladvantageofthetilt-outicebin,onlystoreitems
ontheshelfbelowtheicebInthatarenotallerthan
the/owestpoIntonthebIn.
Door Wine/Beverage Rack (onsomemodels)
This rack holds up to 5 cans, one botde oI To replace:
_ine or one 2-liter bottle ()I soda ......... Oi_,eattncn tile racK to tile sloes
o- s s )) tile of tile bm
The rack han_s from the._ide_ f " " •
dairx bin ...... , ,
•" Enoage tile D_ICK SlOe el tile Din in
To remove: tile molded supports on tile dooi:
• Then push down on tile fl'(mt of the
Empt_ tile xm]e/bexerage rack. , . _{ .........
•'_ Din, lne I)111 XVlll lOCK lnto pJace.
Holding tile bottom of tile &fli T bin,
lift tile ti'ont straight up, then lift up
and ()ill
To detach tile rack from tile dairy bin,
pull the rack's side wires out of the
holes on each side of tile dairy bin.
i
11

Abouttherefrigeratordoors.
ii
iii
When the door is only partially open,
it will automatically close.
Beyond flTisstop flTedoor will stay open.
Refrigerator Doors
The refl_igerator (loo_ may teel different
than the ones you are used to. The special
door opening/closing feature nlakes sure
the 11oo_ close all the way and are secm'elv
sealed.
When opening and closing the door you
will notice a stop position. If the door is
opened past this stop point, the door will
I'elllain open to allow VOtl to load and
tmh)ad tood more easily. When the door
is only partially open, it will automatically
dose.
The resistance you ti_el at the stop
position will be reduced as the door
is loaded with food.
Door Alignment
If (loo_s are tmexen, a/!iust the refrigerator
dooi;
O Using a 7/16" wrench, mrn the door
ai!iusting screw to the right to raise the
dora; to the left to lower it. (A m'lon
I)lug, imbedded in the threads ot the
pin, prevents the pin ti'om turning
unless a wrench is used.)
O _Mter ()lie or two turns of the wrench,
oi)en.... and close the reflJ gerator, door
and check the aligmnent at the top of
the dome.
12

About the crispers and pans. cEAppli .cos,
Not all features are on all models.
Fruit and Vegetable Crispers
Excess water that may accunmlate in the
bottom of the drawe_ should be wiped (hw:
On some models, the bottom drawer has
tifll extension slides that allow flfll access
to the drawex:
NH LO Adjustable Humidity Crispers
Slide the control all the way to the HIsetting
to provide high humidi_' recommended tot
most vegetables.
Slide the control all the way to the LO
,settino_ to proxide lower h umidi_' lex els
recolmnended fi)r inost fl'uits.
i_i/ii i_)_I_/
Convertible Deli Pan
The comertible dell pan has its own cold
air duct to allow a stream ot cold air from
the fl'eezer compartment or fl'esh rood
coiilpai'tlllent to flow to the pan.
Thevariabletemperaturecontrolregulates
the air flow from the Climate Keepex:
Set the control to the coldest setting to
store fl'esh meats.
Set the control to coldto convert the pan
to nomml refl_igerator temperatm'e and
provide extra vegetable storage space. The
cold air duct is turned off. ¼u{able settings
between these extremes can be selected.
About crisperremoval.
Not aft features are on all models.
Crisper Removal
Crispers cm_ easily be removed by puIIim_g
the drawer smdght out amid ]iflim_g the
dm wet Iq:) a m_dover th e stop ]oca ti(m.
If tile door prevents yol* {_'om ta]dm_gol,t
the drawers, thst t_T to remo_e the door
bim_s.I{ this does m_otoffer enol*gh
cIeamm_ce, the reti'ige_wtor will m_eed to
be rolled {i)rward m_ti] the door opens
em_ol_g]] to slide the dm*_e_s ol_t. Im_some
cases, whe]_ }_l_ roll the reiiige_ttw ol_t,
V()_* _%rH]] m]eed to move the re[i'igelwtor
to the ]eft or right as yol* roll it (rot.
13

Abouttheautomaticicemake
A newly instafled refrigerator may take 12to 24 hours to begin making ice.
Automatic Icemaker
Ondispensermodels,
to access ice or reach
the power switch:
oLift thebin, then pull it
forward until the bin stops.
Lower the bin to access ice
or reach the power switch.
NOTE:In order to take full advantage
of the tilt-out ice bin, only store items
on the shelf below the ice bfl7that
are no taller than the Iowest point
on the bhT.
The icemaker will produce seven cubes
per cycle---aI)I)roMmately ] 00-130 cubes
in a 24-hour period, depending on fl'eezer
coiili)ai'tlilent teiilpei'att/i'e, i'ooiil
t eil/pei'at tli'e, n tlillber ( )f d()()r ()I)enings
and other use conditions.
If the refl_gerator is operated befiwe the
water connection is made to the icemaket;
set the power switch in the 0 (off) position.
_._hen the reflJgerator has been connected
to the water SUl)pl); set the power switch to
the I (on) position.
The icemaker will fill with water when it
cools to 15°F (-10°C). A newly installed
refrigerator may take 12 to 24 hems to be_4n
makhlg ice cubes,
You will hear a buzzing sotmd each time
the icemaker fills with water:
Throw awm the first fray batches of ice to
allow the water line to clem:
Be sm'e nothing interferes with the sweep
of the feeler amL
When the bin fills to the level of the feeler
am_, the icemaker will stop producing
ice. It is nomml for several cubes to be
joined together:
If ice is not used fl'equentl> old ice cubes
will become cloudy, taste stale and shrink.
Special note about dispenser models:
Dispenser models have a tilt-out ice bin.
The bin can be tilted out as shown in the
illustrations, and it will hold itself up
while you take ice out or mrn the
icemaker power switch on and off'. Be
sure to put the bin back in place before
closing the (loo_:
To restore your ice level from an empty
bucket stage, the following steps are
recommended:
O 12 hotu_ alter the fi_st 1)atch of ice
has fidlen into the bin, dispense
3 to 4cubes.
@ _MteI" an additional 6 hom_, dispense
3 to 4 cubes again.
These steps will restore your ice level
in fire shortest amount of time.
Power
Switch !cemaker
Green
PowerLight FeelerArm
NOTE: inhomes with lower-than-averagewater
pressure,youmayhear the icemakercycle multiple
times whenmaklhg onehatchof ice.
Removing Ice Bin (dispenser models)
CAUTION'.Theicebin is heavywhenfull.
Set the power switch to the 0 (Off) position
before removing the bin.
Whenreplacingthebin,be sure to press it
firefly into place./f it does not go all the
way back, remove it and rotate the drive
mechanism 1/4 ttlFn. Then push the bin
back again.
Dispenser Models only
oLift andpull forward again
to remove the bin.
14

Aboutthe ice and water dispenser.(onsomemodels) GEAppliances.com
SpillShelf
ToUse the Dispenser
Select CUBEDICE _J, CRUSHEDICE I_
or WATER l_J x
Press the glass gentl) against the top ot
the dispenser cradle.
The spill shelf is not self:draining.
To reduce water spotting, the shelf and
its grille should be cleaned regularly.
Oispenser tight
LIGHT
If no water ls dispensed when the refngeretor ls
first instafled, there may be air in the water line
system. Pressthe dispenser arm for at least two
minutes to remove trapped air from the water Quick Ice
fine and to fi// the water system. Toflush out
impurltiesinthewater/ine, throw away the first When you need ice
six glassfuls of water • in a hl_rr_; press this
CAUTION: Never put fingers or any other
objects into the ice crusher discharge opening.
Lockingthe Dispenser
. P,-ess,,,eLOCKCON OL
p.dfo, sec,,,,dsto
lock the dispenser and
control panel. To
unlock, press and
LOCKCONTROL hold the pad again
HOLD3 SECS for 3 seconds.
QUICKICE
DoorAlarm
DOORALARM
This pad turns the night
light in the dispenser
on and off. The light
also coi/les on when
the dispenser cradle is
pressed. On some
models, if this light
bm'ns out, it should be
replaced with a 6 watt
12V maximum bulb.
pad to speed up ice
production. This will
increase ice production
for the following
48 hotu_ or tmfil you
press the pad again.
To set the ;11;11111, pl'ess
this pad tmti] the
indicat(w light c(nnes
on. This alam_ will
sound it either door is
open JOt l//Ol'e thai3
3 minutes. The light
goes out and the
beeping stops when
you close the dool;
Important Facts About Your Dispenser
Do not add ice fi'om trays or bags to
the storage (h'awe_: It may not crush or
dispense well.
Avoid overfilling glass with ice and use ot
narrow glasses. Backed-up ice can jam the
chute or cause the door in the chute to
freeze shut. If ice is blocking the chute,
poke it through with a wooden spoon.
Beverages and too(ls should not be
quick-chilled in the ice storage drawer.
Cans, bottles or food packages in the
storage drawer may cause the icemaker
or auger to jam.
To kee I) dispensed ice fl'om missing
the glass, put the glass close to, but not
touching, the dispenser opening.
Some crushed ice may be dispensed
even though you selected CUBED ICE.
This hal)pens occasionally when a few
cubes acddentally get directed to
the crusher.
_dter crushed ice is dispensed, some
water may drip flxm_ the chute.
Sometimes a small motmd of snow will
t0m/ on the door in the ice chute. This
condition is nomml and usually occm_
when w)u have dispensed crushed ice
repeatedly. The snow will eventually
evaporate.
15

Careand cleaning oftherefrigerator.
Dispenser drip area.
Cleaning the Outside
The dispenser drip area, beneath tile giille,
should be _ped dIT: _,\_ter left in this area
may lea',e deposits. Remo',e the deposits by
adding undiluted vinegar to the well. Soak
until tile deposits disappear or become
loose enotlgh to iJnse _l_';iv,
The dispenser cradle. Before cleaning, lock
tile dispenser by pressing and holding tile
LOCKCONTROLpad tot 3 seconds. Clean
with wam_ water and baking soda
solution--about a tnblespoon (15 ml) of
baking soda to a quart (l liter) of wateI:
Rinse thoroughly and wipe dry.
The deer handles and trim. Clean with
a cloth dampened with soapy wateI:
Dry with a soft cloth.
The stainless steel panels and door handles
(oil sonle models) can be cleaned with
a commercially a\:filable stainless steel
cleanei: A spra)_on stainless steel cleaner
works best.
Do not use appliance wax or polish
on the stainless steel,
Keep theoutsideclean.Wipe Mth a clean
cloth lightly dampened Mth kitchen
appliance wax or mild liquid dish deteigent.
Dry and polish with a clean, soft cloth.
Donot wipetherefrigeratorwith a soileddish
clothor wet towel.Thesemayleavearesidue
thatcanerodethepainLDonotusescouring
pads,powderedcleaners,bleachor cleaners
containingbleachbecausetheseproductscan
scratchandweakenthepaintfinish.
Cleaning the Inside
Tohelp prevent odors,leave an open bc,x ,':4
baking soda in tile fl'esh ti)od and fl'eezer
COII/l)_l i'tiilents.
Unplug the refrigerator before cleaning. If this
is not practical, wiing excess moisture ()/It
of sponge or cloth when cleaning around
switches, lights or controls.
Lrse w;mn wamr and baking soda solution--
about a tablespoon (15 ml) of baking soda
to a quart (1 liter) (ff wami: This both
cleans and neutralizes odois, Rinse and
wipe dry:
Use of any cleaning solution other than that
which isrecommended, especially those that
contain petroleum distillates, can crack or
damage the interior of the refrigerator.
Avoid cleaning cold glass shelves with hot water
because the extreme temperature difference
may cause them to break. Handle glass shelves
carefufi_zBumping tempered glass can cause
it to shatter
Donot washanyplasticrefngeratorparts
in thedishwasher
Thechili/thaw trayis dishwashersafe.
16

GEAppliances.com
Behind the Refrigerator
Be careflll when moving the refi_igerator
away fl'om the wall. _dl types of floor
coverings can be damaged, particularly
cushioned coverings and those with
enlbossed S/liS[;ices.
Pull the refl_igerator straight out and return
it m position by pushing it straight in.
Moving the refl_igerator in a side direction
may result in damage to the floor covering
or refl_igerato_:
When pushing the refrigerator back, make sure
you don't roll over the power cord or icemaker
supply line.
Preparing for Vacation
For long ;;ications or absences, YelllOve
food and uI_plug the reli_igei'ato_: Clean the
interior with a baking soda sohltion of one
tablespoon (15 ml) of baking soda to one
quart (l liter) of water: i,eave the (loo_
open.
Set the icemaker power switch to the 0 (off}
position and shut off the water supply to
the refl_igerat(n;
If the temperature can drop below fl'eezing,
have a qualified servicer drain the water
supply s)'stem to prevent serious propert},
damage due to flooding.
Preparing to Move
Secure all loose items such as shelves and
(h'awe_ by taping them securely in place
to prevent damage.
X,_]_en using a hand track to move the
refl_igeratot; do not rest the ti'ont or back
(ff the reti_igerator against the hand truck.
This could damage the refrigerator. Handle
only fi'om the sides of the reli_igerato_:
Be sure the refn)erator stays in an upright
position during moving.
/7

Replacingthelightbulbs.
Setting the controls to OFFdoes not remove power to the light circuit.
Refrigerator Compartment--Upper Light
Tabs
0
0Unplug tile refl'igerator.
Tile bulbs are located at tile top of tile
compartment, inside the light shield.
On some models, a screw at tile fl'ont of
the light shield will have to be removed.
@To rein(we tile light shieM, on solne
models, press in on the tabs on the
sides of the shieM and slide torward
and out. On other models,just slide
fin'ward and out.
O,Mter repladng tile bulb with an
appliance bulb of tile same or lower
wattage, replace the light shield and
scrmvs (on some models). When
replacing the light shield, make sure
that the tabs at the back ot the shield
fit into tile slots at tile back of tile light
shield housing.
O Plug the refl_Jgerator back in.
Refrigerator Compartment--Lower Light
Thishght is located above the top drawer
O Unl)iug tile refrigerator:
@ Remo_e tile comertible meat drawer
control knob b) pulling straight out.
IJlt the light shield up and pull it out.
O_Mter replacing tile bulb xfith an
appliance bulb of tile same or lower
wattage, replace the shield and
the knob.
0 Plug tile refrigerator back in.
Freezer Compartment
O Unl)lug tile refrigerator:
{ ' @ Remoxe the shelf just aboxe tile light
shield. (The shelf will be easier to
remoxe if it is emptied fixst.) On some
models, a screw at the top of the light
shield will need to be remoxed.
To remoxe tile light shield, press in
on tile sides, and lift up and out.
0Replace tile 1)ulb with an appliance
bulb of tile same or lower wattage,
and reinstall the light shield. When
reinstalling the light shield, make
sure tile top tabs snap secm'elv
into place. Replace the screw
(on some models).
0 Reinstall tile shelf and plug tile
refrigerator back in.
Dispenser (onsomemodels)
O Unplug tile refligerato_:
@ The bulb is located on the dispenser
trader tile control panel.
Remoxe tile light bulb b) tm'ning
it co/mterclockwise.
O Replace tile bulb with a bulb of tile
same size and wattage.
Plug tile refrigerator back in.
18

Trimkits anddecoratorpanels.
For CustomSlyM °'models
Read theseinstructionscompletely and carefully.
BeforeYouBegin
Some models are equipped with trim kits that aflow you to install door panels. You can order
pre-cut black, white, bisque or stainless steel decorator panels from GE Parts and Accessories,
800.626.2002,or you can add wood panels to match your kitchen cabinets.
Panels less than 1/4" (6 mm) thick
When installing wood panels less than ]/4" (6 ram) thick, you need to create a filler panel, such as ]/8"
cardboard, that Mll fit between the ti_ce of the door and the wood panel. If you are installing the ix'e-cut
decorator panels, ix'e-cut filler panels are included in the kit. The combined thickness of the decorator
or wood panel and the filler panel should be 1/4" (6 ram).
PanelsI/4" thickorless
1/4" max
3/4" (19 mm) or Raised Panel
A raised I)anel desion_ screwed or ,glued to a ]/4" (6 ram) thick backing, or a 3/4" (1 (.)ram) _outed board
can be rise(l. The raised portion of the panel m tlSt be fid)ricated to pe_nit clearances of at least 2" (5. l cm)
from the handle side fi)r fingertip clearance.
Panels thicker than l/4" (6 ram), up to 3/4 (l .) ram) max, will reqture that the outer :)/16 (8 ram) of
panel perimeter be no thicker than 1/4" (6 ram).
Weightlimitationsfor custompanels:
FreshFood38Ibs.(17kg)max.
FreezerDoor28Ihs.(13kg)max.
Panelsthickerthan1/4"(6ram)
1/4"(6ram)max
3/4"(19 ram/
f
2"(5.1 cm)
Clearance
HandleSide
Appearance "'"
Panel
1/4"(6ram)
kBacking
Door
19

Trimkits anddecoratorpanels.
23"Dimensions for Custom Wood Panels
The areas at the top of the panels need to be cut out of the panels.
Freezer Panel Freezer Panel
Without Dispenser With Dispenser FreshFoodPanel
Cutout "-'I _'- 1/8" (3 ram)
!...".F
t
6/18"
(Smm)
67%2"
(170.9 cm)
FRONT
1415/J2"
'(36.8 cm)"
Cutout .-_: :_-1/8" (3 rnm)
,,
i i
(8ram)1 I
117V¢"
N6i4cml
iFRONT
141%2" ..,
(36.8 cm)
33%"
(85.4 cm)
4
1/8"(3 ram)--,,.: 1-- Cutout
', "...! 5/16"
I.. ""} (8 ram)
67%Z'
(170.9 cm)
FRONT
1915/32"
"-(49.5 cm)' "-_
25" CustomStyle TM Dimensions for Custom Wood Panels
The areas at the top oI the panels need to be cut out oI the panels.
Freezer Panel Freezer Panel
Without Dispenser With Dispenser FreshFoodPanel
20
Cutout .-,.: :4- 1/8" (3 mrn)
t
6/16"
(8ram)
89"
(175.3 cm)
FRONT
1415/32"
_'-"(36.8 cm)"
Cutout --,-f :---1/8" (3 mm)
',
i i
iFRONT
15 "
, 14 iJ2 .,
(36.8 cm)
361/4"
(92.0 cm)
1/8"(3 mrn).-_ I I_- Cutout
. ', ',____15/16"
"---1 (8ram)
69 r'
(175.3 cm)
FRONT
19_5/32"
"-(49.5 cm)" "-_
Other manuals for TURBOCOOL 23
19
This manual suits for next models
8
Table of contents
Languages:
Other GE Refrigerator manuals

GE
GE GTK17JBDBS Manual

GE
GE GTS16DTHBB Owner's manual

GE
GE GSL25JGBLB Manual

GE
GE ENERGY STAR GTH18ECBWW Manual

GE
GE Double-Door User manual

GE
GE TCX18 User manual

GE
GE Profile PCF23NGW Manual

GE
GE Cafe ENERGY STAR CFE29TSDSS Operating instructions

GE
GE AJCH 12 Operating instructions

GE
GE TFM20JRB AA User manual