GE Hygromaster User manual

GE
Sensing
Hygromaster®
Protimeter Thermo-Hygrometer
Instruction Manual

GE Protimeter Hygromaster Page 2
Table Of Contents
Introduction . . . . . . . . . . . . . . . . . . . . . . . . . . . . . . . . . . . . . . . . . . . . . . . . . . . . . . . . . . . . . . . . . . . . . . . . . . .3
1 Hygrostick® and Quikstick Humidity Probe Options. . . . . . . . . . . . . . . . . . . . . . . . . . . . . . . . . .4
2 Function Buttons . . . . . . . . . . . . . . . . . . . . . . . . . . . . . . . . . . . . . . . . . . . . . . . . . . . . . . . . . . . . . . . . . .5
3 Standard Functions – Humidity and Temperature Measurements . . . . . . . . . . . . . . . . . . . .6
4 Function Tables. . . . . . . . . . . . . . . . . . . . . . . . . . . . . . . . . . . . . . . . . . . . . . . . . . . . . . . . . . . . . . . . . . . .7
5 Logging Functions - PC Setup . . . . . . . . . . . . . . . . . . . . . . . . . . . . . . . . . . . . . . . . . . . . . . . . . . . . .16
6 Logging Functions - Manual Logging (Recording) . . . . . . . . . . . . . . . . . . . . . . . . . . . . . . . . . . .18
7 Logging Functions - Reading the Data . . . . . . . . . . . . . . . . . . . . . . . . . . . . . . . . . . . . . . . . . . . . .19

GE Protimeter Hygromaster Page 3
Introduction
The GE Protimeter Hygromaster is a handheld hygrometer with data logging capability. Spot
measurements of relative humidity, dew point, mixing ratio and ambient temperature are shown
on a split display at the touch of a button. Surface temperature can also be measured using an
optional surface temperature sensor.
When used as a data logger, the instrument is set to record measurements as required and is left
in place for the required period of time. The memory contents are then downloaded to a PC,
using optional software, where the logged measurements are displayed in tabular and graphical
form for quick and simple analysis.

GE Protimeter Hygromaster Page 4
1Hygrostick
®and Quikstick Humidity Probe Options
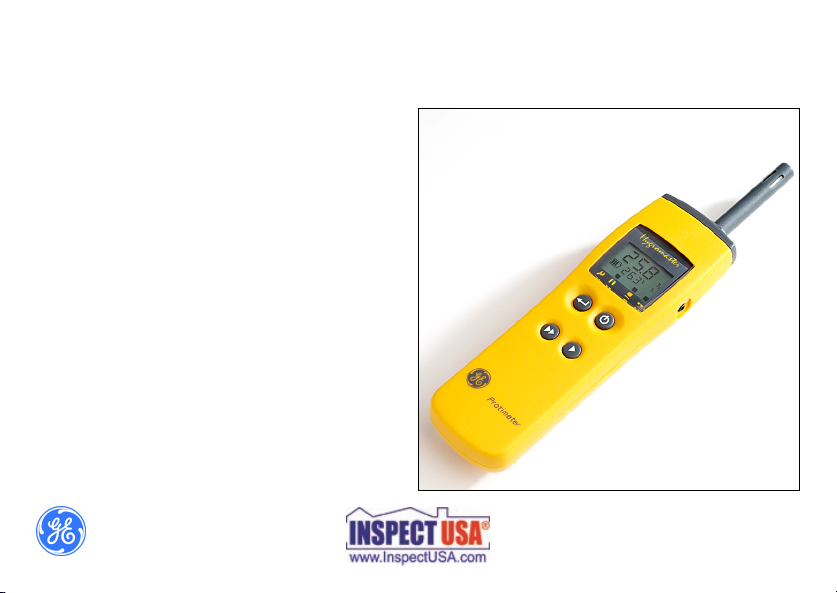
The Hygromaster is used with a detachable humidity probe to measure relative
humidity and ambient temperature. Two humidity probes are available, the
Hygrostick and the Quikstick. The Hygrostick is optimized for measuring
humidity in the 30-100 %rh range and may be used with Protimeter humidity
sleeves for measuring the equilibrium relative humidity of solid walls and
floors. The Quikstick is a general purpose sensor, with a measurement range of
1-100 %rh, making it more suitable for general air quality applications.
Table 1 below lists the specifications for both Humidity Probes, which are shown in the
photograph above and are distinguished only by the color difference.
Table 1: Humidity Probe Dimensions
Humidity Probe Color Dimensions Nominal
rh Range
Nominal
Temperature
Range
Hygrostick Grey Ø8 mm x 50 mm 30 to 100 %rh 0 to 50 °C
Quikstick Black Ø8 mm x 50 mm 1 to 100 %rh -10 to 70 °C

GE Protimeter Hygromaster Page 5
2 Function Buttons
The Hygromaster has four buttons (see Table 2 below) that are used individually or in pairs to
take measurements, log readings and set-up the instrument. When pressed individually they
perform the following standard functions:
For details of all button combinations, refer to Table 3 through Table 8.
Table 2: Function Buttons
Buttons Function
ON, OFF and hold
Upper level display scroll
Lower level display scroll
Stores measurement in memory

GE Protimeter Hygromaster Page 6
3 Standard Functions – Humidity and Temperature Measurements
Measure humidity and temperature as follows:
1. Connect the Hygrostick or Quikstick probe to the Hygromaster instrument either directly
into the socket on the top of the instrument or indirectly with the optional extension lead.
2. Switch the Hygromaster instrument ON by pressing briefly.
3. Press successively to display relative humidity (%rh), dew point (TD) or mixing
ratio/absolute humidity (ppmw/gpp) on the upper display.
4. Press successively to display air temperature (TA), surface temperature (TS), surface
to dew point temperature difference (Δ-T), time and date, probe serial number.

GE Protimeter Hygromaster Page 7
5. To switch OFF, press and hold until display shows ‘OFF.’ Alternatively, the instrument
will switch itself OFF after a user-settable interval (default 2 minutes) from the last button
press or RS232 activity.
Note: The battery status will be shown for 3 seconds each time the instrument settings are
changed. Change the batteries immediately when 1 bar is shown, as < 10% of life
remains. See note below regarding clock.
Note: Ts and Δ-T will only be displayed if the auxiliary surface temperature sensor is
connected to the socket in the right hand side of the instrument and this later is set to
“ON”(see above). Otherwise, the lower display will show “OFF”changing to “—”after
3 seconds.
Note: Should successive readings on both halves of the display not change, the upper display
decimal is flashed to show that new readings are still being taken.
4FunctionTables
See Table 3 on the next page for Spot Measurements.

GE Protimeter Hygromaster Page 8
Table 3: Spot Measurements
Button Function Display Symbols Explanation
ON, OFF, Hold II (pause) Switch ON - quick press
Switch OFF- press and hold for 3 sec
Hold value - quick press and release,
pause symbol flashes.
Humidity, dew point,
mixing ratio/absolute
humidity, air temp.
%rh TD
°C or °F
ppmw/gpp
Primary display scroll.
To change units see Instrument Set
Up (Table 7).
Surface temperature,
surface - dew point
temperature difference,
time and date, probe
serial number
TA
Ts
Δ- T
Secondary display scroll.
Time is shown on upper display as
HH:MM. Date is shown on lower
display as MM:DD. Probe serial
number is scrolled across.
Stores measurement in
the instrument memory
Log Press and hold for 3 seconds to store
all measurements. Momentarily
displays the log record number and
stored data.

GE Protimeter Hygromaster Page 9
See Table 4 below for Setup Functions.
Table 4: Setup Functions
Button Function Display Symbols Explanation
Enter logging
parameters set
up mode
When the instrument is ON, press
and hold buttons for 2 seconds to
enter data logger mode - see
Logging Set Up (Table 6).
& Enter
instrument set
up mode
When the instrument is ON, press
and hold buttons for 2 seconds to
enter instrument set up mode - see
Instrument Set Up (Table 7).
&
Short cut to
Surface
Temperature set
up modes
(RS 232 mode)
Switches surface temperature
socket ON, OFF (RS232 mode) or
Auto mode.

GE Protimeter Hygromaster Page 10
See Table 5 below for Common Functions in Setup Modes.
Table 5: Common Functions in Setup Modes
Button Function Explanation
Slow incremental advance Increment the active parameter
Fast incremental advance Fast increment the active parameter
Advance to next parameter Accept the selected parameter and advance
to next parameter. After final parameter,
save the settings.
Abandon set up Returns instrument to normal operation
without saving new settings.
& Zeroes current parameter
settings
Resets the active parameter to minimum
value
(none) Timeout If no button is pressed for 5 seconds setup
mode exits without saving changes.

GE Protimeter Hygromaster Page 11
See Table 6 below for Logging Setup.
Table 6: Logging Setup
Upper
Display
Lower
Display
PC Setup
Definitions Meaning Minimum Maximum
Note: The logger settings are unaffected by powering down, but if the batteries are removed
and replaced, all settings will be cleared to ‘0’, making the logging disabled.
The Logging Setup parameters are presented in the following order:
SEE L09 Entering Logger setup mode
(display is frozen until buttons
released)
15 InT Logging Logging interval is set to
15 minutes (example)
0 (OFF) 24 hr
0 dEL WB First Delay before logging is set to
none (take a log immediately
when settings accepted)
0 (no
delay)
24 hr

GE Protimeter Hygromaster Page 12
1If is pressed after ‘job’, the logging settings will be accepted. If the interval is set other
than ‘0’, logging will be active and the icon set. Pressing , or not pressing any key at
all for five seconds at any point in the process will exit immediately without making any
changes.
0 Cou No. Rem If not zero, count this many
logs and stop
0
(no
count)
400
logs
2Job1Job No User job number - to be stored
with all following readings
015
Table 6: Logging Setup (cont.)
Upper
Display
Lower
Display
PC Setup
Definitions Meaning Minimum Maximum

GE Protimeter Hygromaster Page 13
See Table 7 below for Instrument Setup.
Table 7: Instrument Setup
Upper
Display
Lower
Display Meaning Default Minimum Maximum
Note: The Instrument Setup parameters & are presented in the following order:
SEE USr Entering Instrument (User) setup
mode (display is frozen until
buttons released)
0 dEF Reset all instrument parameters to
factory Default
0 (no) 0 (no) 1 (yes)
2 Sdt Set automatic ShutDown Time.
0= stay on until turned-off
manually
2 mins 0 9 mins
C dE9 Select °C and ppmw, or °F and
gpp
°C °C °F

GE Protimeter Hygromaster Page 14
1
The side-port temperature sensing function reverts to the default OFF mode when the
instrument is switched OFF. If is pressed during the set-up procedure, or there is a delay of
more than 5 seconds in confirming a set-up parameter by pressing , then the instrument
returns to normal operating mode without changing the set-up parameters.
2If is pressed after ‘bu2’, the new settings are accepted; except, the settings are retained
when the instrument is switched OFF.
OFF Sur Set side-port1surface temperature
ON or OFF
OFF OFF ON
2bu22Set buzzer level: 0=OFF (silent),
1= minimum, and 2= maximum
2
(max)
02
Table 7: Instrument Setup (cont.)
Upper
Display
Lower
Display Meaning Default Minimum Maximum

GE Protimeter Hygromaster Page 15
See Table 8 below for Surface Temperature Port Selection.
Table 8: Surface Temperature Port Selection
Upper
Display
Lower
Display Meaning Default Minimum Maximum
Note: This short-cut parameter & allows you to set the Surface Temperature port
without using the instrument setup menu. Each time the key-pair is pressed, the lower
display switches between ON and OFF
- Sur Set side-port surface
temperature ON or OFF
OFF OFF ON

GE Protimeter Hygromaster Page 16
5 Logging Functions - PC Setup
To log the functions and setup the PC, do the following:
1. Connect the sensors as described previously and confirm correct operation.
2. Unplug the surface temperature sensor, if fitted. Connect the instrument to the serial port on
the host PC, using the supplied cable.
3. Switch ON the instrument and ensure that the side socket is set to RS232 mode and the
computer icon is lit.
4. Start the PC software and select Tools Setup (if the setup dialogue has not started
automatically).
5. Confirm that the instrument serial number has been read correctly (not shown as “-”). This
would indicate that the communications have been established. If not, check settings under
the “Communication” tab.
6. Click on “Set Time” to set the instrument clock to the PC clock time.

GE Protimeter Hygromaster Page 17
7. Enter the required logging parameters as follows:
Note: Be sure to enter the Logging Interval, Wait Before First Log, Number of Logs and Job
No in the appropriate boxes.
a. Press “Set Interval” button to send to the instrument.
b. Confirm that the logging parameters are set correctly by pressing the “Check Interval”
button, and ensure that the settings you require have appeared in the appropriate
parameter boxes.
c. Finally, check that the ‘logging’ icon is lit on the instrument display.
Note: It does not matter whether the above is set from the PC or in “Logging Setup” mode, as
described in Logging Set-up Function (Table 6).
8. Remove the RS232 serial cable from the instrument port and place it in the environment that
is to be monitored. Ensure that a Hygrostick or Quikstick sensor is plugged into the top of
the instrument.
9. Press and hold until the display shows OFF.

GE Protimeter Hygromaster Page 18
6 Logging Functions - Manual Logging (Recording)
Note: It is recommended that the clock is checked before performing manual logging.
1. Use as described above to scroll to the time/date display. The clock must be set from
the PC as described above whenever the batteries are replaced.
2. With the instrument OFF, press and hold for 3 seconds to take a manual log point.
This behaves exactly as if the logging were performed using the timer as above. There is no
requirement for logging to have been enabled first, although it may be useful to set the job
number.
3. Similarly, with the instrument ON, press and hold for 3 seconds to take a manual log
point. In this case, note that the side port must be previously set in “surface temperature”
mode if this input is to be used. Again there is no requirement for logging to have been
enabled first, although it may be useful to set the job number.

GE Protimeter Hygromaster Page 19
7 Logging Functions - Reading the Data
1. Switch ON the instrument and ensure that the side socket is set to RS232 mode and the
computer icon is lit.
2. Start the PC software and select Tools Setup (if the setup dialogue has not started
automatically).
3. Confirm that the instrument serial number has been read correctly (not shown as “-”). This
indicates that the communications have been established. If not, press “Get Serial Number”
before checking settings under the “communication” tab.
4. Confirm that “Number of records used” is as expected (refresh the data with the “Get Log
Data” button) and close the setup dialogue using “OK”.
5. Select the fourth tool button (shows two computers, tool-tip “Download data”) and “All
new records” in the download dialogue. Use “Latest specified number of records” to
recover older data if desired.
6. When the download completes, click on OK then save as prompted.
7. Use the graphing tool for a quick inspection (select a subset of the records first, if required)
or open the saved data file in a spreadsheet for further manipulation.

INS7700, Rev. B
August 2007
The information contained in this leaflet is given in good faith. As the method of use of the instrument
(and its accessories) and the interpretation of the readings are beyond the control of the
manufacturers, they cannot accept responsibility for any loss, consequential or otherwise, resulting
from its use.
USA
1100 Technology Park Drive
Billerica, MA 01821-4111
Web: www.gesensing.com/protimeterproducts
Ireland
Sensing House
Shannon Free Zone East,
Shannon, County Clare
Web: www.gesensing.com/protimeterproducts
Protimeter Hygromaster®and Hygrostick®are registered trademarks of GE Sensing.
Table of contents
Other GE Thermometer manuals