6
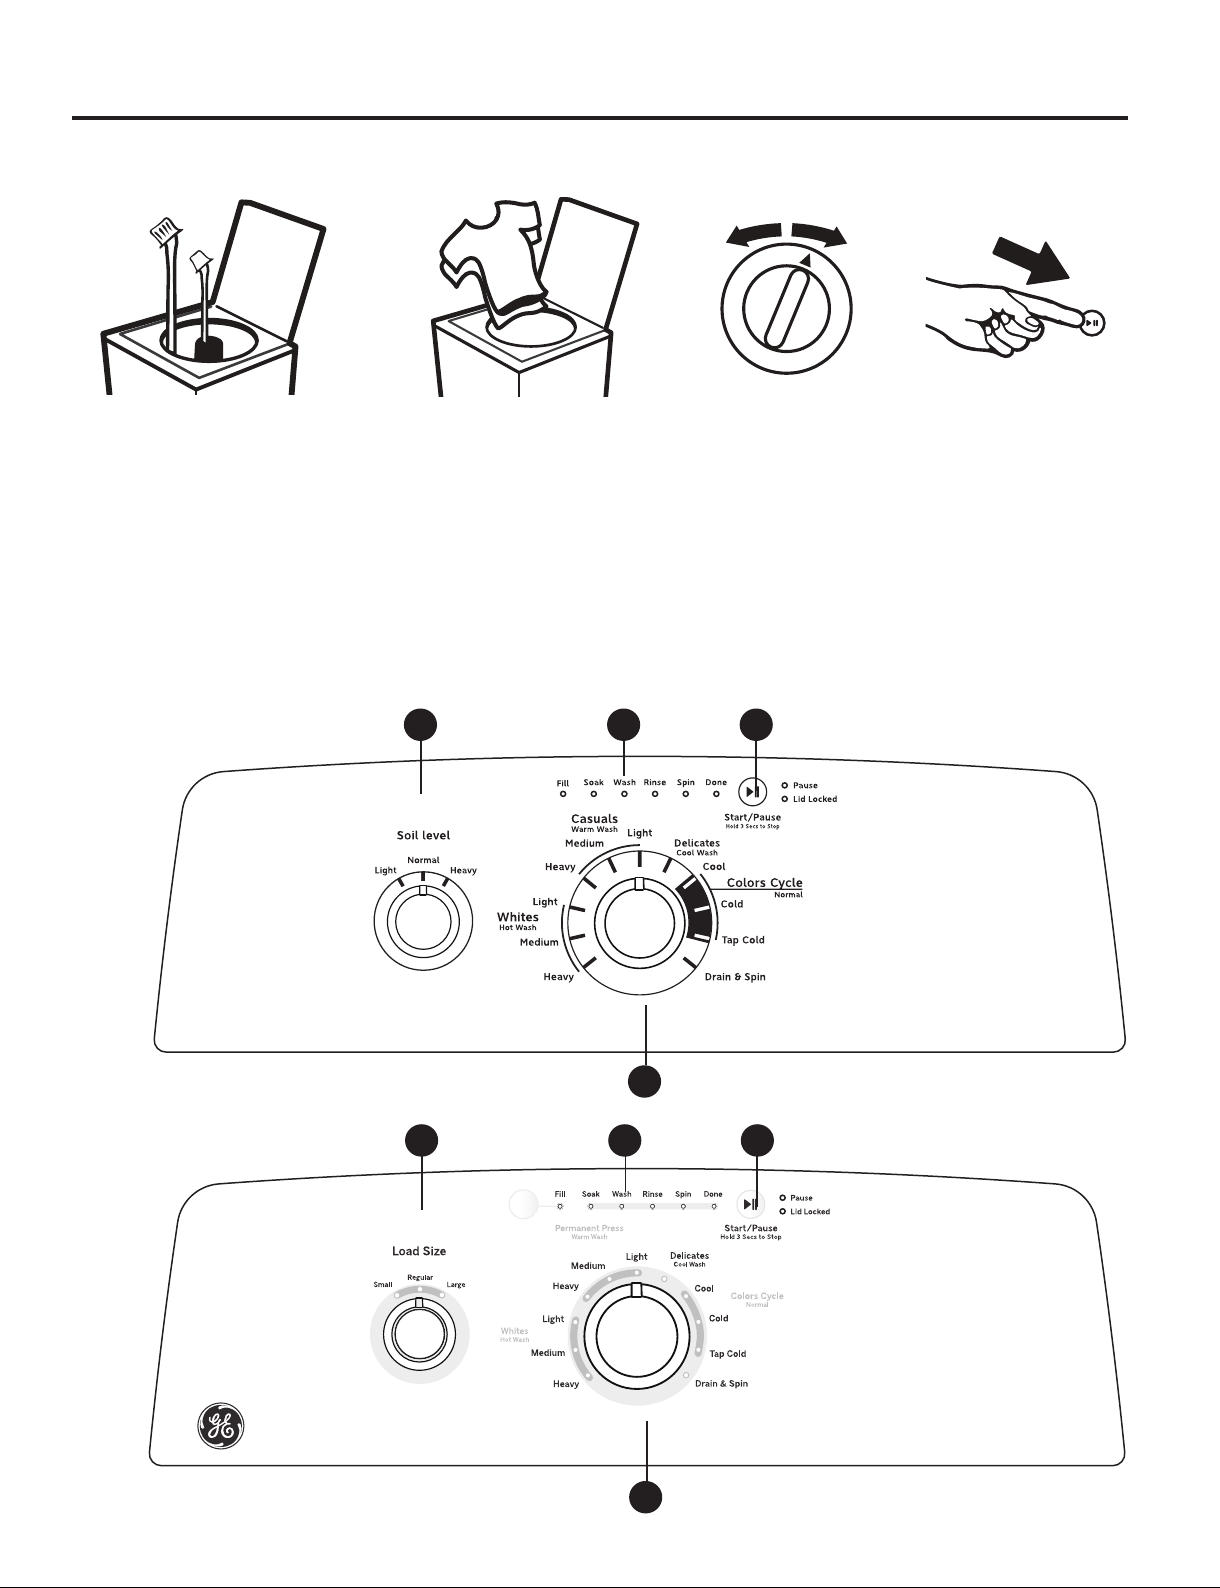
DWash Cycles-Cycle Selector Knob
The wash cycle controls the type of washing process. The cycle selector knob can be turned in either direction. Turning the knob after
starting a cycle will stop the washer and change the cycle/options to the new selection. PressStart to begin the new cycle selection.
The chart below will help you match the items to be washed with the best wash cycle settings. For optimal performance, select the
cycle that most closely matches the items being washed.
Selections and options shown in bold are the recommended settings for that cycle.
Some cycles and options may not be available on some models.
GEAppliances.ca
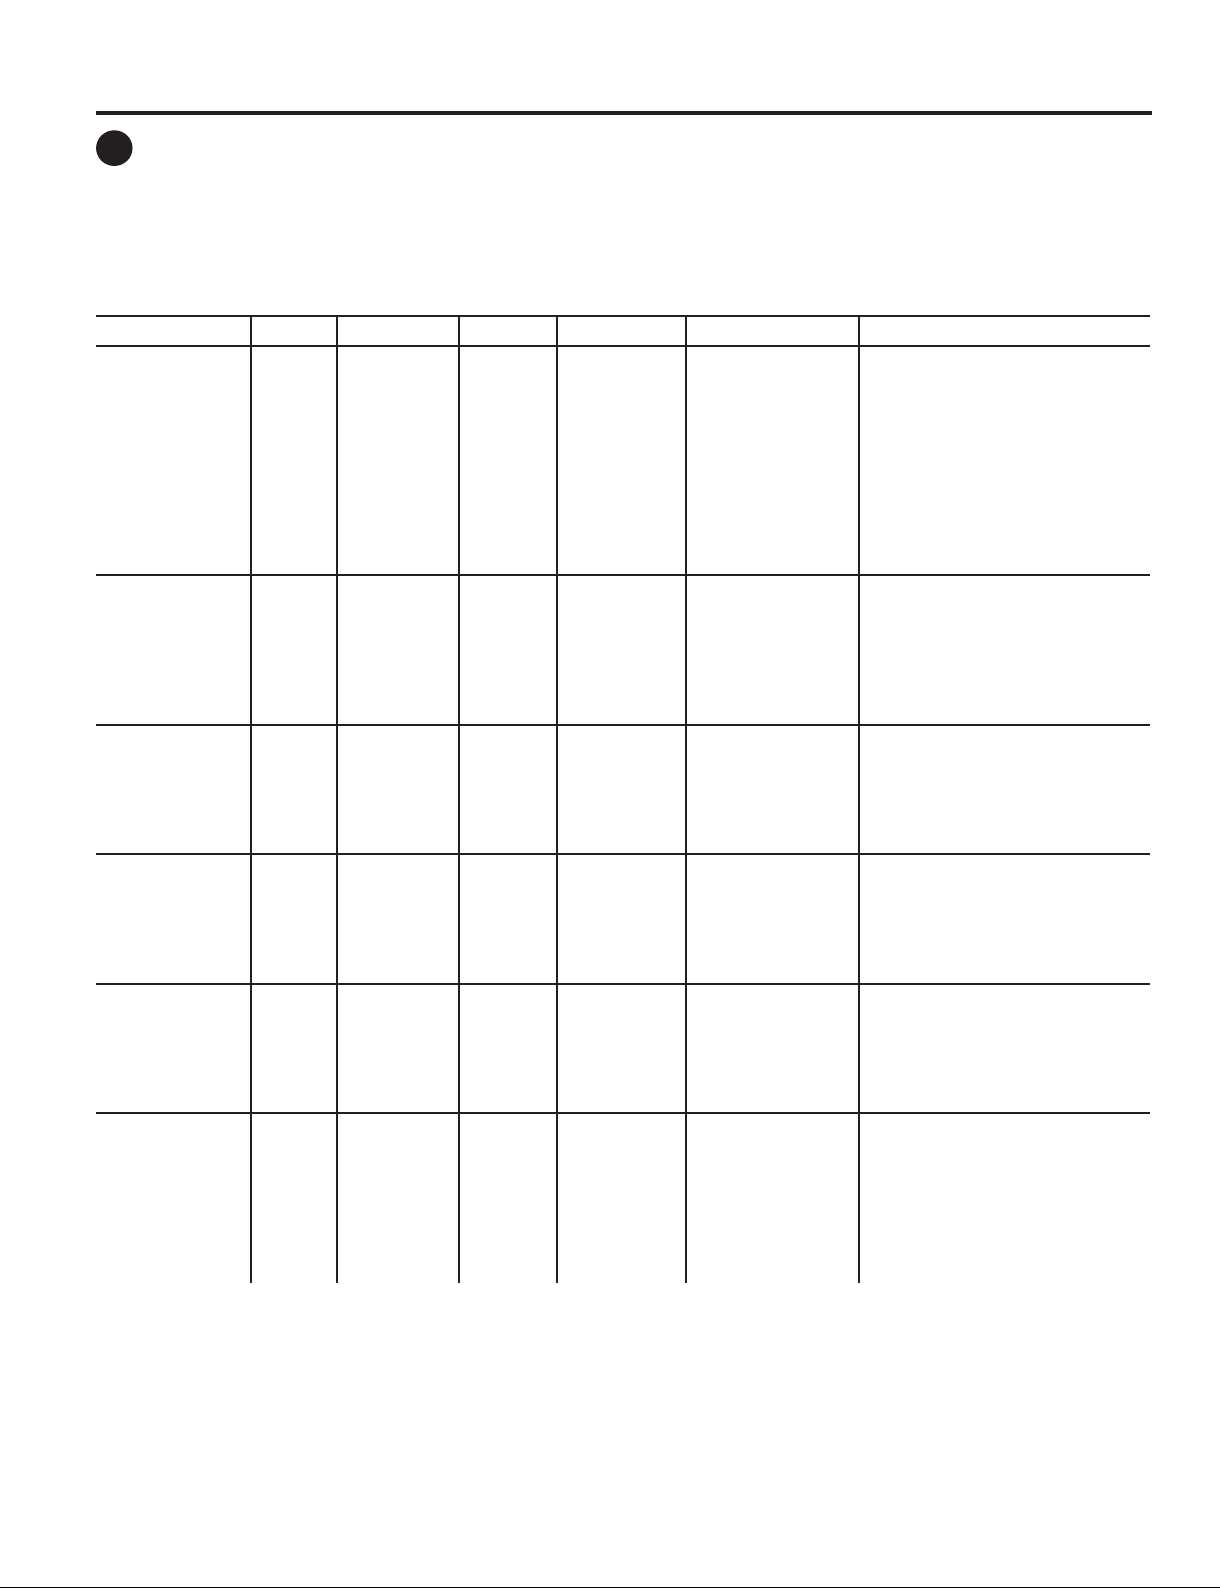
Items to Wash Cycle Wash Temp Soil Level Spin Selection Options Available Cycle Details
Cycle for normal,
regular, or typical
use for washing
up to a full load
of normally soiled
cotton clothing.
Colors Hot
Warm
Colors
Cool
Cold
Tap Cold
Ex. Heavy
Heavy
Normal
Light
Ex. Light
Max/Extra
Normal
Stain PreTreat Guide
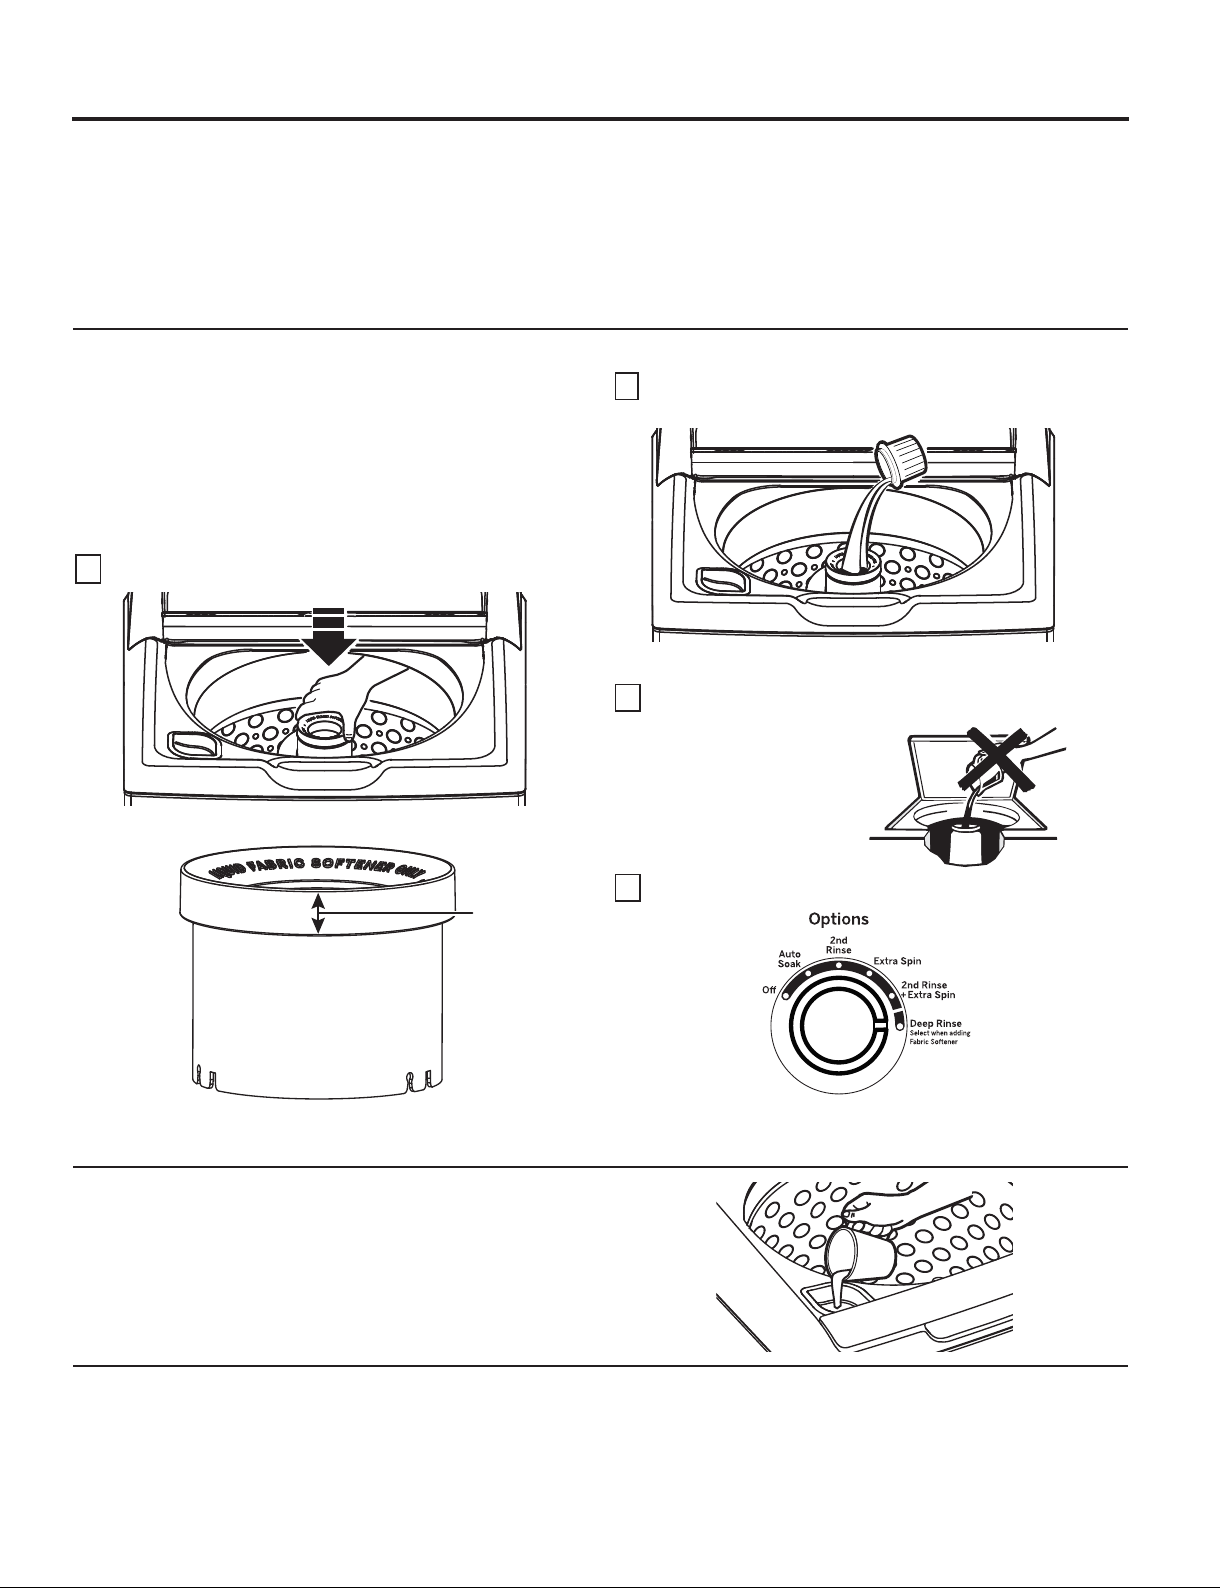
Deep Fill
Auto Soak
Deep Rinse
2nd Rinse
Cycle for normal, regular, or typical
use for washing up to a full load
of normally soiled cotton clothing.
Choose the Heavy or Extra Heavy
soil level selection and Warm or
Hot water temperature selection as
appropriate for your clothes load
for a higher degree of cleaning.
Incorporates multi-stage fills and
wash periods to provide optimal
fabric care.
Dark colored
items, linens, and
mixed loads.
Dark
Colors Hot
Warm
Colors
Cool
Cold
Tap Cold
Ex. Heavy
Heavy
Normal
Light
Ex. Light
Max/Extra
Normal
Stain PreTreat Guide
Deep Fill
Auto Soak
Deep Rinse
2nd Rinse
Lower wash temperatures, a shorter
wash period, and a deep fill rinse
(on some models) minimizes fading
and spotting of dark colored fabrics.
Incorporates multi-stage fills and
wash periods to provide optimal
fabric care.
Casual clothes,
lightly soiled
office wear.
Casuals Hot
Warm
Colors
Cool
Cold
Tap Cold
Ex. Heavy
Heavy
Normal
Light
Ex. Light
Max/Extra
Normal
Stain PreTreat Guide
Deep Fill
Auto Soak
Deep Rinse
2nd Rinse
Wash period tailored to care for
casual clothes and office wear items.
Incorporates multi-stage fills and
wash periods to provide optimal fabric
care.
Lingerie and
special care
fabrics with light
soil.
Delicates Hot
Warm
Colors
Cool
Cold
Tap Cold
Ex. Heavy
Heavy
Normal
Light
Ex. Light
Max/Extra
Normal
Stain PreTreat Guide
Deep Fill
Auto Soak
Deep Rinse
2nd Rinse
Utilizes a unique “tri-pulse” extra
gentle agitate profile to provide
special care to delicate fabrics. It is
recommended to place small or ultra
delicate items in mesh bags before
washing.
Dark colored
fabrics and mixed
loads.
Cold
Wash Hot
Warm
Colors
Cool
Cold
Tap Cold
Ex. Heavy
Heavy
Normal
Light
Ex. Light
Max/Extra
Normal Deep Fill
Auto Soak
Deep Rinse
2nd Rinse
Cycle combines multiple extended
wash agitation periods with soak
periods to provide enhanced cleaning
performance and energy efficiency
with colderwater temperatures.
Medium to lightly
soiled athletic
wear items of
technical or
synthetic fabrics.
Active
Wear Hot
Warm
Colors
Cool
Cold
Tap Cold
Ex. Heavy
Heavy
Normal
Light
Ex. Light
Max/Extra
Normal
Stain PreTreat Guide
Deep Fill
Auto Soak
Deep Rinse
2nd Rinse
Cycle designed for care of medium
to lightly soiled active wear, aththletic
wear, and technical fabrics.
Incorporates a multi stage wash
period with soak to effectively treat
body soils and odors. Use the Heavy
Duty cycle for heavily soiled sports
clothing constructed of sturdy fabric.
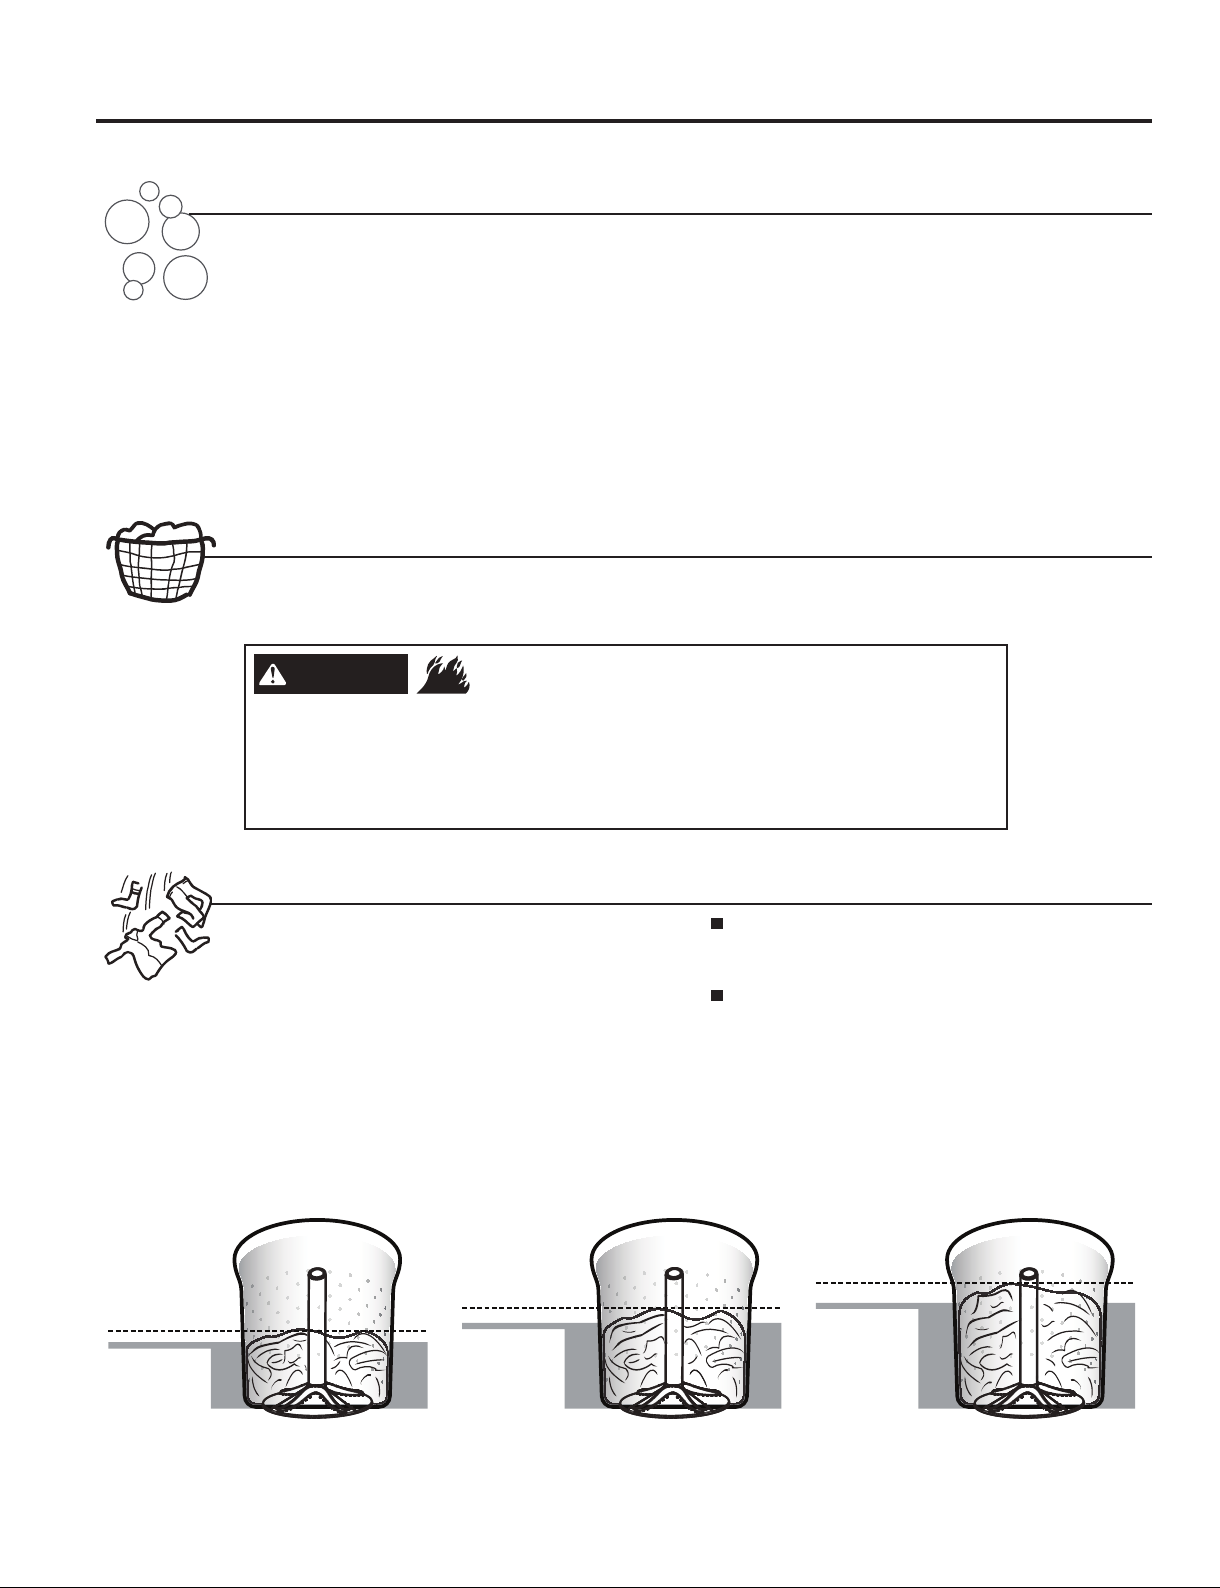
For waterproof, water-resistant items only use the Delicates cycle. DO NOT use other cycles for these items, for example: ski clothing, diaper
covers, bulky waterproof bed covers, umbrella covers, vehicle covers, sleeping bags, waterproof coats, etc).
In other cycles different to the one recommended, when the basket turns, it is possible that water gets trapped in waterproof items and clothing,
which can cause abnormal vibration. Besides, the clothing moves upwardsand may be expelled,thismay result in injury or
damage tothe washer,walls, floor, or clothing.
DO NOT mixwaterproof and non-waterproof items.
/
Perma-
nent Press