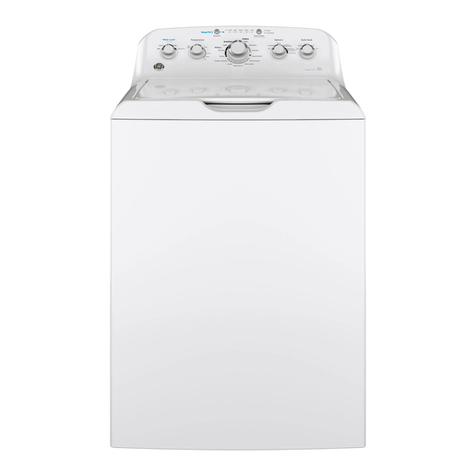
GE GTW680 series Original instructions

Washers
Safety Instructions . . . . . . . . . . 2, 3
Operating Instructions
Care and Cleaning
of the Washer. . . . . . . . . . . . . . . . . . . . 11
Features . . . . . . . . . . . . . . . . . . . . . . . . . . 10
Loading and Using
the Washer . . . . . . . . . . . . . . . . . . . . . . . . 9
Operating instructions. . . . . . . . . .4–8
Installation Instructions. 12–16
Troubleshooting Tips. . . . . 17–19
Consumer Support
Consumer Help Indicator . . . . . . . . . 11
Consumer Support. . . . . . . . . . . . . . . . 21
Parts and Accessories. . . . . . . . . . .3, 21
Warranty. . . . . . . . . . . . . . . . . . . . . . . . . . 20
Printed in Mexico
English/Français/Español
Write the model and serial
numbers here:
Model # _____________
Serial # ______________
You can find
them on the
right side of
the washer.
Owner’s Manual &
Installation Instructions
GTW680
GTW685
GTW690
29-6434 03-22
29-6434
MAC ID (GTW690
only) ________________

IMPORTANT SAFETY INFORMATION.
READ ALL INSTRUCTIONS BEFORE USING.
will
could
could
DANGER
WARNING
CAUTION
IMPORTANT SAFETY INSTRUCTIONS
Power
SAVE THESE INSTRUCTIONS
WARNING

GEAppliances.ca
SAVE THESE INSTRUCTIONS
WHEN NOT IN USE
H
C
Parts and Accessories
www.geappliances.ca
PROPER INSTALLATION
This washer must be properly installed and located in accordance with the Installation Instructions before it is used.
Start
START-UP SEQUENCE
- Electrical Shock Hazard
WARNING
DO NOT
DO NOT
DO NOT Part Number Accessory

Throughout this manual, features and appearance may vary from your model.
Operating instructions.
Power
NOTE: Power
Start/Pause
Start NOTE: Lid Lock
Pause Start
Start
Drain & Spin
• Loosely add items around Infusor.
Overloading may negatively impact
wash performance. See page 9 for
suggested loading examples.
•Close lid.
NOTE: Washer will not start with lid
open.
Step 2 Step 3 Step 4
Step 1
• Select wash cycle.
• Select wash options,
including Deep Rinse option
when using fabric softener.
• Select options.
• Press Start.
• Add fabric softener to the fabric
softener dispenser; see page 10.
• Add the manufacturer’s recommended
amount of detergent. GE recommends
the use of High Efficiencydetergents
such as he in your energy efficient
washer. Place detergent pods in the
bottom of the wash basket before
adding clothes.
Display and Status Lights
Display: approximate NOTE:
In addition, this display will, “scroll” the washer status:
• bALAnCINg
• dELAY Delay Wash
• End
• FILL
• H2O SUPPLY
• LId
• SEnSIng
• PAUSE Start Pause Pause Start
Cycle status lights: Delay Fill Soak Wash, Rinse Spin
Spin
Drain & Spin
GTW680 / GTW685 / GTW690 (WiFi)

Feature status lights indicate (see sections F and Gfor more details):
Pause
Controls
Lid Lock Control Lock
Spin Stop
GEAppliances.ca
Items to Wash Cycle Wash Temp Soil Level Spin Selection Options Available Cycle Details
Warm
Normal Normal
Colors Normal Normal
Cold
Normal Normal
Warm
Normal Normal
Tap Cold
Normal Normal
Wash Cycles-Cycle Selector Knob
Start
bold
Some cycles and options may not be available on some models.
Warm
Normal Normal
- Will allow your appliance to communicate with your smartphone for remote appliance monitoring, control and notifications.
It stays lit whenever the washer is on and is connected. It will blink during the commissioning process or if it loses connection
to the network.
(WiFi)
(apply to GTW690)

Normal
Wash Cycles-Cycle Selector Knob - Continued
Items to Wash Cycle Wash Temp Soil Level Spin Selection Options Available Cycle Details
Operating instructions.

SaniFresh with Oxi
SaniFresh with Oxi
GEAppliances.ca
Stain Removal Guide
Stain Removal Guide
To use Stain Removal Guide:
1
2 Stain Removal Guide
Tomato Wine Blood Grass Dirt
To select a different stain, press the Stain Removal Guide button until desired stain to be removed is lit.
To turn off Stain Removal Guide,
NOTE: The Soil and Temperature levels will be changed to match the recommended default setting for each stain type. Turning off Stain
Removal Guide will return the settings to default.
Stain Removal Guide
Category Recommended
Temperatures
Treatment/Wash Stain For best results,
before placing in washer:
For waterproof, water-resistant items only use the Delicates cycle. DO NOT use other cycles for these items, for example: ski clothing,
diaper covers, bulky waterproof bed covers, umbrella covers, vehicle covers, sleeping bags, waterproof coats, etc).
In other cycles different to the one recommended, when the basket turns, it is possible that water gets trapped in waterproof items and
clothing, which can cause abnormal vibration .Besides, the clothing moves upwards and may be expelled,
thismay result in injury or damage tothe washer,walls, floor, or clothing.
DO NOT mixwaterproof and non-waterproof items.
WARNING

Operating instructions.
Cycle Options
Deep Fill
Deep Fill
Deep Fill Deep Fill
To cancel the option if desired, Deep Fill
NOTE: Deep Fill
To stop the extra fill, Deep Fill
Warm Rinse
Auto Soak
Soak
Deep Rinse
Spin
Delay Wash
Delay Wash
Delay Wash
Extra Rinse
Extra Rinse
NOTE:
Additional Options
My Cycle Settings
Temp Soil Spin My Cycle
My Cycle My
Cycle My Cycle
My Cycle My
Cycle My Cycle
My Cycle My Cycle
NOTE: Temp Soil Spin Extra Rinse Deep Fill Warm Rinse Auto Soak Deep Rinse
Stain Removal Guide
Volume
Volume
Control Lock
To lock/unlock the washer controls, Warm Rinse Auto Soak
NOTE: The Power button can still be used when the machine is locked.
Settings
Soil Temp Spin
NOTE: Spin
WiFi Press and hold the Temp* button for 3 seconds to activate. See the WiFi Connect section for details on how to get stated with
WiFi connection.

GEAppliances.ca
Loading the Washer
Proper Use of Detergent
Sorting Wash Loads
- Fire Hazard
WARNING
he
Loading and using the washer.
Start/Pause
Lid Locked
Start
Deep Fill
not
Average Small Load Average Medium Load Average Large Load
not

About washer features.
Automatic Load Sensing
NOTE: Automatic Load Sensing
NOTE: This is a high efficiency washing machine with Infusor wash action. This system requires less water while providing effectivecleaning
action. You may notice that the water level is lower than on your previous washer. This is normal for an Infusor-equipped washer.
right
side
right compartment
NOTE:
Detergent Dispenser
left side
left compartment
NOTE:
Liquid Fabric Softener Dispenser
front left corner
NOTE:
Liquid Bleach
NOTE:
Pretreatment

Water Supply Hoses Moving and Storage Long Vacations
Care and cleaning of the washer. GEAppliances.ca
Basket Clean
Basket Clean
NOTE: Basket Clean
1.
2.
3. Basket Clean
Start
4. Basket Clean
Basket Clean
Start
Basket Clean
Basket Clean
Power
Basket Clean
IMPORTANT:
Basket Clean
Basket Clean
Cleaning the Dispenser Drawer
Exterior of the Washer
Interior of the Washer

Spin Spin
Drain & Spin
H2O SUPPLY
CAnCELEd
Lid
Consumer Help Indicator
Appliance Communication
WiFi Connect
Scan here to get the
app and get started.
Your washer is GE Appliances WiFi Connect enabled.
It is highly recommended that you connect your washer to WiFi to download the latest software, receive periodic updates and benefit
from many of the extended features available through the SmartHQ App. Many of the AI features for your washer require connection to
the SmartHQ App.
Visit geappliances.com/connect and enter your model number to show you the proper steps to connect your appliance.
Take special note of your washer’s serial number and MAC ID address on the front of this manual. You can find them on the right side of
the washer.
Please visit GEAppliances.com/connect to learn more about connected appliance features, to learn what connected appliance App’s will
work with your smartphone.

Installation
Washer
Instructions
If you have any questions, call 1.800.561.3344 or visit www.GEAppliances.ca
TOOLS REQUIRED FOR
WASHER INSTALLATION
PARTS REQUIRED (Sold separately)
GE Parts and Accessories
GEApplianceparts.com
Part Number Accessory
will
could
could
DANGER
WARNING
CAUTION
NOTE:
BEFORE YOU BEGIN
Read these instructions completely and carefully.
IMPORTANT –
IMPORTANT –
Note to Installer –
Note to Consumer –
Skill level –
Completion time –
PARTS SUPPLIED
13

14
Installation Instructions
LOCATION OF YOUR WASHER
Do Not Install the Washer:
1.In an area exposed to dripping water or outside
weather conditions. The ambient temperature
should never be below 60°F (15.6°C) for proper
washer operation.
2. rosniatruchtiwtcatnocniemoclliwtierehwaerananI
drapes.
3.On carpet. The floor MUST be a hard surface with
a maximum slope of 1/2 per foot (1.27 cm per
30 cm). To make sure the washer does not vibrate
or move, you may have to reinforce the floor.
NOTE: If floor is in poor condition, use 3/4 impregnated
plywood sheet solidly attached to existing floor covering.
IMPORTANT: Minimum Installation Clearances
- Alcove or Closet
• If your washer is approved for installation in an alcove
or closet, there will be a label on the back of the
machine describing requirements.
• Minimum clearance between washer and adjacent
walls or other surfaces: 0" either side, 2" front, 3"
rear. Vertical space from floor to overhead shelving,
cabinets, ceiling, etc. = 60".
• Closet doors must be louvered or otherwise ventilated
and require 60 square inches of opening near the top
of the door and 60 square inches near the bottom of
the door. If a dryer is located in the same closet, then
these areas must be doubled.
NOTE: The clearances stated on this label are minimums.
Consideration must be given to providing adequate
clearances for installing and servicing.
After the machine is in the home, remove outside packing
material/carton from washer.
Remove bag (containing cable tie, drain hose clip) and
Owner’s Reference Guide from tub.
NOTE: Leave foam shipping material inside tub opening to
hold tub in place during the rest of installation.
Bag
Leave shipping
material inside tub
1
UNPACKING THE WASHER
Remove base from unit by placing foot on side of base and
tipping unit back on corner post. Remove base and bring the
washer back upright.
2
REMOVE THE BASE
WATER SUPPLY REQUIREMENTS
WATER PRESSURE - Must be 20 psi minimum to 120 psi maximum.
WATER TEMPERATURE - Household water heater should be set to deliver water at 120° to 150°F (50° to 66°C)TO THE WASHER when
hot wash is selected.
SHUTOFF VALVES - Both hot and cold shutoff valves (faucets) should be supplied.
DRAIN - Water should be drained into standpipe. Discharge height MUST NOT BE LESS THAN 30 INCHES, and no more than 8 feet
above the base of the washer. Standpipe must be 1-1/2 inches minimum inside diameter and must be open to atmosphere.

Installation Instructions
H
C C
3CONNECT WATER HOSES TO WASHER
We recommend cleaning both water inlets of your
washing machine at least once a month.
* Check the table “Wash cycles – Cycle selector knob"
15
4CONNECT WATER HOSES TO OUTLET
VALVES

5CONNECT TO DRAIN
NOTE:
16
Installation Instructions
ELECTRICAL REQUIREMENTS
- Fire Hazard
WARNING
DO NOT
DO NOT
DO NOT
CIRCUIT
POWER SUPPLY
Outlet Receptacle
7CONNECT POWER AND INSTALL

Before starting the washer, check to make sure:
Run the washer through a complete cycle.
FINAL CHECKLIST
Installation Instructions
17
Mobile Home Installation:
GROUNDING INSTRUCTIONS
WARNING
DO NOT

Save time and money! Review the charts on the following pages, or visitGEAppliances.ca. You may not need to call for service.
Before you call for service…Troubleshooting Tips
WATER Possible Causes What To Do
Small amount of water
remaining in dispenser
(Not all features areon
all models) at end of cycle
Normal dispenser
operation
Short spray and delay
after pushing the Start
button
Lid was opened and closed
between cycle selection
and start
START-UP SEQUENCE Safety Instructions
Water level seems low This is normal
Low water flow Water valve screens are
stopped up
Water siphoning out
of washer Drain standpipe is too
low or hose too far into
standpipe Installation Instructions
Too many suds Soft water
Too much detergent
Type of detergent he
Water leaks Type of detergent he
Using too much detergent
in washer
Fill hoses or drain hose is
improperly connected
Household drain clogged
Drain hose rubs on wall
Constant water pressure to
fill hoses at water source
Water temperature
seems incorrect Cooler water temperatures
provide improved energy
efficiency
Water supply is turned off
or improperly connected NOTE:H C
Water valve screens are
stopped up
Cool/Cold Water when
selecting Hot
House water heater is not
set properly
Water pumped out
before cycle is complete Lid lifted or cycle was put
in pause for over 24 hours
Water won’t drain Drain hose is kinked or
improperly connected
Washerspinsandpauses
atthebeginningofcycles This is normal

Washer pauses during
wash cycle The Soak Option was
chosen
This is normal
OPERATION Possible Causes What To Do
Residual powder in
dispenser or clogging
of dispensers (Not all
features areonall models)
Wash water too cold or low
home water pressure
Laundry additives
dispensing too soon
(Dispensers Not all
features areonall models)
Overfilling of dispensers Deep Rinse
Washer pauses during
spin cycle This is normal
Washer won’t operate Washer is unplugged
Water supply is turned off
prevents agitation and
spinning when lid is up
Start
Circuit breaker/fuse is
tripped/blown
Electronics need to be reset Start
Start was not pressed Start
Detergent packets
not dissolving Laundry detergent packet
placed in dispenser
Unexplained time and/
or settings changes Changing options (Not all
features are on all models)
Basket seems loose Basket moves or rotates
freely
Before you call for service…Troubleshooting Tips
PERFORMANCE Possible Causes What To Do
Colored spots Incorrect use of fabric
softener
Deep Rinse
Speed Wash
Dye transfer
Grayed or yellowed
clothes Detergent amount
Hard water
Water is not hot enough
Washer is overloaded
Dye transfer
Lint or residue on
clothes Clothes are air or line dried
Incorrect sorting
Washing too long Light Soil
WATER Possible Causes What To Do
Detergent not dissolving
Overloading

Clothes too wet No spin selected
Incorrect cycle selected
Wash load out of balance
Drain & Spin
Lint or residue on
clothes Incorrect use of fabric
Deep Rinse
GEAppliances.ca
PERFORMANCE Possible CausesWhat To Do
Blinking Spin light or
Spin light on at end
of cycle
Out of balance condition
has been detected Drain
& Spin
Pilling Result of normal wear on
poly-cotton blends and
fuzzy fabrics
Snags, holes, tears,
rips or excessive wearPins, snaps, hooks, sharp
buttons, belt buckles,
zippers and sharp objects
left in pockets
Undiluted chlorine bleach
Chemicals like hair bleach
or dye, permanent wave
solution Speed Wash Extra Rinse
Wrinkling Incorrect wash and dry
cycles
Improper sorting
Overloading
Repeated washing in water
that is too hot
SOUNDS Possible CausesReason
“Clicking”Shifter mechanism is
engaging or disengaging
Back and forth
“swoosh”Electric motor reversing
direction
“Clicking” behind
Control during fillAutomatic Temperature
Control Valve
Water flow changes
during fillAutomatic Temperature
Control Valve
Motor sounds during
spinMotor ramping up/down
during spin cycle
“Humming” Water drain pump
Drive motor
“Gurgling”Water drain pump
Water “swishing”
Washing process
Washer rocking/
movingWasher leveling legs
uneven
“Squeaking” soundWasher not level and
rubbing on cabinet
Other manuals for GTW680 series
2
This manual suits for next models
2
Table of contents
Languages:
Other GE Washer manuals

GE
GE Profile Washer User manual

GE
GE G189 User manual

GE
GE GFW148 Original instructions

GE
GE WWA7646M User manual

GE
GE VISR208CT User manual

GE
GE Appliances GFWN1100 Original instructions

GE
GE EWA6500 User manual

GE
GE GTWP2000FWW Assembly instructions

GE
GE Profile WPRB9250 User manual

GE
GE Appliances GFWN1300 Original instructions