manuals.online logo
Brands
  1. Home
  2. •
  3. Brands
  4. •
  5. GE
  6. •
  7. Washer
  8. •
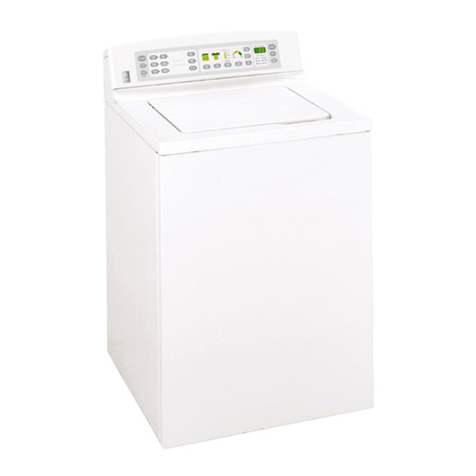
  9. GE Profile WPRB9220 User manual

GE Profile WPRB9220 User manual

Other manuals for Profile WPRB9220

3

Other GE Washer manuals

GE WBSR3140 User manual

GE

GE WBSR3140 User manual

GE WWA8620R User manual

GE

GE WWA8620R User manual

GE Profile PFQ97HS Technical Document

GE

GE Profile PFQ97HS Technical Document

GE Profile PTWN6250MWT Manual

GE

GE Profile PTWN6250MWT Manual

GE WCVH4800K User manual

GE

GE WCVH4800K User manual

GE G017 User manual

GE

GE G017 User manual

GE Appliances G153 User manual

GE

GE Appliances G153 User manual

GE GFWH1200H Manual

GE

GE GFWH1200H Manual

GE Profile PTWN8055MMS User manual

GE

GE Profile PTWN8055MMS User manual

GE GTWN4250DWS User manual

GE

GE GTWN4250DWS User manual

GE Profile WPGT9350 Operating instructions

GE

GE Profile WPGT9350 Operating instructions

GE GTW495DMNWS Original instructions

GE

GE GTW495DMNWS Original instructions

GE GTWS8455D0MC User manual

GE

GE GTWS8455D0MC User manual

GE GRWN5150MWS User manual

GE

GE GRWN5150MWS User manual

GE G139 User manual

GE

GE G139 User manual

GE WWA5636M User manual

GE

GE WWA5636M User manual

GE Profile Harmony PTWN8050M Operating instructions

GE

GE Profile Harmony PTWN8050M Operating instructions

GE GTW485 Original instructions

GE

GE GTW485 Original instructions

GE WWA5304V Installation instructions

GE

GE WWA5304V Installation instructions

GE Profile PTWN6050M Manual

GE

GE Profile PTWN6050M Manual

GE WCVH4800K Safety guide

GE

GE WCVH4800K Safety guide

GE GTWN5050MWS Manual

GE

GE GTWN5050MWS Manual

GE GTWN3000M Manual

GE

GE GTWN3000M Manual

GE GTWN4000M User manual

GE

GE GTWN4000M User manual

Popular Washer manuals by other brands

Zanussi ZWF 14080 W user manual

Zanussi

Zanussi ZWF 14080 W user manual

Zanussi FV 825 N Instruction booklet

Zanussi

Zanussi FV 825 N Instruction booklet

LG WM8000HVA Specifications

LG

LG WM8000HVA Specifications

Whirlpool 3RGSC9400 Use and care guide

Whirlpool

Whirlpool 3RGSC9400 Use and care guide

Zanussi TJ 1284 H instruction manual

Zanussi

Zanussi TJ 1284 H instruction manual

AEG KO-LAVAMAT 74740 User information

AEG

AEG KO-LAVAMAT 74740 User information

Beko WSRE7512PRA user manual

Beko

Beko WSRE7512PRA user manual

Whirlpool LA5OOOXP Use and care guide

Whirlpool

Whirlpool LA5OOOXP Use and care guide

Miele PW 6207 operating instructions

Miele

Miele PW 6207 operating instructions

Bush WMNB712EB instruction manual

Bush

Bush WMNB712EB instruction manual

ALLIANCE UW60AV Information manual

ALLIANCE

ALLIANCE UW60AV Information manual

Bosch WAN280H3 User manual and installation instructions

Bosch

Bosch WAN280H3 User manual and installation instructions

Maytag MAT15MNAW installation instructions

Maytag

Maytag MAT15MNAW installation instructions

LG T2109VSAL owner's manual

LG

LG T2109VSAL owner's manual

Indesit IWC 61481 Instructions for use

Indesit

Indesit IWC 61481 Instructions for use

Electrolux EWF12843 user manual

Electrolux

Electrolux EWF12843 user manual

Indesit WIN 70 Instructions for use

Indesit

Indesit WIN 70 Instructions for use

Whirlpool Cabrio WTW6400SW2 quick start guide

Whirlpool

Whirlpool Cabrio WTW6400SW2 quick start guide

manuals.online logo
manuals.online logoBrands
  • About & Mission
  • Contact us
  • Privacy Policy
  • Terms and Conditions

Copyright 2025 Manuals.Online. All Rights Reserved.

ge.com
Safety Instructions .......... 2,]
Operating Instructions
Clothes Care Cgcles ................ 6
Controls ........................... 4
Controls Features .................. 7
Cgcle Options ...................... 8
Easg Touch Selections .............. 5
Loading and Using
the Washer ................... 11, 12
Other Features ..................... 9
Quick Start Guide .................. 4
Washer Features ................. 10
Troubleshooting Tips ...... i]-16
Consumer Support
Consumer Support ....... BackCover
Warrantg ........................ 23
WPRB9220
1
ENERGYSTAR
As an ENERGYSTARe partner,
GEhas determined that this
product meets the ENERGYSTARe
guidelines for energy efficiencg.
Write the model and serial
numbers here:
Model #
Serial #
You can find them on the bottom
right of the washer cabinet. 175D1807P513 49-90245 11-05 JR
IMPORTANTSAFETYINFORMATION.
READALLINSTRUCTIONSBEFOREUSING.
WARNING! Foryoursafetheinformationinthismanualmustbefollowedtominimizetherisk
of fire or explosion, electric shock, or to prevent property damage, personal injury,
or loss of life.
WATERHEATERSAFETY
Under certain conditions hydrogen gas may be produced in a water heater that has not been used
for two weeks or more. Hydrogen gas can be explosive under these circumstances.
If the hot water has not been tlsed tk)i" two weeks or more, pre\'ent the possibili b' of damage or iqjury by
turning on all hot water fimcets and allowing them to run fin" several minutes. Do this befin'e using any
electrical appliance which is cmmected to the hot water system. This simple procedure will allow any
built-up hydrogen gas to escape. Since the gas is flammable, do not smoke or use an open flame or
appliance during this process.
%PROPERINSTALLATION
This washer must be properly instafled and located in accordance with the Installation Instructions
before it is used. If you did not receive an Installation Instructions sheet, you can receive one by
visiting ge.cem or by calling 888.GE.CARE$ (800.432.2737).
• Install or store where it will not be exposed to • Properly ground washer to confom_ with all
telnperatures below fl'eezing or exposed to the governing codes and ordinances. Follow details
weafl_e_: in Installation Instructions.
• Remove the colored protective fihn fl'om the
control panel.
YOURLAUNDRYAREA
• Keep the area tmderneath and arotmd yore"
appliances flee of combustible materials such as
lint, papeI; rags, chemicals, etc.
•Close supervision is necessary if this appliance is
used by or near children. Do not allow children
to play on, with or inside this or am' other
appliance.
ge.com
WHENUSINgTHEWASHER
Use this
appliance
only for its
intended
purpose as
described in
this Owner's
Manual
• Never reach into washer while it is moving.
_Mfit until the machine has completely stopped
before opening the lid.
• Do not mix chlorine bleach with ammonia or
acids such as vinegar and/or rust removei:
Mixing different chemicals can produce a
toxic gas which may cause death.
• Do not wash or (liT articles that have been
cleaned in, washed in, soaked in or spotted with
combustible or explosive subst;mces (such as
wax, oil, paint, gasoline, degreaseis, (h_cleaning
solvents, kerosene, etc.). These substances give
off \:q)ors that may ignite or explode. Do not add
these stlbstailces to the wash wateI: Do Ilot rise or
place these stlbst;lIlces aI'OtlIld VOtlI"_;_sher or
dryer during operation.
• The laun(h T process can reduce the flame
retardancv of ti_biics. To avoid such a result,
caI'efllllv tbllow the gai_nent malmfi_cturer's
%;lsh _lIld C_lI'e iiistilictioiis.
• To minimize the possibility of electric shock,
unplug this appliance fl'om the power supply
or disconnect the washer at the household
distribution panel by removing the Rise or
switching off the circuit breaker betore
attempting any maintenance or cleaning.
NOTE:Pressl)vgSTART,STOPorPOWERdoesNOT
disconnectthe apphancefrom the power supp/y
• Never attempt to operate this appliance if it is
damaged, malflmcfioning, partially disassembled,
or has missing or broken parts, including a
damaged cord or plug.
WHENNOTINUSE
• TtII'II OlC[ W;l[eI" t;ItIcets to relieve pI'esstII'e Oil
hoses and \:dyes and to minimize leakage if
a break or rupture should occur. Check the
condition ot the fill hoses; they should be
replaced every 5 veaI_.
• Beli_re discarding a washei; or removing it
fl'om service, remove the washer lid to prevent
children from hiding inside.
• Do not attempt to repair or replace any part _ff
this appliance unless specifically recommended
in this Owner's Manual, or in published use>
repair instructions that you undei_tand and
have the skills to cam' out.
• Do not tamper with controls.
READANDFOLLOWTHISSAFETYINFORMATIONCAREFULLY.
SAVETHESEINSTRUCTIONS
3
QuickStart Guide.
You can locate your model number on the bottom right of the washer cabinet.
0Add detergent.
Add diluted fabric softener when using liquid
ti_bric sottener (poured in the cup or with a
Downy Ball). Press the LIQUID SOFTENER pad
on the control panel.
i.ooselv load clothes no higher than the top
row of holes in the washer basket. The water
level should just coxer the clothes.
@Select the wash cycle and other wash options.
NOTE:Any timeyoumakea selectionthat is
incompatiblewith the chosenwash cycle,
thewasher will beeptwice.
f
EASY
TOUCH Q
OChange any of the automatic settings,
if desired, by pressing the pad beneath
the setting. Higher settings will:
•Fill the washer basket with more water.
• Remove heavier soil. The highest level is the
Stnin Wash cycle, with a 30 minute soak and
agitation at the begim_ing of the wash cycle.
• Add cold, wam_ or hot water: The Tap Cold
selection may save energy by turning ott
the PeffecTempPluswasher temperature
control and using the household tap cold
_'_l[eI" teiiipei'_lttli'e.
• Spin fi_ster to remove more water liar
shorter d_Ting times.
f %
HOT
WARM
COLD
TAP COLD
NO SELECTION
0 Close the lid and press START
4
EasyTouchSelections. gecom
Your new washer offers the convenience of starting your wash loads with our EASYTOUCHcycles. Make one simple
selection, and your LOAD SIZE, SOIL LEVEL,WASH TEMPERATURE and SPIN SPEED are automatically set. Then all
you have to do is press START.
Cycle Wash Speed Description
WHITES Fast Forheavyto lightly soiledwhite cottons,householdlinens,workand
HOT playclothes.
COLORS Fast Forheawto lightly soiledcolorfastcottons,householdlinens,workand
WARM playclothes.
COLORS Medium Fornon-colorfastcottonsandblends,anditemsthat arelabeledcold
COLD washbythefabricmanufacturer.
EASYCARE Medium Forknits,wrinkle-freeandpermanentpressitems.
ULTRA VerySlow Usesanextraslowspeedagitationcombinedwith periodsof soakto
HANDWASH providea truehandwashforall ofyourdelicatewashables.
SPEED Fast Forlightlysoileditemsthat areneededin a hurry.Cycletime is
WASH approximately20 minutes,dependingonyourhouseholdwater
pressure.
BULKY Medium Forlargebulkyitemssuchascomfortersandpillows.
ITEMS
AboutClothesCare Cycles.
QUICKRINSE
Use this teature to quickly rinse chlorine, perspiration, stains, etc. out el clothes.
• The washer fills with water; agitates tot three minutes, drains and spins. Y_u may change
the autoinatic settings if desired.
SOIL LEVEL
The SOILLEVELsetting detemfines the amount ot agitation time.
The highest SOIL LEVELis the Stain Wash cycle, which adds a 241)minute soak and agitation
at the beginning of the selected wash cycle.
DRAIN & SPIN
Ybu can drain and spin any cycle at any time.
On models with a DRAIN& SPINpad, press to drain and spin.
On models without a DRAIN & SPIN pad, press STARTLe pa use the washex; select DRAIN & SPIN
fi'om the WASH CYCLES menu, then press STARTagain.
@.
P_ESS & HOLD
TO STORE
CUSTOM 1and CUSTOM2 (onsome models)
Set up your tm'orite combination of settings and save them here tin" one-totwh recall.
These custom settings cannot be set while a cycle is in progress.
Tostore a customcombination ofsettings:
1. Select an EASYTOUCHsetting.
2. Change LOADSIZE, SOILLEVEL,WASH TEMPERATUREor SPIN SPEEDto fit umr needs.
3. Select any OPTIONS vou _:_i_t.
4. Press and hold the CUSTOM I or CUSTOM2pad m_til the washer beeps to store
your selection.
Torecall your stored combination:
Press the CUSTOM I or CUSTOM2pad, then press START.
Toreprogram the customsettings:
Repeat steps I-4 above.
Aboutcontrolsfeatures, gecom
START
• _Mter you have selected a new cycle, press once to stnrt the cycle.
• Press twice to select the last cycle used and stnrt the washe_:
• If the washer is rtmning, press once to pause the cycle; press again to continue the cycle.
STOP
It the washer is rtmning, press once to pause the cycle; press again to cancel the cycle.
TIME REMAINING Time Remaining
• Displays the approximate time remaining tmtil the end of the c_cle or the time remaining
lot DELAYSTART.
• Cycle time is affected b} how long it takes the washer to fill. This depends on the water
pressm'e in }otu" home. The "smart" timer "learns" the amotmt of time it takes to fill yore"
washer and a(!iusts the total time accordingly.
Aboutcycle options.
eSIGNAL
_Merts _ou when the c)cle is complete.
Press SIGNAL to select low, mediun_ or high ",ohune, or to turn the beeper off.
LIQUID SOFTENER
Press LIQUID SOFTENERwhene_er liquid thbric sottener is used.
WARM RINSE
Chan,,es the final rinse of a wash c_cle from a cold to a warm rinse.
NOTE: WARM RINSE is not available when choosing a HOT wash temperature.
PRESOAK
Topresoak a load and go straight into a wash cycle:
Select yore" wash cycle, press the PRESOAKpad, then press the STARTpad.
• Each time you press PRESOAK,you will add three minutes _ffagitation, tollowed by
12 minutes of soaking, tier up to an horn" _ff additional time. _Mier the final soak period,
the selected wash cycle begins.
• Uses the speed and water temperature of pmr selected wash cycle.
Aboutotherfeatures.
CYCLE STATUS
•FILL •RINSE
NO
•SOAK •2RINSE
•WASH •SPIN
ge.com
Cycle Status Indicators
On some models, c'_cle status indicator lights show what part of the cycle the washer is in.
On models without indicator lights, the cycle status will show in the display.
PedogTomp Plus Perfec TempPlus
PeffecTemp Plus senses the incoming water temperature and a(!iusts the temperature of the
fill water to meet the clothing manttfi_cturer's recommendations.
The lid m ust be closed fin" PerfecTempPlusto work.
If your incoming water is to() cold, detexgent will not dissolve efli_ctivelv and clothes may not
get clean. If the wamr is too hot, tabrics could be damaged.
PerfecTemp Plus a(!itlsts these water temperature extremes fi)r better washing pexl'0mmnce.
Ybu may hear the water valves turning off and on while the wamr temperature is being ac!justed.
This is nomml.
W"N
Perfec T_mp Plus
I OT
WARM
COLD
TAP COLD
NO SELECTION
Tap Cold
The Tap Cold feature turns the PerfecTemp Plus teature on )our washer off, and uses _our,
household tap water temperature for a COI,D wash. This can proxide energy saxings by
reducing the amount of hot water used in )our wash.
During winter months when the water entering your home is colder, or fin" locations with xeta'
cold water _ear round use the PeffecTemp Plus COI,D to help dissolxe powdered detergents
and to improxe the cleaning of your clothes.
About washer features.
Liquid Bleach Dispenser
The dispenser dilutes liquid chlorine bleach befin'e it reaches your wash load.
rT] Check ch)thing care labels fi)r special instructions.
['_ Measure liquid bleach carefull}; fi)llowing instructions on the bottle.
•Neverpour undilutedliquidchlorinebleachdkect/yontoclothes or intothe washbasket.
• Donotpourpowderedb/each into bleachdispenser
[_] gefi)re starting the washer, pour measured amount of bleach directly into bleach
dispense_: Axoid splashing or o_e>filling dispense_: If )ou prefer to use powdered
bleach, add it into the wash basket with your deter ,ent
• Donot mixch/onbebleachwith ammon& oracidssuchas wnegarand/or rust remover MiXibg can
producea toxicgas whichmay causedeath.
Fabric Softener Dispenser
Thefabric softener dispenser automadcally
releases liquid lid)rio softener at the proper
time during the cycle.
Do not stop the washer during the first spin.
Thiswill cause the dispenser to empty
toosoon.
Touse, follow those steps:
[_] Make sure dispenser is securely
attached to agitato_:
[_-] Use onl_ liquid tid)ric softener.
Pour into dispensei; using an_ount
reconm_ended on package.
Never pour fabric softener directly on clothes.
It may stain them.
[-_] A(ld water to dispenser until it reaches
the maxim um fill line.
[_ Select LIQUIDSOFTENERon the controls
when liquid softener is used.
Donot pour anything into flTeagitator if
flTeagitator cap or dispenseris removed.
Separate for cleaning
Cleaning the Fabric Softener Dispenser (on some models)
_] Remove the dispenser ti'om the top of the agitat(n:
_-_ Sel)arate ....the disl)enser cui ) ti'om the coxer bv,,grasl)ing, the tel ) and I)ushing, down on
the inside of the cup with your finge_. Dispenser cup will pop fl'ee fl'om the coxe_:
[_]To clean the dispense_; soak both the dispenser cup and the dispenser coxer in the
fi)llowing solution:
• 1 USgallon (3.8fiters)warm water
• 1/4cup {60m/)heavyduty liquid detergent
• I cup(240ml)bleach
[-_]f necessary loosen build-up with a clean soft cloth after soaking. Do not use a stiff
brush; )ou ma)roughen the surface of the dispensei:
N Rinse and reassemble (lispense_: Place dispenser back on the agitato_:
10