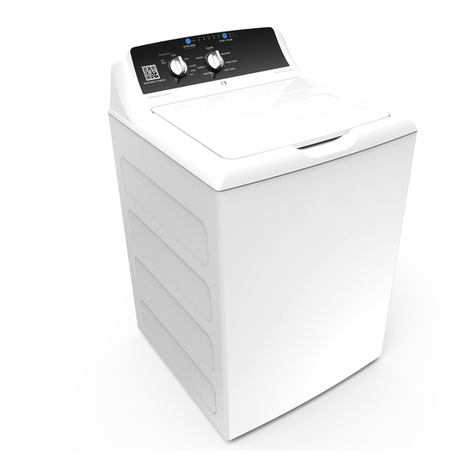
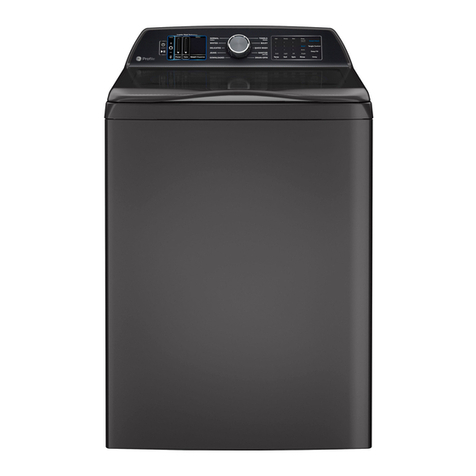
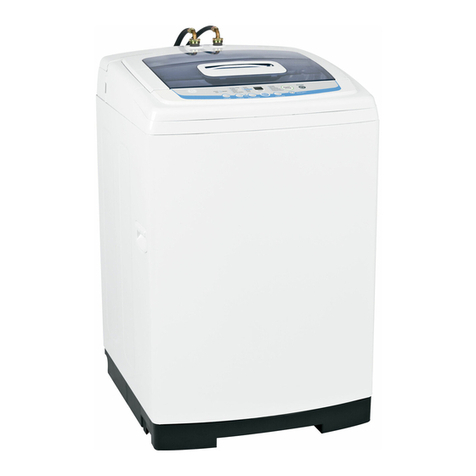
GE PTWN8050M0WW and Operating instructions

0GEAppliances.com
Q.
Safety Instructions ........... 2,s
Operating Instructions
Control Panel ..................... 4-5
Features ......................... 6-8
Loading and Using
the Washer ..................... 9, ZO
Installation Instructions
Before You Begin ............... 11-13
Step-bg-Step Instructions ...... 13-16
Troubleshooting Tips ...... 17-19
Consumer Support
Consumer Support ................. 22
Warrantg (Canada) ................ 21
Warrantg (U.S.).................... 20
Write the model and serial
numbers here:
Model #
Serial #
You can find them on the
rear cover of the washer
backsplash. 49-90404 09/13/10 GE

IMPORTANT SAFETY INFORMATION.
READ ALL INSTRUCTIONS BEFORE USING.
AWARNING! _or_ou_so_,_in_ormo_ionin_,ismonuo_mus___o,o__ominimi__ ris,
of fire or explosion, electric shock, or to prevent property damage, personal injuryor
loss of life.
WATER HEATERSAFETY
Undercertain conditions,hydrogen gas may beproduced in a water heaterthat has not been usedfortwo weeks
or more. Hydrogengas can beexplosiveunder thesecircumstances.
Ifthe hotwater hasnot been usedfor two weeksor more, prevent the possibility ofdamage or injury by turning on
all hotwater faucets and allowing them to run for several minutes. Dothis before usingany electricalappliance
which isconnected to the hot water system.Thissimple procedurewill allow any built-up hydrogen gasto escape.
Sincethe gas isflammable, do not smokeor usean open flame or appliance during this process.
PROPERINSTALLATION
Thiswasher must beproperly installedand located in accordance with the Installation Instructionsbeforeit is used.
Installation Instructions are includedin the back of this manual.
[] Installor storewhere itwill not beexposedto
temperatures belowfreezingor exposedto the
weather.
[] Properlyground washer to conformwith all governing
codesand ordinances.Followdetails in Installation
Instructions.
YOURLAUNDRYAREA
[] Keepthe area underneath and around your
appliances free of combustible materials such as
lint, paper,ragsand chemicals.
[] Closesupervision isnecessary ifthis appliance is
used by or near children. Donot allow children to
play on,with or insidethis or any other appliance.
2

GEAppliances.com
Use this
appliance
only for its
intended
purpose as
described in
this Owner's
Manual.
WHEN USINGTHEWASHER
Never reach into washer while it is moving.
Wait until the machine has completelg stopped
before opening the lid.
Do not mix chlorine bleach with ammonia or
acids such as vinegar and/or rust remover. Mixing
different chemicals can produce a toxic gas
which mag cause death.
Do not wash or drg articles that have been
cleaned in,washed in, soaked in or spotted
with combustible or explosive substances (such as
wax, oil, paint, gasoline, degreasers, drg-cleaning
solvents, kerosene) which mag ignite or explode.
Do not add these substances to the wash water.
Do not use or place these substances around
gour washer or drger during operation.
The laundrg process can reduce the flame
retardancg of fabrics. To avoid such a result,
carefullg follow the garment manufacturer's
wash and care instructions.
[]
[]
To minimize the possibilitg of electric shock,
unplug this appliance from the power supplg
or disconnect the washer at the building's
distribution panel bg removing the fuse or
switching off the circuit breaker before
attempting ang maintenance or cleaning.
NOTE:Pressing the START/PAUSEor POWER
button does NOT disconnect the appliance
from the power supplg.
Never attempt to operate this appliance if it is
damaged, malfunctioning, partiallg disassembled,
or has missing or broken parts, including a
damaged cord or plug.
WHEN NOT IN USE
[]Turn off water faucets to relieve pressure on
hoses and valves and to minimize leakage if
a break or rupture should occur. Check the
condition of the fill hoses; theg should be
replaced everg 5 gears.
[] Before discarding a washer, or removing it
from service, remove the washer lid to prevent
children from hiding inside.
[] Do not attempt to repair or replace ang part of
this appliance unless specificallg recommended
in this Owner's Manual, or in published user-repair
instructions that gou understand and have the
skills to carrg out.
[] Do not tamper with controls.
READAND FOLLOWTHIS SAFETYINFORMATIONCAREFULLY.
SAVE THESE INSTRUCTIONS

About the washer control panel.
Control Panel Throughout: this manual, features and appearance may vary from your model.
START
COLORS INORMAL
SANITIZE f
EASYCARE • WHITESI HEAVY DUTY
DELICATES.
JEANS •
HAND WASH "
POWER WASHABLE WOOL "
TOWELS &SHEETS ° •BASKETCLEAN
SPEED WASH RINSE & SPIN
Power
Press to "wake up" the displag. If the displag is active, press to put the washer into idle mode.
NOTE:Pressing POWERdoes not disconnect the appliance from the power supply.
NOTE:If the washer remains idle for 4 minutes after turning the washer off, the water in the tub will
drain.
START/PAUSE
Press to start a wash cgcle. If the washer is running, pressing it once will pause the washer. Press
again to restart the wash cgcle.
NOTE:If the washer is paused and the cycle is not restarted within 2hours the washer will turn off.
Before enter idle state will drain the water out.
Wash Cycles
The wash cgcles are optimized for specific tgpes of wash loads. The chart below will help gou match
the wash setting with the loads. The GentleClean_"lifters lightlg tumble the clothes into the water and
detergent solution to clean the load.
WHITESIHEAW DUTY
COLORS/NORHAL
SANITIZE
For heavilg soiled white cottons, household linens, work and plag clothes.
For colorfast cottons, household linens, work and plag clothes.
Useto sanitizeand killmorethan 99%of mang bacteriafound in homelaundrg.Thisisa
cgclewith an extra heavgsoilsettingand usesan extra heaterto heatwater to 140° F.
Do not use with delicate faberics.
* TheSANITIZECgcleisCertifiedbg NSFInternational(formerlyNationalSanitation
Foundation)to NSFProtocolP272-075anitizationPerformanceof ResidentialClothes
Washers.
_i_ Protocol P 172-07
Sanitization Performance of Residential and
Commercial, Family Sized Clothes Washers
EASYCARE For wrinkle-free and permanant press items
(PERMANANTPRESS)
DELICATES For lingerie and special-care fabrics with light to normal soil. Provides gentle tumbling and
soak during wash and rinse.
JEANS For use with jeans or denim fabrics.
HANDWASH For items labeled hand-washable with light soils. Provides gentle rocking to mimic the
handwashing action.
4

GEAppliances.com
Wash WASHABLE For the washing of machine washable wool products, provided that they are washed
C.ycles WOOL according to the instructions on the garment label. When selecting this cycle, you must use
_'cont) a detergent suitable for washing wool.
TOWELS& SHEETS For towels, sheets, comfortors and pillows
SPEEDWASH For lightly soiled items that are needed in a hurry. Cycle time is approximately 55 minutes,
depending on selected options.
RINSE& SPIN To quickly rinse out any items at any time.
BASKETCLEAN Usefor cleaning the basket of residue and odor. Recommended use of once per month
Soil Level
Changing the SOILLEVELincreases or decreases the wash agitation to remove different amounts of soil.
To change the SOILLEVEL,press the SOILLEVELbutton until you have reached the desired setting.
You can choose between Extra Light, Light, Normal, Heavy or Extra Heavy soil.
Spin Speed
Changing the SPIN SPEED changes the final spin speed of the cycles. Always follow the fabric manufacturer's care
label when changing the SPINSPEED.
To change the SPIN SPEED,press the SPIN SPEEDbutton until you have reached the desired setting. Higher spin
speeds are not available on certain cycles, such as Delicates.
Higher spin speeds remove more water from the clothes and will help reduce dry time, but may also increase the
possibility of setting wrinkles on some fabrics.
Temperature
Adjust to select the proper water temperature for the wash cycle.
Follow the fabric manufacturer's care label when selecting the wash temperature.
To change the wash temperature, press theTENP button until you have reached the desired setting.
NOTE:Not all temperature settings are available on each cycle selection.
Ply Cycles
Set up your favorite combination of settings and save them here for one touch recall.
These custom settings con be set while o cycle is in progress.
To store a MYCYCLEScombination of settings:
1. Select your washing cycle (except BASKETCLEAN).
2. Change SOIL,SPIN and TENP settings to fit your needs.
3. Select any washer OPTIONSyou want (except SIGNAL).
4. Pressand hold the pad for three seconds to store your selection. A beep will sound
and the pad will light up.
To recoil your stored f4YCYCLEScombination:
Pressthe PIYCYCLESbutton before washing a load.
To change your stored f4YCYCLEScombination:
Follow steps 1-4 in "To store a MY CYCLEScombination of settings".
Add Garment
The add garment indicator light is illuminated to inform you that the washer is in the proper cycle to add
garments for best performance. If you add garments when the light is off it may cause unsatisfactory
performance.
To add garments when ADD GARNENT light is illuminated:
1. PressSTART/PAUSE
2. Open lid after unlocked
3. Add garments
4. Close lid
5. Press START/PAUSEto resume wash cycle.
NOTE:If the washer remains idle for 2 hours after pausing the cycle, the water in the tub will drain.

About the washer features.
NOTE: Features may not beavailableon all washermodels.
MY CYCLE
Tosave a favorite cgcle,set the desired
settings for wash cgcle,soil level,spin speed
and wash temp settings and hold down the
MYCYCLEbutton for 3 seconds.A beep will
sound to indicate the cgcle has been saved.
Touse gour custom cgcle,pressthe
AtYCYCLEbutton before washing a load.
Tochange the saved cgcle,set the desired
settings and hold down the MYCYCLEbutton
for 3 seconds.
NOTE:Whenusing MYCYCLEwash options
cannot be modified after the cyclehasbeen
started.
NOTE:Ifyou change wash options with
MYCYCLEbeforestarting the cycle the
MYCYCLElight will turn off andyou will
beretumed to thebasecycle.
Signal
Alerts gou that the cgcle is complete.
The clothes should be removed when the
beeper goes off so wrinkles don't set in.
PressSIGNAL to select low or high volume,
or to turn the beeper off.
The beeper will continue to sound everg
2 minutes (maximum of 4 times).
0IS°AK)
Lock
Youcan lock the controls to prevent ang
selectionsfrom being made. Or gou can lock
the controls after gou have started a cgcle.
Children cannot accidentally start the
washer by touching pads with this option
selected.
Tolock the washer,pressthe LOCKbutton. To
unlock the washer,press and hold the LOCK
button for 3 seconds.
When the lock function isenabled,the red
lock icon will appear in the upper displag.
Soak
Soak isan extra wash beforethe main wash.
Useit for heavilg soiledclothes or for clothes
with a care label that recommends soaking
beforewashing.
Besureto add high-efficiency detergent, or
the proper wash additive to the soak
dispenser.
Extra Rinse
NOTES:
,When selecting soak, it is recommended
to use powder detergent in the main wash
(detergent) compartment.
.The maximum soak time is 3hours.
Use an extra rinsewhen additional rinsing is
desiredto remove excessdirt and detergent
from soiledloads.
6
fDELAY ]
0 L START J
f FABRIC ]
0LSOFENERJ
Delay Start
Youcan delag the start of a wash cgcle
for up to 24 hours. Pressthe DELAYSTART
button to choose the number of hours gou
want to delag the start of the cgcle,then
press the STARTbutton. The machine will
count down and start automaticallg at the
correct time.
NOTE:Ifyou open the lid when thedelay
iscounting down, the machine will enter the
pause state.Youmust closethe lid and press
STARTagain in order to restart the countdown.
Fabric Softener
SelectFABRICSOFTENERbutton to change
the final rinsetgpe from sprag rinse,to deep
rinse.Thisworks bestwhen usedwith liquid
fabric softener. Fabricsoftener isdisplaged
during the final rinse.
NOTES:
.For best performance with
COLORS/NORMAL,or WHITES/HEAVY
DUTYselect fabric softener or extra rinse.
.If extra rinse is selected instead of fabric
softener, fabric softener will be displayed
during the extra rinse cycle.

GEAppliances.com
TIDAL WAVE Wash System
Your washer has an innovative washing
system which uses rapid spinning
motion and an angled spray to pull
water through faberic. The TIDAL WAVE
Wash system provides a gentler and
more thorough cleaning.
TIDAL WAVEWash is avaiable only
during COLORS/NORMALand
WHITES/HEAVYDUTYcycles.
Using the Liquid Bleach
Dispenser
The bleach dispenser automatically
dilutes and dispenses liquid chlorine
bleach at the proper time in the wash
cycle.
1 Check clothing care labels for special
instructions.
2 Measure liquid bleach carefully,
following instructions on the bottle.
Never pour undiluted liquid chlorine
bleach directly onto clothes or into
the wash basket.
•Do not pour powdered bleach into
bleach dispenser Do not place load
items on top of the bleach dispenser
when loading and unloading the
washer
•Avoid overfilling or splashing
when adding bleach to the
dispenser The maximum capacity
of the bleach dispenser is one cup
of bleach per wash cycle. Overfilling
could result in early dispensing of
bleach.
3Beforestarting the washer,pour
measured amount of bleachdirectly
into bleach dispenser.If you preferto
usepowdered bleach,add it into the
wash basket directly before adding
clothes.
AWARNING!Donotmix
chlorine bleach with ammonia or acids
such as vinegar and/or rust remover.
Mixing can produce a toxic gas which
may cause death.
The manufacturer's recommended
amount of undiluted bleach goes into the
bleach dispenser.During the final
"lnfusor" wash action, the bleach isadded
to the wash load.Thisensures
performance won't be diminished.Two
sequential flushes through the bleach
dispenser completely remove the bleach
from the dispenser.Any residualliquid left
in the dispenser at the end of the cycle is
water, not bleach. Toprevent self-
siphoning ofthe bleach into the wash
basketand damage to your clothes,
neveradd more than the maximum fill
levelmarked on the dispenser.
Alsokeep clothes away from the bleach
dispenser so they don't absorb any
bleach droplets left around the bleach
dispenser.
Using the Dispenser Drawer
Thedispenser drawer contains
2 compartments:
Liquid Fabric Softener
Liquid or PowderLow-Sudsing,
High-Efficiency Detergent
Thedispenser automatically dispenses
additives at the proper time in the wash
cycle.
1 Slowly open the dispenser drawer by
pulling out the drawer until it stops.
2 After adding laundry products, slowly
close the dispenser drawer. Closingthe
drawer too quickly could result in early
dispensing of additives.
Avoid overfilling or splashingwhen
adding laundry products to the
dispenser.Doingsocould result in
early dispensing of laundry products.
Atthe end of the cycle, you mag see
water in the compartments. Thisispart
of the normal operation of the washer.
NOTE:Do not usebleach in the dispenser
drawer.
About the washer features.
NOTE: Features may not be available on all washer models.
Main Wash Main Wash
Powder Detergent Liquid Detergent
Compartment Compartment
So°lwtepne_rnentLiquid Fabric ___._.._ _/ x__ × ......_ -_'_,,j
...... _""z-_ _%_ Insert
Adding Detergent
NOTE:Useonlg low-sudsing,
high-efficiencg detergent such as
Tide®HE.
Add measured detergent to the detergent
compartment of the dispenserdrawer.
,Do not exceed the maximum fill line.
Detergent isflushed through the
dispenser at the beginning of the wash
phase. Eitherpowdered or liquid
detergent can be used.
When using liquid detergent, make sure
the detergent boxand insert are in place.
Forpowdered detergent, remove both
the detergent boxand insert. Powdered
detergent will not dispense with the
detergent box and insert in place.
Detergent usagemag need to be
adjusted for water temperature, water
hardness,sizeand soillevelof the load.
Avoid usingtoo much detergent in gour
washer,as it can lead to oversudsing and
detergent residuebeing left on the
clothes.
Adding Fabric Softener
Ifdesired,pour the recommended
amount of liquid fabric softener into the
left-hand compartment. Useonlg liquid
fabric softener.
Dilutewith water to the maximum fill line.
,Donot exceedthe maximum fill line.
Overfilling can cause earlg dispensing
of the fabric softener,which could stain
clothes.
NOTE: Do not pour fabric softener directlg
on the wash load. It mag stain the clothes.
8

Loading and Using the Washer. GEAppliances.com
Always follow fabric manufacturer's care label when laundering.
Sorting Wash Loads
Sortbg color (whites, lights,colors),soil
level,fabric tgpe (sturdgcottons, easg
care,delicates)and whether the fabric
produces lint (terrg cloth,chenille)or
collects lint (velveteen,cordurog).
Loading the Washer
Load drg itemsevenlg and Iooselg,
around the outside of the basket.
Overloadingmag negativleg impact the
wash performance and can result in
leakage,
Bulkgitems should be placed asfar down
inthe wash basket aspossiblefor optimal
results.
Alwags place buogant items at the
bottom of the wash basket.
Thewasher will automaticallg detect the
load size.Becauseof the high-efficiencg
wash sgstem,the water levelmag not
completelg cover the load.
,Do not wash fabrics containing
flammable materials (waxes,
cleaning fluids, etc.)
,Thewasher will not fill or operate
with the lid open.
,Do not load items over the tub.
Fabric Care Labels
Beloware fabric care label "sgmbols"that
affect the clothing gou will be laundering.
Bleach Labels
Bleach A
symbols _w_neYn,ll_d_
A
Only non-chlorine bleach
(whenneeded) Do not bleach
Washer Temperature Ranges
Category Target Temperature
Cold 65%
Warm 95%
Hot !20°F
Sanitize 140%
NOTE:UseHE(high-efficiencg)labeled
detergent. HEdetergents are available that
provide good cleaning performance in hot,
warm or coldwater temperatures.

Loading and Using the Washer.
Proper Use of Detergent
Usingtoo much detergent isa common
cause of laundrg problems.Todag's
detergents ore formulated to be effective
without highlg visible sudsing.Besureto
carefullg read and follow manufacturer's
recommendations for how much
detergent to usein gour wash. Youcan
use lessdetergent if gou hovesoft water,
a smaller load or a lightlg soiledload.
NOTE:Useonlg low-sudsing, high-
efficiencg detergent such asTide®HE.
Main Wash Main Wash
Powder Detergent Liquid Detergent
Compartment Compartment
Liquid Fabric " /,_
Sottener -_ /_i_ >'
Compartment ¢7" z -o
__rnserti_I
Care and Cleaning
of the Washer
Lid:Wash with a damp cloth on the
outside and insideand dry with a soft
cloth.
Wash Basket: Leavethe lid open after
washing to allow moisture to evaporate. If
gou want to cleanthe basket, usea clean
soft cloth dampened with liquid detergent;
then rinse.(Donot use harsh or grittg
cleaners.)
Fill Hoses: Hosesconnecting washer to
faucet should be replaced everg 5 gears.
Exterior: Immediatelg wipe off ang spills.
Wipe with damp cloth. Donot touch the
surface or the displagwith sharp objects.
Noving and Storage: Askthe service
technician to remove water from drain
pump and hoses.Formore information,
visitGEAppliances.com or call
800.GECARES(800./432.2737).Donot
store the washer where it will be exposed
to the weather.
Long Vacations: Besurewater supplg is
shut off at faucets. Drainall water from
hoses ifweather will be below freezing.
Dispenser Drawer: Detergentand fabric
softener mag build up in the dispenser
drawer. Residueshould be removed
once or twice a month.
i Removethe drawer bg pulling it
straight out until itstops. Lift up
on the front of the drawer and
pull itout.
2 Removethe insertsfrom the
3 compartments; rinsethe inserts
and the drawer with warm water
to remove traces of accumulated
laundrg products.
Toclean the drawer opening,use a
small,non-metal brush to clean the
recess.Removeall residuefrom the
upper and lower parts of the recess.
Returnthe insertsto the proper
compartments and replace the drawer.
10

Istall ti
Istructi ns Washer
Questions? Call 800.GE.CARES {800.432.2737) or visit our Web site at: GEAppliances.com
in Canada, call 1.800.561.3344or visit geapplionces.co i
BEFORE YOU BEGIN
Read these instructions completely and carefully.
.IMPORTANT- Save these instructionsfor
local electrical inspector's use.
, IMPORTANT- Observe all governing
codes and ordinances.
, Note to Installer- Be sure to leave these
instructions with the Consumer.
, Note to Consumer - Keep these instructions for
future reference.
, Skill level - Installation of this appliance requires
basic mechanical skills.
, Proper installation is the responsibilitg of the
installer.
, Product failure due to improper installation is not
covered under the Warrantg.
PLUMBING REQUIREMENTS
WATER PRESSURE- Must be 10 psi minimum to
120 psi maximum.
WATER TEMPERATURE - Household water heater
should be set to deliver water at 120° to 150°F
(50° to 66°C) TO THE WASHER.
SHUTOFF VALVES - Both hot and cold shutoff
valves (faucets) should be supplied.
DRAIN - Water mag be drained into standpipe
or set tub. Discharge height MUST NOT BE LESS
THAN 30 INCHES and no more than 8 feet above
the base of the washer. Standpipe must be 1V2
inches minimum inside diameter and must be
open to atmosphere.
FOR YOUR SAFETY:
ELECTRICAL REQUIREMENTS
-&CAUTION -Forpersonalsafetg,do
notuse on extensioncord oradapter plugwith
thisappliance.Do not,under ang circumstances,
cut or remove the thirdgrounding prong from the
power cord.Follownationalelectricalcodes and
ordinances.Thisappliancemust be suppliedwith
the voltageand frequencg indicatedon the rating
plate (located on the rear cover of the backsplash),
and connected to an individual, properlg grounded
branch circuit, protected bg a 15- or 20-amp circuit
breaker or time-delog fuse. If the electric supplg
provided does not meet the above requirements,
call a licensed electrician.
GROUNDING INSTRUCTIONS
This appliance must be grounded. In the event of
malfunction or breakdown, grounding will reduce
the risk of electric shock bg providing a path of
least resistance for electric current. This appliance
is equipped with a cord having an equipment-
grounding conductor and a grounding plug.
The plug must be plugged into an appropriate
outlet that is properlg installed and grounded in
accordance with all local codes and ordinances.
-& WARNING -Improper connection
of the equipment-grounding conductor can result
in a risk of electric shock. Check with o qualified
electrician or serviceman if you are in doubt as to
whether the appliance is properlg grounded. Do not
modifg the plug provided with the appliance-if it
will not fit the outlet, have a proper outlet installed
by a qualified electrician.
11

Installation Instructions
WASHER LOCATION
The washer must be installed on firm flooring to
minimize vibration during the spin cgcle.
Concrete flooring is best, but a wood floor is
sufficient, provided floor support meets FHA
standards. The washer should not be installed
on rugs or exposed to weather.
Minimum clearance between washer and adjacent
walls or other surfaces:
, 1" either side
2" front
4" rear
Minimum vertical space from floor to overhead
shelves, cabinets, ceilings, etc., is 58".
WASHER DIMENSIONS
Front View
27"
-,_qm.m (68.6 cm)
]45½"
(114.6 cm)
--'lb--
Side View
28½"
(73.3 cm)
57½"
(145.1 cm)
(with lid
open)
J
REQUIREMENTS FOR ALCOVE OR
CLOSET INSTALLATION
Your washer is approved for installation in an
alcove or closet, as stated on a label on the back
of the machine.
Minimum clearance between washer and adjacent
walls or other surfaces:
, 1" either side
, 2" front
, 4" rear
Minimum vertical space from floor to overhead
shelves, cabinets, ceilings, etc., is 58".
Closet doors must be Iouvered or otherwise
ventilated and have at least 60 square inches of
open area for washer onlg, or if the closet contains
both a washer and a drger, door must contain at
least 120 square inches of open area equallg
distributed. Air openings are required to be
unobstructed when a door is installed. A Iouvered
door with equivalent air openings for the full length
of the door is acceptable.
NOTE: The clearances stated on this label
are minimums. Consideration must be given to
providing adequate clearances for installing and
servicing.
12

Installation Instructions
PARTS INCLUDED
rlWater Hoses (2)
@
DCable Tie
TOOLS YOU WILL NEED
DAdjustable Pliers
[] Carpenter's Level
_] UNPACK THE WASHER ICONT.)
Remove the Stgrofoam block containing the
Owner's Manual, parts, water hoses and laundrg
product samples.
Remove the power cord from the back of the
washer.
[i] UNPACK THE WASHER
After the washer is in the home, remove the carton
and Stgrofoam shipping base from the washer.
oi_oooooo
13

Installation Instructions
r_ ATTACH WATER HOSES TO WASHER
Thread the hot water hose onto the washer hot
water connection (ORANGE) and the cold water
hose onto the cold water connection (BLUE).
Hand tighten; then make an additional 1/8
turn with pliers.
[_] MOVE WASHER CLOSE
TO HOUSE UTILITIES
Hove the washer as close to the final location as
possible, leaving enough room to make water, drain
and electrical connections to the home.
The minimum required rear clearance is 4)".
_____/-
[] CONNECT WATER HOSES
TO HOUSE UTILITIES
Connect the water hoses to the HOT and COLD
water valves of your home. Hand tighten, plus
make an additional 1/4 turn with pliers.
[_] ATTACH DRAIN HOSE
TO HOUSE DRAIN
Firmly insert the free end of the drain hose
into the drain opening of your home. Hake sure
the soft rubber end is completely inside the drain
opening.
. If the water valves and drain are built into the
wall, fasten the drain hose to one of the water
hoses with the cable tie (ribbed side on inside).
. If your drain is a standpipe, fasten the drain hose
to the standpipe with the cable tie provided.
Cable Tie
14

Installation Instructions
[_ SET REAR LEGS
Tilt the washer forward (pivot on front legs)
about 4 to 6 inches and gentlg lower the rear legs
back onto the floor. This action will set rear leg
adjustments to correspond to front settings.
[Z] LEVEL THE WASHER
Move the washer into final position.
, To check if the washer is level side to side,
open the lid and place a level at the back of
the opening above the dispenser drawer.
, To check if the washer is level front to back,
place a level at the side of the washer on the
edge where the cabinet side meets the top cover.
If the washer is not level, adjust the front leveling
legs. Turn clockwise to raise, counterclockwise to
lower.
15

Installation Instructions
r_ PLUG IN WASHER
[_] WASHER STARTUP
Press the POWER button.
POWER
NOTE: If the washer has been exposed to
temperatures below freezing for an extended
period of time, allow it to warm up before pressing
POWER. Otherwise, the displag will not come on.
The washer is now readg for use.
SERVICING
WARNING- LobeJoUwiresprior
to disconnection when servicing controls.
Wiring errors can cause improper and
dangerous operation after
servicing/installation.
For replacement parts and other information,
refer to the Owner's Manual for servicing phone
numbers.
16

Beforeyou call for service... GEAppliances.com
Troubleshooting Tips
Save time and money! Review the charts on the
following pages first and you may not need to call for
service.
Possible Cause What ToDo
Washer won't Control panel is asleep • Thisisnormal. PressPOWER.
operate Washer is unplugged . Make surecord isplugged securelg into a working
outlet.
Water supply isturned off • Turnboth hot and cold faucets fullg on.
Controls are not set properly . Make surethe cgcle was set correctlg, closethe lid and
pressSTART.
Lid is open--safety feature. • Closelid and reset cgcle,to the beginning if necessarg.
Prevents the washer from filling
and operating when lid is up
Circuit breaker/fuse is . Checkhousecircuit breakers/fuses.Replacefusesor
tripped/blown reset breaker.Washer should haveseparate outlet.
Electronics need to be reset . Unplug washer,wait 2 minutes,plug back inand
pressPOWER.
STARTwas not pressed after a . PressSTART.
cycle was set
Extremely low water pressure * PressSTARTagain.
Washer is too cold . If the washer has been exposedto temperatures
below freezing for an extended period of time, allow
it to warm up before pressingPOWER.Otherwise,
the displag will not come on.
Water not filling Filter clogged or fill hoses may . Make surethat the water valve filters (blueand
properly be kinked orange screen must be free of solids)on the unit
are not clogged.Turn off water and checkfilter bg
disconnecting hoseat machine.Checkthat fill hoses
are not kinked or clogged.
Washer will not
drain water
standing in the tub
Energy efficiency
Insufficient water supply
The washer lid is open
. Thisisanenergg-efficient washer. Asaresult, the
temperature settings for this washer mag be different
than non-energg-efficient washers.
Incorrect fill hose connection
. Make surethat the water supplg isturned on.
Make surethat the water faucets are turned to their
completelg open positions.
Water fill optimization
Thewasher lid must be closed for all washer cgcle
operations. Ifthe lid isopened during washer
operation, all functions will stop, including water
filling.
Kinked drain hose or drain
located higher than
8' above floor
Make surethat the fill hoses connect the hot water
supplgto the hot inlet on the washer,and the cold
water supplg to the cold inlet on the washer (hotto
hot, cold to cold).
Water mag not cover the top levelof the clothes.This
isnormal for this high-efficiencg washer.Thewater fill
isoptimized bg the sgstem for best wash performance.
Ensurethat the drain hoseis not kinked.Perthe
recommended installation instructions, the drain outlet
cannot be over8' above the floor.
17

Beforeyou call for service...
PossibleCause What ToDo
Water leakseveryload Hosesnot installedcorrectly eCheckallfilland drainhoseconnectionsto ensurethat theg
aretight and secure.
Waterleaks Oversudsingofdetergent . Oversudsingmagcreate leaks,and mag becausedbg
the tgpeand amount ofdetergentused.High-efficiencg
detergentisrecommended.Hakesurethat detergent
and angadditivesareput intothe correctdispenserbins.
Followthedetergentmanufacturer'srecommendations
for theamount ofdetergent,buttrg usinglessdetergent,
Too many garments
loaded
Incompleteorno
dispensingofdetergent Detergent binscloggedfrom
incorrectfilling
18
Too much detergent used
. Iftoo mang garmentsare loadedinthetub,thewater can
overflowoutofthetub duringwash.Neverloadclothesabove
thetub. Beespeciallgcautiouswhen pillowsor comfortersare
loadedinthe machine.Thesetgpeof buogantitemsshouldbe
placedatthe bottomofthewasher basket.
. Hake surethat detergentandadditivesareput into
thecorrectdispenserbins.Ifliquiddetergentisused,
makesurethat the liquiddetergentinsertboxisinthe
dispenserbin.Ifpowdereddetergentisused,makesure
that theliquiddetergentinsertboxisnotused.Liquids
mustbe putinthe fabricsoftenerbin.
Foralldetergenttgpes,alwagsmakesurethat the
dispenserboxisfullgclosedbeforethestartofthecgcle.
. Hake surethat thesuggestedamount of detergentis
usedperthe manufacturer'srecommendations.Youmag
alsodilutethe detergentwith water to themaximum
filllineon the bintoavoidclogging.High-efficiencg
detergentisrecommendedforthiswasher.
Premature Bleachbin filled for future load . Youcannotstorebleachinthedispenserforfuture use.
dispensing Thebleachbinwillbedispensedevergloadforoptimal
of bleach safetgofthewasher.
Overfillingthe bleachbin . Overfillingthebinwith bleachmag leadto premature
dispensing.Thereisa maximum filllineindicatedon
thebleachbinto helpavoidoverfilling.
Cloggingofbleach Bleachbin isnot seated . Hake surethat thebleachcoverisproperlgseatedand
snappedintoplacebeforethe startofthecgcle.
Insufficient cleaning . Youmag removeand cleanthe bleachcoverwith warm
water and ascrub brushtoclearclogging.
Poorstain removal Presoaknot selected . Whenstaininspectorisused,presoaktemperatureandtime
areautomaticallgselected.Ifgouchoosenotto usethestain
inspector,we recommendthat gou selectpresoakwhen
defininggourwashcgcle.Alwagsmakesurethat ang additives,
suchasgour high-efficiencgliquiddetergent,are added
beforestartingthe cgcle.Alwagsreferencegourclothes
carelabelbeforetreatingstains.
Insufficient water supply • Hake surethat thewater supplgisturnedon.Hakesurethat
thewaterfaucetsareturnedtotheircompletelgopenpositions.
Normal residue . Normaloperation.Residuemag remaininthebinsof
thedispenserbox.Thedispenserboxmagbe removed
foroccasionalcleaningwith warm water and a scrub
brush.Theliquiddetergentinsertboxand siphon
capsmag alsobe removedfrom thedetergentbinfor
occasionalcleaning.Rememberthat onlg liquidmagbe
usedin thefabric softenerbin.Powderwillnotdispense
from thefabricsoftenerbin.

GEAppliances.com
Possible Cause What To Do
Thedisp!ayshows:
i iiii i i_ ii_iii_ I
i_i !i
_ ii iiiiiiiiiiiiiiiiiiiiiiiiiiiiiiii
Lid lock switch error
Unbalancedetection, gourwasherhas
detectedan unbalancedload.
Articlesofclothingmagcausean outof
balance.Yourwasherwillattempt to
rebalancebgadding morewater and
agitatingto redistributetheclothingand
thenrestartthe spincgcle.
. Hakesurethat thelid isclosedand pressthe START/PAUSE
button. Thewasher will not spinunlessthe lid is locked
(LIDLOCKEDwill appear in the displag).
. Ifthe lidisclosedand thelid lockerrormessageis
displaged,callforservice.
. Allowthe machineto continueit'scgcle.
. Washerwillcontinueto re-balancethe loadbg adding
morewater and agitatingto betterredistributetheclothing.
• ThisCodeisdisplagedforinformationalpurposeonlg.
• SeeLoadingthewashersectioninthis Useand careGuide.
NOTE:If an error message is displayed for 4 minutes, the water in the tub will automatically drain. Once the washer
initiates draining, all functions will be suspended until draining iscomplete.
Normal Operating Sounds
The following are normal sounds you may hear:
Description
Repeated starting and • TheHgdroWash_"action spinsthe wash basketin one direction,then pauses and spinsin
stopping the opposite direction to clean gour items.
Sound of water being
added after the washer
has already been
operating
. Thewasher adapts to the load sizeand tgpe to add more water to the cgcle as needed.
•Thewash load mag be unbalanced. If the washer sensesthat the load is unbalanced, it will
stop and refillto redistribute the load.
• Thewasher mag be diluting laundrg additives to add to the wash load.
Clicking sound_ • Thewasher will make a seriesof clicking noisesas it changes the cleaning mode.
the wash cycle
High_pitched noise during • The wash basket spins faster to remove moisture from the load.
the spin cycle
Water flushing sound . The washer is diluting laundrg additives to add to the wash load. Wash Boost additives
are dispensed during presoak. Detergent is dispensed at the beginning of the wash cgde.
Bleach is dispensed during the main wash. Fabric softener is dispensed during the final
rinse.
Humming noise during • The pump is operating to remove water from the basket.
draining
Pinging noise durin_e • The washer has special rinse features to remove detergent residue from the load after the
spin or rinse cycle main wash cgde.
Water sloshing sound . Aliquid inthe balance ring around the wash basket helps the basket spin smoothlg.
when washer is turned
off and tub is rotated
19

GE Washer Warranty. (Forcustomersin the UnitedStates)
All warranty service provided by our Factory Service Centers,
or an authorized Customer Care®technician. Toschedule service,
on-line, visit us at GEAppliances.com, or call 800.GE.CARES
(800.432.2737). Please have serial number and model number
available when calling for service.
Stapleyour receipt here.
Proof of the original purchase
date isneeded to obtain service
under the warranty.
We Will Replace:
One Year Any part of the washer which fails due to a defect in materials or workmanship. During this
From thedate of the limited one-year warranty, GEwill also provide, free of charge, all labor and related service
originalpurchase costs to replace the defective part.
Second through Thesuspension rod and spring assembly, and main electronic control board if ang of these parts
Fifth Year should fail due to a defect in materials or workmanship. GEwill also replacethe washer lid or
From thedate of the cover if theg should rust underoperating conditions. Duringthis additional three-year limited
originalpurchase warranty, gou will be responsiblefor ang labor or related servicecosts.
Second through Thedirect drive motor and outerwasher tub ifang of these parts should fail due to a defect in
Tenth Year materials or workmanship. Duringthis additional eight-year limited warranty, gou will be
Fromthe date ofthe responsiblefor ang labor or related servicecosts.
original purchase
Lifetime of Product Thewasher basket if it shouldfail due to a defect in materials or workmanship. Duringthis
From thedate ofthe product lifetime limited warranty, gou will be responsiblefor ang labor or related servicecosts.
original purchase
[] Service trips to your home to teach you how to use
the product.
[] Improper installation.
[] Failure of the product if it isabused, misused, or usedfor
other than the intended purpose or used commercially.
[] Replacement of housefuses or resetting of circuit
breakers.
[] Damage to the product caused by accident, fire, floods
or acts of God.
[] Incidental or consequential damage caused by possible
defects with this appliance.
EXCLUSION OF IMPLIED WARRANTIES--Your sole and exclusive remedy is product repair as provided in this Limited
Warranty. Any implied warranties, including the impfied warranties of merchantability or fitness for aparticular
purpose, are limited to one year or the shortest period allowed by law.
This warranty is extended to the original purchaser and any succeeding owner for products purchased for home use
within the USA. If the product is located in an area where service by a GEAuthorized Servicer is not available, you may
be responsible for a trip charge or you may be required to bring the product to an Authorized GEService location for
service. In Alaska, the warranty excludes the cost of shipping or service calls to your home.
Some states do not allow the exclusion or limitation of incidental or consequential damages. This warranty gives you
specific legal fights, and you may also have other rights which vary from state to state. To know what your legal rights
are, consult your local or state consumer affairs office or your state's Attorney General.
Warrantor: General Electric Company. Louisville, KY 40225
20
This manual suits for next models
1
Table of contents
Languages:
Other GE Washer manuals

GE
GE GCRH410 User manual

GE
GE WPSE7003A0 How to use

GE
GE WJRE5550K Manual

GE
GE WCVH6800JMS - 27" Front-Load Washer Manual

GE
GE WSLS1100 Original instructions

GE
GE GFWR4805FMC Manual

GE
GE MTW201 Original instructions

GE
GE WCVH4815K Original instructions

GE
GE GE Profile WWSE3160AAA User manual

GE
GE WCCN2050FWC User manual