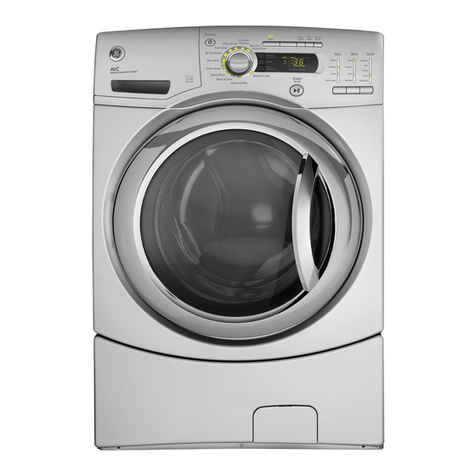
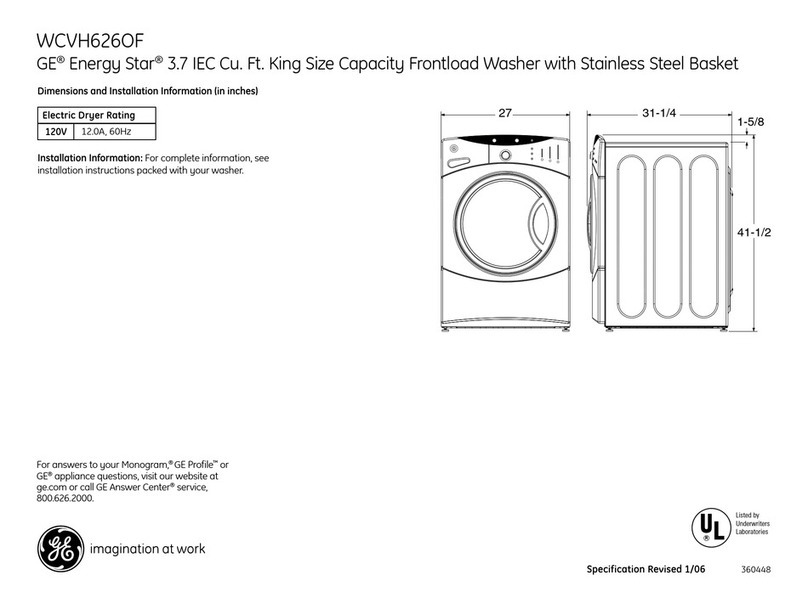
GE WCVH4800K Original instructions

GEAppliances.com
Safety Instructions ............. 2,]
Operating Instructions
Control Panel ......................... 4
Control Settings .................... 5-7
Features .............................. 8
Loading and Using the Washer ..... 9-12
Installation Instructions ..... 13-18
Drain Requirements .................. 16
Electrical Requirements ............... 16
Grounding Requirements ............. 16
Installing the Washer ............. 17, 18
Location of Your Washer ............. 14
Preparing to Install Your Washer ...... 13
Replacement Parts ................... 18
Rough-In Dimensions ................. 14
Unpacking Your Washer .............. 15
Water Supply Requirements .......... 16
Troubleshooting Tips ......... 19-21
Consumer Support
Consumer Support .......... Back Cover
Warranty (Canada) .................. 23
Warranty (U.S.) ...................... 22
WCVH¢8OOK
WCVH¢815K
Laveuses
La section frangaise commence _la page 25
Lavadoras
La secci6n en espaflol empieza en la pSgina 49
ENERGYSTAR
As an ENERGY STAR® partner,
GEhas determined that this
product meets the ENERGYSTAR®
guidelines for energy efficiency.
Write the model and serial
numbers here:
Model #
Serial #
Youcan find them on a label inside
the door. 175D180 7P633 49-90369-2 08-11GE

IMPORTANT SAFETY INFORMATION.
READ ALL INSTRUCTIONS BEFORE USING.
of fire or explosion, electric shock, or to prevent propertbt damage, personal injurbt or
loss of life.
Theinstructionsin this manual and all other literatureincludedwith this washerare
not meant to covereverypossiblecondition and situation that may occur.Good,safe
practicesand cautionMUSTbeappliedwhen installing,operating and maintaining
any appliance.
WATER HEATERSAFETY
Undercertain conditions,hgdrogen gas mag beproduced in a water heater that hasnot beenusedfor two weeks
or more. Hgdrogengas canbe explosiveunder thesecircumstances.
Ifthe hotwater hasnot beenusedfor two weeksor more,prevent the possibilityof damage or injuryby
turning on all hot water faucets and allowing them to run for severalminutes. Dothis before usingany electrical
appliancewhich isconnected to the hot water system.Thissimple procedurewill allowany built-up hydrogen
gasto escape.Sincethe gas isflammable, do not smokeor usean openflame or applianceduring this process.
PROPERINSTALLATION
Thiswasher must beproperly installedand located in accordancewith theInstallation Instructions beforeit isused.
[] Installor storewhere itwill not beexposed [] Properlygroundwasher to conform with allgoverning
to temperatures belowfreezingor exposed codesand ordinances.Followdetails in Installation
to the weather,which couldcausepermanent Instructions.
damage and invalidatethe warranty.
YOUR LAUNDRY AREA
[] Keepthe area underneath and around your
appliances free of combustible materials such as
lint, paper,ragsand chemicals.
[] Donot leave the washer door open.An open door
could entice childrento hang on the door or crawl
insidethe washer.
Closesupervisionis necessaryif this appliance is
used by or near children. Donot allow children to
play on,with or insidethis or any other appliance.
Keepall laundry aids (suchas detergents, bleaches,
etc.)out ofthe reach of children, preferably ina
locked cabinet. Observe all warnings on container
labelsto avoid injury.
[] Neverclimb on or stand on the washer top.
2

GEAppliances.com
Use this
appliance
only for its
intended
purpose as
described
in this
Owner's
Manual.
WHEN USINGTHEWASHER
[]
[]
[]
[]
Never reach into washer while it is moving.
Wait until the machine has completely stopped
before opening the door.
Do not mix chlorine bleach with ammonia
or acids such as vinegar and/or rust remover.
Mixing different chemicals can produce a toxic
gas which may cause death.
Do not wash or dry articles that have been
cleaned in, washed in, soaked in or spotted
with combustible or explosive substances (such as
wax, oil, paint, gasoline, degreasers, dry-cleaning
solvents, kerosene, etc.) which may ignite or
explode. Do not add these substances to the
wash water. Do not use or place these substances
around your washer or dryer during operation.
The laundry process can reduce the flame
retardancy of fabrics. To avoid such a result,
carefully follow the garment manufacturer's
wash and care instructions.
[]
[]
[]
Never attempt to operate this appliance
if it is damaged, malfunctioning, partially
disassembled, or has missing or broken parts,
including a damaged cord or plug.
Do not slam the washer door closed. Do not try
to force the door open when locked (LOCKED
indicator ON).This could result in damage to
the washer.
Thewasher is equipped with an over-temperature
detection system. The motor will stop if it
becomes overheated. Thewasher will turn off the
motor for 2 minutes to cool down. If the motor is
still too hot after 2 minutes, the washer will repeat
the cool-down a total of 3 times. If the motor
remains too hot after 3 cool-downs, the washer
will be paused until it is manually started again.
[] To minimize the possibility of electric shock,
unplug this appliance from the power supply
or disconnect the washer at the building's
distribution panel by removing the fuse or
switching off the circuit breaker before
attempting any maintenance or cleaning. NOTE:
Pressing the power button does NOT disconnect
the appliance from the power supply.
WHEN NOT IN USE
[] Turn off water faucets to relieve pressure
on hoses and valves and to minimize leakage
if a break or rupture should occur. Check
the condition of the fill hoses; they should
be replaced every 5 years.
[] Before discarding a washer, or removing it
from service, remove the washer door to prevent
children from hiding inside.
[] Do not attempt to repair or replace any part of
this appliance unless specifically recommended
in this Owner's Manual, or in published user-repair
instructions that you understand and have the
skills to carry out.
[] Do not tamper with controls.
READANDFOLLOWTHISSAFETYINFORMATIONCAREFULLY.
SAVE THESEINSTRUCTIONS

About the washer control panel
Youcan locateyour mode!number on a labe!insidethe door.
IMPORTANT SAFETY INSTRUCTIONS before operating this appliance.
Quick Start
Ifthe screen isdark, pressthe POWERbutton to "wake up"
the display.
r_l Pressthe POWERbutton. POWER
1-51Selecta wash cycle.(Defaults
are set for each wash cycle.
Thesedefault settings can be
changed. SeeControl settings
for more information.)
r_ ifyou selected a wash cycle, START
pressthe START/PAUSEbutton..AUS\.,
WRINKLE FREE
ACTIVE WEAR
DELICATES
HAND WASH
SPEED WASH
RINSE &,SPIN
DRAIN &,SPIN
COLORS /NORMAL
WHITES/HEAVY DUTY DE \V START
EXTRA RINSE
MY CYCLE
BASKETCLEAN SIGNAL.)
START
PAUSE
f
Power
Press to "wake up" the display. If the display is active, press to put the washer into standby mode.
NOTE: Pressing POWER does not disconnect the appliance from the power supplg.
4

Control settings. GEApp ion o . o
Wash Cycles
The wash cycles are optimized for specific types of wash loads. The chart below will help you match
the wash setting with the loads. The Gentle Wash m_lifters lightly tumble the clothes into the water and
detergent solution to clean the load.
WHITES/ Forheavily to lightly soiled white cottons, household linens, work and play clothes.
HEAVYDUTY
COLORS/NORMAL Forheavy to lightly soiled colorfast cottons, household linens, work and play
clothes.
WRINKLE FREE For EasyCare and permanent press items.
(PERMAPRESS)
ACTIVEWEAR Foractive sports, exercise and some casual wear clothes. Fabrics include modern
technology finishes and fibers such as spandex, stretch and microfibers.
DELICATES Forlingerie and special-care fabrics with light to normal soil. Provides gentle
tumbling and soak during wash and rinse.
HANDWASH Foritems labeled hand-washable with light soils. Provides gentle rocking to mimic
the handwashing action.
SPEEDWASH Forlightly soiled items that are needed in a hurry. Cycle time is approximately
30 minutes, depending on selected options.
RINSE& SPIN To quickly rinse out any items at any time.
DRAIN & SPIN Drain and spin at any time.
BASKETCLEAN To clean drum and reduce odor.
NOTE:Basket Clean is a special cycle used to clean the washer drum and reduce
odor. DONOTadd garments to this cycle. Remove detergent cup and add one cup
of bleach or other commercially available product manufactured for this purpose,
such as Tide®Washing Machine Cleaner.

Control settings.
Soil Level
Changing the SOILlevel increases or decre(]ses the w(]sh time to remove different amounts of soil.
To change the SOIL level, press the SOILlevel button until you have reached the desired setting.
You con choose between E×tr(] Light, Light, Normal, Heavy or E×tr(] He(ivy soil.
Spin Speed
Changing the SPIN setting changes the final spin speed of the cycles. AIw(]ys follow the garment
manufacturer's core label when changing the SPIN setting.
To change the SPIN setting, press the SPIN setting button until you have reached the desired
setting. You con choose between No Spin, Low, Medium, High or E×tro High Spin. Higher spin
speeds ore not available on certain cycles, such as Delicates.
Higher spin speeds remove more water from the clothes and will help reduce dry time, but mo7
also increase the possibility of setting wrinkles on some fabrics.
Wash Temp
Adjust to select the proper water temperature for the wash cycle. The rinse water is always cold
to help reduce energy usage and reduce setting of stains and wrinkles.
Follow the fabric manufacturer's core label when selecting the wash temperature.
To change the wash temperature, press the TEMPbutton until you have reached the desired
setting. You con choose between Top Cold, Cold, Worm, Hot or Sanitize. The Sanitized wash
temperature is not available on certain cycles, such as Delicotes.
When selecting the S(]nitize w(]sh temper(]ture, the w(]sher increases the water temper(]ture to
sanitize and kill more than 99% of many common bacteria found in home laundry. The sanitize
wash temperature isonly available on the Whites/Heavy Duty wash cycle. For best results, select
the heavy soil setting when using the Sanitize wash temperature setting.
Start/Pause
Pressto start o wash cycle. If the washer is running, pressing it once will pause the washer and
unlock the door. This function con be used to odd garments during o cycle. Pressagain to restart
the wash cycle.
NOTE:If the washer is paused and the cgcle is not restarted within !5 minutes, the current wash
cgcle will be cancelled.
NOTE:In some casesthe washer will drain first, then unlock the door when it ispaused.
NOTE: Thewasher performs automatic sgstem checks after pressing the START/PAUSEbutton.
Water will flow in 45 seconds or less.You mag hear the door lock and unlock before water flows;
this is normal.
6

GEAppliances.com
Signal
When the light is"on," the washerwill
beep at the end of the cycle and every
time you pressa button on the control
panel.
To turn the signal off, press the SIGNAL
button and the light will go off.
EXTRA RINSE Extra Rinse
Use an extra rinse when additional
rinsing isdesired to remove excess dirt
and detergent from soiled loads.
DELAYSTART
]!
Delay Start
Useto delay the start ofyour washer.
1. Chooseyour wash cycle and any
options.
2. PressDELAYSTART button. You can
change the delay time in 1-hour
increments (up to 18 hours)each time
you pressthe DELAYSTARTbutton.
Stop pressingthe button when your
desired time isdisplayed.
3. Pressthe START/PAUSEbutton to start
the countdown.
Thecountdown time will be shown in the
ESTIMATEDTIMEREMAININGdisplay.
NOTES:
IIf the door is opened while the washer
is in DELAY,the countdown time will
continue to count down the delay
time. If the door is not closed and the
countdown time expires, the cycle will
not start until the door is closed and
the START/PAUSEbutton is pressed.
I Youcan delay the start of a washer
cycle up to !8 hours.
Thelight on the button will light up when
DELAYSTARTison.
TEMP SPIN
i ii i
LOCK & UNLOCK
CONTROL PANEL
Lock
You can lock the controls to prevent
any selections from being made. Or you
can lock or unlock the controls after
you have started a cycle.
Children cannot accidentally start
the washer by touching pads with
this option selected.
To lock the washer, press and hold
the TEMPand SPIN buttons together
for 3 seconds.
To unlock the washer controls, press
and hold the TEMPand SPIN buttons
together for 3 seconds. A sound is
made to indicate the lock/unlock
status.
The control lock icon on the display will
light up when it is on.
NOTE:The POWERbutton can still be
used when the machine is locked.
MVCVCLE
% HOLD 3
[] _ SECONDS
/TOSTORE
My Cycle
To save a favorite cycle, set the desired
settings for wash cycle, soil level, spin
speed and wash temp settings and
hold down the MYCYCLEbutton for
3 seconds. A beep will sound to indicate
the cycle has been saved.
To use your custom cycle, press
the MYCYCLEbutton before washing
a load.
To change the saved cycle, set
the desired settings and hold down
the MYCYCLEbutton for 3 seconds.
NOTE:When using MY CYCLE,
wash options cannot be modified
after the cycle has been started.
NOTE:Ifyou change wash options
with HY CYCLEbefore starting the cycle,
the MY CYCLE light will turn off and you
will be returned to the base cycle.

About the washer features.
The Dispenser Drawer
Slowly open the dispenser drawer by
pulling it out until it stops.
After adding laundrg products, slowlg close
the dispenser drawer. Closing the drawer
too quickly could result in early dispensing
of the bleach, fabric softener or detergent.
You mag see water in the bleach and fabric
softener compartments at the end of the
cgcle. This is a result of the
flushing/siphoning action and is part of the
normal operation of the washer.
Use onlg HE High-Efficiencg
detergent.
L
DetergentCup- Usefor Liquid
Detergent
Dete[gent
Cavity -Us_
for Powder
Detergenl
The Detergent Compartment
mOnlg use high-efficiencg detergent
in this washer. Use the detergent
manufacturer's recommended
amount. DO NOTfill above the
MAXline.
The detergent compartment is in the left
side of the dispenser drawer. The detergent
cavity (cup removed)is used for powder
detergent, and the detergent cup isused
for liquid detergent.
[] Powder Detergent - Removethe
detergent cup and pour the suggested
amount of powder detergent into the
detergent cavity.
[] Liquid Detergent - Leavethe detergent
cup in the drawer and pour liquid
detergent into the cup. Donot fill above
the MAXline.
[]
[]
[]
Add measured detergent to the left
detergent compartment of the
dispenser drawer.
Detergent is flushed from the dispenser
at the beginning of the wash cycle.
Either powdered or liquid high-
efficiency detergent can be used.
Detergent usage may need to be
adjusted for water temperature, water
hardness, size and soil level of the loud.
Avoid using too much detergent in your
washer since it can lead to oversudsing
and detergent residue being left on the
clothes.
LiquidBieOChcompartment The Liquid Bleach Compartment
If desired, measure out the recommended
amount of liquid bleach, not to exceed
1/:3 cup (80 ml) and pour into the right
compartment labeled "LIQUIDBLEACH"
marked with this symbol _L_-
It is recommended to use High-Efficiencg
(HE)bleach in this front-load washer.
Do not exceed the maximum fill line.
Overfilling can cause early dispensing of
the bleach which could result in damaged
clothes.
NOTE:Do not usepowdered bleach in the
dispenser.
Fabric softene_COmPartment
€
!
The Fabric Softener Compartment
If desired, pour the recommended
amount of liquid fabric softener into the
compartment labeled "FABRICSOFTENER."
Use only liquid fabric softener in the
dispenser.
Dilute with water to the maximum fill line.
Do not exceed the maximum fill line.
Overfilling can cause early dispensing of
the fabric softener, which could stain
clothes.
NOTE:Do not pour fabric softener directlg
on the wash load.
8
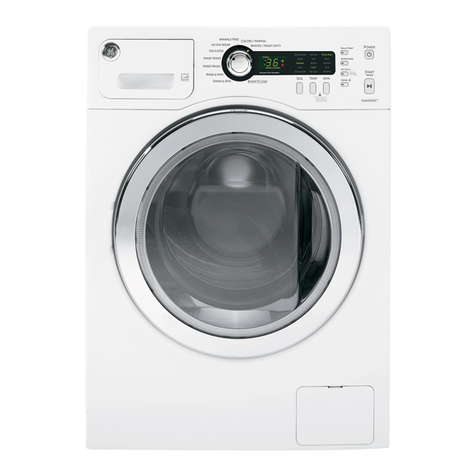
Loading and using the washer.
Alwags follow fabric manufacturer's care label when laundering. GEAppliances.com
Sorting Wash Loads
m
m
[]
[]
Colors Soil Fabric Lint
Whites Heavy Oelicates Lint Producers
Lights Normal EasyCare LintCollectors
Darks Light SturdyCottons
Combine large and small items in a load. Load large items first. Large items should not be more than
half the total wash load.
Washing single items is not recommended. This mag cause an out-of-balance load. Add one or two
similar items.
Pillows and comforters should not be mixed with other items. This may cause an out-of-balance load.
Sort dark-colored clothes from lighbcolored clothes to prevent dye transfer. This is a high-efficiencg
washer, so it uses less water, making dge transfer more common.
Loading the Washer
The wash drum may be fully loaded with loosely
added items. Do not wash garments containing
flammable materials (waxes, cleaning fluids, etc.).
Toadd items after the washer has started, press
START/PAUSEand wait until the door is unlatched.
Thewasher may take up to 30 seconds to unlock
the door after pressing START/PAUSE,depending
on the machine conditions. Do not try to force open
the door when it is locked. After the door unlocks,
open gently. Add items, close the door and press
START/PAUSEto restart.

Loading and using the washer.
Careand Cleaning/GeneralMaintenance
Exterior: Immediately wipe off any spills. Wipe with damp cloth. Wipe or dust spills or washing
compounds with a damp cloth. Washer control panel and finishes may be damaged by some laundry
pretreatment and stain remover products. Apply these products away from the washer. The fabric may
then be washed and dried normally. Damage to your washer caused by these products is not covered
by your warranty. Do not hit surface with sharp objects.
Interior: Dry around the washer door opening, flexible gasket (including attached hoses) and door glass.
These areas should always be clean to ensure a watertight seal.
It is recommended to rinse the washer at least once per month with 1 cup of bleach (or other
commercially available product manufactured for this purpose, such as Tide®Washing Machine Cleaner)
poured into the bleach section of the dispenser (no clothes) using the BASKETCLEAN cycle (found in
the WASHERcycles menu).
Moving and Storage: Ask the service technician to remove water from drain pump and hoses.
Do not store the washer where it will be exposed to the weather. When moving the washer,
the tub should be kept stationary by using the shipping bolts removed during installation.
See Installation Instructions in this manual. If these parts are not available, they can be ordered
by visiting our Website at GEAppliances.com or by calling 800.GE.CARES.
Long Vacations: Be sure water supply is shut off at faucets. Drain all water from hoses if weather
will be below freezing.
Clean Pump Filter
Due to the nature of the front-load washer, it is sometimes
possible for small articles to passto the pump. The washer
has a filter to capture lost items so they are not dumped to
the drain. To retrieve lost items, clean out the pump filter.
1. Open the door on the bottom right of the front of the unit.
2. Twist the small white cap counterclockwise a quarter turn
and unhook the small rubber hose. Pull the hose out of the
hole and remove the white drain hose plug above a small
pan to capture any water that may drain. Drain the excess
water. Replace.
3. Unscrew the pump filter. Rinse.Replace.
4. Close the access door.
Pump Filter
Door
Drain
Drain Plug
PumpFilter
10
Cleaning the Door Gasket
Open the washer door. Using both hands, press down the door gasket.
Remove any foreign objects if found trapped inside the gasket. Make sure
there is nothing blocking the holes behind the gasket.
While holding down the door gasket, inspect the interior of the gasket
by pulling it down with your fingers. Remove any foreign objects if found
trapped inside this gasket. Make sure there is nothing blocking the holes
behind the gasket.
When you are finished cleaning the door gasket, remove your hands and
the gaskets will return to the operating position.

Always follow fabric manufacturer's care label when laundering. GEAppliances.cam
Dispenser Drawer Area: Detergent and fabric softener may build up
in the dispenser drawer. Residue should be removed once or twice a month.
[] Remove the drawer by first pulling it out until it stops. Then reach back into
the rear center of the drawer cavity and press down firmly on the lock tab,
pulling out the drawer.
Lock tab is visible on/&tafter
drawer has been puffed out
[] Remove all cups and inserts from the dispenser drawer. Rinsethe inserts, cups
and drawer with hot water to remove traces of accumulated laundry products.
[] To clean the drawer opening, use a small brush to clean the recess.
Remove all residue from the upper and lower parts of the recess.
[] Return inserts to the proper compartments. Replace the dispenser drawer.
[] To reduce buildup in the Dispenser Drawer area:
Useonly HE
High-Efficiency
detergent.
11

Loading and using the washer.
FabricCare Labels
Below are fabric care label "symbols" that affect the clothing you will be laundering.
WASH LABELS
CyCle Normal Perm .... t Press/ Gentl"'_/ Do notwash Do notwring
wrinkle resistont delicote Hond wosh
Water • • • 00 •
temperature .or Warm Cold/cool
(50°C/120°F) (40°C/105°F) (30°C/85°F)
BLEACH LABELS
Bleach_., A A
symuols Any bleach Only ..... hlorine bleach
(when needed) (when needed) Do not bleach
DETERGENT LABELS
Useonly HEHigh-Efficiency detergent.
12

Istall ti
Istr cti Wash r
WCVH4800 and WCVH4815
If you have ang questions, call 800.GE.CARES(800.432.2737) orvisitour Website at:
GEAppliances.cam
In Canada, call 1.800.561.3344 orvisitwww.GEAppliances.ca
BEFORE YOU BEGIN
Read these instructions completelg and carefullg.
.IMPORTANT -Savetheseinstructions
for local inspector's use.
" IMPORTANT - Observe all governing
codes and ordinances.
. Note to Installer - Be sure to leave these
instructions with the Consumer.
. Note to Consumer - Keepthese instructions
for future reference.
, Skill level -Installation of this appliance requires
basic mechanical end electrical skills.
, Completion time - 1-3 hours
, Proper installation isthe responsibility of the installer.
, Product failure due to improper installation is not
covered under the Warranty.
FOR YOUR SAFETY:
_ZlLWARNING
. This appliance must be properly grounded and
installed as described in these Installation Instructions.
. Do not install or store appliance in an area where
it will be exposed to water/weather. See Location
of Your Washer section.
. NOTE:This appliance must be properlg
grounded, and electrical service to the washer
must conform with local codes and ordinances
and the latest edition of the National Electrical
Code, ANSI/NFPA 70.
TOOLS REQUIRED FOR
WASHER INSTALLATION
[] Wrench (provided)
[] Channel-lock adjustable pliers
[] Carpenter's level
PARTS SUPPLIED
I Wrench
I Water Hoses (2)
[] O
Hose Fittings (4)
ml Hose Guide
9
[] Shipping Bolt
Hole Covers (4) [] Detergent Cup
13

Installation Instructions
LOCATION OF YOUR WASHER
Do Not Install the Washer:
1.In an area exposed to dripping water or outside
weather conditions. The ambient temperature
should never be below 60°F (15.6°C)for proper
washer operation,
2.In an area where it will come in contact with curtains
or drapes.
S.On carpet. The floor MUSTbe a hard surface with
a maximum slope of 1/2" per foot (1.27cm per
30 cm).To make sure the washer does not vibrate
or move, you may have to reinforce the floor.
NOTE:If floor is in poor condition, use 3/4" impregnated
plywood sheet solidly attached to existing floor covering.
IMPORTANT:
Minimum Installation Clearances
. When installed in alcove: Sides, Rear,
Top = 0" (0 cm)
,When installed in closet: Sides, Rear,
Top = 0" (0 cm), Front = 1" (2.54 cm)
Closet door ventilation openings required:
2 louvers each 60 square in. (387 cm_),located 3"
(7.6cm) from top and bottom of door
CONTRACTOR DIMENSIONS
BACK
_,_ 21" 6.25"
(533 mm) _I (159 mm)
-- 4"
(102 ram)
29.75"
(756 mm)
ROUGH-IN DIMENSIONS
FRONT
23.5"
(597 mm)
33.4"*
(849 mm)
SIDE
26.6"
(676.5 mm)
*NOTE:
Washer legs have 0,75" (19 mm) adjustability.
Stacked: 67.7" (172.8 cm)
14

Installation Instructions
UNPACKING THE WASHER
_ZlWAR NING: Recycle or destroythecarton
and plastic bags after the washer isunpacked. Make
materials inaccessibleto children. Childrenmight use
them for play.Cartons covered with rugs, bedspreads
or plasticsheetscan become airtight chambers causing
suffocation.
1. Cut and remove all packaging straps.
2. While it isin the carton, carefully laythe washer on its
side.DONOTlaythe washer on its front or back.
3. Turndown the bottom flaps.Removeall base packaging
including the styrofoam base.
4. Carefullyreturn the washer to an upright position and
remove the carton by lifting it upward.
5. Carefully move the washer to within 4 feet (122cm)
of the final location.
6. Removethe following from the back sideof the washer:
4 bolts
4 plastic spacers(including rubber grommets)
Do not remove
screw or clip
UNPACKING THE WASHER Icont,}
7. Insertshipping bolt hole covers into shipping bolt holes.
©
s
©
NOTES:
. Failure to remove the shipping braces can cause
the washer to become severelg unbalanced.
. Saveall bolts for future use.
. If you must transport the washer at a later date,you must
reinstall the shipping support hardware to prevent shipping
damage. Keepthe hardware inthe plastic bag provided.
15

Installation instructions
ELECTRICAL REQUIREMENTS
Read these instructions completelg
and carefullg.
WARNI NG--TOREDUCETHERISKOF
FIRE,ELECTRICALSHOCK AND PERSONAL INJURY:
, DO NOT USEAN EXTENSIONCORD OR AN ADAPTER
PLUG WITH THISAPPLIANCE.
Washer must beelectricallygroundedinaccordance
withlocalcodesand ordinancesor,intheabsence
oflocalcodes,inaccordancewiththeNATIONAL
ELECTRICALCODE,ANSI/NFPANO. 70.
CIRCUIT- Individual,properly polarized and grounded
15-amp branch circuit fused with 15-amp, time-delay fuse
or circuit breaker.
OUTLETRECEPTACLE- Properly
grounded 3-prong receptacleto be
located so the power supply cord is
accessiblewhen the washer is
in an installed position.
POWERSUPPLY- 2-wire, with ground, 120-volt,
single-phase,60-Hz,Alternating Current.
GROUNDING REQUIREMENTS
WARNING: ,mproperconnectionofthe
equipment-grounding conductor can result in a risk
of electricalshock.Checkwith a licensedelectrician
ifyou are in doubt asto whether the appliance is
properlygrounded.
.Thewasher MUSTbe grounded. Inthe event of
malfunction or breakdown,grounding will reduce
the riskof electricalshock byproviding a path of least
resistancefor electricalcurrent.
.Sinceyour washer isequipped with a power supply
cord havingan equipment-grounding conductor and
a grounding plug,the plug MUSTbe plugged into an
appropriate, copper-wired receptaclethat is properly
installedand grounded in accordancewith all local
codesand ordinances or inthe absenceof local codes,
with the National ElectricalCodes,ANSI/NFPA70 (latest
edition).If in doubt, calla licensedelectrician. DONOT
cut off or alter the grounding prong on the power supply
cord. Insituations where a two-slot receptacle ispresent,
it isthe owner's responsibilityto havea licensed
electricianreplaceit with a properlg grounded
three-prong, grounding-type receptacle.
WATER SUPPLY REQUIREMENTS
Hot and cold water faucets MUSTbe installedwithin
/42inches (107cm) of your washer's water inlet. Thefaucets
MUSTbe 3/4" (1.9cm) garden hose-type so inlet hosescan
be connected. Water pressure MUSTbe between 10 and
!20 pounds per square inch.Your water department can
adviseyou ofyour water pressure.The hot water
temperature should be set to deliver water at 120°to 140°F
(48°-60°C)
to provide proper Automatic Temperature Control (ATC)
performance.
DRAIN REQUIREMENTS
1. Drain capable of eliminating 17 gals(64.3L)per minute.
2. A standpipe diameter of !-!/4" (3.!8 cm) minimum.
3. Thestandpipe height above the floor should be:
Minimum height: 30" (76cm)
Haximum height: 96" (244cm)
Toachieve a drain height above 58" (!/47cm),to a
maximum of 96" a service kit must be purchased
through GEService(WH49X301).
BACK
),
mT
96"
(244 cm)
Max.
t
30"
(76 cm)
Min.
NOTE:Thedrain hose attached to the washer can reach
a 58"-high standpipe. Fora higher standpipe, contact an
authorized parts distributor.
16

Installation instructions
INSTALLING THE WASHER
1. Runsome water from the hot and coldfaucets to flush
the water linesand remove particlesthat might clog
the water valve screens.
2. Removethe inlethosesfrom the plasticbag. Remove
black rubber washers from bag and insert into hosefitting
before connecting to unit.
3. (90° elbow end)
Carefullyconnect the inlet
hose marked HOTto the
outside "H" outlet of the
water valve.Tighten by hand;
then tighten another 2/3 turn
with pliers.Carefullyconnect
the other inlet hoseto the
inside"C"outlet of the water
valve.Tighten by hand;then
tighten another 2/3 turn with pliers.Do not cross-thread
or overtighten these connections.
4. Connectthe inlet hoseendsto the HOTand COLDwater
faucets tightly by hand;then tighten another 2/3 turn
with pliers.Turnthe water on and checkfor leaks.
S.
.
Carefullymove the washer to its final location. Gently rock
the washer into position.It is important not to damage
the rubber levelinglegswhen moving your washer
to its final location. Damaged legscan increasewasher
vibration. It may be helpfulto spray window cleaner on
the floor to help move your washer into itsfinal position.
NOTE:To reduce vibration, ensure that all four rubber
leveling legsere firmly touching the floor. Pushend
pull on the beck right end then beck left of your
washer.
NOTE:Donot usethe dispenser drawer or door to lift
the washer.
NOTE:Ifyou are installing into a drain pan,you can use
a 24-inch-long 2x4to leverthe washer into place.
With the washer in its
final position, place
a level on top of the
washer (if the washer
is installed under a
counter, the washer
should not be able to
rock).Adjust the front
leveling legs up or down to ensure the washer
is resting solidly. Turn the Iocknuts on each leg
up toward the base of the washer and snug with
a wrench.
NOTE:Keepthe leg extension at a minimum to prevent
excessive vibration. The farther out the legs ere
extended, the more the washer will vibrate.
Ifthe floor isnot levelor isdamaged, you may have
to extend the rear levelinglegs.
17

Installation Instructions
INSTALLING THE WASHER {cont.)
7. Attach U-shaped hose guide to the end of the drain
hose. Place the hose in a laundry tub or standpipe.
NOTE:Ifthe drain hoseisplaced in a standpipe without
forming a U shape,a siphoning action could occur.There
must be an air gap around the drain hose.A snug hose
fit can alsocause a siphoning action.
8. Plug the power cord into a grounded outlet.
NOTE:Check to be sure the power is off at the circuit
breaker/fuse box before plugging the power cord into
an outlet.
.
lO.
11.
12.
13.
14.
Turn on the power at the circuit breaker/fuse box.
Read the rest of this Owner's Manual. It contains
valuable and helpful information that will save you
time and money.
Before starting the washer, check to make sure:
[] Main power isturned on.
[] Thewasher isplugged in.
[] Thewater faucets are turned on.
[] Theunit isleveland all four levelinglegsare firmly
on the floor.
[] Theshippingsupport hardware isremoved
and saved.
[] Thedrain hoseisproperly tied up.
[] Thereare no leaksat the faucet, drain line
or washer.
Run the washer through a complete cycle,
Check for water leaks and proper operation,
If your washer does not operate, please review
the Beforeyou call forservicesection before
calling for service.
Place these instructions in a location near the washer
for future reference.
REPLACEMENT PARTS
If replacement parts are needed for your washer, they can
be ordered in the United States by visiting our Website
at GEAppliances.com or by calling 800.GE.CARES.In
Canada, visit www.GEAppliances.ca or call 1.800.56!.3344.
18

Before gou call for service... GEAppliances.com
TroubleshootingTips
Savetime and mone_t!Reviewthe chartsonthe
FollowingpagesFirstand you may not needtocall
Forservice.
PossibleCause What ToDo
Notspinningor agitating Drainhoseiskinkedor • Straightendrainhoseand makesurewasherisnot
improperlyconnected sittingonit.
Householddrain may • Checkhouseholdplumbing.Youmayneedtocall
beclogged a plumber.
Drainhosesiphoning;drain hose • Ensurethereisanair gapbetweenhoseanddrain.
pushedtoo fardown inthe drain
Washerpumpfilter mag • CleanPumpFilter- Openthepumpaccessdoor(useacoin)
beclogged and removethepumpfilterbyturningitcounterclockwiseand
pullingout.Cleanthefilter,removingall loosedebris,andputfilter
backin place.
Loadisout of balance • RedistributeclothesandrunDrain&Spinor Rinse&Spin.
• Increaseloadsizeifwashingsmallloadcontainingheavy
and lightitems.
Leakingwater Doorgasketisdamaged • Checkto seeifgasketisseatedand nottorn.Objects
leftin pocketsmaycausedamageto thewasher(nails,
screws,pens,pencils).
Doorgasketnotdamaged • Watermaydripfromthedoorwhenthedoorisopened.
Thisisa normaloperation.
Checkbackleftof washer • tfthisareaiswet,youhaveoversudsingcondition.
forwater Uselessdetergent.
Fillhosesor drain hoseis • Makesurehoseconnectionsaretight atwasherand
improperlgconnected faucetsandmakesureendofdrainhoseiscorrectly
insertedinandsecuredto drainfacility.
Householddrain mag • Checkhouseholdplumbing.Youmayneedtocall
beclogged a plumber.
Not draining Drainhoseiskinkedor • Straightendrainhoseand makesurewasherisnot
improperlgconnected sittingonit.
Householddrain mag • Checkhouseholdplumbing.Youmayneedtocall
beclogged a plumber.
Drainhosesiphoning;drain hose • Ensurethereisanair gapbetweenhoseanddrain.
pushedtoo fardown inthe drain
Washerpumpfilter mag • CleanPumpFilter- Openthepumpaccessdoor(useacoin)
beclogged and removethepumpfilterbyturningitcounterclockwiseand
pullingout.Cleanthefilter,removingall loosedebris,andputfilter
backin place.
Not spinning Drainhoseiskinkedor • Straightendrainhoseand makesurewasherisnotsittingonit.
improperlgconnected
Householddrain mag • Checkhouseholdplumbing.Youmayneedtocallaplumber.
beclogged
Drainhosesiphoning;drain hose • Ensurethereisanair gapbetweenhoseanddrain.
pushedtoo fardown inthe drain
Washerpumpfilter mag • CleanPumpFilter- Openthepumpaccessdoor(usea coin)
beclogged and removethepumpfilterbyturningitcounterclockwiseand
pullingout.Cleanthefilter,removingall loosedebris,andputfilter
backin place.
Loadisout of balance • RedistributeclothesandrunDrain&Spinor Rinse&Spin.
• Increaseloadsizeifwashingsmallloadcontainingheavy
and lightitems.
Motor isoverheated • Washermotorwillstopifitbecomesoverheated,ttwill
automaticallyrestartaftera cool-downperiodofupto
2hours(ifwasherhasnotbeenmanuallyturnedoff).
Doorisopen • Makesuredoorisclosed. 19

J49-90369-2 ENVOI:49-90340 ENv05 8/2/2011 7:37 PM Page 20
Before gou call for service...
Possible Cause What To Do
Incompletecycleor timer Drainhoseiskinkedor ,, Straightendrainhoseand makesurewasherisnot
notadvancing improperlyconnected sittingonit.
Householddrain may •Checkhouseholdplumbing.Youmayneedtocall
beclogged a plumber.
Drainhosesiphoning;drain hose • Ensurethereisanair gapbetweenhoseanddrain.
pushedtoo fardown inthe drain
Washerpumpfilter may •CleanPumpFilter- Openthepumpaccessdoor(useacoin)
beclogged and removethepumpfilterbyturningitcounterclockwiseand
pullingout.Cleanthefilter,removingall loosedebris,andputfilter
backin place.
Automaticloadredistribution •Timerstopsat 1minute;machinehasredistributedthe
loadonceortwice.Thisisnormaloperation.Donothing;
themachinewillfinishthewashcycle.
Loudorunusualnoise; Cabinetmoving *Washerisdesignedto move1/4"to reduceforces
vibrationor shaking transmittedtothefloor.Thismovementisnormal.
All rubberlevelinglegsare not *Pushandpullonthebackrightandthenbackleftofyour
firmly touchingthefloor washertocheckif itislevel.Ifthewasherisuneven,adjust
therubberlevelinglegssotheyareallfirmlytouchingthe
floor.Yourinstallershouldcorrectthisproblem.
Unbalancedload • Opendoorandmanuallyredistributeload.Tocheck
machine,run rinseandspinwith no load.tfnormal,
unbalancewascausedbyload.
Shippingbolts not removed •Allfive (5)shippingboltsshouldbe removedbeforeuse.
Clothestoowet Drainhoseiskinkedor •Straightendrainhoseand makesurewasherisnot
improperlgconnected sittingonit.
Householddrain mag *Checkhouseholdplumbing.Youmayneedtocall
beclogged a plumber.
Drainhosesiphoning;drain hose • Ensurethereisanair gapbetweenhoseanddrain.
pushedtoo fardownthe drain
Washerpumpfilter mag • CleanPumpFilter- Openthepumpaccessdoor(useacoin)
beclogged and removethepumpfilterbyturningitcounterclockwiseand
pullingout.Cleanthefilter,removingall loosedebris,andputfilter
backin place.
Loadisout of balance •RedistributeclothesandrunDrain&Spinor Rinse&Spin.
• Increaseloadsizeifwashingsmallloadcontainingheavy
and lightitems.
Nopower/washernot Drainhoseiskinkedor • Straightendrainhoseand makesurewasherisnot
workingordead improperlgconnected sittingonit.
Householddrain mag *Checkhouseholdplumbing.Youmayneedtocall
beclogged a plumber.
Drainhosepushedtoofar •Ensurethereisanair gapbetweenhoseanddrain.
downin thedrain
Washerpumpfilter mag • CleanPumpFilter- Openthepumpaccessdoor(useacoin)
beclogged and removethepumpfilterbyturningitcounterclockwiseand
pullingout.Cleanthefilter,removingall loosedebris,andputfilter
backin place.
Washerisunplugged *Hakesurecordispluggedsecurelyintoaworkingoutlet.
Water supplgisturnedoff • Turnbothhot andcoldfaucetsfullyon.
Circuitbreaker/fuseis *Checkhousecircuitbreakers/fuses.Replacefusesor
tripped/blown resetbreaker.Washershouldhaveseparateoutlet.
Controlsare not setproperlg • HoldSTART/PAUSEbuttonto startcycle.
Automaticself-sgstemchecks •Firsttimethewasherispluggedin,automaticchecks
occur,it maytakeupto 20secondsbeforeyoucanuse
yourwasher.Thisisnormaloperation.
20
Other manuals for WCVH4800K
5
This manual suits for next models
1
Table of contents
Languages:
Other GE Washer manuals

GE
GE Profile WSXH208AWW User manual

GE
GE WSLM1100 Original instructions

GE
GE GBSR1070 User manual

GE
GE GTWP2250DWW Manual

GE
GE Profile Harmony WPGT9360 Operating instructions

GE
GE WWA5407M User manual

GE
GE PFW950 Original instructions

GE
GE WWA7010G User manual

GE
GE Profile Prodigy WBSE2090 User manual

GE
GE Spacemaker WSLP1500JWW Manual