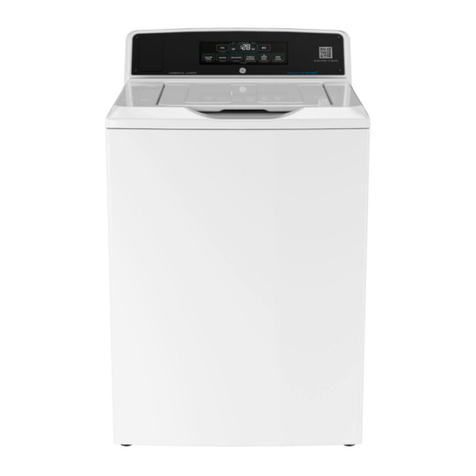
GE Washers User manual

GEAppliances.ca
Safety Instructions .......... 2,s
Operating Instructions
Careand Cleaning
of theWasher ...................... 7
Control Panels...................... 4
ControlSettings ................. 4,5
Features............................ 6
Loadingand Using
theWasher ........................ 7
Troubleshooting Tips ...... 8-1o
Consumer Support
Consumer Support ................ 12
Warranty .......................... 11
Write the model and serial
number here:
Model #
Serial #
You can find them
under the lid of
the washer.
49-90413-1 09/02/10 GE

IMPORTANT SAFETY INFORMATION.
READ ALL INSTRUCTIONS BEFORE USING.
WARNING! in om o ionin,ismonuomus minimi is,
of fire or explosion, electric shock, or to prevent property damage, personal injury,
or loss of life.
WATER HEATERSAFETY
Under certain conditions, hydrogen gas may be produced in a water heater that has not been
used for two weeks or more. Hydrogen gas can be explosive under these circumstances.
Ifthe hot water has not been usedfor two weeksor more, prevent the possibility of damage or injury byturning
on all hot water faucets and allowing them to run for severalminutes. Dothis before usingany electrical
appliance which isconnected to the hot water system.This simple procedure will allow any
built-up hydrogen gas to escape.Sincethe gas isflammable, do not smoke or usean open flame or
appliance during this process.
%PROPERINSTALLATION
This washer must be properly installed and located in accordance with the Installation
Instructions before it is used. If you did not receive an Installation Instructions sheet, you can
receive one by visiting GEApplionces.co or by calling 800.561.3344_
I Installor store where it will not be exposedto
temperatures below freezing or exposedto the
weather,which could cause permanent damage
and invalidate the warranty.
Properlyground washer to conform with all
governing codes and ordinances. Follow details
in Installation Instructions.
I This washer doesnot includewater supply hoses.
Parts and Accessories
Toorder,pleasecall !.800.66!.!6!6 or contact your
local GEparts supplier..
PartNumber Accessory
WH41X!0207 4 ft RubberWater Supply Hose
WX!4X!0005 4 ft BraidedWater Supply Hose
GEstrongly recommends the useof factory
specified parts. A list offactory hoses availablefor
purchase are listed below. Thesehosesare
manufactured and tested to meet GE
specifications.
GEstrongly recommends the useof new water
supply hoses. Hosesdegrade over time and need
to be replaced every 5years to reducethe riskof
hosefailures and water damage.
YOURLAUNDRYAREA
it Keepthe area underneath and around your
appliances free of combustible materials such as
lint, paper,rags,chemicals,etc.
I Closesupervisionisnecessary ifthis appliance is
used by or near children. Donot allow children to
play on,with or insidethis or any other appliance.

GEAppliances.ca
WHEN USINGTHEWASHER
I Never reach into the washer while it is moving. I Thelaundry processcan reduce the flame
Wait until the machine has completely stopped retardancy offabrics. Toavoid such a result,
before opening the lid. carefully follow the garment manufacturer's
wash and care instructions.
Use this
appliance
only for its
intended
purpose as
described in
this Owner's
Manual.
B
B
Do not mix chlorine bleachwith ammonia or acids
such asvinegar and/or rust remover. Mixing
different chemicals can produce a
toxic gas which may cause death.
Do notwash or dry articles that havebeen
cleaned in,washed in,soaked in or spotted with
combustible or explosivesubstances (suchas
wax,oil, paint, gasoline, degreasers,dry-cleaning
solvents,kerosene,etc.).Thesesubstances giveoff
vapors that may ignite or explode.Do not add
these substancesto the wash water. Do not useor
placethese substancesaround your washer or
dryer during operation.
B
B
Tominimize the possibilityof electric shock,
unplug this appliance from the power supply
or disconnect the washer at the building's
distribution panel by removing the fuse or
switching off the circuit breaker before attempting
any maintenance or cleaning.
NOTE:Turningthe CycleSelectorKnobto an off
position,or pressing PAUSEdoesNOTdisconnect
the appliance from thepower supply.
Neverattempt to operate this appliance if it is
damaged, malfunctioning, partially disassembled,
or has missingor broken parts, including a
damaged cord or plug.
WHEN NOT IN USE
B
B
Turnoff water faucets to relievepressure on hoses
and valves and to minimize leakage ifa break or
rupture shouldoccur. Checkthe condition of the fill
hoses;GErecommends changing the hoses every 5
years,
Beforediscarding a washer,or removing it
from service,remove the washer lid to prevent
children from hiding inside.
I Donot attempt to repair or replaceany part of this
appliance unlessspecifically recommended inthis
Owner's Manual,or in published user-repair
instructionsthat you understand and hove the skills
to carry out.
I Do not tamper with controls.
READAND FOLLOW THISSAFETYINFORMATION
CAREFULLY.
SAVE THESE INSTRUCTIONS

About the control panel-for models with "pull knob" start.
. Add detergent
. Add diluted fabric
softener (on models
with a fabric
softener dispenser)
• Add items
Step 2
7p3
• Select load size and
other wash options
• Select wash cycle
Step 4
. Close lid
. Pull knob
LOAD TEMPERATURE OPTIONS
m El D
Controls
Load
Looselyload items in the washer basket. Overloading may negatively impact wash performance. Adjust the load sizeaccordingly.
Temperature
Selectthe water temperature for the wash and rinsecycles.Alwaysfollow fabric manufacturer's care label or instructionswhen
laundering.
Options (on some models)
Fabric Softener
Setthis option when adding fabric softener to the washer.
Clean Rinse Option
When you use extra detergent or bleachto clean heavily soileditems,you may want to usethe 2nd Rinseoption. It provides an
enhanced second cold rinse.
4

GEAppliances.ca
Wash Cycle-Cycle Selector Knob
The chart below will help you match the wash cycle setting with your items. The chart is ranked from greatest to least
wash intensity.
Yourwasher may not have allthese cycles. (Cycles vary by model.)
WHITES Forheavy to lightly soiledcottons, household linens,work and play items.
(REGULARWASH/FASTSPIN}
DARKCOLORSFornon-colorfast cottons and blendsand itemsthat are labeled coldwash bythe fabric manufacturer.
(RE6ULARWASH/FASTSPIN}
CASUALSForwrinkle-free and permanent pressitems, and knits.
(PULSEDWASH/FASTSPIN}
RINSESPIN Forquickly rinsingchlorine, perspiration,stains, etc.,out of items.
(FASTSPIN)
CLEANRINSEProvidesan automatic, enhanced rinseto thoroughly remove detergent or bleachfrom
your items. (FASTSPIN}
FABRICSOFTENERActivatesthe FABRICSOFTENERdispenser cycle.(FASTSPIN}
Liquid Bleach Funnel
The water filldilutes liquid chlorine bleach as the washer fillsfor the wash cycle.
rl] Check clothing care labels for special instructions.
r_] ivleasure liquid bleach carefully, following instructions on the bottle.
[] Never pour undiluted liquid chlorine bleach directly onto clothes or into the wash basket.
[] Do not pour powdered bleach into bleach funnel.
r_] Before starting the washer, pour measured amount of bleach directly into bleach funnel.
Avoid splashing or over-filling dispenser. Ifyou prefer to use powdered bleach, add it into
the wash basket with your detergent.
[] Do not mix chlorine bleach with ammonia or acids such as vinegar and/or rust remover.
Mixing can produce a toxic gas which may cause death.
Q:What isthe difference between Heavy and Light settings?
A: ForWhites and Colors,the wash agitation time is increased by 6 minutes and for Cusuuls, by !2 minutes. (Timesare
approximate)
Q:What isthe difference between Regular and Pulsed?
A:Regulur means the washer will continuously agitate during the wash cycle.Pulsed provides a more gentle wash
cycle by including pause periodsduring the wash cycle.
Q:Which cycle isbest for heavily soileditems?
A: Whites or Colors cycles have the greatest wash intensity.This cycleprovides the best overallcleaning. Cusuuls
should be used for wrinkle-free and permanent press items.
Q:How can I reduce linting?
A:Sortwash loads byfabric type and whether they collect lint (velveteen,corduroy) or produce lint (terry cloth,chenille).
Wash small loadsfor a shorter amount of time.
Q:
A: How much detergent do I use7
Forbest performance, always follow the detergent manufacturer's instructions on usage.Many detergents are
concentrated, soconsult the product label and follow the clearly marked lineson the detergent measuring cups.
Excessivedetergent can negatively impact the wash performance.

About washer features.
The Agitator Cap (on some models)
Theagitator cap fits intothe top of the
agitator. If it accidentally comesoff,
simply put it back on.
OPTIONS
OFF_ FABRIC SOFTENER
nd/or CLEAN RINSE
Fabric Softener Dispenser (on some models)
Thefabric softener dispenser automatically r_] Add water to dispenser until it reaches
releasesliquid fabric softener. Setting the _ the maximum fill line.
knob ensures that itdispensesat the proper
time.
Do not stop the washer or raise the lid
during the first spin. This will cause the
dispenser to empty too soon.
To use, follow these steps:
[_ Hake.sure dispenser issecurelyattached
to agitator.
r_ use only diluted liquid fabric softener.
Pour into dispenser,usingamount
recommended on package.
Never pour fabric softener directly on items.
It may stain them.
Do not pour anything into the
agitator if the agitator cap or
dispenser is removed.
r41select FABRICSOFTENERsetting knobto
activate the cycle.
Note: Fabricsoftener will not dispenseif the
knob isin the "OFF"position.
Separate for cleaning
Cleaning the Fabric Softener Dispenser (on some models)
r_ Removethe dispenser from the top of the agitator.
r_ Separatethe dispenser cup from the cover by graspingthe top and pushing down on the
insideof the cupwith your fingers. Dispensercup will pop free from the cover.
r_To cleanthe dispenser,soak both the dispenser cup and the dispenser cover in the
following solution:
[] ! USgallon (5.8liters)warm water
[] !/4 cup (60ml)heavy-duty liquid detergent
[] ! cup(240ml) bleach
r_lf necessary,loosenbuildup with a clean,soft cloth after soaking. Donot usea stiff brush;
you may roughen the surface of the dispenser.
r5-1Rinseand reassemble dispenser.Placedispenser back on the agitator.
6

Loading and using the washer.
Always follow fabric manufacturer's care label when laundering. GEAppliances.ca
WashLoads
Sort bycolor (whites,lights,colors),soil level,
fabric type (sturdycottons, easy care, delicates)
and whether the fabric produces lint (terrycloth,
chenille)or collects lint (velveteen,corduroy).
Proper Use of Detergent
Add detergent before adding items sothat the
detergent can work effectively. Usingtoo little or too
much detergent isa common cause of laundry
problems.
Forspots, apply pre-treatment to items as
recommended on the product label. Application
should be made in the basketto prevent overspray
which may cause the coloring on the lid or graphics
to fade.
You can use lessdetergent ifyou have softwater,
a smaller load or a lightly soiledload.
When using high efficiency or concentrated
detergents, consult the product label to determine
amount required for optimum performance.
Excessivedetergent will negatively impact wash
performance.
i, LoadingtheWasher
_? Load dry items loosely inthe washer basket. When
loading wet items, make sureyou setthe load/water
levelhigh enough to allow the items to move freely.
Water levelshouldjust cover the items. Toadd items
after washer hasstarted, lift the lid and submerge
additional items next to the agitator.
IDo not wrap long items likesheets or pants
around the agitator.
IDo not wash fabrics containing flammable
materials (waxes,cleaningfluids,etc.).
IWasher will not agitate or spin with the lid up,
however the timer will continue to run.
Care and cleaning of the washer.
| 86
Wash Basket: Leavethe lid open after washing to
allow moisture to evaporate. Ifyou want to clean
the basket, use a clean soft cloth dampened with
liquid detergent; then rinse.(Donot useharsh or
gritty cleaners.)
FillHoses: GErecommends changing the hoses
every 5years.
Exterior: Immediately wipe off any spills.Wipe
with damp cloth.Try not to hit surfacewith
sharpobjects.
Moving and Storage: Ask the servicetechnician to
remove water from drain pump and hoses.Seethe
Installation Instructions packed with product for
information on how to reinstall the shipping rod
to keepthe tub stationary when moving the washer.
Formore information, visit GEAppliunces.ca or call
800.561.3344.Donot store the washer where it will be
exposedto the weather.
Long Vacations: Besurewater supply isshut off at
faucets. Drain all water from hoses ifweather will
be below freezing.

Before you call for service...
_roubleshooting Tips
Save time and money! Review the charts on the following pages,
or visit GEAppliances.ca. You may not need to call for service.
WATER Possible Causes What To Do
Toomany suds Too much detergent , Heasure your detergent carefully. Uselesssoap ifyou have
soft water, a smaller load or a lightly soiledload.
Type of detergent , Switch to a lower sudsing detergent brand and follow
instructions on package.
Soft water , Try lessdetergent.
Water leaks Using too much detergent , Uselessdetergent. Uselesssoap ifyou have soft water.
in washer a smaller load or a lightly soiled load.
Fillhoses or drain hose is , Hake sure hoseconnections are tight at faucets and
improperly connected rubber washers are installed.Hake sure end of drain hose
iscorrectly inserted in and secured to drain facility.
Household drain may , Checkhousehold plumbing. You may need to call
be clogged a plumber.
Drain hose loose , Hake sure drain hoseisfully seated in back of washer and
that the two retaining screws are fully seated.
Drain hose rubs on wall , Hake sure drain hosedoes not make contact with the wall.
Hay cause excessivewear on the hose.
Constant water pressure , Tighten hosesat the faucets and turn the water off after
to the fill hoses at the each use.
water source , Checkcondition of the fill hoses;they should be replaced
every 5 years.
Water temperature Coolerwater temperatures , New laundry detergents have been formulated to work
seems incorrect provide improved energy with coolerwater temperatures without affecting wash
efficiency performance.
Water supply isturned off , Turn both hot and coldfaucets fully on and make sure
or improperly connected hosesare connected to correct faucets.
Water valve screens are , Turn off the water source and remove the water connection
stopped up hosesfrom the upper back of the washer. Usea brush or
toothpick to clean the screens inthe machine. Reconnect
the hosesand turn the water back on.
House water heater is , Hake sure housewater heater isdeliveringwater at
not set properly !20°F-!40°F (48°C-60°C).
Water pumped out before Lid lifted or cycle was put in , Resetcycle.
cycle is complete pause for over 24 hours
Water won't drain Drain hose is kinked or , Straighten drain hoseand make surewasher isnot
improperly connected sitting on it.
, Topof drain outlet should be lessthan 6 ft (1.8m)
above floor.
Washer pauses during This is normal , Thisis normal.Thewasher alternates between agitate and
wash or rinse cycle soak during these cycles to get your clothes cleanerwith
lesswear.
Washer pauses during This is normal , Thewasher may pause during the spincycleto remove
spin cycle soapy water more efficiently.
8

GEAppliances.ca
OPERATION Possible Causes What To Do
Washer won't operate Washer is unplugged . Hake surecord isplugged securely into a working outlet.
Water supply is turned off • Turnboth hot and cold faucets fully on.
Controls are not set properly • Checkcontrols.
Lid isopen--safety feature • Closelid and reset cycle,to the beginning if necessary.
prevents agitation end
spinning when lid is up
Circuit breaker/fuse is _ Checkhousecircuit breakers/fuses.Replacefuses or
tripped/blown reset breaker.Washer should have separate outlet.
Timer knob not pulled • Pulltimer knob.
Lid magnet missing _ Callfor service.
Movement inside machine Shifting mechanism is o When the machine ismanually turned off,the shifter will
when shut off disengaging the motor disengage the motor before completely shutting down.
Iflid israised beforethe motor isdisengaged,the processwill
stop and will resume when lid isclosed.
PERFORMANCE Possible Causes What To Do
Clothes too wet Incorrect spincycle _ Hakesurethe spincycle selectedmatches the load you are
selected washing.Somefabricswillfeelwetterwhenrinsedwith coldwater.
Colored spots Incorrect use of fabric , Checkfabric softener package for instructions and follow
softener directions for usingdispenser.
Hake sureyou haveselected the Fabric Softener option,
Pretreatstain and rewash,
Dyetransfer o Sortwhites or lightly colored items from dark colors.
Grayed oryellowed Not enough detergent _ Usemore detergent (especiallywith larger loads),
clothes Besureto follow detergent manufacturer's directions.
Hard water _ Usea water conditioner likeCalgon brand or install
a water softener.
Water is not hot enough _ Makesurewater heater isdeliveringwater at
120°F-140°F(48°C-60°C).
Washer is overloaded • Selectload sizeto match clothes load.
Detergent is not • Add detergent beforeyou load items.
dissolving
Dyetransfer _ Sortclothes by color. If fabric label states wash separately,
unstable dyes may be indicated.
Lint or residue on Clothes are air or line dried , Ifyou do not dry your clothes with a clothes dryer,your
clothes clothes may retain more lint.
Incorrect sorting • Separate lint producers from lint collectors.
Washing too long • Wash small loadsfor a shorter time than larger loads.
Detergent not dissolving o Add detergent beforeyou load items.
Trya liquid detergent.
Usewarmer water temperature.
Overloading _ Loadclothes loosely inthe washer basket. Adjust load size
based on items sizeand materials.
, Hake sure load sizeselected matches clothes load size.
Incorrect use of fabric
softener Checkfabric softener package for instructions
and follow directions for using dispenser.
Hake sureyou haveselected the Fabric Softener option.
9

Before you call for service...
_Troubleshooting Tips
PERFORMANCE (cont.) Possible Causes What To Do
Pilling Resultof normal wear on , Whilethis isnot caused by the washer,you can slow the
poly-cotton blends and pilling processbywashing garments insideout.
fuzzy fabrics
Snags, holes, tears, rips
or excessivewear Pins,snaps, hooks, sharp , Fastensnaps,hooks,buttons and zippers.
buttons, belt buckles, , Removelooseitems likepins,objects in pockets and
zippers and sharp objects sharp buttons.
left in pockets • Turnknits (which snag easily)inside out.
Undiluted chlorine bleach , Checkbleach package instructions for proper amount.
, Neveradd undiluted bleachto wash or allow clothesto
come in contact with undiluted bleach.
Chemicals like hair bleach or , Rinseitems that may have chemicals on them before
dye, permanent wave solution washing.
Wrinkling Improper sorting , Avoid mixing heaWitems (likework clothes)with light items
(likeblouses).
• Trya fabric softener.
Overloading or incorrect * Loadyour washer soclothes have enough room to move
water level freely with water covering all of the clothes.
Incorrect wash and * Hatch Cycleselectionto the type of fabric you are washing
dry cycles (especiallyfor easy care loads).
Repeated washing in * Wash inwarm or cold water.
water that istoo hot
SOUNDS Possible Causes What To Do
"Metallic clicking" Shifter mechanism is , Thedrivesystem will engage at the start of agitate and
engaging or disengaging disengage when agitate iscomplete. This occurs multiple
times during the wash.
"Click" when water Relayswitch * Therelay makesa clicksound when activated. Thewater
stops filling levelactivates the relayand stops filling.
"Clicking" behind Control Automatic Temperature * Thisvalve mixes in cold and hot water. The"clicking" isthe
Panel during fill Control Valve valve turning on and off.
Water volume changes Automatic Temperature * Thisvalve mixes in cold and hot water. Thesound changes
during fill Control Valve when the valves areturned on and off.
Motor "whining up" or Motor ramping up/down * Themotor will speed up incrementally during the spincycle.
"coasting down" in spin during spin cycle When spin iscomplete, itwill coast until it stops.
"Humming" Water drain pump * Thedrain pump will make a humming soundwhen pumping
out water after agitation stops and continue until spin is
complete.
"Gurgling" Water drain pump * When the pump starts drawing in air,It starts to gurgle.
Thewasher shouldthen begin spinning and the sound will
continue until it is done spinning.
10

GEWasher Warranty.
All warranty service provided by our Factory Service Centers,
or an authorized technician. For service call 1.800.561.3344.
Please have serial number and model number available when
calling for service.
Stapleyour receipt here.
Proof of the original purchase
date is needed to obtain service
under the warranty.
For The Period Of: We Will Replace:
One Year
From the date of the
original purchase
Any pert of the washer which fails due to a defect in materials or workmanship. Duringthis
limited one-veer warranty, we will also provide, free of charge, all labor and related
serviceto replacethe defective part.
What Is Not Covered:
[] Service trips to your home to teach you how to use
the product.
[] Improper installation, delivery or maintenance.
[] Failure of the product if it is abused, misused, or
used for other than the intended purpose or used
commercially.
[] Replacement of housefuses or resetting of circuit
breakers.
[] Damage caused after delivery.
[] Damage to the product caused by accident, fire, floods
or acts of God.
[] Inddental or consequential damage caused by possible
defects with this appliance.
I Product not accessible to provide required service.
EXCLUSIONOFIMPLIED WARRANTIES--Your sole and exclusive remedy is product repair as provided in this Limited Warranty.
Any implied warranties, including the implied warranties of merchantability or fitness for a particular purpose, are limited to
oneyear or the shortest period allowed by law
Thiswarranty isextended to the original purchaser and anysucceedingowner for productspurchased in Canadafor home use
within Canada.In-home warranty servicewill be provided in areaswhere it isavailableand demand reasonablebyMabe to
provide.
Somestatesor provincesdo not allow theexclusionor limitation of incidental or consequentialdamages,sothe above exclusion
may not aplly toyou. Thiswarranty givesyou specific legal rights,and you may alsohaveother rights which vary from province to
province.Toknow what your legal rights are inyour province,consultyour local orprovincial consumeraffairs office.
Warrantor: Plabe Canada Inc.,
Burlington, Ontario
11

Consumer Support.
GEAppliances Website www.geuppliunces.cu
Havea question or need assistancewith your appliance? Visitour Website,www.geeppliences.ca, 24 hours a
day, and any day of the year!
ScheduleService
ExpertGErepair service iscloseto you.
Toarrange servicefor your GEappliance, all you have to do iscall.
1.800.561.3344
RealLifeDesignStudio GEAppliences.ce
Uponrequest, GEcan provide a brochure on designing a kitchen for personswith limitedmobility.
Contact :Manager,Consumer Relations,ivlabeCanada Inc.
Suite3!0, ! Factory Lane
Moncton, N.B.E1C9M3.
Partsand Accessories GEAppliances.ca
Individualsqualified to servicetheir own appliances can have parts or accessoriessent directly to their homes
(VISA,MasterCardand Discovercards are accepted).
Instructions contoined in this monuol cover procedures to be performed by onv user. Other servicing
generully should be referred to qualified service personnel. Cuution must be exercised,since improper
servicing muy cuuse unsufe operution.
Youwill find the nearestMabeServiceCenterin theyellow pagesofyour phone book. Or,callus at
1.800.661.1616.
Contact Us
Ifyou are not satisfied with the serviceyou have received
First of all, communicate with the people who repaired your appliance.
Then, ifyou are still not satisfied,send all information including telephone number to:
Director,IConsumer Relations,IVlabeCanada Inc.
Suite310, 1 Factory Lane
Moncton, N.B.EIC 9M3
Register YourAppliance www.geuppliunces.cu
Registeryour new appliance on-line--at your convenience! Timelyproduct registration will allow for enhanced
communication and prompt serviceunder the terms of your warranty, shouldthe need arise.
Youmay also mail in the pre-printed registration card included in the packing material.
12 Printed in the United States

ELECTROMENAGERSGE.CA
Consignes de s6curit6 ....... 2,]
Consignes d'utilisution
Entretien et nettoyage de la laveuse 7
Panneau de commande ........... 4
R6glage des commandes ....... 4, 5
Fonctions ........................... 6
Chargement et Utilisation de
la Laveuse ......................... 7
Conseils de d_pannage ...8-1o
Assistance _Io clientele
Assistance 5 la clientele .......... 12
Garantie ........................... 11
Inscrivez ici les num_ros de
module et de s_rie:
Num#ro de module #
Num_ro de S_rie #
Ces num@os sont /t_- 1
inscrits sous le
couvercle de lu
laveuse..
49-90413-1 09/02/10 GE

J
IMPORTANTES CONSIGNES DE SECURITE.
VEUILLEZ LIRE TOUTES LESCONSIGNES AVANT UTILISATION .
AAVERTISSEMENT! doivent_tresuiviesafin de minimiser /esrisquesd'incendieou
d'explosion, de chocs dlectriques et d'dviter les dommages, les
blessures corporelles voire lamort
SECURITEDU CHAUFFE-EAU
Dons certaines conditions, de I'hydrog_ne gazeux peut _tre produit dons un chauffe-eau Iorsque
ce demier n'a pas dtd utilisd pendant deux semaines ou plus. Dons ces conditions, I'hydrog_ne
gazeux peut provoquer une explosion.
Sivous n'avezpas utilis@I'eauchaude depuis plusde deux semaines,6viteztout dommage ou blessureen
ouvrant tousles robinets d'eau chaude et en leslaissantcouler pendant quelques minutes. Effectuezcegeste
avant d'utiliser tout apparei161ectrom6nagerbranch@au systSmed'eau chaude. Cette proc@duresimple
permet 6 toute accumulation d'hydrogSnegazeux de s'6chapper.Comme ce gazest inflammable, nefumez
pas,n'utilisez pas de flamme vive ou d'apparei161ectrom6nagerpendant cette proc6dure.
INSTALLATION CORRECTE
Cette laveuse doit _tre correctement installde et positionn_e conformdment aux Instructions
d'lnstallation avant toute utilisation. Si vous n'avez pas requ de fiche contenant /es consignes
d'installation, vous pouvez vous en procurer une sur le site www.electromenagersge.ca ou en
appelant le 1.800.561.3344.
I Installezou entreposezvotre appareil dans un
endroit o0 il ne sera pasexpos@au gel ou aux
intemp@iesqui pourraient causer desdommages
permanents et annulet la garantie.
it Mettez correctement la laveuse6 la terre
conform6ment 6 tous lescodes et rSglementsen
vigueur. Suiveztous lesd@ailsdonn6s dans les
Instructions d'lnstallation.
it Cettelaveuse n'est pasfournie avec lestuyaux
d'alimentation en eau.GEvous recommande
fortement d'utiliser despisces d'usine. Une liste
destuyaux disponibles6 I'achat est donn6e ci-
dessous. Cestuyaux sont fabriqu6s et test6s de
faqon 6 respecter lessp6cifications de GE.
Pi@ceset accessoJres
Appelezle 1.800.661.1616ou contactez votre
marchand de pisces GElocal.
Num_ro de pi@ce Accessoire
WH41X10207 Tuyau en caoutchouc de 4 pi (1,2
mStres)pour I'alimentation en eau
WX14X10005 Tuyau tress@de/4pi (1,2mStres)
pour I'alimentation en eau
GEvous recommande fortement d'utiliser des
tuyaux d'alimentation en eau neuf. Lestuyaux se
d6gradent avec le temps et doivent @reremplac@s
tousles Sans pour r6duire le risquede rupture des
tuyaux et/ou de d6g6ts deseaux.
VOTREAIREDE LESSIVE
it Gardezlazone autour et en dessousde la laveuse
propre et exempte de tout mat@iau combustible
tel que descharpies, du papier,deschiffons ou des
produits chimiques.
it Unesurveillanceaccrue est n_cessaireIorsde
I'utilisation de cet appareil en pr6sence d'enfants.
Neleur permettez pasdejouer sur le dessus,avec
ou dons cette laveuseou avec tout autre appareil
61ectrom6nager.
2

electromenogersge.co
N'utilisez cet
appareil
qu'aux fins
prdvues
ddcrites
dons le
manuel
d'utilisation.
LORSQUEVOUSUTILISEZVOTRELAVEUSE
I N'essayezjamaisd'ouvrir votre laveuse Iorsque I Leprocessus de lavage peut r6duire la r6sistance
B
B
celle-ci est en marche.Attendez que la machine soit
compl_tement arr@6eavant d'ouvrir le couvercle.
Nem61angezjamais dejavellisant avec de
I'ammoniaque ou desacides tels que du vinaigre
et/ou de I'antirouille. Lem61angedesdiff@ents
produits chimiques peut produire des gaztoxiques
pouvant entraTnerla mort.
Nelavezpas et ne s6chezpas desarticles ayant
@6nettoy6s, laves,tremp6s ou tach_s par des
substances combustibles ou explosives(tellesque
la cire, I'huile,la peinture, I'essence,lessubstances
d6graissantes,lessolvants de nettoyage 6 sec,le
p@role,etc...).Cessubstances peuvent d6gager des
vapeurs qui peuvent s'enflammer ou exploser.
N'ajoutez pasces substances 6 I'eau de lavage.
N'utilisezpas et neplacez pas ces substances
autour de votre laveuse ou de votre s6cheuse
pendant leur fonctionnement.
B
B
aux flammes destissus.Pour6viter de tels
r6sultats,suivezsoigneusement lesinstructions de
lavage etd'entretien donn6es par le fabricant de
v@ements.
Pour r6duire le risquede choc 61ectrique,
d6branchez I'appareil de I'alimentation 61ectrique
ou d6branchez la laveuse au niveaudu panneau
de distribution en retirant lefusible ou d6clenchant
le disjoncteur avant d'entreprendre toute activit6
d'entretien ou de nettoyage.
RENARQUE:L'appareiln'estpas ddconnectdde
I'alimentationdledfique Iorsquevousfaites toumer
le bouton desdledion de programme sur la position
Arr6t ou Iorsque vousappuyez sur Pause.
N'essayezjamais de faire fonctionner cet appareil
s'ilest endommag6, s'il ne fonctionne pas
correctement, s'ilest partiellement d6mont6 ou si
certainesdes pisces sont manquantes ou cass6es,
ycompris sile cordon d'alimentation est
endommag&
LORSQUEVOUSN'UTILISEZPAS
B B
B
VOTRELAVEUSE
Fermezlesrobinets d'eau pour r@duirela pression
dons lestuyaux et lesrobinets et pour diminuer le
risque de fuite en cos de cassure ou de rupture.
V@ifiezI'@atdestuyaux d'alimentation; Hotpoint
vous recommande de leschanger tousles 5 ans.
Avant de mettre votre laveuseau rebut ou de la
mettre hors service,retirez lecouvercle pour 6viter
que lesenfants ne secachent 6 I'int@ieur.
N'essayezpasde r_parerou de remplacer une
piecede I'appareil,6 moins d'une recommandation
pr6cise 6 cet effet dans ce manuel ou dans des
instructions de r@aration par I'utilisateur publi6es
que vous comprenez et pour lesquellesvous
poss6dezlescomp6tences requises.
it Nemodifiezjamais lescommandes.
\,,_,,r,_1LISEZ ET SUIVEZSOIGNEUSEMENT CESCONSIGNES DE
-_"f _ SECURITE.
CONSERVEZCESINSTRUCTIONS

Aprotx_du_bleaudecommand_Pourlesmod_lesav_ boutondemiseenmaxim
Etape1
!
. Ajoutez Jed_tergent
. Ajoutez I'ossouplissont
dilu_ (sur les modules
_quip_s d'un
distributeur
d'ossouplissont)
Etope 2
Ajoutez les orticles
Etope 3
Etape_
• S_lecfionnezIotoillede Iobross_e_
etlesoutresoptionsde Iovoge
• S_lecfionnezleprogramme de . Fermez lecouverde
Iovoge . Tirez sur le bouton
G uidede d_morroge rapide
CHARGE TEMPI_RATURE OPTIONS
Controls
Charge
Pl(]cezlesv_tements dans le panier de la I(]veusesans lescomprimer. Toute surcharge pourr(]it (]voir un impact n6g(]tif sur les
performances de I(]veuse.Ad(]ptez I(]t(]ille de I(] brass6een cons6quence.
Temperature
Choisissez I(]temp6r(]ture de I'e(]u pour les progr(]mmes de I(]v(]geet de rinq(]ge. Observez toujours les recomm(]nd(]tions indiqu6es
sur les 6tiquettes d'entretien du f(]bric(]nt ouses instructions pour le I(]v(]ge.
Options (sur certains modules)
Assouplissant
Sivous utilisez le distributeur d'(]douciss(]nt, vous devez s61ectionner cette option.
Option Lavage ringage
Lorsque vous utilisez du d6tergent ou du j(]vellis(]nt suppl6ment(]ire pour nettoyer des v_tements tr_s sales, vous pouvez choisir
I'option 2_me rinq(]ge Cette option propose un deuxi_me rinq(]ge (_froid.
4

electromenogersge.co
_rogramme de lavage --Bouton de S_lection du Programme
Letableau ci-dessousvous aidera (3s_lectionner lesprogrammes de lavages adapt6s hvos v_tements. Les
programmes sont class6esdu plus long au pluscourt et par intensit6 de lavage.
IIest possibleque votre laveusene salt pas6quip6e de tous ces programmes. (lesprogrammes varient suivant le
mod61e)
BLANCS Pour les articles en cotton sales ou tr_s sales, les v_tements de travail et d'activit6 physique.lLAVAGE
NORMAL/ESSORAGE RAPIDEI
COULEURS FONCI_ES Pour les articles en coton et en polyester qui ne sont pas grand teint etles articles @iquet6s
<<lavage h froid >>par le fabricant.lLAVAGE NORMAL/ESSORAGE RAPIDEI
TOUT-ALLER Pour les articles infroissables et h pressage permanent.lLAVAGE PULSI_/ESSORAGE RAPIDEI
RINCAGE ESSORAGE Pour un rinqage rapide de chlore, de transpiration, de taches sur les v@ements.(ESSORAGE
RAPIDEI
LAVAGE RINCAGE Pour un rinqage automatique et am61ior6 pour 61iminer les d@ergents ou le javellisant de vos
v_tements.(ESSORA(3E RAPIDEI
ASSOUPLISSANTActive le programme de distribution de I'assouplissant.lESSORA(3ERAPIDEI
Distributeur de javellisant liquide
Au moment du remplissagede lalaveuse,I'eau dilue lejavellisant.
r_ v6rifiez I'@iquetagedesv@ements en cas d'instructions particuli@es.
r_ Mesurezsoigneusement la quantit6 de javellisant en suivant lesinstructions sur la
bouteille..
INeversezjamais dejavellisant non dilud directement sur les v_tementsou dans le
panier de la laveuse.
INeversezpas dejavellisant en poudre dansle distributeur dejavellisant.
r_lAvant de d6marrer la laveuse,versezla quantit6 dejavellisant mesur6e directement dans
ledistributeur dejavellisant2vitez les 6claboussureset @itez de trap remplir le
distributeur. Sivous pr6f@ezutilisezdujavellisant en poudre,ajoutez-le dans le panier de
lavageavec votre d@ergent.
INemdlangezjamais dejavellisant avecde I'ammoniaque ou desacidestels que du
vinaigreet/ou de I'antirouille.Lemdlangepeut produire desgaz toxiquespouvant
entraFnerla mort..
Ouestionsetr@onses
Q: Ouelle est la diff@ence entre les programmes pour v@tementssales et ceux pour les v@tements peu sales ?
A: Pour le coton, la dur6e d'agitation Iors du lavage est prolong6e de !0 minutes et de 6 minutes 30 pour les articles Tout-
aller. (Lesdur6es donn6es sont approximatives)
Q:Ouelle est la diff@ence entre un lavage Normal et un lavage L6ger?
A: Un lavage normal indique que la laveuse utilisera une agitation d'une intensit6 normale pendant le cycle de lavage. Un
lavage doux se fait (3vitesse r6duite.
Q: (Duelest le programme le plus aux v_tements tr_s sales?
A: Le coton n_cessite I'intensit@de lavage la plus..importante. Ce programme.donne une des meilleures performances de
avage. Le programme tout-aller aevralt _tre ubhs6 pour les v_tements inTrorssaDleset sans repassage.
Q: Est-il possible de r6duire la production de charpie?
A:Triez la brass6e par type de tissu et selon leur tendance hcollecter la charpie (velours de coton, velours c6tel6) ou hla
produire (tissu 6ponge, chenille). Lavez les petites brass6es pour des dur6es plus courtes.
Q:Combien de d@ergent doit-on utiliser ?
A: Pour de meilleurs r6sultats, veuillez toujours suivre lesconsignes du fabricant de d@ergent selon les utilisations.De
nombreux d6tergents sont concentr6s, consultez 1'6tiquette du produit et suivez les lignes donn_es sur verre gradu6 du
d6tergent. Une quantit6 trap importante de d@ergent peut avoir un impact n6gatif sur I'efficacit6 du lavage. 5

A propos des fonctions de la laveuse.
Le couvercle de I'agitateur (sur certains modules)
Le couvercle de I'agitateur se pose sur le haut de
I'agitateur. S'i! tombe accidentellement, remettez-
le simplement en place.
OPTIONS ASSOUPLISSAT
m/ou
,uo
A_GE R P_E
Distributeur d'assouplissant (sur certains moddles)
Le distributeur d'assouplissant lib@e r_ Ajoutez de I'eauau distributeurjusqu'a la
automatiquement I'assouplissantliquide, ligne de remplissage maximal.
Grace au bouton sur la bonne position,
I'adoucissant est lib_r_ au ban moment.
N'arr_tez pas la laveuse et n'ouvrez pas le
couvercle pendant son premier essorage
sinon le distributeur sevidera pr_cocement.
Pour utiliser le distributeur, suivez les
dtopes suivantes
[_ Assurez que le distributeur est
correctement fix6 a I'agitateur. Ne versez den dans I'agitateur sirJe
couverde ou le distfibuteur est retir6
[] N'utilisezque de I'assouplissantliquide
dilu& Versez-ledans ledistributeur en
utilisant la quantit6 recommand6e sur
I'emballage.
Ne versez jamais I'assouplissant
directement sur les v_tementsJIs pourraient
@tretach_s.
[_Sdlectionnez I'optionAssouplissantpour
activerceprogramme.
Remarque . L'assouplissantne serapaslibdrd
sile bouton est surla positionArrSt.
3
S6parez pour nettoyer
Nettoyage du distributeur d'assouplissant (surcertains modules)
[-_] Retirezle distributeur du haut de I'agitateur.
r_1%parez le compartiment distributeur du couvercle en attrapant le haut et en poussant
vers le basdans lecompartiment. Lecompartiment seraalors s6par6 du couvercle.
r_ Pournettoyer le distributeur, faites tremper le compartiment distributeur et le couvercle
dans la solution suivante
[] 60 ml (1/4tasse)de ddtergent liquide
[] 240 ml (1tasse)dejavellisant
[] 3,8litres (! gallon)d'eau tilde
r_ si n6cessaire,d@crocherles r6sidusaccumul6s a I'aide d'un chiffon propre et doux apr@s
m ,i trempage. N'utilisezpas de brossedure, la surface du distributeur pourrait @treray6e.
r-5-1Rincezet r6assemblez ledistributeur. Placezle distributeur sur I'agitateur.S6parezpour
nettoyer.
6

Chargement et utilisation de ia laveuse
Observez toujours les recommandations du fabricant indiqudes sur les dtiquettes d'entretien.
Triezpar couleur (bluncs,couleurs claires,couleurs),
niveau de salet6,type de tissu (coton,entretien facile,
d61icats)et, au cas o0 letissu produit de la churpie
(tissu6ponge, chenille)ou accumule de lacharpie
(veloursde coton,velours c6tel6).
Utilisationcorrecteduddtergent
Ajoutez le d@ergentavant d'ajouter lesarticles6
laver pour que le d@ergentsoit plusefficace.
L'utilisationd'une quantit6 insuffisante ou trop
importante de d@ergentest une cause courante de
probl_me de lavage..
Encas de taches, pr@raitezlesarticlesen suivant les
instructions donn6es sur I'@iquette.Toute application
de d@achant doit @refaite dans le panier de la
laveuse pour 6viter de trop vaporiser Particleet
d'6viter de d6colorer lesgraphismes ou lecouvercle.
Vous pouvez utiliser moins de d@ergent sivous avez
une eau douce, une brass6e pluspetite ou peu sale.
Lorsquevous utilisezdesd@ergents 6 haut
rendement (HE)ou concentr6s,consultez les
recommandations donn_essur I'@iquettedu produit
pour d@erminerlesquantit6s optimales requises
pour desr6sultats optimum. Unequantit6 trop
importante de d@ergentpeut avoir un impact n6gatif
sur I'efficacit6 du lavage.
Chargementdela laveuse
Placez les v@ements dans le panier de la laveuse
sans lescomprimer. Lorsquevous placez desarticles
mouill6s dans la laveuse,assurez-vousque le niveau
d'eau/de linge est assez61ev6pour permettre aux
articles de bouger librement. Leniveau d'eau dolt
juste recouvrir lesarticles. Pourajouter du linge apr_s
avoir d6marr6 un programme, soulevezle couvercle
et submergez lesarticlessuppl6mentaires 6 proximit6
de I'agitateur.
IN'enroulez pas des articles de grande Iongueur tels
que des draps ou des pantalons autour de
I'agitateur.
INe lavez pas les tissus imbibds de substances
inflammables (cites, liquides de nettoyage, etc....).
ILe lavage et I'essorage ne sont pas en marche
Iorsque le couvercle est ouvert, toutefois, la
minutefie continuera 8 fonctionner.
Entretien et nettoyage de #a#aveuse.
Panier: Laissezle couvercle ouvert apr_s une lessive
pour permettre I'_vaporation de I'humidit6. Sivous
souhaitez nettoyer le panier,utilisezun linge propre et
doux 16g@ementimbib6 de d@ergentliquide,puis
rincez.(N'utilisezpas de produits nettoyants abrasifs).
Tuvau×de remplissage :GEvous recommande de les
changer tousles 5 ans.
Ext_fieur: Essuyezimm6diatement tout produit
renvers@6 I'aided'un chiffon humide. Evitezde
flapper la surface avec des objets tranchants.
D_m_nagement et Entreposage : Demandez6 un
r6parateur de vidanger I'eau de la pompe et des
tuyaux. Consultez la Notice d'lnstallation fournie avec
I'appareilpour des informations sur la proc6dure 6
suivre pour r6installer la cale d'exp6dition qui
immobilise la cuve pendant le d6m6nagement. Pour
de plusamples informations, consultez le site
www.electromenagersge.ca ou appelez
1.800.561.3344.Entreposezla laveuse6 I'abrides
intemp@ies..
Vacancesprolong@es: CoupezI'alimentation en eau
au niveau desrobinets.Vidangez I'eaudestuyaux en
cas de risquede gel.

Avant d'appeler un r .parateur...
_onseils de ddpannage
Economisez du temps et de I'argent ! Consultez les tableaux sur les pages suivantes ou consultez
www.electromenagersge.ca. Vous n'aurez peut-@tre pas besoin d'appeler un rdparateur.
EAU Causes Possibles Qua faire
Moussage excessif
Fuites d'eau
Trap de d_tergent . Mesurezsoigneusement la quantit6 de d6tergent. Utilisez
mains de d6tergent si vous avez une eau douce, une brass6e
plus petite ou du linge peu sale.
Type de d_tergent • Passez6une marque de d6tergent mains moussante et suivez
lesinstructions donn6es sur I'emballage
Eaudouce . Utilisezmains de d6tergent.
Utilisation d'une trap
gronde quantit_
de d_tergent dens la leveuse
Utilisezmains de d6tergent. Utilisezmains de d6tergent si
vous avez une eau douce, une brass6e plus petite ou du
linge peu sale.
Lestuyaux de remplissageou
devidange sont mal bmnch_s. Assurez-vousque lesbranchementsd'eausoientbien
serr6sau niveaudesrobinetsetles rondellesencaoutchouc
ant bien_t6misesen place.Assurez-vousque I'extr6mit_du
tuyau devidangeestcorrectementins6r6eetfix_e61'6vacuation.
Lacanalisation d'_vacuation • V6rifiez la plomberie du domicile.Vousaurezl
du domicile est peut _tre bouch_e, peut-_tre besoind'appeler un plombier.
Tuyau de videnge desserr_ . Assurez-vous que le tuyau de vidange est correctement
r6install_ 6 I'arri_re de la laveuse et que les deux vis de fixation
sont correctement install6es..
La temp_.rature de I'eau
semble incorrecte
Letuyeu de vidonge frotte
contre lemur , Assure-vousque le tuyau de vidange n'est pasen contact
avec le mur. Cecipeut provoquer une usureexcessivedu
tuyau..
Pression d'eau constante
vers les tuyoux de
remplissege
, Resserrezlestuyaux au niveau desrobinets et fermez les
robinets apr_schaque utilisation.
. V6rifiez I'_tatdestuyaux de remplissage, ilsdoivent _tre
remplac6s tousles 5 ans.
Uutilisotion d'eou aux
temperatures plus basses
permettra une meilleure
efficocit_ _nerg_tique.
, Lesnouveaux d6tergents ant _t6 formul6s pour obtenir
une bonne performance de lavage 6 destemp6ratures plus
basses.
Ualimentation en eau est ferm_e .Ouvrez compl_tement les robinets d'eau chaude et froide
ou branch_e Jncorrectement et assurez-vous que les tuyaux soient branch6s aux bans
robinets..
Les filtres des soupapes
sont obstru_s Fermezle robinet et retirez lesraccords de tuyaux 6 I'arri6re
sup6rieur de la laveuse.Nettoyez lesfiltres de la laveusea
I'aide d'une brosse ou d'un cure-dent. Rebranchezlestuyaux
et ouvrez lesrobinets.Reconnect.
Lechauffe-eau n'est . Assurezvous que le chauffe-eau produit une eau 6 une
pas r_gl_ correctement temp6rature variant de 48 a 60oc(120a 140°F)..
L'eau est vidang6e avant la Le couvercle n'est pas ferm_ • R6initialisezle programme.
fin du programme ou le programme a _t_ en
pause pendant plus de 24 heures
La laveuse ne se vidange pas Letuyau de vidange est . Redressez letuyau de vidange et assurez-vous que la
entortill_ ou mol branch_ laveuse ne salt paspos_e dessus.
. Lapartie sup_rieure du tuyau de vidange dolt
_tre 6 mains de 1,8m (6pi)du sol.
. Ceciest normal. La laveusealterne entre agitation et
trempage pendant ces programmes pour obtenir des
v_tements plus propres avec mains d'usure.
La laveuse s'arr_te pendant Ced est normal
le programme de lavage ou
La laveuse s'arr_te pendant Ceci est normal .Lalaveuse peut s'arr_ter pendant I'essoragepour 61iminer
I'essorage plus facilement I'eausavonneuse.
8
Other manuals for Washers
4
This manual suits for next models
1
Table of contents
Languages:
Other GE Washer manuals

GE
GE Profile PTWN6050MWT Assembly instructions

GE
GE GE Energy Star WBVH5300K Manual

GE
GE GBVH5140 Original instructions

GE
GE WPSB8060 User manual

GE
GE WNCD2050 User manual

GE
GE GTWN5450DWW User manual

GE
GE G188 User manual

GE
GE WWA8800M User manual

GE
GE EWA4500 User manual

GE
GE WPGT9150HWW - Profile 27" Washer Manual